
https://www.youtube.com/watch?v=dsjLfbFfT8w&t=8s
2024-04-05 07:58:07
Getting started with Fliki - Text to Video
flicky text to video .
log in or sign up at flicky dot ai .
select files option from the top panel .
click on new file button .
select the language and dialect .
next , write the file's name .
select your desired aspect ratio and under start with select idea .
finally , hit submit .
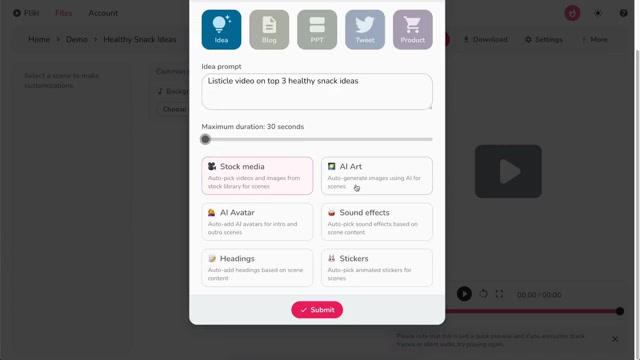
in the idea box , write your idea and select the length of the video .
next , you can choose whether you want premium stock media or unique ai art images for each scene .
let's continue with ai art .
you can pick from styles like three d model , digital art , low poly , photographic , for now , let's select the cinematic style .
besides , you have the option to add ai avatars , sound effects , headings , and stickers to your video .
finally , hit submit .
flicky will create the video based on your idea .
once the video is created , you can preview the video by clicking on the play icon below the video .
to expand a scene , simply click on it once .
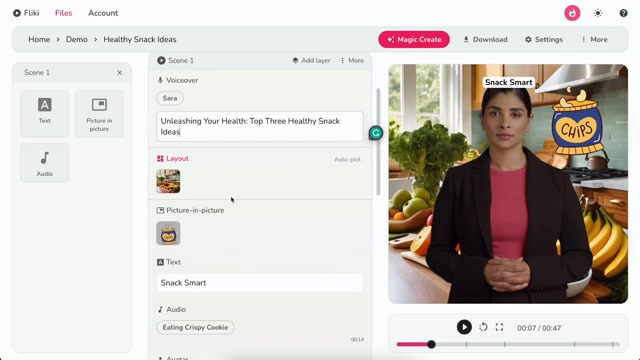
now what exactly is a scene ?
in the context of your video , a scene refers to an individual section .
each scene represents a distinct portion of your video content .
alright .
so when you're working on a scene , you've got layers to play with .
first off , there's the voice over layer .
that's your main narration .
then there's the layout layer , which determines how your background is arranged on the screen .
now focus on this smaller video inside the main one .
that's the picture in picture layer .
now don't forget about the words that pop up on the screen to emphasize or explain .
this is a text layer .
and of course , there's the audio layer , which includes your uploaded audio or any cool sound effects you wanna throw in .
lastly , we have an avatar , a character representing you or your brand .
now let's quickly explore each layer .
we'll start with voice over layer .
click on the voice name to select a different voice .
filter by language , dialect , gender .
hit the speaker icon to play a sample of the voice .
once satisfied , double click on the voice to select .
in the left panel , you can control the volume and speed of the voice over .
you can also change the visibility , position , font , size , display , color , animation , and visualization for the subtitles .
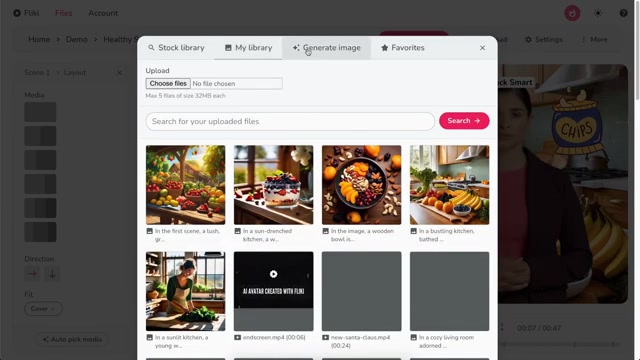
next , in the layout layer , click on the media icon to select the background for your scene .
you can either select media from our premium stock library , upload your own media , or get ai generated visuals via visual based on your instructions .
once generated , you can either click auto generate to auto generate a different visual or click use this art to use the generated visual in your scene .
in the left panel , you'll find various layout splits .
you can choose the layout that suits your needs .
the most exciting feature is auto pick media .
clicking this option will automatically select media based on the text in your scene .
now , let's explore the avatar layer .
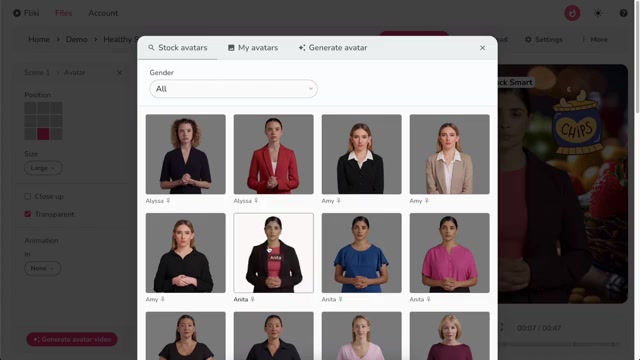
click on the avatar icon to open the avatar selection pop up .
here you can pick from a rich collection of stock avatars .
hover over the avatar to see how it interacts .
you can filter the avatars by gender as well .
you can also upload your own image or create a personalized talking avatar from a text prompt .
for now , let's continue with the already selected stock avatar .
in the left customization panel , you can customize the position , size , close-up settings , transparency , and animation of the avatar .
once satisfied , click on generate avatar video , then accept confirmation to generate your talking avatar .
like voiceover , layout , and avatar layers , you can control the settings of picture in picture , text , and audio layers from the left customization panel .
now scroll to the top .
click on the choose file button in the background audio layer to search or upload your music .
you can control the volume and speed of the background audio from the customization panel .
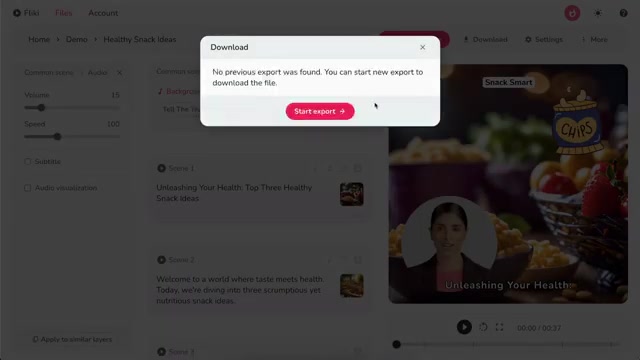
finally , click download then start export to download your video in m p four format .
this video was created using flicky with the voice of celine .
Original video
Partnership
Are you looking for a way to reach a wider audience and get more views on your videos?
Our innovative video to text transcribing service can help you do just that.
We provide accurate transcriptions of your videos along with visual content that will help you attract new viewers and keep them engaged. Plus, our data analytics and ad campaign tools can help you monetize your content and maximize your revenue.
Let's partner up and take your video content to the next level!
Contact us today to learn more.