https://www.youtube.com/watch?v=MZbKNiKb_Qc
How to Clean Install Windows 11 From USB Flash Drive (Complete Tutorial)
Hi guys .
Today , we're gonna be showing you how to install Windows Seven from a USB flash drive .
It can be used for any compatible desktops or laptops .
So without further ado , let's get started .
Step number one compatible T check up .
And this time we're gonna show you how to check your computer hardware for Windows seven compatible .
T if you're confident about a device being compatible with Windows seven , you can skip this step .
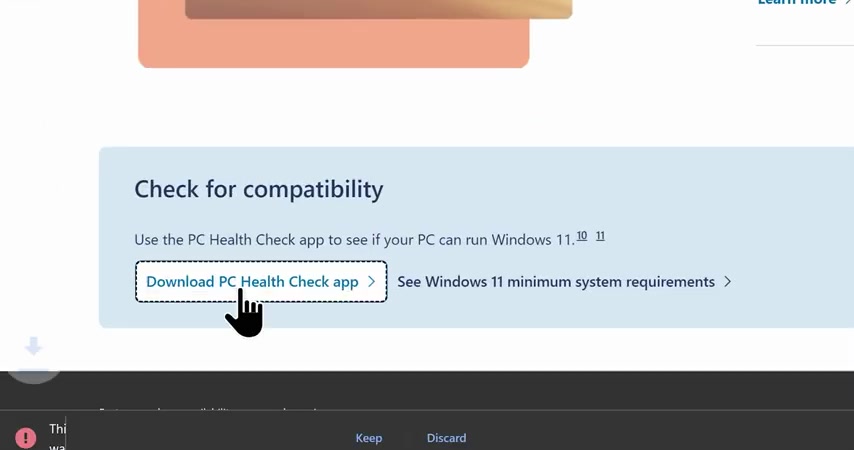
There will be time stamps all across the video to test your computer hardware for Windows seven compatible T we need a tool called PC health check app from Microsoft .
So go to this website and get it .
Downloaded link will be in the video description once downloaded , run it and click on the check now button .
Now we scan your computer hardware for Windows Seven compatible .
And once it finished , it will tell you whether your computer is capable or not of running Windows seven .
At least officially speaking , if your computer doesn't pass the test , don't worry .
At least you will know what went wrong and you can make necessary upgrades to your PC accordingly .
And if you're curious , these are the following must be requirements for Windows seven have a look if you want .
So that's all here , which you guys have a compatible device .
So let's jump to the next one step .
Number two , create a boot USB flash drive .
And this year we're gonna show you how to download Windows Seven and create a boot USB flash drive for the installation for this .
You need just two things , a flash drive with at least a capacity of up to eight gigabytes of storage , a computer to make it into a portable US P DVD or you have all the formation requirements in your position .
So here we go , get your computer and go to this website .
A direct link will be in the video description .
Don't reach an official website of Microsoft or you can legally download your genuine copy of Windows seven , whether you have a license key or not .
Once you're here , go ahead and click on the download a button under the Create Windows seven installation media section which you will download a small program called Windows 11 media creation tool .
Go to the download location and run the program .
It's a portable one so you can run it without installation .

Once you are here , you'll be greeted with a license agreement accepted and you will see the screen at this point .
You'll have to plug in your USB flash drive or pen drive that we mentioned earlier to the computer .
But make sure you have a backup of anything important in it before proceeding any further because it will be formatted during the US P DVD creation process .
Now let's get back to the media creation tool and uncheck this box use the recommend option for this PC and checking the option will give us access to change these settings .
So go ahead and choose your preferred language for Windows seven .
And for the edition , there isn't anything other than just Windows seven because it will become home pro or enterprise as you're validating the specific product or license keys later .
And you will not find an option here to choose the system architecture unlike its processor because Windows seven is available only as a 64 bit OS for 64 bit CP US .
Once you're ready , click on the next button .
Now you must choose the USB flash drive option from here .
Now click next again and carefully choose your USB flash drive .

Now click next once again which will start the Windows seven .
Download , wait for it to finish .
And once it's done , it automatically starts the Windows seven media creation process will take a few more minutes .
So let's wait again .
And there we go .
The process has been completed and we have successfully created a bud USB flash drive .
So click finish , which will cost the media creation tool .
Now reject the flash drive and we are moving on to the next step .
Step number three load Windows seven set up using bio .
So UE five in this step , we're gonna show you how to enter into your bio .
So five set and run the Windows seven installation media or the US P DVD that we just created .
This is a step that most of you will struggle .
But since we might have different bios interfaces , bio keys from different or say motherboard manufacturers , and I will try to explain most of the scenarios that you might encounter .
So restart your PC or Tony tone in case there is no spring installed now hit your bias key continuously or press and hold it until you enter the bio settings .
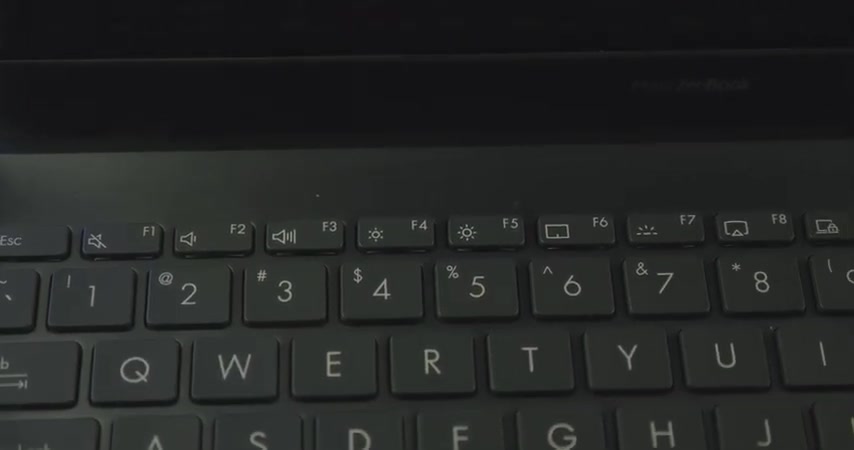
Please make sure to enter the bios key before the post your power and self disc gets completed to be more specific , start hitting the bios key as soon as you can after you have restarted or started the computer for this particular a book laptop , the bias key would be F two function button two .
But in your case , it might be also your FNF two F one F two or delete keys .
These are the most commonly known bio keys .
As far as I know to find the particular bias key for your device , you can also refer to the device manual or just Google it doing so will get you to your UEF five home settings .
And for some reason if you're having issue entering the bio settings , this way , don't worry , you can also get to it by utilizing the advanced startup option in your window settings .
Assuming you have an O installed in this case , go to your window settings , update and security recovery and click on the restart now button under the advanced startup section , wait for a few seconds and it'll bring you this menu .
So go to troubleshoot advanced options and choose UEF I form settings and hit restart which will restart your computer and get you straight to your bio or UEF five former settings .
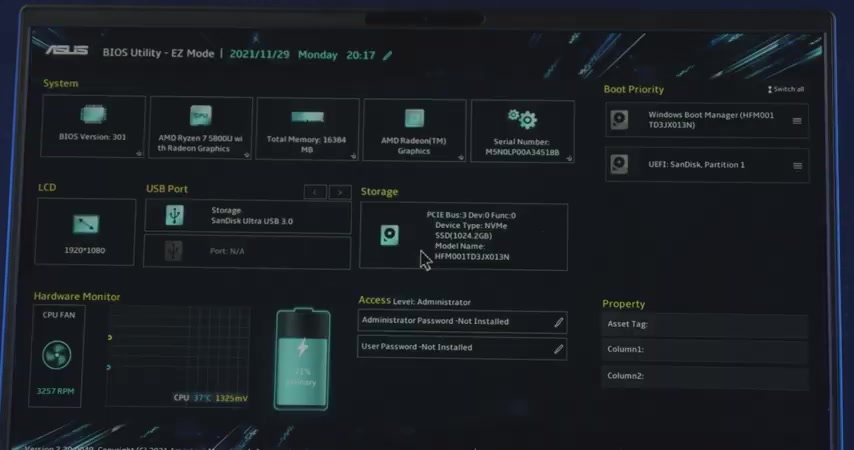
Anyway , once you get here by utilizing no matter any of the aforementioned methods , look for an option called boot priority or similar .
Like it can be boot manager , boot menu and so on .
You will know when you see it .
Now you can either make the US P installation media that we created as the first boot device .
In this case , it's my sandi flash drive and hit F 10 to 7 exit .
Doing so we load the Windows seven installation media or you can just go to boot menu and click go on the installation media , which is also gonna start the set up and that's all here .
So let's move on step number four , Windows seven installation .
And this step , we're gonna walk you through the installation process for Windows seven A step will cover every nook and cranny , which means it's also gonna cover the storage partition in depth .
A step that some of us might find difficult wanting before proceeding any further please make sure to keep your laptop plugged in all time during the installation procedure and make sure to have a proper power backup in case if it's a desktop for shut down or any power failure while installing the OS will call system malfunction .
So let's get started .
Choose your preferred language , diamond currency format , keyboard or input method and click next .
Now , click on the install now button which will start the set up and we'll show you this Microsoft license agreement read through if you want but you have to accept it to proceed further .
So tick this box , I accept the terms and click continue , which will ask you to choose the type of installation .
So go ahead and choose the custom option since it's a fresh install , which will bring you to this window where you can partition in your storage .
So let me show you how to properly partition in your available storage into local disks size and number of local disks are doesn't matter .
You can make as many as you want and as big or small as you want .

But I only recommend creating a minimum of two or a maximum of three local drives including the system drive .
The recommendation is also parallel to the capacity of your storage device .
For example , if you only have a TB of drive capacity , I won't recommend splitting into anything more than two .
Anyway , at the end of the day , it's your decision .
What am I to argue ?
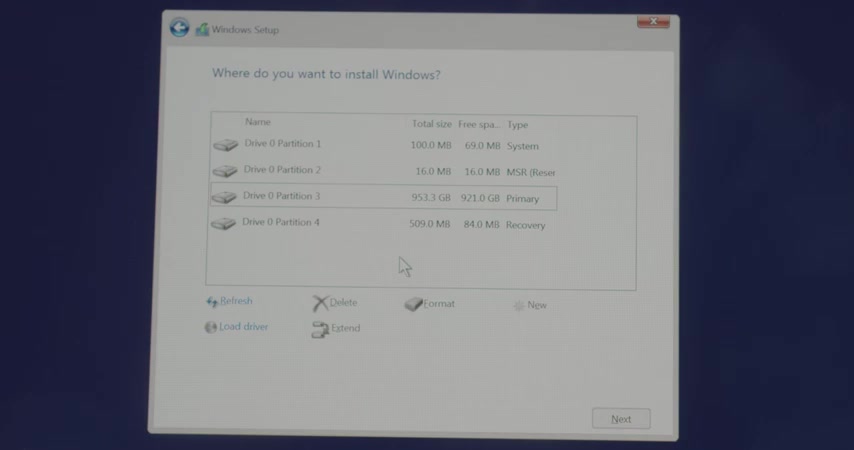
So let's start , as you can see this laptop already have a partition created from the this installation .
So let me show you how to delete them first .
But be deleting an existing partition , we'll also delete any previously created data in them and it will get formatted afterward .
So be sure to back up if anything important before proceeding to delete an existing partition , just right , click on the particular partition and click on the delete option down here .
Now do this with all the partition including the system reserve one .
Now you can see we have deleted all the partitions and we have close to a TV of unallocated space , A K A , any physical space on a storage device that doesn't belong to a partition .

Now I'm gonna show you how to create the local disks that we need from this available unallocated space .
So go ahead and select the whole unallocated partition , then choose new , which will open this box where you can enter your decide drive size .
I would like my first primary partition to be 300 G BS out of the available 953 G BS where I'm hoping to install windows seven .
So let's type in 317,000 MP which is roughly about 300 G BS .
If you're confused about GB two MB , just Google GB two MB conversion , do the thing and you can enter that here .
Click up then OK .
And there we go , we have created the first partition as well as you might notice , we have created two more partitions automatically in the process .
The partition one and partition two , they are system reserved and MS R reserved or Microsoft reserved partitions , they are essential partition to your operating system .
In order to work , they'll be hidden .
For example , they can be seen from your file explorer or this PC .
So leave the message , do not delete or format them .
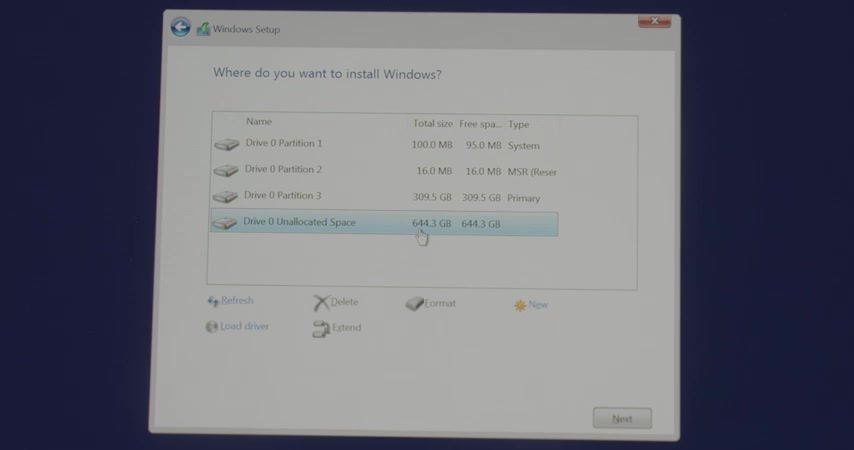
Now , as you can see , we have the leftover unallocated space of 644 G BS out of the 953 G BS .
So let's go ahead and make a second partition of it .
Same as we did before select the unallocated space , click new .
And this time I'm gonna leave the size as it is because I want my second partition to be made of the whole leftover unallocated space .
So click apply and that's it .
Now , we have created all the partitions that we needed .
So let's go ahead and choose the partition to install windows .
11 .
I'm going to choose the 300 GB one .
Now , click next and you can see we'll start the installation process .
All you have to do is sit back and relax and will go through several phases of installation including several restart cycles during the installation process .
So do not interrupt the process whatsoever .
And let's wait until finished .
There we go the installation process has just got finished , but we have some more work to do before getting your hands on windows .
Seven step number five , window , seven initial set up in this step , we're gonna walk you through the window seven initial setup procedure .
So follow me and let's get it done from here .
Choose your country or region hit .
Yes .
And you'll be asked to choose a keyboard input method , choose as you prefer and hit .
Yes .
Now we'll let you choose the second keyboard layout .
If you want click add layout and choose another one or just hit the skip button .
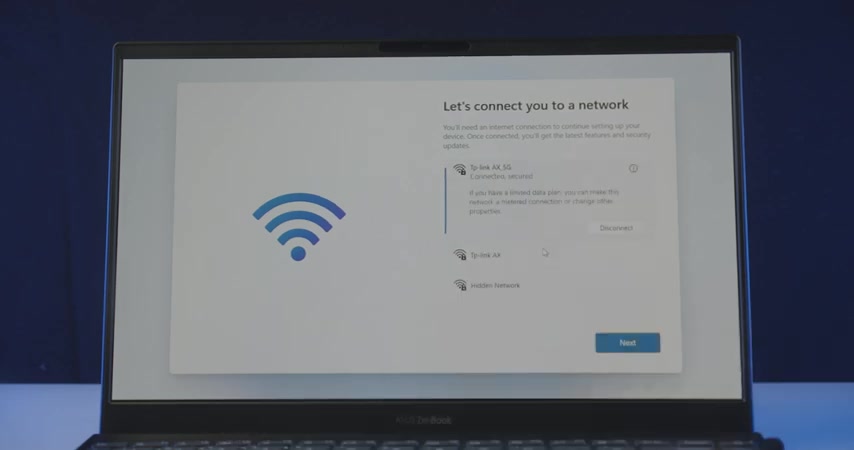
Now we'll ask you to set up your internet connection .
If you have a wide connection , just plug it in or choose your preferred network from here .
Click connect , which will ask you for your wifi password .
Enter that here , click next , which will establish the wifi connection .
Now click next again , which will run a quick Windows .
Seven update , check up and once it finished it will ask you to name your device .
So enter your device name as you please and click next , which will restart a computer for one last time .
Now , we will ask you to add your Microsoft account .
So enter your Microsoft account credentials and sign in after that , you will be asked to set up Windows .
Hello , it's facial recognition feature for Microsoft .

Do that if you want or just skip and it will ask you to create a pin for quick log in , click on , create the pin button and enter a four digit pin here , re enter it to confirm and once you do click , OK , that will ask you if you want to synchronize your Microsoft absent settings from another device under the same account .
If you want to choose restore or choose set up as a new device for a fresh start .
Click next and you will be asked to choose the privacy settings for the device or can put it this way .
What kind of data access are you compatible ?
Giving Microsoft from your device , things like location , diagnostic data and so on , read through and enable or disable as you please hit next next .
And I accept that will let you customize your Windows seven experience .
So I suggest you to go through these options and check your primary use for your particular device once you're ready , click next again and it will ask you to set up one drive for backup .
If you are a one drive user , click next or just click on the only save files to this PC option .
And finally , we'll ask you to set up Microsoft 3 65 if you have a subscription for that click next or click .
No , thanks .
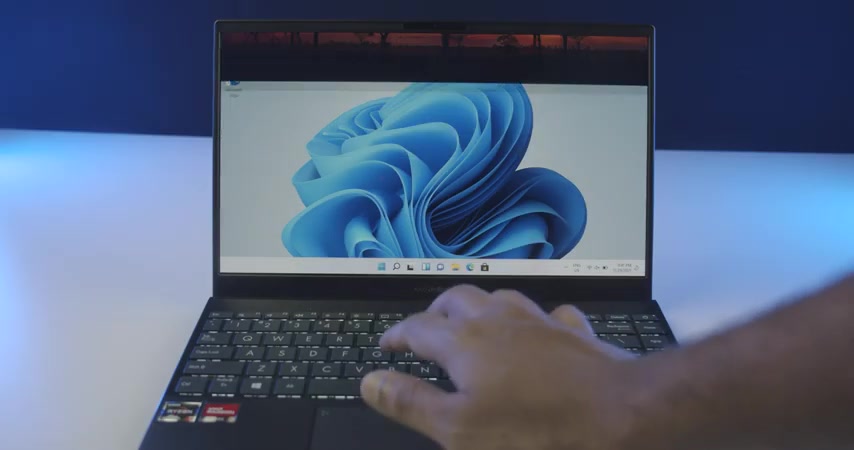
Now let's wait for a few more minutes for it to prepare the desktop .
And there we go , we have completed the Windows seven installation successfully .
Now go ahead and get all the proper drivers .
Get a license key if you haven't already and enjoy your Windows seven , that's all for today .
Leave a like if you like , subscribe to the channel and enable to be like and to watch more .
If you found the video helpful , why not share with your friends as well ?
This is me , your host , Rafiq .
Thank you so much for watching .
Are you looking for a way to reach a wider audience and get more views on your videos?
Our innovative video to text transcribing service can help you do just that.
We provide accurate transcriptions of your videos along with visual content that will help you attract new viewers and keep them engaged. Plus, our data analytics and ad campaign tools can help you monetize your content and maximize your revenue.
Let's partner up and take your video content to the next level!
Contact us today to learn more.