https://www.youtube.com/watch?v=WTkMXYjxGzU
How to Flash the BIOS and Install Windows 11 - ASUS TUF Gaming Z690-Plus WIFI D4
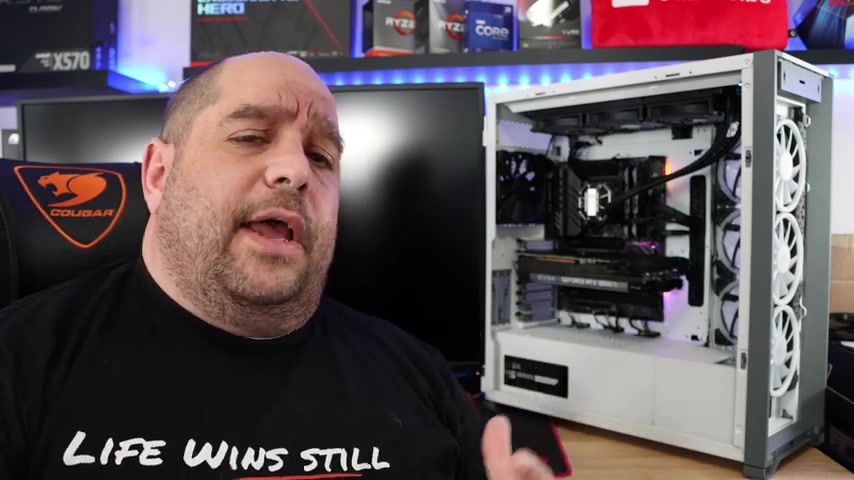
So now that we have the system all put together and all cabled and looking beautiful .
Our next step is to flash the bias , configure the bias , install windows 11 , get all the drivers up and running .
That way we can start gaming , we can start editing videos , we can start doing everything we built her for .
And don't worry if you haven't seen the entire process , I'll have links to it down below and then at the very end as well , so you can check them out from start to finish .
So the very first thing we want to do is download bias the latest and greatest bias .
Now , the reason we do that is to support potentially unsupported processors and then also to fix some things that might have been broken out of the gate when they first developed the board .
Then afterwards we want to download all of the drivers .
Now , mind you , we probably only need the Ethernet driver to let us start downloading Windows updates and then the rest of the drivers .
But since we're already going to be there , I like to download all of them .
And then we're also going to want to download those 11 .
I'll also link another video down below where you can download it and prepare a thumb drive and all that good stuff on it .
But let me show you real quick on the bias and driver process .
In order to download the latest bias and drivers , we're going to need a fully functioning PC .
Maybe your other PC , your friends , your family , just another PC .
Then we'll need a thumb drive , that thumb drive needs to be formatted that 32 .
That way we can flash the bias from this as well .
And yes , the bias and the drivers can be put on this thumb drive for Windows 11 that will need to be a separate thumb drive and I have the process on another video also linked down below .
So I'll leave that one out of this video .
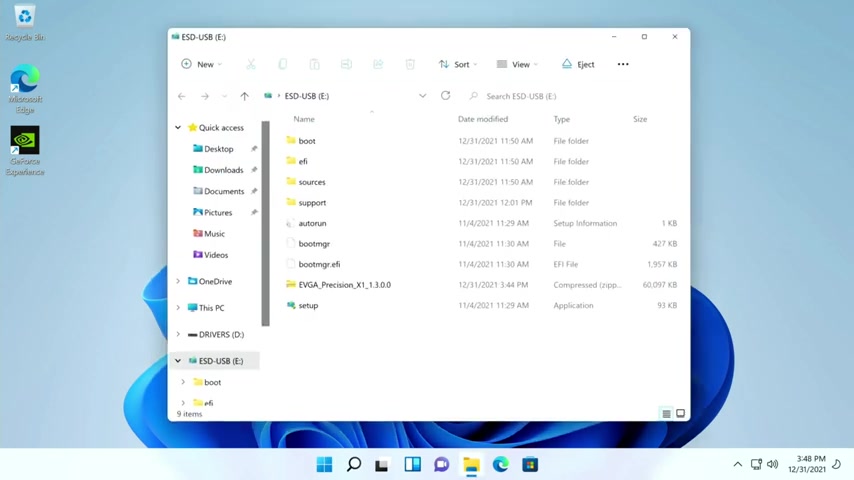
Now we'll go ahead and insert that thumb drive into the PC .
Now you'll notice I already have a bunch of stuff on here .
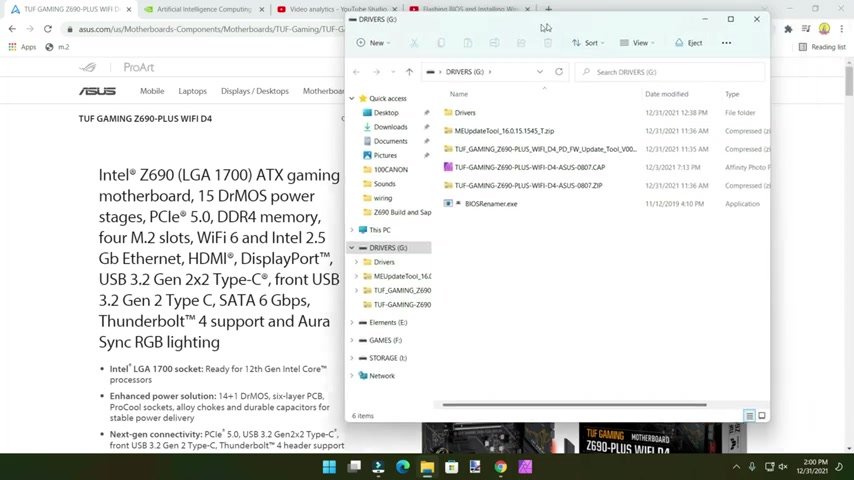
I've already downloaded all the drivers .
I've placed them unzipped in their own directories in a directory called drivers .
That way I can just copy all of these on the other machine .
Then on the route , I have the bias file , the dot cap file and then the bias Remer which we don't need to use unless we're going to be using the AIS flashback utility , which I have another video down below explaining how that works as well .
If you want to check it out .
In order to get all these drivers .
First off , we'll go to the motherboards page .
This is where you get all the information about your board .
Ok , then we'll go ahead and click on support .
So AIS dot com , then we'll look up this motherboard and then we'll go to the support page , then we'll click drivers and tools from here .
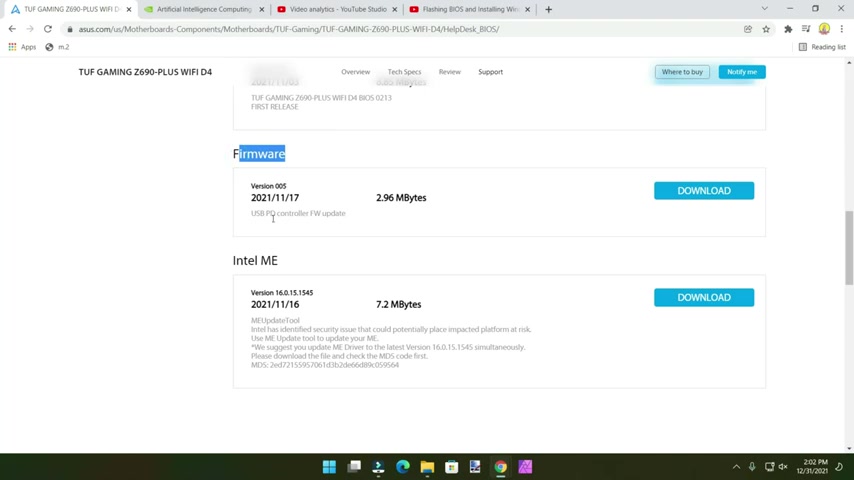
We'll go to bias and firmware and we'll grab the very latest bias at the time of this recording .
It's 0807 and may be newer when you're doing it .
And then click see all downloads just in case below that , we'll see a firmware update for the USB control .
So we'll download that as well and then we'll see an update for Intel's Me .

So I've already downloaded all this after we download all of that and transfer it to a thumb drive .
Then we'll go to drivers and tools , select your Os .
I'm using Windows 11 .
I'll click that .
We'll download the land driver , the wireless driver chips set , click see all downloads here because there's also the Intel management engine chip set which is separate the Intel GNA and then the chip set itself .
So four separate downloads we'll need to do there audio VGA if we're using the onboard video , which we're not Bluetooth utilities , which is the A I suite .
Pretty important .
We don't need anything else there .
Again , that firmware , we don't need it , we've already downloaded it .
The intel , rapid storage technology .
Armory crate .
Now , the armory crate allows you to download everything on there .
But in order to get Armory crate to work , you need to install either your land drivers or your wireless drivers , which will go over in the video as well .
You don't want to install drivers from within a zip file because it can only reach this one file inside of a zip file .
It can't reach the rest , especially inside of subdirectories .
So you want to extract everything .
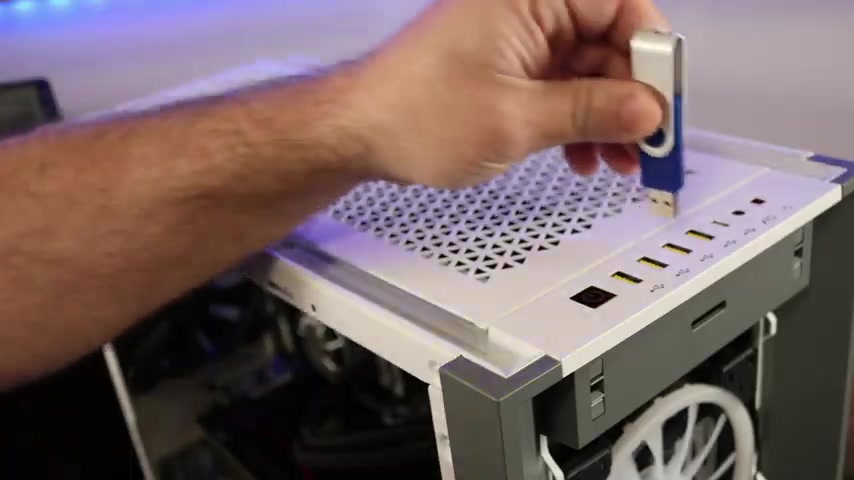
So now that we have all the drivers on that thumb drive , let's go to the machine .
I'm going to go ahead and put the thumb drive in the machine while it's off every time .
So I'm going to bring you in close so that you can see the machine booting up .
I haven't turned it on just yet .
You'll see it at the same time I do .
And then afterwards I'll bring you in on the screen .
Mind you , if everything works , if it doesn't , then we'll troubleshoot it together .
I'm gonna put you right in front so that you can see how it functions and then how loud it is .
I'm going to put the microphone right in front of it .
I have you right in front of the machine .
The microphone is right here , probably a good four inches from the side panel which is off right now .
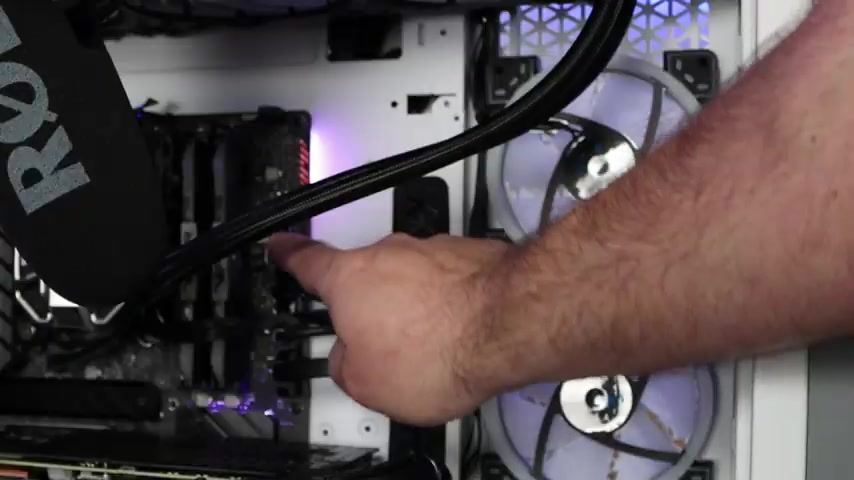
We can see there is power going to the board .
We can see the R GB back here and down here as well .
So I'm gonna go ahead and turn it on for the very first time .
So it's pretty quiet .
I'm about 3 ft away from it .
Just got even more quiet .
OK ?
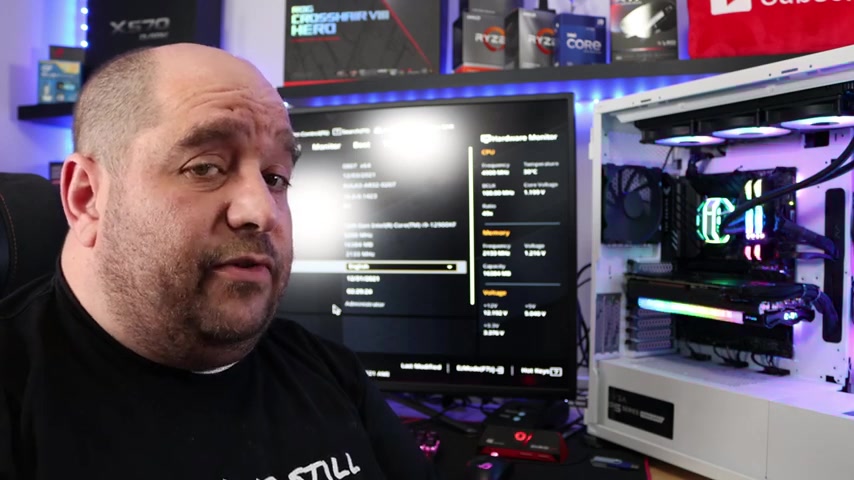
And now we have the image on the screen first .
Roop .
Thank God .
Everything worked .
Great .
New CPU installed , please enter , set up to configure your system .
OK ?
So we'll go ahead .
Hit F one .
All right .
Now that we're in the bias , I prefer F 71 of the things we'll first want to look at now that we're in a regular bias bias .

Version 53 .
After that , we'll go into tool , then we'll go into AIS easy flash utility .
And then this goes to the root of that thumb drive with the bias on it that we inserted .
And we can see here , tough gaming Z 690 dot C A or dot Tap .
Click on that .
Please back up your Bit locker .
Now we don't have anything installed .
So don't worry about it .
Click .
Yes , you want to read the file .
Yes , the video may go out for a second because it's updating the bias .
And since my capture device is running off a USB that might flick if you remember before we are on bias or right here .
Actually , version 0503 .
The newest version on the thumb drive is 0807 and we'll click .
Yes , then you'll notice it starts flashing the bias down at the bottom left .
This may take a minute .
That took a little bit longer than I thought it would .
But it actually reset it for me .
Don't freak out during this process .
It reset the machine for me as well .
So if it did it for you again , don't freak out .
Ok .
So after the reboot , please enter , set up to recover bios settings after settings .
So then we'll go ahead f one to enter the bias .
So now we're back in the bias .
Unfortunately , we're on the easy mode again , F seven to go back into this mode .
It's incredibly important that we go ahead and set the correct date and time stamp .
So today's 11 2022 time is right .
Happy new Year .
You definitely want to make sure you have the right date in your machine because when you install windows , if you go back , there may be a problem with activation .
So keep that in mind .
All right , we're going to go ahead and do basics here .
I'm not gonna go incredibly in depth because every configuration will be different .
So then we come into A I tweaker A I over Clocker tuner that is based off of the X MP profiles on your memory .
Chances are your memory does have X MP profile files .
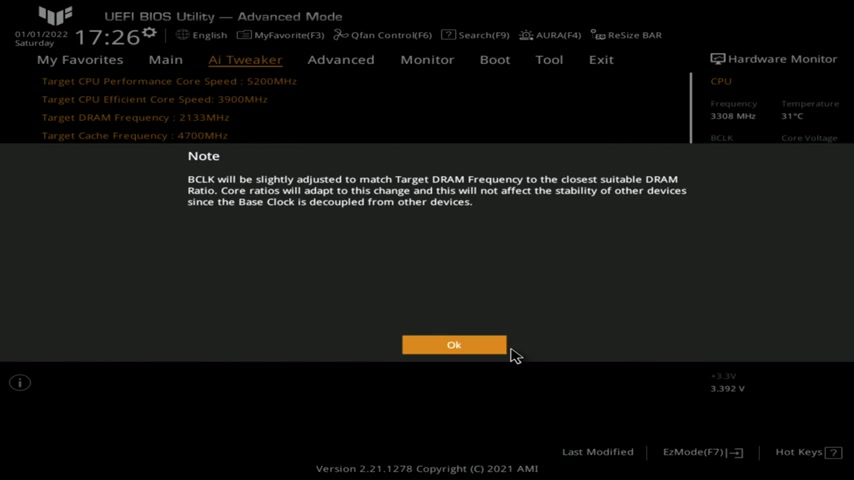
If not , you'll leave it either at auto or manual .
But since mine does have X MP profiles , we'll select X MP profile one and yes , BC LK will be slightly adjusted to match target D ram .
So we'll click , OK here .
And the rest is set again by the X MP profile .
There are more things that we can change in here .
But for right now , I've already gone over these .
These are good coming out of here .
We'll go into advanced , then we'll come down to system agent S A configuration and then we'll click on PC I express configuration .
The M 0.2 drive we have on there is a by four drive or a GEN four drive .
If yours was a GEN three , you said gen 321 and so on or you can leave it at auto .
I'd prefer to hard set it to gen four .
So coming out out of here , we'll come down to trusted computing .
And since we are using or installing windows 11 , you want to make sure that a T PM 2.0 device is found , it shows it here and that it is enabled .
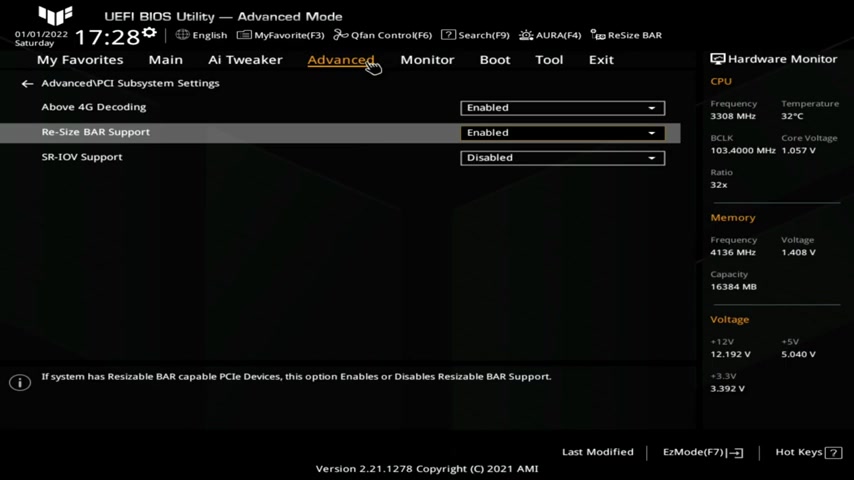
So then coming out of here under PC IE subs settings .
If you are going to be using res sizeable bar , you want to make sure that you enable res sizeable bar here as well .
Now , I'll go ahead and link below a video that you can check out on how to set up res sizeable bar and everything .
So coming out of here , coming down to NV me configuration here , we can see the M 0.2 drive we have installed then going under onboard device configuration , everything is set up .
Well , here if you have a , an M 0.2 drive , that is a Stata drive , you would change this to Sata or if you have a PC IE , you would change it to PC IE .
Again , you can leave it under auto , but I prefer to manually set that and I like to disable my serial ports just to not have an extra calm one in my device manager .
Ok .
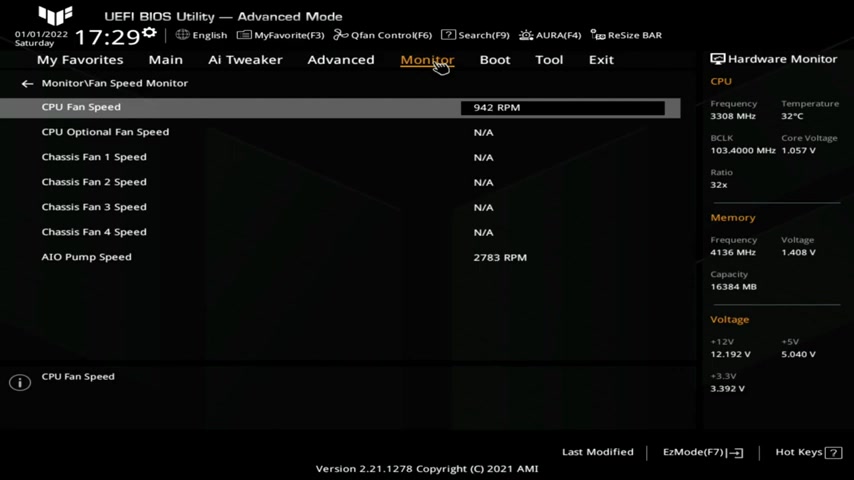
So then coming out of here going into monitor under temperature monitor here , we can see all temperatures of the CPU the package .
The motherboard VR MC PU is kept nice and cool by the liquid cooling unit coming out of there under fan speed monitor .
This is an important one here .
We see CPU fan speed one .
Now if we had a regular CPU fan , this is fine , we leave it alone but because we have a liquid cooling unit and that is plugged in , at least one is plugged into CP fans will just go under here and select ignore if you don't .
When you save an exit , every time you restart your computer , it will prompt you to hit F one to go into the bios to change something .
Ok .
Now , coming out of here , since this liquid cooling unit is controlled by the PWM , we'd come down here under Q fan configuration and under CPQ fan control we set this to PWM .
Now this is going to take care of all the other fans .
But over here under A I pump Q fan control , we'll go ahead and set that to PWM mode , full speed .
We can leave that at full speed or we can change it to something different here .
I'm gonna go ahead and leave that at full speed .
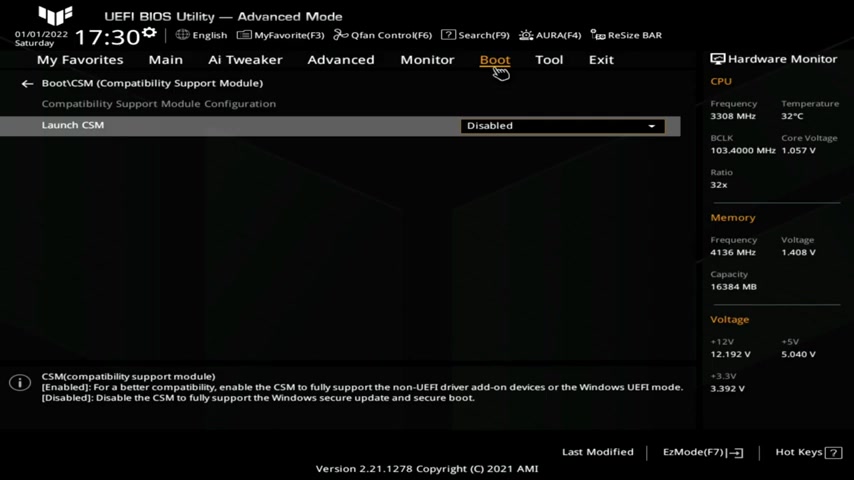
Now , coming out of here , we go into boot under boot , under CS M , we'll leave CS M disabled for resi bar support , secure boot .
Then here under boot option number one , we'll see Windows boot manager .
This is only here because we've already installed windows on that M 0.2 drive .
If not , it might only show the UAF I generic flash , which is the Windows 11 install me .
Now , we could always change is here and I'm gonna go ahead and leave that as it is because then right over here , we can actually select the boot override for the generic flash disc , which is the thumb drive .
And let me just before I do that , let me come into tools .
Now , we've already flashed a bias .
That's where you do it .
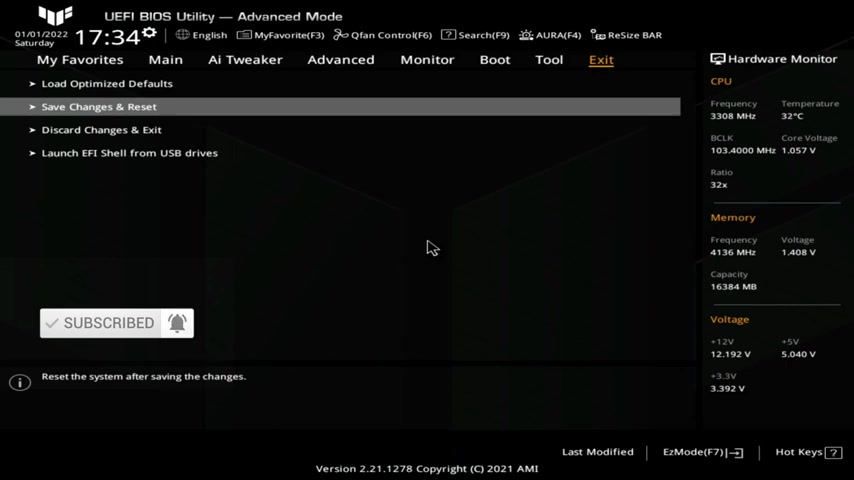
You want to save changes and reset so that you could save all the changes that we've made in the bias .
So let's go ahead and save the changes and come back into the bias real quick after you reboot , you come back over here into boot .
Now , we're gonna go ahead and select from boot override generic flash disc .
Now we'll select our language , our time and currency and our keyboard and now we'll click next and install .
Now , if you have a product key , go ahead and enter it in here .
Now , if you don't click , I don't have a product key .
This is something you can always enter in later .
You'll have a free period that you can use Windows 11 .
So I'm gonna select , I don't have a product key , select your version of Windows or the version that the key if you did have would activate two and then click next , make sure to read through all of this important information and click I accept .
And next , now choose custom .
Now I should have removed the SSD but I forgot .
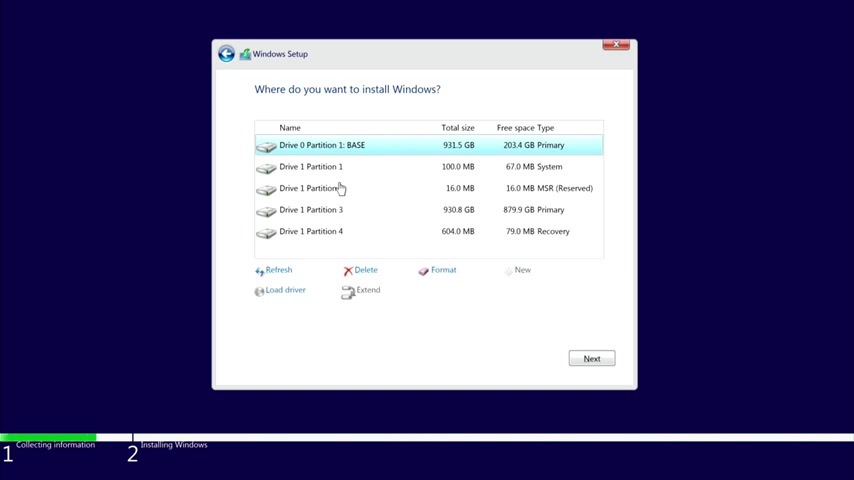
Now , mind you if you had removed the other drive , so that this was the only drive installed , you would only see drive zero partition 123455 , many partitions it had .
Now that is the single drive that only had some data written to it .
I know that this is the only one .
So it's safe .
Now , if you don't know , it's best to remove the media .
So I know drive one partition , 1234 has data on it and that's the Windows 11 install .
So I'm gonna go ahead and delete that and now keep the leading only drive one .
Ok ?
So this is my or this will be my windows 11 install .
So make sure you select that and then click next .
This is going to take about seven minutes or so .
I'll go ahead and fast forward through it .
So you don't have to sit through all of it .
All right .
Now with all that done , we'll go ahead and click , restart now .
All right .
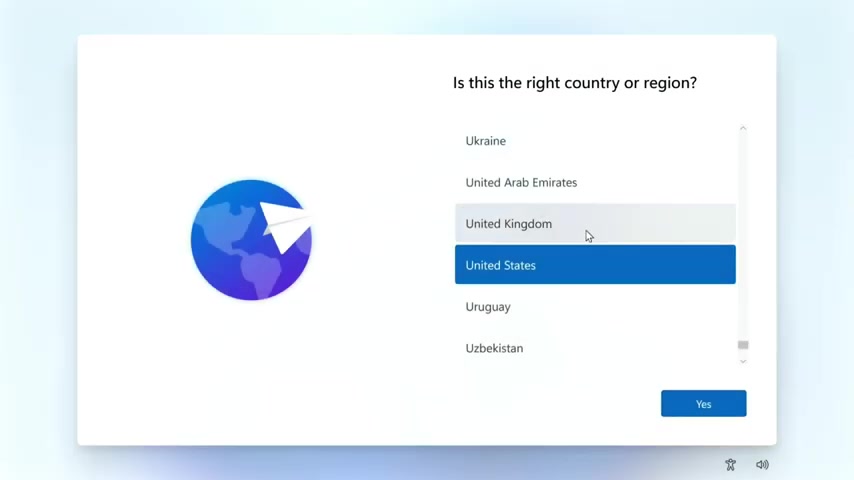
So then here we'll select the country or region .
Yes .
Right .
Keyboard layout .
So you asked for me and I don't want to add a second keyboard layout , skip checking for updates .
Now , if you have Ethernet or wifi that is compatible with it , it'll automatically do all this for you .
If you don't , it'll just skip this part .
So device name this bite for you next .
Ok .
How would you like to set up this device for personal use ?
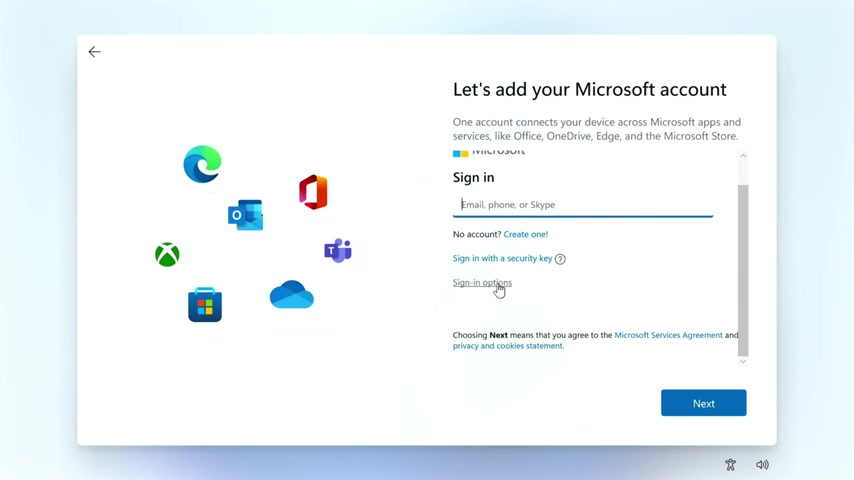
Next here you would enter your Microsoft account .
If you have one .
If not , you can create one or use a sign in option .
I'll choose sign in option .
Then we'll do an offline account .
What is a Microsoft account ?
You could read it or you could just skip for now .
Enter my name , Iggy password .
I won't use the password .
So I'll just click next and then you select any of these you want to change .
I'll just click accept for now .
So now that we are in Windows 11 , I'm going to go ahead and disconnect the thumb drive that Windows 11 was on and I'm gonna go ahead and pop in the driver's thumb drive and we'll just click here , open folder .
Now , since these are just the drivers , I'm going to go ahead copy and paste them into the C drive , paste them here .
If you wanted to , you could have Armory create , install all the drivers for you and that'll be fine .
I prefer the manual method of having the drivers installing from the drivers .
Now , I will go in afterwards and have Armory create , check everything and do some updates .
There will be some updates , but I like to do everything manually first .
So for now , I'll just go ahead and click .
Now we'll install Armory crate a little bit later on .
So we'll just wait for this to finish .
Ok .
So now that everything has been copied over , just go into here and make sure that everything out of every single zip file has been extracted because programs will not correctly install inside of a zip file to get started .
The very first thing we want to install is the chip set drive .
So come in here and set up chip set and click .
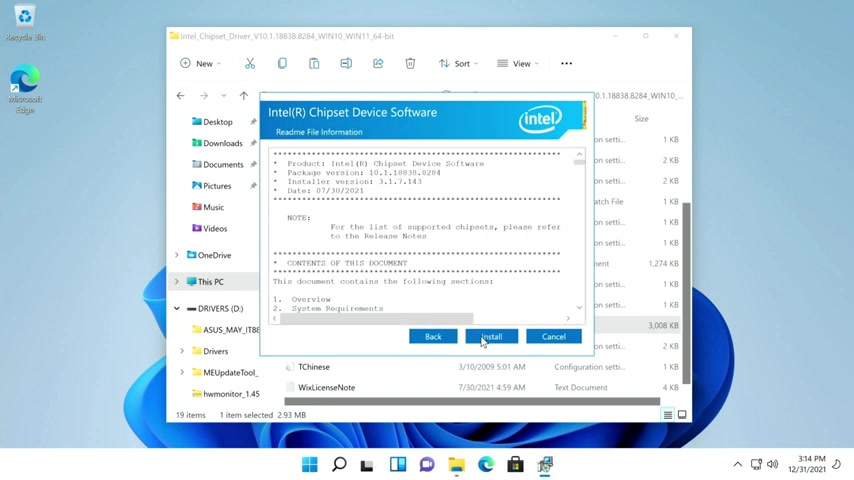
Yes , then we'll click next and accept and install a lot of people skip or totally forget about the chip set .
Some people never even install it , but the chip set basically provides the foundation of your entire system .
Kind of like the motherboard .
It's the backbone of everything .
So it's incredibly important to install it .
Now , mind you without it , things will still run , but they will not run as well .
Oh , perfect .
Ok .
So now we'll just go ahead and click , restart .
Now , now , after a fresh restart , let's go back into file manager , this PC , the C drive and back into drivers .
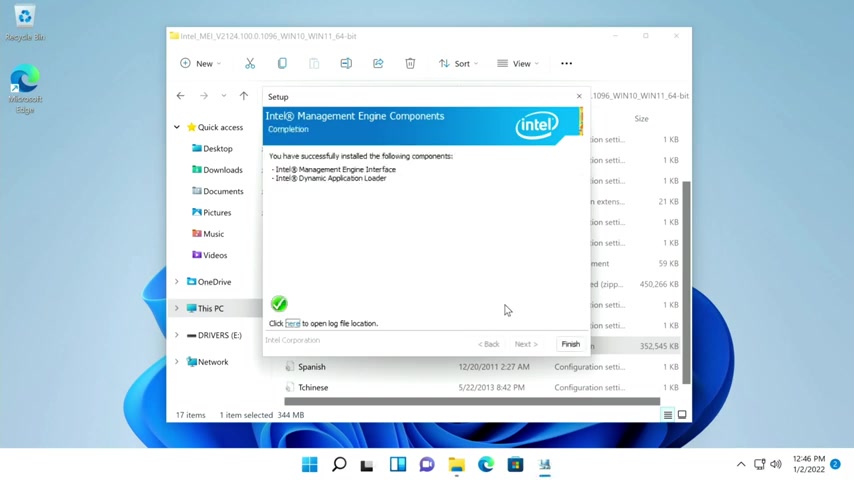
We're going to install the Me I drivers .
So let's go in there and set up me .
Yes .
Next , I accept .
Next .
Now , one very important thing that a lot of people overlook is whenever a program that you install asks you to restart , just go ahead and restart .
It takes only a few seconds .
Sometimes programs need to write to the registry or something that's in use with Windows at that time .
And the restart allows it to write to those files when windows doesn't have its hook on it with that said , we'll go ahead and click , finish here .
I'm going to go ahead and click back .
And if you remember when we first transferred everything and downloaded everything there was in the driver's thumb drive , the me update tool .
I've already extracted it again .
You need to extract it .
So we'll go into that .
Now , the driver has been installed .
We can run the me update tool .
We'll click .
Yes .
Here updating me might take a while to ensure a proper update .
We suggest that you close all running apps on your computer before updating me .
Yes , please back up .
Yes .
Ok .
And the update is complete .
Press ok .
To reboot the computer don't freak out .
Your computer does turn off but it automatically turns back on .
All right .
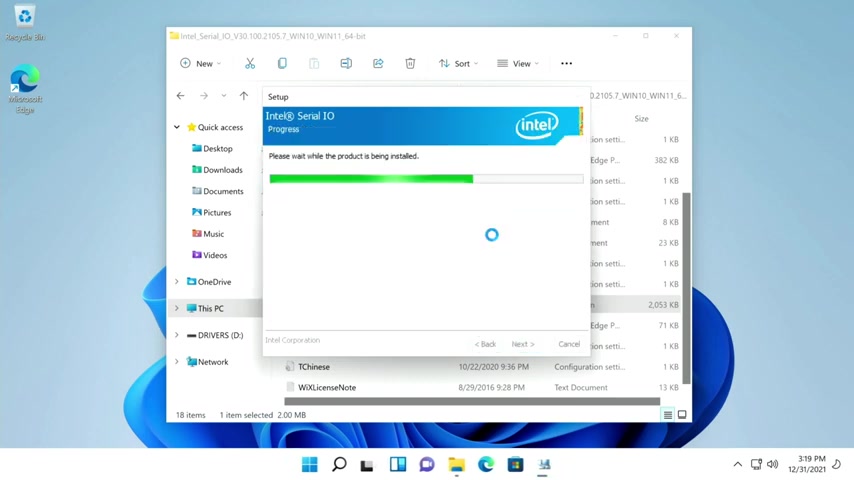
So now we'll come back over here .
We'll come into Intel Serial IO serial IO and yes , next I accept and next , next and next install here now .
Ok , perfect .
And now we're going to install the Intel RST driver set up RST .
Next I accept next and next include installation of octane .
Next .
Ok .
Coming out of here , we'll install wi-fi .
And for this one , we'll use the ASIS set up .
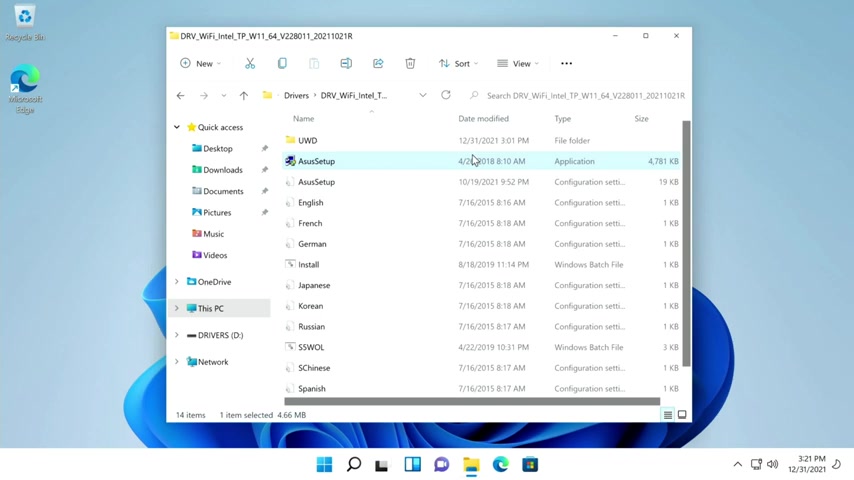
A lot of people have issues on other chip set with this .
If it looks like it doesn't do anything , what you would do is right .
Click on the start button , go to device manager .
If you see a red X under network adapters , it would be probably this one .
So you would do is right .
Click on it , update driver , browse my computer for driver .
Then we click browse over here this PC C drivers and then we'll look for wifi under UWD 1 64 drivers .
Ok .
Next best drivers already installed .
But if not , it would have installed the driver for you .
So we're good there , close here and we'll close out of here and the same thing would happen for Bluetooth .
So it installs that on the back end .
But if not even that way you can come in here , right ?
Click on the in I file here , the I BT USB , show more options and install .
So then get out of here .
Now , we'll install the audio , scroll down .
A little click on , set up and next .
All right .
Now we'll go ahead and restart now that we're back in windows .
We'll go to farm manager again , go to the driver's folder .
Now , we install a I suite and install .
Ok , here .
And yeah , let's go ahead and reboot .
You must turn off memory integrity to proceed with a suite .
Click here to turn it off and then we got to do another restart .
You guessed it back into file manager and the driver's folder and now we'll install the AIS Armory crate and we can install both .
If we want to start , it's been installed .
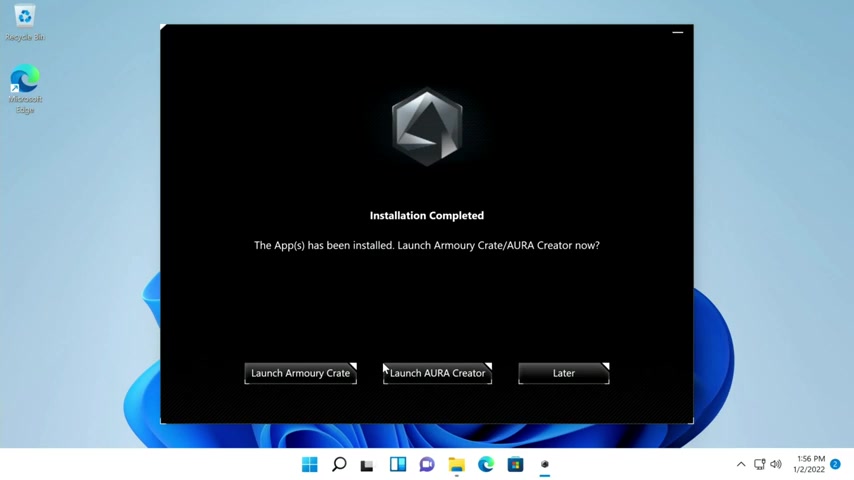
Take a little while , but we'll go ahead and launch it a little bit later on .
So later and then we'll go back into the driver's shoulder and last , but not least we'll install the video drivers , agree and continue .
We'll do custom next , perform a clean installation even though it is a clean installation and normally ID du things .
But just to get you by on this , perform a clean installation next .
Now , with that done , I'm gonna go ahead and uncheck this for right now not to launch it and click close .
Should have done this before , but click on start settings , windows update .
Then we'll go ahead and download all these updates .
I typically like to install the windows updates before because all the drivers get out of hand and then when you install drivers , it goes ahead and overwrites them , but both ways will work just fine here and download .
Now , even though it says restart now , don't restart until all these pending installs have completed .
Then we'll go ahead and click restart once it's all done .
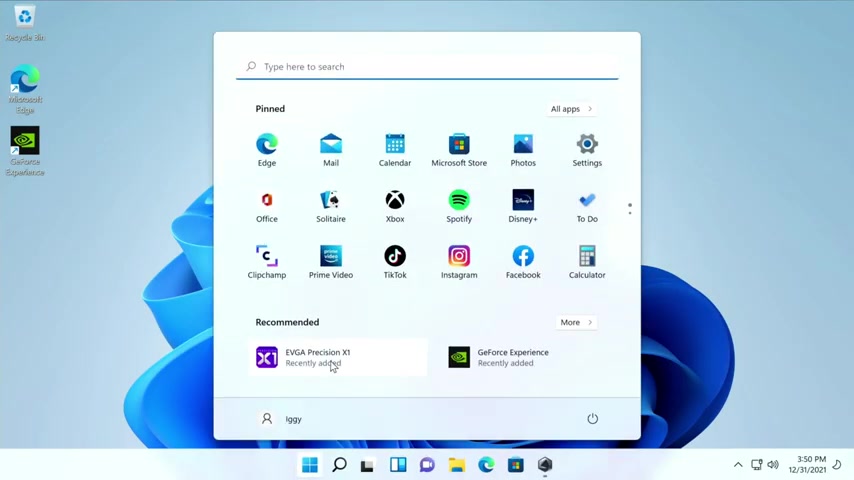
And now for good measures , since we are using an EVG A card and we might want to change the lighting and the fan curves and everything on the card .
I forgot .
So on the back end , I downloaded Precision Precision is Evgas Fan curve and R GB application and it also updates the firmware on the card whenever there's a need for it .
I'm just waiting for direct to finish downloading and installing next here , install finish and go ahead and run that real quick just to see if there's a firmware update or anything along those lines .
Ok ?
No update required .
Ok .
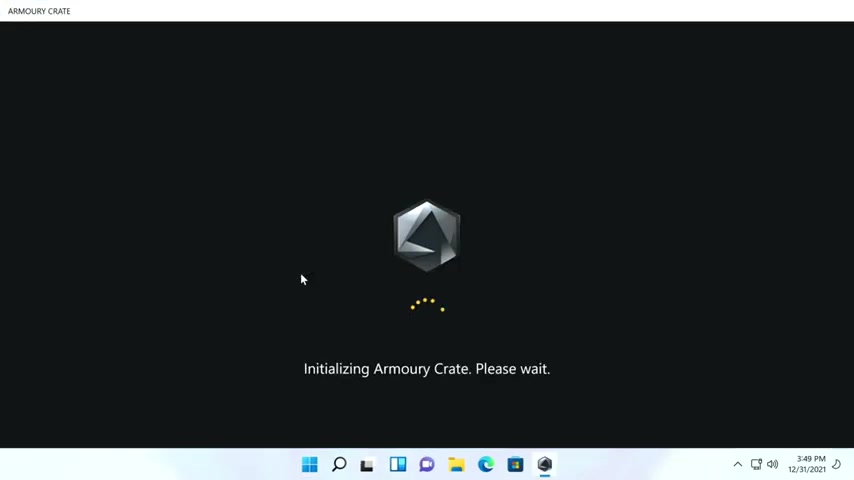
So now we can come in over here if we wanted to then go under more and we can go under the Armory crate .
And I agree next read through all that and I agree it's about like a desktop .
I'm good , thanks .
Ok .
And log into your account .
Not right now , maybe a little bit later on .
So then if I want to change the coloring , let's say I want to go to breathing , I change it right here on the main screen .
I can just bring it over if I wanted to or use it just like that .
And then I can change all the coloring on the system .
Static breathing rainbow like it was before .
And then , for example , I can just minimize out of that .
Now , I'll come into evg a precision just to show you how it works .
Then I go to led and we'll do the big bar first , we'll go to static and we'll change the color to a more blood red .
So now it's ma oh , it's not static .
Sorry , it's breathing and we'll change it to blood red to black .
So now , oops .
And you can't see the card there .
There we go .
Sorry about that .
But now you can see everything matches before it was just on that .
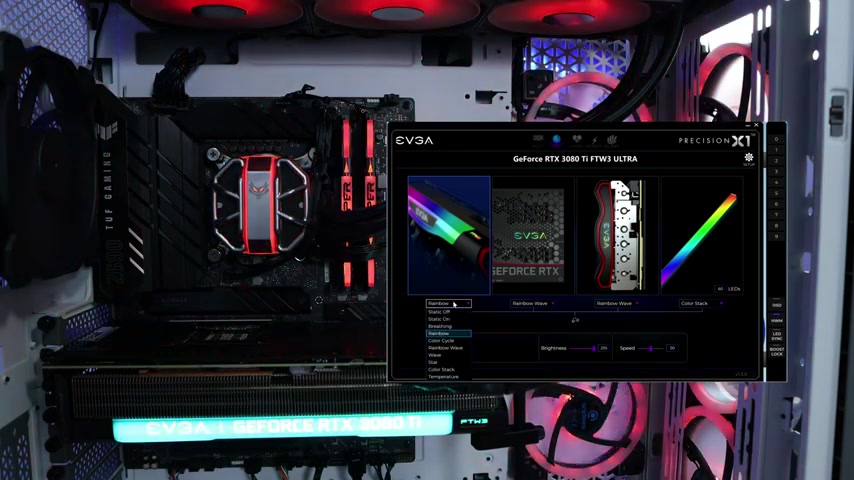
And now with precision , I can either leave it static breathing or I could change it to match the system .
Unfortunately , evg A cards don't have anything to match to the system .
You need to use precision .
Ok .
Then coming down to tools , we can see all the different applications and drivers .
It says we're out date on the land and the serial IO they might have had their own still .
I like to use manually installed drivers , but I will go in in here afterwards and just double check to see what they provide .
Let's do a quick restart now .
All right .
Then .
Coming back into the Armory crate and Armory crate app , there's an update for the armory crate as well .
So let's go ahead update now .

Back under tools , go to utility .
Now , these are different utilities you don't need to use them , but that they suggest you install .
I may install this one later , but then I need the Intel GN A .
I'll take care of that a little bit later on bias .
We've already seen we have the latest bias though .
They don't show anything here .
So then manuals and documents , you can always download them here or from the website individual kit .
So we already have this installed .
And uh well , just a bunch of cool stuff that the AIS Armory crate provides .
In this video , I've shown you how to flash your bias to get all the errors that are potentially in the current bias up to date so that there's less errors to get them more performance out of your system before you install windows .
Then I've also shown you how to configure the bios , mind you basic configurations .

I don't want to get too detailed because not everyone is going to have the exact same configuration , but the settings I gave you are going to help you out a lot .
Then I've shown you how to install windows 11 .
You can install windows 10 , basically the same .
Then I've shown you how to install every single driver and software .
You're going to need to get you up and going .
If you have any questions , comments or concerns , please do leave them down below .
I love to help you guys and I do answer every single comment and question as soon as I get them .
Thanks so much for stopping by .
This is your friend Iggy with this bite for you up .
See you guys .
Are you looking for a way to reach a wider audience and get more views on your videos?
Our innovative video to text transcribing service can help you do just that.
We provide accurate transcriptions of your videos along with visual content that will help you attract new viewers and keep them engaged. Plus, our data analytics and ad campaign tools can help you monetize your content and maximize your revenue.
Let's partner up and take your video content to the next level!
Contact us today to learn more.