https://www.youtube.com/watch?v=0ptZPTTwRaE
How To Install PuTTY on Windows 10
how to install Putty on Windows 10 .
The first thing you need to do is open up your browser and then navigate to the following URL address .
I'll put this URL address in the video description below .
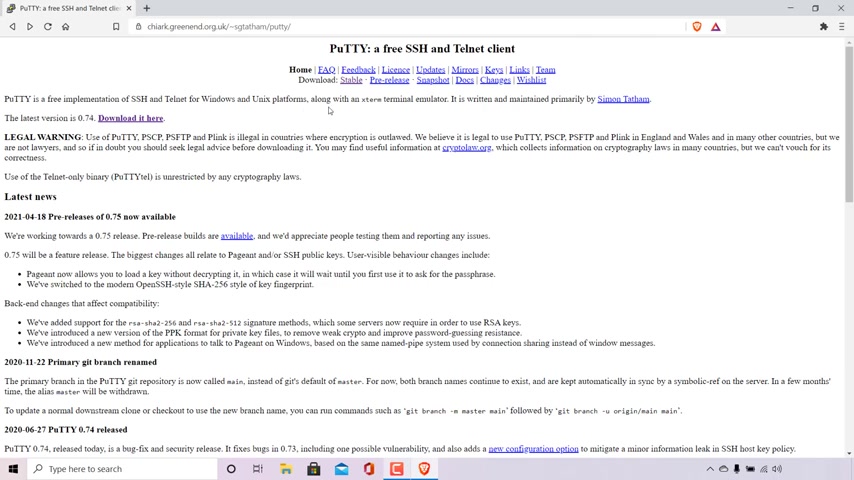
Once you're here , you should see at the very top of the page Putty , a free SSH and telnet client .
Underneath , you'll see a brief explanation of what exactly putty is .
So Putty is a free implementation of SS and Telnet for Windows and UNIX platforms , along with an X term to emulator .
It is written and maintained primarily by Simon and below that , it says the latest version is 0.74 at the time of recording of this video , and right next to the version is a hyperlink text here , which says Download it here to be taken to the download page for Putty .
All you need to do is left click on Download it here .
Once you've done that , guys , you'll be taken to the download Putty page .
As you can see at the very top here , it says This page contains download links for the latest release version of Putty .
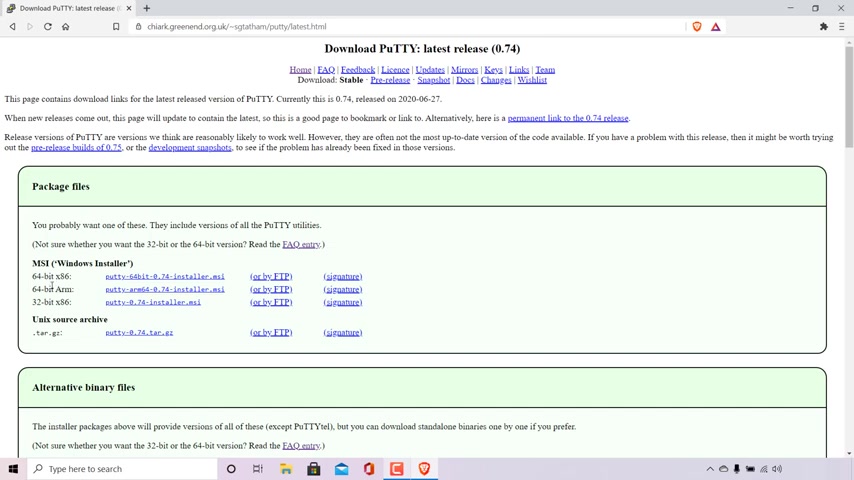
Currently , this is 0.74 released on June 27th 2020 .
To find the appropriate version of Putty for your operating system , navigate to where it says package files here and what you'll be looking for because you're on Windows is the M SI Windows installer .
As you can see for Windows , you've got three different versions here .
You've got the 64 bit X 86 64 bit arm and 32 bit X 86 .
Most likely , if you have a modern computer , you'll be on the 64 bit system of windows , so what you'll need is a 64 bit X 86 version of Putty .
Now this download link will include versions of all the putty utilities .
To begin the download , simply hover over the appropriate hyperlink text opposite the appropriate version of Putty that you need and simply left .
Click on it .
Once done , guys , the file Explorer window will open here .
You'll need to pick a destination to save the putty installer .
As you can see , I'm currently in my desktop , and that's where I'm going to save the installer .
You can change the file name if you would like .
I'm going to leave it as default As you can see , the file name is currently Putty 64 Bit Dash , the latest version of Putty Dash installer .
Below that , the save as file type should be Windows Installer package .
If you're on windows and then once you're happy with the destination file name and save type of the Putty installer file , all you need to do is left click on Save to download Putty .
As you can see , Putty is a relatively small file and should be downloaded very quickly .
The next thing we need to do is find where we saved the putty installer .
So of course , for me it's on my desktop , So I'm simply going to minimise my browser here to end up on my desktop and find the putty installer .
As you can see , guys , it's right here .
Next .
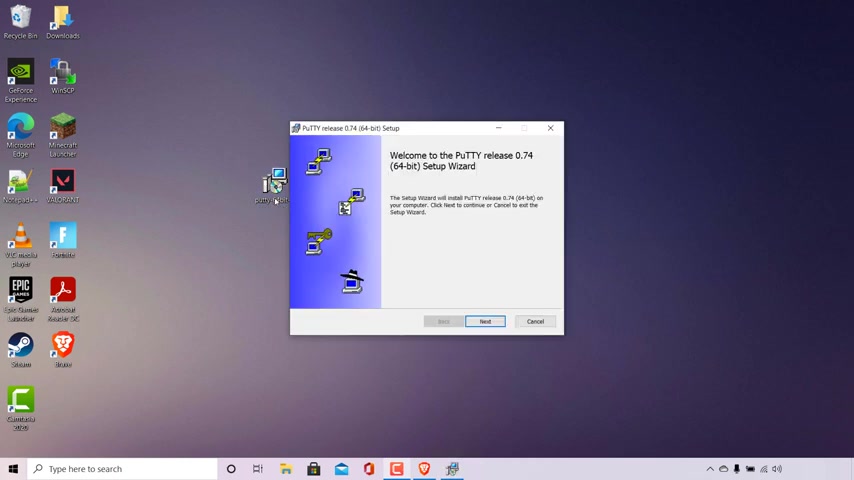
What you need to do is double click on the putty installer to begin the installation process , so I'm going to do that now .
Once you've done that , guys , the installer will open and the putty set up will commence .
So , as you can see , it says at the very top here .
Welcome to Putty release and then the latest version of Putty 64 bit set up wizard .
All you need to do is simply left .
Click on Next .
You'll then be asked by the installer to pick a destination folder .
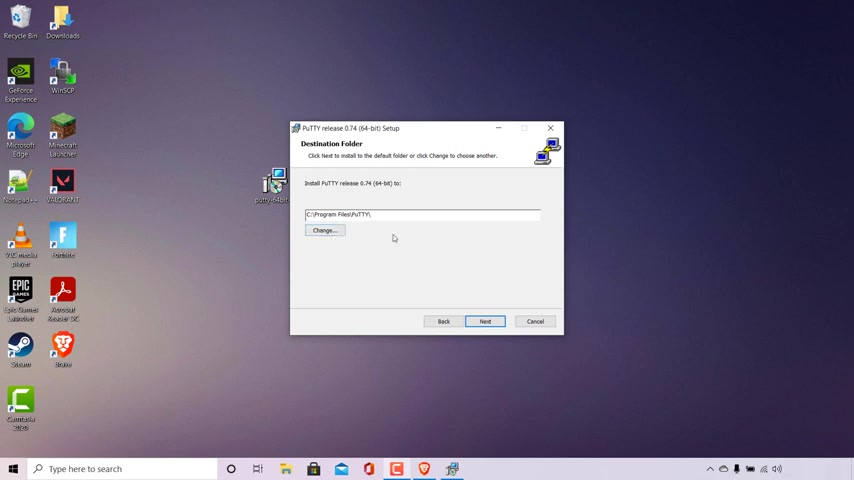
As you can see , it's currently set at AC Drive Programme Files and Putty .
If you would like to change this destination , simply left click on change .
I'm happy with the default option here , so all I'm going to do is left Click on next .
You'll now be on the product features part of the set up where you can select the way you want features to be installed .
As you can see , install Putty files is currently set to install .
Add shortcut to body on the desktop is not set to be installed .
I would like to change that as I always like to have a desktop shortcut on my desktop for all the programmes that I have installed on my device , so all I'm going to do is simply left .
Click on this arrow here next to the feature that I would like installed .
You have three options here will be installed on local hard drive .
Entire feature will be installed on local hard drive and entire feature will be unavailable .
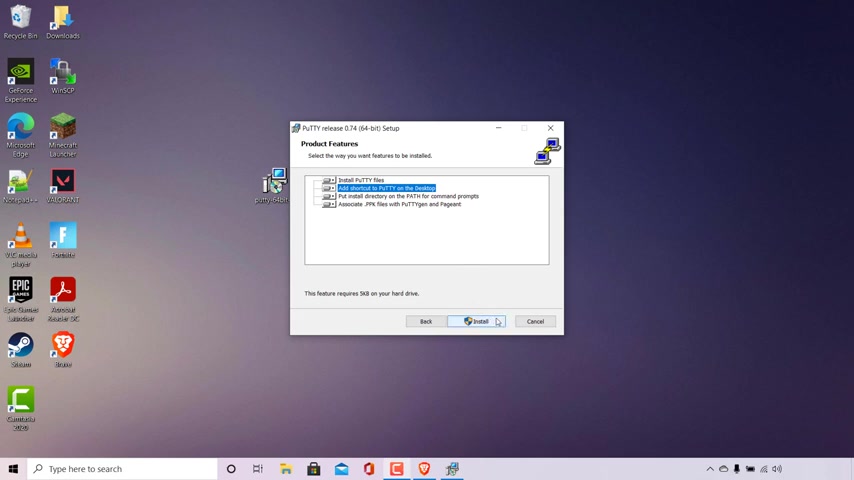
The option that we are going to be selecting is will be installed on hard drive , and now it should match all the other product features so below that put install directory on the path for command prompts and associate dot PK files with putty and pageant .
Everything else I'm going to leave as default .
The only change that we've made was to add a short cut to put on the desktop .
Once you're happy with all the product features that you have customised and adjusted , all you need to do is left click on install to begin the installation of putty Putty set up will then immediately begin install putty .
It's a very quick install since putty is a very small programme .
Once done , guys , you'll be brought to the completion page .
As you can see , it says completed a putty release latest version of putty 64 bit set up wizard Click the finish button to exit the set up Wizard , You also have the option here to check Mark the view Read me file After the installation has finished , I'm going to uncheck mark this So to complete the process , guys , all you need to do is simply left .
Click on finish and that's it , guys , you have now installed putty .
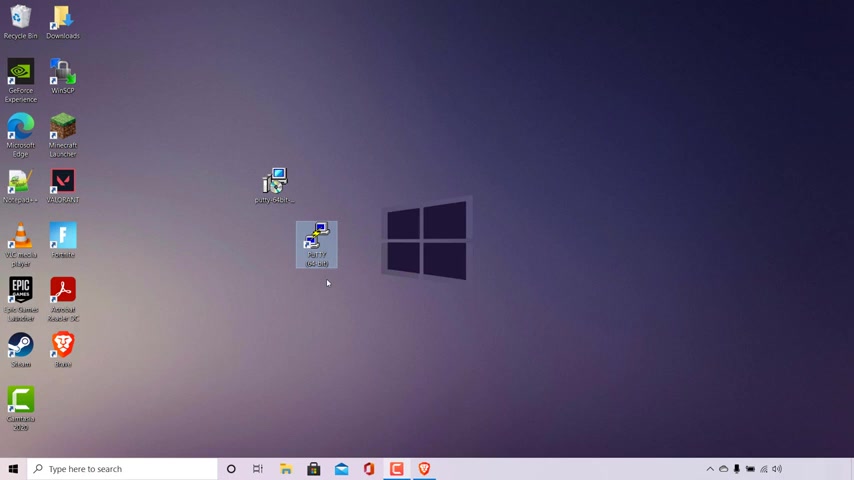
So as you can see on my desktop , here we have the putty shortcut , which means our installation was successful .
So I'm just going to double click on the putty shortcut here to open up putty .
And there we go , guys , we're brought to the Putty configuration page where you can begin SS hing into your server .
And that pretty much concludes the video guys on how to install Putty on Windows 10 .
If you enjoyed this video , be sure to give it a like comment down below and , most importantly of all , subscribe to support the channel .
I'll see you on the next video .
Are you looking for a way to reach a wider audience and get more views on your videos?
Our innovative video to text transcribing service can help you do just that.
We provide accurate transcriptions of your videos along with visual content that will help you attract new viewers and keep them engaged. Plus, our data analytics and ad campaign tools can help you monetize your content and maximize your revenue.
Let's partner up and take your video content to the next level!
Contact us today to learn more.