https://www.youtube.com/watch?v=n5nKYqvu29w
The Crispiest Fried Chicken _ Kenji's Cooking Show
Hey , everyone .
It's Kenji and we're gonna make some fried chicken .
So this is loosely pretty closely based on the recipe from my book , the Food Lab .
Um , although I've modified it a little bit , um based on some based on the way we do it at w hall .
Um So there's , this is , this is , there's a lot of ways to do fried chicken .
There's , you know , you can , you can batter it , you can dredge it .
This is a dredging style of fried chicken .
Um So it's going to get a wet brine and then a dry coating and then we're going to fry it .
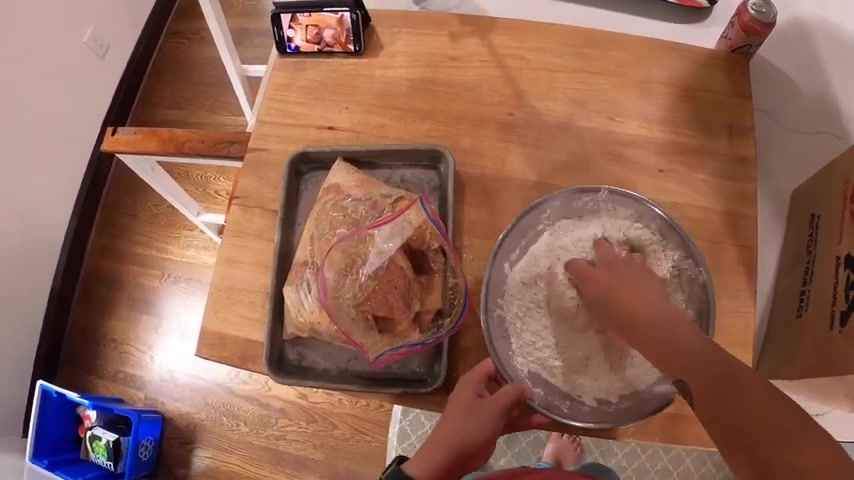
Um So I'm going to start by making this dry coating , right ?
So I'm going to use about a cup of flour and you'll see why I'm making this right now instead of , you know , later on when you fry it because , well , I'll show you in a second about a cup of flour , um about three quarters of a cup of rice flour .
OK ?
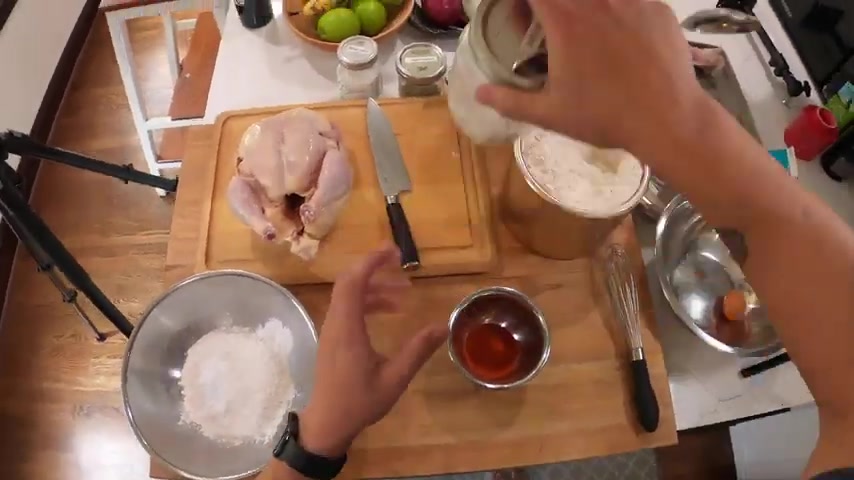
Then a couple of teaspoons of baking powder , give it that leavening , make it lighter and then a big pinch of salt .
OK ?
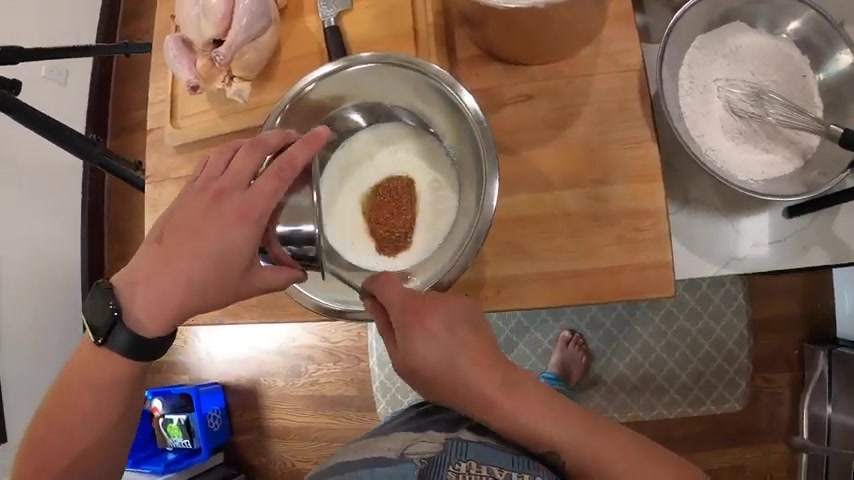
So I'm gonna set that aside and now I'm going to make a spice mix .
All right .
So there's not 11 secret herbs and spices in this one .
There's just a few , but they work well together and I like them .
So about a tablespoon of paprika .
This is kind of hot paprika .
So , if I was using regular mild paprika , I would add also sort of a pinch of cayenne pepper if I wanted a little bit of heat to it , but you could also go no heat at all .
Um , a couple of teaspoons of oregano , oops , a couple of teaspoons of garlic powder and you can eyeball all this , do it the way it pleases you , you don't have to keep anything consistent .
Um , and some black pepper , I have a whole bunch of black pepper in this bowl from when I was grinding stuff , but I'm gonna end up adding quite a bit of black pepper .
That's sort of like the main seasoning here .
So about two tablespoons , brown black pepper .
All right .
Now , I'm just gonna mix up that spice mixture , pinch of salt out of , add a tablespoon of salt to it .
Also mix it all up this spice mixture .
By the way , it's a good sort of all purpose rub like you can do this on .
You're gonna grill chicken or you gonna grill a steak , do barbecue .
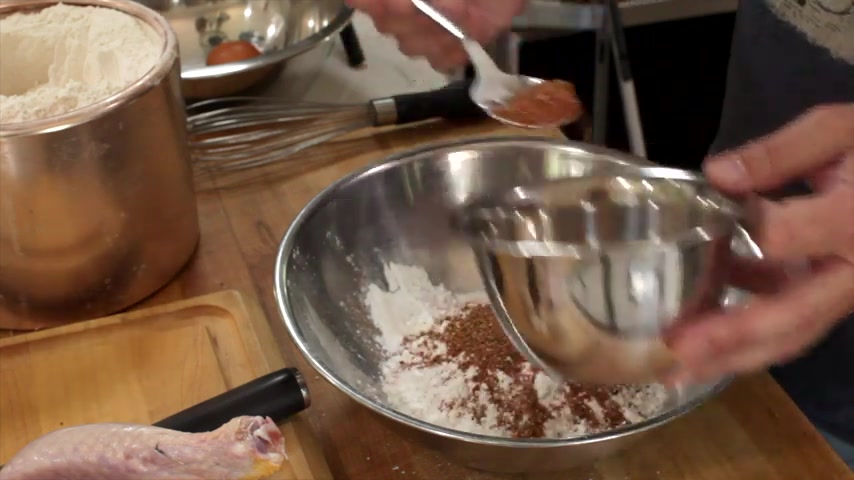
This would work nicely on there .
All right .
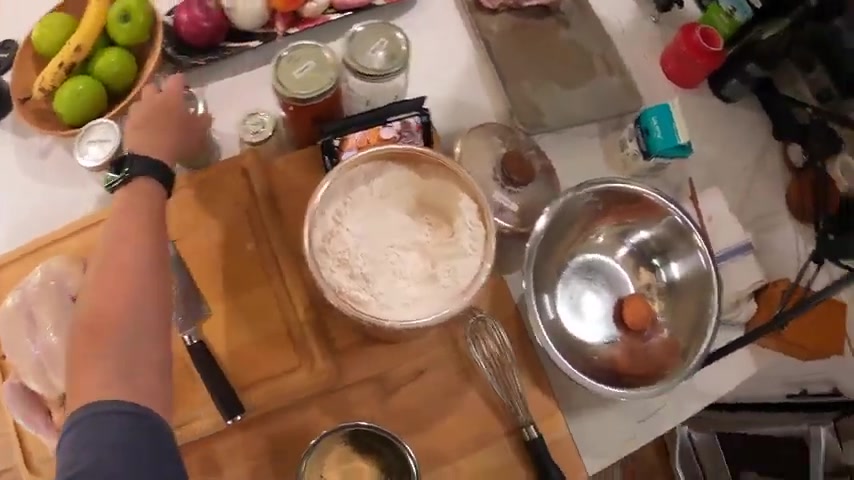
Now , I'm gonna take about two thirds of this mixture and put it straight into that flour dredge .
All right .
So that's gonna be our dredging mixture here .
This is what we're going to coat our chicken with at the end .
Now , we're also going to make a batter .
Um , Brian , basically .
So that Brian consists of buttermilk .
If you don't have butter milk , you can use a mixture of yogurt and regular milk like half and half .
That'll work fine .
Um , about a cup of buttermilk .
I'm putting in here , I'm gonna add an egg .
Then I'm going to add the remainder of this spice mixture and but another tablespoon of salt .
So you do want this to be quite salty actually .
So this , this this mixture does two different things .
So the buttermilk in there , it's acidic which will tenderize a little bit .
But really the main point of this brine step is that you want it to be salty enough that it starts to actually break down some of the muscle fibers in the chicken .
And that allows it to retain moisture better when it goes when it goes on to fry later on .
Um And that is important because we want our chicken to stay juicy .
The buttermilk is mainly there for a bit of flavor and also because it adds viscosity .
So it sticks to the chicken .
And to that end , I'm also going to add just a little little pinch of the dredging mixture and that will thicken this up just to touch so that it sticks more nicely .
So , what we got here is sort of a cross between a brine , a marinade and a batter and that's exactly what we're looking for .
All right .
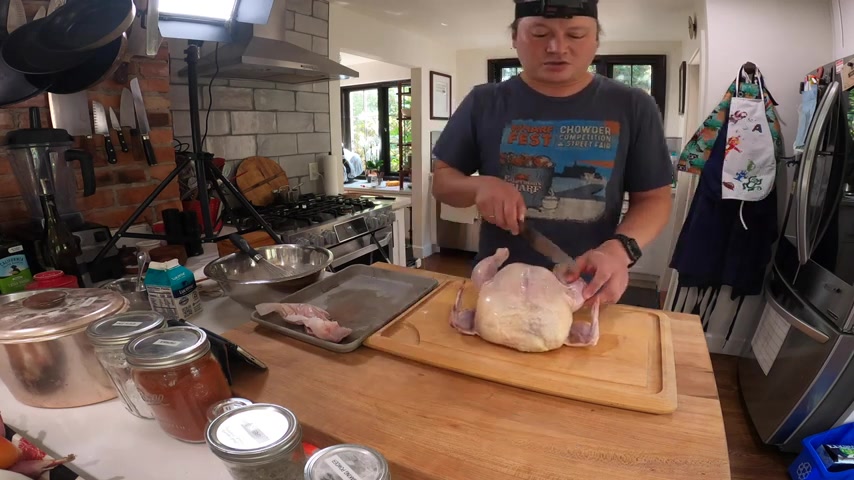
So now I'm going to set all this aside and I'm going to work on my chicken because you need chicken to make fried chicken .
I'm starting with a whole chicken that is by no means a necessity .
You could do it with drumsticks or whole legs .
You could do it with white meat , dark meat , anything I prefer bone and skin on .
But again , you could do it with boneless if you prefer , it really doesn't matter .
The magic is really in the sort of dredging mixture in the frying process .
Oh , so to break down a chicken , I start by slicing the skin between those joints there .
OK ?
Then I flip the whole bird over .
You want to pull the leg out until this joint pops out right here .
OK ?
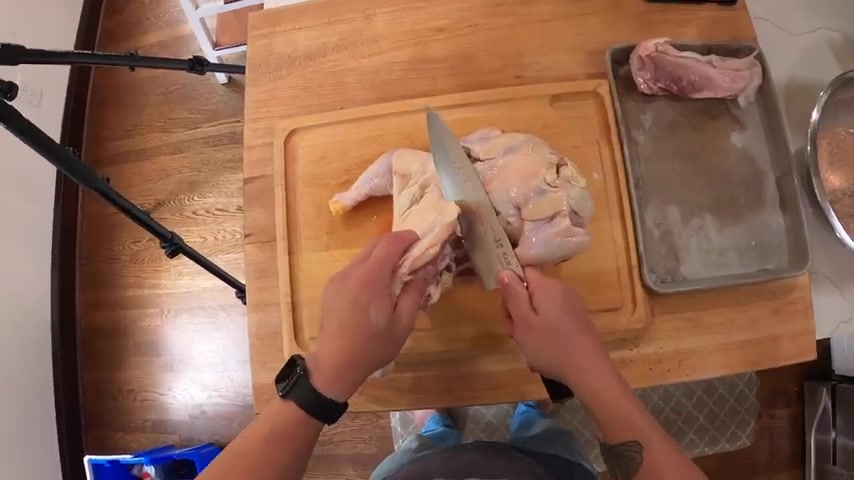
And then take your knife and follow along the back and there's a little chunk of meat here called the oyster .
And you want to make sure to get that because it's nice and juicy .
OK ?
And then just go straight through between the bones and there we've got a leg .
Same thing on this guy popped the bone out .
Make sure you get the oyster .
There you go .
Two legs .
All right .
So for fried chicken , we're gonna get this whole wing out with a little bit of the breast meat attached like that .
Guys are ready to go on the batter .
OK ?
Like that , I like having that little nugget of meat attached to it so that the bones , the breast meat breasts give you a little bit something else to hang on to .
Now we're gonna split the cark the back off the chicken .
So hold it up right up , right .
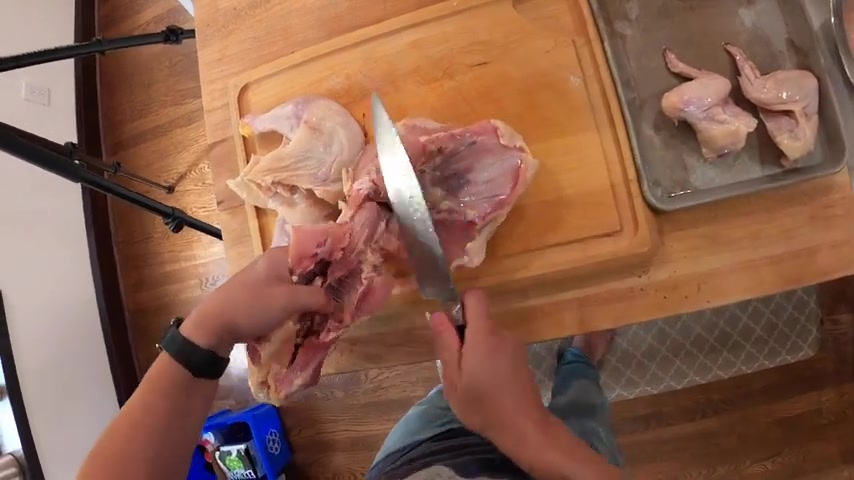
Like this , that goes through those bones should come nice and easy .
OK ?
And you can basically just rip through there with your hand and then just use your knife where it's needed , right ?
That's our chicken back that we'll use for stock later on .
And now the breast , we're just gonna split it once down the middle like that .
These are some big chunks of skin will render those out with the stock also .
And then again in half .
OK ?
And then finally we're going to split the drumsticks and thigh .
So when you move it , you can find where the joint meets right around there .
OK ?
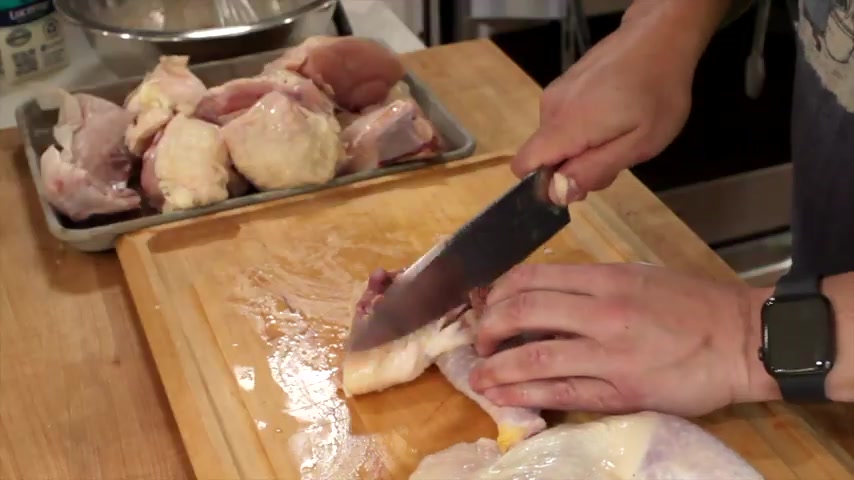
And you want your knife to go in between those joints just like that .
And if you get a little false start , you can always pull your knife out and reset , but you should be able to find that joint pretty easily .
All right .
So now we've got our , how many pieces of chicken is that ?
One , 2345678 , 9 , 10 , 10 pieces of chicken , right ?
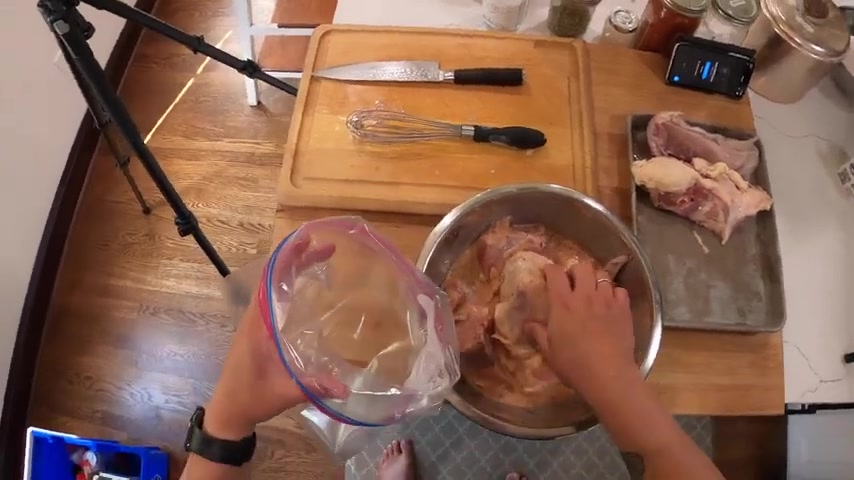
I'm gonna toss this up make sure everything is nicely coated .
And then what I'm gonna do is I'm just going to transfer this to a container .
I'll use a , like a lied camera or maybe a , if I , if I have like a large Ziploc bag , you can , I can do that .
Um , but put it in a container and let it sit in the fridge overnight .
At least overnight .
You can go up to a couple of nights .
I've done this up to two or three nights and it actually comes out even better juicier .
The longer you let it in this marinade , the juicier it's going to get , you know , until it starts to rot .
Ok .
That's it .
All right .
So my hands are messy .
So I'm not going to do the snap thing , but I will see you guys all .
Hm .
How should I do this ?
I will see you all in a couple of minutes because I realize I want to show you this trick for putting things in Ziploc bags .
So , Ziploc bags when you put things in them , it's very easy to get the ridge , the ridge , the rim , the seal messy .
Um So what you do is you just open it up , turn that inside out just like that .
Ok .
And then you can get everything in there and it's ok if stuff drips a little bit onto the edge as long as it doesn't get in that area with the seal .
Ok ?
Because then at the very end .
Once you're done doing all this , you flip it back inside out and you're good to go .
It's nice doing that also because it kind of keeps the bag open and it sort of ends up being this sort of like bucket shape .
So that makes it easy to do things .
Like pour the rest of your marinade in without it flopping around everywhere .
Ok , I'm gonna leave it sitting like that while I wash my hands .
All right .
And so now we unroll this and to get most of the air out of a Ziploc bag .
The way I do that is I seal it , not quite , but almost all the way .
So you have like , you know , an inch or two left at the end here , then you lay your stuff flat , squeeze out the air from one side .
It doesn't have to be perfect for something like this , but you want to squeeze out the air mostly from one side and try and push it all out that one little gap and then close it up .
Now you've got a nicely sealed bag , the marinade's in there .
It's in good contact with the chicken and it's ready to go in the fridge .
All right .
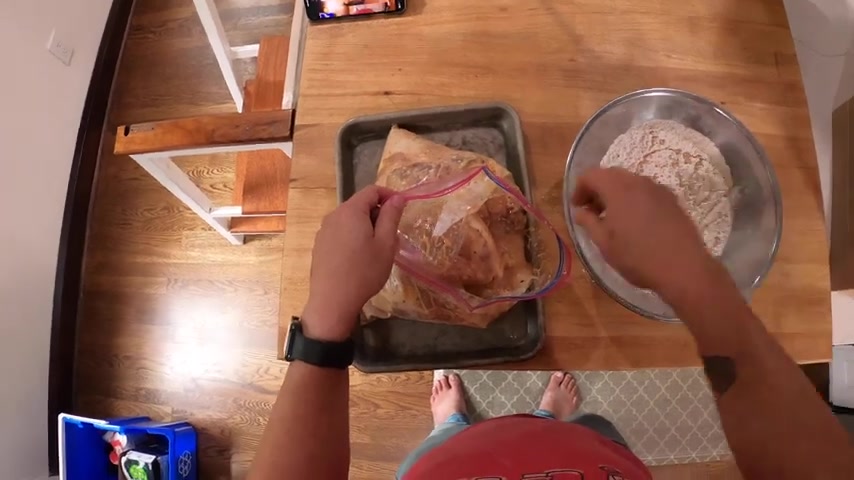
So now I will definitely see you in another minute because I'm gonna show you something else when you put stuff like this in a Ziploc bag into the fridge , make sure you always put it on a tray or in a baking dish or something , a plate first because just in case there's a leak , you want something that's gonna catch that .
So it doesn't get all over the inside of your fridge .
All right .
So now I will definitely see you overnight .
So .
All right .
So it's been overnight .
Now comes the messy fun part .
So we're going to fry this now .
So I got my bowl of seasoned flour here .
I'm going to open this up and we're going to use and then I got this paper bag and I'm going to use this paper bag method , which I like to do at home sometimes .
So the first thing we're going to do is actually we're going to get our hands messy .
So don't worry about that .
You'll wash them at the end .
What I want to do is take some of this wet marinade and put it into the flour just like that , just drizzle it in .
Now , this is a trick I learned .
Um I talked to a friend of mine who used to work at a um at a fried chicken fast food fried chicken place .
And um what he told me was that as they dredged their chicken , um the batch , the , the , the flour that they judge their chicken in as they did more and more chicken through the day .
Um The flour would start to get these little clumps in it from the extra um marinade buttermilk that got into it and that those clumps would actually stick to the chicken and make the later batches of chicken better than the first batches because they had all these sort of extra nooks and crannies .
So , what we're doing is kind of artificially getting the flour to that stage .
So we're just going to drizzle in a couple of tablespoons a little bit of that um mixture so that your flour gets a little bit clumpy like this .
You see , so you see how it's clumping up a little bit .
That's what we're looking for .
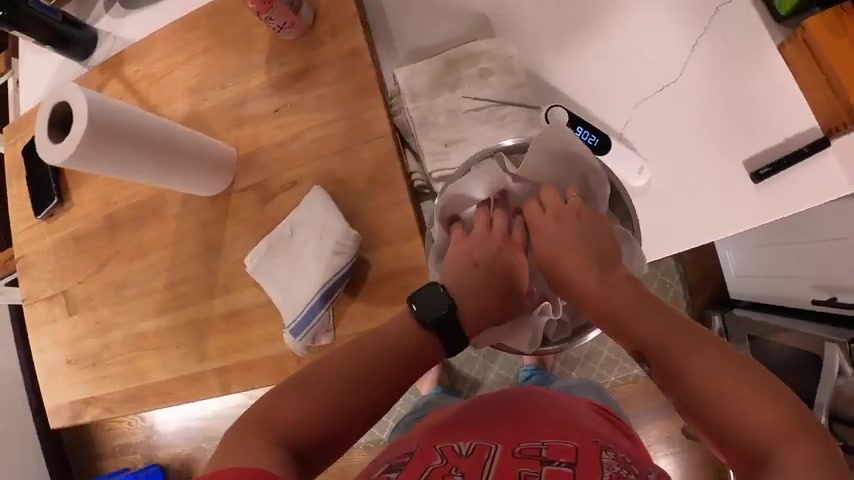
Now , we're gonna add our chicken can add a piece at a time , make sure it's nicely coated in the flour that they don't stick together .
And so that there's no sort of pockets of dry flour remaining or sorry , what chicken we want it all to be nicely dredged and then as the bowl starts to fill up , we're going to dump them into this paper bag .
It's just a shopping bag .
Ok .
And keep going .
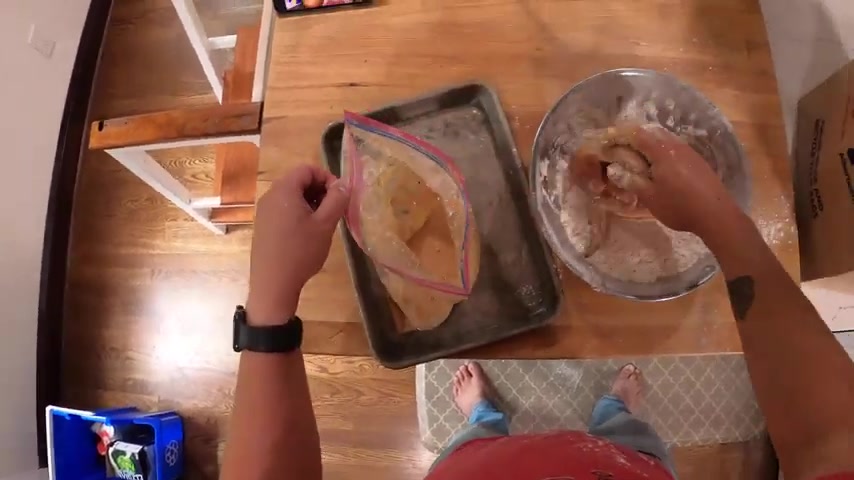
Now , there are different sort of schools of thought as to whether you want to let your chicken sit and rest after it's been in the flower or not .
Um , I've tested this pretty extensively .
Um , and what I find is that if you let it sit and rest , the flour starts to hydrate , eventually it starts to form some gluten .
And what you end up , what ends up happening is that your flour mixture gets a little tough , your coating gets tough .
So I actually prefer to fry right after dredging it .
All right .
So I got all my chicken in the bag .
I dumped the remaining dredging mixture in there .
Like I said , don't worry about dirty hands .
We'll clean up everything after we're done .
Pinch the top , pinch the top like that , support it and then just shake the devil out of it .
Yes , because that painter on TV would say , oh , beat the delo .
That's , he beat his brush , right anyhow .
All right .
So we got our chicken coated .
Now , I got my fat over here .
This is rice brand oil .
You could use peanut oil .
You could use shortening , you could use lard , you could use vegetable oil .
So , what we're going to do is we're going to actually double fry this chicken .
So we'll fry it once we'll let it rest and then we'll fry it again .
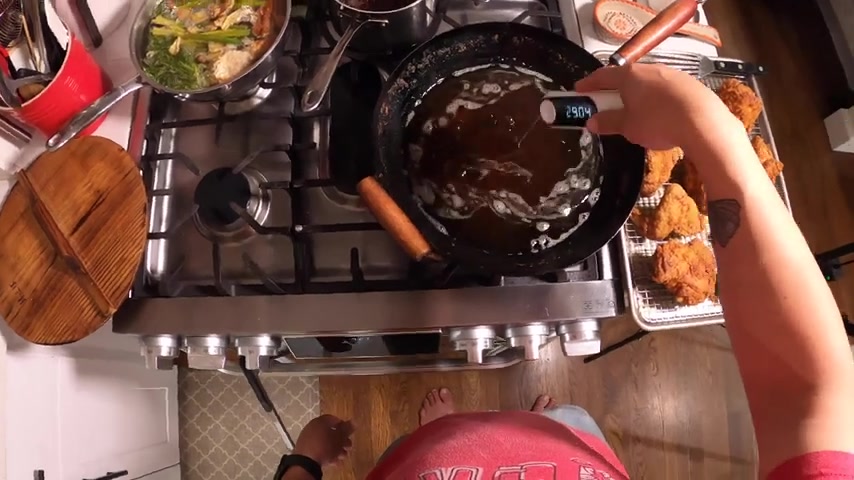
And I'm looking to have a temperature of around .
Well , I was looking for around 325 .
This is probably 343 150 .
That's fine .
What's going to happen is when I add the chicken , the temperature's going to drop and we want the final temperature after it drops to be around 275 250 to 275 degrees .
And that's going to be for the initial cook where the chicken is going to basically cook through and then we'll raise the temperature again and fry it at the end , fry it again at the end .
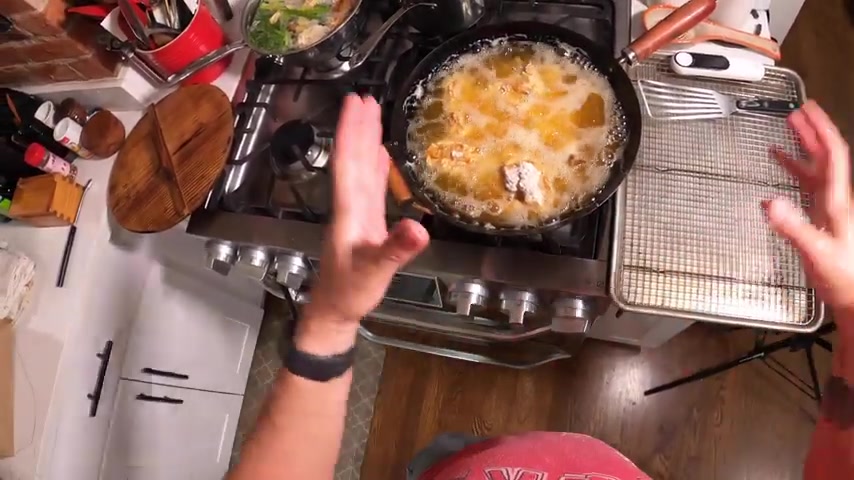
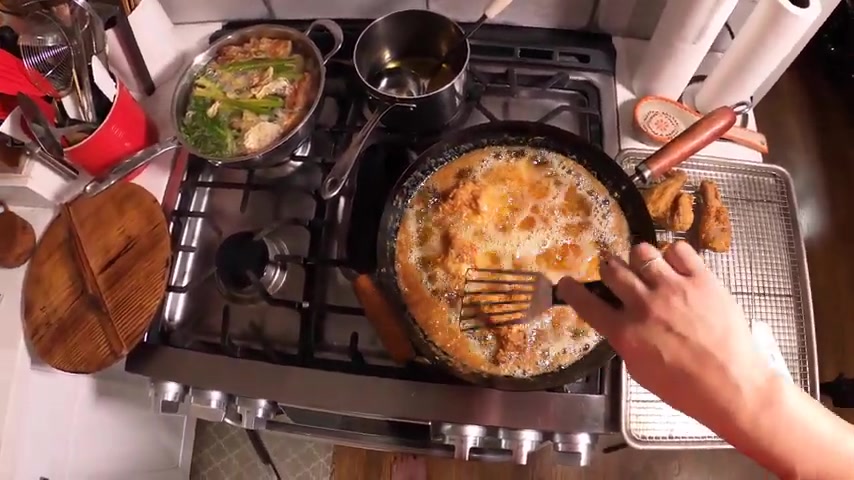
So when you add food to a to hot fat , you want to always lower your hand right down .
Don't drop it from high because , you know , fat can sort of sense fear .
And if you drop it from too high , it's gonna splash up and that's how you get burned .
You want to lower your hand right down to the surface and gently lower the food in and you also want to let it the bottom sit a little bit just so that it starts to set up before completely dropping it in that way .
You don't end up losing too much crust , it doesn't stick to the bottom .
All right , we'll probably get half of this in for this first batch .
I don't know , maybe we can get it all in .
Should we give it a try ?
Now , let's go with that for now .
All right .
So we'll fry the rest of this afterwards .
I'm going to get my hand washed .
All right .
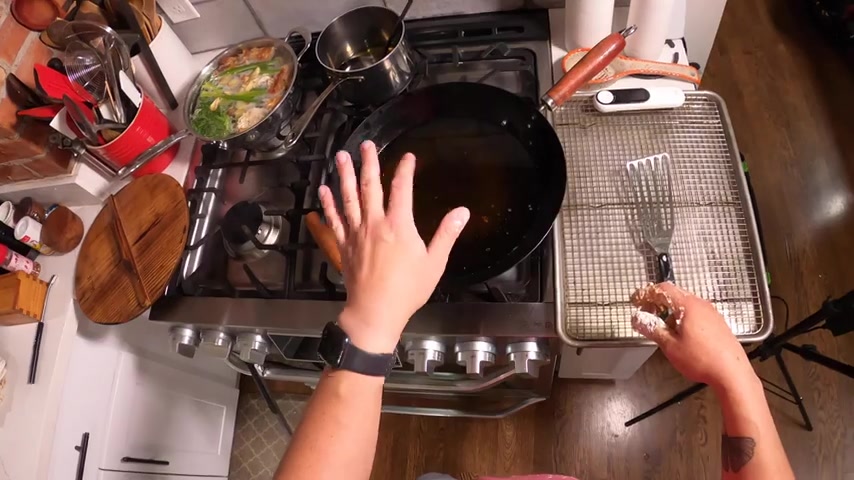
So you see , I'm cooking , I'm frying in a walk .
I think a walk is the best vessel for deep frying .
You could also do this in a Dutch oven if you want .
But a walk has a few advantages .
One of them is that it has these flared sides , you know .
Um And because of those flared sides , uh as the , as you move up , height wise on a walk , your volume increases non linearly .
So with a , with a , with the straight side of pot , the higher you go , the volume increases linearly with the height of the pot , which means that if your , as your oil starts to bubble up , it really , those bubbles will start to rise up the sides and you could have the sort of spillover .
Whereas with a walk because of the flared sides , as you go up in height , the oil bubbles rise , but then they spread out .
They never really , it's much safer .
I find to fry in a walk than to fry in a straight side of thing that those wide sides also sort of make it easier to kind of get under there and maneuver food around , which we're not going to do right yet because we want to let this rest sit a little bit .
We want that crust to start setting up before we start going in there and fiddling around .
Perfect .
We're right out around right around 2 35 .
Slightly over .
We're good .
I'm gonna adjust the flame as I go to try and maintain that temperature .
Uh , the whole way until the chicken hits around 100 and 55 degrees in the center .
The breasts around 100 and 55 degrees .
The legs and uh , thighs will get up to around 100 and 65 maybe 100 and 75 .
All right .
And that's gonna probably take around , I don't know , probably 10 to 12 minutes or so .
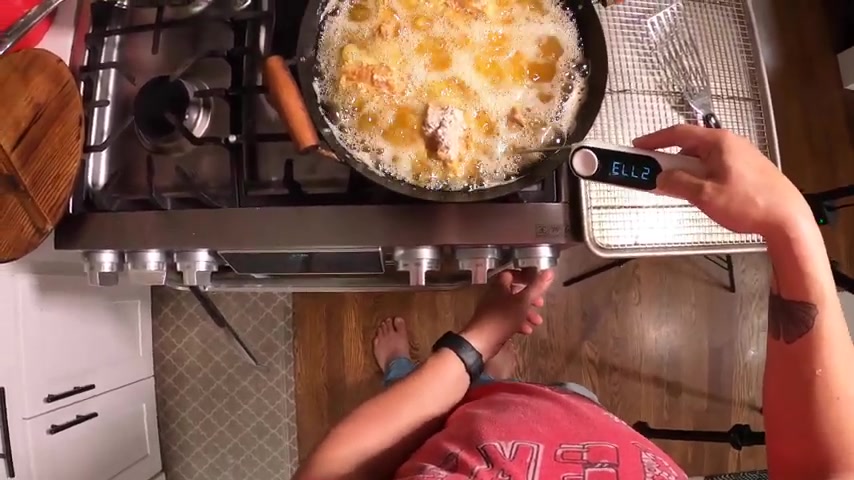
Um Oh , people have asked me this thermometer I use right here .
This is a oxo instant thermometer .
They don't make it anymore .
So you actually can't get this thermometer anymore .
But the thermometer I most highly recommend is the thermo pen , the thermo pen , the thermo pen like mark five I think is out .
Now .
It's a relatively expensive thermometer .
It's like , you know , it'll run you probably 80 bucks , maybe 100 bucks .
But it's like top of the line , instant read .
Super accurate .
It's a great thermometer .
If you want to go on a budget , you can get the thermo Po , which is about 25 bucks or so .
It reads a little bit slower , a little bit less accurate , but it's still a great thermometer .
The reason I'm using this one is because I lost my thermo fan when we , when we moved to Seattle last year , but I'll probably pick up a new one pretty soon .
Um All right .
So I'm going to let this go .
I'm going to let it go without touching it for a few minutes and then I'm going to kind of flip the pieces around really gently using .
Actually , it's probably ready to flip around gently right now .
Let's take a look .
Shall we , some of those early ones we stuck in ?
It's been a couple of minutes .
All right .
The reason you want to move it around .
Well , first of all , to promote sort of even cooking .
But I also don't like when , um , my chicken sits at the bottom , uh , and sort of gets , if wherever it's in contact , direct contact with this , the metal , it's going to cook a little bit faster .
And so if you don't flip your chicken around , it ends up getting these sort of dark spots on the crust , which I don't love the look of or the flavor of .
So I like to keep them moving around a bit .
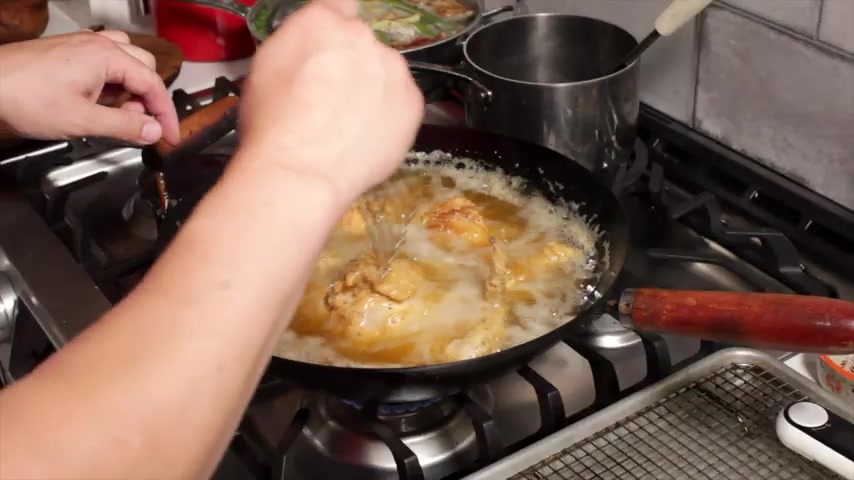
But you've got to be real gentle in this stage .
You want to really kind of get under it and very gently flip it so that you don't lose you crust .
You want that crust in the skin to get , have that cosmic oneness .
All right .
So I'm just going to let this fry basically just do what I just did for the next few minutes until it comes up to temperature .
And I will see you then .
So I will see you back again in about 20 minutes .
It's actually been about 20 minutes a lot more than I anticipated because these chicken breasts are actually huge , which I should have accounted for .
But , um , I've already pulled out the leg , one of the legs and the wings that I was going with before because they hit their temperatures .
But these chicken breasts 152 they're getting close .
And then what I'm doing is that guy's done .
All right .
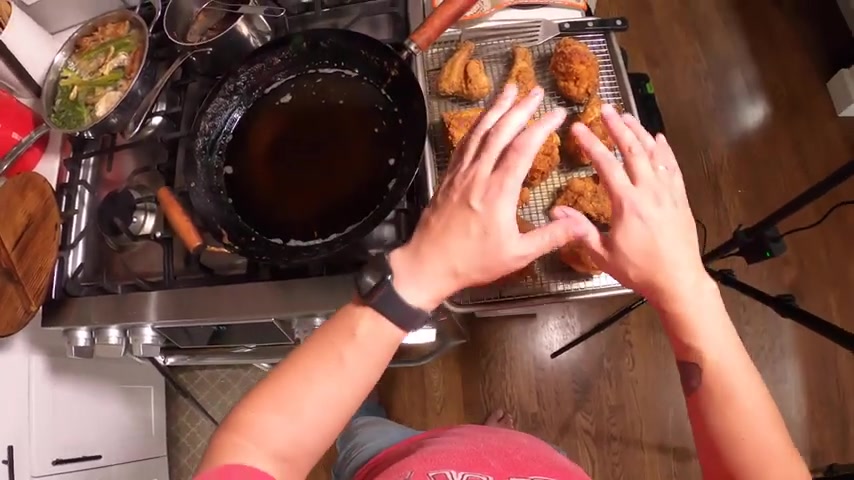
What I'm doing is as the pieces are done , I pull them out and don't worry if they're not super crispy right now , they're not supposed to be .
And as space clears up in the walk , I've been adding those remaining pieces .
So I've already got two more pieces of chicken in there , the thighs .
Um And then as more space clears up , I will add in the remaining pieces and keep going .
So basically , you just want to keep your chicken , you want to monitor it , you want to take it out as it hits its target temperature for each piece .
That again , that's around 165 for dark meat , at least , and at least 155 for light meat .
In this particular case , it doesn't really matter if your chicken overshoots its target a little bit .
You know , oftentimes like if you're roasting a chicken , for instance , if you overshoot that target temperature , the meat gets really dry .
Um , when , when you've been brining it all night like this , that sort of acts as a , as a safeguard against drying out .
So even if you overshoot the target a little bit , your chicken is still going to end up plenty juicy .
So don't worry about that , but you do want to hit the minimum at least .
And again , don't worry if it's not crispy , we will deal with that shortly .
All right .
There we go .
That one's done .
Ok .
I'm going to keep frying and I will come back to you when this is all done .
So I will see you in 15 minutes , about 15 minutes .
All right .
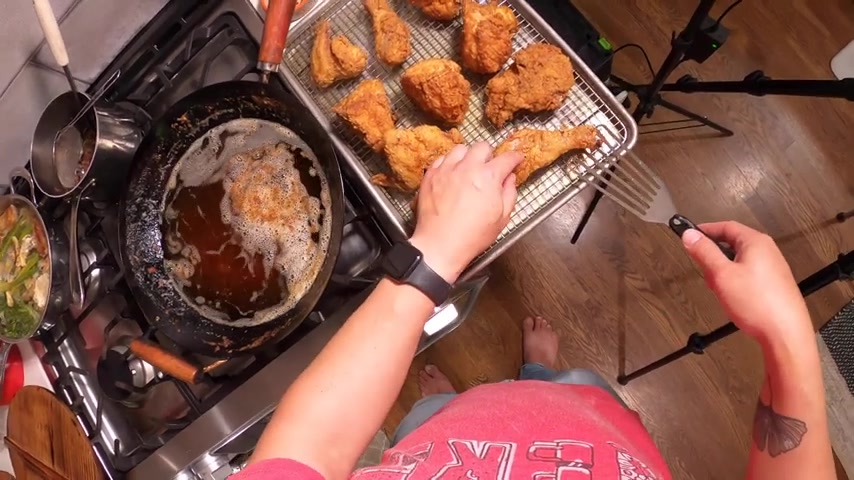
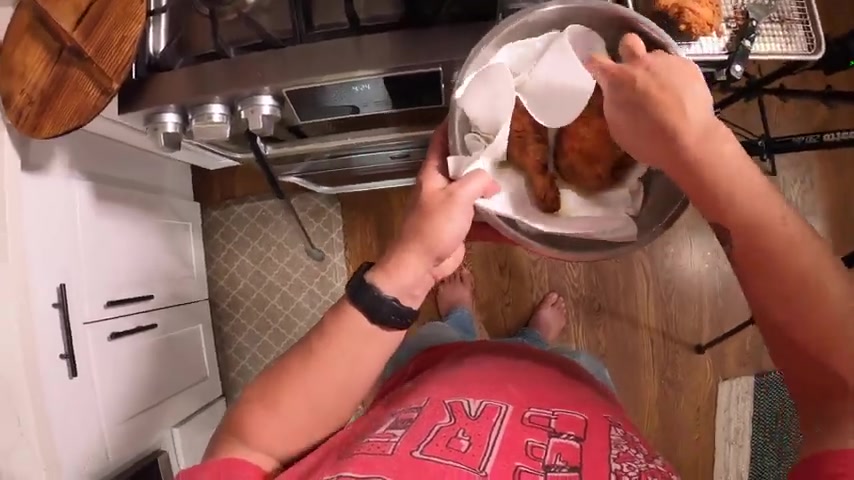
So all my chicken is up to temperature .
I'm just taking the last piece out now .
And like I said , these crusts are not going to be extremely crispy right now .
In fact , they're going to be quite delicate .
So you want to be very careful with them .
That's why , by the way , I would not recommend using tongs for this process .
You want something like this , a flexible spatula agent , get under the chicken and really move it around without the risk or at least minimizing the risk of getting that of scraping that crust off because you don't want that to happen .
Although it can still happen , of course , you still got to be careful , but I don't know you can see this , but you see how nice and craggy these chicken pieces got super crackly .
All right .
So now to crisp them up .
So at this stage , by the way , the reason we're double frying is because when you fry your chicken once and this is true , whether you're flying frying chicken or onion rings or you know , anything , anything that you're going to , anything that you want to build a nice crust on that doesn't get soggy when you fry it .
Once some of the moisture is going to come out and evaporate , that's what causes all the bubbling when you fry things , that's the moisture evaporating and that's part of what's going to get your crust to be crispy .
But , um , you still have quite a bit of moisture sort of underneath there in the meat itself and in the lower layers of the crust that never really make it out .
And so as your chicken kind of sits , that moisture is going to then start migrating towards the exterior and that's going to soften up your crust pretty quickly .
And so what you want to do is you want to let your chicken so fry your chicken so that it's cooked all the way through and then let it rest a little bit so that , that moisture has a chance to start coming out again .
And you can see the ones that I pulled at the beginning are actually really kind of mushy and that's all the moisture from underneath coming out and soaking into that crust and softening it up again .
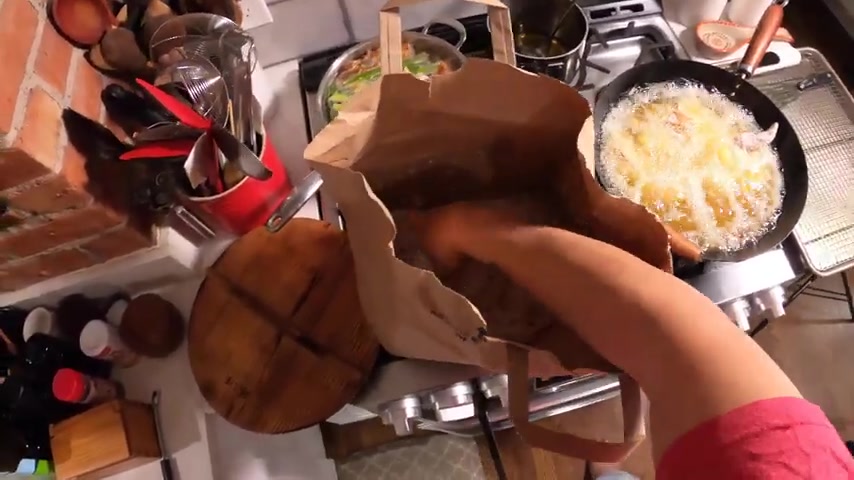
And that's good because now what we're going to do is we're going to fry it a second time at a higher temperature and we're going to drive off that moisture again .
All the moisture that went into that crust is going to go out again .
And so you're going to end up with an extra dry , extraordinarily crispy crust .
This is a trick I use for when I'm making , you know , something like , like Chinese American dishes where you're frying things and then putting them in a sauce , something like general .
So's , you know , I think Andrew Ray binging with babish , he did a version of my general .
So's chicken recipe on his channel where you can go and see .
And I'm pretty sure he does the double frying process there too .
I'm pretty sure he does .
Maybe he doesn't .
But if he doesn't , you should , it'll make it even crisper .
It'll stay , you can get it in sauce and it'll stay crispy , you know , like overnight in the fridge , you can microwave it in sauce and it'll still be crispy .
So at this stage , you can take the chicken , you can ref fry it immediately , which I'm going to do with a couple pieces just to show you or you can let it sit until you're ready for dinner , which is what I'm going to do with the rest of the pieces .
So I can feed my family tonight .
Fried chicken is actually relatively safe to leave out because first of all , you've fried it .
So it's sterile , it has that crust on it .
So there's nothing really that's going to get into the meat .
And in fact , that's one of the reasons why fried chicken makes such great picnic food because even at room temperature , it actually has quite a long shelf life anyhow .
So you can let this sit for several hours and then fry it again right before dinner .
You could also put this in the fridge and fry it , fry the pieces as you want them .
It takes a little bit longer to fry when you do that .
But at worst , all my , my restaurant , well , I'm no longer the chef there but the restaurant I opened and was the chef at the chicken we do there , we double fry it and we refrigerate it overnight between the frying stages .
And that actually allows quite a bit of excess moisture to come out into that crust .
So that when you fry it the second time it gets really , really crispy and that's how we get our chicken so crispy there .
But what we're going to do now , I'm just going to fry a couple pieces just to show you the results .
And also so that I can have a taste .
So for the second fry , we want the oil to be hotter .
We want , we want the whole fry to take place between around 303 125 degrees .
So if you're going to do a big batch of chicken , you want to have a couple quarts of oil .
Again , peanut , this is rice brand .
Peanut oil works really well .
Canola oil works fine .
Um But you want a couple of quarts of oil and you want to heat it hotter than the 300 to 325 because when you add your chicken in there , it's going to drop in temperatures .
So right now I'm only going to do a couple of pieces so I can actually probably just take this to 325 .
And because I'm only adding a couple pieces and they're still relatively hot out of the fryer , the oil is going to maintain its temperature just fine .
But if I was refrigerating these overnight or I was going to do the whole batch at a time , I would probably heat the soil to 375 or so .
So that as I add the chicken pieces , it ends up being at around 300 at least 300 .
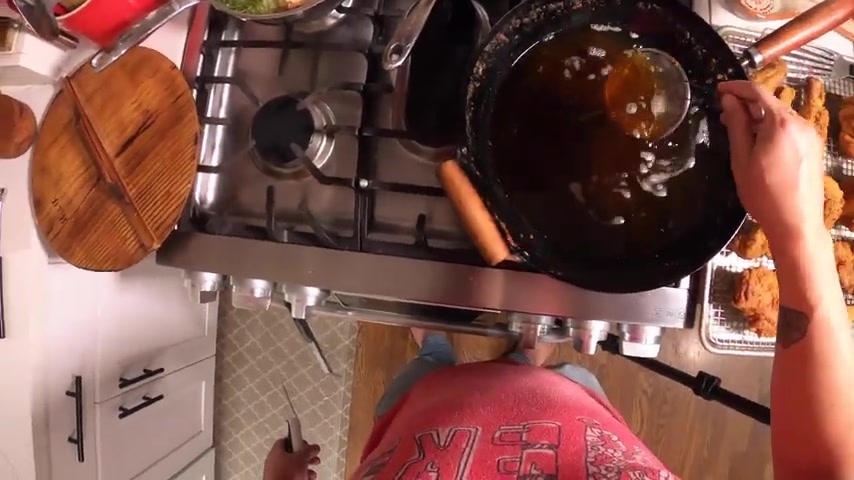
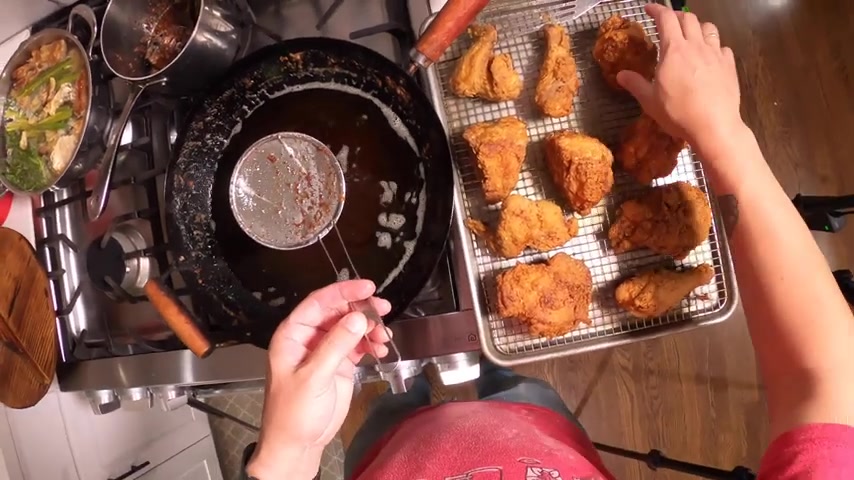
That is , I like to have one of these handy when I'm , whenever I'm frying , so I can skim it and make sure that the oil stays clean , at least relatively clean if you happened .
If you're lucky enough to have a deep fat fryer , you know , a countertop , deep fat fryer or if you have a restaurant where you have a real deep fat fryer , one of the big advantages of a restaurant style or even a countertop fryer is that the heating elements are actually raised above the bottom of the uh the oil vessel .
Whereas when you're , when you're frying on a countertop , on a stovetop , the heat comes from the bottom .
And so anything that falls into oil ends up sitting at the bottom of the container , no matter what the pan , no matter what kind of pan you're using .
And so that causes it to burn , which can cause your oil to break down faster .
Whereas with a restaurant style fryer or a countertop , deep fat fryer , the heating elements are above the bottom of the oil .
So when things fall off your chicken or whatever and settle to the bottom of the pan , um , they don't come in direct contact with the heating elements .
And so they actually , uh , don't burn as easily .
All right .
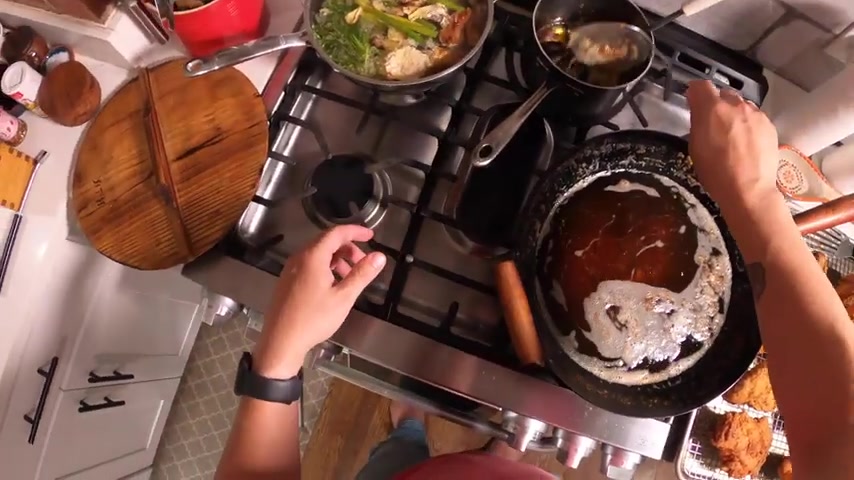
So our oil is at around 3 45 right now .
I just tested it .
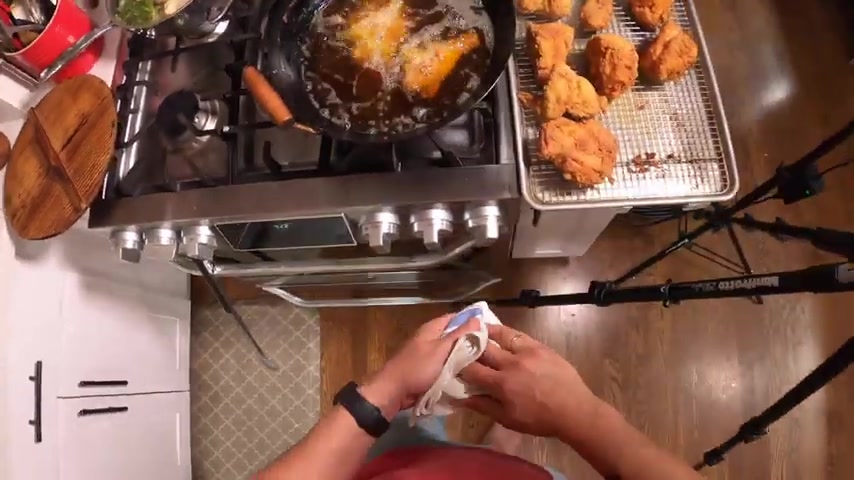
I'm going to carefully lower a couple of pieces of chicken back in .
We'll do that guy and we'll do this guy .
Now , this stage of frying , it's only gonna take a couple of minutes , especially because this chicken is already pretty hot .
If I was coming out of the fridge , I would do , I think at the restaurant we set the timer for three minutes and that's for chicken thighs for big chicken breasts like that .
You'd probably do four or five minutes .
You don't have to let it come all the way back up to the same temperature again .
The second time letting it come up just so it's warm enough to eat in the center is just fine .
What you're really looking for is getting that nice golden ultra crisp crust is that prize I'm gonna get a little landing ball ready .
So when you get fried foods out of the fryer , some people tell you to put it in a rack .
I actually like to put it in a paper towel because it sort of wicks away some of the excess oil .
Whereas in a rack you got to rely on it to drip away and oil actually doesn't drip away that well from fried foods , it kind of gets soaked back in as it sits .
So , if you want to wick it away in one of these in a little , we call these a diaper pan at the restaurant at least .
But in a , in a bowl with paper towels or a clean kitchen towel , get it in there , get off the excess oil and then you can transfer it to a rack if you want to rest it .
And if you're doing like a lot of chicken and you want to cook it in batches , you can put it on a pan , a sheet pan with a rack like this and keep it in a 200 degree oven and it'll stay nice and crispy as you cook subsequent batches .
All right .
I think we are there .
Oh , sometimes the spirit at you .
Perfect .
I'm gonna shut this off for now .
Oh , boy .
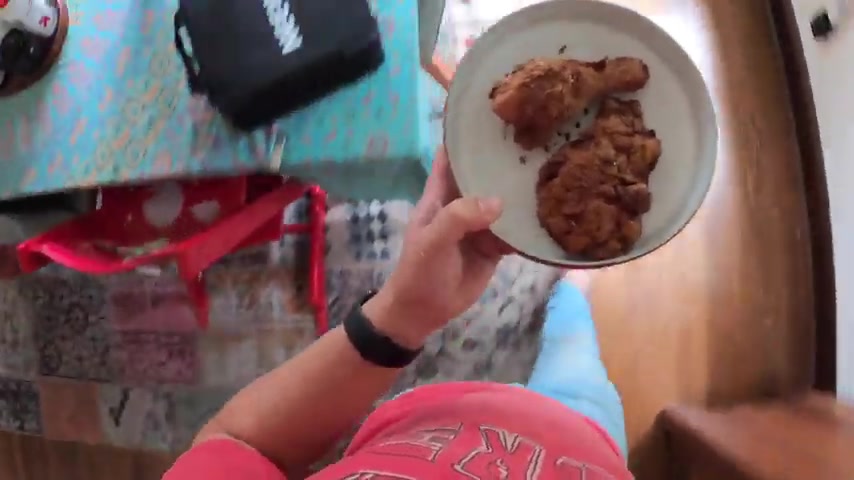
Let's get a plate for this .
So you can see what we're working with .
It is hot .
Hm .
I didn't season , it should have always seasoned things .
Right .
When they come out of the fryer .
I had an old chef .
He used to say , I don't care if you're frying dog crap .
Well , he didn't say crap but he said another word .
And he said , I don't care if you're frying dog crap .
As soon as it comes out of the fryer , you season that dog crap in the season , hot food while it's hot .
All right .
How does that look ?
Oh , man .
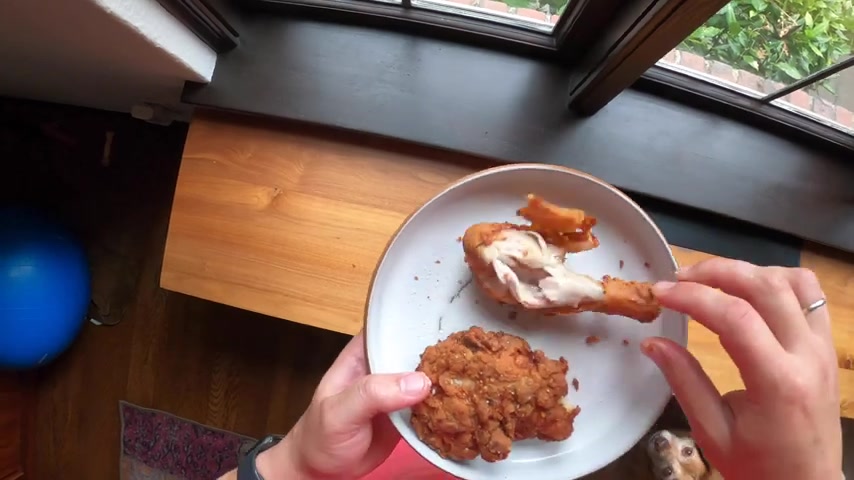
All this with a drizzle of hot honey .
Perfect .
So , you see how crispy that crust is ?
Can you hear it ?
My friend , friend Ed Levine would say that is some serious fried chicken crispy juicy .
Oh , man .
Delicious .
I don't know where the dogs are .
I'll go find them .
Shut them .
Come on , come here you go on .
Good boy .
Sit .
Hey , no jumping , sit .
Good girl .
All right .
Extra crispy , double fried and fried chicken .
Hm .
Cosmic oneness .
See this is the cosmic oneness that Ed used to refer to between the skin and the crust .
The skin doesn't slough away from the crust .
It sticks .
That's because of that overnight buttermilk .
So , all right guys , gals , non-binary pals .
I'm going to get messy for a little while .
See you later .
Bye bye .
Are you looking for a way to reach a wider audience and get more views on your videos?
Our innovative video to text transcribing service can help you do just that.
We provide accurate transcriptions of your videos along with visual content that will help you attract new viewers and keep them engaged. Plus, our data analytics and ad campaign tools can help you monetize your content and maximize your revenue.
Let's partner up and take your video content to the next level!
Contact us today to learn more.