https://www.youtube.com/watch?v=-4c3MO3Hm_c
How to Install Windows 10 on VMware
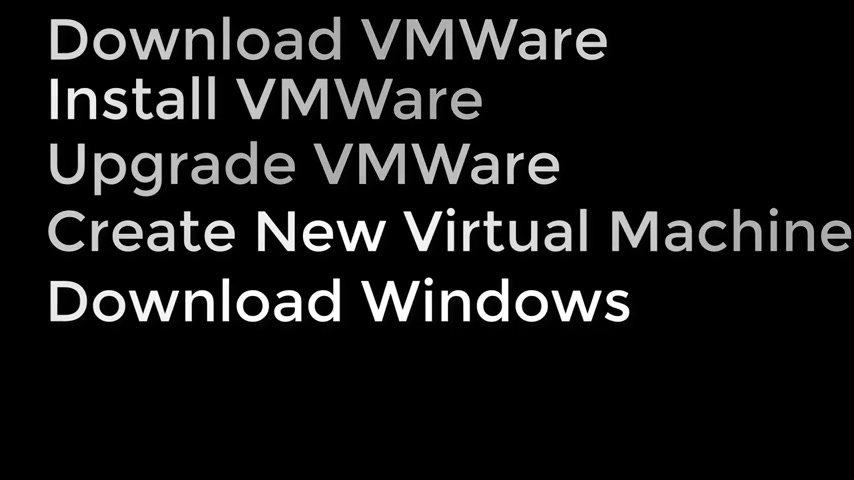
In this step by step tutorial , we're going to install latest version of Windows 10 and to VM ware , we will cover how you can download VM ware , install vmware , upgrade vmware to the latest version , create new virtual machine , download latest version of Windows , install Microsoft Windows 10 and then complete Microsoft Windows .
Post installation steps .
If you'd like to jump to the specific section , make sure to check the description of this video for the table of content .
Let's start by downloading VMWARE and installing VM ware and the Windows PC to download vmware workstation pro .
You need to type VMWARE workstation pro trial , download in Google search and then click workstation 15 pro for Windows .
Download now button and once download is complete , you double click on downloaded exc file to start the installation .
Then you go through the installation wizard and click next and choose uh different options based on what you're trying to accomplish .
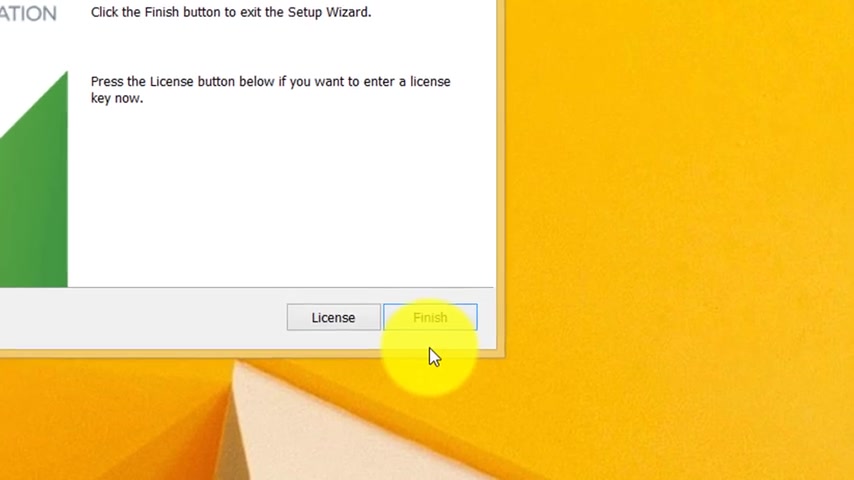
Once installation is complete , you can either enter a license right there or you can click finish and use it as a trial version .
When you launch vmware workstation and upgrade is available .
You will see this message that's currently shown on the screen , you need to click download and install .
You can also skip this version if you are in a hurry and just trying to use VMWARE or you can put a reminder on .
So I'm going to click download and install once download is complete .
VMWARE .
Launches the wizard and we go step by step through the wizard .
So it tells me that I need to close VM ware .
So what I'm gonna do , I'm gonna close VM Ware and continue with the wizard .
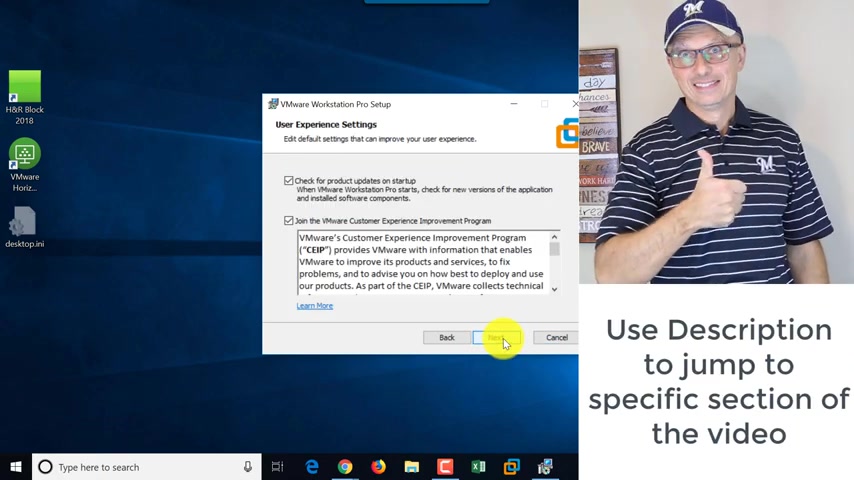
Click next , accept terms and conditions .
Click next .
I don't need an enhanced keyboard driver .
Um I'm OK .
Joining the program creating shortcuts and click upgrade and once install is complete , we'll just click finish in this tutorial .
We're going to create new VMWARE workstation pro virtual machine and then install Microsoft Windows 10 in the first menu that's presented to you when you launch VMWARE , we'll create um create a new virtual machine .
In here .
We're gonna pick up custom option on this screen .
You can pick hardware compatibility .
You should consider choosing different options , but I'll choose the latest workstation vmware 15 and click next here .
You can choose from uh installer desk .
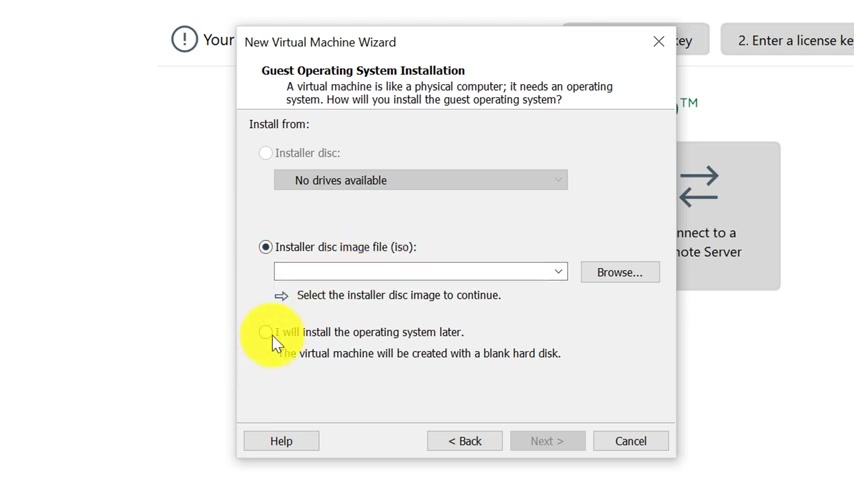
If I would have a DVD or installer disk image or choose an option , I'll install the operating system later .
And this is the option I'm going to choose here .
I'll pick uh Microsoft Windows because this is gonna be the guest operating system .
I will be installing and I will here choose Windows 10 X 64 .
And here you give a name .
It doesn't matter which name you will choose .
Uh And you would need to pick a spot where you will be installing .
This is where the large files will be created .
So if C drive is not the right place , you can probably pick a different place .
Maybe D drive .
If you have a bigger drive , depending upon your hardware configuration , I'll leave the virtual machine name as default windows 10 X 64 and leave the location default as well .
Here , you have to choose uh bias versus EF five and define if you would like to do a secure boot .
Uh I'll click uh keep a default option .
UF five , a newer version of bias and I'm not gonna choose secure number of processors .
The best practice for VM Ware is just to use one processor .
You can use a more than one processor .
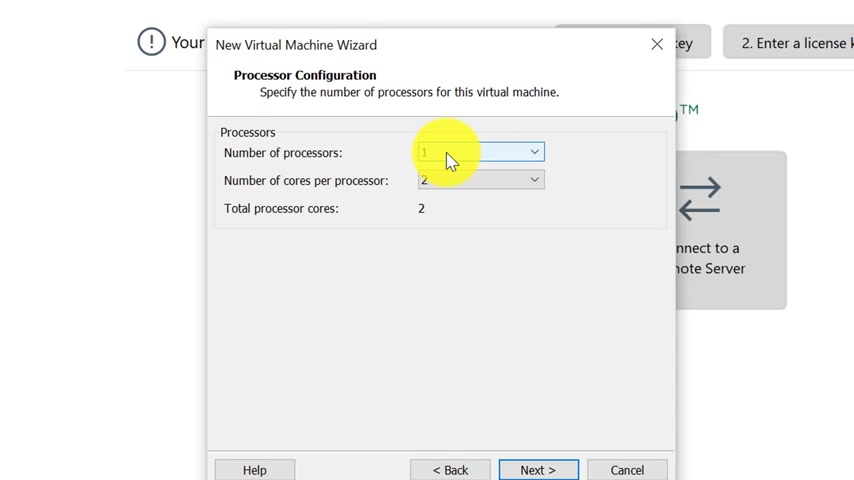
Um But um it's typically not recommended if you're running multiple virtual machines , depending upon your configuration , you might have challenges if you choose more than one processor .
So one processor and two cores is a good configuration .
I'm gonna click next here .
You choose the amount of memory .
Uh The good amount is two gigabytes .
If you're planning to run um a lot of applications on this virtual machine might , you might consider having four gigabytes and this is how you choose and configure and switch between options .
Um Another thing to keep in mind , you can always change it later .
So it doesn't matter what you choose initially .
Uh Because memory is something you can change later in VM Ware .
Here you choose how the virtual machine will be connected to the network .
Uh This is the best default option , use network address translation .
Typically it works uh the best and this is the Skai controller type .
So I'll just choose a default option .
This is the only option I can choose uh L SI logics SAS and I'll choose Skai .
This is the fastest uh hard drive platform and that's the default option as well .
So I'll keep it there .
Um Here , you would need to choose how your hard drive data drive C will be stored or maybe additional drives that you will be creating for the virtual machine .
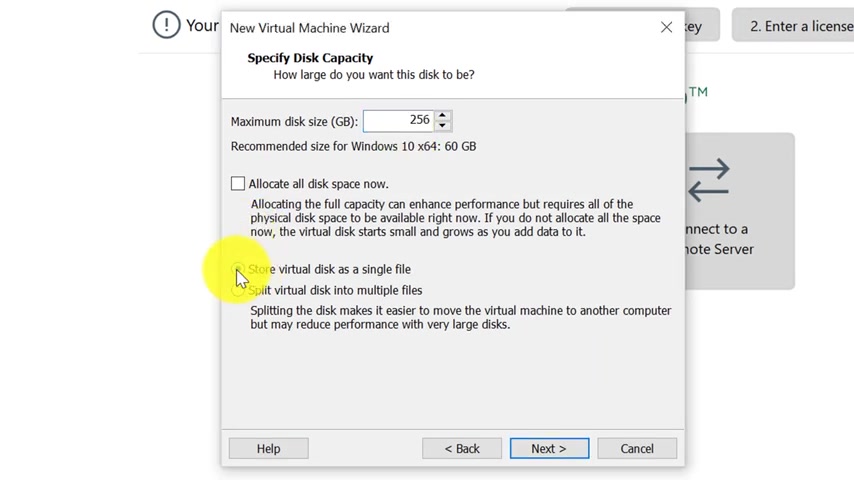
Here you choose the size , I typically recommend storing um a virtual disk as one single file because that's the fastest performance .
Uh But uh the selecting , selecting the bottom option uh gives you more choices if , for example , your operating system doesn't support files larger than four gigabytes or your USB system , which is not the case anymore it used to be .
So I would not recommend selecting this option because that's slower performance .
So keep uh all your hard disk as one as one file .
Here , you choose the name of the file and you browse for the location .
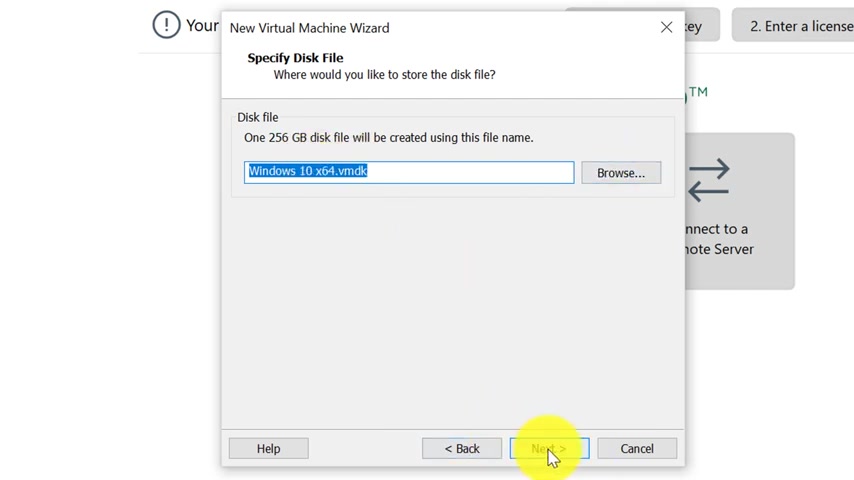
We just choose a default windows , 10 X 64 V MD by default , it creates small file , but then it grows as uh windows uh or any applications or you add more files into the operating system and then we'll click finish this other kind of the summary of uh everything that you've done a name , location of the files , uh version of operating system .
This is compatibility for virtual machine files and the hard disk files .
Even though I believe hard disk files , V MD X files are compatible .
I'll click finish and what we have now we have a new virtual machine uh created under my computer .
It shows all this configuration in this interface .
Uh We can close this window because also it shows each new uh each virtual machine is a separate tab here .
What we can do now we can power on this virtual machine and we can also go and modify uh settings if necessary if we change something .
And remember I told you that memory you can change later .
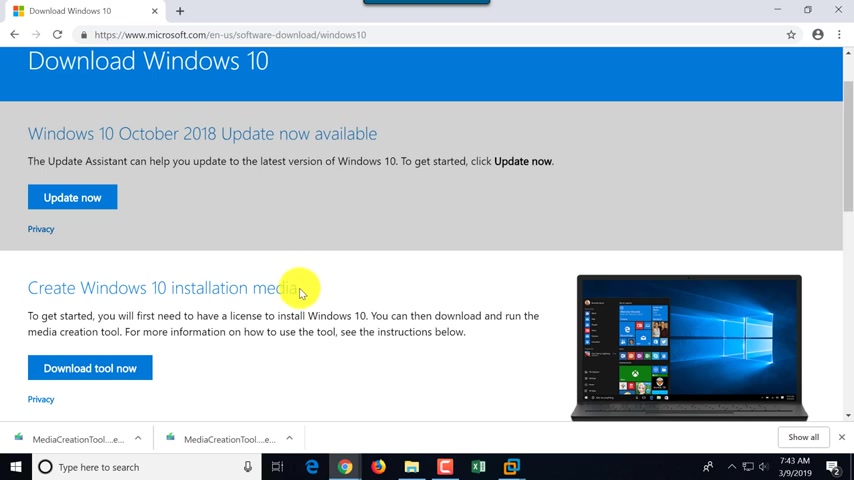
As the next step , I'm going to download Microsoft Windows iso file .
That's the installer for Windows operating system .
You always want to choose the latest .
So you go to Google and you type , we type download Windows , Iso and Google search and this is the first link that pops up .
Uh We will click and download tool , we need uh create Windows 10 installation media .
So you need to download the tool .
Uh and it will allow you to create uh the ISO file .
So you click download the tool and then you click on the tool itself , launch it and what we'll be doing , we'll be creating installation media .
You can put your installation media and USB drive DVD or ISO file ISO file is what VM Ware uses .
So we'll pick ISO file option and click next .
Uh choose default .
Uh This is fine .
Click next and here we'll put ISO file , I'll click next and then I'll just pick location would be in my documents for this user and Windows machine .
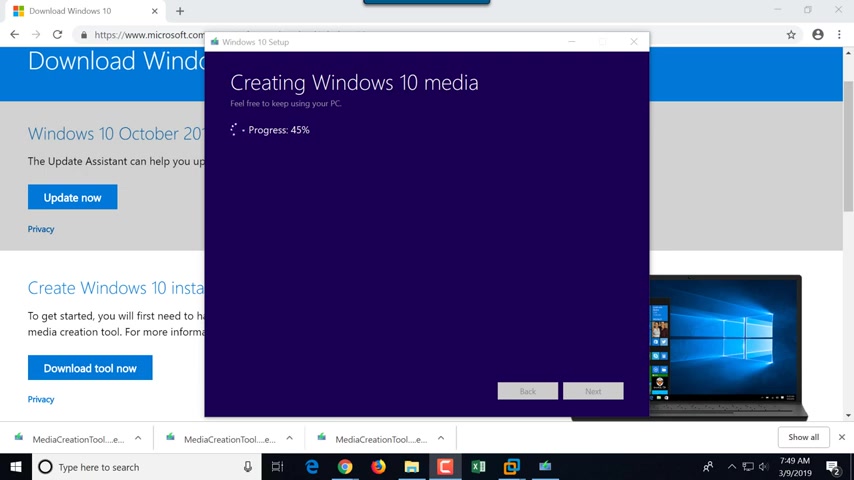
And I'm gonna click save and it is going to download the software and we will have at the end of this process uh Windows iso file on my local machine .
And now we have the process of uh downloading uh completed .
So we'll click finish if we go back to VM Ware , what we can do now we can insert this virtual uh Windows installation file into our virtual DVD .
Uh And the way we do it is we click on the edit virtual machine settings , we click on the CD DVD .
And here we choose , use ISO file , image option and click browse .
And uh what we have here in the documents .
If we go to documents , this is the Windows iso file that I just downloaded .
And I also need to choose the option connected power on to make sure that this DVD will be connected .
I'm gonna click .
OK .

And I'm going to pour on this virtual machine in this section .
We're going to complete Windows 10 installation process .
So I had to click a microphone , uh mute button here uh to continue the process and we'll choose region United States , a keyboard layout for United States .
Us , we're not gonna add any additional layouts .
So we're gonna skip this additional layout options here .
We will not be signing in with Microsoft account instead , we'll create local accounts .
So we'll choose option domain join instead .
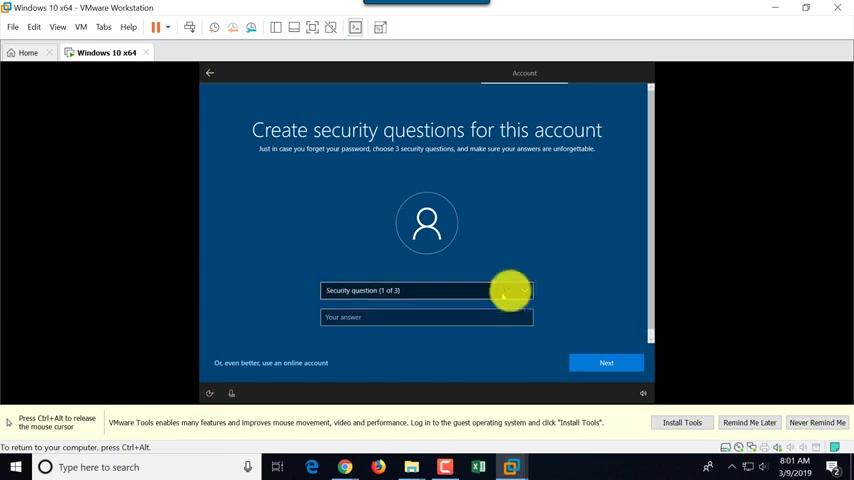
And uh here we'll create a user ID for our PC and then we'll set up security questions , uh will accept uh tan as a personal system or you can decline for VM Ware .
It might be hard with hardware uh because we have to have a special hardware to do it .
So I'm gonna decline .
So you choose this to support Microsoft uh uh program , we will choose default privacy settings .
So we are done here , but you see my screen is rather small .
Um And I do not have a driver that fits screen well , so what we're gonna do and there are some other limitations .
Uh I'm pretty sure if I try networking connection , it wouldn't work .
So what needs to happen ?
Uh We need to install VM Ware tool which will update all the drivers .
And you see VM ware conveniently downloaded all the tools for us .
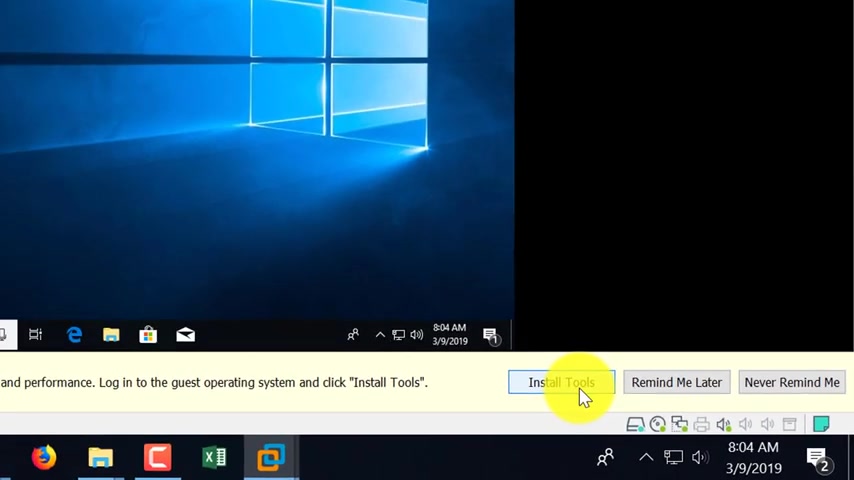
We just need to click , install tools and what's gonna happen is uh it will insert uh downloaded iso file for VM ware tool that it downloaded uh into the D drive .
Uh And we just need to click file explorer here .
And if we go to the D drive , we just need to go to this PC and this is D drive VM ware tool .
We'll just click uh set up 64 confirm , click .
Yes .
And it will trigger the VM ware tool installation process .
I'll just go through the wizard and choose default options , typical installation G and , and we click finish and after restart , we should see much , much better resolution and uh all the features of VM ware working uh much , much better and much more integrated with latest version of windows and looks like .
Um we need to go to VM ware view and we can choose option feed guest now and now our resolution feeds the guest window and that's was possible because we installed VM Ware tools .
So let's quickly go back to the host operating system .
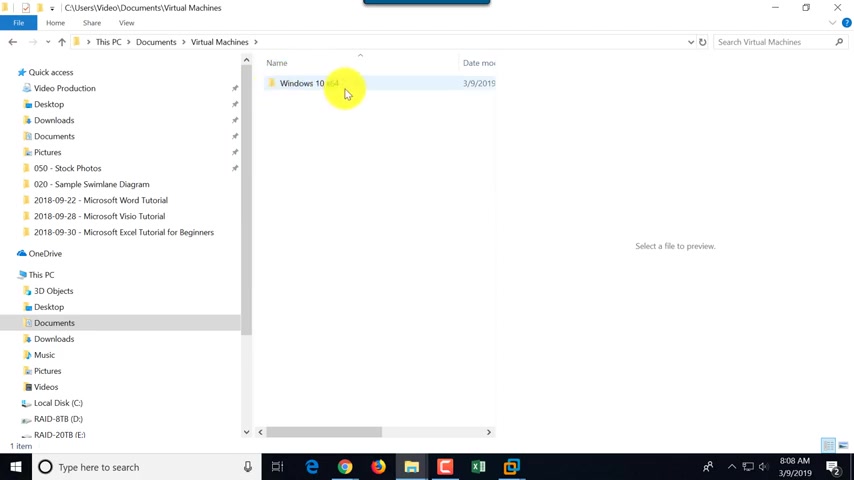
Uh And we will click on the documents , uh virtual machines and what you can see here in virtual machines .
This is our virtual machine that we've created the Windows 10 X 64 and this is where all the files are located .
You see that right now V MD K file , which represents the disk , hard disk .
Uh Windows 10 X 64 is 10 gigabytes .
But when you shut down and close your virtual machine .
You uh it typically goes down .
This is the temporary file , uh memory file , uh two gigabyte memory file and there are some other files that only uh get created when you're running virtual machine .
So what you might want to do is once installation is complete and updates are complete .
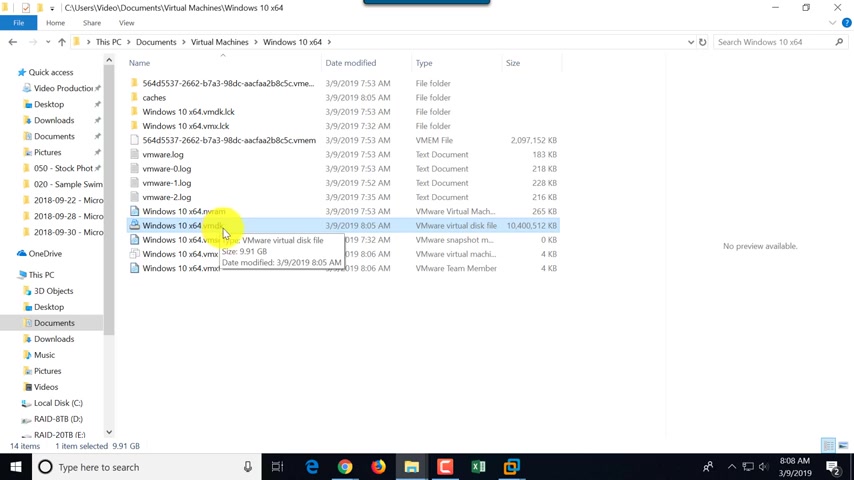
For Windows , you might wanna go and uh choose or compact this file .
And uh this will make it much , much smaller and much more transportable if this is what you're trying to accomplish .
Now , let's go back to Windows update in this section .
We're going to complete Windows 10 post installation steps .
You're gonna check for updates and you click , check for updates button and it should automatically download and install uh all windows updates .
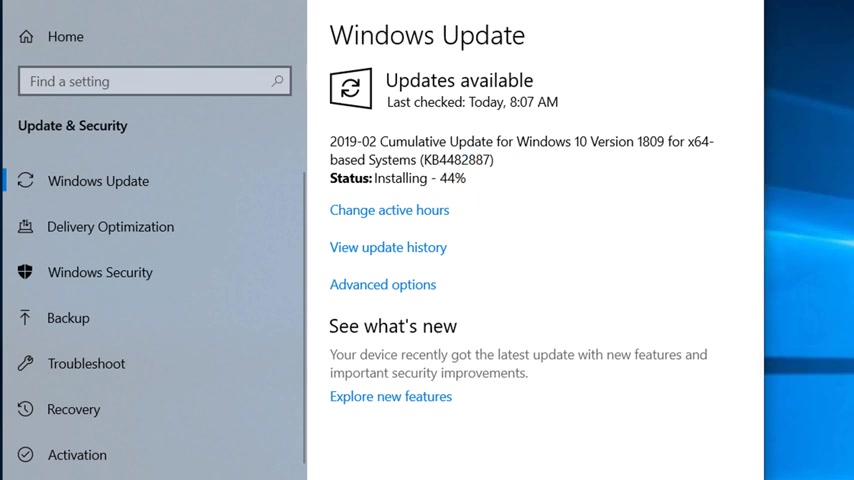
So your uh installation is secure and you see that it's continuing to updating Windows and installing uh missing components because we once we log in and go back to check for updates , it should show that it's up to date .
You see this uh green check box .
Uh and that indication that it's uh your windows is up to date .
Another important step after Windows installation is complete is to create backup user accounts .
So we need administrative accounts to get back in case our account no longer works to do that .
You go to and click on the start button , right , mouse click and then go to computer management .
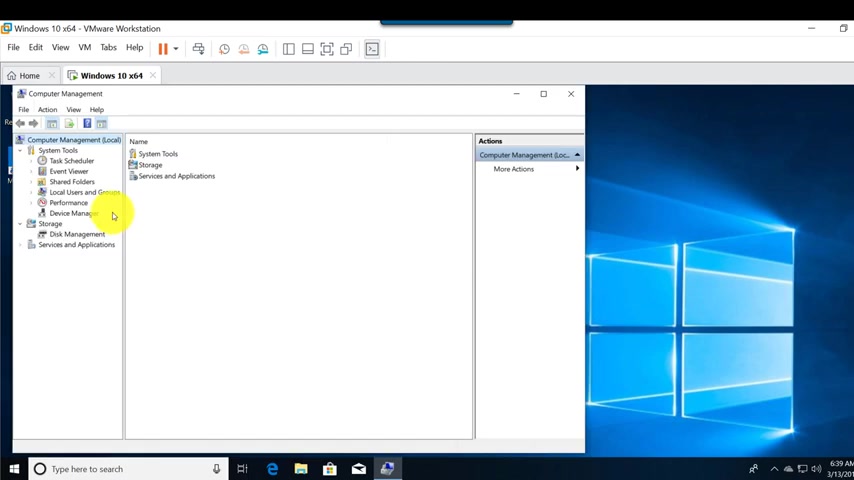
That's one of the Windows tools uh to manage the computer as the name implies .
And then here there is a local users and groups and typically backup account is good as , um um you know , local account , not Microsoft online account .
And uh here we have uh VM Ware administrator is one of the accounts we've created .
And I'm just gonna right , mouse , click , click , new user and create a backup account .
We'll call it a backup admin .
Um And then another backup admin , choose the password and then we're not gonna ask user to change password in the next log on .
Instead , we're gonna say password never expires and then we'll click , create by default .
Um Windows creates account of the type of user .
So instead what we're gonna do , we're gonna go in multiple ways to do it .
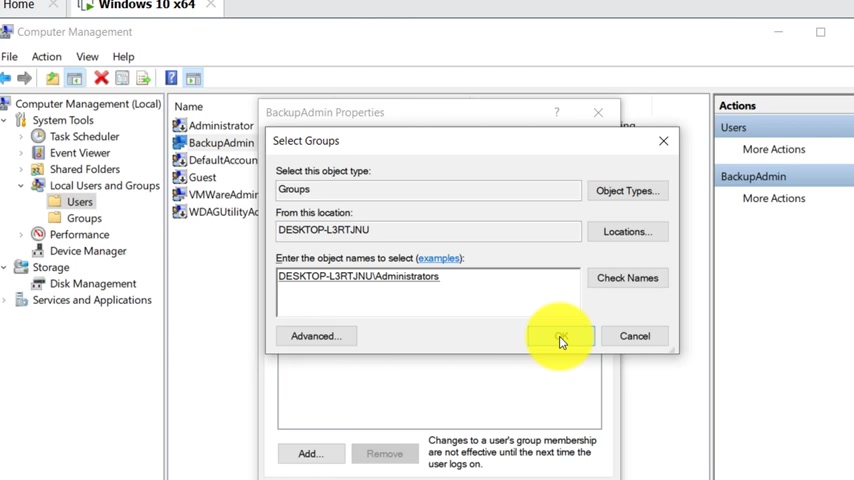
We can go to account properties and say member off and then just add administrators and then check names .
Uh administrator is the local um administrator group .
So once we add the account to that group account becomes administrative account um and then we'll click , ok .
Another way to do it would be go to the groups and just click on the group itself .
Administrators and just click add here and it will add the account .
So this are the administrator accounts , uh members of administrators group , but administrator account by default is disabled .
Uh So we only have two administrative account VM ware administrator and then backup admin .
Another thing to do is to create recovery drive this is helpful when you need to recover , something happens to your PC .
So what you do is type recovery uh and then it goes to recovery application to control panel and then we click , create recovery drive .
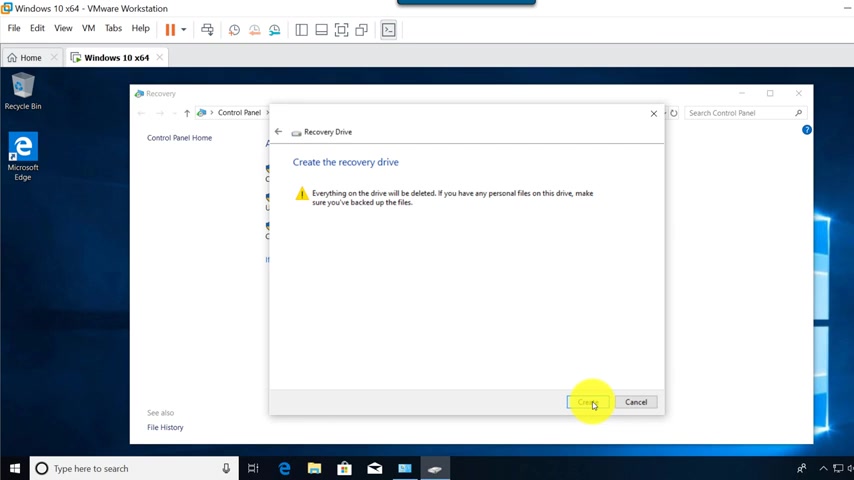
Click .
Yes .
And then uh we go and set up recovery drive .
We will pick one of the drives USB drive , um which I have as a 16 gigabyte drive and click next .
There's a confirmation that everything will be deleted and I confirm that that's the case .
And in this step , Windows is creating a USB recovery drive .
Once it's done , we'll go to Windows Explorer and check the content of the drive .
But basically this is where information will be stored and this is where you would need to be booting from .
If something happens to your main installation of Microsoft Windows , we'll click , finish here and let's go and check the drive itself .
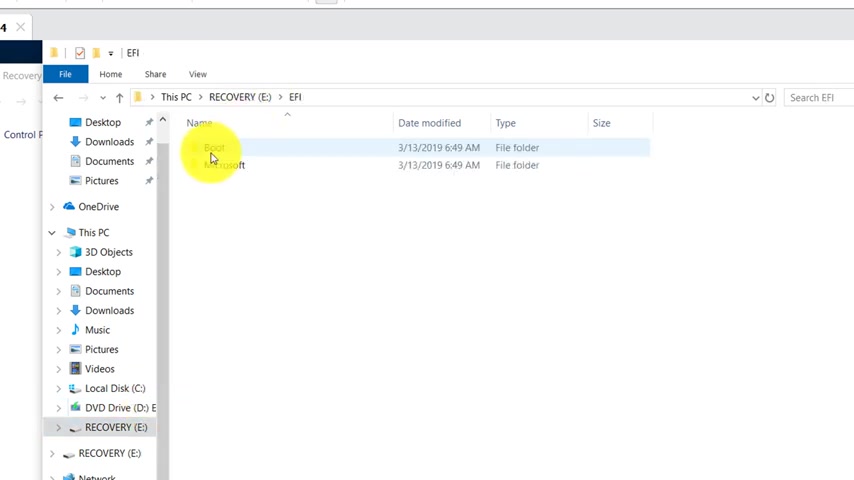
So this is a recovery E drive and this is a Buddha drive and all the files are in here .
So what you need to do in case of recovery , you need to boot from this drive and follow the steps .
In this step , we're going to install frequently used Windows software , specifically open source software or software that's distributed freely .
I go to the site , obviously , you can go to uh any place uh and individually download packages , but I go to the site called dot com and all links are in the description of this video , so make sure to check it out .
Um But here you can select uh different uh packages uh that's available and specifically , I'm interested in browsers .
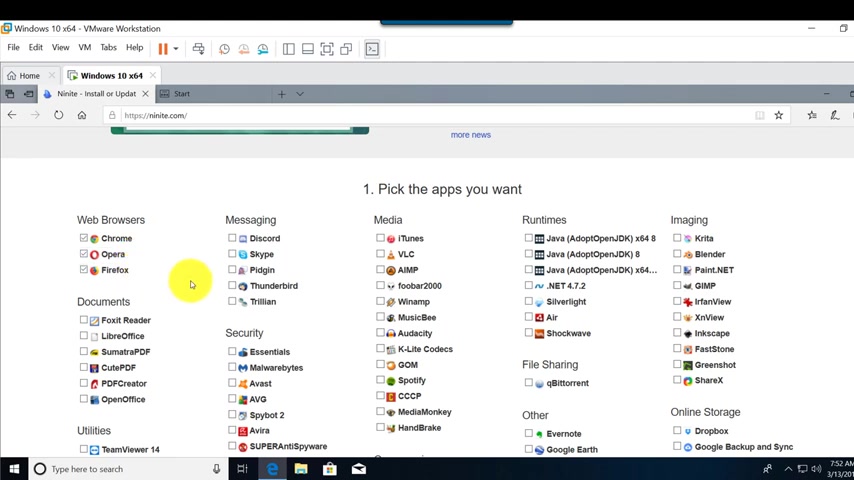
Uh Instead of going to each individual sites , they maintain packages and help you deploy and they can also select and uh install and batch a lot of different uh software packages maybe if you don't use um if you need , for example PDF readers or PDF creators , they available here , messaging apps , security , uh apps and then some developer tools .
I like the notepad plus plus editor , then VLC media play are also very good .
I definitely recommend that for compression seven zip .
So um I'm going to be selecting uh those applications and then run time .
If you need uh latest Java run time , you can also download and get it from here in some clients .
Forever note uh that's also helpful if you're using the tool and a lot of uh other tools based on your selection .
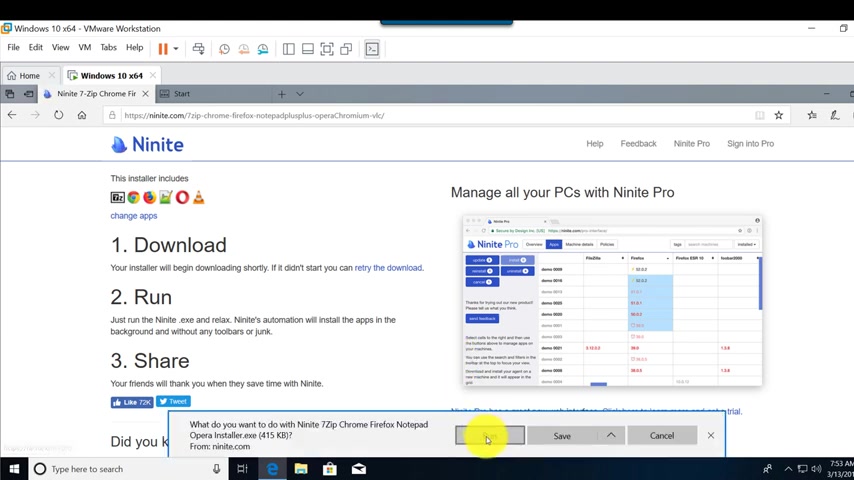
Once you've selected everything that you need , uh you go to uh get your and uh I clicked , run , I trust this site .
It prompts me again and uh goes through the installation process and now installation is complete .
We're gonna click close here .
And if we go to the start menu , for example , type Firefox , uh Firefox is available , that's my favorite browser that I use .
Um And then Chrome should also be available .
You might wanna consider pinning it to ta task bar .
So I I did the right mouse click and selected pin to task bar .
Uh And another way to do it is just to go and look at all the apps and you see recently added applications .

And if you scroll down , you see recently added applications , you you can expand and you will see all recently added applications uh that we've just uh selected and downloaded .
If you like the content , please make sure to click the like button and share with your friends .
Also , there's tons of information in the description of this video .
Make sure to check it out , make sure to check out my other relevant videos and subscribe to my youtube channel .
We have a lot of great stuff planned in the pipeline and I don't want you to miss any of it .
And if you'd like to get notified about all the new stuff that are coming out , make sure to subscribe to my email list as well .
All links are here on the screen .
Make sure to click to stay in touch .
Thanks again for watching .
Are you looking for a way to reach a wider audience and get more views on your videos?
Our innovative video to text transcribing service can help you do just that.
We provide accurate transcriptions of your videos along with visual content that will help you attract new viewers and keep them engaged. Plus, our data analytics and ad campaign tools can help you monetize your content and maximize your revenue.
Let's partner up and take your video content to the next level!
Contact us today to learn more.