https://www.youtube.com/watch?v=WVpTtawrCVM
How to Draw a Face from any Angle _ Part 2 - The 3_4 View
Hey , I'm Darlene .
And you're watching a rapid fire art tutorial .
You're watching part two of two .
If you haven't watched part one yet , where I cover the front and side view of the human head , please find the video link in the card and in the description in this video , I'm covering the last two poses .
So it might be confusing if you watch this one .
First .
These are the tools I'm gonna use a colored pencil for drawing construction lines and a graphic pencil for the finalized drawings .
If you want to create your own reference material , you'll need a styrofoam ball and marker to draw lines on it .
You'll need a toothpick and finally a need eraser .
We're gonna make some models with these to help us draw certain facial features .
If you don't have a Nable eraser , you can use playdough , see recipe below .
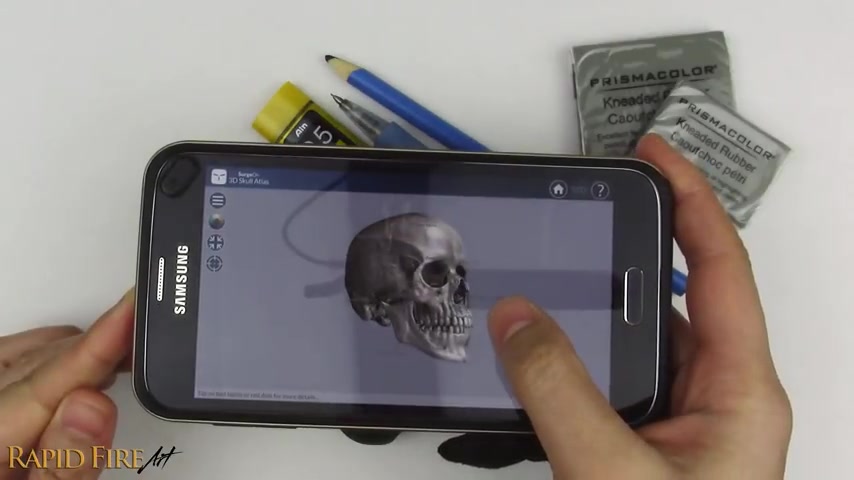
Another handy reference would be a rottable human skull .
All of these tools will be linked up in the description .
Now let's continue where we left off .
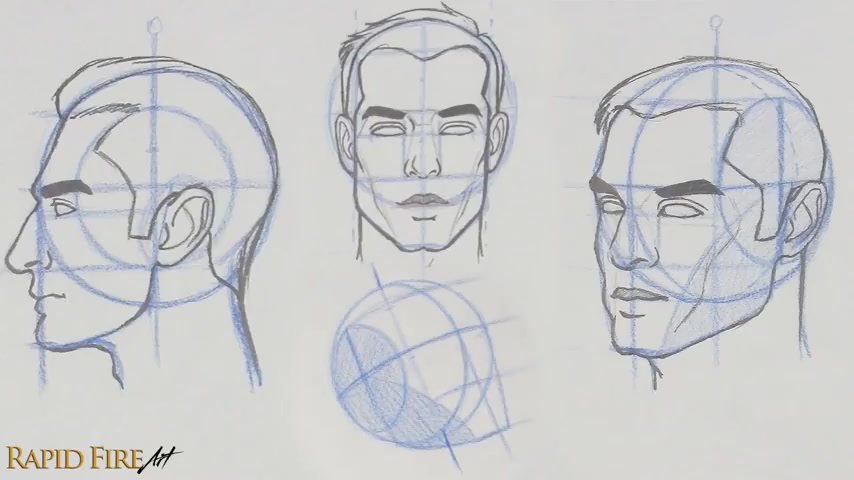
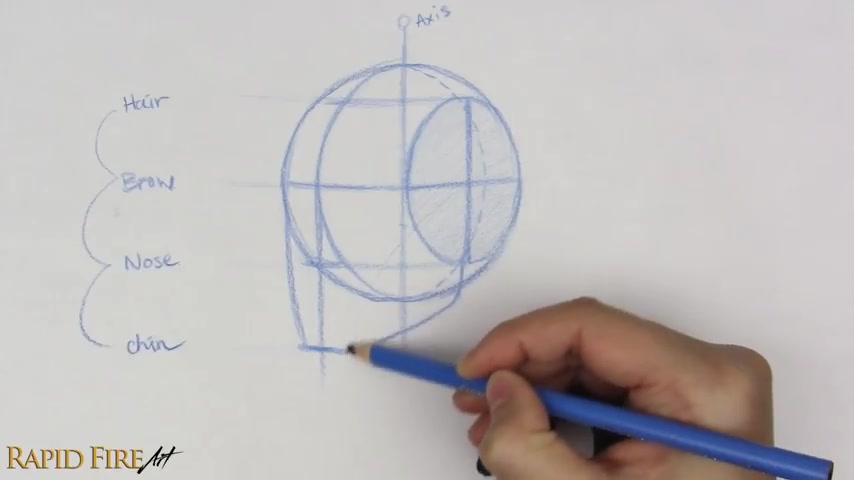
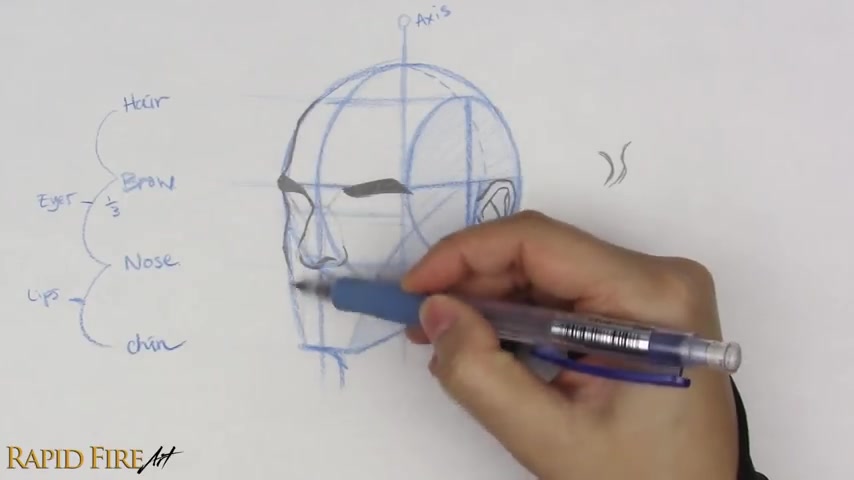
Let's draw ahead in the three quarter view .
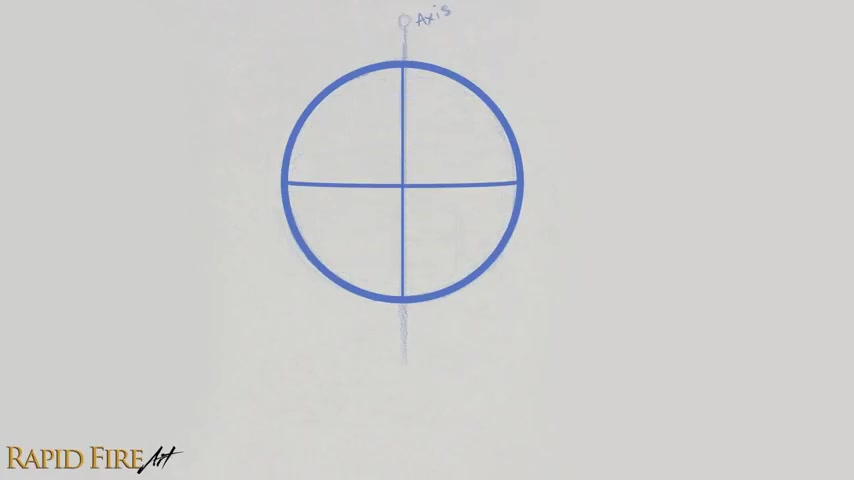
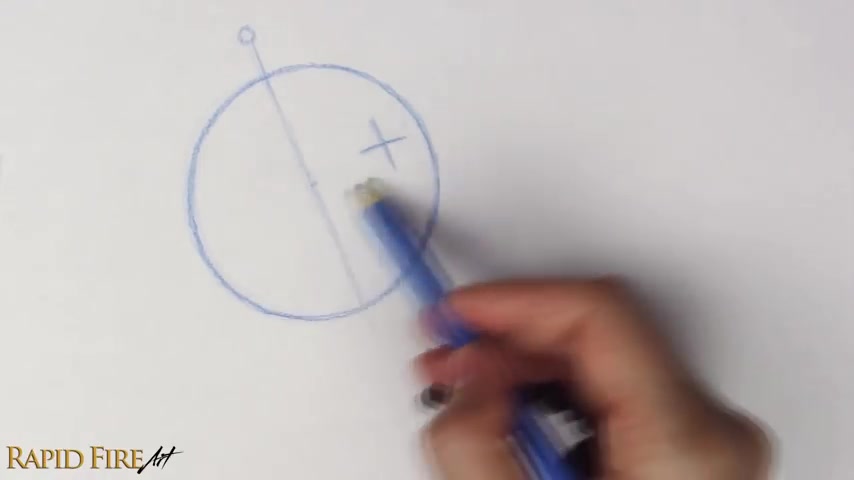
Now start with a circle .
Once again , this one's gonna be a little tricky , but it's also the most fun and most rewarding one to draw .
Well , for me personally , before I continue , I want to introduce something very important .
It's called the axis picture , an imaginary pole running through the center of the ball .
The head revolves on this axis , just like how this styrofoam ball revolves about the toothpick .
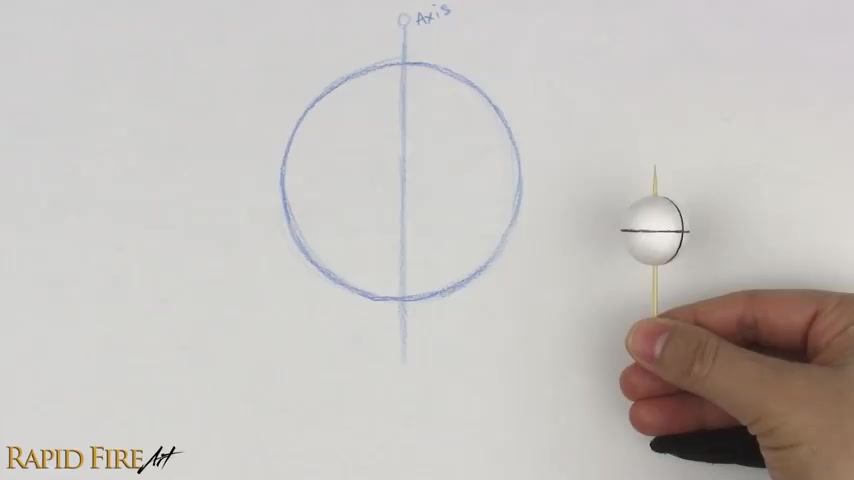
The axis will really come in handy throughout the construction process going forward and you'll see why as we continue on When I rotate the ball to the left , you'll see that the middle line actually becomes more and more curved to accurately draw that curve .
Let's draw a full oval or ellipse that's well balanced along the axis .
I'm using the same technique for drawing circles just hovering until my pencil movement looks and feels right , then lowering my pencil to create a faint oval , it's barely visible .
So let me make it a little darker .
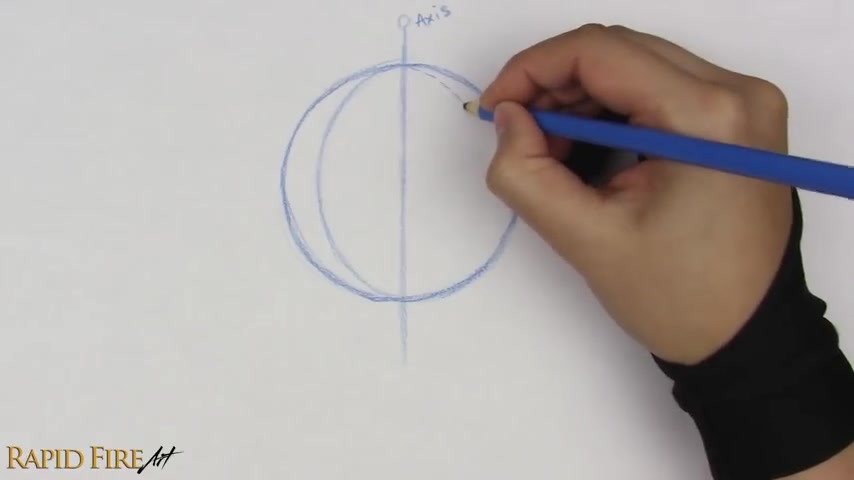
The line on the other side of the ball is represented using a dotted line .
You can see that the oval is well balanced along the axis .
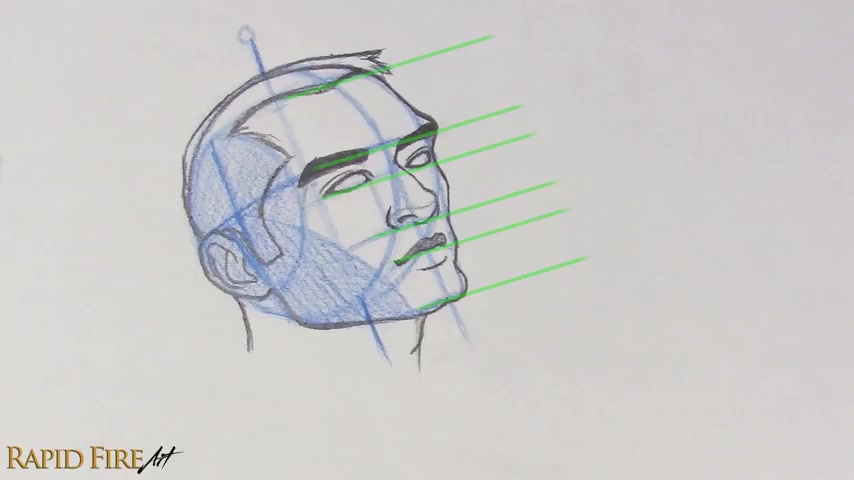
Draw the brow line perpendicular to the axis .
Constructing a sphere properly is one of the most difficult things about this method .
This one is one of the easiest ones to construct .
If we keep the brow line straight , the sphere can be easily rotated left to right by changing the width of the ellipse .
Keep the middle line straight and play with the brow line to get the head looking up or down the wider your lips .
The more extreme the rotation using this simple method , we can rotate the head from this front facing position to any one of these directions left , right up or down to draw heads in any other position .
We're going to use a different method which I'll cover in the very last example .
Those ones are a little tricky to draw .
OK .
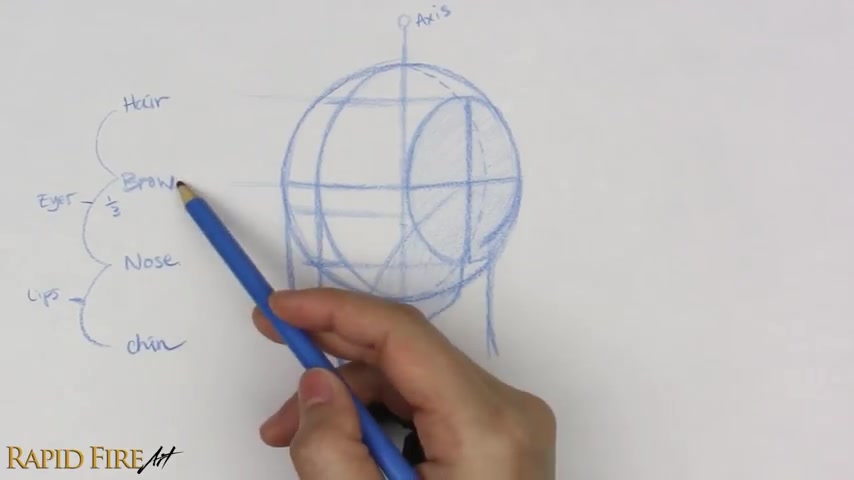
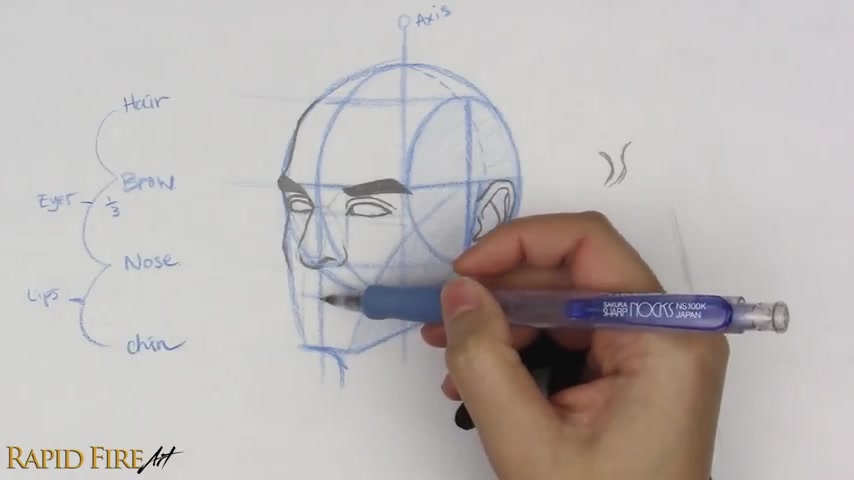
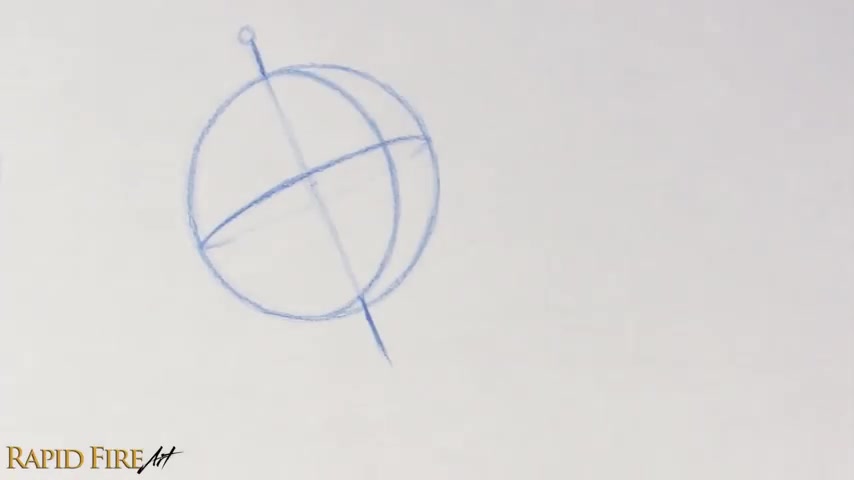
Let's get back to our three quarter head split the top and bottom half of the ball into thirds .
So we can draw the side plane .
The top third will mark the top of our side plane and the bottom third marks the bottom for a head in the three quarter view , the side plane will look like an oval .
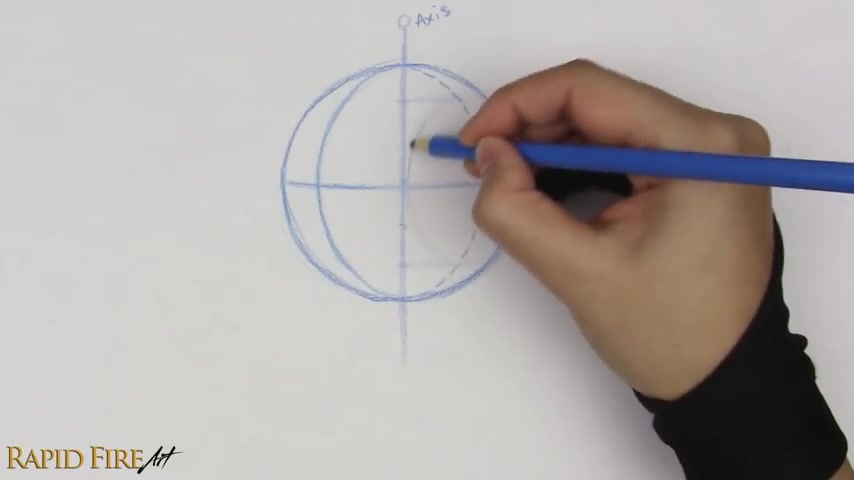
The more the head is turned to the side , the wider , more circular the side plane will appear it kind of spans across half of the sphere , draw a vertical Earline , make sure it's parallel to the axis and that each quadrant is fairly equal in size .
We already have our brow line .
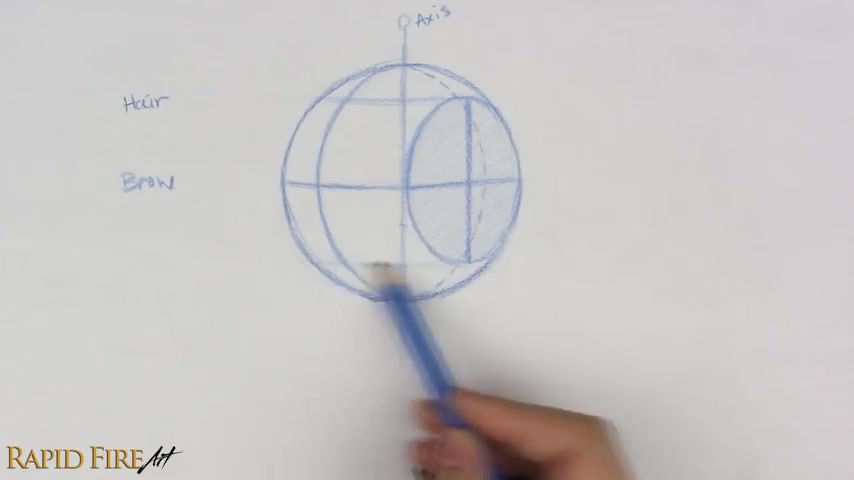
Let's draw the hairline which is parallel to the brow line , align it with the top of your side plane , draw out the nose line also parallel to the brow and align it with the bottom of your side .
Pla make sure the spacing is equal between each section .
Don't forget to extend your middle line down to form the front of his face .
Let's make it parallel to the axis , make sure the spacing between the hair , brow and nose are equal and then draw your chin line by measuring the space between the brow and nose .
Bring it down here to get his chin .
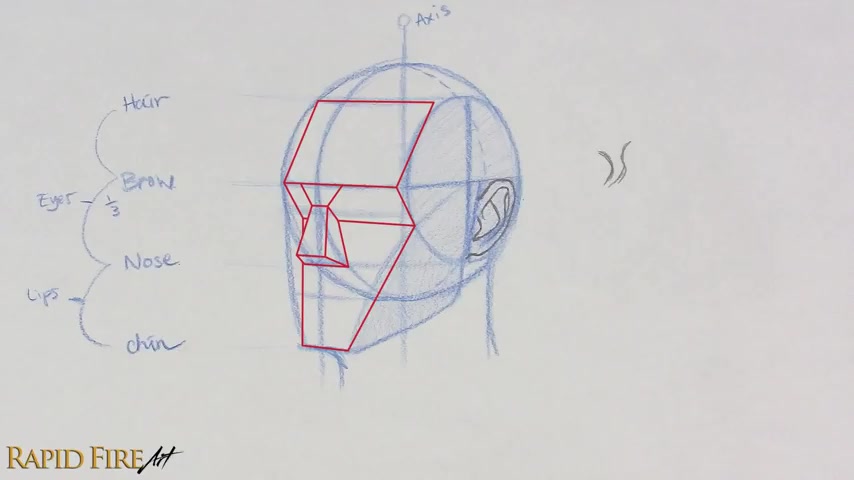
Let's draw the far side of his face by connecting the sphere to chin .
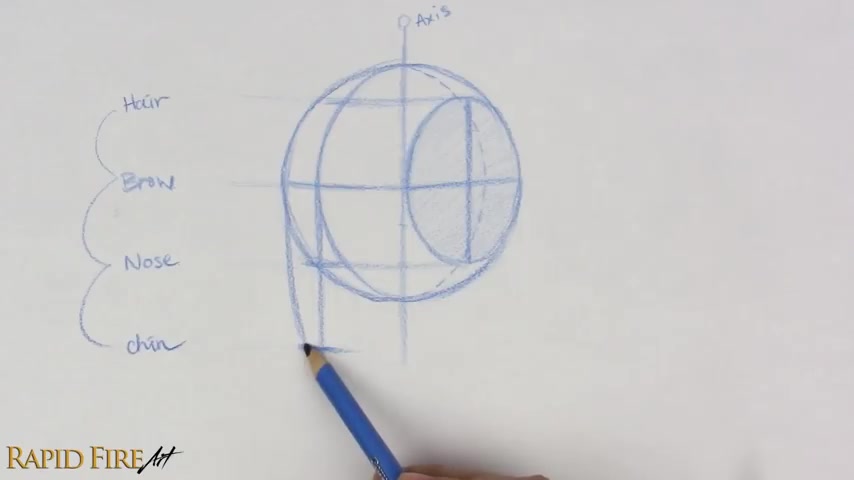
The jawline is barely visible from this angle , this side of his jawline by extending the Earline down and angled towards the chin .
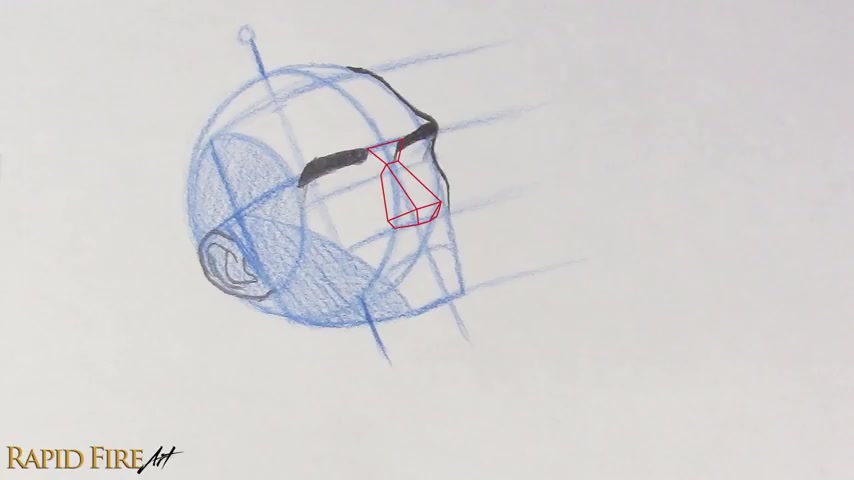
This next step is optional , but it helps a lot with sectioning .
So when you start drawing the features , it's less intimidating .
419.049 --> 483.179
Let's draw his ear between the brow and nose , placing it in this quadrant .
Also , it's slanted back like so the steps are similar to the previous heads we drew .
So I'm not going to narrate this part .
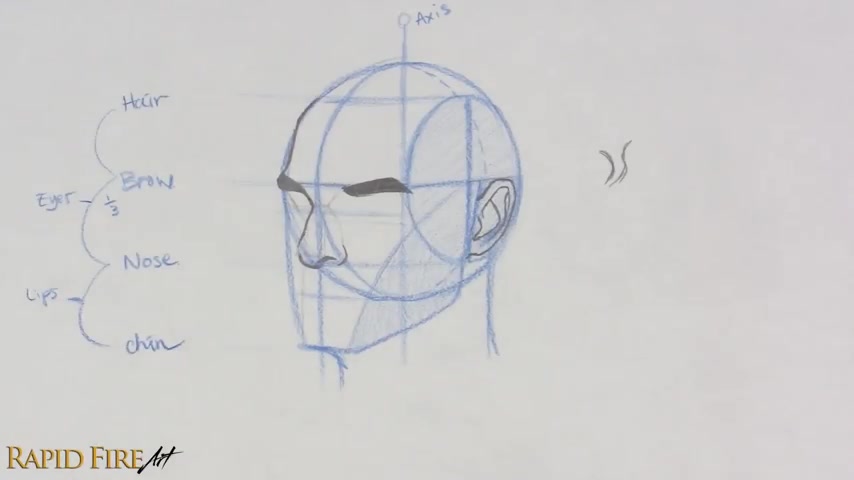
Now , for the rest of his features to make this process easier , you can draw or imagine the skull and planes of the face .
If you can't visualize that quite yet , practice drawing them until they come more naturally to you .
It's important to not just think about what you're seeing from your viewpoint , but also consider the sides that you can't see .
Can you visualize the shape of his eyebrows and where exactly you would draw them ?
Let's go ahead and draw those in .

It is pretty difficult to just draw the nose at this angle without any guidelines .
So working out a simple blocky 3d nose really helps try your best to balance it on the middle line to draw the base of his nose , start in the center where the middle line and nose line intersect and draw towards the tip , then draw the side of his nose wrapping around your planar guidelines and then draw the nostril in between from this angle .
The far side of his nose is still visible but much less .
So if you want to study the nose from different angles , you don't need any fancy tools , just grab a needle eraser or some play dough , create a triangular nose shape and add two round pieces on the side .
For each nostril , it's quite sloppy .
But you get the idea , draw the side of his face while visualizing the shape of his skull .
Where are the cheekbones ?
Where do they end ?
The cheekbone , kind of ends where the nose line is ?
So I'm gonna to curb my stroke inward around there , I'm gonna stop here for now because I'd like to draw this part after the mouth has been drawn to draw his eyes , create a line from the nose wing going up .
This marks the inner corner of his eye .
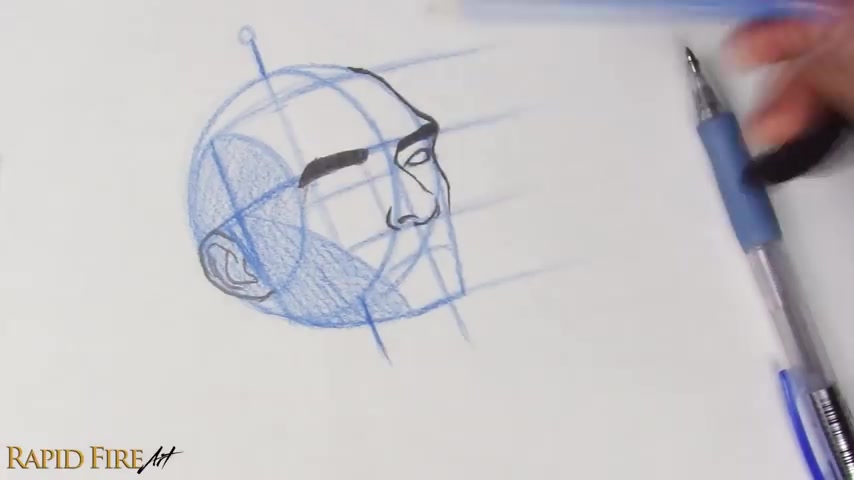
If you want to learn how to draw the eye from different angles , it helps to have a reference .
I'll show you how to make one in a moment .
It's very easy .
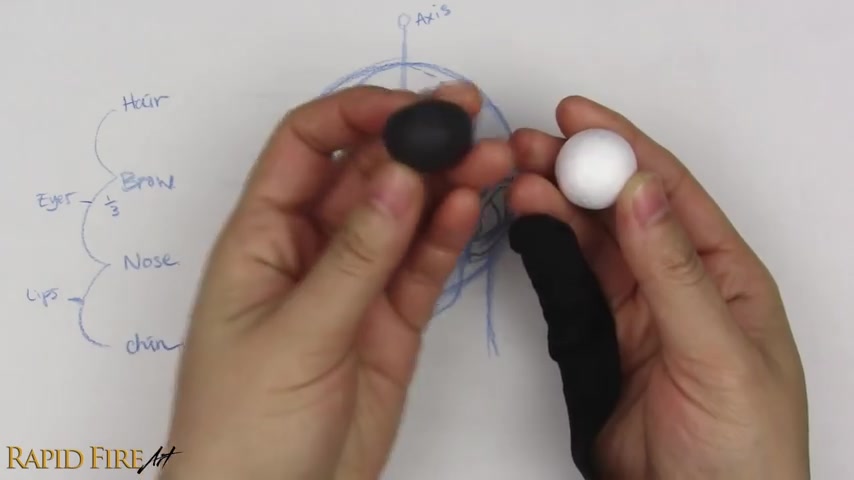
If you have a ball and a piece of play dough , you can make a pretty good model of an eye .
I'm flattening my needle eraser and then I'm just gonna cut it in half , wrap each piece around the ball to create an eye .
Now , you can find out what eyes look like from any angle just by rotating the ball .
You can use this model to draw a page full of eyes in all sorts of directions .
So you can memorize it for later .
Instead of needing to rely on a physical reference all the time .
I'm just checking that all the features are parallel to each other for the mouth .
Let's draw it along the line we created earlier , except this time .
Instead of centering his lips on the middle line , we're going to move it a bit to the left so that his mouth doesn't look flat .
This part of the face actually comes out .
So keep that in mind as you draw , let's draw the corners of his mouth , the size is up to you .
I'm gonna align it between the nose and middle of the eye on the left .
Try not to go past the nose .

Now , let's connect the dots to form the opening of his mouth , the middle of his top lip then connect everything together .
The slope on the far side is gonna appear steeper than the right .
Then draw the bottom lip .
Let's finish drawing the side of his face , drawing a bump right here to account for the mouth's protrusion .

You can make his chin stick out more or less just roughly following my construction lines .

977.53 --> 1045.01
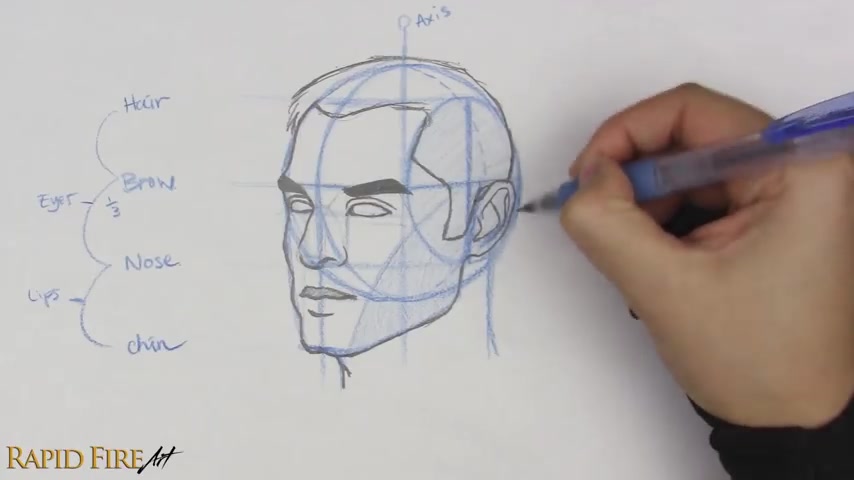
So his head doesn't look like a ball .
And there we have another completed face .
Let's draw the last head facing the upper right for ankles like this where both the middle line and brow line are rotated off center .
It will be easier to draw the sphere using a different method .
It starts with a cross which marks the front of his face .
Since we want him to face the upper right , draw the cross in the upper right of your sphere .
The middle line and brow line are always perpendicular to each other .
So make sure the quadrants of your cross are fairly equal , draw your axis going through the center of the sphere while making sure it's parallel to the middle line .
Now draw your brow line as an ellipse , making sure it passes through the cross double check that your ellipse is well balanced about the center of the sphere .
Do the same thing for the middle line .
Since the head is looking up , tilt your lips in a way that will expose more of the bottom portion of his head .
The head is tilted up so much that we can actually see the point at which the axis and middle line intersect the very bottom of the ball , the southernmost point .
This is important and I'll tell you why in a moment , extend the middle line down , making it parallel to the axis , draw the side plane by creating an oval that is well balanced along the brow line , making sure each quadrant is fairly equal in size .
When the head is rotated in a more extreme position , the side plan can become increasingly difficult to draw .
So there's actually another method to find each feature line .
See this space between the brow and southernmost point of the ball , the midway point will give us the approximate location of his nose line .

Now , we can take the measurement between brow and nose to get the hairline and chin line when drawing more extreme angles .
Don't forget to apply some for shortening also make sure each feature line is parallel to the brow line .
Otherwise the face will look skewed .
We've gone through the following steps many times before .
So I'm gonna fast forward through them .
The trickiest thing about this pose is the nose and mouth .

1253.68 --> 1380.05
So to make it easier , first think about what the Planar version would look like at this angle .
When you tilt the nose up , the tip will be higher and we will see more of the bottom .
We know the nose is balanced along the middle line .
So start your stroke there and draw towards the tip .
The tip of his nose at this angle will be at a higher position .
So I've angled up after drawing that the rest will just fall into place , the far nostril should be less visible .
If the eyes are difficult to visualize from this angle .
Don't forget to reference your model that you made with me earlier .
I'm just referencing the axis .
So my lines don't angle out in all sorts of weird directions , the mouth curves around the face .
So instead of drawing a straight construction line , I've drawn one that's slightly curved down , the more you tilt the head up , the more extreme the curve at this angle .
Instead of drawing his mouth centered on the middle line , which makes the face look flat , the center should be moved forward to show that the mouth sticks out of the face .
When you're done , double check that all the features are parallel to each other .
His eyes are a little off the angle isn't quite parallel with the other features .
So let me fix that you can draw any number of poses by using this method .
For more info on the Luis method for drawing heads , check out the link below where you can find his book .
It covers a great deal more .
There are more poses and it also covers females , babies and Children .
Please keep in mind that the book mostly covers the construction of the head with less focus on the individual features .
If you want to see more videos like this , please like comment and subscribe , hit that notification bell while you're at it .
And thanks for watching .
Are you looking for a way to reach a wider audience and get more views on your videos?
Our innovative video to text transcribing service can help you do just that.
We provide accurate transcriptions of your videos along with visual content that will help you attract new viewers and keep them engaged. Plus, our data analytics and ad campaign tools can help you monetize your content and maximize your revenue.
Let's partner up and take your video content to the next level!
Contact us today to learn more.