https://www.youtube.com/watch?v=807jMu-MNzA
How To Make a Real Estate Website with WordPress and Houzez Theme 2023 (Updated)
Hey , what's up party people ?
My name is Darryl Wilson .
And today in this video , I'll be showing you all how to create a real estate listing website with wordpress step by step .
So let's take a look at the website that I'll be showing you how to make today in this video today , I'll show you how to create professional and modern real estate listing websites step by step .
And the great part about this video is that you don't need to know any sort of coding or have any experience because we will be using a simple drag and drop builder to build your real estate websites .
So you can be a complete beginner and manage your own personal real estate websites .
Plus this website looks super professional and very modern and I'll be showing you how to submit your properties , apartments or even rentals step by step in this video .
Now , I understand the term real estate is a little broad .
So let me explain who can benefit from this word pre number one , a single real estate agent .
If you're a single real estate agent that just has a few properties under your belt , this tutorial would be perfect for you because I'll be covering how to submit your personal listings to your website .
In this video .
Number two , a real estate agency .
If you're an agency or company that manages multiple real estate agents , this tutorial would be ideal for you .
With this website , your agents can log into your website , submit and manage their own properties and even have their own personal custom dashboard with their personal custom dashboard .
They can see their deals leads properties , the location of your visitors and they may also respond to inquiries about the properties .
They list your agents will also be able to add listings and manage them directly from their dashboard .
They can also see the number of views and visits on their properties and for agencies who have their own MLS .
This theme integrates with ID X MLS and I'll be talking more about that later in the video .
Number three , an apartment listing website .
Instead of listing real estate housing , you can also list apartments rentals or any property you want on your real estate website .
You can completely modify and configure any part of this website to adjust and fit any criteria of the real estate markets .
Number four , a real estate directory websites .
If you're an agency and would like your visitors to list their own properties on your own , then this tutorial is perfect for you .
With this website , your website visitors can create their own listings .
You may offer free and paid listings on your real estate directory .
Websites .
Here , website , visitors can input information about the house , put some information like description about the house .
They can talk about the year the house was built .
The number of floors , how many beds and bathrooms the house has ?
And you have full control over what information your visitors input in their listings .
They also have access to their own personal custom dashboard , which they can access at any time .
So now that we know who this video is for , let's go ahead and show you on the website and show you how the website works .
All right .
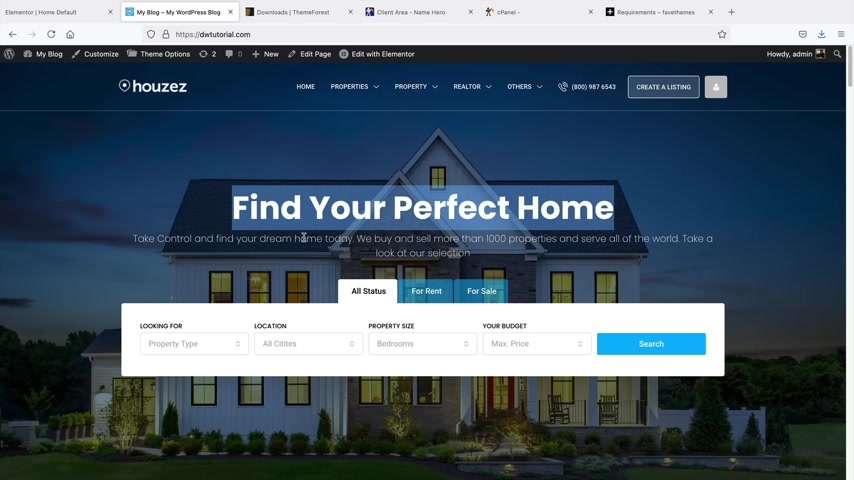
So this is the website that I'll be showing you how to make today .
So in this video , I'll be showing you how to configure your real estate websites , like adding in a menu , also a logo .
Your users can also create listings and also they can log into their accounts if you want your agents or visitors to have that option .
And then from here , we have this search bar .
Now , your visitors can search based off property type or location and you can add and configure this any which way you want .
You can also say , you know what , I only want people to search for the rent or for the uh houses on sale .
And let's say , for example , we just clicked on for sale and search your website will then go ahead and , and all the available houses that are for sale on your websites .
And then from here , they can also have more further customization .
So if they want to filter this by area or bathrooms , they can do that .
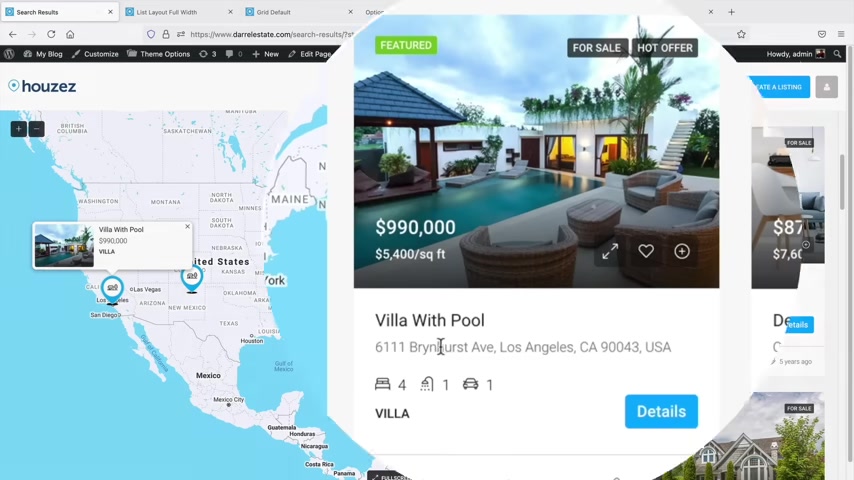
On the left side , you can see we have the maps and if they click on the location , they can actually go directly to the listing .
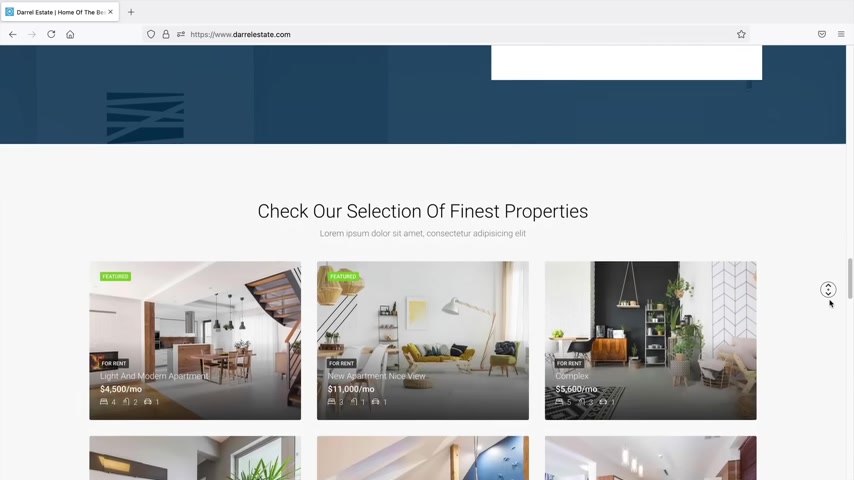
If they just click on this listing here on the map and then scrolling down here , we have some of the listing .
So you can see that we have the title of the listing .
We have the address .
It also shows like the beds , baths and all of the categories about the house .
And here , I'll just go ahead and click on one house .
So then here's our listing and here you can see that we have the listing and it also has the agents who listed the house .
Now , you can add agents to your website or not .
It's strictly up to you .
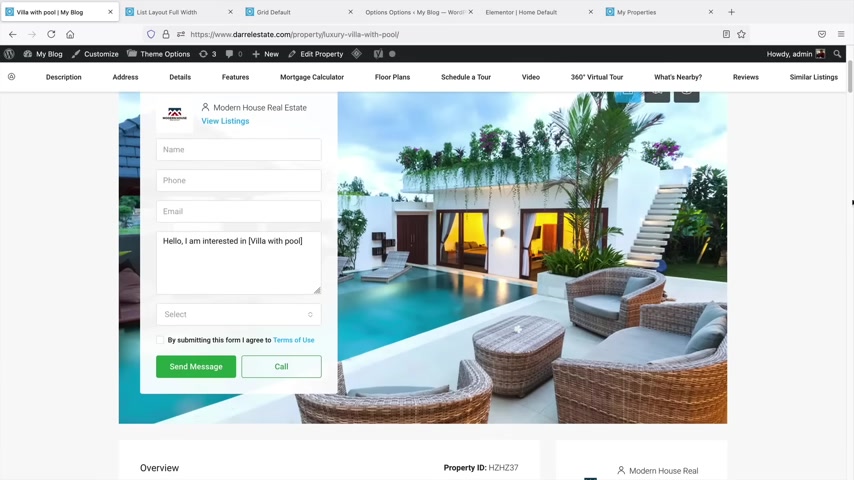
And below that , we just have some more description , you know , like about the beds , the baths .
And we also have this sticky bar on the right side where they can always go ahead and message the agents .
And then below that , they just gave a lot more information about the house .
They can also go ahead and open this and see it on Google Maps .
Now , also , I'll be showing you how to add in Google Maps on your website with an API and also how to add in the map in the description of the properties as well .
So yeah , this would be something like your , you know your listing and just a lot of other information .
Also , I think there is a mortgage calculator where they can go ahead and you know , check out if they can afford the house as well .
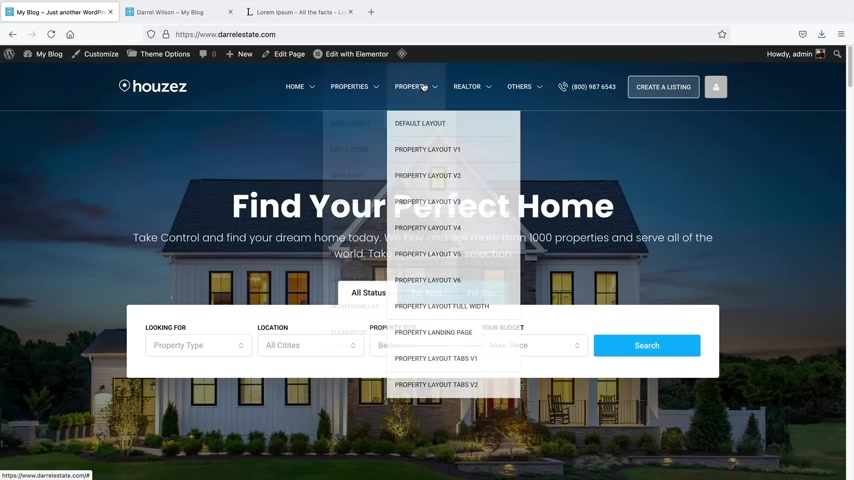
Now , besides this style of listing like this or layouts , there are other layouts that we can choose from .
So there is a , I guess you wanna say a listing grid and also a grid style where they can view the houses , you can also get rid of the side bar or add the side bar depending if you want it .
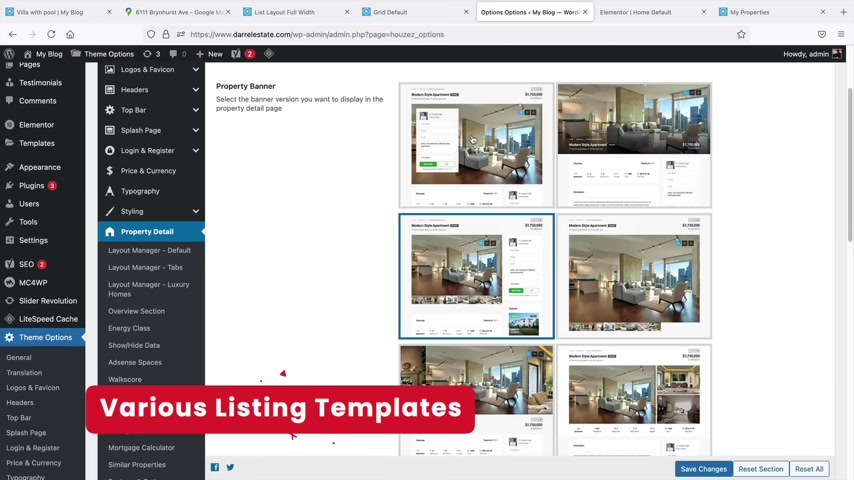
Now , also , I do want to mention that the house that we just saw previously like this one , we can actually change the layout .
So you will have a lot of options to change the layout .
So there are like seven different layouts to choose from .
I like this one here .
I think this one's very practical and once you select a layout , it will then go ahead and apply on all of your properties .
So for example , I'll just say I want to choose this layout right here and I'll save the changes and if we go back to our property and then we refresh the page .
So now you can see how the property changed to the setting that we set .
It's so you do have a lot of diversity and control over how your listings look .
And then here also users can see where it is on the map and they may also even click on this and get a street view of the house if they want to take a look at it .
So now let's talk about the page bolder .
So I did mention that this is a fully drag and drop page bowler and it's really simple .
So all you would have to do is just turn on the builder and then dragon elements .
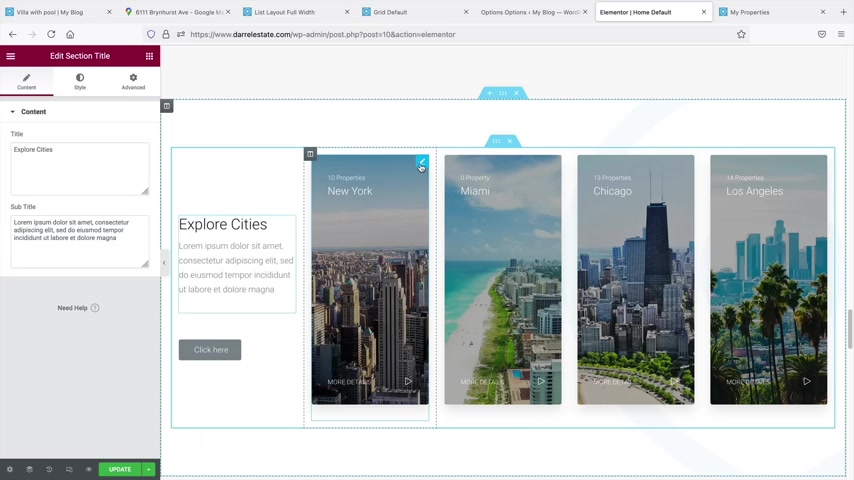
So for example , if you want to drop in this button , you could drop in that button , move that around uh like that using a little pencil icon and the same thing with these images .
So let's say you want dragon images , I'll just take this and put it here and then I'll take the Miami and I'll put it in this one just to switch up the columns here .
So you guys can see it's very simple to use .
You would just drag and drop elements here and then you can kind of design and customize uh the website to your liking .
So I'll take that and wrap it right there and there you go .
And then of course , I can move this to like the left or the right .
And then also under the style , I can just simply change the color to something like red or you know , whatever color that you , you know , you choose to change it to also with this website , you can list your agents .
And also if you are a large corporation , you can list a sub agencies .
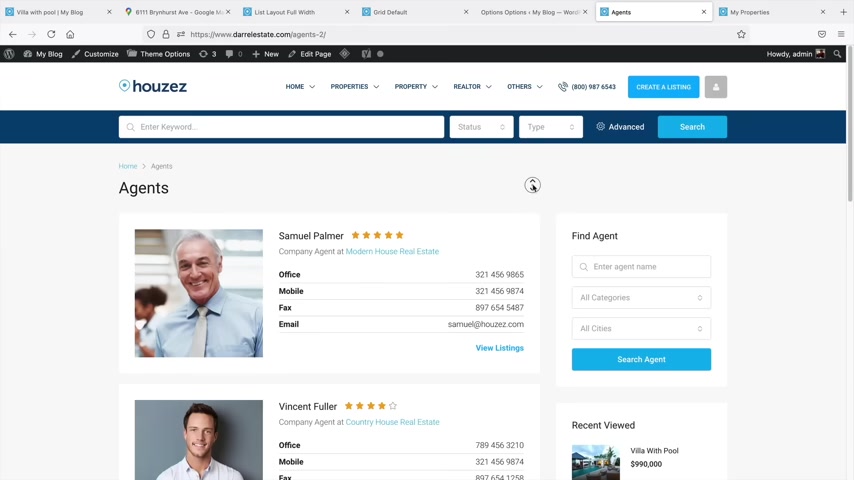
So here , I'll click on agents and you can display a list of all of your agents here , it'll also display their listings .
So for example , if Vincent right here displayed uh various listings , they can click on view listings and they can see all the listings that Vincent has displayed .
So I'll go ahead and scroll down here .
This is like a little biography about him .
And here's a list of all of his listings right here and users can contact him at any time .
He can also put in all of his social media , you know , icons and websites and stuff like that .
So the agent page looks really nice and if they do want to call him or send him an email , they can just go ahead and click on send email and send an email directly to his inbox .
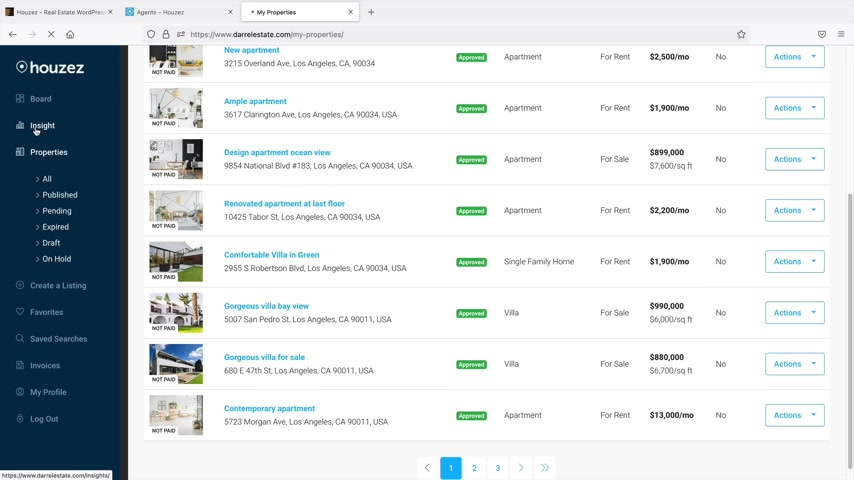
Also , I do want to mention that you'll get a beautiful custom dashboard .
So from right here , you'll have access to all of your properties .
You can see uh the title , the description , the price , the status .
Also , let's say for example , there is a update with your listing .
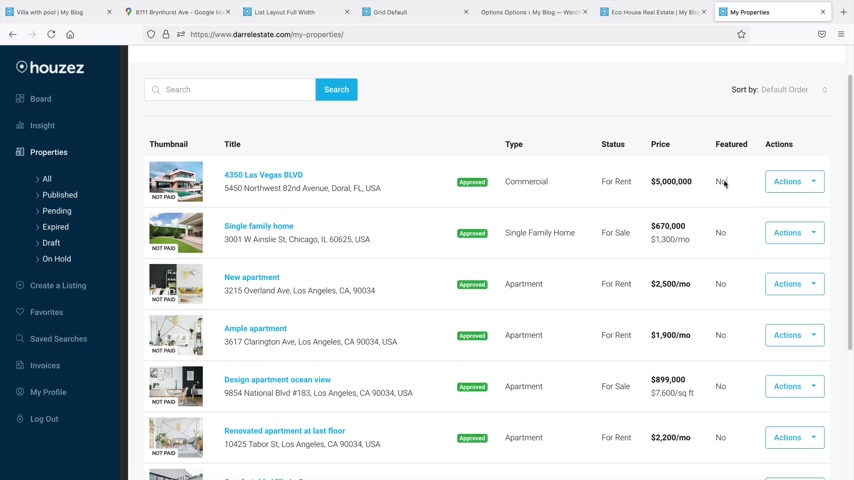
You can go over here and click on edits and you can update the price or the address or anything that you want to change with your listing .
You may also view the stats to see how many people are actively looking at this specific property versus the other one .
Maybe if you have a lot of people looking at one , maybe you want to raise their price or something like that over here , you'll also have insights .
So this just gives you some information about who's visiting your website .
It tells you what country they're coming from and also what devices as well .
It does also let you know which browsers people are using as well .
So over here , I'll click on my profile .
Now , if your agents want to update their profile or their email or a picture , they can simply go ahead and do that here .
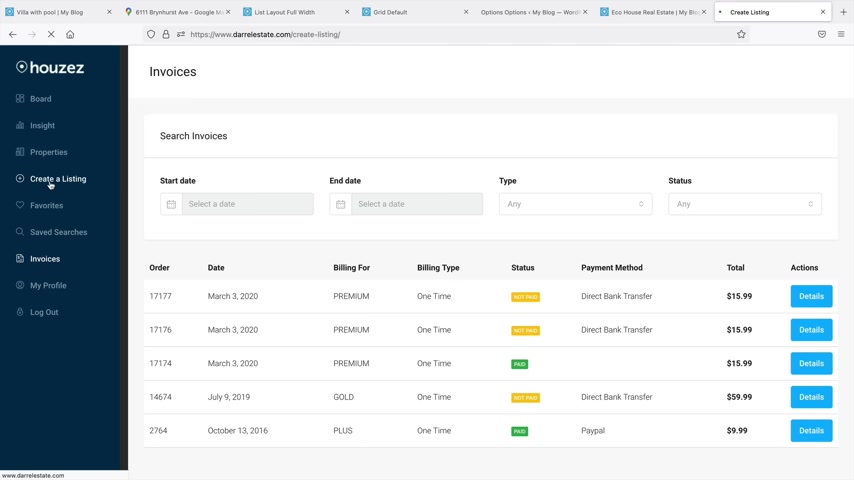
Now , also if this is a paid website , this is where you can see invoices , so you can see if people are paying you .
Um You can go ahead and send invoices .
I'll talk more about paid listings a little bit later in the video , but you can offer free and paid listings and also offer memberships , subscriptions on your website for listing on your sites .
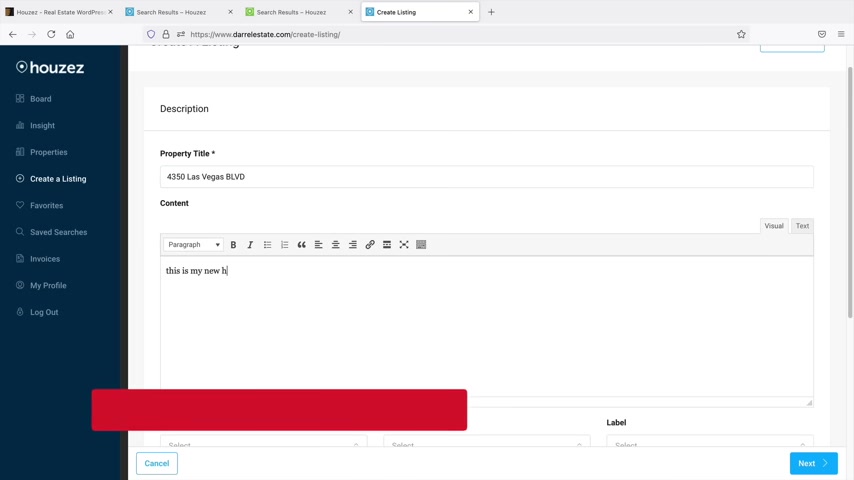
And also if your agent is in their back end right here and they want to create a listing , they can click on , create a listing and then from here , they'll go through the process of creating a listing .
Now , I'll walk you through the whole process of all of this .
In the video .
You can have agents create listings , you can have visitors create listings or you can restrict it to only yourself or restrict it to only your agents that can list properties .
So you do have a lot of control over your real estate website as to who can list properties .
Also in this video , you will get all of the demo images available .
So all the images is that you guys see on this website , you guys all will get for free and you guys can use these like as placeholders until you get your own property images .
Um So for example , you can kind of use this just to get started and then later on , you can go ahead and swap it with your uh pictures from your real estate properties .
Also , don't forget your visitors can always favorite their properties .
So they can always come back and visit them later .
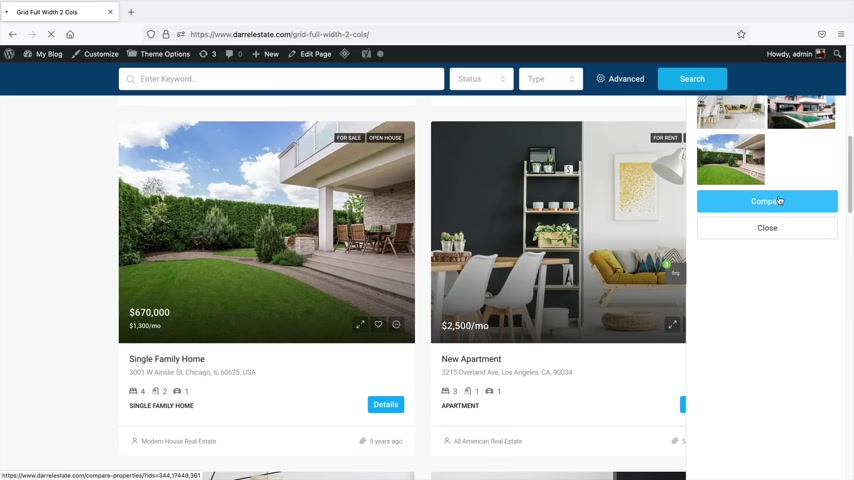
And if they are decisive about properties , they can click on this compare and they can compare this property versus other properties .
So they can compare these and they can compare as many properties as they want to just see the pros and cons of each house to make their decision a little bit more easier .
So pretty cool .
Huh .
Now , this website is ideal for all real estate agents and businesses .
Now , if you try to build this website yourself as an agent or an agency , it probably cost you around 25 to $50,000 .
But we will be using a premium wordpress theme and fast cloud hosting that will only cost you around 100 bucks .
So if you're ready to get started , let's go ahead and build your real estate website with wordpress .
Ok ?
So for step one , we'll get your domain and hosting .
So for example , my real estate website dot com and I do have an exclusive discount for all of you that you will only find on this youtube channel .
Step two .
I'll show you how to install wordpress and import the demo content .
And then from there , we'll go ahead and design the website using the drag and drop builder .
Step three .
I'll show you how to configure your website and also create listings .
So I'll go through the process of creating listings and managing a real estate website .
So you can walk away from this video knowing how to personally configure your own real estate websites .
Now , there is a link in the description of this video .
It will take you to a website to purchase fast cloud and cheap web hosting .
All right .
And this is name hero dot com .
Now , I've been recommending name hero dot com for a few years now because they won the fastest web hosting competition in my previous web hosting video .
Now , more importantly , we're gonna be using name Hero because they offer cloud hosting and to use this wordpress theme and to create this website , you need to be using cloud hosting are better .
So if you are using shared hosting like hosting , you cannot use this wordpress theme .
So I highly recommend to make the upgrade and switch to name hero because they are actually a lot cheaper than a lot of other companies and they're a lot faster .
So we have four different packages .
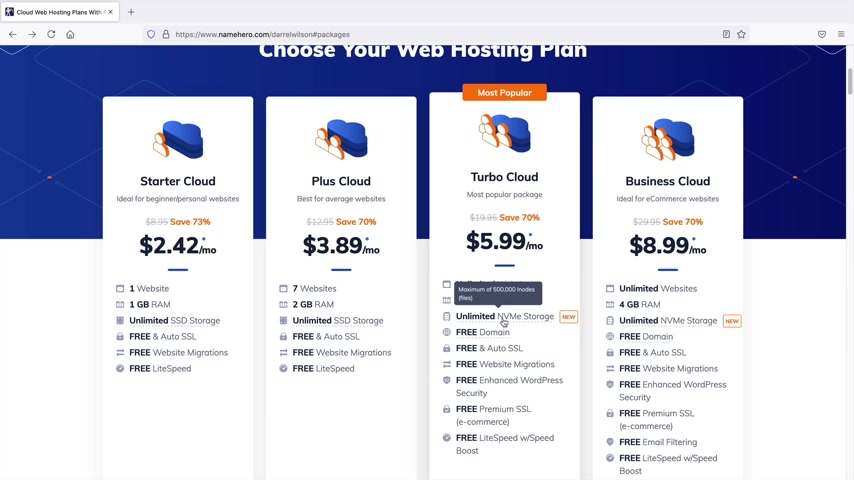
We have starter cloud plus cloud turbo cloud and the business cloud .
I would personally go with the turbo cloud with this plan , you get MBME storage .
And if you guys don't know NVME storage is a lot faster than typical SST storage .
In fact , a lot of hosting companies do not offer uh NVME storage because it's actually quite new and it's a little expensive .
So I would probably go with the Turbo cloud plan .
You also do get uh more ram as well .
So you do have a little bit more server performance .
So once you are here , you'll click on order now .
All right .
And then right below that , we are going to register a new domain name .
So this would be the name of your real estate website .
So personally , I would do something simple , you know , like yellow pages dot com , you know how they're simple , do something like uh you know , easy ads dot com .
I mean that probably is not available but let , let's just see if that's available , easy ads dot com .
I , I don't think it's available .
Let , let's just see there though .
I , I really doubt it .
Yeah .
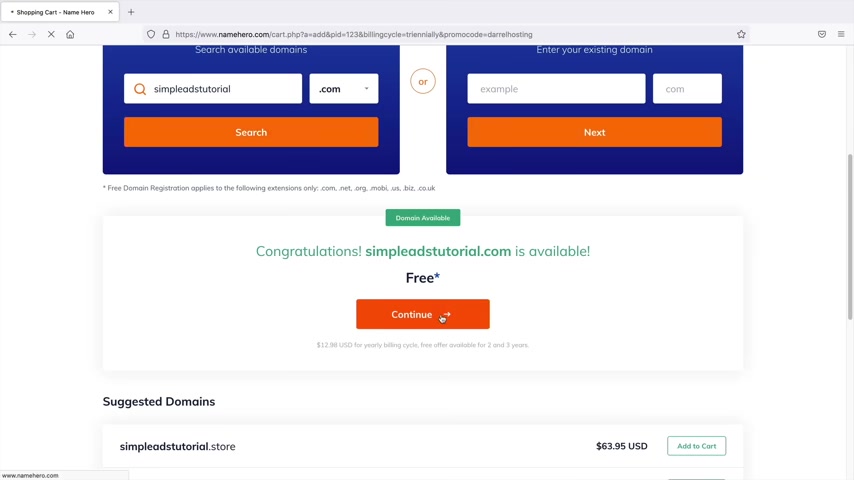
So maybe like a simple simp , simple ads or I don't know , you know , we'll just do simple ads tutorial dot com or something like that .
I don't know , but you would pick your domain name and you guys also do get a free domain name with this tutorial as well .
So let's go ahead and click on continue next .
You'll select your billing cycle .
So you guys can select three years , two years , one year or even one month .
However , I do recommend the one year because you do get the best discount available or you do get a bigger discount in the more years .
But I think one year is enough time to see , you know , if this tutorial is for you and it just gives you a lot more breathing room .
One month is just not enough time .
And uh I wouldn't recommend the one month option .
So let's go down here also like one year , there we go .
I just said one year , right ?
And then I go to the three year next , we have some uh upgrades and some packages personally .
I don't think you need any of these .
Um these are really up to you , but uh you get backups with wordpress plugins and all this stuff , you can get all this uh for free .
So , uh yeah , once you're here , you'll click on continue on the right side .
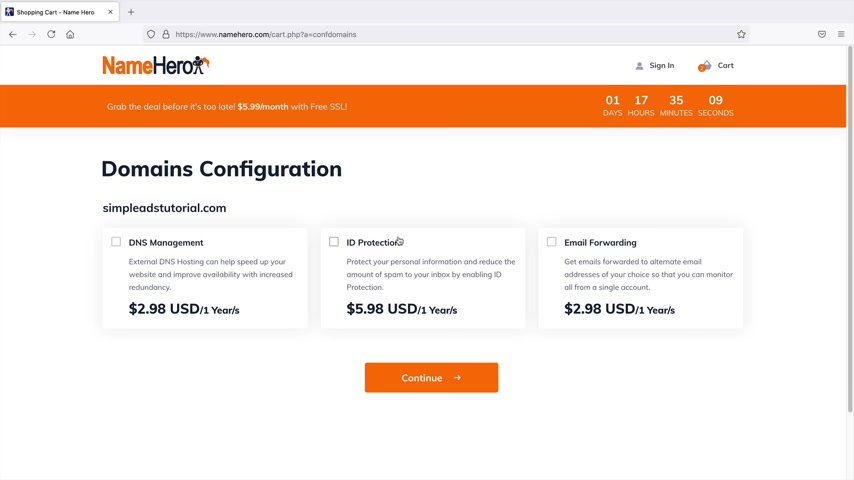
Next , you have the domain configuration .
Now , I highly recommend the ID protection .
This is gonna protect you against spam against all these people trying to send you advertisements because your personal information will be protected .
So I highly recommend to do the ID protection .
So once you select that you'll click on continue .
All right .
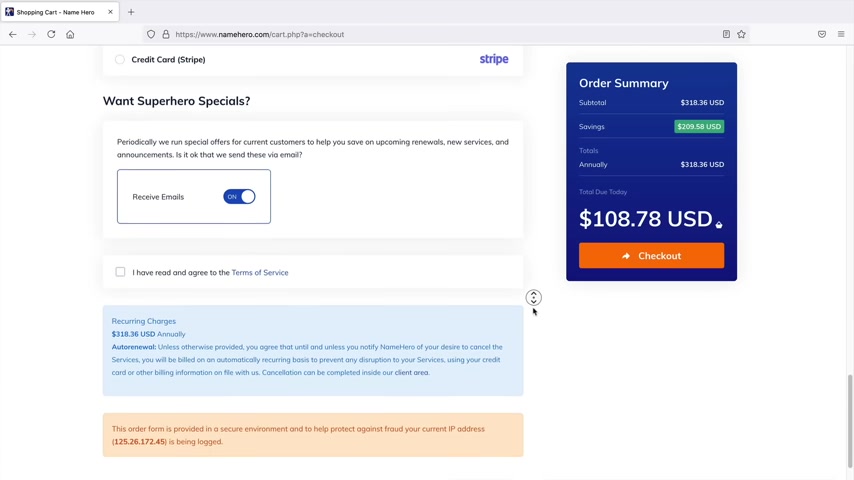
So let's go ahead and take a look at what we've got right here .
So for web hosting , for the entire year , we get a free domain , you guys have saved 70% off .
So for your entire year of web hosting , you'll pay around 100 bucks .
So it's a really a deal .
It's really fast .
You guys are gonna love name hero .
They have a really good record .
You guys can just go ahead and do some , you know , go ahead and do some Google some reviews and you know , is Daryl a scammer or whatever , whatever you want , you know , whatever you want to Google and then below that , you will put in your account information and your social .
I'm just kidding guys .
No social .
Uh you can pay with , oh , look at that .
You can pay with coin base .
Can I pay with three M or I'm actually interested .
Do we have to play with pay with Bitcoin or maybe we can do like another Cryptocurrency .
It's getting wild man .
It's getting really , really high .
So you can select your form of payments .
And uh below that , you can say I have read to the terms of agreement which I'm sure you guys are all gonna read those terms of servers , which probably none of you will .
But hey , that's fine .
And then once you're done , you'll click on , check out .
Now , I'll go ahead and go through the process of purchasing a package and I will meet you in the very next page .
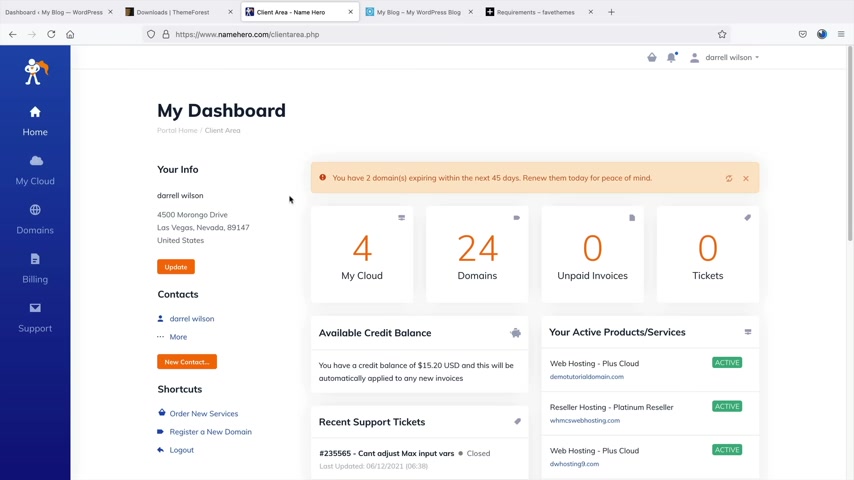
All right .
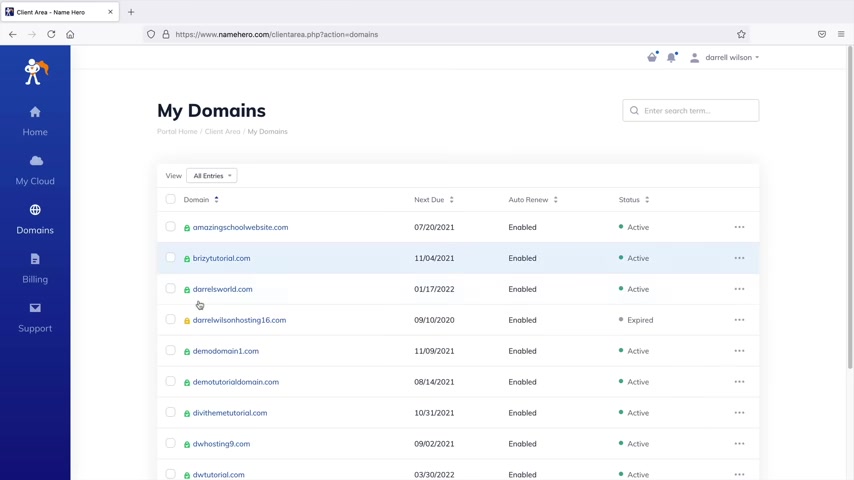
And once you guys press , ok , a few times and you answer some questions , you guys will end up in your client's area .
So from here you can access your information , your contacts , you have your domains and your uh hosting packages .
You should probably only have one here .
I do have a few just because I use a lot of um for testing purposes and stuff like that .
Now , if you guys have a problem , let's say word press to install or your SSL is not working , you guys can go to the supports and you can open up a ticket and these guys will definitely help you out with any website problems that you have .
They're really fast and prompt and they're extremely helpful .
So enough of that up selling and all that crap .
Let's go ahead and install wordpress onto your domain .
Now , if you click on domains here , you should probably see a list of your domain , right ?
It might have the , you know , it might have the the thing checked or not checked .
It doesn't matter .
But uh I'll go ahead and walk you through how to get all of this set up today .
So first things first , let's go ahead and click on my cloud .
Now you're gonna see your hosting package here .
So go ahead and click on your hosting package .
So it should just be one , right ?
So I'll click on the plus cloud , which is one of my hosting accounts .
And then from here you'll click on login to see panel .
Now , this is where like kind of the magic happens .
This is where we install wordpress .
This is where oh , we configure PHP settings and all that stuff and it's really simple to get started .
Also , guys , before we go on , please make sure to leave this tab open .
Do not close this tab because we're gonna come back to it a little bit later .
So let's go ahead and scroll down here .
We're gonna keep scrolling .
I know there's a lot of options , but we're just gonna keep scrolling , just keep scrolling .
Ok ?
Keep going .
Keep going .
We're gonna find wordpress .
There we go .
So you're gonna see software and Wordpress manager by soft Ulus .
Go ahead and click on Wordpress manager by soft Taus .
Now you guys should have probably nothing here .
I have a few domains already .
And what you're gonna do is that you're gonna click on install .
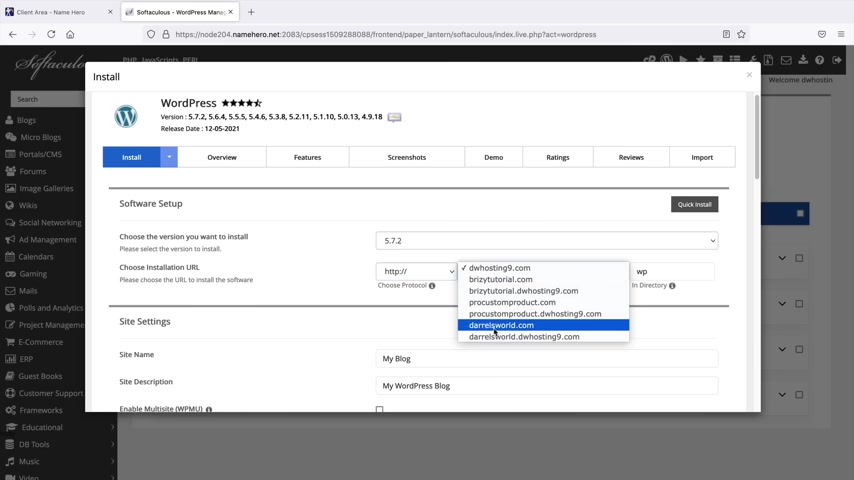
Now , you're gonna be prompted to install wordpress onto your domain .
So the domain that you purchase , we are now going to install wordpress , which is like the website builder where we can install all the stuff and make your site look really cool .
So by default , you probably should see your domain right here .
There's probably only one available .
Uh , go ahead and select your domain .
So I'll just select , uh , I'll just select this one for now and make sure this is AC TPS .
Also .
Make sure nothing is here in the Indi directory .
So make sure that is blank .
All right .
That's very important .
Make sure that's blank because then it's gonna install your website into a directory and you don't want that to happen .
Let's go ahead and scroll down here .
So go ahead and put in your user name and password .
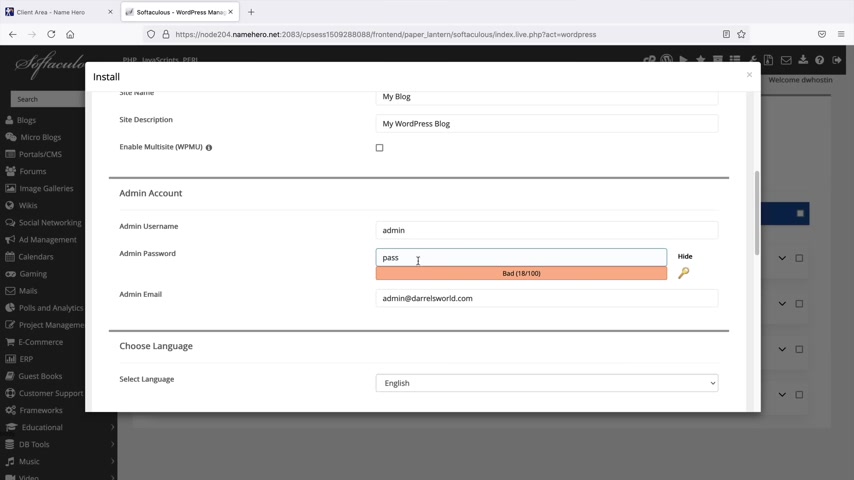
Now , these are the credentials that you need in order to customize and design your website .
So please write this down .
Don't forget about it .
In fact , you will have to change this .
So for this tutorial , I'll do classifieds and then I'll put in my email address , make sure it's an email that you have access to .
Because if you forget your password , it will go directly to this admin email .
And then below that , we have select language .
So if you guys speak in those languages , you can uh translate your entire word , press back into various languages .
And then below that , we'll go ahead and scroll down .
We don't need any of this junk .
And then once you are ready , you will click on install and then this will install wordpress onto your domain and there you go .
So once you have successfully installed wordpress , you will see this administrative URL .
You can go ahead and click right here to log into your website and congratulations .
This is your new wordpress website .
So this is the back end .
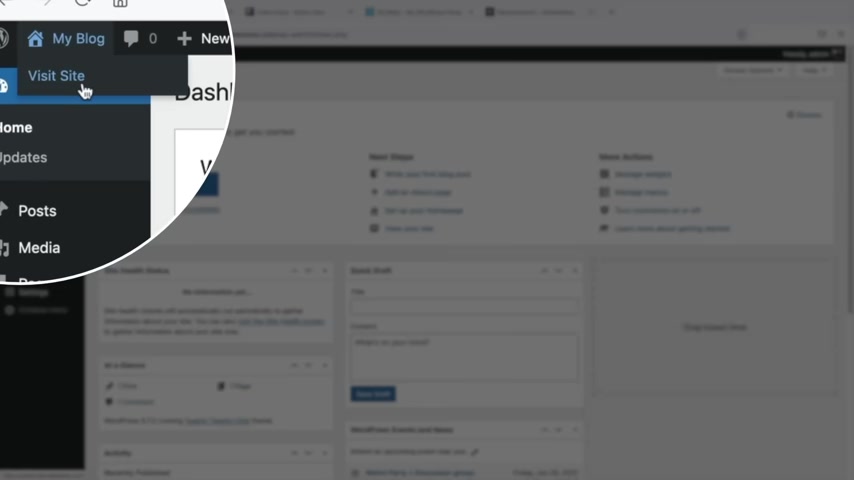
And if you want to see your website live on the internet , you'll go over here and click on visit sites and this is your new website .
So it's using a default theme .
It's really ugly , but not to worry , we will make it look really cool .
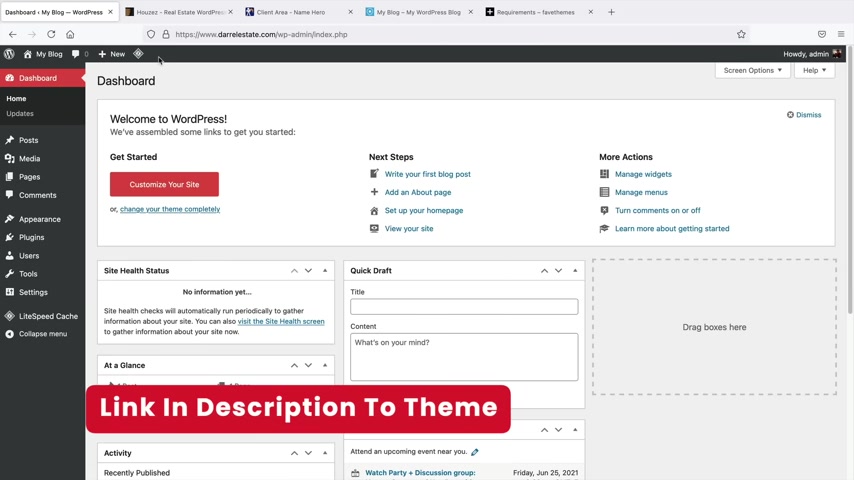
Now , let's go back over here and click on dashboard , right ?
Congrats on the new domain .
So at this point , your website is now live on the internet .
Now , in this next section , I'll show you how it's to purchase and install the houses theme .
So what we're gonna do is that we're going to import some demo content and then from there , I'll show you how to configure your agents , your brokerage , how to add pages , how to use the page builder and also how to add those pages to the menu .
So with that said , let's go ahead and jump back to the video .
Now , before we go on any further , we need to adjust some of the general settings just to make sure that your website is running optimal .
So first let's go ahead and go over here to to users and click on profile .
Now , this is where you can change the admin color scheme .
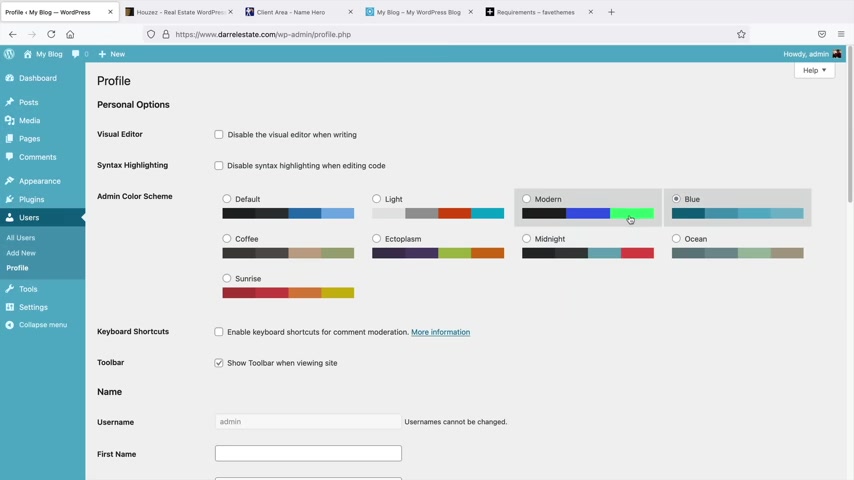
So on your back end , when you're working on stuff , you might want to change the back end color , you know , I like modern and also midnights .
I just feel like it's easier on the eye and scrolling down here .
This is where you can update your email address .
Now , this is important because let's say , for example , you forget your password , it will send it to this specific email .
So make sure that you have this um email that you have access to it and then scroll down here .
And if you ever need to change your password , you can click on set new password and then you can adjust your password to whatever that you want .
And I'll click on cancel and once you're done with those changes , you'll click on update profile at the bottom .
All right , cool .
So next , let's go ahead and go to settings and let's click on general .
Now , for those of you who are Multilingual and you prefer a different language over here under site language , they have like tons of languages you guys can pick .
So yeah , if you need to change your language at any time , you can do that .
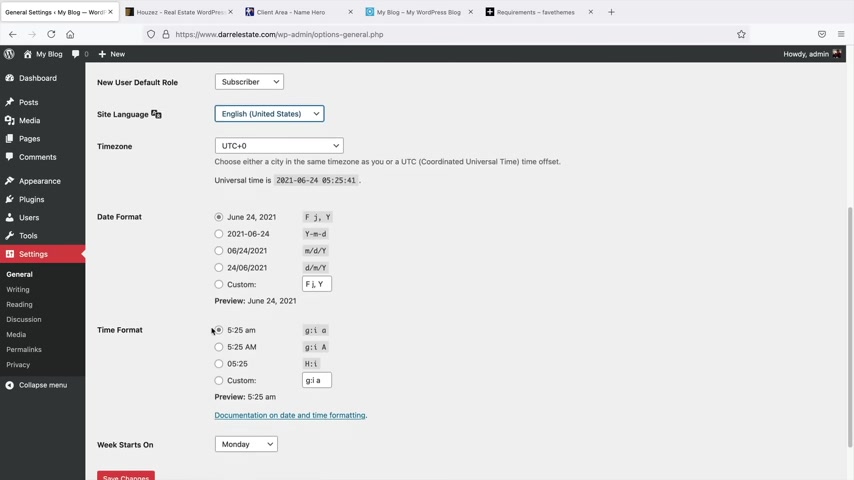
You can also adjust the date and the time format if you want to do that and then your time , you know , these are just personal preferences .
But uh yeah , so that's , that's let's click on save changes .
And the last thing we need to do is update our Perma links .
So usually when you go to a website , you'll see like , you know , uh like your website dot com dash about us , right ?
So over here , click on perm links .
Now we're gonna change this to post name .
So here we can see why .
So it's a lot cleaner .
It makes your website look very professional , it doesn't look messy .
So with these other Perma links , it just looks really messy and clustered and you know , this is actually optimal for seo purposes .
So once you select post name , we go down and click on save changes .
All right .
Awesome .
Now , there is one more thing that I want to do before we install the Wordpress team .
I want to install a plug-in .
So right here , click on plugins and add new .

Now , what are plugins ?
Well , plugins are essentially kind of like applications for your website .
So you know how like your iphone has apps , plugins are no different .
They're just kind of added things that you can add on your websites to just improve it or add a particular feature .
But under search plugins , go ahead and type in cash , cashe cash and I want you to install this plug in right here .
So Lightspeed cache , this will help optimize your website , make it faster .
And let's say for example , we're building our websites and something doesn't update , we can refresh the cache and it will uh make your site run a little bit more optimal .
So yeah , make sure you have the light speed cache plug in installed and then up here you have this little diamond and you can click on purge all and that will always clear the cache and refresh your website to its uh optimal settings .
So now that we have all of the technical stuff out of the way , now let's talk about the wordpress theme that we're going to be using .
So there is a link in the description of this video .
It'll take you to a page to purchase the houses theme .
Now , the houses theme is probably the number one most popular real estate wordpress theme for wordpress right now .
Uh It has tons of features .
In fact , you can make any style website you want with this wordpress theme .
They constantly update it .
They have great documentation and they have a lot of really nice demos .
So you guys can see on this page , it lists a lot of their features like their page layouts .
Um Again , the reason why I really like this theme too is because they have various layouts and designs .
A lot of the real estate website themes that I've seen , they only have like a few styles on uh like your listing page and everything and it just looks very limited .
In fact , over here under wordpress , if I click on real estate and under the best seller , um houses will be on the top too .
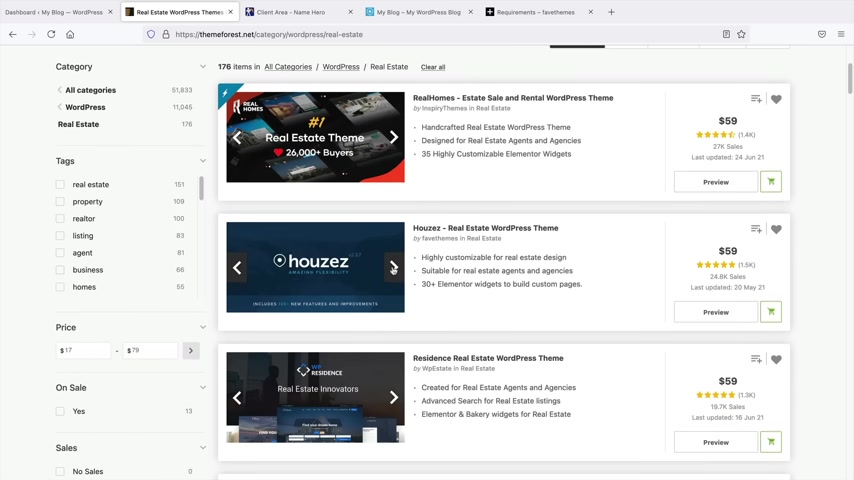
I did try this one last year and I just didn't really like it .
It's actually quite limited and I strongly believe houses is a much suitable real estate theme for pretty much any type of real estate uh niche that you're in .
So once you guys get here , you guys will purchase this .
Now , this is about $1000 .
Nope , I'm just kidding .
It's only like $59 .
So uh that's a one time payment .
You don't have to pay that ever again and you get the product and you get lifetime updates .
Now , if you guys do want support , you guys can always extend the support for 17 bucks for a year .
I mean , that's ridiculously cheap compared to doing it yourself .
So , um go ahead and purchase this wordpress theme and then I'll go ahead and meet you in the actual , uh I said , I guess you wanna say dashboard .
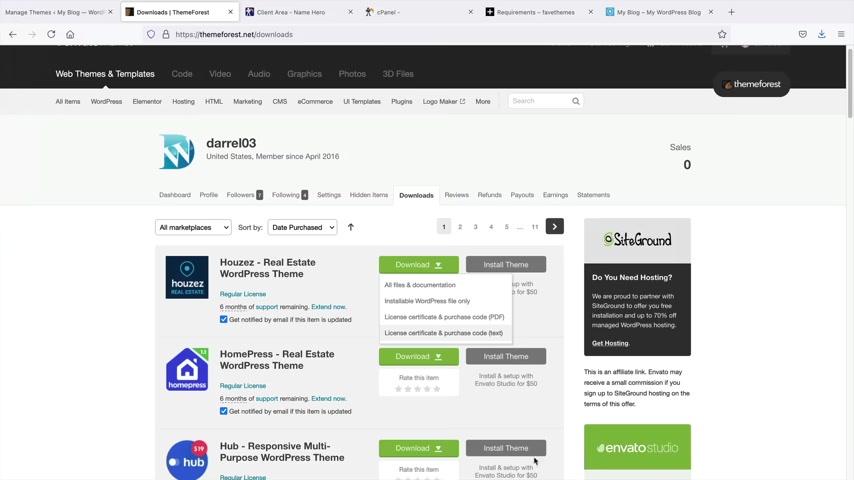
So let's go over here to my downloads right here because I have already purchased this Word Press Team .
So this is available in my account .
All right .
And you guys can see here is the house's real estate wordpress theme .
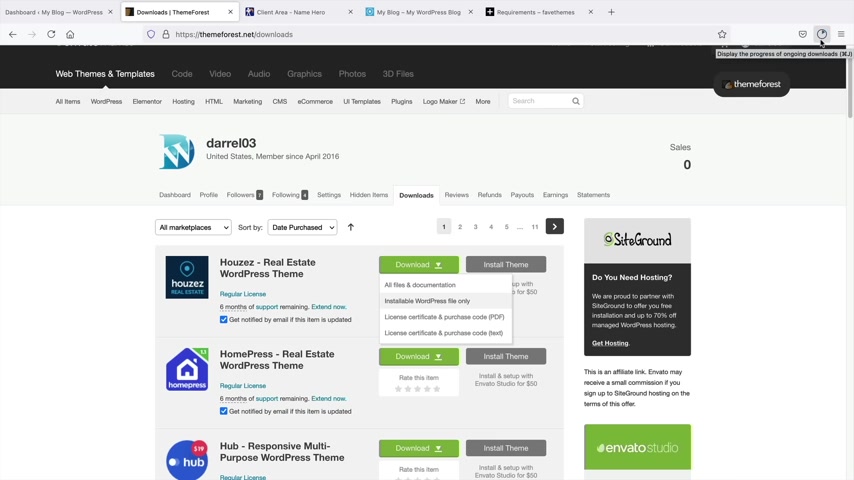
So just remember this is the theme that we're gonna be using for this word press tutorial .
Once you get here in your accounts , you'll click on download and then you'll see install Wordpress file only .
So go ahead and click on that .
And what it's going to do is that it's going to download a zip file .
So , uh this is the file that we're going to need in order to upload to our websites .
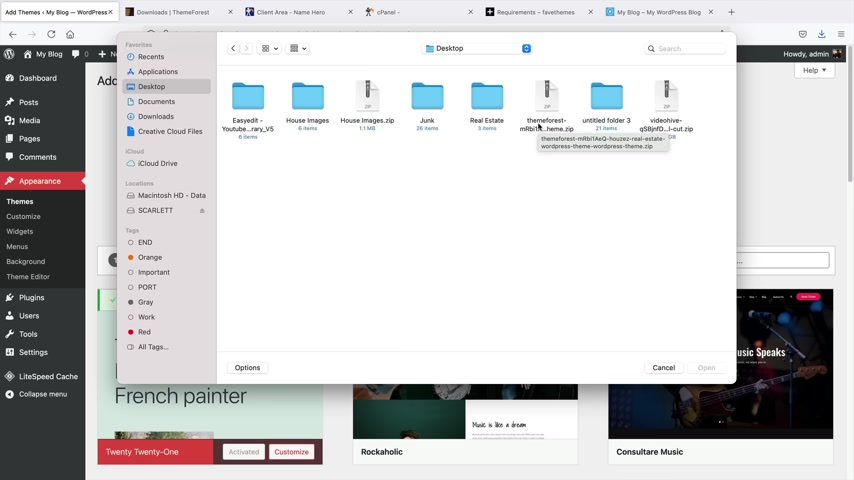
So go ahead and save the file to your computer .
And then right now you can see that it's currently downloading to my desktop right now while that's downloading , there is something that we need to adjust on our server for this wordpress theme .
Now , this wordpress theme has specific server requirements .
Now , it's very easy to change this .
And since we're using cloud hosting , we can adjust our server to meet these uh configuration limits .
So let's go ahead and do that .
It's really simple guys don't panic .
All we need to do is go back to our C panel .
So let's go back to name hero .
And I wanna go ahead and log in to the server and adjust some small changes .
It's really simple .
We're just gonna go ahead and copy and paste these onto our server .
So let's go back over here .
I'll click on my cloud and then you'll click on your hosting package .
So whatever hosting package that you see available , you'll go ahead and click on that .
So for me , it's this one right here .
Next , I'm gonna click on login to C panel .
All right , cool .
So this is our C panel and right here we're gonna type in PHP , that's it PHP and then click on select PHP version and then you'll configure all this by yourself .
No , I I'm just joking .
Uh This is all we just need to click on options here .
So just click on options and we're gonna scroll down , just keep scrolling and this is it .
So for example , the max execution time you want to change that ?
Oh Wrong one wrong page max execution time is 600 right ?
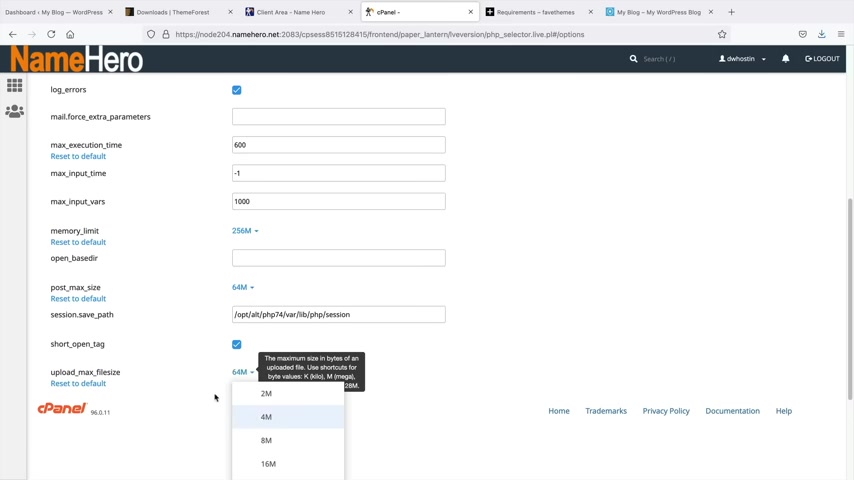
So right here , just put in 600 simple memory limit .
1 20 eights .
My memory limit I set to 2 56 .
So I just wanted a little bit more for performance .
So I put 2 56 for the post max size 40 eights .
Uh Here I put 64 .
All right .
And the upload max file size is also 48 .
You can see here how I put uh 64 as well .
I also put my Mac input varies to 1000 and this is default .
So that's it .
You just need to change that to uh those settings and you're all set to go and also your PSP version .
So if you guys are watching this for maybe six months from now , always leave your PHP version at the current .
So just leave it at what the hosting company recommends never go up higher because sometimes a lot of these teams are not compatible .
So you want to use the stable version of PHP .
All right .
Pretty simple , right .
That's all you have to do .
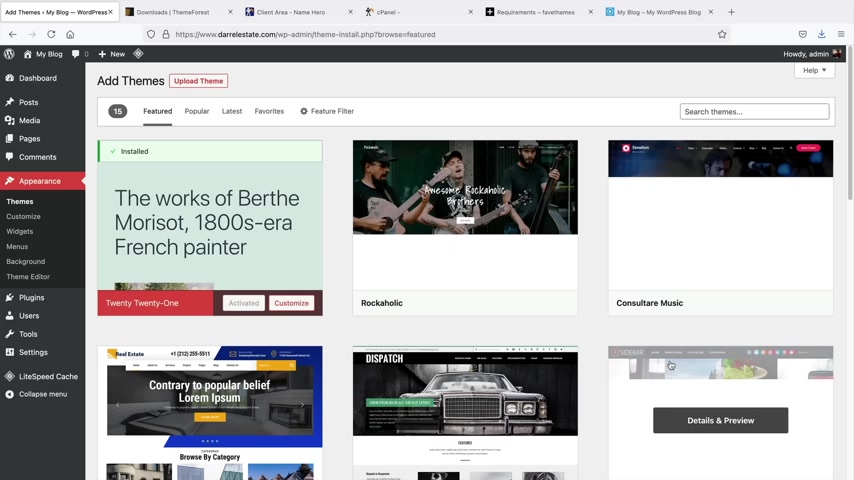
So now that we have that done , we can go back to our wordpress website and now we can upload the houses the so you guys ready over here under appearance , we'll click on themes now , there are a lot of wordpress themes , a lot of these free themes , they're very limited because they have a free version and you have to unlock their pro and that allows you access to adjust colors .
But there are some good free themes out there .
But for this specific website , we're gonna be using a premium theme that's designed specifically for real estate .
So right here under upload theme , click on upload theme and then click on browse .
Now , what we're gonna do is that we're going to uh upload the zip folder .
So remember , don't extract it just the way you downloaded it .
That's the one that we need .
So this is the current file and you can make sure just by uh you know , hovering over it and making sure that it says the house is real estate wordpress theme dot zip and then click on open next , we'll click on install .
Now .
Now this process might take anywhere between 1 to 2 minutes because it is somewhat of a larger Wordpress theme .
So just give it a few minutes .
All right .
And once the theme has successfully installed on your website , you will click on activate .
All right , awesome .
Now , right away , it's asking for your purchase code .
Now , you will need the purchase code in order to import the demo content and unlock all the features , you can find your purchase code going back to your downloads .
And right here if you click on either the PDF or the text , it will display your license code .
So go ahead and click on one of these .
So your purchase code will be displayed right here .
You can see the item purchase code .
So go ahead and take this code and then paste it into your website .
So let's go back to our website and I'll click on my website and then I will paste the purchase code and then I'll click on , verify .
All right .
Awesome .
So now we have successfully activated and installed the house's Wordpress theme .
Now , the next step , what we're gonna do is that we're going to install some plugins .
The plugins , give the website the functionality and basically the features that we need for our real estate website .
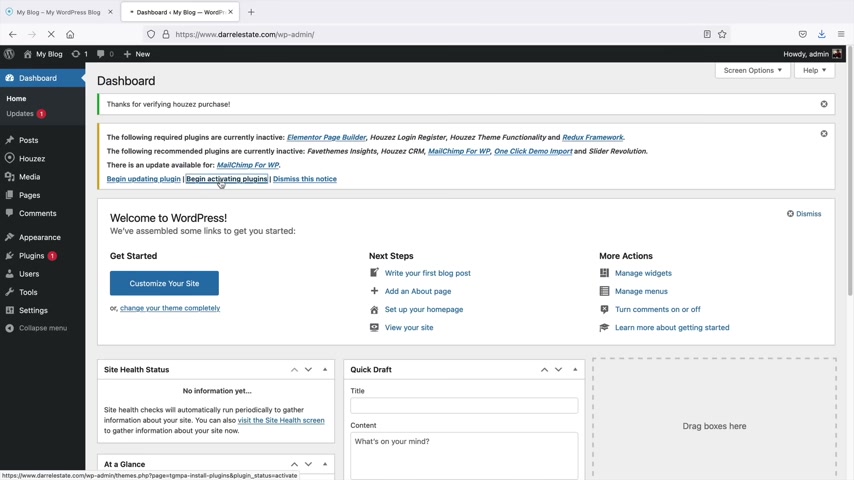
You guys can click on this begin installing plugins in case you guys did close this on accident , which I know some people do .
Um You can actually react as this by going over here to appearance and clicking on install plugins .
And these are the required plugins in order to make the theme work properly .
So go ahead and click on this little box right here and then click on install .
And what this is going to do is it's gonna bulk install all the plugins at once .
So let's click on apply and just give it about a minute .
All right .
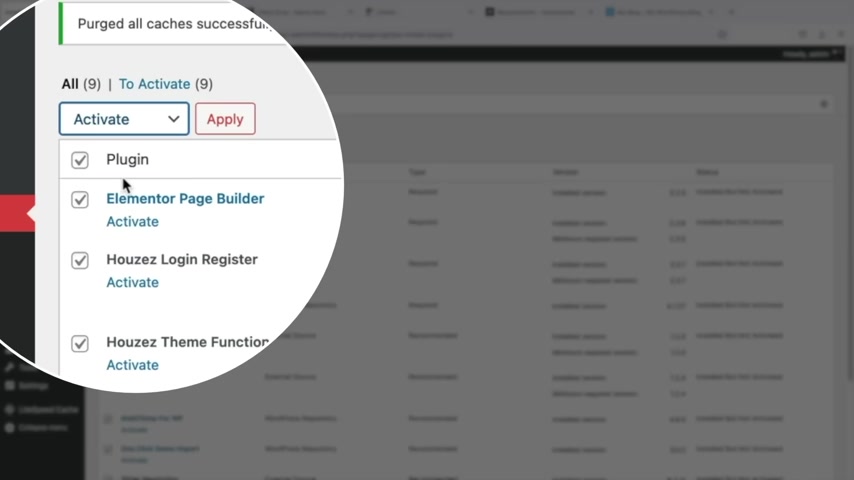
And once those are done installing , we'll go to the bottom and click on return to required plugins , installer now we're going to activate these plugins .
So let's click on this plug-in thing in the little empty box and then we're going to activate all these plugins and then we'll click on , apply .
All right .
Awesome .
So now we have successfully installed and activated the plug in .
So let's click on , return to the dashboard .
Now you guys might notice on the left side things are gonna change , you're going to see a lot more tabs open and these are due to the plug in .
So it's just more options and more features that we'll cover later in the video .
You guys might also get these really annoying banners , just click on like no things and just close them if they pop up , it's just little ads from the designers and the developers , you know , whatever .
So now that we actually have our uh websites with the plugins and everything , you guys want to take a quick look at it , you guys can also see how the website has kind of changed a little bit .
We have just like a different structure and everything .
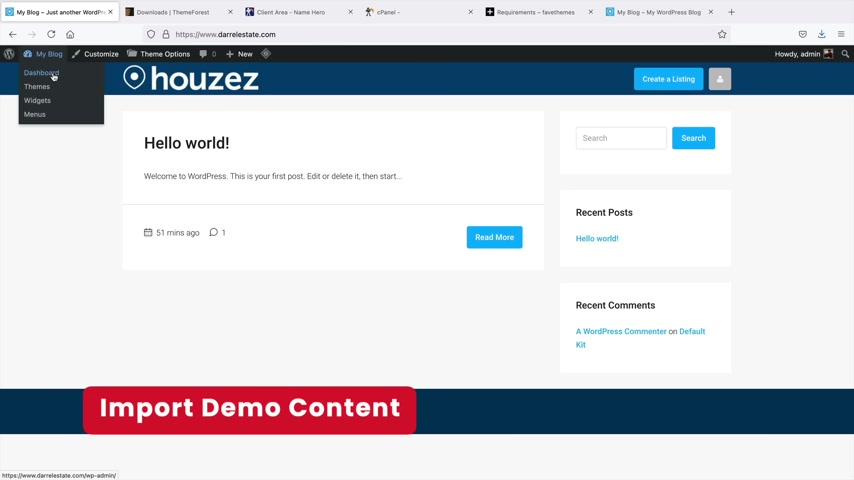
So next , let's import some demo content onto our website .
Let's go back over here to dashboard and here we have the houses .
Uh I guess you wanna say tab , we're gonna click on demo import .
So with the demo import , we're going to import some demo content and then from there we're gonna kind of dissect and we're kind of go through each section one by one to make sure you guys know how to operate to your real estate websites .
Now , here you can see uh the server requirements .
So we have already changed the server requirements .
So we don't need to adjust anything on our own .
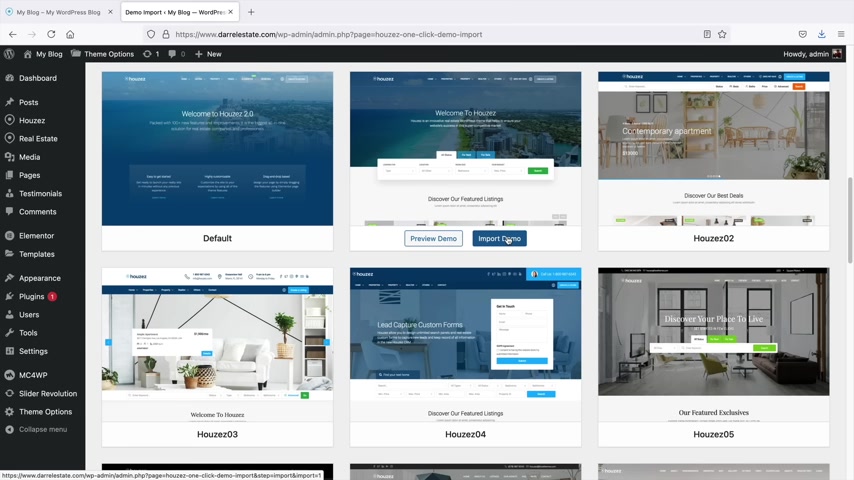
And if you scroll down right here , you're gonna see a lot of demos .
Now , what's really cool guys is you can switch from demo to demo .
So let's say , for example , you can import this demo and then if you don't like it , you can delete your website and then import another demo .
So they do have a lot of demos and these are for specific uh you know , specific niches .

So here we have just like uh you know , uh a normal luxury house condominium style , you know , and just different uh ways to present your real estate website .
I do like this one right here .
It's like very corporate but it's very simple .
I do like that approach .
But um yeah , you guys can check out these demos on your own free time .
But for total purposes , I want you guys to uh install and activate the houses one thing .
So what we're gonna do is that we're going to import this layout right here and then I'll show you guys how to add agents , how to add properties , how to adjust everything .
And then I'll also show you how to use the page builder .
So make sure that you use the houses one .
So right here , click on import demo and scroll down right here .
We don't need to click on anything else .
I just want you to click on continue and import .
These are just plugins and up sells and we just don't need them .
So click on continue and import and go ahead and give this process about five minutes .
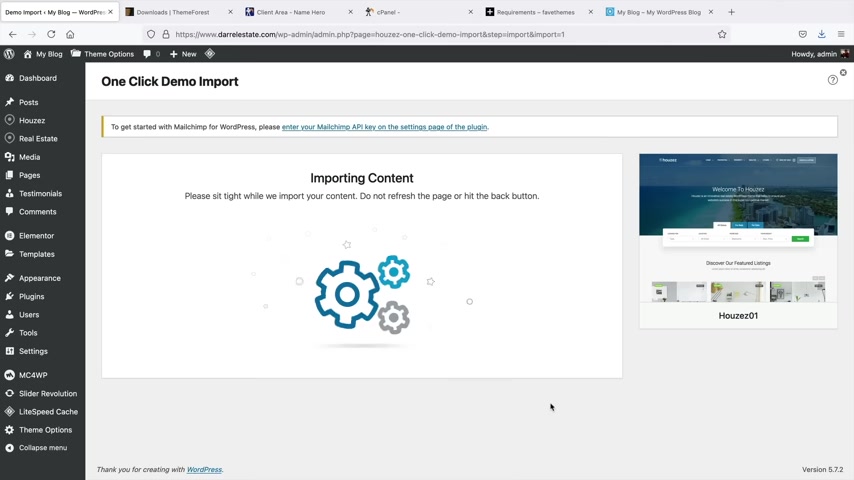
So it's going to import all of the pages , all of the listings , all the agents and then we're gonna configure each 11 by one .
So just go ahead and just wait a few minutes while this imports .
So just go ahead and give this about five minutes while it imports all the demo contents on your real estate website .
Also , sometimes you guys might get an import failed .
There's no problem .
Sometimes weird stuff happens with wordpress .
Just go ahead and try it again .
So just go back over here to your houses , demo imports and then simply go ahead and just try it again .
You guys might want to clear the cache here .
So I'll just purge all .
So that just kind of refreshes the websites going back down here to import demo .
You guys might have that problem on other uh you know , layouts if you guys do decide to use different layouts later , but just go ahead and click on continue and import .
All right .
And once your import is complete , you'll get this check box and then you can click on visit sites .
So that process took about five minutes .
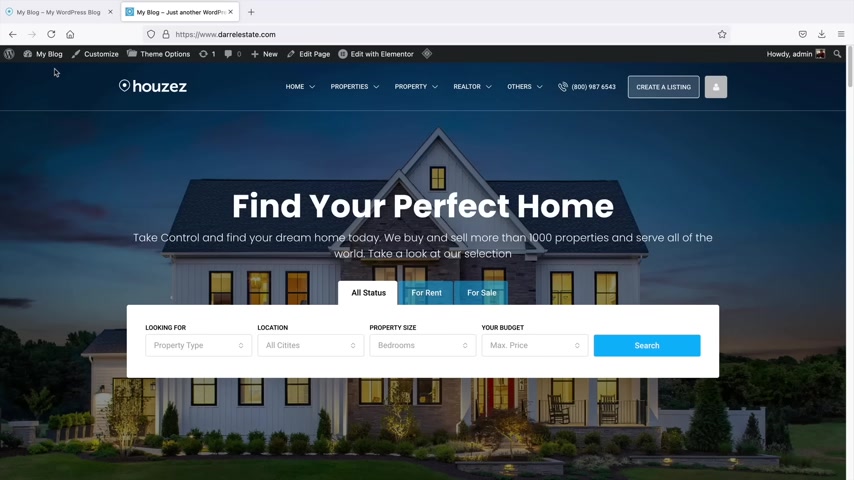
It does take a little , a little time to import .
So this is your current websites and you guys can kind of just take a look at it and just check it out .
So we have the home page , we have our featured listings and this is basically where all your listings will be displayed .
You guys can adjust all this , not to worry , we can fully customize and change everything that we want , but just take a look at your website , make sure everything imported correctly .
Um You can see the website looks great .
I do want to change the fonts .
I'm not a fan of the fonts .
I do like the Poppins fonts .
But uh here you can see we have a list of all these demo uh properties that we can , you know , we can customize and we can change everything .
We have our agents , which we'll do .
Uh right after we mess around with the page builder and just some testimonials and we have our footer at the bottom .
So congrats you guys have your current website and it , it's already starting to look really , really good .
Now , we're gonna turn it into something like this just to bits .
But first , let's go ahead and just talk about how do you guys actually change and customize everything , right ?
So , uh we've seen the website but we need to learn how to actually use the builder .
So the builder is called element to and this is the builder right here .
So click on edit with element to .
And what this will allow you to do is that this will allow you to add an elements , allow you to change the images .
You can basically change everything that you want .
So for example , we have these elements here on the left side .
Now these elements , you can use these to drag in to your website .
So for example , let's say you want to add in a button , you would just take this button and drag it and then on the content tab , this is where you can change like the position , you can add the link , you can change the font to like a start now .
And yeah , so the content tab , you can change the content the style tab .
This allows you to change the uh the font and also the color .
It also gives you options like adding a tech shadow , a drop shadow and other various uh you know , design tool tips here .
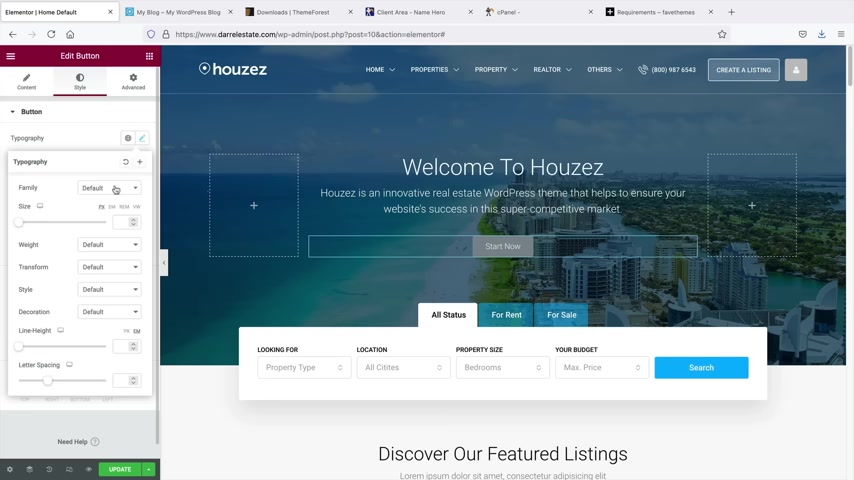
I'll click on this little pencil and this is where we can change the font .
So for example , you know , I like Poppins , I like Poppins bold actually like that .
And if you want to change the text color , we can change the text color here and also the background color to , you know , anything that we want , you know , we can change that to , you know , any style that we need .
And yeah , that's pretty much it .
Now at any time , if you want to duplicate your modules , you can right click and click on duplicate and then you can kind of drag this around the website to like anywhere else .
So you can see here how it's just a very visual uh drag and drop builder .
If you want to delete something , you can right , click on the pencil icon and then click on delete .
So right , click on that and delete .
Now , what I wanna do is I want to turn this into something like this .
You know , I feel like this is more appropriate .
Uh I like the style of it .
It looks really clean .
So let me show you all some quick tips on how to adjust your website .
Now , we have these three columns right here , right ?
But I don't really want these columns .
So right click and let's delete it , you know , right click and delete it .
So we have just welcome to houses .
But I want to change something to like maybe , you know , I wanna change it to like something like , you know , find your perfect home and then we can just , you know , throw in some demo content below that .
So all you need to do is just click on the actual elements .
And then for the title , we can say , you know , what's I want to say , find your perfect home and you know , we can leave this contents , but I'll just use this one because I've already prepared it .
So I'll just take that and I will go ahead and paste this like that so you can put in any content that you want .
Obviously .
Now , one thing I do want to change is the actual fonts .
So here we have style and we have the section title which is this part , I want to change this to Poppins Poppins .

And like I told you guys , I like bold and for this bottom part , we can change that as well to maybe like Poppins and yeah , we'll just leave it at that .
Now , I do want to make this top text a little bigger .
So under this little pencil icon , we can control the size of the text or something that looks like that .
And if you want to see what it looks like without the actual uh builder right here , you can click on this tab and this will kind of demonstrate how this all looks .
So I do like that , you know , I think this text is just a little too big , so maybe I can reduce it by just maybe like 10 pixels or something like that , you know .
There we go .
It looks like that .
Now also right here , we have this , this uh whole section right here and I wanna make this full width .
So you see here on this how this is full width ?
I do like that .
So if you want to edit the actual background of a section , you'll right click and click on edit section .
So this can kind of gives you control over the actual background here and we have a few options .
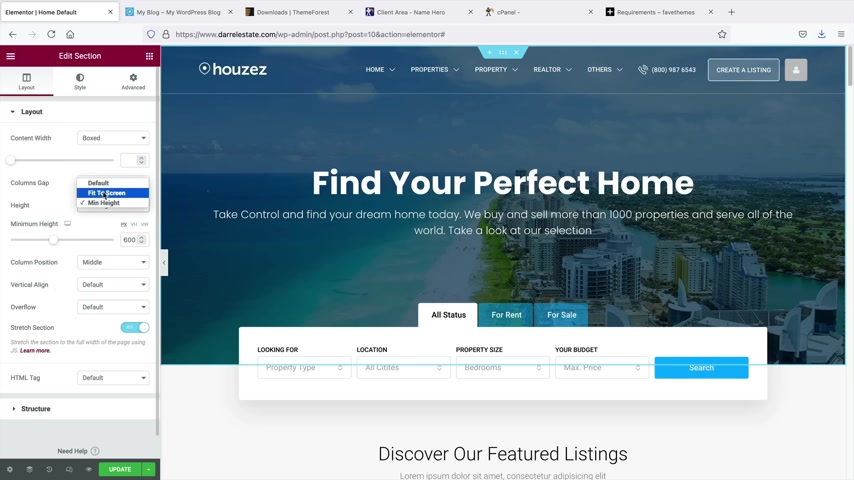
So I want to actually change the height to fit the full screen to look like this .
I do like that a lot better .
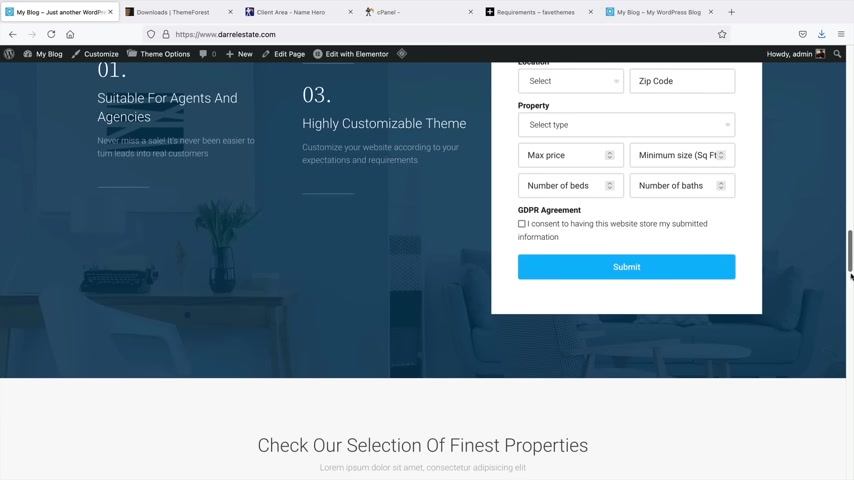
And also one thing I wanna do is I want to take this search tab and I kind of want to move it around so you guys can see here how it kind of pushed it at the bottom .
So what I wanna do is I wanna click on this pencil icon which controls this search navigation and I want to drag it right below the text like that .
So I feel like this looks a little bit more appropriate .
So you can see here how you can kind of drag and drop elements around um the websites just to make things a little bit more easier .
Now we will talk more about the search bar a little bit later .
Um When we talk about , you know , adding in a custom fields and stuff like that .
But let's say for example , you want to change this background image .
So again , I will just right click and click on edit section .
And here we have the style tab .
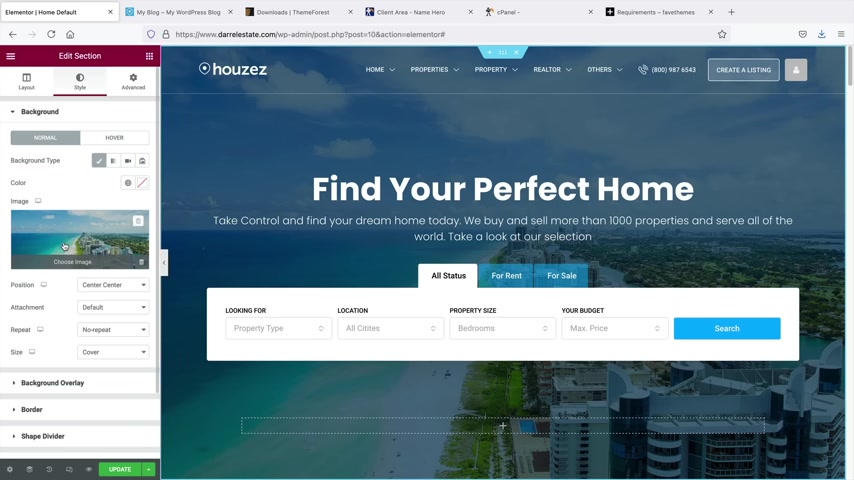
Now the style tab again , remember it controls like the actual colors , the fonts and in this case , we can change the image .
Now I do have demo images for all of you in the description below of this video to help you guys follow along .
So for example , I will click on this image and I want to upload some files .
So I click on select files and the folder that is in the description , it is called the real estates and it'll be in a zip folder .
So all you need to do is just go ahead and open it .
I'm sorry , it is the house's image .
You'll just go ahead and open that and then you'll get access to these images right here .
So what I'll do is I'll go ahead and take all of these and I will click on open .
So now I'm uploading these images to my current real estate website .
Now , if you guys do need images , I highly recommend going to pix to bay dot com and also uns dot com .
So this is P two bay dot com and this is where you guys can get free uh images for your website .
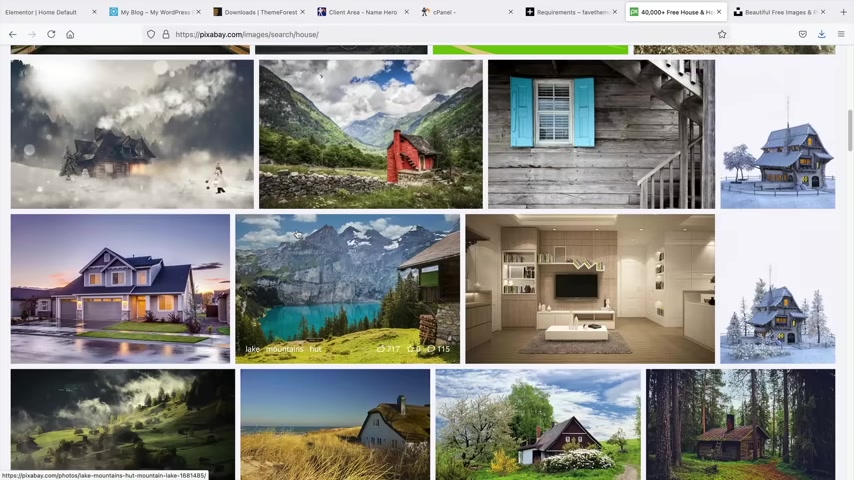
So I just typed in house and then you can see here how they are offering a bunch of different images that you guys can use for free just to make sure that your website looks really professional .
These are really high res images and it just gives a good representation of your business .
You can also use on splash , remember just type in like house or beautiful house or houses or whatever you want and they will have a bunch of images that you can use for your um website .
Now , if you do decide to use images from this website , I highly recommend to optimize them .
Now , there is a free website you can use for all of your images for your website .
Just to make sure it's running fast .
You wanna go ahead and go to tiny JPEG dot com .
So what this will do is that this will shut off all the fat off your images .
It's completely free .
It doesn't cost you anything .
And I highly recommend to do this .
Uh Even if you just take regular images from your own camera phone because you want to make sure that your images are optimized .
So all you would need to do is just click on this , go to any of the images that you downloaded .
So what I'll do is I'll grab this one here and I'll click on open and you can see it's around 421 kilobytes and the website will compress it and you can see here how it did save some uh it did reduce it a little bit .
So you want to make sure that you do that for all of the images just to make sure that the site doesn't run very slow because that's the number one biggest complaint is people say the website's slow and it's because of the images , trust me .
So anyways , uh once you guys upload this to your website we can go ahead and add this to our site .
So I'll click on this one right here and click on insert media and beautiful .
Look at that .
It looks actually very similar look at that .
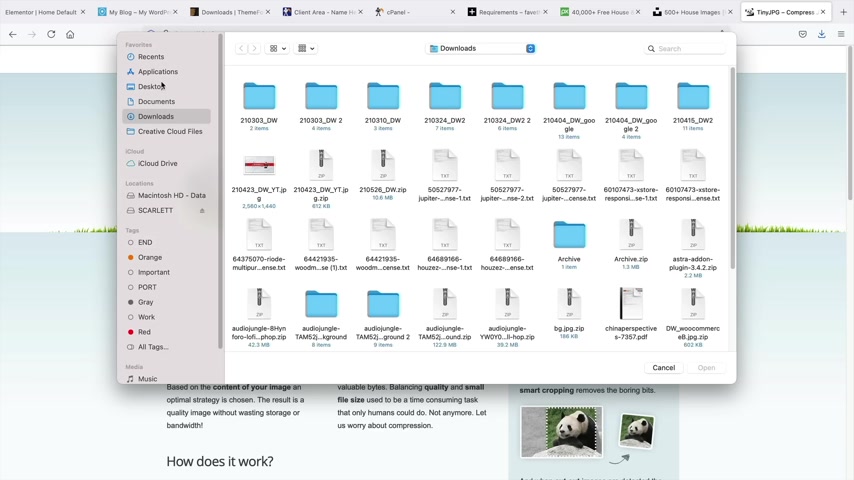
Now , there's one thing that you can do and this is optional , you can adjust the background overlay .
So for example , right here we have background overlay , right ?
And here we can kind of adjust the color of the actual overlay .
So you can give it like a bright blue , a dark black if it's like a high end kind of websites and you can adjust the actual background like that .
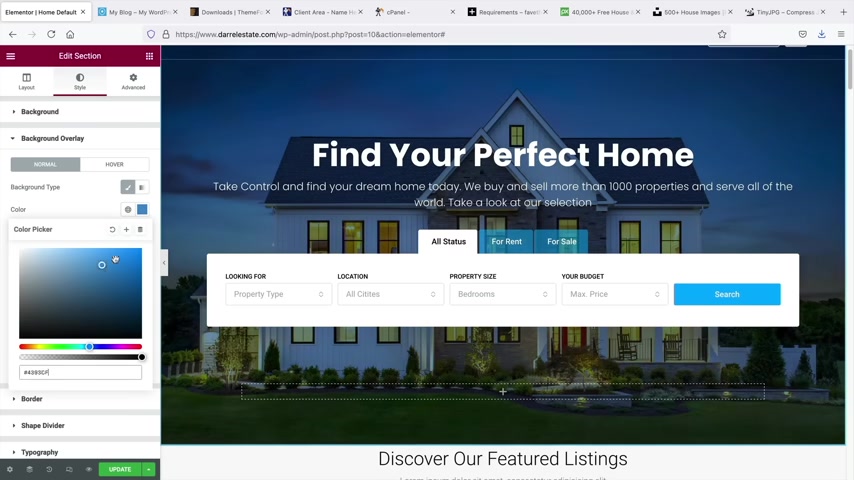
Now , there are a lot of other options here like shape dividers and a lot of other cool things like shape dividers are really cool , just kind of add these like , you know , these designs to either the top or even the bottom of your websites .
So you can kind of like have some fun and kind of mess around with a lot of these options .
But um right now I'm just gonna go ahead and just close all this .
Now , if you guys do need help with this page builder , I understand I'm not gonna cover everything about element to because this video can easily get very long .
I do have a full another video on element .
So here we talk about the advanced parts , we talk about the pro version as well .
So if you do want to upgrade and get the pro you can , but you don't really need to with this website .
So you guys can watch this video .
It's about an hour and a half long and it covers every option of mentor .
So once you watch this video , you guys will be like elementary professionals , but I don't want to cover everything about Element because again , I don't want to get off topic here and focus on the builder .
I just want to kind of give you guys a crash course so that we can focus on making the real estate websites .
So anyways , let's go ahead and scroll down here .
And uh one thing you guys might notice if I close this , you might notice how this text now is uh boost it up right here and we also have this section .
Now , I wanna go ahead and delete all this because I want to remake it .
So let's go ahead and show you guys how to remake sections .
So I'll go ahead and close that and also delete this right here and I'll delete this right here .
So we're just left with this empty section .
Now , whenever you want to add a section , you can click on this plus arrow and click on this plus and then you can select the amount of columns that you want .
But in this case , I just want one column .
Now , I'm kind of lazy guys .
So I realize that this demo website has already made a lot of sections for us .
So we can kind of copy and paste and use these sections throughout the website .
For example , I want to take this section right .
It's already made for us .
I don't want to have to redo everything all over again .
So what I'll do is I'll right click and duplicate and I will take this pencil icon .
I'll drag it , I'll hold it and drag it , use the scroll button and I'll just drag it here to the top like that .
All right , cool .
We're actually we dragging it right here and there like that .
All right , cool .
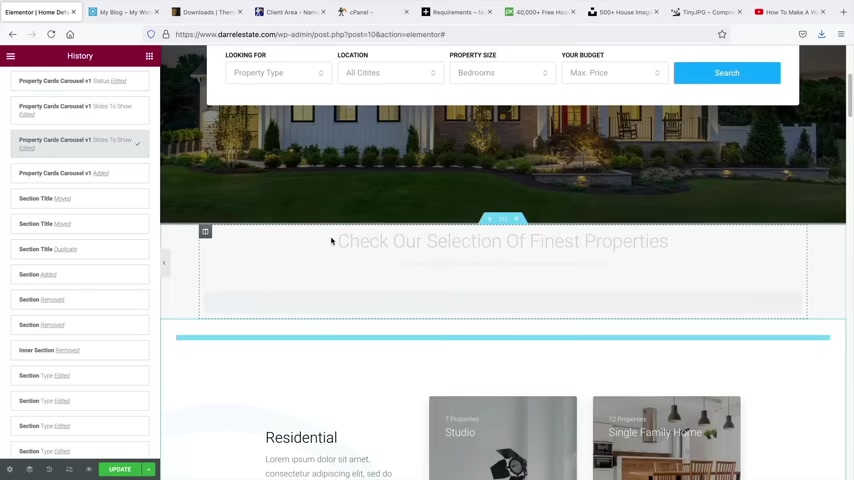
Next , what I wanna do is I want to add in some listings , right ?
So here I'll click on the listings .
Now , I think the listing was listing six or something like that .
So the wordpress theme actually creates their own elements .
So you see here how this says houses elements .
So this is where you would get all of the properties , you would get the listing tabs .
Um This is basically everything that you need for your properties .
So here we have property cards , Carousel V one , I guess version one .
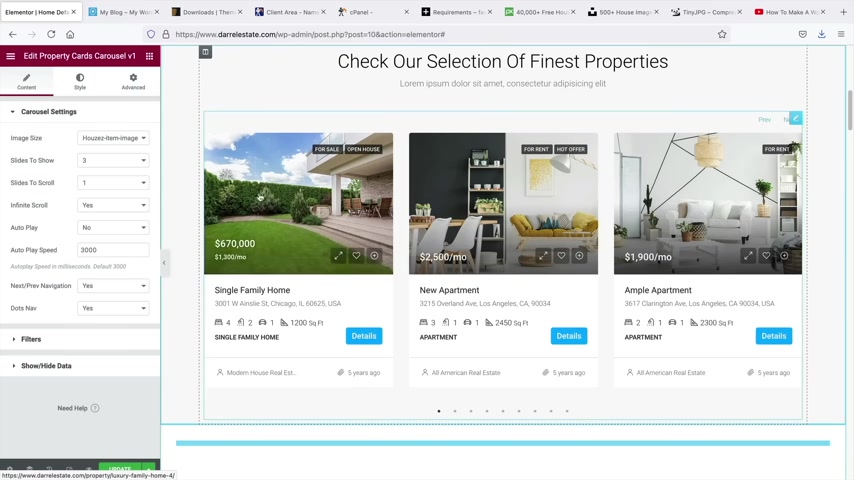
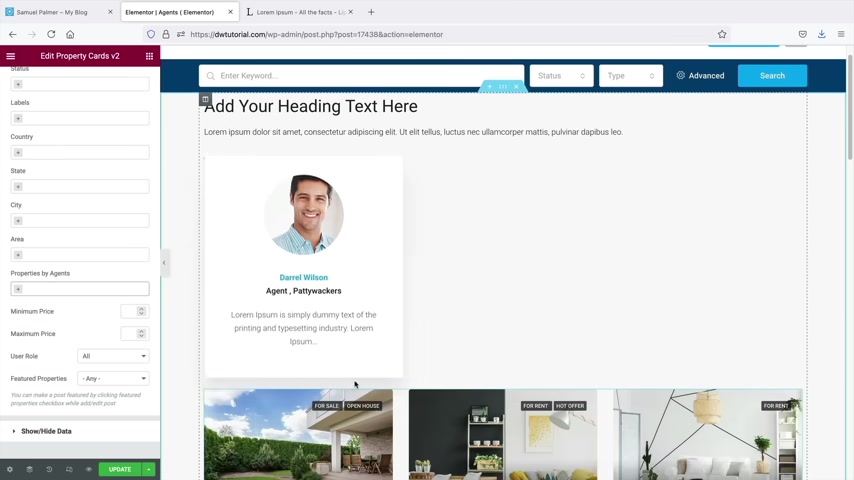
So I'll take that and I'll drag it right there .
And what this is gonna do is that this is going to display all of the listings that you have created .
And then here you can always customize stuff .
So like how many listings do you want to show ?
We can say one , we can say two and just kind of give a better look , you know , of whatever you want to go with .
Here , we have filters now .
So let's say for example , you want to display the houses for rent only .
So here we have status and we have rent .
So basically you're saying , I only want to show the houses that are for rents and then then you can change us obviously to check out our selection of rental properties , right ?
Rental properties to kind of , you know , make people understand that uh these are rentals only .
So you can use the filters to kind of match with whatever text that you're trying to or whatever message that you want users to understand .
So yeah , that's just a quick rundown of how to drag in elements .
Now , I can't really tell you guys uh which ones to use for these houses elements .
These are strictly up to you , but later on once we create listings , this is how you can display them onto various parts of your website .
Also , there's a really cool one here , I'll just right click and delete that .
Now , remember you're not delete , you're not deleting the listings , you're just deleting the actual section .
So don't think that you're del you're deleting your listings , you , you're not doing that .
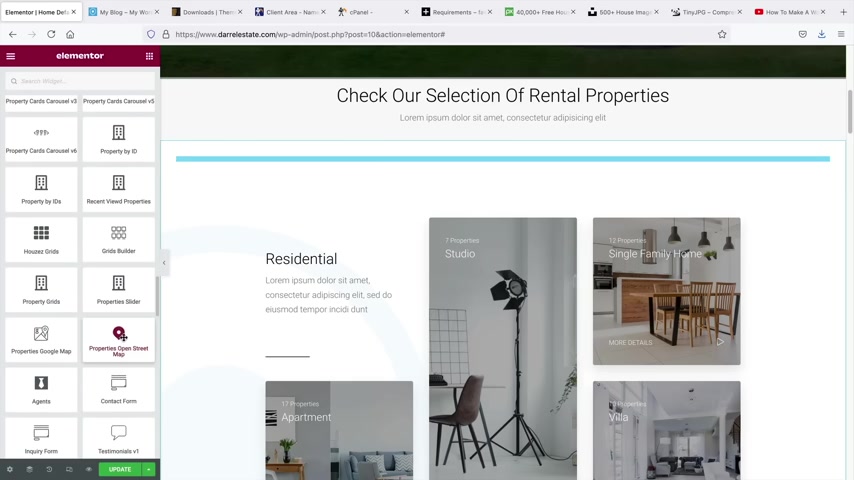
But also we have like um where's this really cool one ?
It's like , like uh here we go the proper open street map so we can take this and drag it they'll change the offset to something like seven .
So what this is going to do is that you can actually display a list of all your properties here and users can click on it and then they can go ahead and access the listings right away .
So this will link them to the actual listing , which is really cool .
And then again , you can use the filters here to show specific properties like for rents .
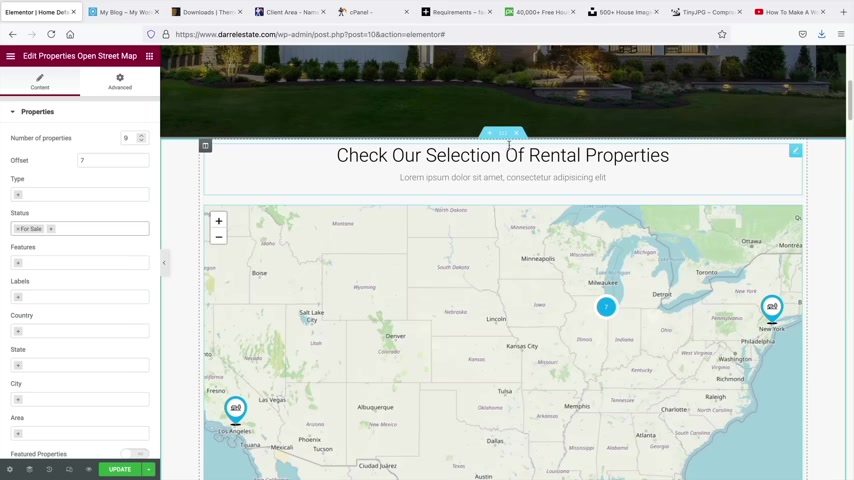
Uh Here we have features status .
Now , we're gonna make all these a little bit later , but uh you'll understand this once we actually kind of make the uh fields later .
So don't worry if you don't understand this section uh too much , we will be creating custom fields in the very next section or actually no in in a few sections .
So , you know , for example , if you want to display only the houses for sale , this will then only display the houses for sale .
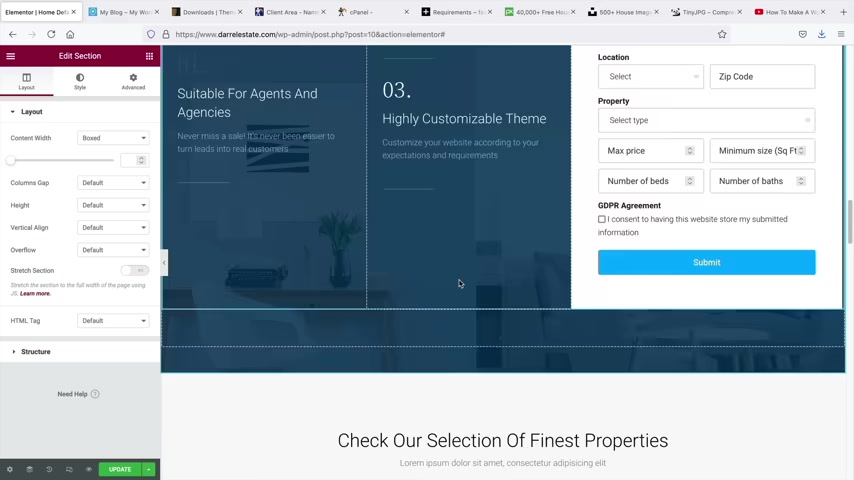
Now , one last thing I want to show you before we move on to the next section is how to add padding .
So you guys might notice that this text is just really too close , you know , to this section .
So whenever you want to adjust padding , click on the elements , go to advanced , click on this little uncheck , whatever .
And you wanna add padding to the top , right ?
So padding is just space .
So like , you know , just , just some space , right ?
I like that a little bit better .
And yeah , I do want to change this , you know , text right here to Poppins , right ?
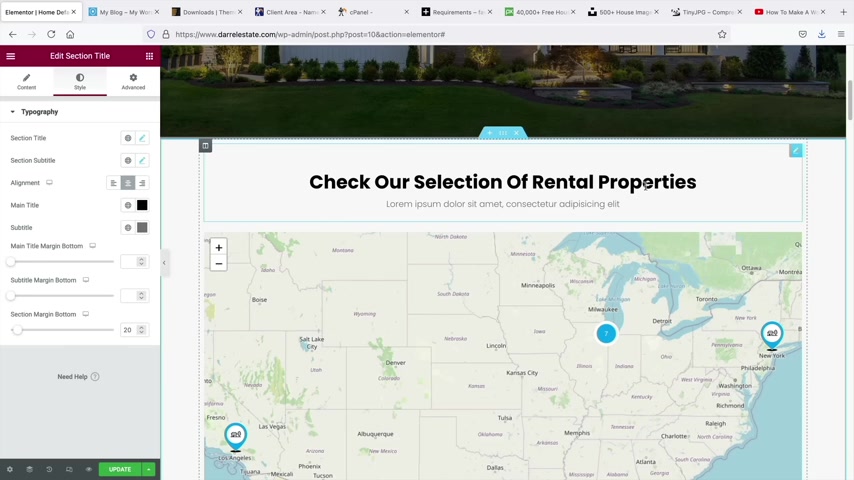
I think Poppins is our go to font at this point right .
Here we go and , and then also change this to Poppins .
Yeah , something like that .
Now also a quick shortcuts as you're building your website is that you can copy and paste the styles of this .
So you want to keep your design consistent , right ?
So right here , I will copy this and for whatever reason , you can go to any of the elements like this one and you can paste that style .
So it'll basically paste the fonts and whatever settings that you have for the topography .
So now you can see here how it changed it to pop in bold .
So really , really simple and then I can move that back to the left .
So yeah , that's how you can copy and paste styles .
All right .
But uh I'm just gonna go ahead and delete this section .
Now , if I , I do want to go back , I can click on this history section and I can actually go back steps .
So let's say , for example , I messed up , didn't look good or I deleted something .
I can keep going back to these steps .
And this will actually kind of revert the website back to whatever uh you know , back to whatever steps that we made .
So you can see here how uh it's going back , it's going back and you know , we can keep going back as far as we edited the page .
So you can see here how uh you can always retrace your steps if you guys did have problems .
So what I'll do is I'll just go ahead and leave this and I will go ahead and click on updates .
So that's just a craft course of the builder guys .
Um You know , on your own time , feel free to practice the builder , feel free to get comfortable .
You can drag in these elements and you can kind of explore them and just kind of mess with the filters and just , you know , see what design works best for you , but that is the element or a page builder in a nutshell .
So making the website , it's pretty simple , you just have to kind of tinker around with the builder , find out , you know , what works and just kind of get comfortable with everything .
Now , before going any further , I do want to talk about some important features and also some things that you might want to look into before going any further .
So you don't make any mistakes .
So let me go ahead and quickly step back here and just kind of introduce some things that you might need to know about going forward .
All right .
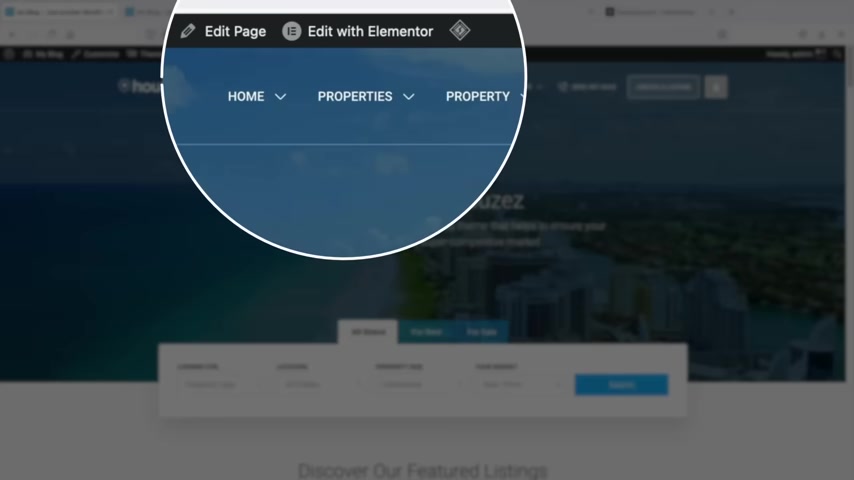
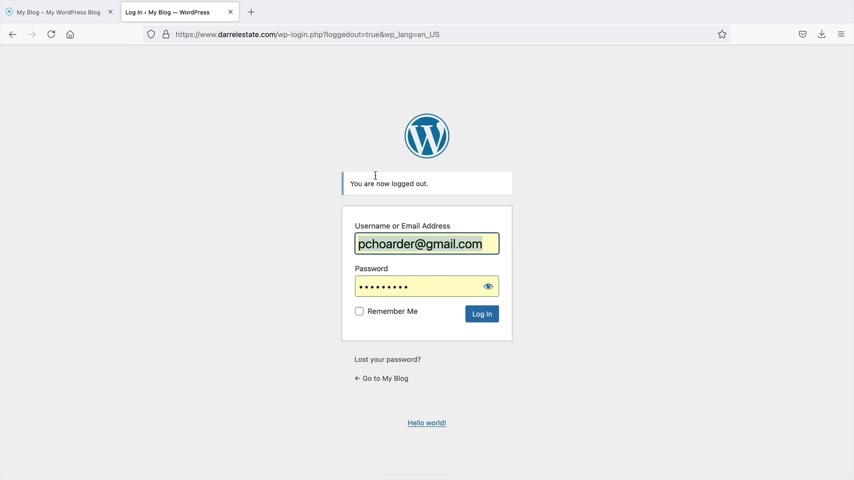
So first let's talk about how to log in and log out of your website .
I didn't really cover that when we kind of just skinned over it now .
Whenever you want to log out of your website over here , you'll click on a log out and this will bring you to your basic , your like your login form .
Now , if I go to my domain right here and just type in the domain , you'll see how it just visits the website and I'm currently logged out .
So this is like the average visitor .
Now , whenever you want to log into your website to make changes or to build stuff , you're gonna type in WP dash admin just like that .
And when you press enter , it'll bring you to your log in page .
And then from here , you'll go ahead and click on login and you'll log into your website using the credentials that it gave you .
So that's how you can log in and log out of your website .
Now , I realize a lot of people watching this might want to use a different template .
You might have made a very big mistake , you might have deleted something on accidents and you kind of need to restart right now .
What I'm gonna do is I'm going to restart my website and then I'm going to import another template to show you that if you want to kind of switch around templates or even if you made a mistake and you want to switch what happens a lot with beginners and amateurs , I'll show you how to do that .
So right here we have plugins and I'll click on add new .
Now , what I'm going to do is I'm going to actually delete this whole website and I'm going to re upload it again just by simply importing demo content .
So under search plugins , we'll type in resets and they do give you a lot of plugins that you can use .
I use this one .
It doesn't really matter which one you use .
They all kind of do the same thing here , but I'll just use WP resets .
Now , once you activate this plug in , I think it's under tools .
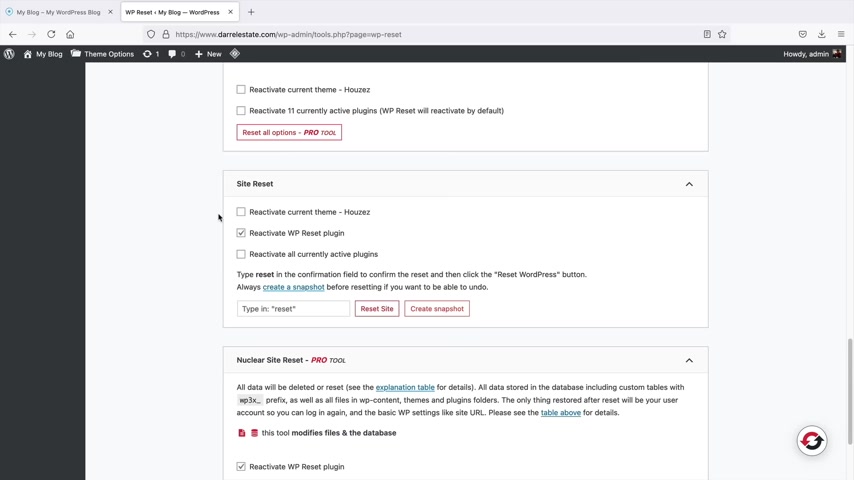
Yeah , under tools you'll go to WP resets and we'll scroll down , scroll down .
And right here it's saying reset website .
Now , before I do this , I just want to let you guys know that this will delete your entire website and start it over again , just like you first installed the wordpress .
So right here , I'll type in resets , reset sites .
And are you sure you want to reset the sites ?
I will say reset , wordpress .
All right .
Now let's go ahead and take a look at our websites and everything is completely gone .
So sad , but not to worry , we can simply reinstall the theme and then import the demo content all over again .
Maybe later if he wants to use a different theme or whatever or I'm sorry , a different layout .
So here's the theme .
It's still activated within our database here .
I'll click on houses and activate .
Now , the one thing that you might need to do is that you might need to reenter the purchase code , which you can find in the uh in customer portal .
All right .
So I activated the theme again and now I'll go through the same process of activating and installing the plugins .
So , uh right here , I'll just click on begin activating plugins .
So the plugins are still installed and if you do want to delete them , you can , but you do need these plugins for the theme to operate .
So right here , I'll click on , activate .
All right , cool and return to the dashboard and you'll click on .
No , thanks .
Now , you might want to reinstall the cashing plug in and you guys can do that on your own time .
But uh what I'm gonna do over here is go to houses and go back to demo import .
Then I will scroll down .
Now , you don't need to say you don't need to change these server configurations because uh that's in our server and that doesn't apply to wordpress .
So you can go ahead and import another demo on your own free time .
But uh I'm just gonna keep this uh demo right here because I'm going to use it throughout the tutorial .
So , um I recommend kind of sticking with me till the end .
And then once you guys are professionals , you guys can use any template that you prefer .
But uh right here , I'll click on import demo .
I'm gonna dismiss this .
These notices are so annoying .
You know , it's like , it's like I don't want to buy it .
You know , I don't want it .
I don't want it .
So here continue in imports and then I'll just go ahead and wait a few minutes while imports the demo contents all over again .
All right .
So the import was complete .
Now , I had to actually install the cashing plug in and purge my cash because it was just failing .
But after I purged my cash , it worked with no problem .
So right here , let's click on visit site and hopefully everything went good .
You know , sometimes weird stuff happens when you import of your websites and it looks like everything loaded .
Perfect .
All right .
Awesome .
So , so that's how you guys can kind of reset your website .
If you're having problems , you can , you know , reset it and then switch to another templates or if you deleted pages that you need , you can always do that to restore all the pages that you might have accidentally deleted .
So now that we know how to use the page builder , let's now add your agency to the real estate websites , right ?
So I'm sure you have , you know , a property , uh a company name or a real estate agent name .
Let's now add it to our website .
So first let's go to our dashboard .
Now for the remainder of this tutorial , I will be using my demo websites as well to help you guys follow along in this video , but uh right here you'll click on , I'm sorry , you'll hover over real estate and then you'll see this agency tab .
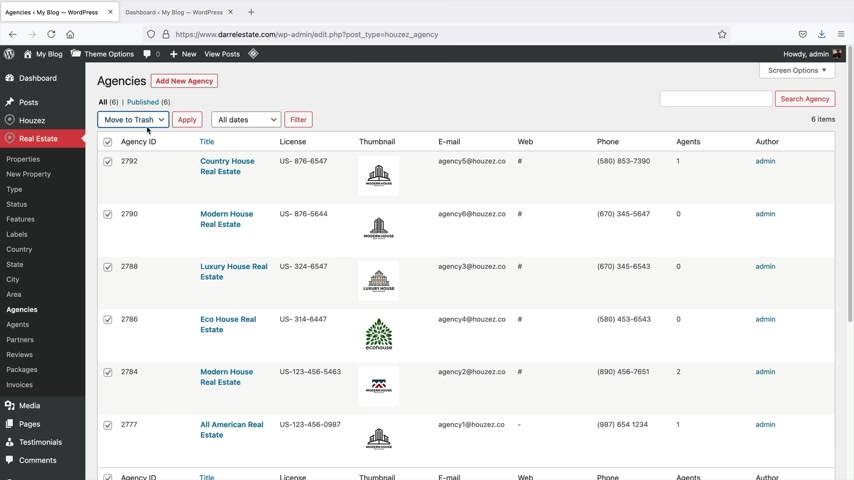
So the first thing we have to do obviously is we have to add our agency .
Now , this is your company .
So for example , we have the title of the company , the license , the image , which is the logo , the email , the websites and the phone number .
Now , these are all of the demo agencies that they have created .
So you might want to delete these .
So if you do want to delete these , you can click on this little tab right here and then just go to move to trash and then click on apply .
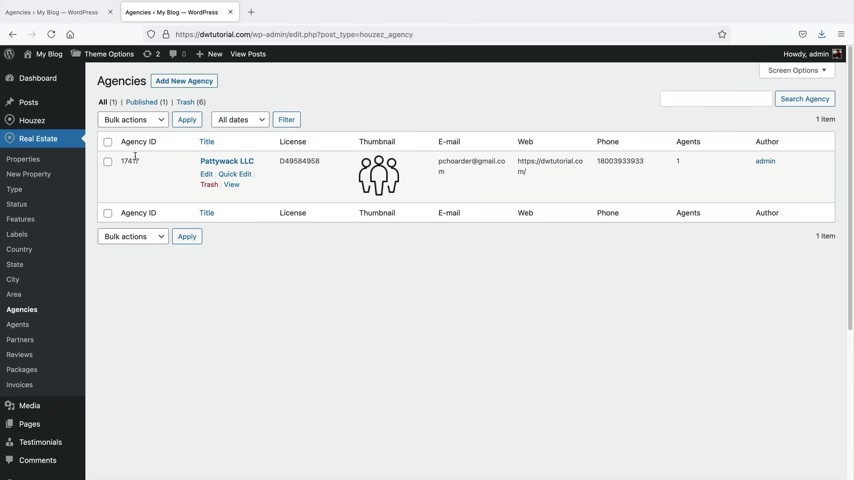
Now , once you do that , I'll go to my other website here and I'll just show you how it'll look right here .
So here's my agencies .
Now , you should probably only have one right now .
If you are a large corporate entity , you might have a lot of sub agencies , right ?
So if you're like Colliers or if you're remax , you might have a bunch of smaller agencies that work under you .
But uh for this instance , I'll go ahead and delete my patty whackers .
We'll remake it .
Don't worry .
And I'm gonna go ahead and add an agency .
So to add your company , click on add new agency .
Now , this is important because later on we're gonna add agents and listings and we want to know basically who those agents belong to and who do the listings belong to .
So that's why we're adding an agency .
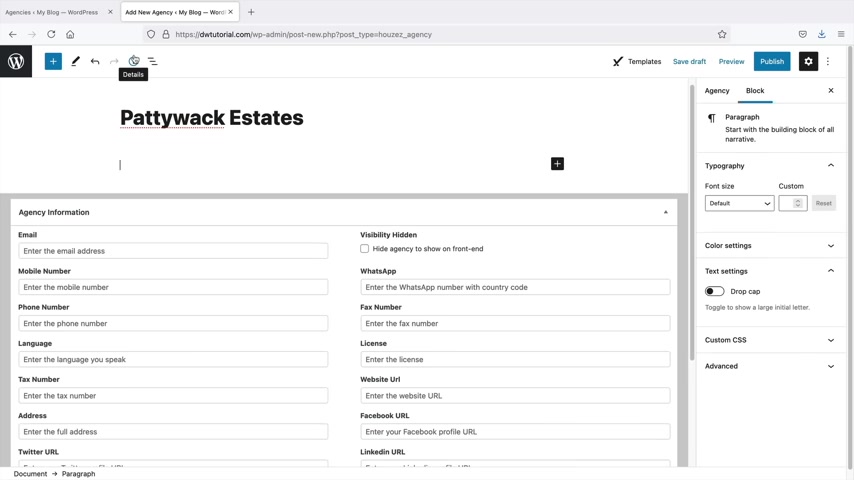
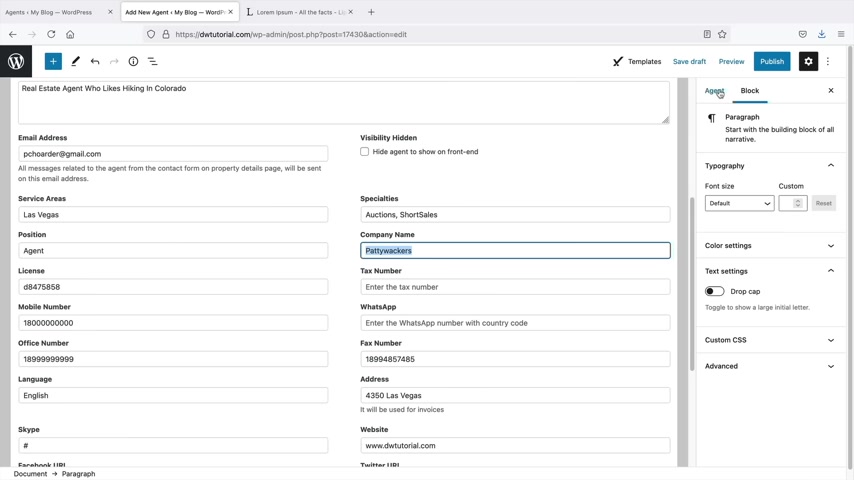
So go ahead and put the listing of your agency or the , I'm sorry , the , the name of your agency here , I'll do Patty Whackers , our Patty Whack estates , Patty Wack Estates right now .
This is where you're gonna put some general information about your company .
So this is like , you know , just the , just the general description about your company .
So what I'll do is I'll grab some demo text .
Uh I'll go ahead and paste that in there and then you're gonna fill in your agency information .
So you're gonna put in your email , your phone number and just put as much information in here as you can .
And once you do that , it'll apply on your um you know , on your agency .
So I'm gonna quickly go ahead and fill in some of this agency information , just fill out as much information as you feel comfortable with or the information that you have available .
All right .
So I went ahead and I filled out some of my information right here .
And next , what I want you to do is click on this agency little tab right here and this is the featured image .
So this is essentially where your logo is gonna go .
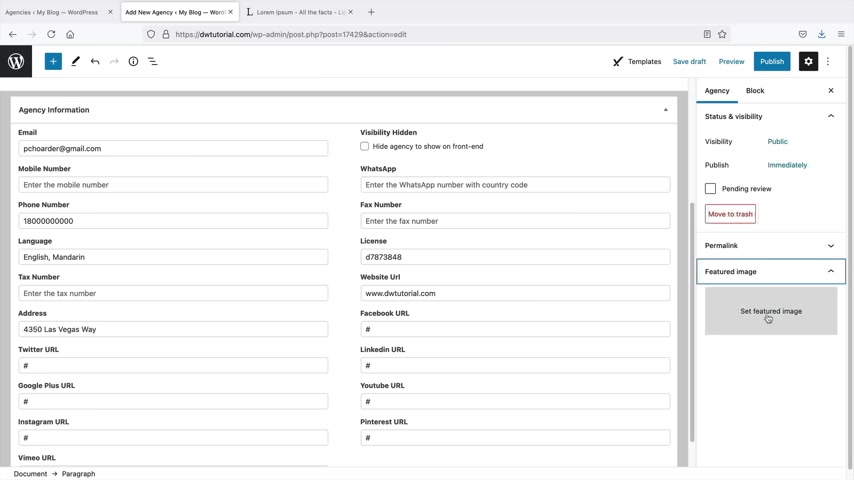
So if you have a logo or something that represents your business , you can go ahead and set that as your featured image .
So I will click on this and I'll go ahead and just grab this one here .
It looks like a poke ball , right ?
Something like that .
They say doughnut chart , but whatever and yeah , that's pretty much it .
So we are now creating our agency .
So once you're done filling out all this information , you'll click on publish and publish .
All right .
Awesome .
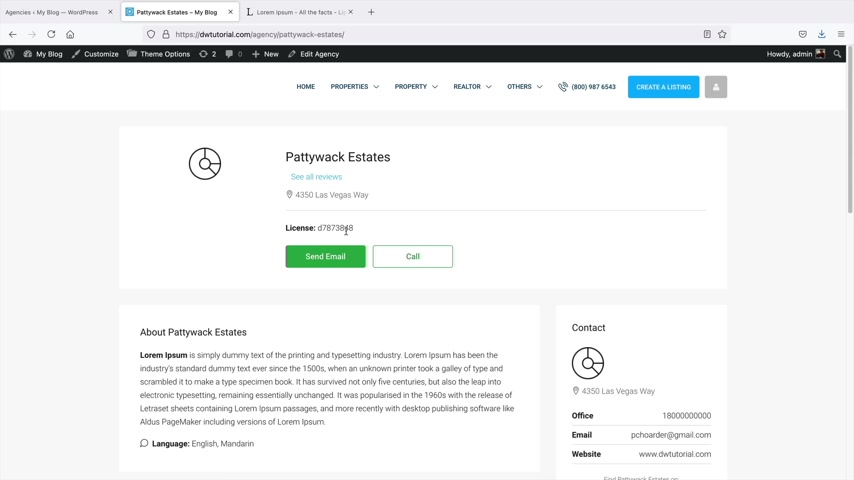
Now if you want to view your agency , you can click on this view agency tab right here .
All right .
So we have Patti estates .
We have the address , we have our license and then we have the contact information and then just some general description about the agency as well .
We have the languages that we speak and just some description .
Now we can edit this page and we will talk more about that in the theme option settings .
But for right now , let's just stick with the basics .
So that's how we can create a brokerage or agency .
Now , let's talk about , well , ok .
We have an agency now who works there , you know , do we have agents ?
So let's now add some agents to our real estate website where users can send you emails .
And if they have questions , they can send uh any information uh that they might want to you directly or your agents .
So let's go back over here to dashboard and over real estate .
We'll go to two agents .
So here I just have one .
Obviously .
Now you might have the demo contents which over here , we have agents .
So this is what it would look like if you had various agents .
So you have a bunch of people , you have their email , uh , their websites preferably , or I don't know if they're working for you , but , uh , if they're a freelance or your partner , whatever , you know , you'd want to put their website , uh , right there .
Now again , what I'll do is I'll go ahead and delete this .
So I will delete everything and start from scratch with you all .
I obviously already made some demo contents , right ?
So let's add a new agent .
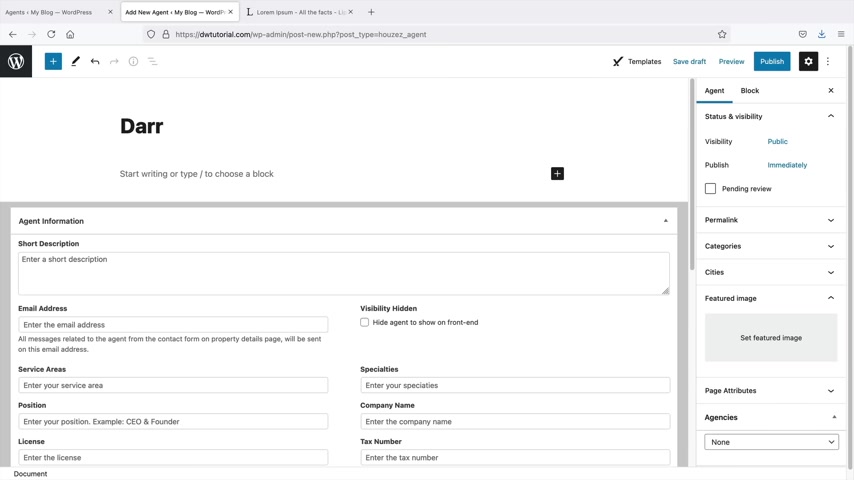
So right here , click on , add new .
So who works for you ?
And who is this person ?
Well , let's do Darrell Wilson .
Now , this is the general description about the actual person .
So you can talk about your credentials , you can talk about your story .
Uh Again , I'm just gonna copy this and here we go .
So , you know , this can be whatever story that you want to talk about .
Short description .
This is for the blog .
So just keep this very brief saying , you know , a real estate agent grew up in uh Colorado and I like to go hiking , right ?
You know , real estate agents , real estate agents who likes hiking .
No , not hiding hiking in Colorado , right ?
Or something like that ?
I don't know .
Did I spell that wrong Colorado ?
OK .
And then this is where we're gonna put all your information again .
So your email address your service areas .
So you might wanna say who or what area you service .
I mean , you know , sometimes if you're in Las Vegas , people want to say , oh , do you uh do you work in Reno ?
It's like , no , it's kind of far from Las Vegas .
So you might wanna put your service areas , your position and all this general description about your agent or even yourself if you are creating an agent for yourself .
So I'll go ahead and fill out this information really quick .
All right .
So I went ahead and I put in some information , you know , I put my specialty .
So you know , I do auctions and short sales .
Uh This is the company name I work with and all of this good info .
Now again , right here under agents , you'll click on agents and you'd want to select your featured image as the actual agent .
So right here , click on set , featured image and I'll just grab one , you know , to represent Darrell Wilson .
It was uh one of these one of these white dudes right here .
There's a few of them .
Yeah , just , you know , put a picture of your agent or your company .
I'll use this guy right here .
Set featured image actually .
No , I don't want that one .
No , I don't want it .
Let's do another one .
I kind of want a smaller one .
You don't want to have a really large image because then it kind of stretches the page but I think that's all we get here .
Yeah , that , that's good .
That's good .
Just a , just a small one like that .
I do like that .
Now , also , if you scroll down on this right tab , we're gonna see agencies now here we can assign the agent to the Patti Wack estates .
So this is why you'd want to create your agency first because then people can find agents a little bit more easier and once you're done with that , you'll click on publish and publish .
All right , cool .
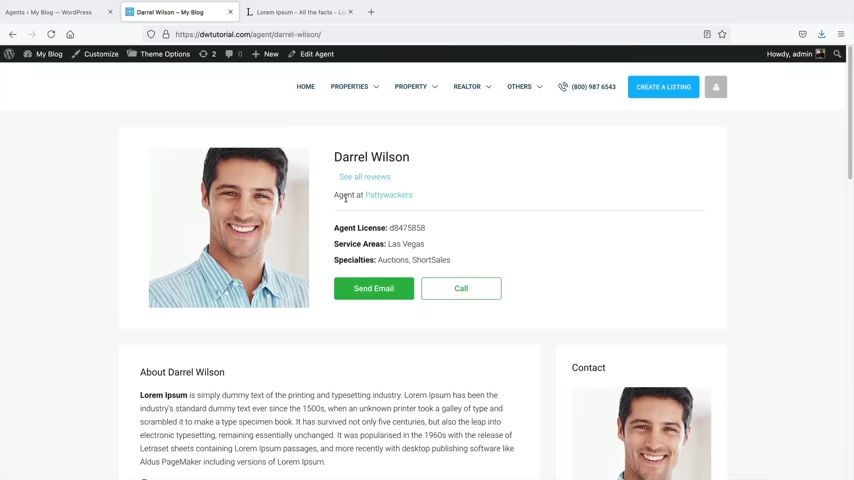
Let's take a look at the agent now .
So right here , I'll click on view agents and here we go .
We got Darrell Wilson , we got the picture of me agent at Patty Whackers .
So this will link back to the agency .
We have some general information , the contact information and all of this cool stuff .
So yeah , that's how you can add agents to your real estate websites .
All right .
So now that we've created our real estate agency and agents , now let's create pages for them and apply them to the menu .
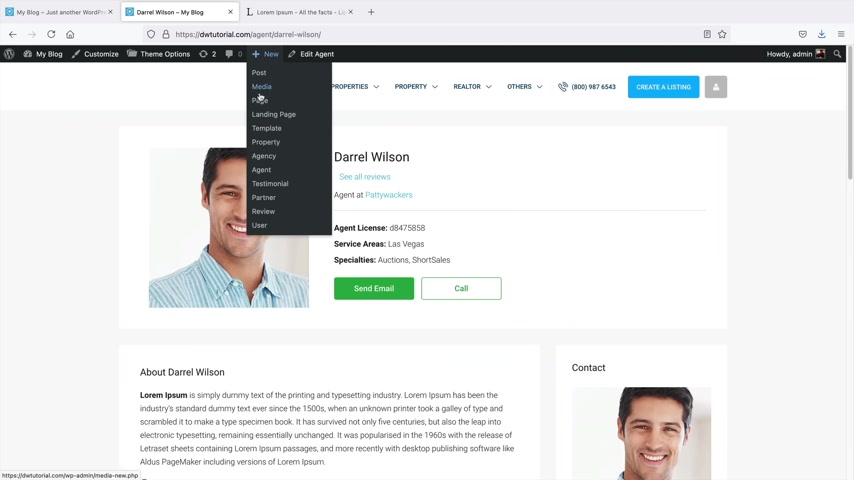
So up here we have plus new and you can see here how we have page , right ?
So I'll do that .
I'll click on plus new and page .
You can also access , you know , plus new page in the back end as well .
And these are going to be the companies , right ?
Or our agents , you know , our agency .
So this is actually like my business now .
If you have multiple businesses , they will be displayed on this page .
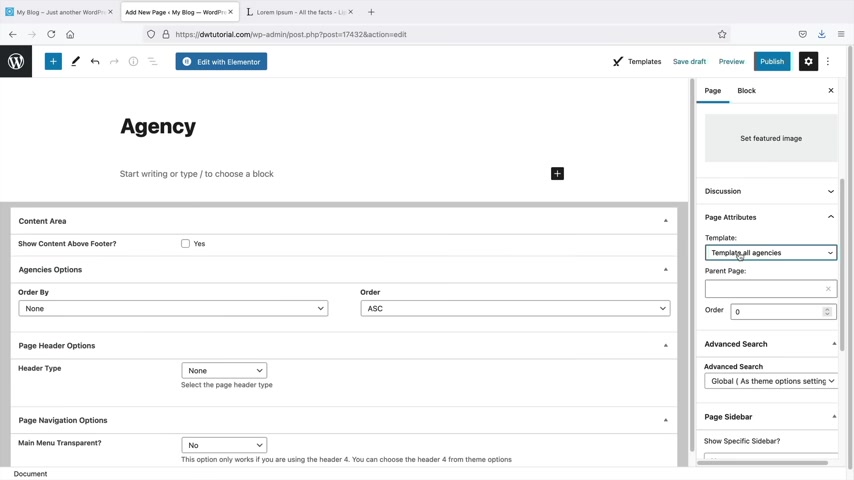
So for example , uh what I'll do here is I'll scroll down and here we have the page attributes .
Now you'll notice here how we have a template .
Now , the template essentially is going to apply to whatever you select here .
So for example , if we select like the template listing grid that will display there or any of these templates , now remember you can always rebuild the pages from scratch using the page builder if you choose to do that .
But for now , let's just keep this basic and just stay on , on on focus here .
It's very easy to get uh uh derailed in this wordpress theme .
So what I wanna do is I want to select the actual uh agencies .
So template all agencies , right ?
And we have some other options here , like you know the header , the footer , we can adjust some other small settings .
Um Yeah , you guys can adjust these to your liking .
And once I select the template , all agencies , I'll click on , publish and publish .
Now let's take a look at the page .
So view page and here we go .
So we have the agencies .
So all the agencies that you created will be displayed right here .
It is so much of a bland way to , you know , to promote your , your uh agency .
You can always remake it from scratch using the builder which might look a little bit better .

But from this section , you can actually click on view listings and then it'll show all the listings for that agency and it's also connected with your agents as well right here .
So you can see here how everything kind of connects all together .
So it makes it easier for your um your agents or your customers to navigate throughout your website .
So next , let's make a page for our agents right here under plus new , we'll click on page .
Now , this is gonna be the same process .
We can , you know , put agents here and under the templates , we will then go ahead and find the template , all agents .
Now , for the agents , you guys can actually use mentor and rebuild the whole page from scratch if you choose to do that .
But for now , let's just go ahead and just click on publish and publish and then you'll get what I'm saying as we progress .
So over here , I'll click on view page .
So now you'll see all of the agents right here that are listed .
So we have the agents we have who they work with and we can also view their listings .
So if this agent has created specific listings , they will all be displayed right here under listings .
And if you guys do need , you guys can go ahead and check out the demo content right here just to get an example .
So for the agents , you will see that uh if I click on view listings .
Uh It will then show a list of the listings that that agent has uh posted .
So that's how you can basically display agents on your website .
Now , there is one small thing that I do want to mention .
You guys can create a custom page with your agents if you choose to do that by using the elements or page builder .
So for example , just like we did before over here , I'll do plus page .
So this theme does have modules for the agents .
So I'll just put like agents and then I'll put element or just to kind of help you guys understand that you don't have to follow me here .
But if you do decide to build a page from scratch , you guys will have more customization this way .
So I'll just do agents element or I will select elements are full with , I'll click on publish and then I'll click on edit with element to .
So for example , here I will type in agents and here we have agents and I can kind of drag and drop this and I have a little bit more customization here .
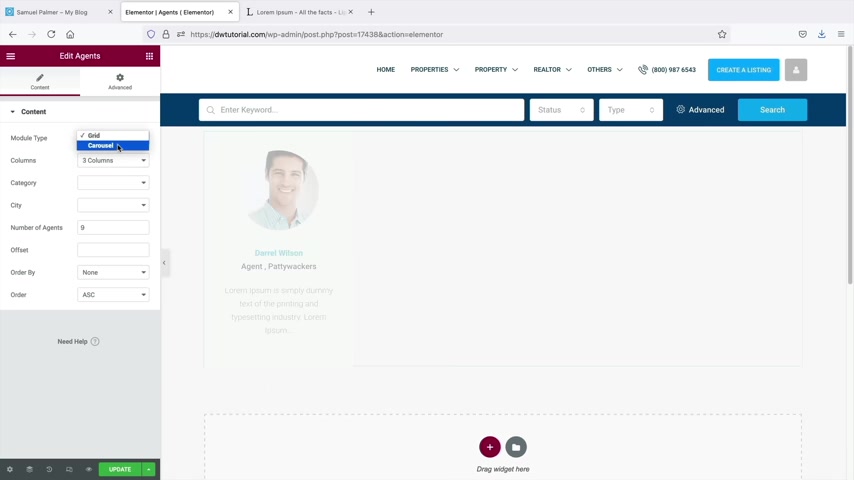
So now a list of agents will be displayed , I can choose the amount of columns .
So if we have a lot , we can choose like a four column , uh four column row .
Right now , it's just under three .
We also have the grid and the carousel style .
So if that's something that you want to do .
Um you can build out your agent page from scratch and then like before we can just drag in elements here , you know , we can add in some contents and you know , uh if you do want , you can put listings right here .
So I'll just put listings to make things easier , list listing , right ?
Or let's see here .
Uh maybe just uh properties .
I think property is the way to go .
Properties .
Yeah , here we go , properties , whatever .
And then there we go , I'll just display some properties and then for the filters , uh we can just go ahead and adjust these to however you want to display them .
And then here we have properties by agents .
So basically , uh if you have like just a few agents , you can just say only I want the properties that are created by Darrell Wilson .
Now , since I have not made any , uh it will display nothing but that's how you can kind of create your agency page from scratch .
If you decide to go that route , it's just an option .
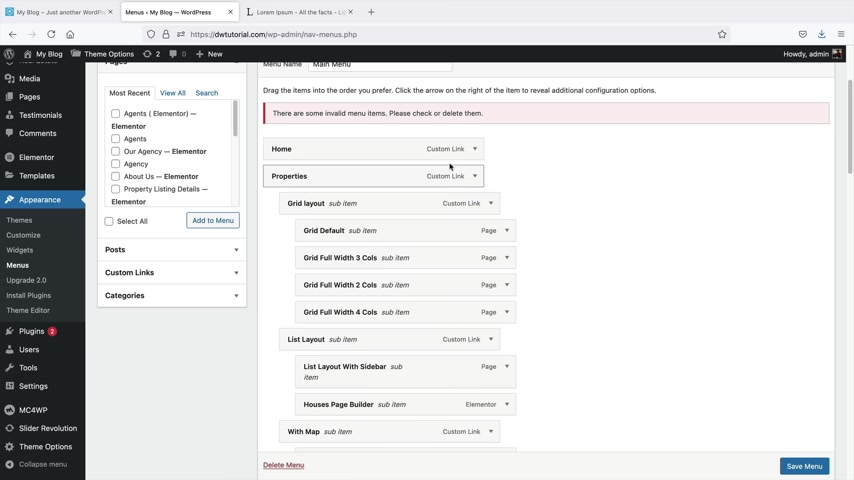
Now , let's talk about the menu .
So you guys have seen how we have this menu at the top .
It's filled with a lot of demo contents and a lot of the stuff just doesn't really apply to us .
So let's now take these pages and apply it to our menu .
So let's go back over here , I'll first click on view the page , right ?
So we don't really need again any of these pages just because um you know , they are nice , but um I don't want them on the menu now for these demo pages .
If you take them off the menu , it does not delete them .
OK ?
So let's just make that very clear .
So let's just go ahead and show you here .
Let's go to dashboard .
And the first thing that we're gonna do is we're gonna create a custom menu .
So right here we have appearance and we also have menus .
Now , the theme has actually created a default main menu for us .
So here we have the main menu right now , the main menu will be displayed at the top of the page right here .
So this is the current main menu .
Now , I'm gonna go ahead and delete all this because you know , we just don't need it , right .
So to delete these pages right here , these are all custom links .
It's gonna take a while , but just uh click on one of these and then remove it , click on one of these , remove it , click on these , remove it .
So go ahead and just go through the process of getting rid of all this demo contents .
Uh There's probably like 30 pages right here they've added .
So yeah .
So what you guys could have done as well is you can just delete the menu at the bottom .
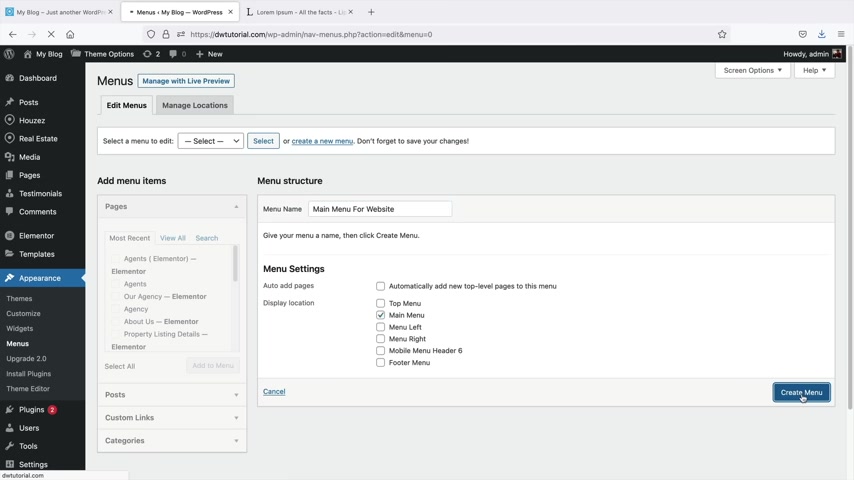
So just make sure you select the primary menu and then click on delete menu and then just click on .
OK ?
And it will delete your primary menu .
Not to worry , we'll make a new menu all over again .
So right here you'll see this , create a new menu .
So let's click on , create a new menu .
And now since I deleted my main menu , I wanna create a new one .
So this is my main menu , right ?
Main menu for websites and I'll click on , create a menu .
So on the left side right here , we have pages .
Now , you can see here how we have the pages that we created earlier , but I'll click on view all .
Now , these are all the pages that are listed on your website .
Now , we do have a lot of pages and these are the pages that were created by default when we imported the demo content .
Now you can delete these pages at any time if you want to do that .
Um I'll do that in the very next section .
But let me just show you guys how to apply these pages to your menu .
So first we have the homepage default .
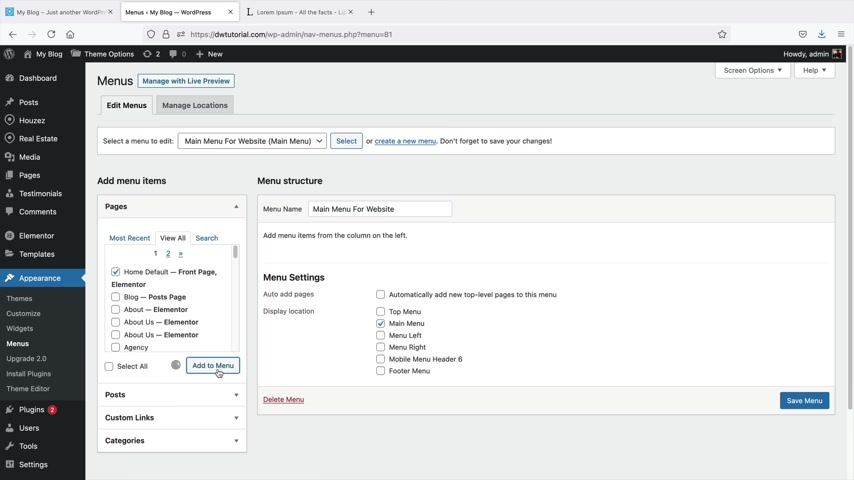
So here I want to add that to the menu , right ?
And next we have the about , I'll add to the menu .
Remember earlier how we created the agents element or I will add that one to the menu and also just the normal agents .
I'll add this to the menu and anything else that you want to add , we can do that So here they have the listing grids and not to worry , we can delete all these and just make one from scratch .
So if that's something that you want to do , we can do that .
But um I'll just go ahead and just say uh all right , for now , this is what I want on my menu .
That's a nothing more .
So , what I'll do is on the bottom right here .
I'll click on save menu .
All right , cool .
So now let's go ahead and take a look at our website .
So right here we have visit site and cool .
So now we just have the home default , right ?
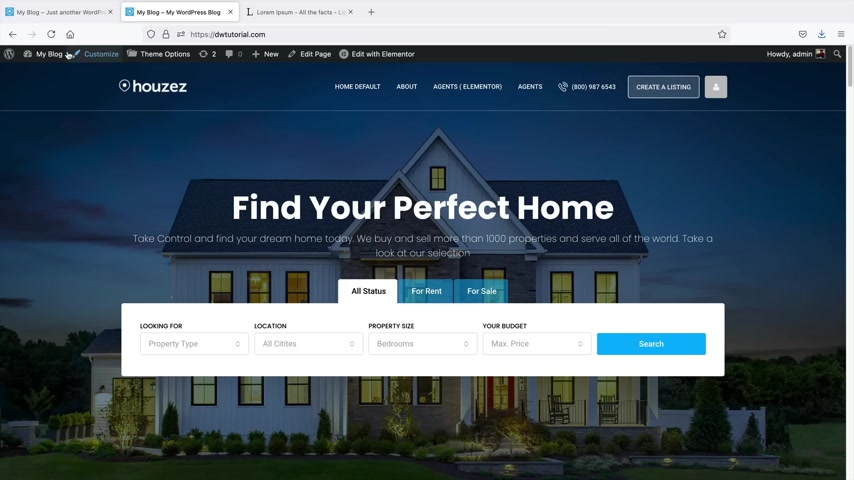
The about us page , the agents element and the a the other agents page .
So this is how you can create pages from scratch and then apply them to the menu .
And if we click on this , like the About us page , it'll take them to the about us page .
The agents will take us to the elementary page that we created .
The one that kind of looks bad , right ?
So this is the page that we were making , right ?
It looks kind of bad .
But yeah , you can , you know , edit the builder and then design this page .
And then also we have just the agents page and this is the default theme page .
So you can use either one , you know , you can make your page or you can use the default theme .
It's really up to you .
It's your preference .
Now , also , you might notice how we have agents element mentor and this doesn't look good also with home default because this is the actual name of the page .
So let me just quickly show you how you can change the name of the page without changing the Perma link and breaking your site and stuff like that .
So right here , I'll go to dashboard and appearance and menus .

And if I click on this little tab , I can actually just change the name of it .
So this is the home page , right ?
And then this is the agents page .
And yeah , that's how we can adjust the menu , but I do want to delete this one .
So I'll just remove this and I'll save that .
So now we just have three pages on our current website and we can click on new sites and now we can see how this has reflected on our website .
So , pretty cool .
Hey guys , real quick .
I just wanna let you guys know not to delete your pages .
Uh We will need a lot of these pages throughout the video and if you guys do delete them , you guys might get into a lot of errors uh because we need some of these pages and we will talk more about page templates and why you need specific pages a little bit later in the video .
But for right now , I'm just demonstrating how to delete them , but uh please don't because then you might get it hairs and yeah , so let's go ahead and go back to the video .
So now let's talk about deleting all those pages that we don't need .
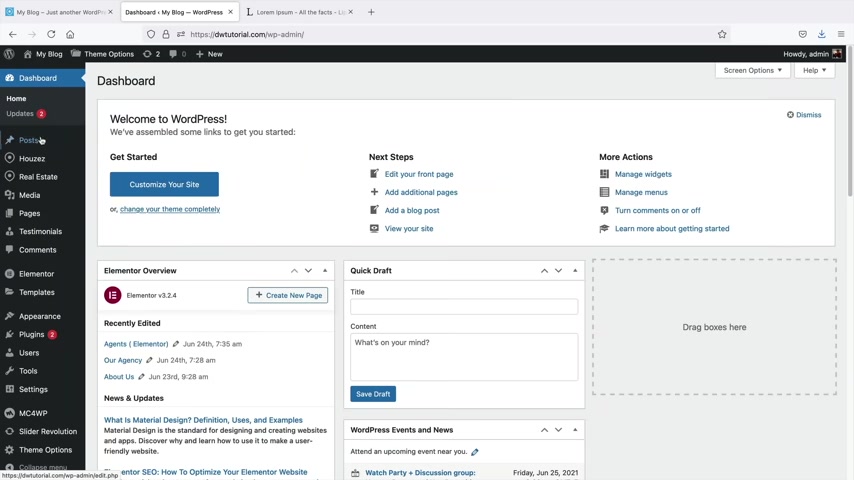
And there are a lot of pages that you have that you simply don't need .
So over here under pages , we'll go to all pages and the fastest way to do this in bulk is simply just going ahead and clicking on this right here , just like we did before and deleting all these pages .
Now , you might not want to delete the pages that you got rid of and or that you apply to the menu .
So I think it's this one , these two are the same .
So we'll find out we'll find out which one is which and all these pages I simply don't need .
So right here , I'll click on , move to trash and apply .
All right , cool .
So at this point , all of the pages have been deleted .
So now we're ready to move on to the next section .
Let's now add a listing page and then let's create a listing .
So right here under a new , this will be properties , so properties and for the actual templates , we can select specific templates .
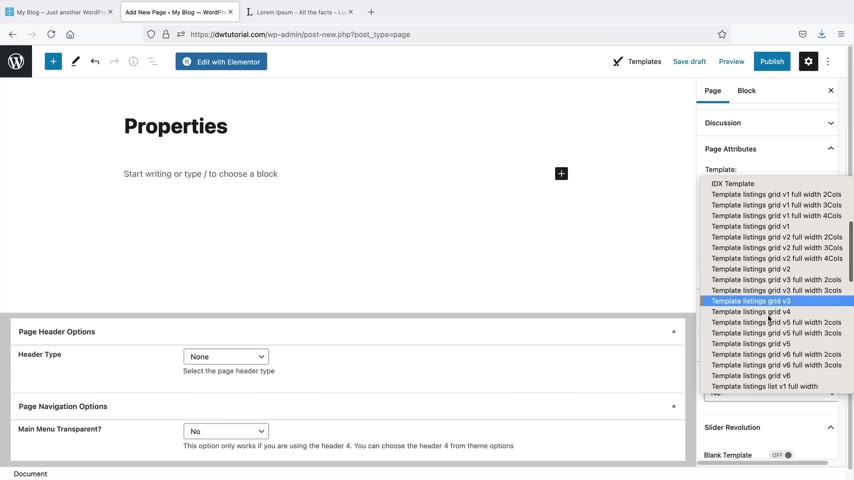
So , you know , you guys can pick one , it's up to you a template listing grid , uh three columns or you know , there's a lot of different listings .
Uh What you guys can pick , you guys did see those earlier .
So at any time you can adjust this .
So I'll just do like three columns , you know , listing grid with three columns .
There are some more options here .
So you can actually add in specific features or um categories .
But um not to worry , we're just going to go ahead and select all of them .
So now we can go ahead and select the template listing .
So I'll just go ahead and just do the listing grid .
I don't know version two with four columns .
And once that's done , I'll click on publish and then publish .
All right .
And let's take a look at this page .
So click on view page .
So now you can see a list of all the properties and here you can just take a look now on your own free time .
Feel free to use any of these uh templates that you want .
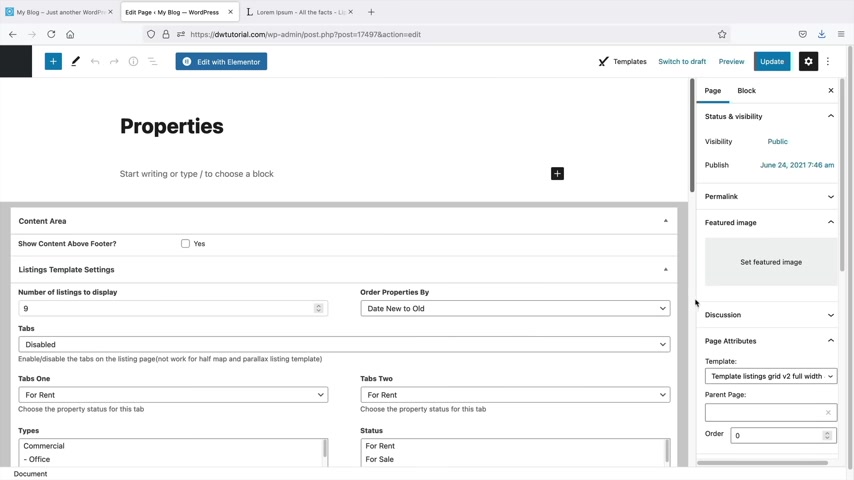
So to change the style of it , you guys can simply go ahead and use the templates and then change that to your liking .
So yeah , feel free to use this page and apply any template that you want to kind of get a look and feel because remember when users go to your website and they click on search , um the template that you select will be this specific page .
So if you want the map or you don't want the map or you want the listing grid , um The search engine will take them to uh whatever template that you select here OK .
So I'll just select this one and click on update and let's view the page one more time .
All right , cool .
So here's a list of our properties and yeah , we can also get rid of this sidebar by selecting the full width template as well .
So if you do not want a sidebar uh over here under edits , you can select the full width and that will basically make it full width .
So it gets rid of the sidebar .
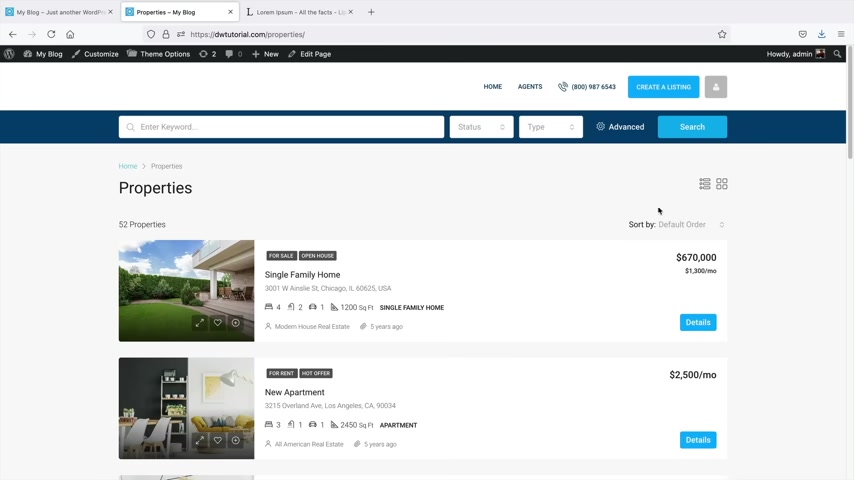
If you choose to uh get rid of the sidebar or you don't want it on your website like that .
And just remember , your users always have the option to go back to various other grids and styles uh if they choose to do that .
So not that we actually created our listing page , we also need to create the search results page .
So in the next section , we're gonna make listings , right ?
But uh let's say , for example , someone clicks on the search button and they want to navigate throughout your website .
We haven't created a page and applied it as our search results page .
So it's really simple right here .
We'll go to plus new and page and just like earlier , how we created a page for agents , how we created a page for our listings .
We're now gonna create a page for our search results .
So this would be something like search results and then under the template , we will go ahead and select the search results .
So it's , it's in here somewhere .
Here we go .
Uh Let's see here .
It's search results , help me find it guys , whereas it's here we go , search results .
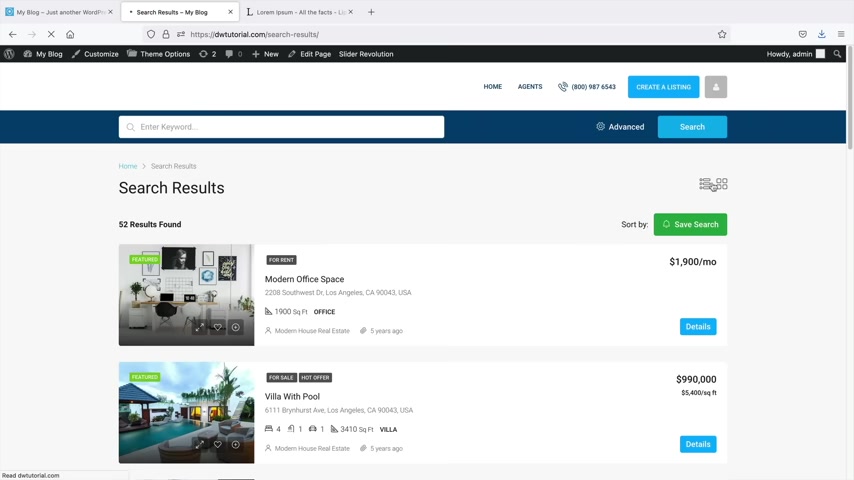
And remember later on when we create the personal custom dashboard , it's gonna be the same thing , right ?
We're just gonna select the templates for the personal uh you know , for the , the personal custom dashboard .
So this is how you can apply the templates to the pages that you create .
So right here , I'll click on publish and publish .
Now if you view the page right here , um it's going to have a search results and this is for your search bar .
So for example , if I click on home and here , let's say the user looks for something like you know , office or whatever and we click on search , it will then bring up these search results and you can see how this is the search results page .
So that's pretty cool .
Hey , congrats on making it this far .
So let's have a quick recap of what we've done so far .
So I've showed you guys how to get your domain set up .
We have imported the demo contents .
We've showed you how to , you know , create agents , how to create pages , assign them to the menu .
Also use the page builder element or so in this next section , I'll be showing you all how to actually uh create listings , which is like the actual property itself .
But before we do that , we need to create categories .
So let's go ahead and jump back to the video .
Next , let's talk about listings .
So now this is gonna be the most important part is creating listings .
So get your thinking caps on and let's create some listings .
So let's go over here to dashboard and on the left side , right here , you're gonna see real estate and you're gonna see all of these special features like type status features , labels , country states and so on and so forth .
So let's just click on properties .
So whenever you create a property , they will be displayed right here .
And these are just some categories .
So we have city type status , price , property ID , and then featured and all this other stuff .
And then from here , you can kind of get an idea .
So um for example , we have the image right , what city it's in the type and so on and so forth .
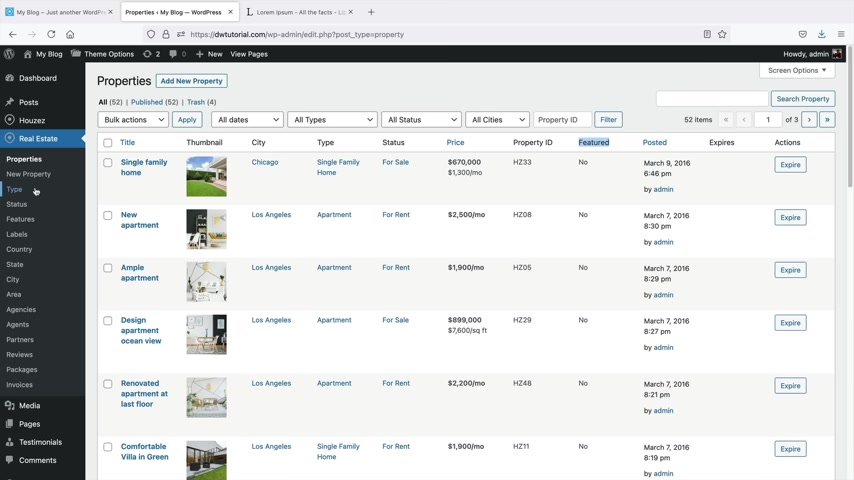
Now these options at the top are all available right here .
So for example , let's just go ahead and click on uh type .
So here we have commercial office shop , residential , apartment condo .
Now , one thing to note here is that these are the main categories and these are sub categories .
So we have uh office and then we also have shop .
OK .
So I just want to make that very clear that these are um categories and also sub categories .
So let's say you want to make your own .
Right .
Let's just go ahead and just start from scratch here .
So , what I'll do is I'll click on this and I'll delete these because these are all created by default .
Now , you are more than welcome to actually keep these .
In fact , these might actually be very helpful to you .
But if you want to create your own , let's do that .
So over here , I will delete these and here we go .
So right here I'll type in apartments and this is just not , this is not a um this is a main category .

So we're just gonna have apartments , right ?
And I'll scroll down and I'll type in or I'll click on add new type .
All right .
So we have apartment also , let's say you are selling real estate .
So right here , I'll put houses and click on add new type .
So let's say for example , you want to add a sub category for houses for one story house or two story house .
Now , you can see here on the demo contents , they just chose to put residential and then apartments and condo .
Now it's really up to you uh how detailed you wanna get .
So this , this would be kind of , this would take time for you to think about actually because for commercial , they have office and they have shop for residential , they have apartment condo , home , single studio , Vila , it again , it just depends on , you know how you wanna approach your website .
But I'll just give you a , a basic , a basic example here .
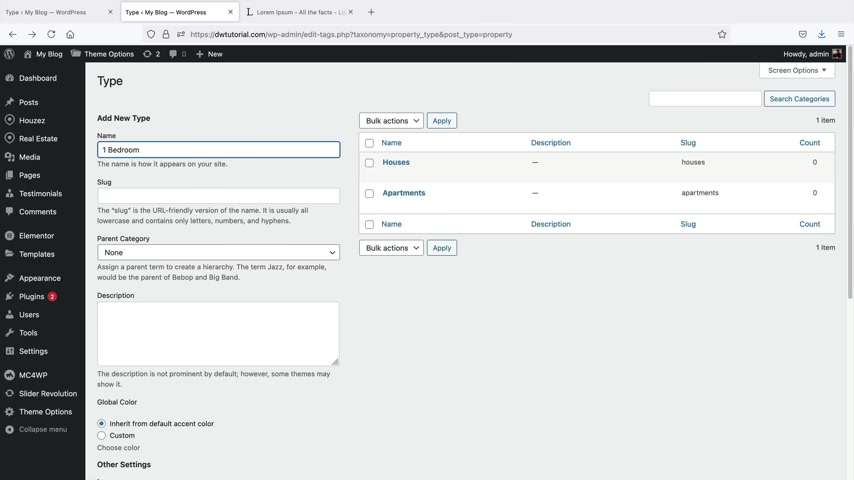
So for houses , I'll just do one bedroom or I'm sorry for a category .
So for the apartments , I'll just say one bedroom , right .
That's it , one bedroom .
And also for the apartments , I'll put two bedroom , you know , two bedroom , you know .
So essentially what I'm doing here is I'm just creating subcategories for the a parent category .
Now , we can do the same thing for uh houses , you know , or you can do kind of what the demo did was just put residential and then put homes , single , multi studio vila .
Again , it really just depends on how you want to approach your real estate website .
But for the houses , I'll put like a , a one story house , one story and here I will select houses and add a new type and I will do one more for a two story house and add a new type .
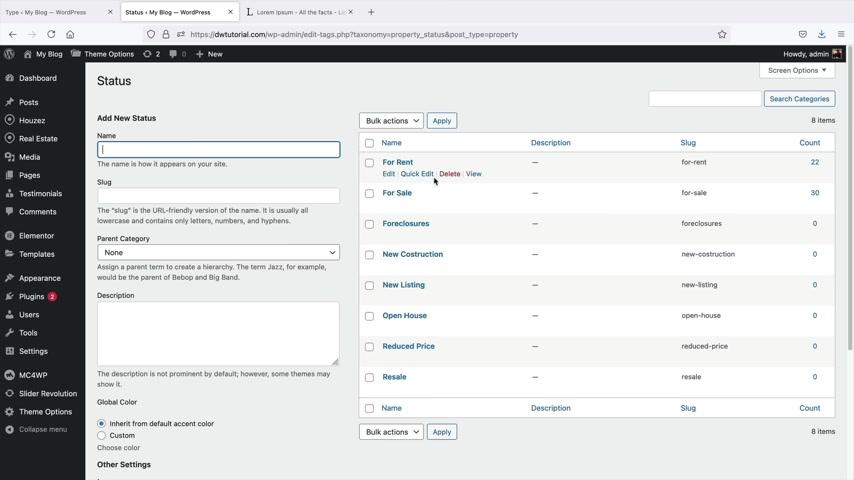
You know , if , if you are an agent out there and this isn't how you do it .
Sorry , I just , I don't know what , how people search , you know , but uh this is just a good demonstration of that .
So , uh yeah , so now that we've actually created some types , we can go back over here and there's also status .
So for example , we have for rent for sale for closures and you can go ahead and list a status and I'm just gonna leave this .
Actually , I think that this is very good , you know , for rent for sale rights or you know , auction or something like that .
So you can go ahead and list the status of the specific house .
And here we have features .
So features are actually cool .
You know , here you can add air conditioning , barbecue dryer .
So if you are a um you know , if you're an apartment , you can list all of the uh properties or the features .
If this is a house , you can put something like the pool .
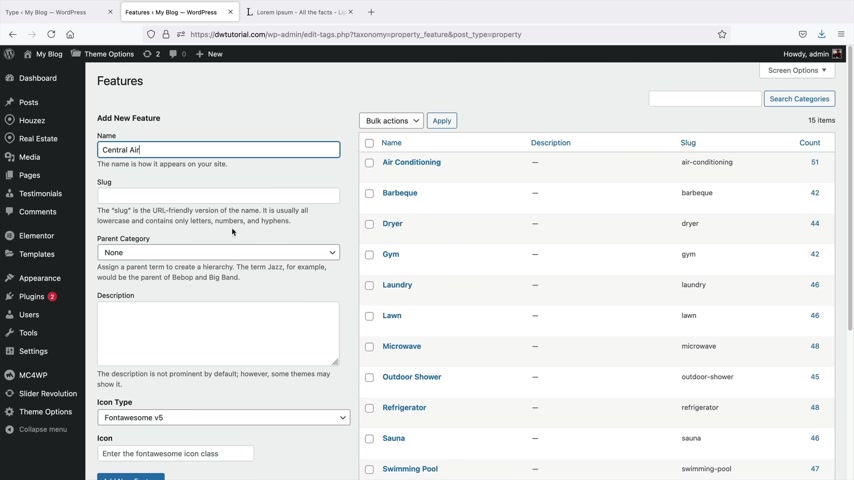
Uh We have a big yard , uh we have central air conditioning , something that relates to whatever you want to talk about .
So for example , I'll just put pool , I don't think there's a pool available oh swimming pool , but also we will do central air and we don't really need to apply it as a uh subcategory .
So I'll just add that new feature , right ?
And we can always add these to the listings later .
Let's go back over here .
So we have done status features and then next we have labels .
So labels is essentially kind of where um let's go back over here .
I'll give you a good example of where this will appear .
So here we're back to our demo websites and on the right side , you're gonna see hot offer , right ?
Hot offer , hot offer , and you can add these to the listings as well .
So let's say , for example , you really want to sell a house , you can say , oh , this is gonna last for like , you know , it's gonna , it's gonna sell out very soon .
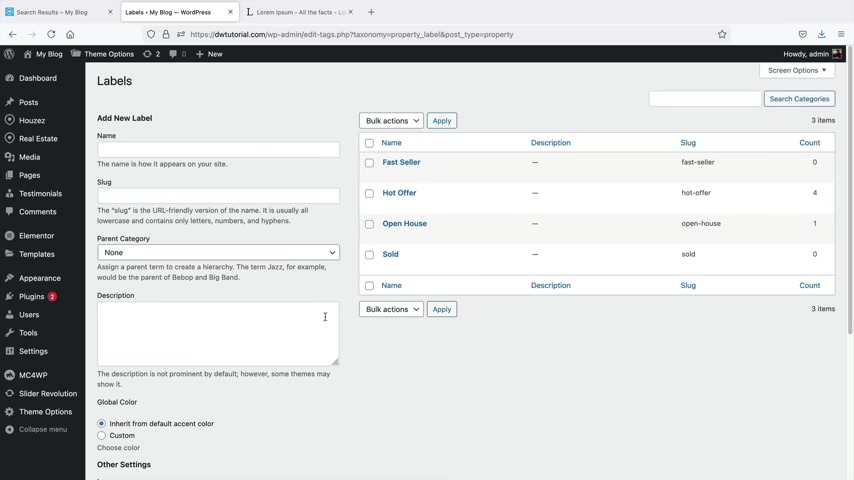
So you can add any category that you want right here .
So will er let's see what we sell , what , what's urgency for real estate um fast seller , you know , I don't know , fast seller , right ?
And we will add this new label .
Ok ?
And yeah , you'll go ahead and just keep making your categories right here .
We have country .
So um many of you might not even use the country because it's pretty obvious , I don't think there's people that sell real estate on a global basis .
But hey , it's always an option .
Uh Here we have the states .
So you might need to list the property areas of where you are selling your property .
So yeah , you know , if you're in California or Florida or Illinois , you might want to select a specific state just so it's easier for your users to navigate .
All right .
Next , let's go to the city .
So the cities are actually quite important .
So here we have Los Angeles now , a good idea here might be to create um sub categories .
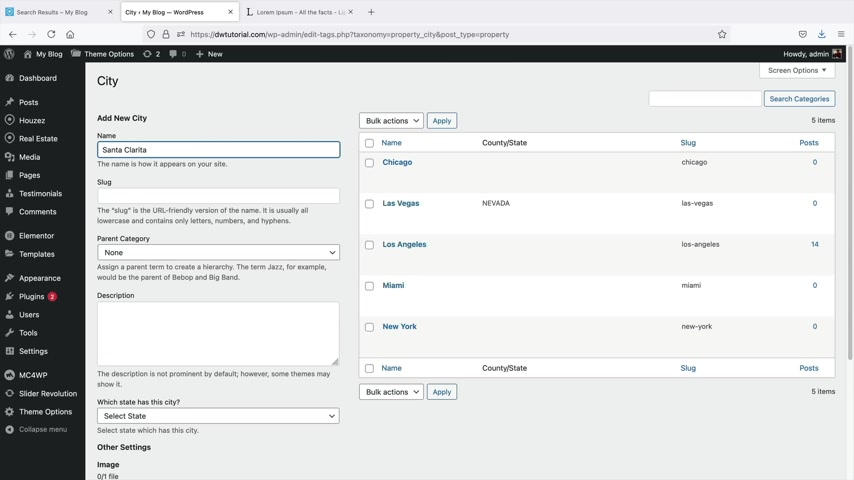
So for example , uh Los Angeles is very , very large , right ?
So you can put specific cities in Los Angeles or if you are in uh Miami .
Um I don't know if they have sub cities , but for example , I'll put Santa Clarita and the parent category is gonna be Los Angeles because uh Santa Clarita is located in Los Angeles , right ?
So here I'll add a new city .
Yeah .
So this would make a lot more sense if you are dealing with a very large area , I'm sure there are small sub cities in that county or uh city , right ?
So let's go ahead and go , keep going , keep going here .
We have area .
Now , area is actually very helpful .
So this will kind of help people understand the area of where it's in .
Let me give you an example .
So here we have a basic listing , right ?
We have this person trying to lease this office space for $1900 a month .
Now , it says Los Angeles again and that's very broad , you know , because L A is really , really large .
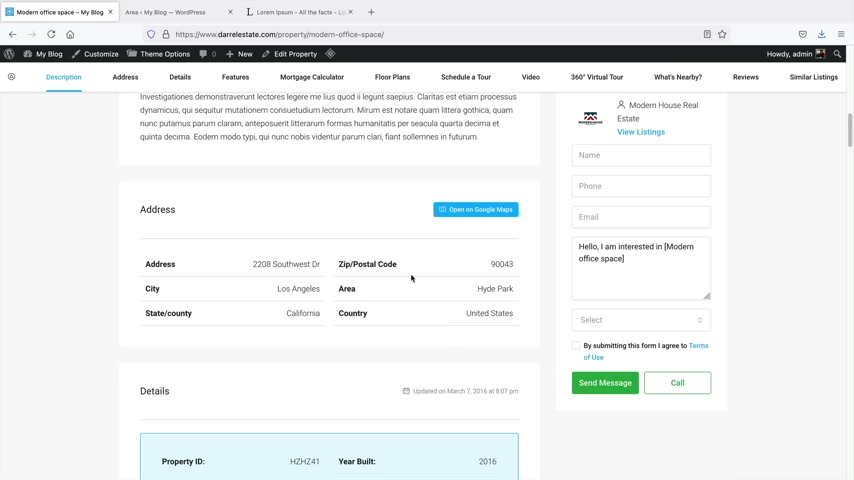
So it's really hard to determine uh what area it's in .
However , if we scroll down right here , uh keeps growing , just keeps growing , you'll see here how it says area and it's like , oh , it's by Hyde Park or , oh , it's by this specific area .
So this kind of helps the users understand uh the location from this specific area that you listed .
So that's just another example or you can just list the city and then use the subcategory .
If you choose to do that , you can use either way on how to list your uh location if you decide to do that .
All right .
So over here , I think that's pretty much it .
We also do have uh partners .
You guys can list specific partners here by adding in partners .
Um Also reviews , you guys may also add in your own reviews here .
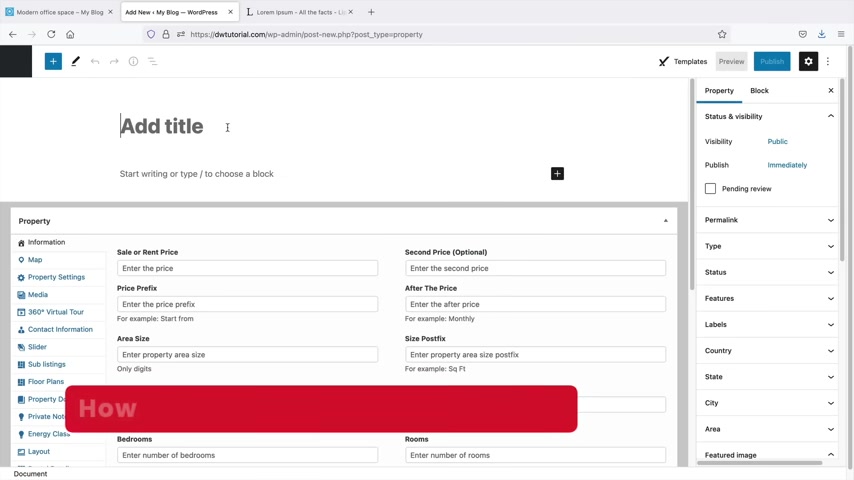
I'm not really gonna get into this too much because um it's really simple , you add in a review and then from there , yeah , everything's pretty much done and you can use these reviews as elements with the elements or page builder .
I'll talk about that more a little bit later once we do the summary section where we kind of summarize everything that what we have done .
So now that we have actually created all of the categories for our listing .
Let's finally create a listing .
So right here we have new property , click on new property .
All right , and the title is essentially going to be the address of the real estate or the house or the apartment , whatever you wanna list .
So I will put in Las Vegas Boulevard , right ?
And then here you can give some description about the actual property and below that we have the sale or rental price .
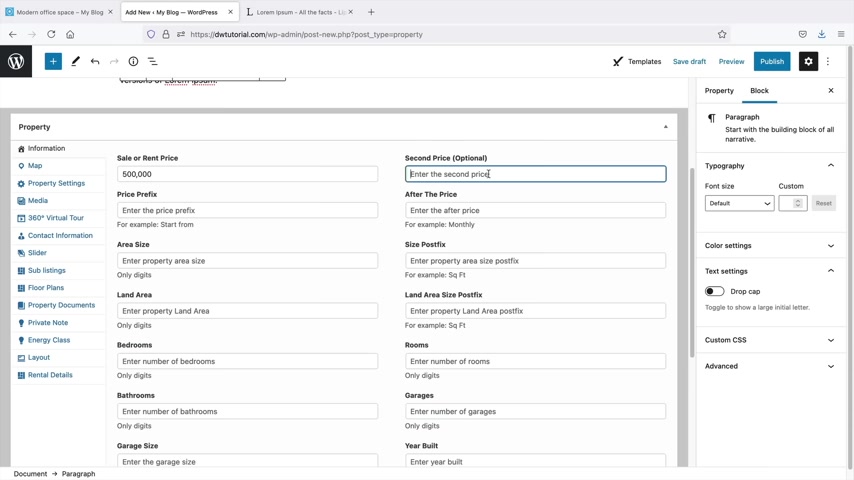
So uh right now I'll say this house is on sale for 500 grand and we also do have a second price .
So maybe you want to offer a specific sale here .
We have the prefix .
So starts from and after the price monthly .
So it really just depends on if you are renting or if you are selling .
So right here , I'll just do price and then for after the price , we're gonna put nothing just because we're not offering monthly area size .
So you can go ahead and fill out this information right here , like the number of rooms , the garages , the bathrooms , all this other stuff .
So you guys can go ahead and fill all this information out .
So what I'll do is I will quickly go ahead and fill this information out .
All right , so I added some information on my listing .
Now , you guys might notice here how this says auction and you do not have this available .
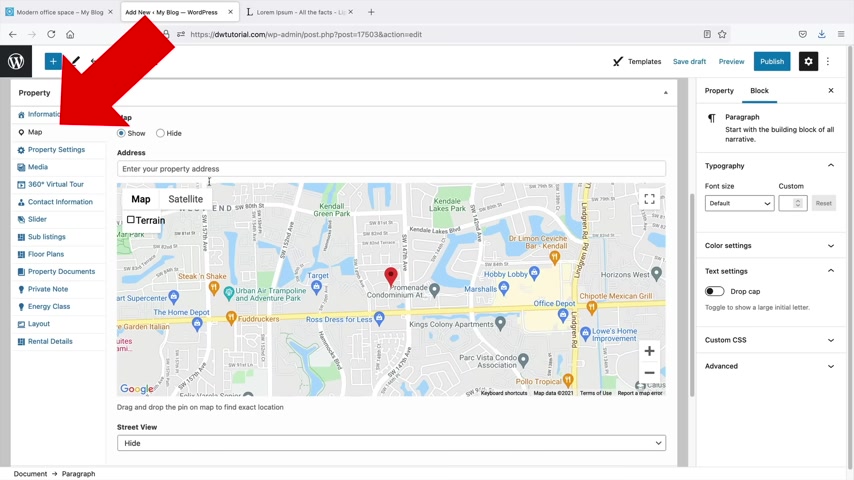
Not to worry because you can make your own custom fields um in with this wordpress theme and I'll show you how to do that in just a little bit .
So we actually added some information and here we have map so we can go ahead and you know , just put in the uh address right here of the map , right ?
Or we can hide it or show it .
It's really up to you here .
We have property setting .
This is where you can put the street address .
So here we go .
Do you want to mark this as featured ?
So you can mark this as featured .
The user must be logged in to view this property that's really up to you .
If you want a private real estate website , that's up to you .
Here .
We have media .
So this is where you'd want to add in images of the house .
So , you know , I don't know .
I'll just , we'll just grab in some images here .
I'll just put in or let's see here .
I hold shift .
If you hold shift , you can actually select more images .
So I'll select those .
All right .
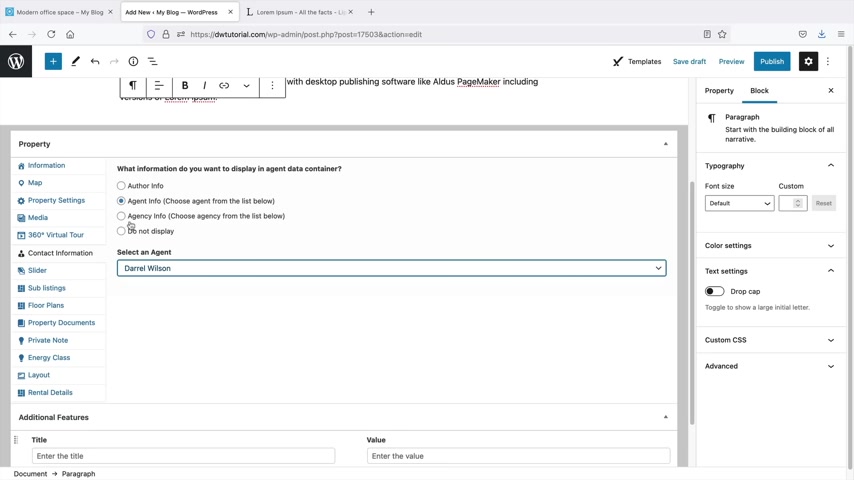
3 60 virtual tour .
Uh If you do have an IRA with a 3 60 virtual tour , you can always add it right here or embed the code right here .
I don't have any .
So I'm just gonna skip this part contact information .
So we can actually assign a specific agent to this listing .
So I'll just select Darrell Wilson , but you can select the specific agents or you can select the agency as well .
Now , if you do select the actual agents , it's obvious they have their own agency they're working with because we have already assigned Darrell Wilson to the agency .
So they will know it's the agency .
So that's if you have no agents slider .
Do you want to display this property as a custom uh property slider ?
You guys can do that on your own free time sub listings .
So if you do want to display sub listings , you guys can go ahead and add in your sub listings right here .
However , I'm not going to do that because I've already put it in the information tab .
So next , we have four plans .
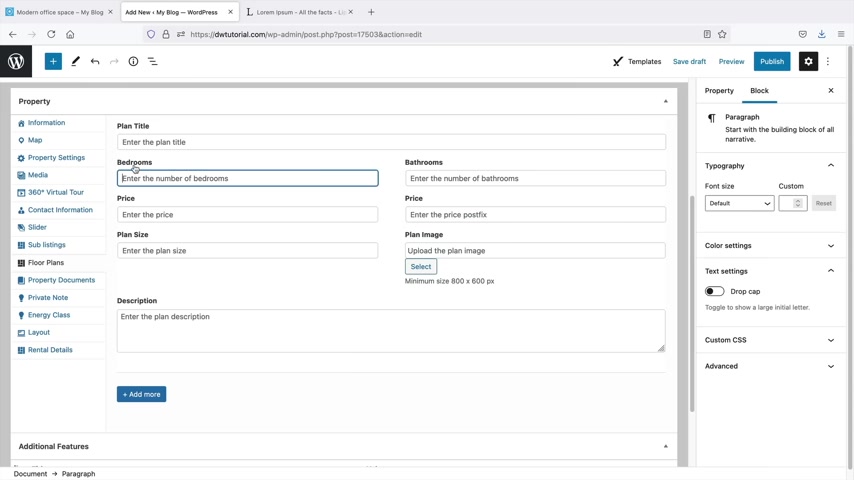
Now , the floor plans will be displayed on the listing under floor plans and this is where you can kind of give a size of the actual beds , the baths and then you can talk about , I guess price or whatever you want to put .
You don't even have to put the price if you don't want to , you can leave that blank .
But if you do want to give them dimensions of the bedrooms and the bathrooms , you can display that right here .
And then also uh you can put any description that you want about the first floor or the second floor .
Now , in the demo website right here , you can see how they have actually taken a picture and kind of given the user a good demonstration of what the first floor looks like .
So if you do want to contact the architecture and you want to get a image of the first floor , you can go ahead and do that .
So under the plan image , I'll go ahead and just select the image of the flooring plan .
So something like this , right ?
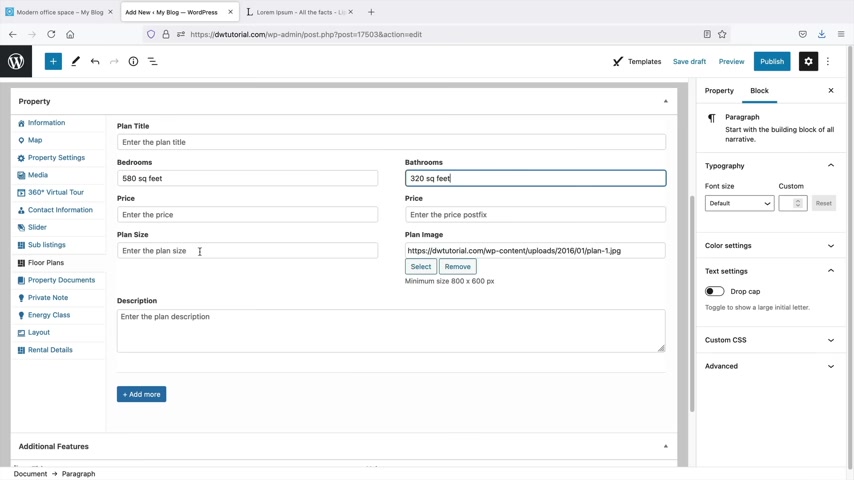
Flooring plan one and then you know , 580 square feet square feet , no , no , no , no square feet and then 320 square feet , quite square feet or foot .
I don't know , wait , I can't spell that right .
There we go .
Come on , come on , there we go .
Uh I'm gonna leave the price blank because that doesn't make a lot of sense .
Uh plan size .
I'm gonna leave that blank as well .
And then here I can just add in some more description about it like , you know , hey , you know , we added so and so forth or whatever you wanna do and then you can also add a another floor .
So this will be like the first floor , right ?
So I do like how the theme just gives you a lot of options here .
I mean , they're very , uh thorough with your plan .
So I know it's a lot to take in , but you rather have more options than less options .
Right .
Next , we have the property documents .
If there's someone that maybe died in the house before you might have to disclose that .
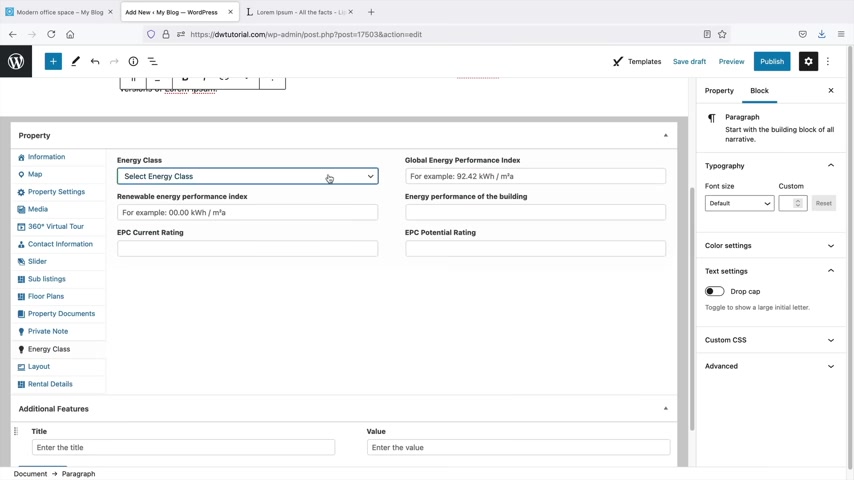
So that that's where you'd wanna , you know , saying , hey , you know , unfortunately someone died uh right before you moved in here .
So here's their whatever .
I don't know what they give them , but something like that uh private notes , this is a private note only for your agents and the agencies .
This will not be displayed for the public um energy class .
You can put , I don't know the energy whatever that's using .
Um Also here we have layout .
So what you can do with your properties is they do have specific versions right now , this is on a global basis .
So right now the theme is using a global um layout .
But you can say , you know what for this listing , I want to have a special version , you know , and you guys can look at these just by simply selecting the version , publishing the page and then viewing it .
Now we will talk more about the theme customizer in the very next section where we can actually select the global style for all of the listings .
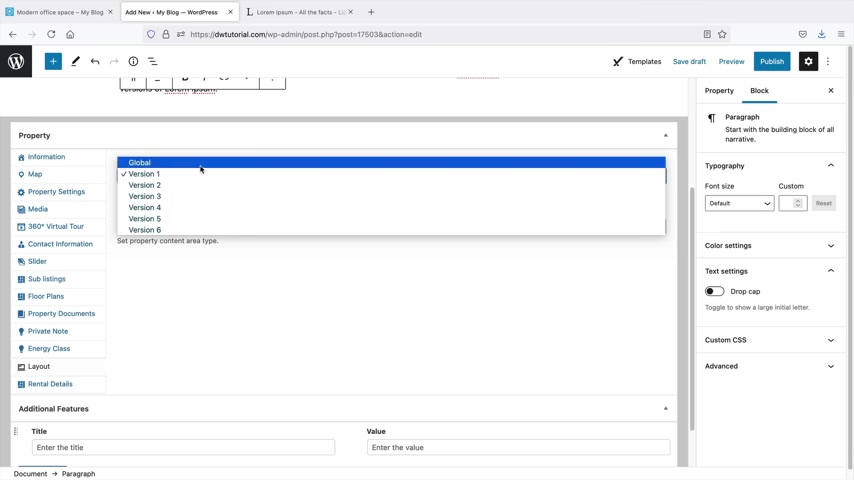
But I just want to let you guys know that you can always create a custom listing right here using the actual versions .
But for now , let's just leave it on global .
We don't need to really get too crazy .
So next we have the rental details and on their website , they let us know that we can use a third party plug in .
I do wish they were a little bit more detailed about .
Um you know , if you guys do want to create like an airbnb style website , you guys can use a third party plug in .
I'll try to get more information on what exact plug in that you can use to enable the uh rental booking .
Uh I know right off the bat that I have a video on the Amelia booking plug in and that allows you to create uh bookings for appointments , but I'm not really sure about um rental details .
So I will get back to you on this .
If I do get an answer , I will put it in the description below of this video .
All right , other than that , I think that's pretty much it here .
Uh We can go ahead and say , all right , everything's done now here in our property .
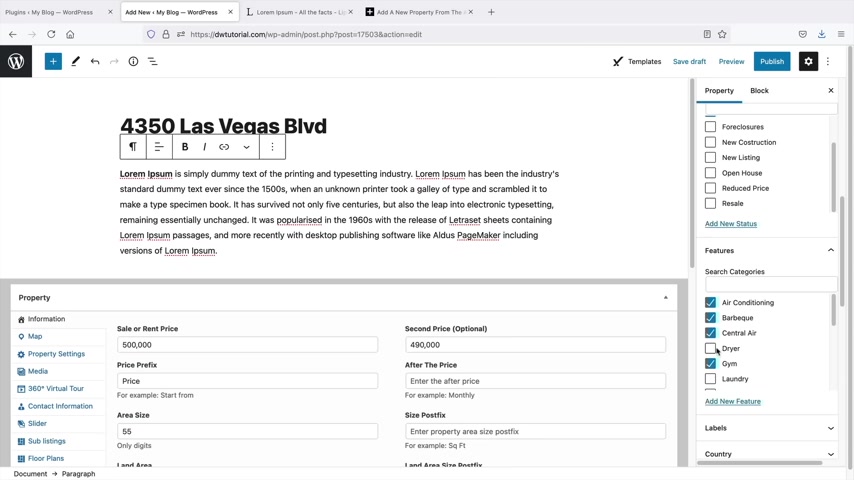
Uh This is where we're going to apply the actual um I guess you wanna say filters to this specific property , right ?
So first we have type and you know , I'll just say this is a one and two bedroom , right ?
So if it's like a two story bedroom , I'll just say , you know what , it's a two story bedroom and a one story , you know , because it has both , you know , or however you want to filter your real estate property .
Here we have status .
Now , I think on the information here , I put that we are selling this .
So this is for sale and for the features , I'll say this has air conditioning , barbecue , all this cool stuff and this is good because this will apply to the search filter on our websites .
Next , we have labels .
So this is a fast seller , right ?
Country .
United States , the States this is gonna be in Nevada .
Uh I could have put Las Vegas , maybe I should have made a subcategory for Las Vegas because I just told you guys earlier that Reno is a little far from Las Vegas , right ?
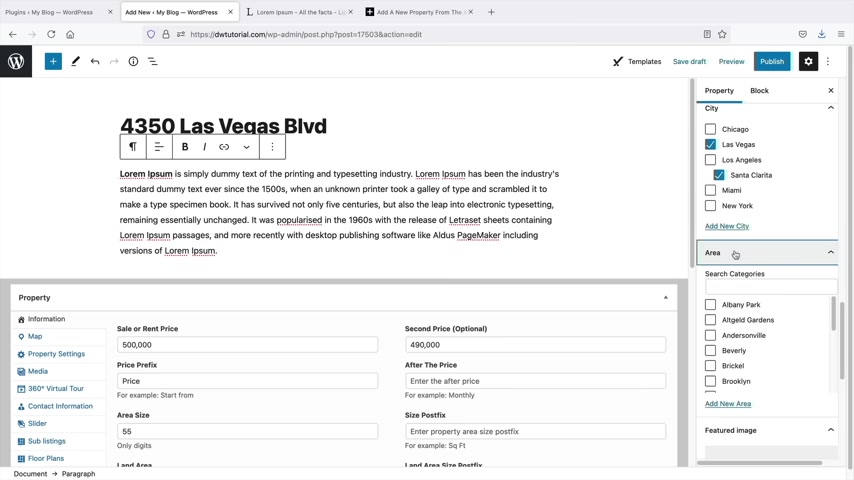
Uh Here we have city .
Uh Yeah , so uh I'll just do Las Vegas .
Yeah .
Oh no , no , no , I had that right the whole time .
No , no , no .
So yeah , it it's under the city .
My bad , my mistake .
But remember earlier how we created that property with Santa Clarita .
Screw it .
Why not ?
I'll just say it's in both .
Obviously , that's not true , but I'll just say , yeah , this is Las Vegas and Santa Clarita and for the area um Let's see here .
We don't have anything near Las Vegas .
So I'll just grab one , you know , we're just gonna grab , I don't even know where midtown , maybe there's a mid town in Nevada somewhere .
And here is where we want to put the featured image .
So this is the image that's going to represent the house on the search results .
So you'd want to put the image of the house , select this one for control purposes .
Uh Next , we have excerpts , page attributes and then property L so you can actually decide to expire this property .
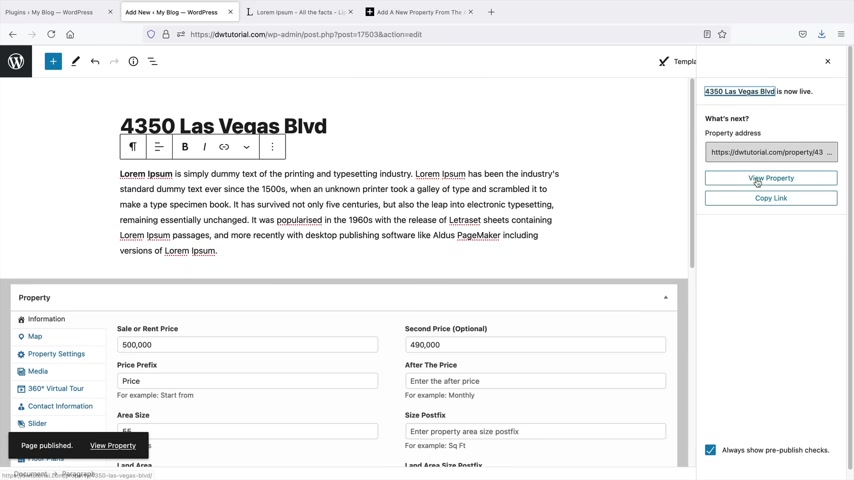
So you can like say , you know what guys , I only wanna list this property for 30 days after 30 days , I want this to take it down automatically .
You can do that and then also paid submissions .
We have not done it yet .
We will do that a little bit later in the video .
That's it .
We have our property .
Let's go ahead now and publish it .
So publish and publish .
Awesome .
Now let's take a look at our property by clicking on view property .
All right .
Awesome .
So here is our property .
We have the address , we have the fast seller and this is for sale , right ?
We have the agent where we can contact him at any time saying , hey , I'm a buyer and I want to buy this property .
We'll scroll down right here or really quick .
We can go ahead and navigate through this .
And right here , we can click on the map and we can actually select the or see the location of the specific uh area here .
We'll go ahead and scroll down .
Here's an overview .
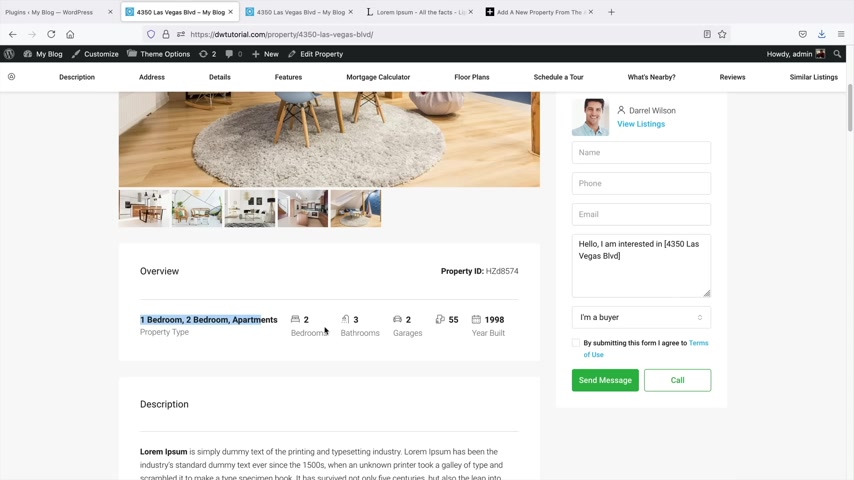
So the 12 bedrooms that we selected now , of course , I know I put selections here that don't really make a lot of sense .
But I'm , I'm just demonstrating .
That's , that's how you would add uh fields and categories to your listings .
So I'll keep scrolling down .
We have the description about the house here .
We have the address , we have the city , the area , it's in the country and the state and below that , we have the price and just some more information about the property uh features .
So here are all the features that we enable and below that we have a mortgage calculator .
So let's say , for example , they're broke and they're like , all right man , well , how much would a loan for this cost ?
You know , go ahead and , and calculate it and they can go ahead and calculate their uh mortgage every month using our calculator .
Also , what's really cool is the listing on the right side or the agent will be sticky that they can always contact him at any time .
We can see the four plans .

Remember we selected the four plans and just some description about the floor plan .
All right , and really cool .
They can schedule a tour , put in some more information .
So they say , hey , I want to do in person and then they can go ahead and submit or submit a toll request .
So then the buyer can put in their name , their phone number and all this information .
And this email will go directly to the agents who listed the property because remember they had to input their email address so they will be notified via email here .
We have what's nearby .
Now , if you guys do have Yelp API S , you can enable that .
If you want to take that out , you can always disable that .
And we will talk more about this in the theme customizer in the very next section .
So we'll scroll down .
Hey , we got more Darryl Wilson .
You can always disable all of these , um you know , these requests .
You can , you can disable this as well because that might be too much .
And then also here we have reviews .
You can always disable reviews .
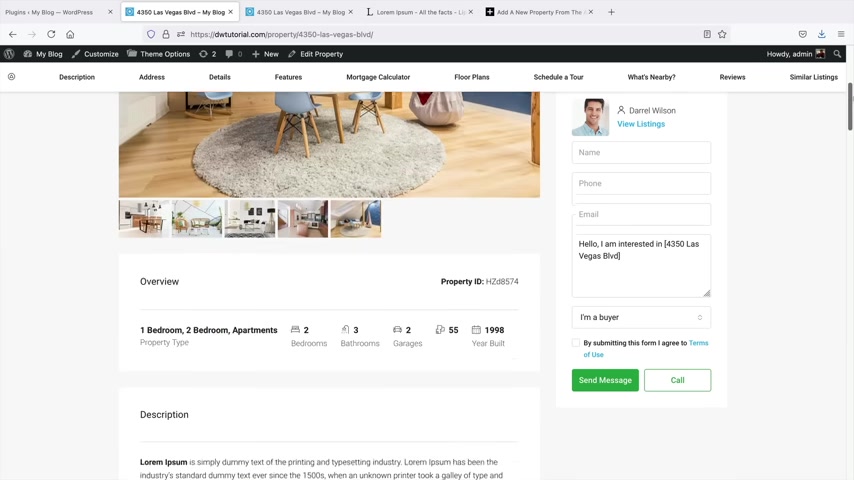
And again , we will talk all about that in the next section when we talk about the theme customizer .
So guys , congratulations .
You guys have listed your property .
Users can share it to their favorite social network .
They can , its they can like it .
And this will be displayed in their uh like their like little section if they create a account on your website .
All right .
So let's see really quickly if our housing will be displayed on our search results .
I'm just gonna put two bedroom .
That's it because remember how we had two bedrooms before .
Um this is for sale .
So we have for sale , two bedrooms and search and the apartment of 43 50 is available right there because remember it's tagged under the two bedrooms .
So you might want to go ahead and add in your own filters and your own system to kind of uh accommodate uh whatever your visitors are trying to look for .
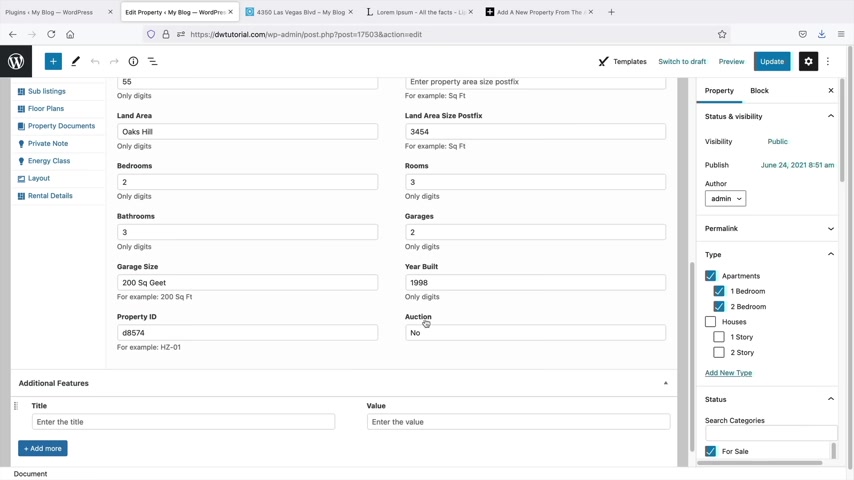
Now , I did really mention or I I mentioned earlier how I had that auction uh fields right here under edit property and I do quickly want to talk about how you can add custom fields to your listing .
So here I have auction right now .
Of course , this is just for a demo purpose .
However , you can add more here if you want to do that under the uh houses tab .
So let me quickly show you how to do that here .
For the dashboard under houses .
We have the fields builder and this is where you can enter in more information .
So if you , there's more information that you want to include , you can add it .
So for example , add new .
So let's say , for example , the user wants to know if the house is connected to a septic tank or is it connected to the city ?
I know this sounds very strange guys , but in America , there are some houses that are not connected to the city .
So septic tank or city connected .
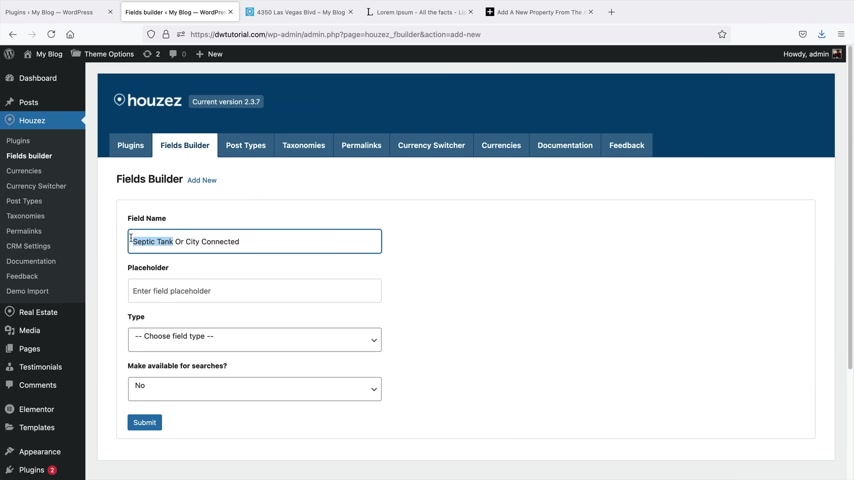
So that means when you guys poop , it usually just accumulates in a big tank and you have to hire a company to suck it out .
So that actually was my parents' house where we had a septic tank .
However , there are houses that are connected to the city .
So when you do poop it goes to the sewer .
So we can say uh for a field name , is this house a septic tank or is it city connected ?
This is actually a very big deal .
And if you are an agent , you should disclose this because people would be pretty pissed if they found out it was a septic tank .
So , uh for the type , I'll just put text and this is available for searches or actually no , not available for searches .
All right .
And here I'll click on submit .
All right .
Now let's go back to our listing .
So , real estates properties , right ?
And let's click on this property .
And now we have this new tab right here for septic tank or city connected .
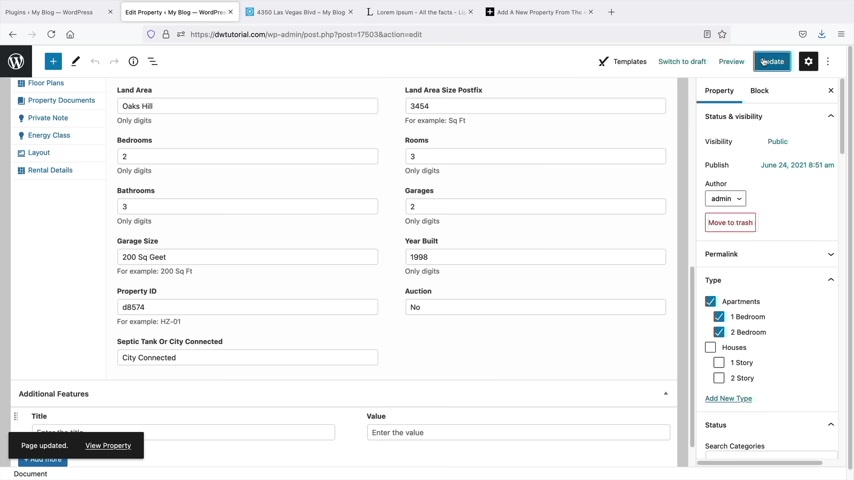
So I'll just put city connected and then I'll click on update .
So now the visitors know that this house is connected to the city and it does not have a septic tank .
So that's how you can add more custom fields to your information for your real estate .
All right .
So let's have a quick summary of everything that we've done so far .
So first things first , you know , I showed you guys how to create agents .
And remember for agents , you can always create your own agent page with the elementary page builder .
We also created a list of properties and we also created our search page .
Now , remember since we added new types or I guess you want to say new custom fields , we can apply those to the specific pages .
And also the search filter also remember now that we actually have created types , we can apply them to our search bar .
So here we have our search bar .
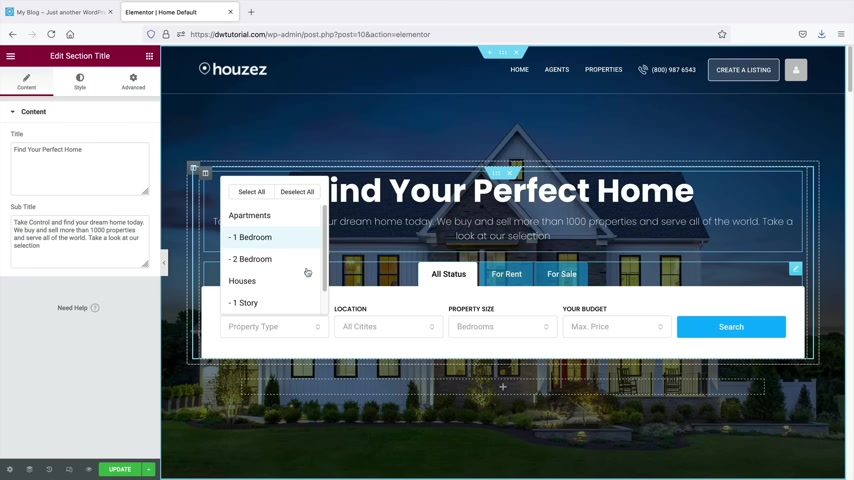
So enable the builder and people click on looking for , they will then see that the apartment's one and two bedroom is now available now with this search bar , just remember that you can add in as many filters as you want , but you will need to kind of customize it accordingly .
So for example , if I click on one of these tabs , you'll see the column width is 20% .
Now , I believe right here .
This is 100% .
So uh it holds five columns and each is 20% .
So if one goes over to 25% it's gonna look a little distorted .
Now , you can add as many as you want .
So you can add uh you can add a lot .
So for example , I'll just , I'll just duplicate this .
You know , if you want a lot of filters , you can make your search bar , your search bar very advanced uh if you want to go that route .
So that's just a way on how you can kind of , you know , further customize the search builder .
So according listings is pretty simple .
There's a lot of different layouts you can choose from , you can build it yourself .
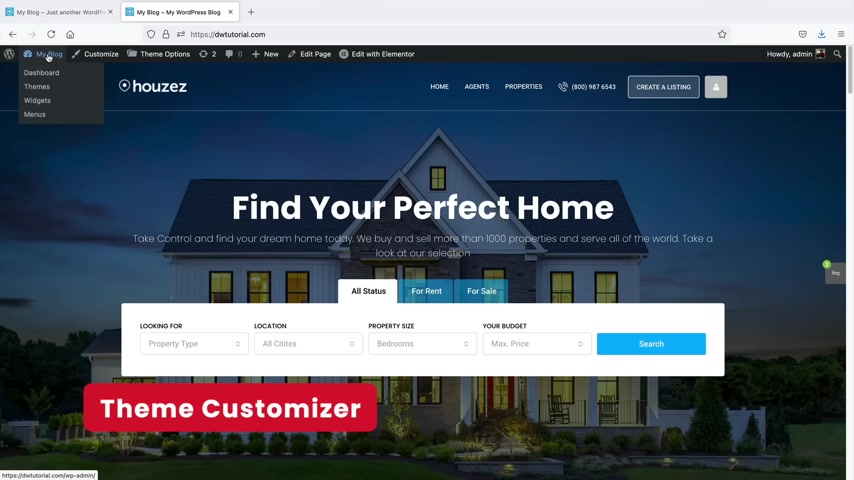
You can use one of the uh premade styles that they have offered us .
And there are more options available in the theme customizer .
So let's go ahead and jump into the theme customizer in this part of the video .
Next , let's talk about the theme customizer .
Now , the theme customizer controls various parts of your website that the page builder normally does not .
So it'll control parts of your header and your footer .
It'll also show how your properties are listed .
So there are several different ways on how to list your properties .
So I'll be covering all of that in this part of the video .
So to access the theme customizer , you can click on right here that says theme options and this will take you to the back end .
Now , what I'll be doing here is I'll open up a new tab that will basically show you exactly where the theme customizer options are being applied .
All right .
So the theme customizer options are located on the back end and right here , you'll see theme options and then you see a list of a lot of these options .
Now , uh I'll go through most of these and just explain to you what they do and what they mean .
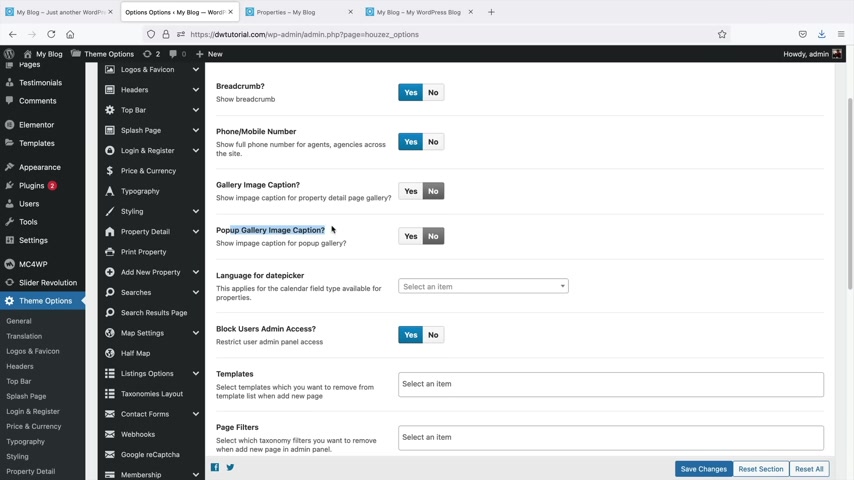
So first I'll talk about the general tab .
Now , the general tab is pretty much sounds general .
So here you can just go ahead and add in some features or take away some features on your website like the bread crumb .
So maybe on your properties page , you don't want this bread crumb right here .
You can go ahead and disable that in the general setting .
You may also disable the phone .
So on the top of the website , you have this phone number , you can always go ahead and disable that .
Um a pop up gallery image caption .
So if you don't want the pop up gallery , you can add that or disable that uh language for date picker .
Huh ?
It's very interesting .
Um Yeah , so I guess you can change the language on the calendar fields if you want to do that block user admin access .
So this restricts users from the admin panel access .
Now , we will talk more about listings and how agents can list their own properties .
But when you do uh select yes , it will disable your agents from accessing the page builder and all the important stuff that makes the website .
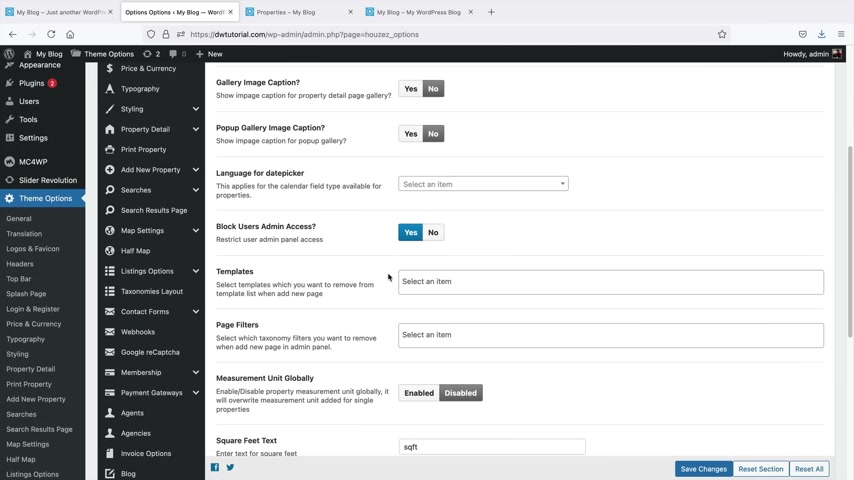
So yeah , you might want to actually select that yes , by default .
So here you have the templates .
Now , let's say , for example , you don't want the templates to be displayed on the page setting , you can uh remove them , but I wouldn't know a reason why you'd want to do that , but you can do that with the templates and also the page filters .
I would personally leave this disabled .
If you leave that enabled , it could um it could kind of mix you up .
But again , it's really up to you if you want to do that .
But remember , you can always go ahead and set the options or the units for each property individually .
Here , you can uh adjust the square feet , text the square meters , text and add the sticky side bar .
So I remember earlier on the listing page , how we had that sticky side bar .
So for example , I'll click on properties and click on my Las Vegas property .
You can see here how we have a sticky side bar so you can enable or disable this option uh in the general settings , right ?
Pretty , pretty straightforward , right ?
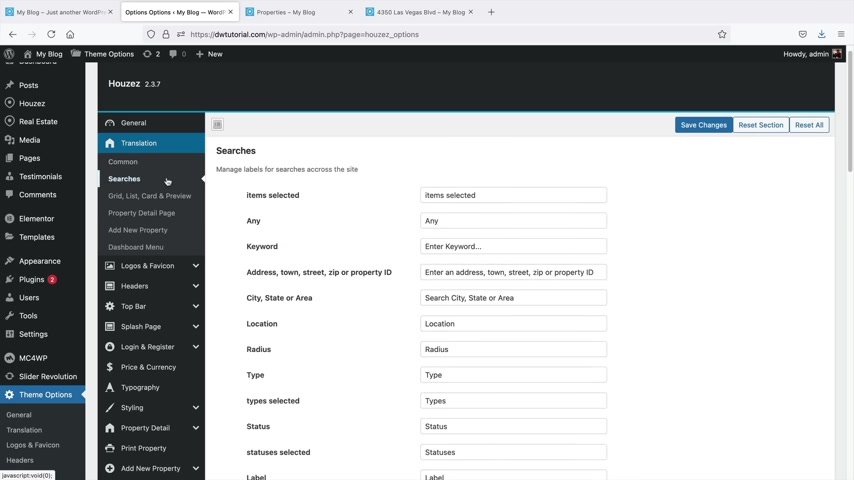
I mean , that's pretty , pretty easy .
Next , we'll go to translations now instead of saying property or properties or any of these stuff , you guys can go ahead and change that to saying like uh you know , house or whatever you want by default .
So essentially what you're doing here is you're just changing the label search the same exact thing you can uh put instead of saying any you can change this .
Um This right here is preference .
I'm not gonna get into it too much .
It's really niche and it's really up to you .
Same thing with the uh bedrooms , the property detail page and also uh the add a new property and then also the dashboard menu .
So uh yeah , you guys can change those if you'd like .
But uh personally I would leave it all stock because they did a pretty good job at displaying the information for us next logos .
So if you guys do have a logo , you guys can upload it here .
Now , if you guys don't have a logo , I recommend going to fiber dot com .
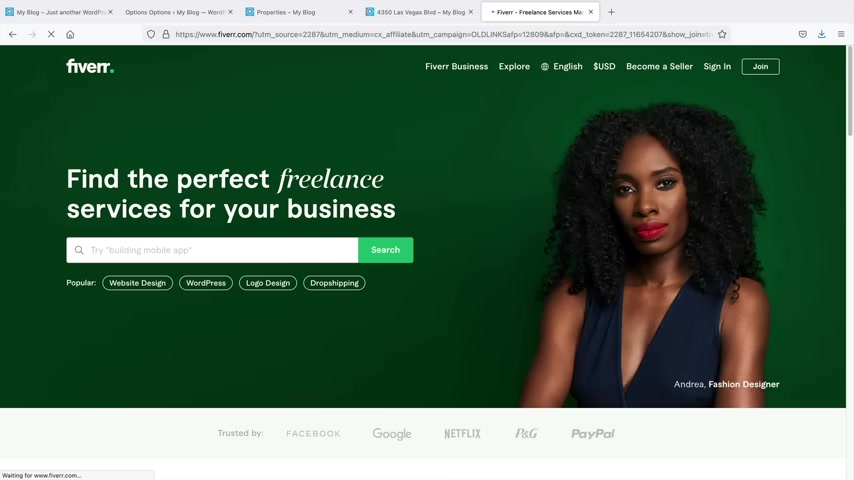
Uh I do have a discount code for new users .
So if you guys use the code , uh I think it's Darrell 10 or I'll put it in the description for you guys .
But um you can actually search for logo here .
So just type in logo and you guys can find someone to build your really nice logo for around 20 to 30 to 40 bucks or something like that .
So there are a lot of designers out here that will make you a premium logo .
Don't do a free logo maker guys .
And those sites actually don't even work because you cannot copyright those uh logos .
So they're a complete waste of time .
Get one from a private seller , right ?
Let's go back here .
So what you would do is that you would upload your logo right here and you can upload specific logos for specific devices .
Uh That gets a little crazy .
But uh hey man , you know , people out there might want to do that .
But yeah , that's how you guys can uh adjust your logo .
Next , we have headers .
Now , the headers are actually pretty important .
So here you can pick different headers for your website .
So here we have a default header , right ?
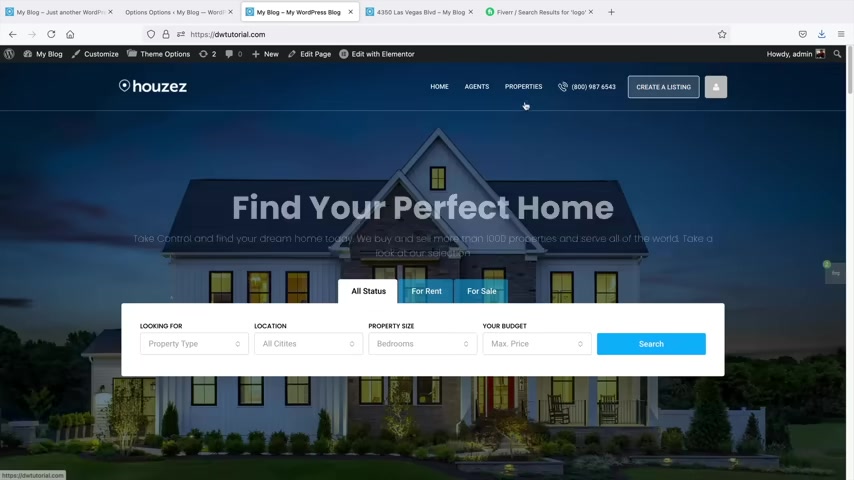
So uh we have create a listing and you guys can see how it is .
We can always change that to something that looks like this , right ?
And save changes and then go back here and refresh the page and now you see that we have this different header .
So uh this is where you can kind of customize the headers .
If you decide to do that , I'm gonna leave it as stock .
And then here you do have some more options .
You can enable a sticky menu .
Um You can adjust all of the menu options right here .
So I'm not gonna get too crazy into that .
But uh yeah , if you guys can adjust this to your liking .
Uh And then also when you have social media icons , you can enable them and list your social media and then also your listing button , which we already have on our websites .
You might want to refresh the page there .
It'll take us back to our default menu , right ?
So if you do want listings , you can have this enabled .
If you want to take them out , you can disable it .
So you can add a top bar above your menu .

So the top bar will be displayed above your menu .
And um you know , you can add more things on there like your phone number or your email address or something like that if you want to add an additional top bar above your menu , and then you also have the option for a currency switcher and an area switcher if you want to apply that to your top bar .
So , um yeah , I don't really know any instance where you'd want to have a button that would change everything from square feet to meters .
But uh hey , you know , it's available .
Next , we have a splash page .
Now , a splash page is simply just the template .
So it's just a template that the theme uses personally .
I think it's a little depreciated .
But for example , I'll just give you a quick demonstration .
If you go to plus new and go to page , there is a template for a splash page .
So templates and then we have splash page , splash page templates .
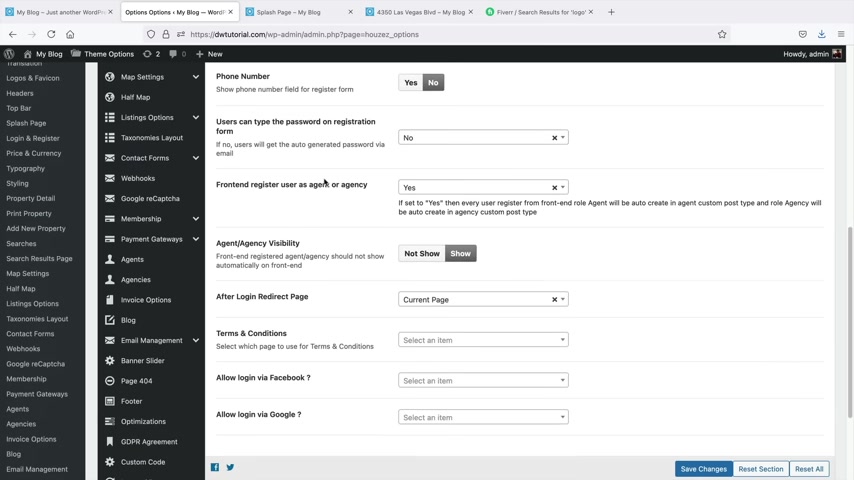
And if I view the page , um you'll see that this is the splash page .
So we can always remake this with mentor .
But uh if you do want to use the theme defaults and adjust it , you can do that as well .
So that's strictly up to you log in and register .
So here we can display the login and the register for users who want to log in and register on our websites .
Now , you might want to actually create these pages .
So um after a log in direct page , so that you , you'd probably want to create a um a log in page , right ?
And you need to create a page for that .
Also the terms and conditions page , you might want to create a page for the terms and conditions page .
For example , over here , I'll go to plus new and page .
And if users do register on your website , you probably need to make a my account page right now .
We did delete it earlier .
So I'll just show you how to create it again .
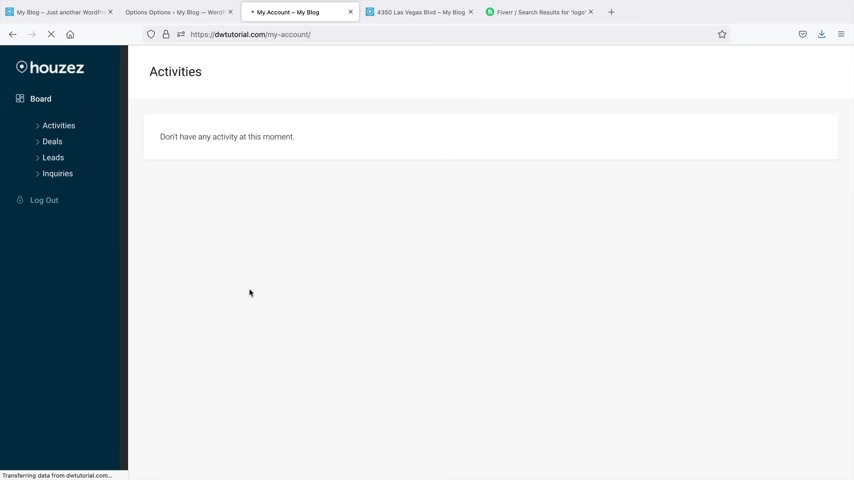
So , templates , we have the uh let's see , we have the uh where is it to my account page , log in and register page .
So this would be the house's CRM and this is essentially the account page .
So I'll go ahead and publish this and publish this and then view the page .
So this is the actual like account page and this is where they can access everything and you know , if they want to see their deals or leads this is where they can access everything .
All right .
So we want to redirect them to that specific page after login so different page and then go ahead and paste the ul of my accounts right there .
All right .
So personally , I think that once we deleted those pages earlier , we probably should re add them because there's a lot of pages that we deleted .
Now , I'm doing this because I want you guys to learn how to actively create your pages .
So in case they did get deleted , you know how to restore them .
So yeah , that's something that you might want to do .
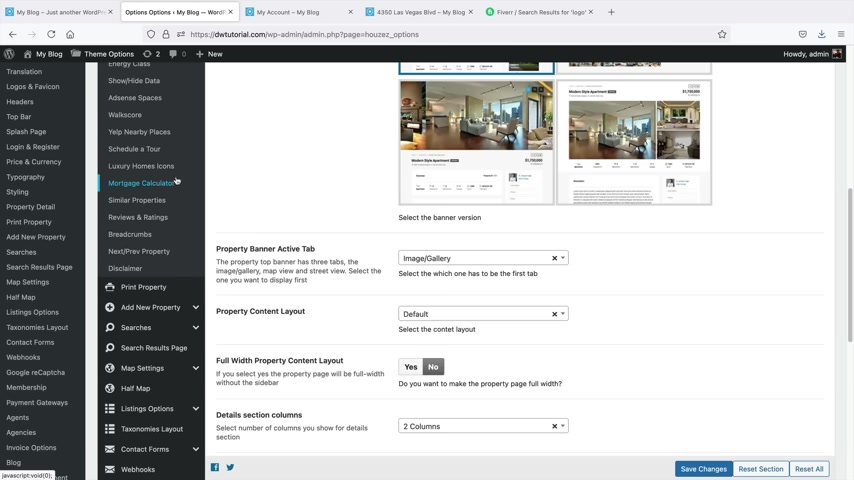
So here , I'll just grab this account and then drag that in there like that and there we go and then we can add the terms and conditions , page and so on and so forth .
So next we're going to go to price and currency here .
You can adjust the price and currency styles .
This is where you can adjust the styles and the color for all of the various sections on your website .
And yeah , you know , that'd be something that you might want to consider property detail .
So this is actually pretty important .
Let's go ahead and quickly go to a property .
So here we have one version right now , this theme actually will adjust it to several different styles .
So for example , if I want this style , I can click on save changes and if I refresh the page , there you go .
So that's how that will adjust .
And then over here , we can adjust it to this , right and refresh the page .
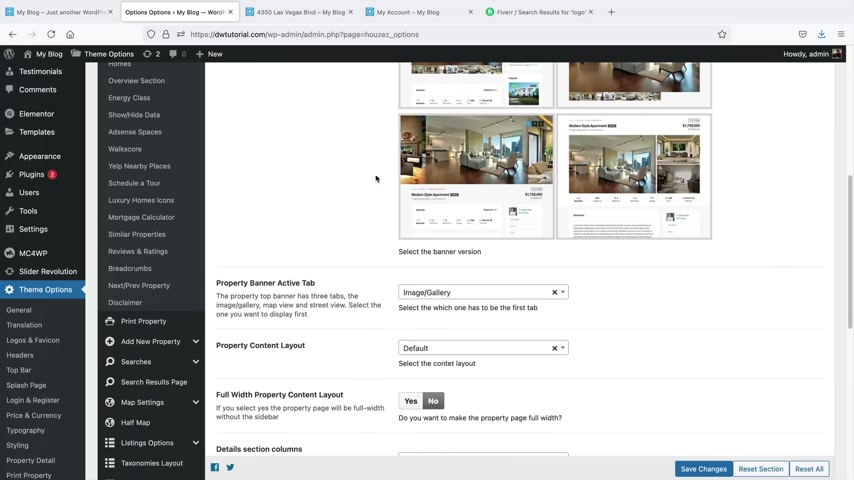
And so you guys see here how you guys can keep adjusting the property details right here .
So this is where all of the information to customize this page would be available .
It would be available right here in the property details .
Now , due to the enormous amounts of information they have here , I'm not gonna cover all of this because uh this is just too much to cover .
Um And again , it's very niche .
So you might need to just go ahead and uh check this out .
But this is where you can adjust the property details , print property , so you can have the option to print the property as well .
And this would be your logo if someone decided to print out the property on some sort of paper on your websites .
So the a property , we have a one step and a multi step .
So a one step will just have everything on one specific step .
But multi steps , it kind of guides the agents on different ways when they are listing the actual property .
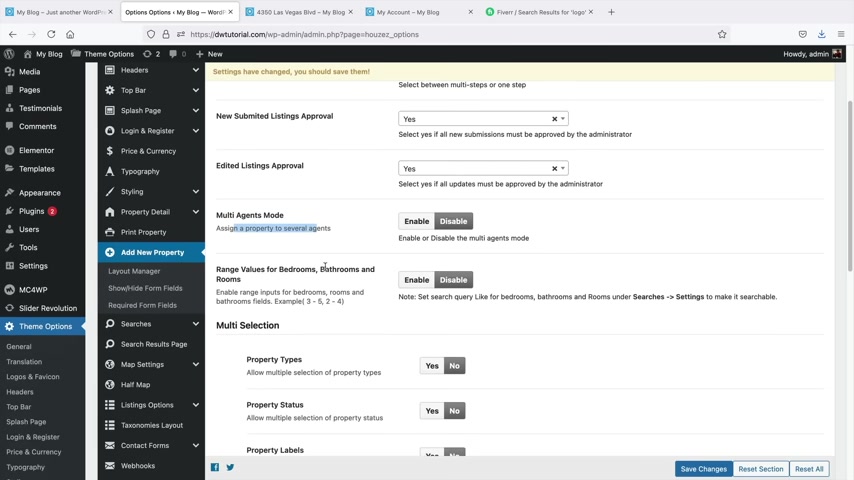
So first it'll say give me some information , yada , yada , yada , we will talk more about that later when we enable listings on our websites .
But this is where you can have multi agents mode , assign a property to several agents .
So this would be all the information that you need in order to list properties and whatever you want to enable or disable you guys can just kind of read through these options and kind of uh see what works best for you .
It's hard for me to kind of tell you what to do here because again , uh it's not my agency .
So I'm just kind of explaining to you where this would be located .
It'd be located when users add new properties , which we will do a little bit later in the video .
So next we have the header search and the header search essentially is this little thing right here .
So if you guys do want users to also be able to search on the top right here , they can do that so they can look for rents and search and then they can see all of these specific categories .
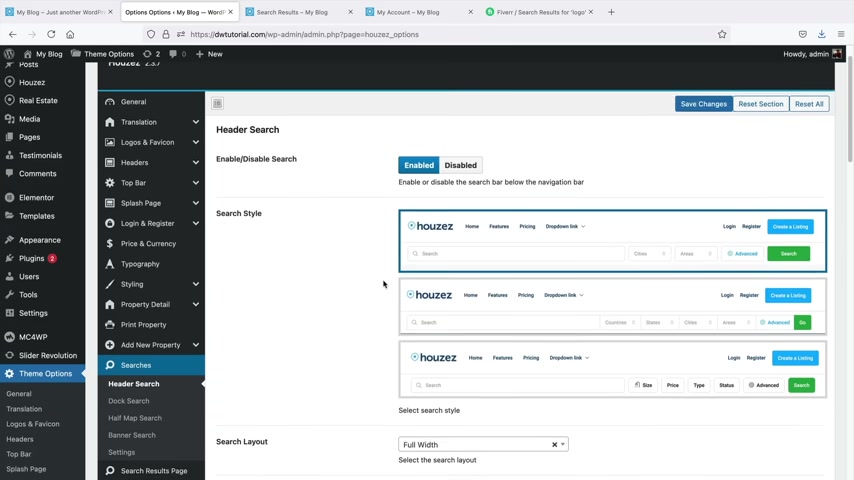
Now you can add any category that you want , they have a few different styles .
And there's just more options here if you decide to add the header search .
Um Also here we have the search builder .
So for example , I want to add in four columns , right ?
And we have keyword status type and cities and I want to disable these other ones .
You know , let me max price .
Let's see .
Yeah , minimum price .
There we go and then I will save this .
And also here I do believe I need five .
So let's add five and save this .
And let's go back over here and refresh the page .
All right .
So we have 12345 and we also have advanced where they can filter and other stuff like that .
So it just adds a search bar to your current menu .
Uh If you want to apply that , go ahead , knock yourself out .
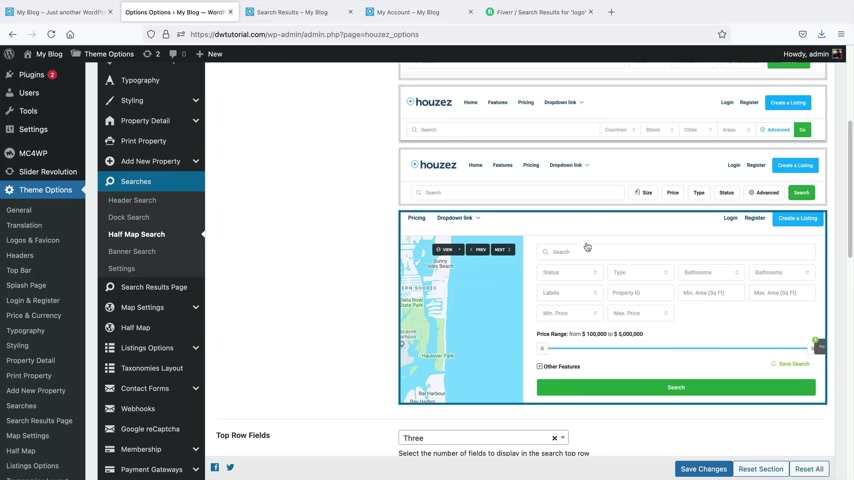
And then there's other options for different type of searches like a doc search and half search .
So this is where things can get um pretty customizable , you know , you can really get crazy and customize everything and yeah , that's where you can access all that .
Here , we have the search page .
So these are the search page results .
You can have a full layouts , a sidebar layouts and then just a regular layouts .
And then here we can adjust like the normal page or the half map .
So on our other website here , how we have the half map , right ?
I think we have the half map , right ?
Yeah .
So we have the half map here .
You guys can always apply this to your current websites if you want to do that and then you can change it between a list , a list view or a grid view .
So this right here is a grid view and the list view is something that looks like this .
So you would just set the default of what you want this page to look like .
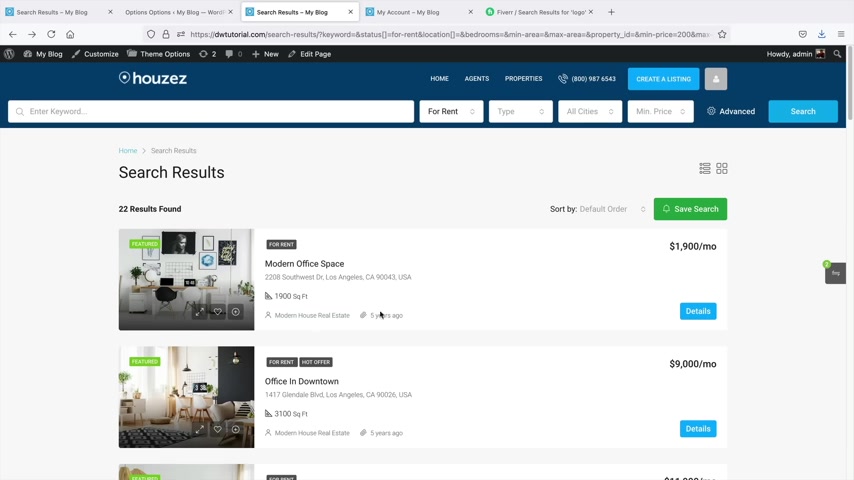
So this is actually a very important page and you might want to , you know , consider how you want , how you want it to look .
Uh Personally , I think the normal page for with list view is perfect .
But uh whenever users search on your website , um this section of the theme customizer controls that area , the search result page is pretty important .
So you might want to do some thinking about that and figure out what's best for you and your real estate website .
Next , we have maps this is where you're going to enter in the Google Maps API key .
Now , I will be talking about Google Maps api a little bit later in the end of the video and I'll show you how to get one .
All right .
So we'll come back to that later listing options .
So next , we have taxon layouts .
Now , the taxon layouts are basically when a user clicks on a specific category of a listing , it'll take them to a specific page .
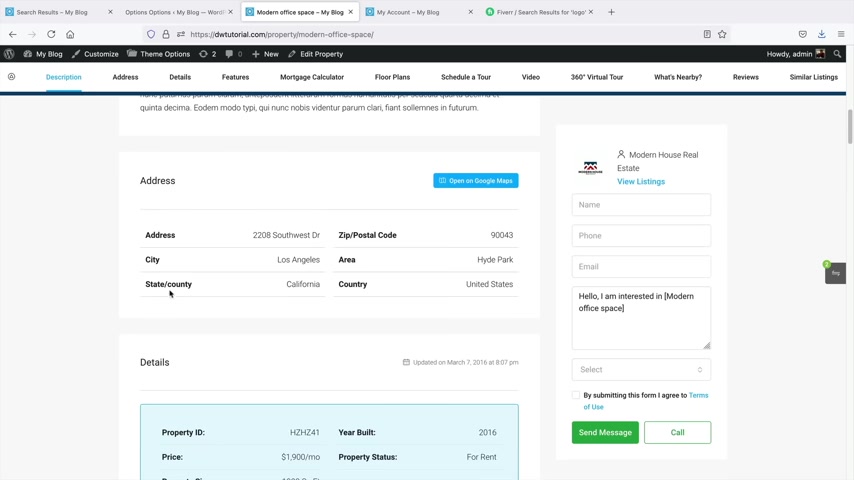
So basically the theme is asking you how do you want that specific page to to like to look , you know , uh for example , if we click on some sort of category here , let's see if we can find one .
Uh Let's see if we can find a link here like TV cable or something like that .
This is a Taxon page .
So basically , it's asking how do you want the TV cable page to look because this page is filtering all of the rental properties that have TV cable , right ?
So that makes sense .
So contact forms now you can actually disable the contact forms on specific parts of your website .
So maybe you don't want it to be displayed on the um you know , the property page side form , you can go ahead and disable that if you want to do that .
So anywhere where there's a contact form you can enable or disable that right here from these options .
Uh Webhooks , we are going to skip webhooks because that involves some developer work , Google recapture .
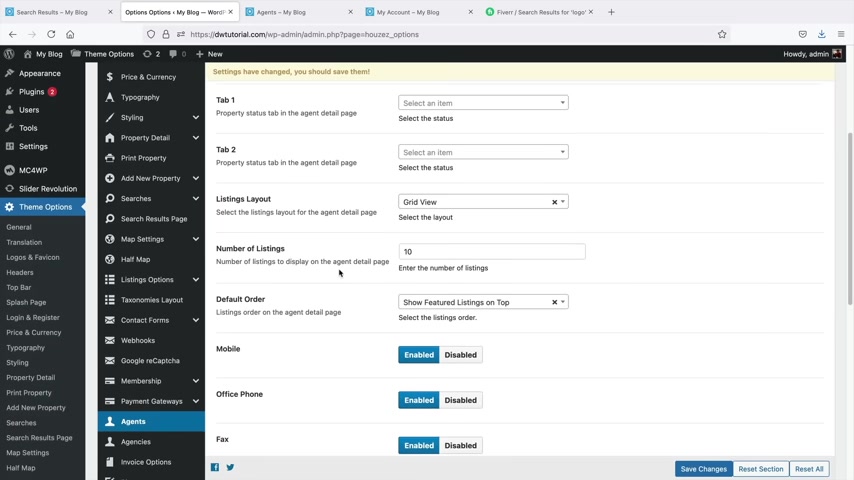
Uh We are also gonna skip this because I'm not gonna really cover how to get a Google recapture , API memberships and payment gateways .
We will come to a little bit later .
Next , we have agents .
Now I did mention about the agents on your website .
Now with this page , you can actually design it .
Uh There are some different layouts that you guys can use and things that you can add for your agents .
Uh Here , you can just like enable or disable specific parts of the uh agent section , right ?
Pretty simple , pretty straightforward .
So here you can customize everything about the agency's page and you can also change the view .
So if you want a list view , you can go ahead and adjust it and then you can enable or disable specific functions on the agency's page .
So just remember , you can design and customize the agencies' page right here by having different layouts and also the agents page .
And I do believe over here they do give us a few examples .
So here we have like the agents and this is like the list view .
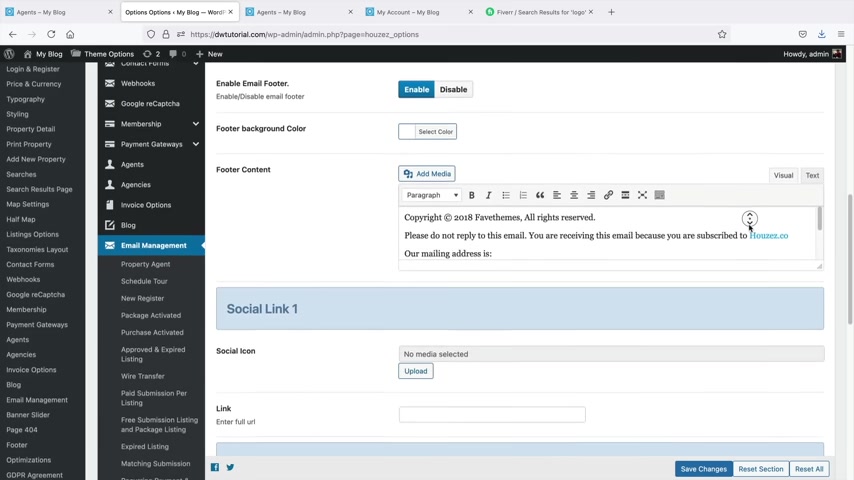
So you can change this view into various styles .
So you can have a list or a a grid or however you want to achieve that .
So if you decide to have listings on your website that are paid , this is the actual invoice options and this email will be sent to users um who register on your website and pay you money .
So you'll just go ahead and say , hey , thank you for your business , blah , blah , blah , blah , blah , and whatever it is that you want to add over here under the invoice options .
Next , we have blog .
Now , making a blog post is really simple .
I'll show you guys how to do it in the next section .
It's really , really easy .
But uh this is where you can enable or disable specific features on the blog page and then email management .
This is basically where you would send an email to people when they do like forgot password or anything like that .
This is where the emails um what they would look .
So you'd wanna change your logo , you'd want to adjust your color to fit your specific brand .
So here we can see just a lot of different options for like the email footer .
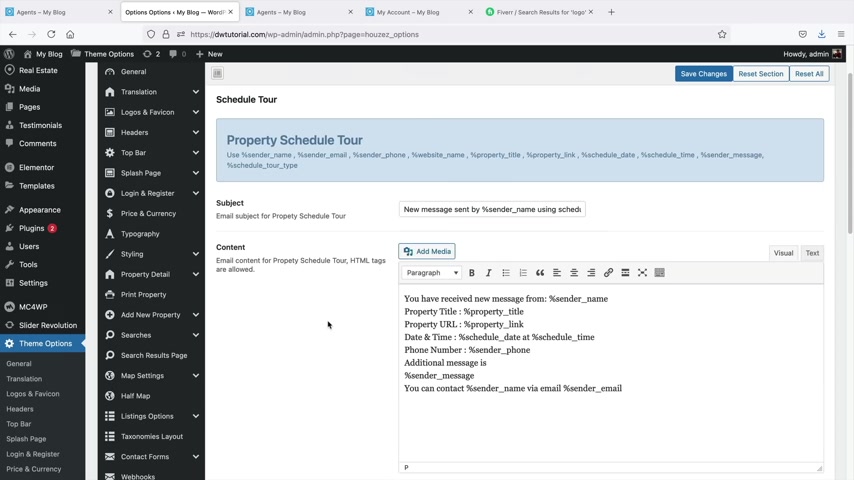
Uh You can add social links and all sorts of stuff to your emails .
Now , what emails are being sent .
So here we have like the property agents , right ?
Or , or any of these categories here , I'll scroll up right here .
So let's say for example , an agent sends someone an email , right ?
You'd want to make sure that you adjusted that email section because then the header and the footer uh right here under email management , this will be displayed on every email , right ?
So again , I remember earlier how we had schedule a tour .
So here we have like uh you have received a new message from this person and you can kind of adjust this to fit your needs for your agents .
Let's say , for example , someone booked a listing with your agents .
This is where you can change the text or anything that you want for your agents .
And then you guys can kind of go through all of these pages right here and just adjust them to your liking you like .
Yeah , these ones up here .
So sorry , it's , it's kind of hard for me to show you guys these because we're scrolling down so far .
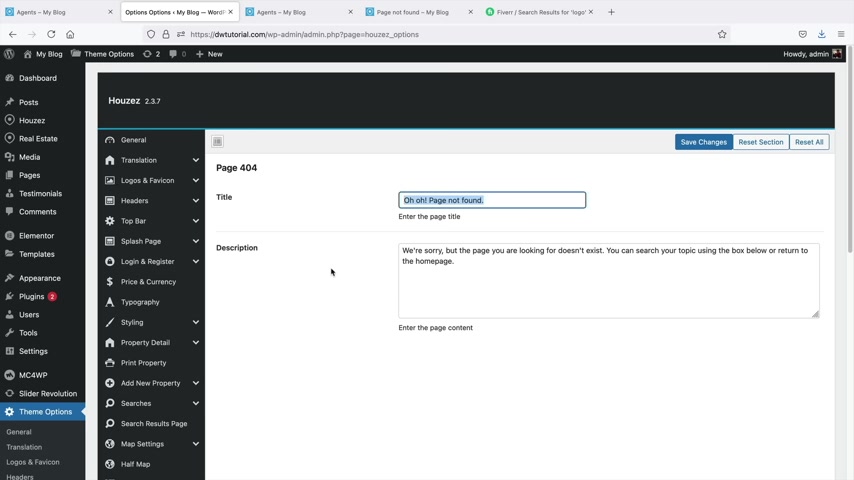
But uh you know , for all these emails , you can adjust it under the email management page 404 .
This is actually pretty important , let's say , for example , someone goes to your website right here and they type in a wrong URL something that looks like this .
So here you can adjust the text .
So they have uh-oh page not found .
This is where you can adjust the 44 .
So the footer you can kind of design and customize and the footer is essentially the bottom part of the website .
So this is widget one , widget two , widget three and widget four .
And this is where you guys can kind of design and customize a few different styles , you can change it .
Um There's a lot of different ways on how you guys can .
Let's go ahead and take a look here .
What , that's what that did .
I don't really know all the versions .
So let's just go ahead and refresh it .
Yeah , you guys can see how now that the house is in the middle and then these are all right here .
We have some other options , you know , uh lazy load .
Actually , these are actually pretty helpful options and we shouldn't overlook this .
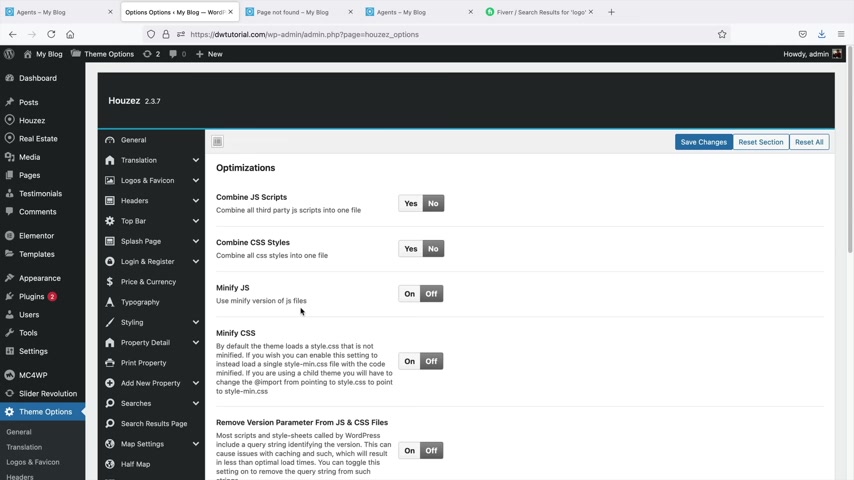
So optimization .
So this will actually help make your website faster with options such as lazy load .
Now , if you are brand new to wordpress , I would probably just do minimize M I CS s and add lazy load , maybe disable emoji scripts .
And uh let's see .
Yeah , a lot of these options are really helpful actually , um I would probably leave that one on as well .
So this right here will reduce the javascript this right here , minimize CS S uh if you have it , this right here is lazy load .
Lazy load is actually a very important feature .
So let's say , for example , someone's on your website and they never scroll down .
Let's just say they never scroll down , right ?
And they just click on another page , lazy load will actually stop your website from loading these images down here because it's just causing more strain on the server and they never scroll down anyways .
So it doesn't even load those images ever resulting in a faster websites .
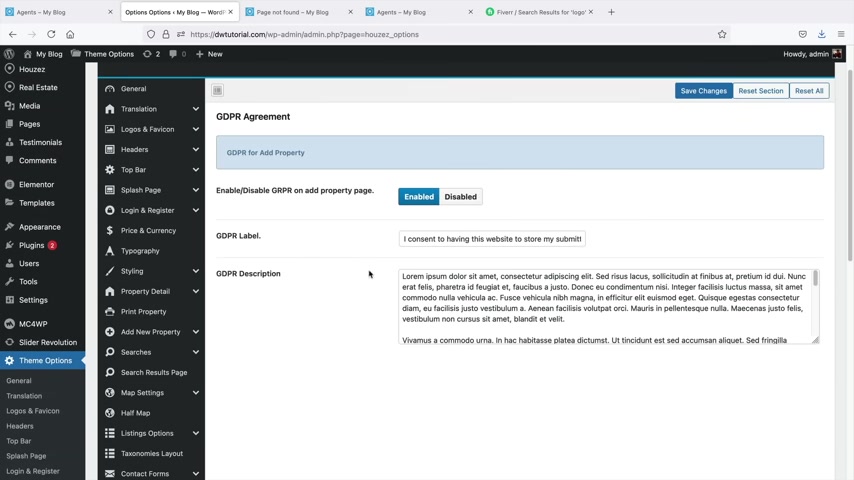
And then we have GDPR where we have Europe trying to take over the world , whatever let them do what they want to do and uh we have custom code and import and export .
All right .
Now that we talked about the theme options , there are some more on the actual home page that I quickly want to cover .
It's really not hard to understand , but here , let's click on customize .
Now , one thing I do want to mention is that um let's say you make a home page , right ?
You need to assign your home page to the actual home page .
So for example , home page settings and then over here you'll say , all right .
Well , I want the splash page to be the home page .
So that means when they go to this website right here , uh I want them to uh see this page first .
So you do want to make sure that you select your home default or whatever it is your home page as your specific home page .
All right , pretty simple .
Right .
Next , we have widgets .
We did talk about widgets and let's scroll down to the bottom .
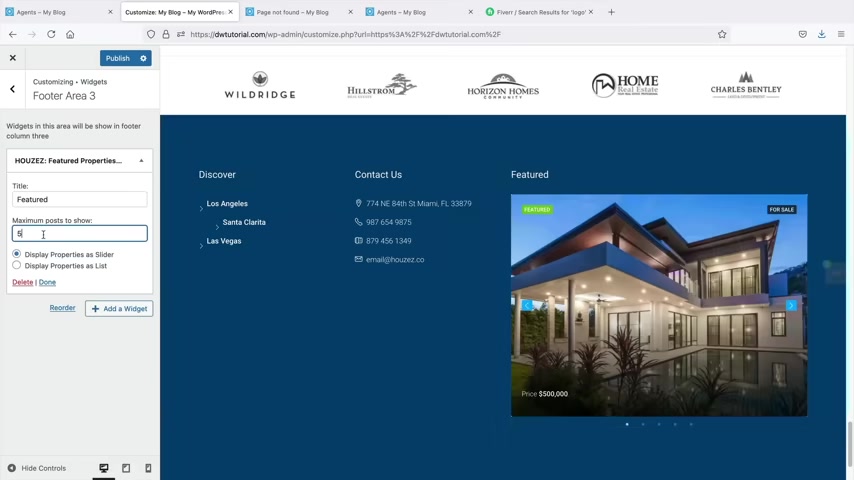
So widgets , footer area one here , we have a widget , we added right ?
Footer area two and also footer area three .
So let's add a widget to footer area three .
Now , you might notice that we have these houses widgets right here and these can be anything , these can be featured properties , uh you know , whatever .
So that's a little too big here .
Can we just put it as a list ?
Make it look a little cleaner , see if that works .
No , maybe as a slider .
Huh ?
Or Max Post the show .
Yeah .
I don't know .
Maybe it's not that good as a widget .
Let's see how that looks .
All right , whatever .
But , uh , you guys get the point , you guys can add more widgets to your footer , uh , properties , match properties to show .
I would put just like three .
So , I do think that looks a lot better .
Now , one thing to note here is that we only have three widgets .
And that's because in the theme options under the footer section , we need to apply a four column row .
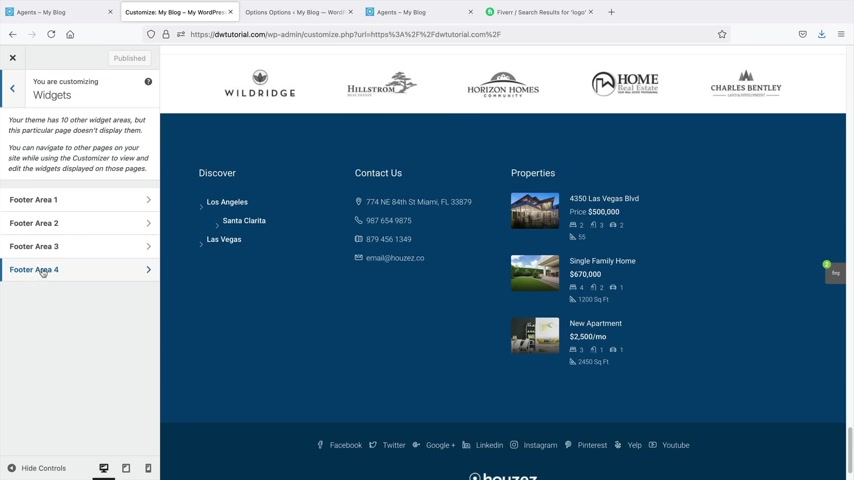
So with the four column row that will allow us to add in more widgets to our footer , you will now see I have footer area four where I can add in more , you know , I can add in a mortgage calculator or something like that to our footer if we want to do that .
So yeah , you can add in more widgets to your uh footer if you decide to do that .
So let's just go ahead and add in .
I don't know about us , right ?
This is about us and then we can add a link and also like an image URL uh if we want to do that .
So that's pretty much it for the footers and everything else .
Also over here , we can change the site identity .
So you know up here how we have these little icons , you can click on a site icon and this will display your company logo or any logo that you want on the browser when people visit your websites .
So I'll just select this one right here .
And as you guys can see , we can get a good example of this like bats , right ?
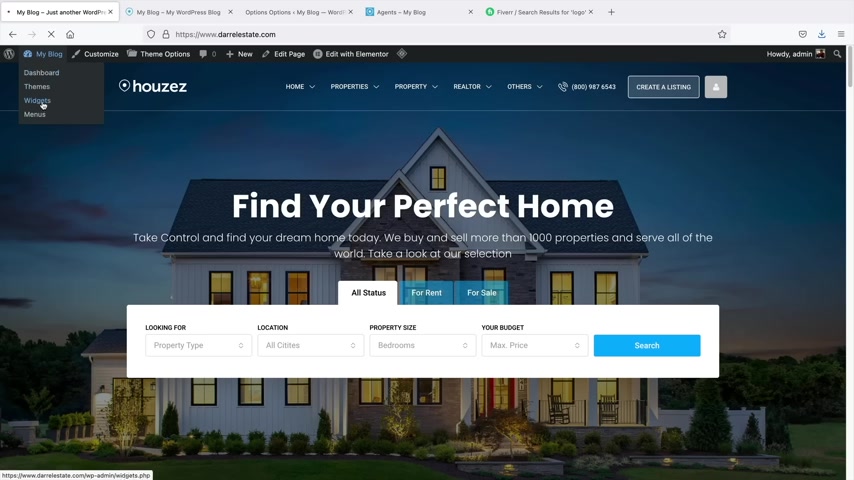
Or let's see here .
Yeah , like that .
There we go .
All right .
Crop the image .
All right , cool .
So I'll go ahead and publish this and then I will close the theme customizer .
All right .
Awesome .
So now that you guys know a little bit about the theme options , you guys do remember that the properties also have widgets as well .
So we have widgets on the footer and also on the properties .
Now you can access those widgets right here by clicking on widgets .
Uh Let's go ahead and see what we got going on here .
We have the property listings , right ?
So for example , so if I click on this page , you can see that this single property listing has a widget section .
Also the actual search , the grid default also has widgets right here .
You can actually change the widgets on the property listings on the search side bar on the single property and you can adjust these widgets and kind of see what works best for your real estate websites .
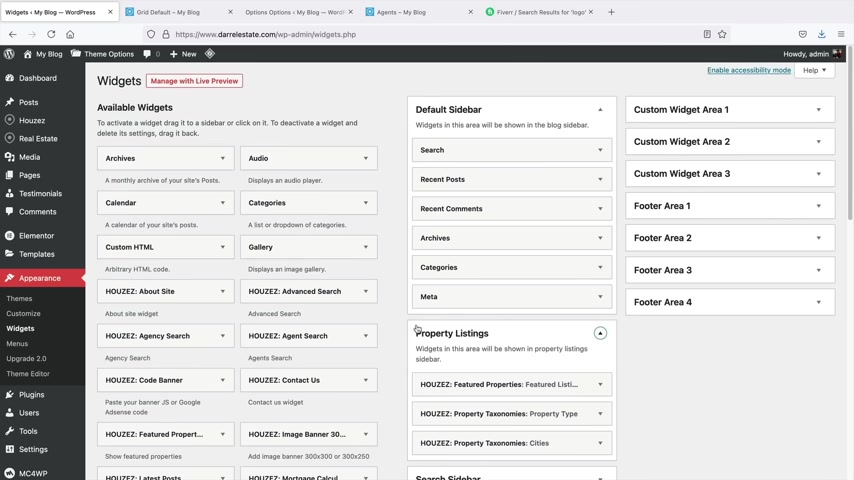
Now , I understand this might take a while and it is somewhat of a process , but I just wanna let you guys know if this is where you can add widgets to your listings on your websites .
All right , in this section , I'll quickly teach you guys how to add a blog to your real estate websites .
Now , you might want to talk about your properties or events that are coming up or trends or whatever that you wanna talk about .
Uh Let's go ahead and do that .
Now , the first thing that you'll need to do is you'll need to create a page and assign that blog page to that specific page .
So for example , I'll go ahead and close that at the title .
This will be our blog .
And on the right side , we have page attributes .
Now , you're gonna use the page attributes a lot with this theme because you need to assign the actual blog to this specific page .
So I believe right here , they have , they only have one right here .
Uh Yeah , the blog masonry templates and then we'll publish that and publish that and then you can view the page and any post that you make will automatically be displayed right here .
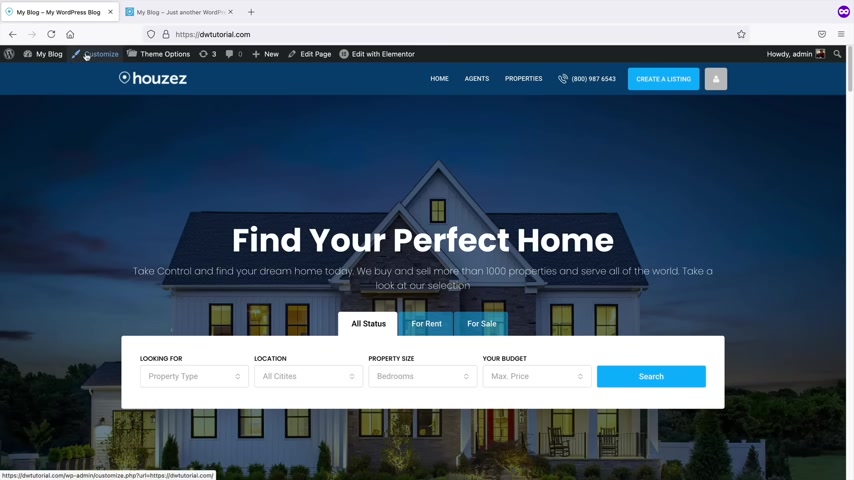
Now , you might be wondering , OK , well , how do we actually assign the blog page to the blog well , or to the theme ?
The first thing you'll do up here , you'll click on customize .
Now , we're going to assign the blog page as the default blog page .
So right here it says home page settings , you'll see post page , go ahead and select the blog and what that's doing , it's the theme is telling wordpress saying , OK , we want to assign this specific page to be the post page , which is whenever you make a post , it will display uh your blog post .
Now , let's just show you how to create one really quick .
So up here you'll go to plus new and instead of clicking on page , you'll click on post and this is where you can blog , you know , like uh the top top 10 best places to buy property , you know , and here you can go ahead and just write some demo contents about the properties or you know , you can insert images .
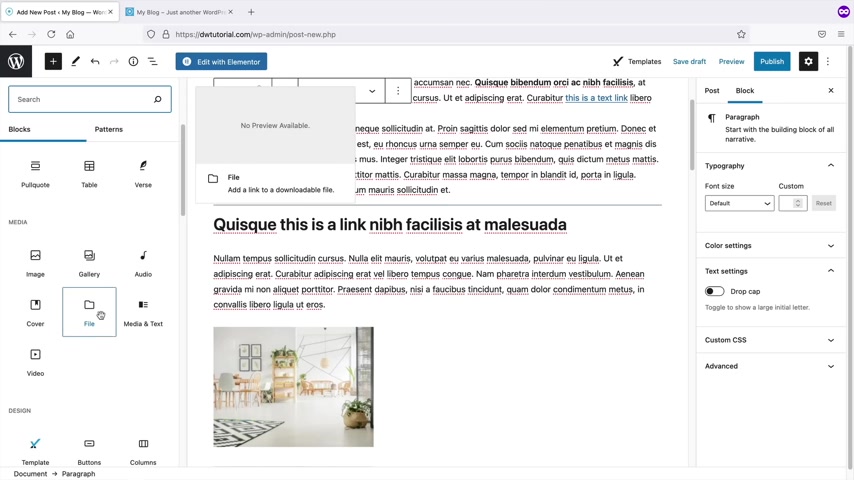
If you do want to insert images , you can click on this plus icon and these are a bunch of elements that you can use .
Now , this is the default editor , it's called Gutenberg .
Now , at the current time , I'm making this video , um I would only recommend Gutenberg for blog posts , but they are rapidly developing their page builder to basically be a specific page builder , but I just don't think it's there yet .
Maybe give him another year or two and they'll be a good page builder .
But uh you can just go ahead and type an image and here we go .
And then you can upload an image or you can use one for your media library .
So media library and then just , you know , select an image insert that and then you can go ahead and talk about that .
So um yeah , you can use this editor to create your blog posts and then once you're done with that , you'll click on publish and publish and you can view your posts and here we go .
So we have the top 10 best places to buy property .
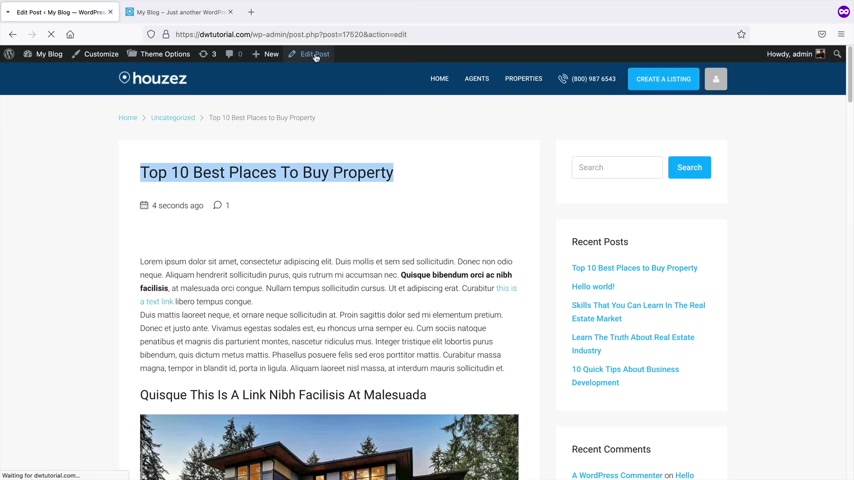
We just have some images and other stuff that I added just for , you know , demo purposes .
Now , also whenever you make a blog post , you need to always add a featured image .
So let's click on edit post really quick .
And the featured image is the image that represents the article .
So for example , when you guys , you know people sharing stuff on Facebook or social websites , there's always that big image , right ?
This is the featured image .
So this is the main image that's going to represent the actual uh article .
So I'll put that and there we go and view the posts and there we go .
Now , the last thing you need to do obviously is you need to assign the blog page to the menu .
So let's do a little shortcut right here .
I'll click on this and click on menus , all pages and just make sure that the blog page is added to your menu just so that uh people can access the blog page .
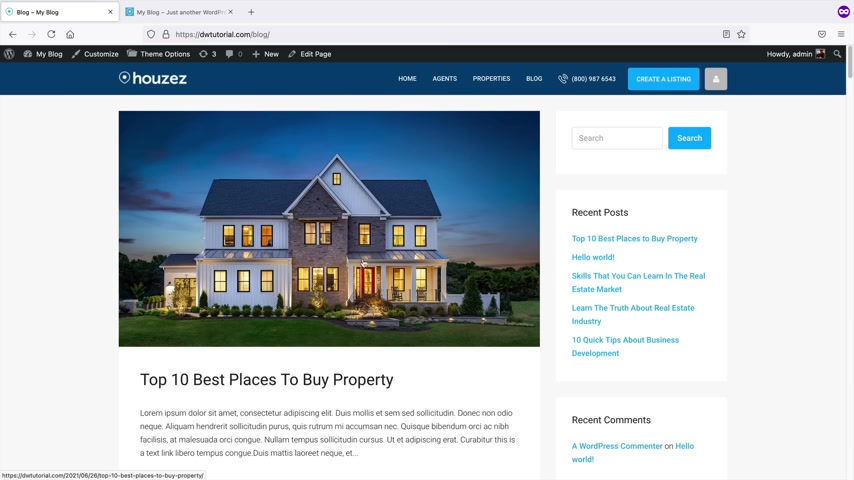
So let's click on save menu and visit sites and then we can click on blog and all of the blog posts that you create will be displayed right here .
Now , remember the theme customizer does have different options for the blog page .
So you can change the structure , you can change , you can get rid of the sidebar and everything .
So make sure to go back to the theme customizer .
I'm sorry , the theme options and just see what other options you have to design your uh blog section .
So that's how you can incorporate a blog onto your real estate website .
All right .
In this section , I want to quickly talk about page templates .
Now , in the beginning of the video , when we were creating pages , I told you guys not to delete specific pages because that can make your website inoperable .
So for example , uh on my website right here , if I go to create a listing , you're gonna find that the website does nothing .
Now , there's nothing wrong with the website .
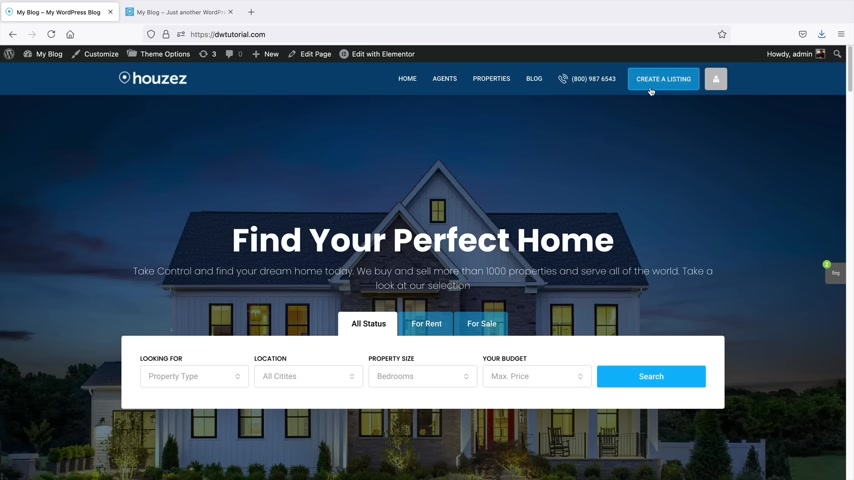
The main issue here is that we deleted the page that create a listing is supposed to propagate .
So for example , if I go to my demo website and I go to create a listing , it will then take us to the create a listing .
And here we have all these different tabs .
So we have invoices , favorites and save searches .
Now , if I go to my website and go to my little board , you'll notice that all of those are gone .
Now , the reason why they're gone is because we deleted the pages that are supposed to be here .
So for example , there's a page for create a listing , there's a page for favorites , there's a page for everything that you see right here .
So let me go ahead and talk about how to add them .
And also I'll give you some more examples of what happens if there is no page found .
So for example , let's just go back here to our dashboard or I'll go to my demo websites and I'll go to my dashboard and I'll go over here .
It's two pages , right ?
And the same thing here , I'll go ahead and just kind of give you all a quick comparison .
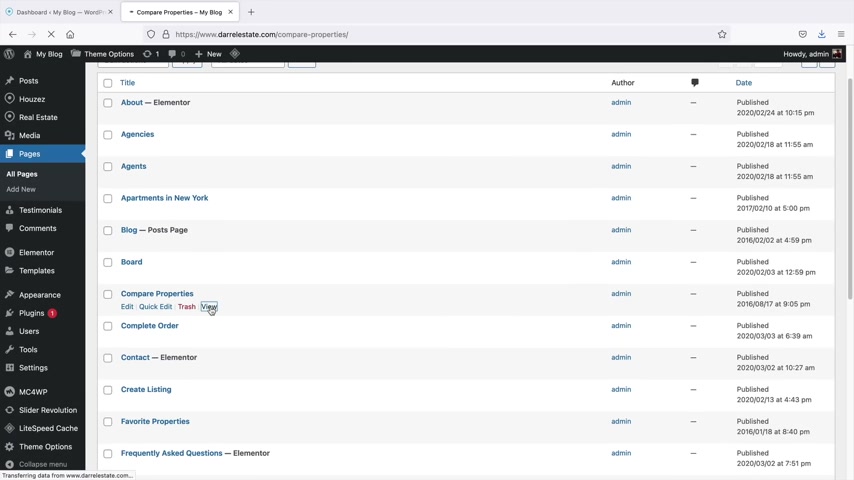
So here we have our pages right now , let's say , for example , I want to compare properties .
So if I click on view right here , this would be the page to compare specific properties .
Now , this page by default doesn't really work well because it needs to compare specific properties .
Now , if I go back to my website right here and I go to the pages , you're gonna see that there's no comparison .
So if I do decide to try to compare properties against each other , the website will take them nowhere again because there is no compare page for them to visit , right ?
So here we go , we have uh we got our compare page , right ?
I'll just add these in now on this website with no compare page .
If I click on compare , um it's just gonna take them back to the search results because we deleted the page that it's supposed to go on for the compare page .
And if I go to my website here and I just do search and let's just compare this one and compare this one .
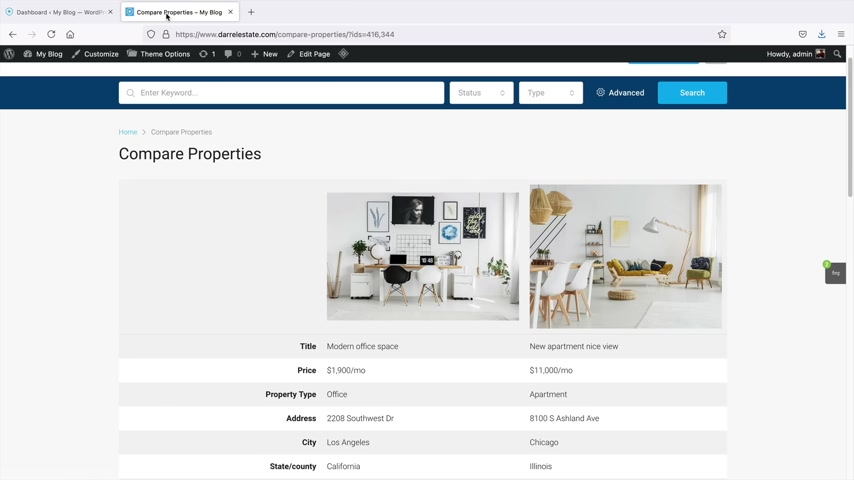
And if I click on compare , so the compare page propagates the two properties .
So when you're using your wordpress theme , you need to make sure that you don't delete specific page templates that you need in order for your theme to operate .
Now , I'll go ahead and just give you some uh pages that are essential .
Uh just in case that you might have deleted them or if you just do want to know which page templates are essential .
All right .
So what I went ahead and did was I restored the pages that you need in order to require the theme to work correctly .
So for example , you know , you need the my account page , right ?
You need the my profile page , you need the my properties .
So these are the pages that you need in order for the theme to operate .
Also Stripe , which is very important .
So if you guys do need help with the page templates , just simply click on edit right here and then it'll tell you which template to pick .
So right here , we have stripe charge page .
See this page is required because you need a page for Stripe to be on in order to accept payments , uh you know , for your website , which we will talk about in the very next section .
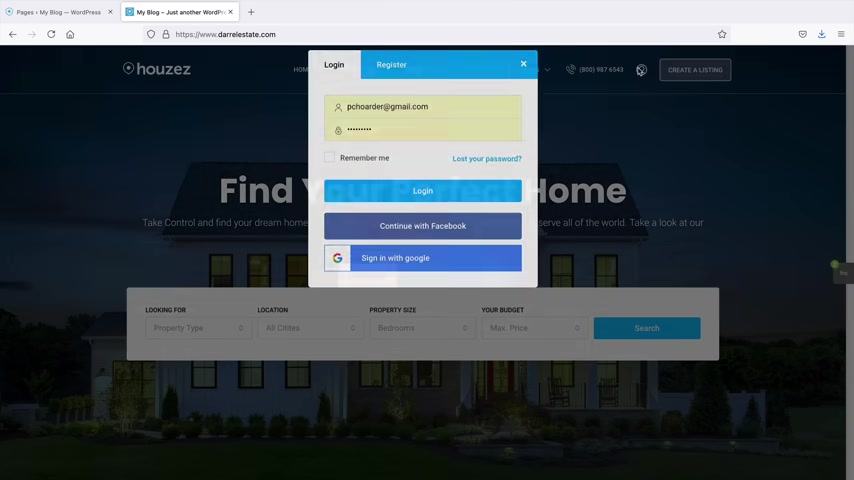
Also , one thing I do want to talk about is this account page right here .
It actually acts as a uh log in and register .
However , you can create a log in and register separately on a specific page if you want to do that .
So for example , if I click on the my account and they're not logged in , it'll want them to log in or it'll want them to register .
Now , what we can do here is we can actually create a page and assign that page as the log in and register page if you want to do that .
So for example , lo log in and register and log in and on the right side here under a template , we will go ahead and find the login and register .
Here we go log in and register and then select that and then publish and publish .
Now a good way to see what this does .
So here , if I click on view page again , a good thing to see what this does is that if you are already logged in , it's very hard to see what's going on .
So you can open this in an incognito window .
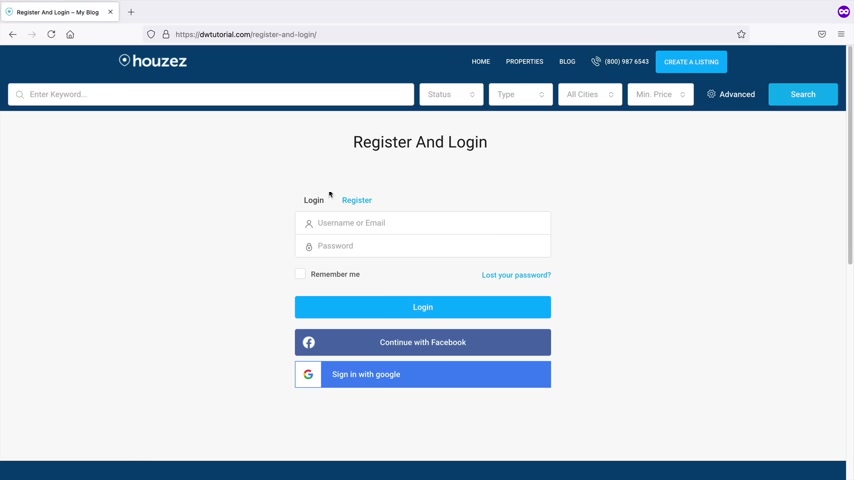
So I will open this in a new private window , right ?
So if the user is not logged in , it will then bring them to a register and log in page , you would have to take this page and then also assign it to the menu if you don't want to have that little icon .
So I just wanna be very clear that you need to have a page for every specific uh function on your real estate website .
So just a quick wrap up , let me display uh our account page and just show you how these pages are working on our website .
So this right here is a page , right ?
This is the my account page .
So we need this page in order for this section to propagate .
Now .
Also right here , we have other other pages that are actually inside of the uh board page .
Like for example , we have the Invoices page .
The Invoices page is actually right here .
So invoices .
So if I click on this , this will display a list of all of the invoices here .
We have the favorites page .
And if I click on the favorites page , you'll see that this is the favorite property page template .
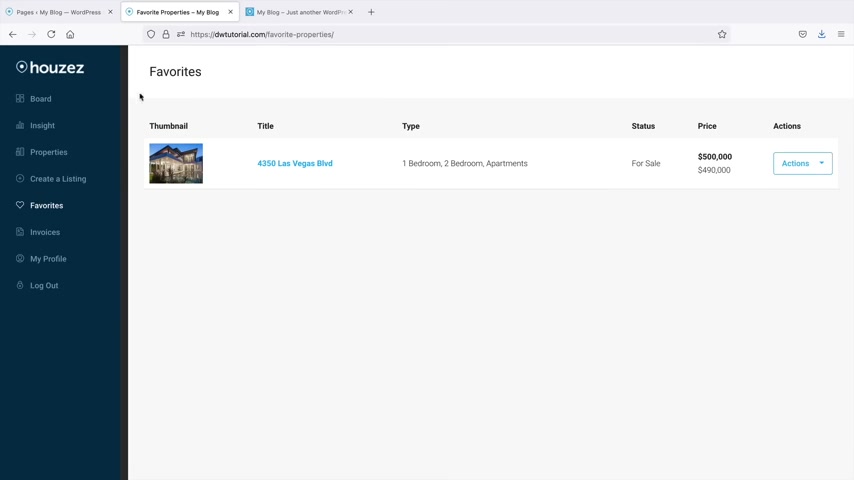
So I believe that's somewhere in here .
I believe it's somewhere here there .
It is favorite properties .
Just remember that uh you know , I just want to be very clear because this could be a very big mistake that people might make is that remember to have a page for every specific section uh on your real estate website to prevent getting four or four errors or you know , having a broken website .
So that's pretty much it for page templates .
I hope that made sense a good way to make sure you don't get any errors is just by using the demo websites .
So you can delete the pages on your demo websites , like the property grid layouts and like the the property versions .
But just remember to keep the central pages , like the log in page , the search page and so on and so forth .
So that's how the page templates work with this real estate theme in a nutshell .
So as you guys can see , creating listings is really simple .
Just create categories , choose a layout for the theme customizer and you're all good to go .
Now , in this part of the video , I'll be showing you how you can let your agents submit and manage their own properties or you can even let your website visitors list their own properties .
It is optional .
You don't have to do this .
But remember your agents and your uh visitors get a really nice custom dashboard .
So uh I'll be covering all of that in this part of the video .
So let's just jump back to the tutorial .
All right .
So in this part of the video , we'll be talking all about registration agents and also how to allow visitors to list properties on your website .
Now , there's a few different ways to approach this .
Now , in this first section , I'll be talking about how to let agents register and list properties and then I'll be talking about how to let visitors list properties and then also how to charge those visitors to list properties , right ?
So first things first , let's talk about how to let agents list properties on your websites .
First , let's go to our dashboard here and before we do anything , we need to allow the option for anyone to register .
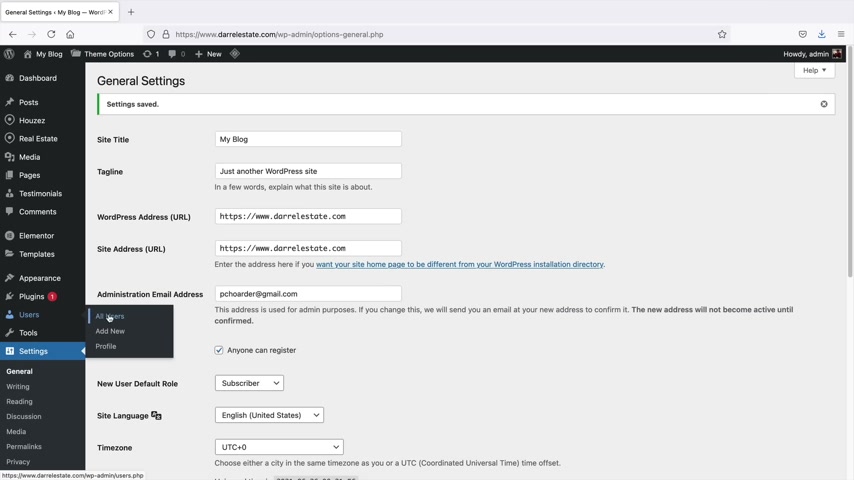
So right here under settings , we'll click on general and you need to make sure that under membership anyone can register .
So make sure that this is checked right there and then scroll down and click on save changes .
Now that we've done that we can now add agents to our websites .
So right here we have users and we'll click on all users .
Now whenever you have someone list on your website or an agent , they will be displayed right here .
So first let's go ahead and add a new user .
So right here , I put uh Patty and Patty at AOL dot com and then this will be her password .
So I'll just put Patty now right here .
We have roll .
So roll is essentially giving them the authority to list properties .
So for agent and agencies , uh they can go ahead and list and manage their own personal properties .
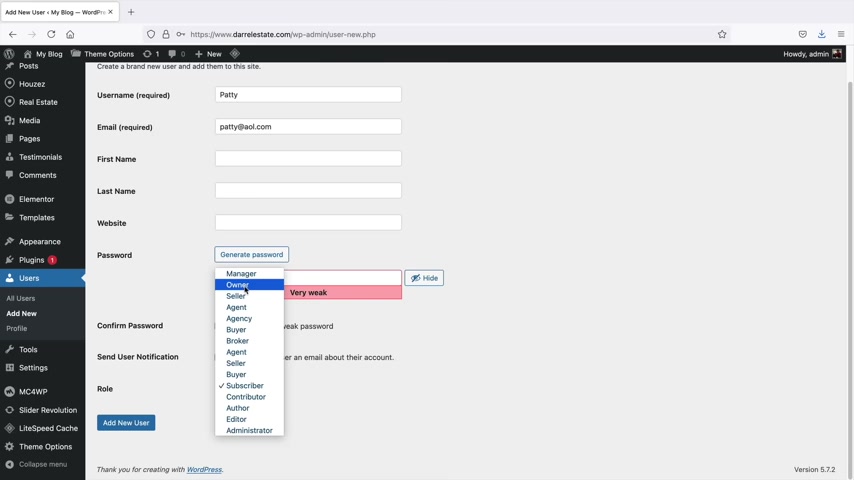
Now , with owner and seller , these are for people who come and visit your website and when they try and list properties , they'll be held in a draft state , meaning someone will have to approve it .
But if you're an agent , you can go ahead and just approve it and you know , be on your merry way .
So let's go ahead and click on add a new user .
Now , you have a few different options here depending on how you want to approach your websites .
What you can do is you can actually make it .
So the login button right here disables register or you can go back to your general settings and disable registration because you already have your agents and you only want your internal team to list properties .
But first let's go ahead and click on theme options and I'll just give you an example really quick .
So there are some options that you might want to consider to take down if you only want agents to list on your websites .
So you'd probably want to take off the register .
So this will only allow the login .
So we have already created the agent so they can log in and then we'll scroll down right here .
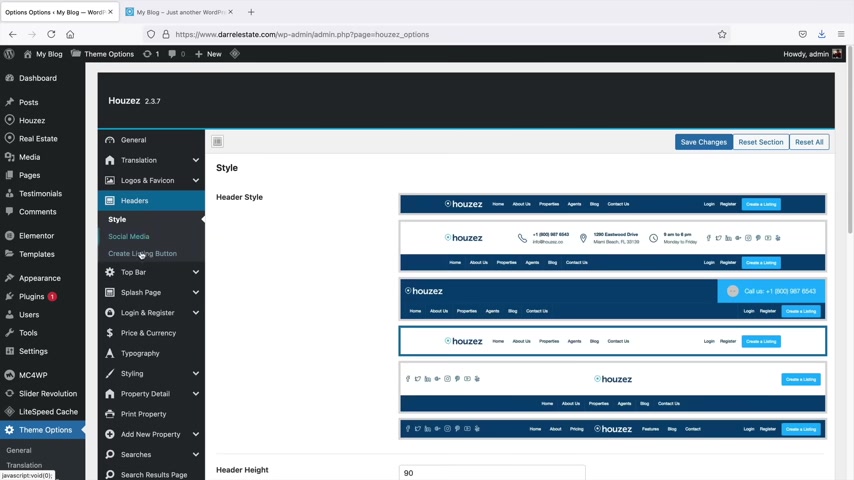
Now , once the agent logs in , we can actually take them to a different page , maybe you wanna take them to their account page .
But um that's up to you .
You can take them to my account or my profile or their invoices page or whatever page you want them to go to .
I'll just leave the current page and click on save changes .
Now , the next thing we're gonna do is over here under headers .
We might want to disable the crate listing button because if we have the create listing uh that kind of invites users to actually , you know , post the listing and everything .
So you might want to disable the create a listing .
All right , cool .
Now you do have one more option if you want to actually restrict registration altogether .
Now , on your entire website , you can go back over here and just make sure this is unchecked .
So that means no one can register on your websites .
Now , that's if you don't want to create your own users .
Uh If you have this checked your own agents can come to your website and register by themselves .
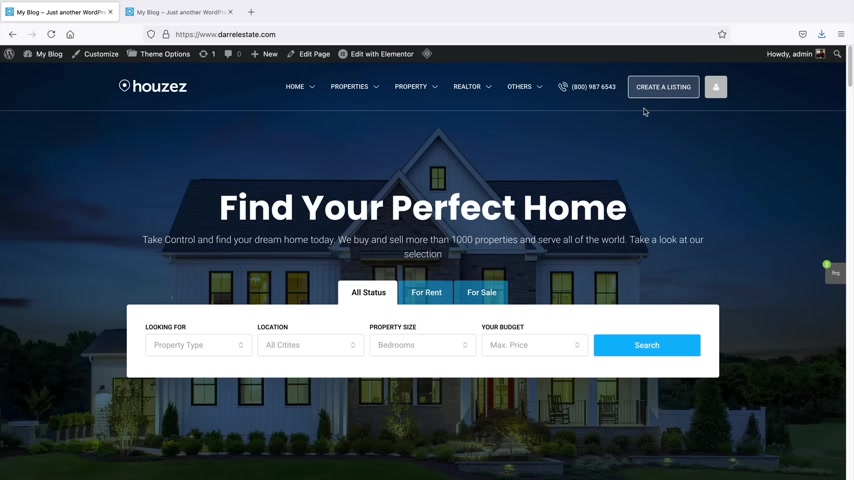
But if you have this unchecked , that means you will have to manually create the agents on your own .
So it really depends on you .
You know , it just really depends on how you want to run your real estate business .
I'm just explaining the different options .
So now that we actually have created the agents and they can log in , let's go ahead now and invite them and have them log in to our website .
So I'll go ahead and open this in a new tab .
Also , you guys might notice that create a listing is still there .
And the reason why that's there is because we have a cashing issue .
So you just want to make sure that you clear your cache and then that credit listing will be gone .
It'll disappear .
So let's go ahead and open this under a new browser .
All right .
Cool .
So let's imagine that we're an agent and we're coming to our websites and we're going to log in on the website .
Now , remember when you created an agent , their log in credentials will be sent to their email .
Uh when you create the agent because there's a check box to let them know that uh about their , you know , about their position with the website .
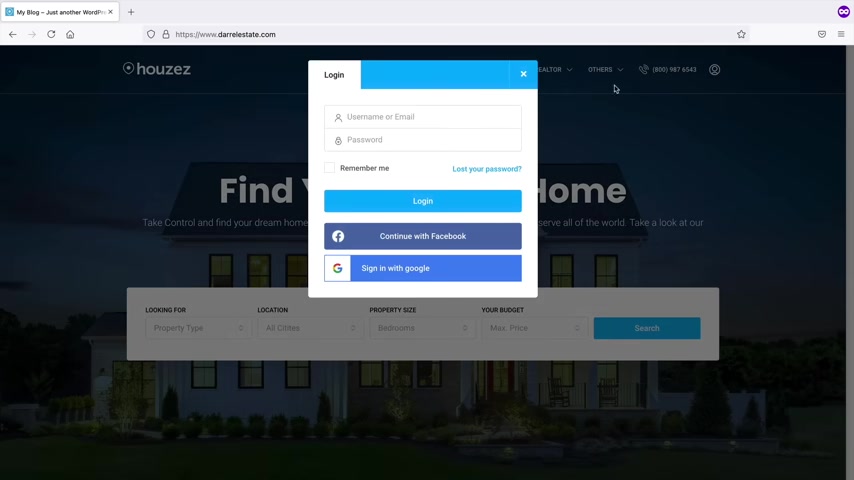
So right here , I'll click on the icon .
Now , you can see how the register is gone .
So all I can do here is log in to the websites .
So I'll go ahead and log in and click on log in .
So it's directing us .
All right .
So you can see here .
Now , we have the log in sets and we have the log in success .
Now , remember you can always redirect them to any other page after login , right ?
You have that option if you want to do that .
So right here , I'll just go to my board .
All right .
And this is where your agents can list their own properties .
So right here , they can click on create a listing , right ?
And they can go through these options right here .
And all these options are the ones that we selected and allowed on our website , so they can put the price .
Now , what I'll do here is I'll create a quick listing to show you how the interface shows for your agents .
All right .
So after they've created their listing , they will be invited to upload their media .
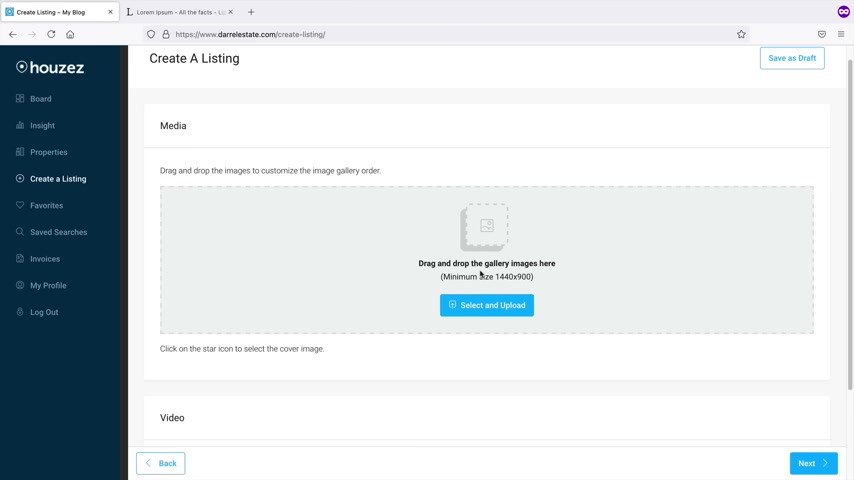
Now , just a reminder that they will not have access to the admins images .
So they will have to get their own images and upload them uh by themselves .
All right .
So I uploaded some images and I'll click on next .
Now , I'll go ahead and enter in some details about the house .
After they enter some details , they'll go ahead and select some features and we create these features with the custom fields builder .
So I'll click on next .
Now , I'll go ahead and submit a location .
Now , there also is sub listings and I don't really use this too much .
So I'll just go ahead and click on next .
All right .
Awesome .
So now you can see over here under properties , we have the listing available .
So if we click on this , the user can actually see what their property looks like and they can edit anything and make any changes they want to their own personal listing .
So that's really , really cool .
Now , your users also have access to their insights and they have a bunch of different things they can take a look at .
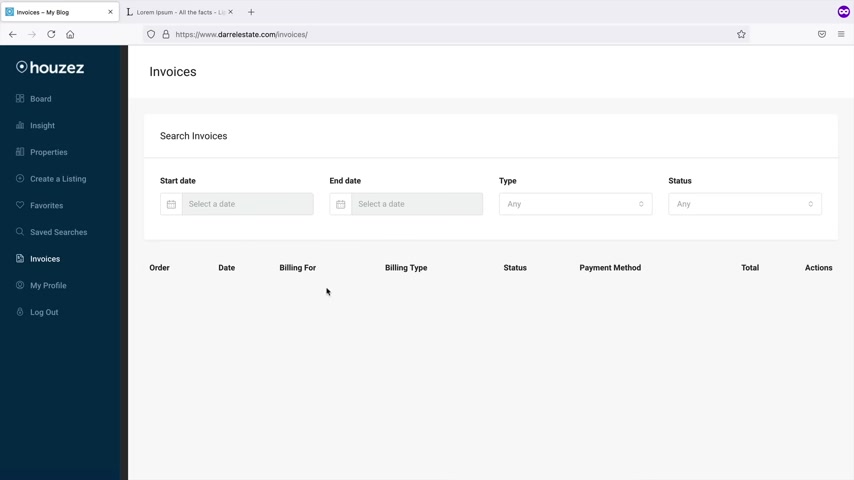
So uh for those of people who are um listing that are not agents , they can see their invoices here , uh favorites , they can create a listing and so on and so forth .
That's pretty much it .
That's how we can essentially have an agent's list properties on our website .
So what we're gonna have to do is go ahead and go back and approve this listing and now you can see how this is pending .
Now , agents will have to get approval for listings the agencies they will automatically post no matter what and it will not ask them for approval .
So that's the difference between agents and agencies and I'll just click on approve .
So right now it's 4350 , Las Vegas Boulevard .
Right .
I'll click on approve and now we can actually find it on our website .
So uh I'll just do , is it commercials ?
I think I did commercial here .
I put it on a commercial , I'll search for it .
And the one it is is 43 50 Las Vegas Boulevard and there it goes .
So that's how you can allow agents to list on your website .
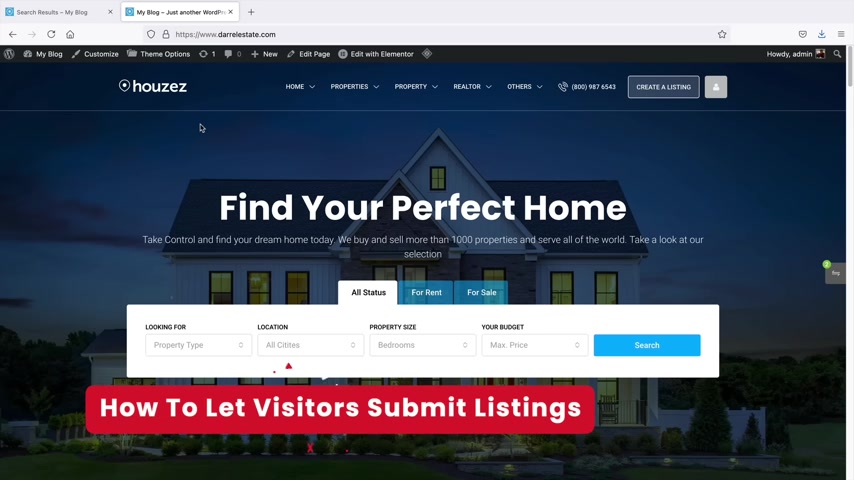
So next , let's talk about how to let users submit properties on your website for free .
And then we'll talk about premium options obviously like getting paid to post .
So first thing we need to do is we need to make sure again that the general options are enabled .
So always make sure that the general options are enabled so that people can register .
And now we're gonna go to theme options right here and we need to re enable some options .
So for example , the create listing button that needs to be enabled , right ?
And also for the login and register , we need to have the register button available .
So this will allow anyone that comes to your website to register and also uh submit posts .
Now at the time right now , we only have , was it one or two users ?
So we have admin and we have Patty .
So she is an agent and you can adjust the roles at any time by clicking on edits and just saying , you know what , we'll be the agency .
So that means that she will no longer need approval .
I think manager , I'm not sure what that does .
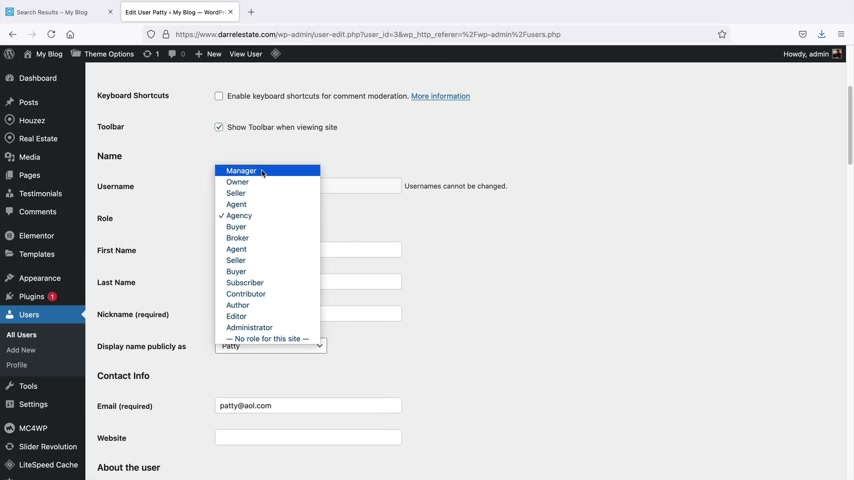
Guys , you might want to go through some of these and there are a lot of different , uh There's a lot of different roles .
You , you might want to go through the documentation .
I'm not really sure what every single one does .
So yeah , just be on the lookout .
But uh let's go back over here to all users or back to our website .
I'm sorry .
And now let's go ahead and go to a new browser and just imagine that we are a random visitor coming to our website for the very first time .
All right .
So this is from the visitor's point of view and they're gonna click on create a listing , right ?
And they might need to log in first because that's one of our options .
So you can have the option for them to either register or submit a guest account , which I don't recommend doing that .
You really want them to make an account because they're listing property on your website .
So you wanna make sure that these people are actually real people and they're not just random people from wherever , you know .
So I'll go ahead and register and make an account .
Now right here , we have select your account type and here they can select the specific account that they want .
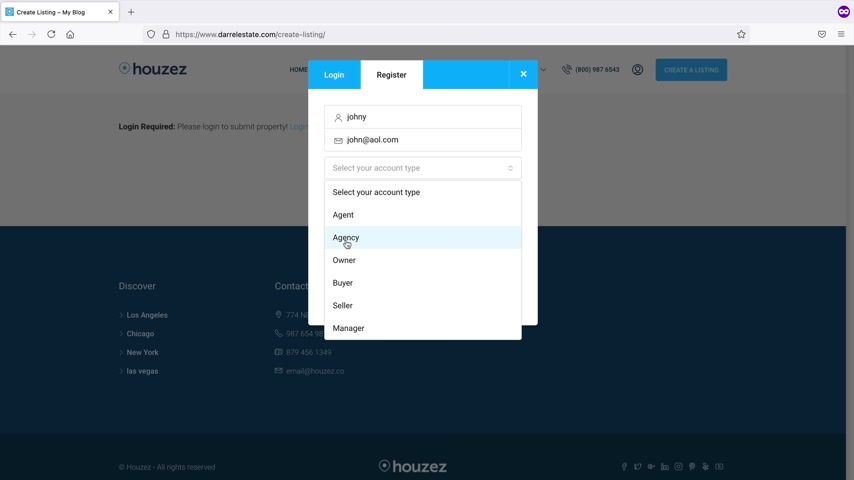
Now , you can restrict these because maybe you don't want people to have the option to be the agency option , right ?
Or the manager .
So what you can do is go back to your website here .
I'll go ahead and go to my other browser here and under the log in and register under user roles .
You might want to disable a lot of these like uh here , just put buyer or seller and that's it .
So anyone who registers on the website , they can only be a buyer and a seller .
So I want to disable these options for people visiting the websites .
All right .
So I'll go ahead and select Johnny and then I just created an email address and I will select register .
All right .
So Johnny was sent an email with their information and they can use that in order to log in to your website .
So right here , I'll click on log in .
All right .
So Johnny , we're gonna go ahead and log in with Johnny .
All right , log in successful redirecting now .
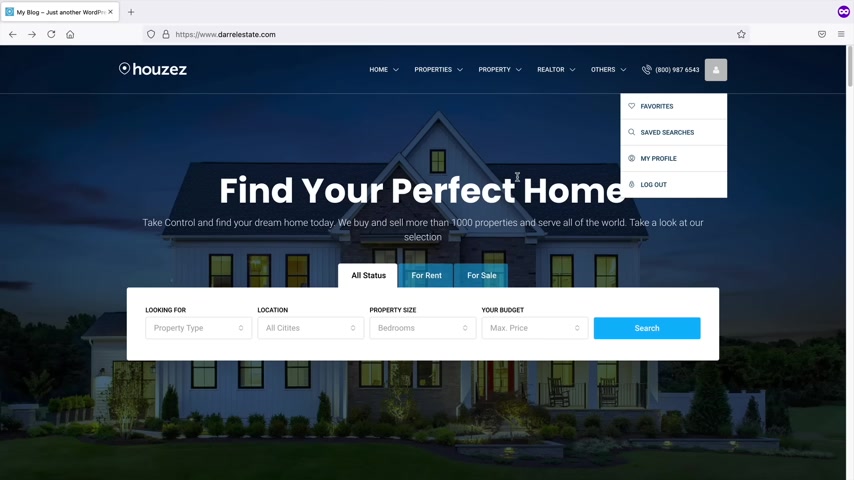
As of right now , Johnny can only view properties and favorite them .
The reason why he cannot list properties because Johnny signed up as a buyer .
So if he wants to list properties , he will need to be a seller .
You can actually go ahead and adjust their options right here or adjust their role in the user section .
So uh going back to our website , here's the user .
And if you find the users under the user section , you can adjust the role at any time right here .
So this will allow them to uh list properties on their website .
So if they did make a mistake , you can always go ahead and change their role .
All right .
So now we're logged in back as Johnny's account and Johnny can go over here and create a listing and this is the same exact format of when your agents list properties .
So they'll go ahead and go through the process and then the listing will be listed as draft .
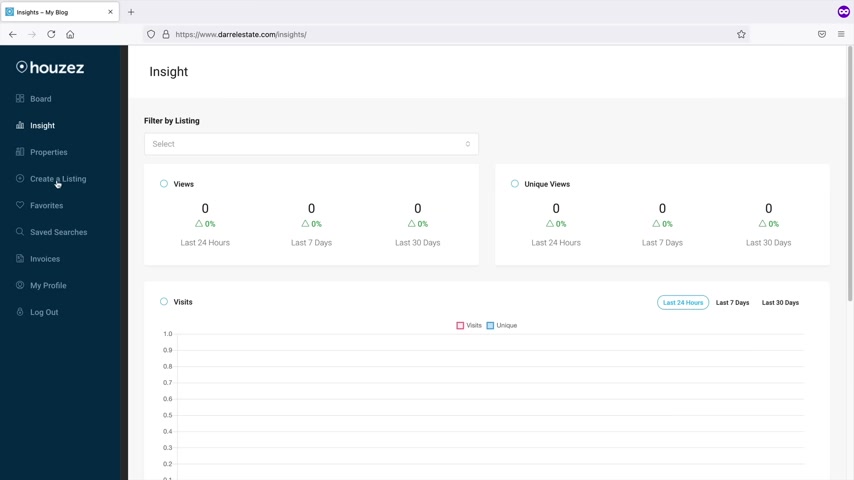
So you'll have to go ahead and approve the listing once they create it and that's pretty much it and they can go ahead and check their insights and they can access anything about their properties and if they want to view their properties , uh it'll be displayed right here just like the agent was earlier .
So that's how you guys can have users list properties on your website and everything's pretty much automated .
All right , it's a good job of making it this far .
We are almost done with this video .
Now , in this next section , I'll be showing you how to integrate payment gateways onto your website .
Now , you have a few options as far as payment gateways and the way you want to charge users .
So I'll be going over that uh in this video .
So the first thing we'll do is go ahead and click on theme options and we're gonna scroll down right here and we're gonna find payment gateways first .
Now , I recommend doing the house's custom gateways .
Woocommerce is another plug in that you can use to integrate um payment gateways , but you have to do install a lot more plugins .
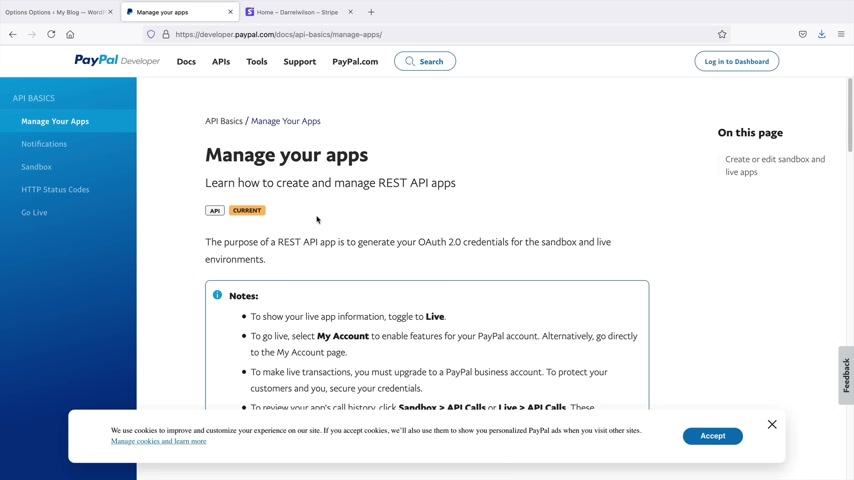
And I just feel like this is a lot more easier and convenient .
It actually looks a lot nicer too .
So you have a few options .
You have paypal as one .
Now , if you do have a paypal account , you will just click on enable and then you'll just go ahead and copy and paste your client ID and your client secret I uh secret key .
Now , if you do not have a paypal account , you can go ahead and register .
It doesn't cost you guys anything .
Now , due to the fact that you need to go ahead and enable API S and stuff like that , I'll just go ahead and leave the documentation for you guys and you guys can check this out .
Um It just shows you how to get your API keys .
You just go ahead and copy and paste it on to your websites .
Now , the one I recommend uh is Stripe , which is the next one .
So I'll go ahead and disable this and we have Stripe .
Now , stripe is available in all of South America .
It's available in Europe .
It's available in the United States .
There are some places it's not available like some parts of the Middle East .
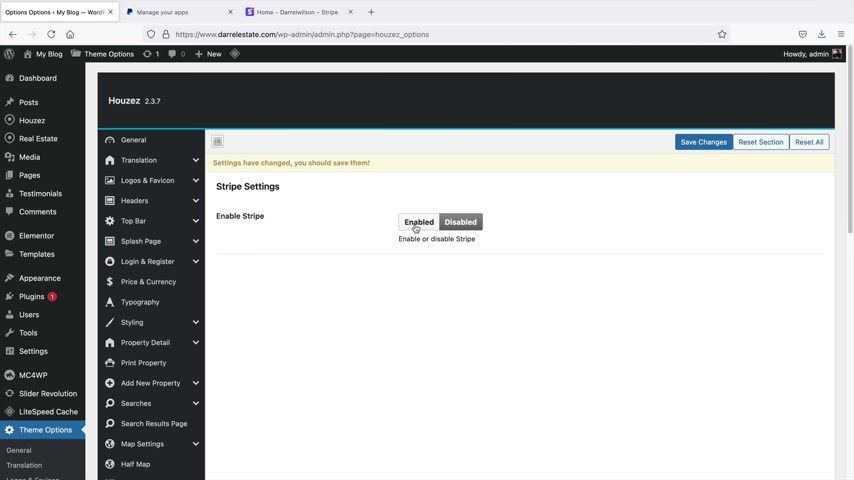
It's not available and I do believe some parts in Asia like China , it's not available , but it's pretty much like the global process or payment at this current moment .
So we'll go ahead and enable that and you guys will go to stripe dot com .
Now , stripe dot com is a free website .
It does not cost you anything to get started with Stripe .
I'll go ahead and log out right here to just to give you an example of what this looks like .
So this is stripe dot com and you guys can register for free .
It doesn't cost you anything .
There's also no credit check and you guys can go ahead and just register on your site .
They do take a small percentage of your uh I think it's like 2.9% or something per transaction .
So it's very , very small and all you need to do is link your bank account with this website and they will automatically deposit the money into your bank account with a , you know , it's a very fast and convenient process .
So I'll go ahead and log into my Stripe account again .
All right .
And this is your personal custom dashboard with stripe .
It does take a little bit of a time to register , but rest assured it's a very easy uh payment gateway to use .
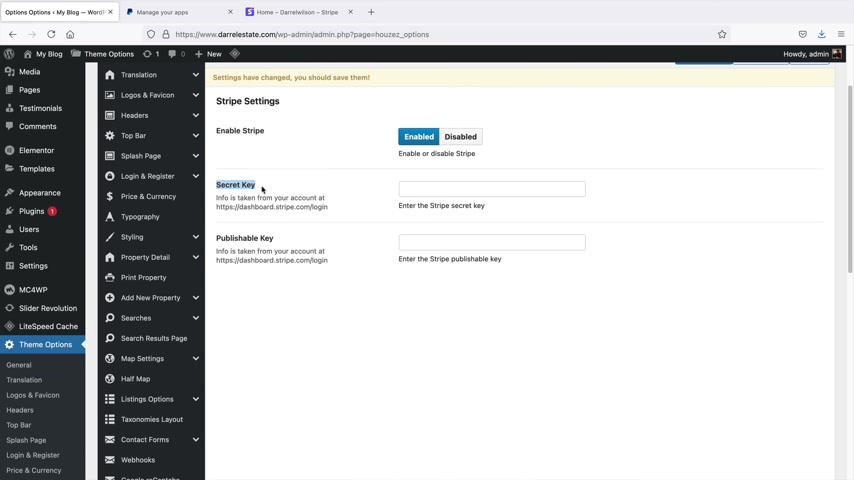
We're just going to go ahead and copy and paste and that's it .
So let's go back to our website here .
So here we have a secret key , right ?
So we're going to enable a secret key and also a publishable key .
Now , right now , it'll accept live payments because we have an SSL on our website .
Now , if you want to run test modes first , which I recommend we can enable a test mode on our websites .
So let's go back over here to memberships and right here where it says enable paid submission will say yes .
Now we have a few options .
So we have per listing and we have membership .
So I'll just go ahead and select per listing .
Now , per listing means we want to charge people per listing so we can charge them for a specific time period .
So for example , expire days , I'll select 30 currency .
I'll accept us d the submission price is $5 .
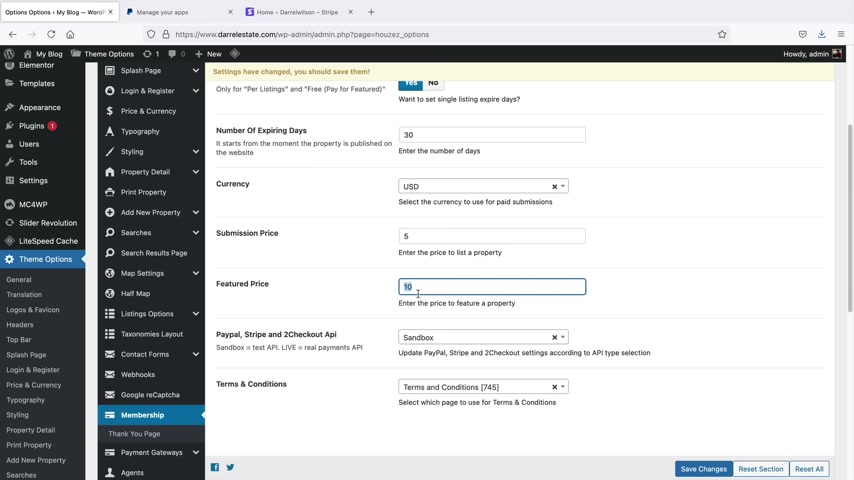
But if they want a featured price , which is like , you know , at the top of the websites , they'll have to pay $10 .
Now , here we have sandbox .
Sandbox means it's basically in test mode and it's not live .
Ok .
So I'll go ahead and , and click on save changes .
So now that I've enabled a per listing payment I can go back to my payment gateways right here and I can enable stripe and remember it's in test mode .
So what I'll do is I'll go back to my stripe and I will click on view test data .
So once I select the viewing test data , you'll see this developer section , go ahead and click on API keys .
Now , what we're gonna do is we're gonna copy this and take the publishable key and go back and paste the publishable key right there .
We will then go and reveal the secret key and I will go ahead and paste the secret key right there and that's it .
We are done .
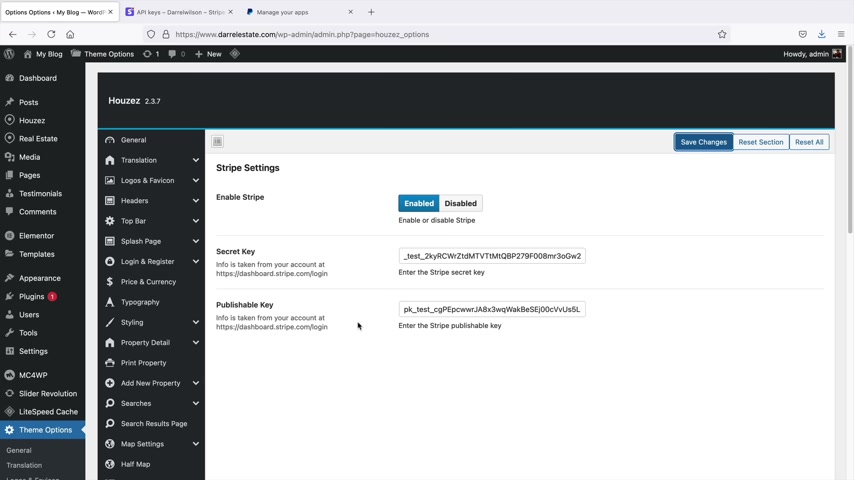
Now , we can always go ahead and run a test transaction so we can go ahead and go through the process of users signing up to see if our payment gateway is accepting the payments .
All right .
So let's go back to Johnny's account , which was our random visitor .
And I'll go ahead and create a listing and show you how they will be charged on your website .
All right .
So we're filling out these information .
So we're putting in the address again and I'll just go ahead and yeah , Las Vegas Boulevard .
Next , next , next .
So right now they're basically filling out all the information about their property and here is the consent agreement , submit property .
So now you'll see how Stripe is a payment method and they'll have to go ahead and enter in their credit card payments in order to uh submit the webs or submit their property .
They can also do like make featured .
Well , they'll go ahead and pay 15 bucks if they want to do that .
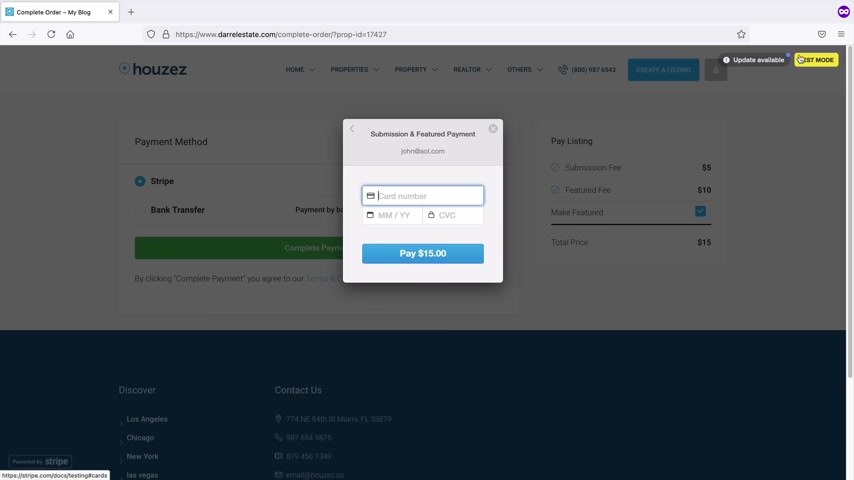
So right here I'll click on complete payment and now it's gonna ask for their credit card .
So this is John and then you know Las Vegas , here we go .
So Las Vegas .
All right , Las Vegas and then here's their address or their zip code .
I think it's 8147 and then payment info .
Now on the top right , you're gonna see test mode .
So we know that this is in test mode .
So I'm gonna enter in the test the test mode , credit card , it says 424242 all the way and click on pay $15 .
All right .
And that's it .
You're done .
Thank you for your business with us .
And this is also the thank you page .
So you wanna go ahead and customize the thank you page because right now it's just demo text here or click on go to dashboard and then they can see their amazing house .
Now they can go ahead and do anything they want with it , they can edit it and all that stuff and then it'll be up to you to basically approve this post .
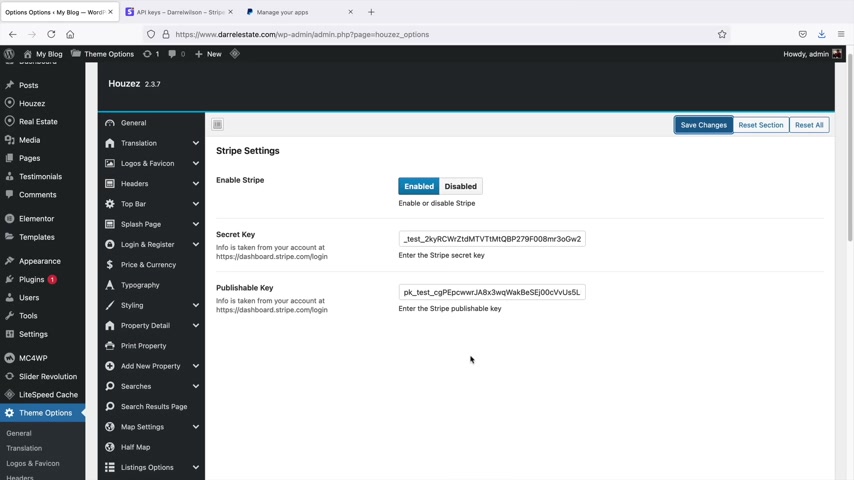
So that's how you can have paid listings on your website .
Now , if you want to accept the real money on your website , you'll need to do a few things here .
So you'll go back to your payment gateways , right ?
Or your uh was it Stripe settings ?
Right ?
No , no , no , no memberships , memberships .
And now let's go ahead and just take a quick look at membership .
So I think a good one right here is free , but pay for featured .
So that will enable them to list their properties for free .
However , if they want featured , like to be at the top of your websites , then they'll have to pay like $10 or something like that right here .
So I'm just letting you know that's an option .
And then per listing is just submitting a listing , you know , they have to pay for , to submit their listing , which is very common , right ?
And then there's also membership .
Now , with membership , you can enable recurring payments with Stripe and Stripe will automatically take the money every month and you can charge them just to list properties on your website as a membership .
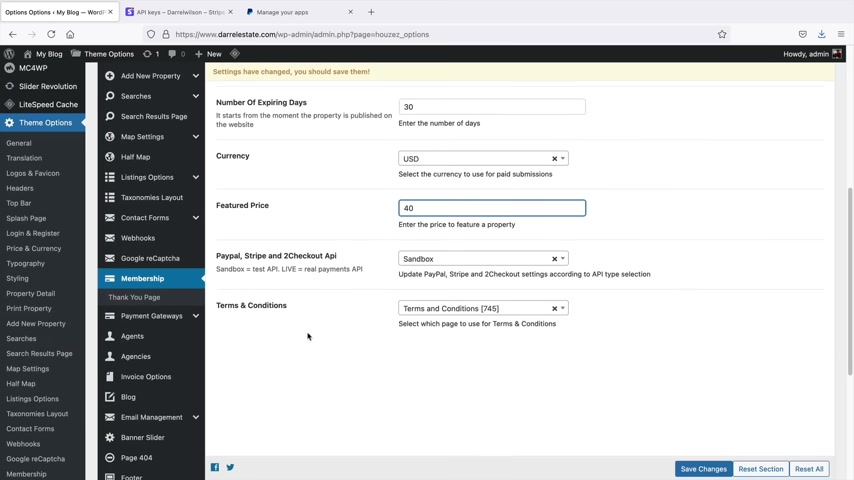
So for example , we'll give them 30 days to list all their stuff and you know , we'll give them a featured price of , you know , I don't know , $40 and whatever it is that whatever you wanna do .
So that's just basically an example of how you can enable a membership on your current uh you know , on your website if you want to have a membership .
But uh that's really up to you .
You can do free which I think is good pay for feature and then per listing , per listing is also pretty common .
I think that's how Zillow does it as as well .
So , uh but what I'm gonna do is I need to take this and put this in live mode .
So once I put this in live mode , uh the website will now accept live payments .
Now , we also need to go ahead and update the payment gateways under the stripe settings because these are the test credentials .
You can even see it how it says test .
So you'll go back to your website and you'll click on the the little orange box right there that says not viewing test data .
So this right now is real money .
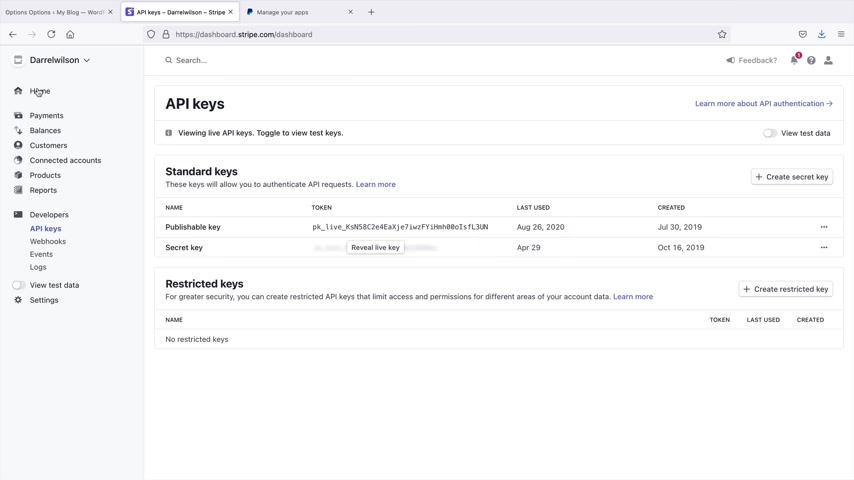
So if I copy and paste these key codes , this is real money .
Now , one thing also to look at is click on view test data .
We can see that the successful payments went through because remember it was $15 and now we get $14.26 .
We can also see the amount of sales right there .
So the payment did get through and it was connected .
So what I'll do is I'll just go ahead and uncheck this .
Get out of test mode developers API and now we're going to do the same thing except push this under the here we go .
And then for the secret key , we'll go ahead and copy that and paste that and save its and we are done .
So at this point , this website can now accept real credit cards from anywhere around the world uh on your real estate website .
So you just want to make sure that you do update the publishable key and the secret key on your website .
And also make sure that the membership section is taking live payments .
Ok ?
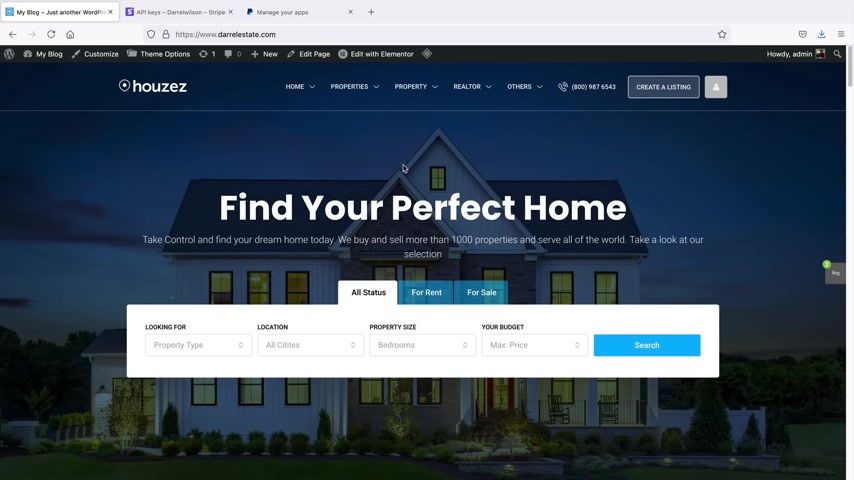
So that's pretty much it guys on payments .
I've showed you guys how to accept payments .
I've showed you guys , uh , how to list , uh , for free and per listing .
And also I talked about membership so you can go ahead and select any one of these options at your discretion .
So I hope this section was pretty clear .
Let me know in the comments if you guys have any questions about what I said or allowing people registering or payments uh , on your website .
Let's go ahead and go to the next section where we're going to talk about how to embed Google Maps on your website .
All right .
So good job guys , you guys are pretty much almost done .
Now , if you guys do want to add the Google Maps api to your websites in this part of the video , I'll be showing you how to integrate Google Maps onto your real estate website .
It is optional , but it does help the user a lot because then they can geo locate with one click .
And I'm sure you guys have seen that on many websites .
So let's go ahead and jump back to the video .
All right .
So in this section , I'll be showing you how to embed the Google Maps api onto your website .
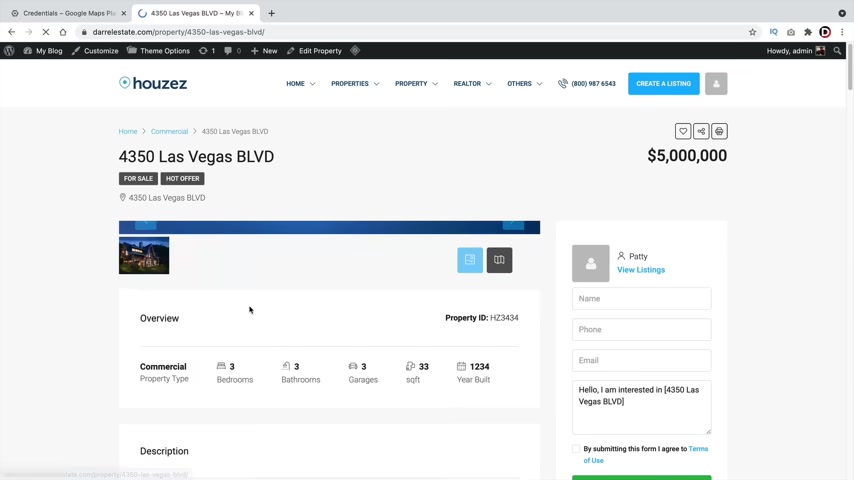
So you can have Google Maps on your website .
Now , the Google Maps will be displayed on many various parts of your website .
It'll be displayed on your listings .
It'll help users um list or find properties by geolocation and it just makes your website a lot easier to navigate .
So right here , we have Google Maps .
Now , this team did a pretty good job at enabling Google Maps where they can click on that .
However , if you want to display on your website automatically , I'll be showing you how to do that .
Now , I've already made a few other videos on the Google Maps API integration .
So what I'm gonna do is take that video , I'll put it right here and once we actually get the API key , I'll show you how to add it to your website .
So let's go .
All right , welcome to the Google Maps section .
Now , this is the end of the video .
But um for those of you who want to add geo local onto your website , which is a very important feature .
I'll be showing you how to add that to your classified ads , websites .
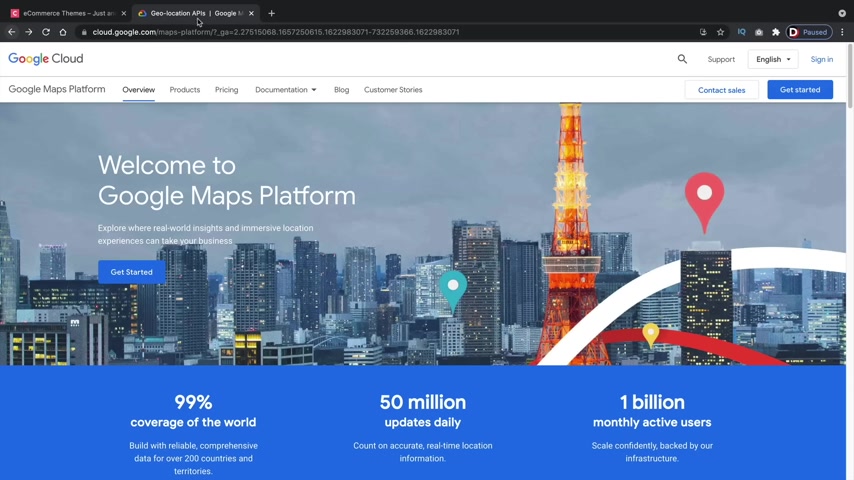
Now , you guys saw over here that a lot of these ads , they have this Google Maps section , but we have this big , you know , something went wrong .
Also , users cannot search by geolocation , which can lead to a little frustration because we want to make things very convenient and easy for our visitors .
Now , there is a link in the description of this video .
It'll take you to Google Maps where you guys can go ahead and sign up .
It'll bring you to something like this right here .
I'll go ahead and put this in the description .
So once you guys get here , you guys will click on , get started .
You guys can also get there by just going to Google Maps API and just signing up .
So what I'll do is I'll just go ahead and log into my uh gmail account right here .
All right .
So this is the Google cloud platform .
Now , they're gonna ask you some questions .
They're gonna prompt you to , you know , um agree with the terms .
You might have to put some account information , you might have to agree to the terms of service .
So just go through the process of this and once you guys are done with the setup process , I will meet you guys on the overview page .
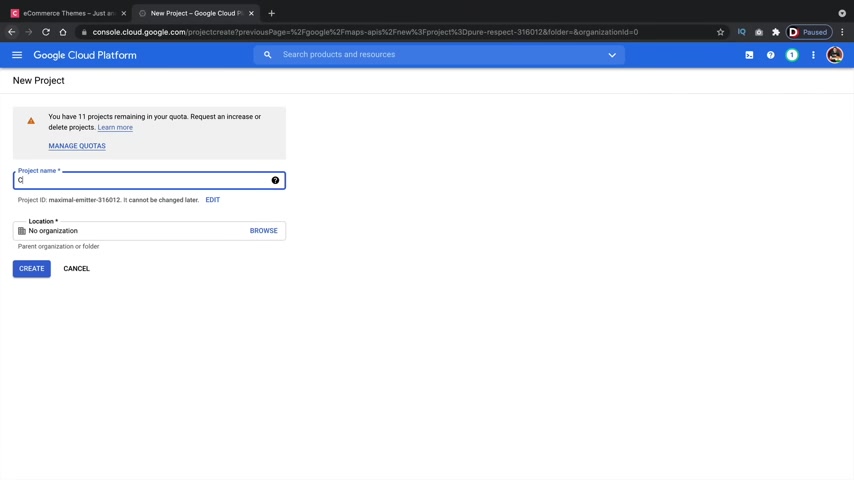
Now , once you guys get to page three , you guys will need to go ahead and input your business name and also your credit card .
Now , there is a very small fee with Google Maps for using their API I think it's like three or $5 a month or something like that .
It's really not that expensive .
So um you guys will have to go ahead and put it in your debit or credit card there .
And once you guys are done , I'll go ahead and meet you guys on the very next page .
So here we have an overview of a lot of different API S .
Now , the first thing that we have to do is right here , we're gonna create a project .
So we'll click on my first project and I'll click on new project and I'll just name this like classified , right ?
Just uh you know , just so I know what's going on here .
So , classifieds and then for location , I'll just go ahead and just put no organization and then just click on create .
All right , cool .
So now you guys can see I have created my classifieds .
Now , we do need to enable API S for our project .
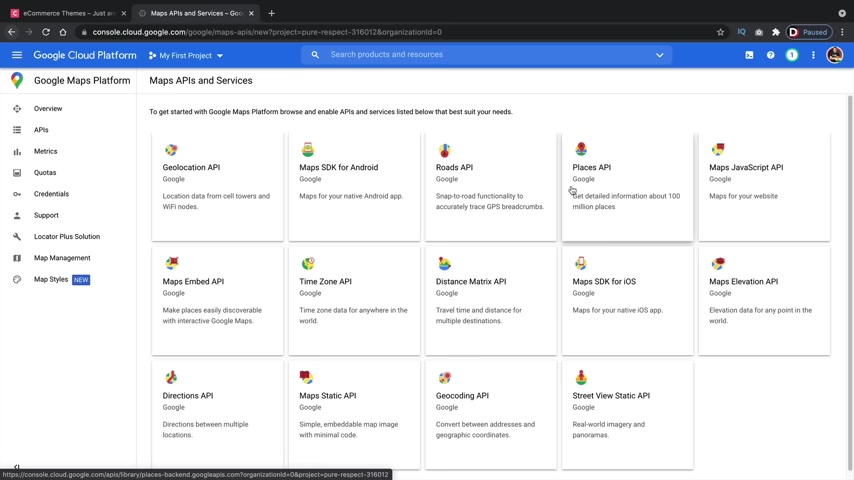
So essentially what this does is that this pulls information from Google and it puts it down to a key and we can take that key and put it on our website .
So the first thing that we're gonna do is we're gonna add geolocation API .
So go ahead and click on this and then we're gonna click on enable .
So we are going to enable this API All right .
So now you can see that this has been enabled .
It's right there .
Let's go and click on overview .
Now we're gonna activate four more API S .
So right here , click API S , it brings us to a new page .
I don't really know uh why it does that .
But uh we're now gonna select places API and I will also enable this API .
All right , cool .
Let's go back over here to overview and pick API S .
I'm gonna close that .
I guess I close automatically .
Yeah .
Now , right here for maps , I'm gonna click on view .
All there are some that we need to actually uh find right here .
So we're gonna select the go coding API .
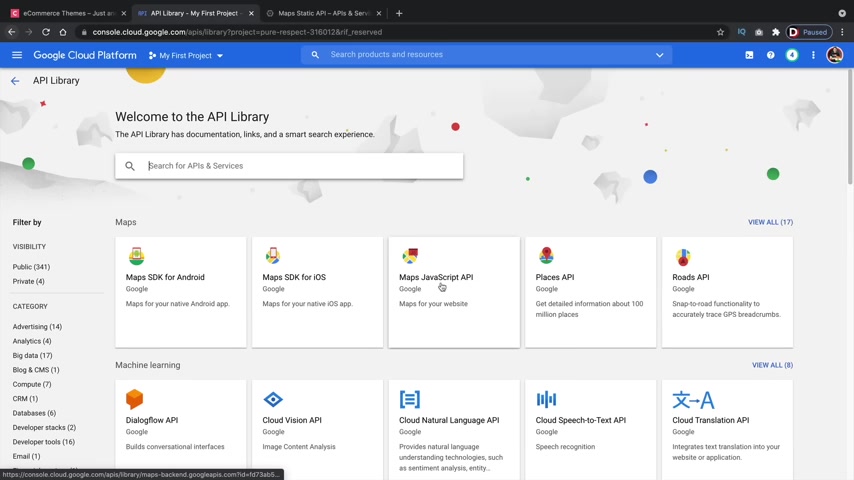
So see , not there it is this one right here and I will enable this .
All right , cool .
So we got three .
So far , let's go ahead and go to overview , pick API S and now we're going to select the mapped javascript api .
So I'll click on that and I'll click on update or I'm sorry , enabled .
All right , cool .
So we have four .
Now we're gonna select one more right here .
So let's go back to overview and pick API S and we're going to select the map , static API .
So over here , click on view all the map , static API .
I'll click on this and I will also enable this API .
All right , cool .
So once you guys are done with that , we can click on overview .
So next , let's go ahead and click on credentials and we're gonna go ahead and create some credentials .
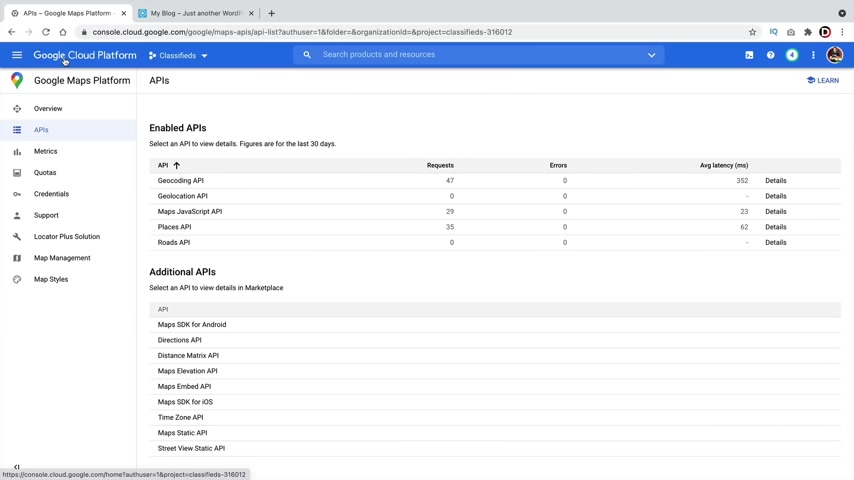
So right here , I'll click on , create a credentials and click on API key and this is the API key that we need .
So , what I'll do is I will copy this and I'll click on close .
All right .
So now that you guys know how to get your API key , let's go ahead and add it to our website .
This is my current Google Cloud or I don't know what they want to call it .
Now , it's like Google Maps or something like that or they change the name so often .
But um , what I'll do is I'll go to my credentials and I will copy my API key .
So I showed you guys how to get the various API keys .
So yeah , let's go back over here and all I need to do now is add it to our website .
So let's click on theme options and we're gonna scroll down right here to map settings now right here is we're gonna go ahead and paste in your API key .
So that's it .
And then you want to select Google .
So there are other platforms you guys can use like open street map and mapbox .
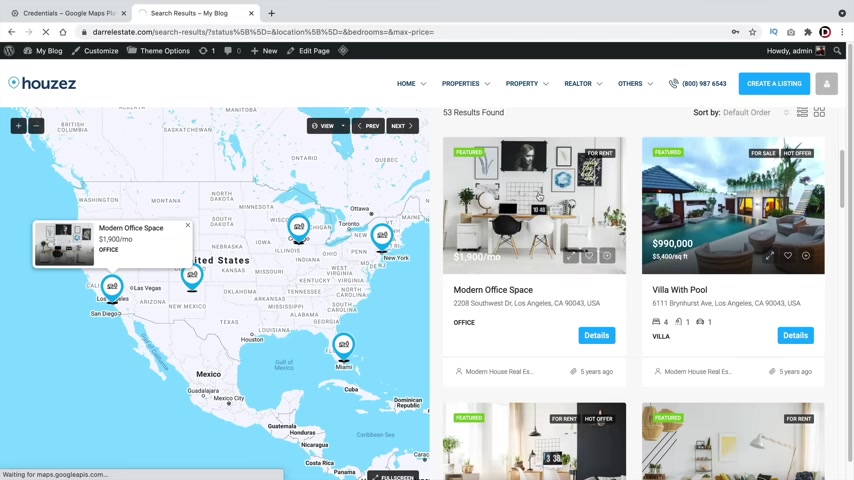
I don't think this one even requires an API key , which is really cool , but unfortunately , everyone trusts Google Maps the most and that's what people use .
So yeah , we'll go ahead and submit that .
There are some other options right here like map style and all this other stuff like a single listing map that you can mess around with .
But uh once we do that , your website is now connected with Google Maps So let's go ahead and take a look at some of our properties .
So I'll click on , click on search here we go and I'll just select this one .
And if we click on the little maps icon , we will then see the uh address show up on the map .
You can change it to satellite view if they want to get a better view .
And then we can also click on open on Google Maps and it will be displayed right there .
Now , let's say , for example , you guys want to actually embed the map onto the listing .
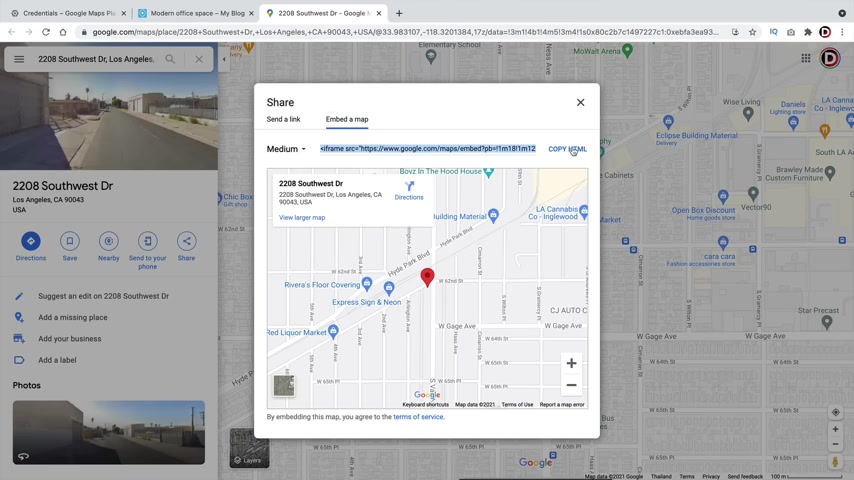
You can also do that manually by just clicking on this share icon , embed a map and then copy this html , right .
Copy this right here .
And what we can do is go back to our listing and we can actually paste it in the description .
So I'll click on edit property and just show you guys how to do that .
So right here and here I think they have the , is it the html or is it embed ?
Let's try html .
I think the custom html will work right here .
So just go ahead and paste the html , see if we can preview that .
There we go and then we can move this up , right ?
Like something like that , you can adjust this map to wherever you want and click on update .
So you can always add it in the description .
Now , one thing I do want to know as well , is you don't need the API key if you're going to do that .
So if you're just , if you're just going to display the maps like this , you don't need the Google Maps API key because that does charge you uh depending on how many times people use it .
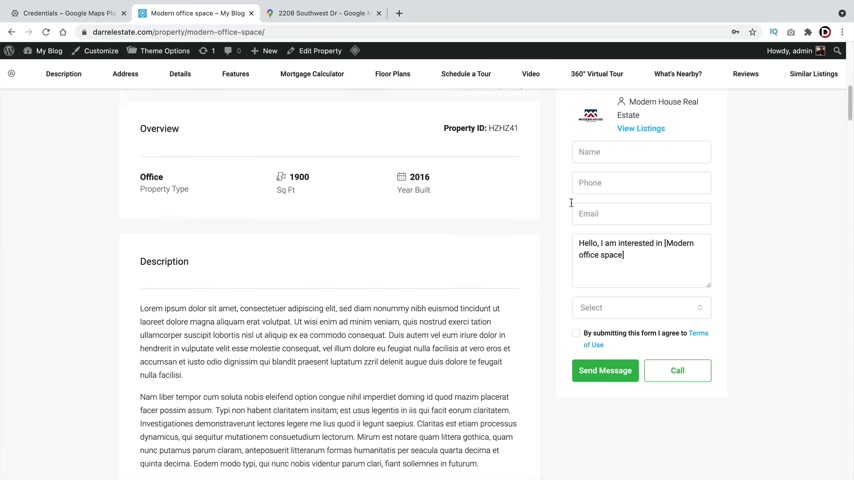
But uh it allows people to geo locate and it also allows people to view like that .
And also , you know , you can just share it like that .
So you do have a few options if you want to embed Google Maps onto your website .
So I hope that was cleared .
If you guys have any questions about Google Maps , feel free to let me know in the comments below .
So congrats on your real estate website at this point , you guys are pretty much almost done .
Now , there is one additional optional service which is MLS .
Now , if you are , if you are from the United States and you have an MLS and you want to integrate it onto your website in this part of the video , I'll be showing you how to do that .
It is a third party service that I'll be introducing you to .
Uh I'm not affiliated with them in any way , but they will uh specifically add your MLS with this word Press the right .
So in this part of the video , I'll be talking to you guys about ID X and MLS .
Now , if you are a real estate agent or an agency and you have your own MLS .
There are a few methods on how to integrate it to your websites .
Now , for those of you who don't know MLS is basically like their own little custom .
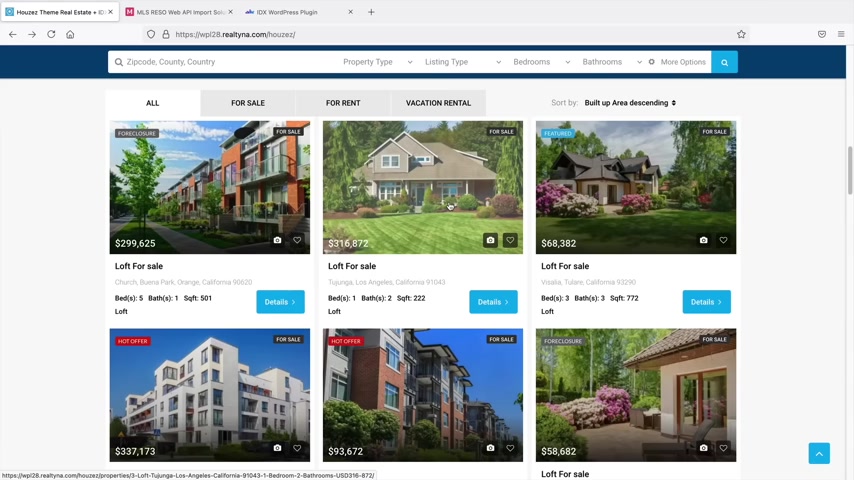
Um I guess I wanna say their database of houses so they might have a really large amount of houses .
And what you can do is you can add it to your website and then it'll automatically propagates and it'll display all your listings accordingly .
Now , I know there are two services out there that help support ID X and MLS with this specific theme that we are using .
So this is MLS import dot com .
Now , I know that these guys work directly with the houses theme .
So if you guys are using the houses theme , like I recommended , uh they actually work specifically for that theme .
So right here under MLS Import plug-in , I'll click on features .
Now , if I scroll down here to the bottom of the page right here , you'll see that the MLS import plug in is ready to work with the houses theme right here .
So just let them know that you don't want their turn key websites because uh a lot of these themes , these companies try to sell , you are very limited and they really try to sell you their products .
But to be honest , the houses theme is definitely good .
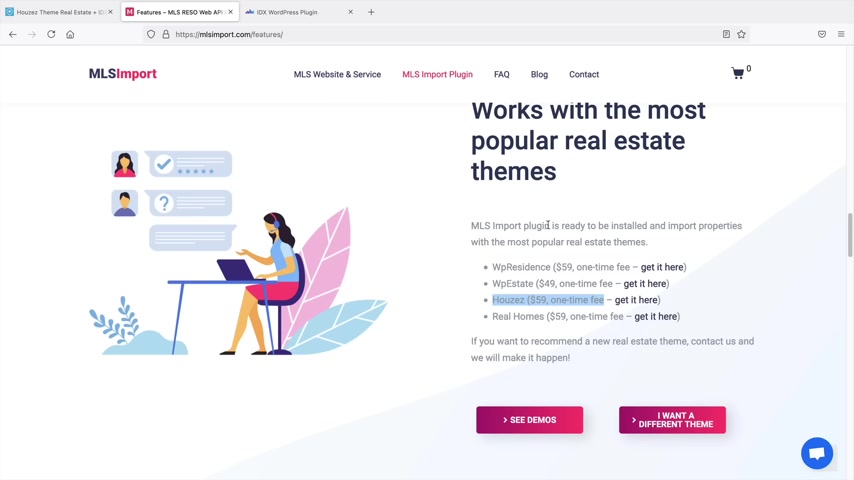
So if you guys do go to any of these companies , just make sure you only get the MLS , you don't need their turn key .
You do not need their demo .
You don't want their theme because Houses is a very powerful wordpress theme .
A lot stronger than what these other companies can offer .
Now , another company that you guys can use is real tina dot com .
They also do sell a ID X word press plug in that works exclusively for the houses theme .
So if you scroll down right or actually , yeah , scroll down right here .
You will see that the integrations work with the houses theme .
So you guys can use this company or the other company .
It's really up to you .
Um Personally , I don't have a lot of knowledge with MLS .
I know what it is , but I've never really uh set it up on clients websites .
So that's pretty much it for the MLS .
You guys can use those two resources to import your MLS to your real estate website , right ?
Part of people congrats on building your real estate website .
I hope I covered everything .
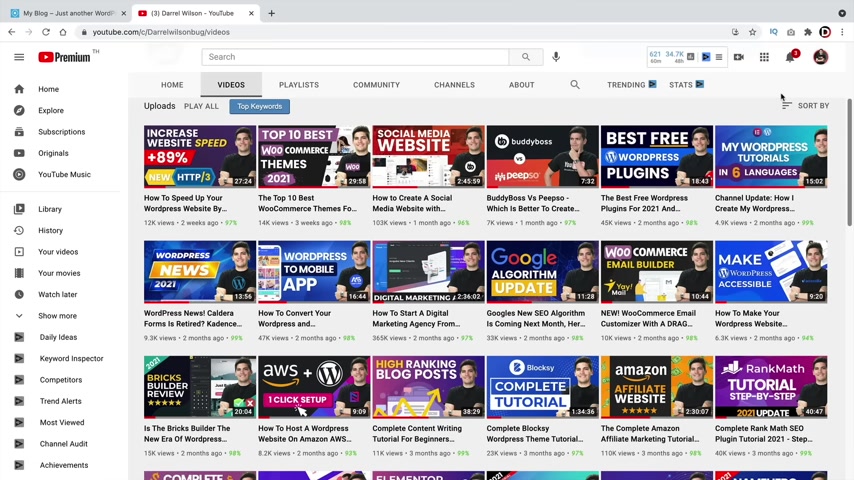
I realized there might be some small things that I didn't cover .
And that's just because you can probably look at it on your own free time and check it out .
Now , congrats on your website and feel free to check out my channel .
If you guys do need help with free plugins or if you guys want to know about more about like Woocommerce or selling products on your site .
I do have videos on Woocommerce as well .
I think it's uh there it is right there and yeah , I do have quite a lot of videos uh regarding press and everything else .
So feel free to check these out on your own free time .
So congrats on your real estate website at this point , tutorials fit you guys are all ready to go .
Now , if you guys have any questions for me , feel free to let me know in the comments below .
Uh I do my best to get to all comments .
Uh Let me know how I did .
You know , I do spend a long time to kind of make this tutorial like you know , accurate and step by step .
So feedback is always appreciated and again , make sure to like this video and I will see all of you party people in the next video guys , take care .
Are you looking for a way to reach a wider audience and get more views on your videos?
Our innovative video to text transcribing service can help you do just that.
We provide accurate transcriptions of your videos along with visual content that will help you attract new viewers and keep them engaged. Plus, our data analytics and ad campaign tools can help you monetize your content and maximize your revenue.
Let's partner up and take your video content to the next level!
Contact us today to learn more.