https://www.youtube.com/watch?v=7Wi6IRWItnI
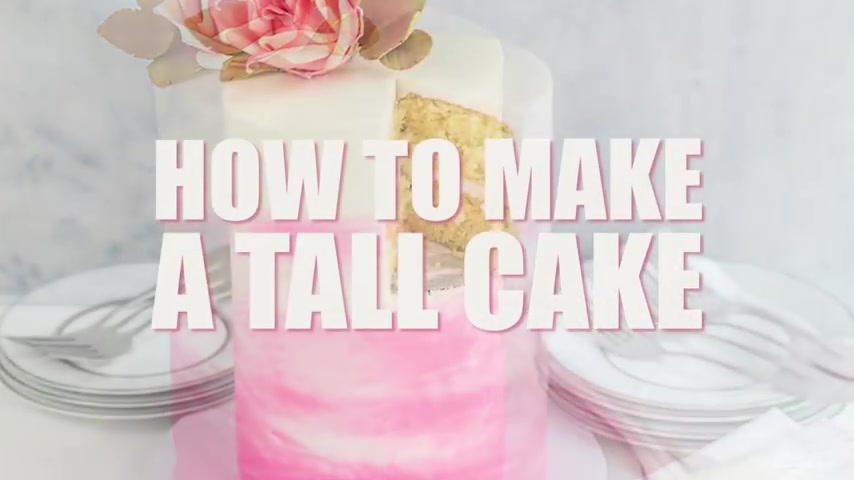
How to Make a Tall Cake (Double Barrel Cake)
इसी तरह मुझे सपोर्ट करते रहे और मेरे विडियो को लाइव शेर और सब्स्क्राइब जरूर करें और ऍम जरूर दबा ।
उससे मेरे आने वाली हर विडियो आप तक पहले पहुंचेगी ।
सो बाइ बाइ ऍफ विडीओ ।
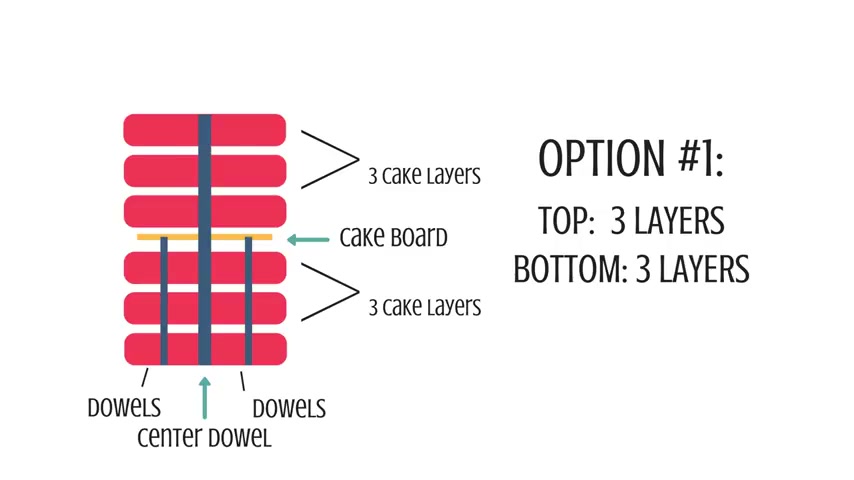
And option one is you may want to do three layers of cake on top three layers of cake on the bottom .
And then in between those is a smaller cake board and then under that through the bottom layer is gonna be dowling .
And I usually like to use uh more than two , but that's all that you can see on this uh sort of two dimensional draw here .
Um But you wanna put in several dos and I always leave the very middle without a dow in it because I like to use a center dow all the way through it , even through the bottom cake base .
so that the cake is very stable and it doesn't try to tip over on you .
OK ?
So that's option 13 layers of cake on top and three layers of cake on bottom separated by a cake board and do .
OK .
So option two is two layers of cake on the top and two layers of cake on the bottom separated by a cake board .
And those are also do as well .
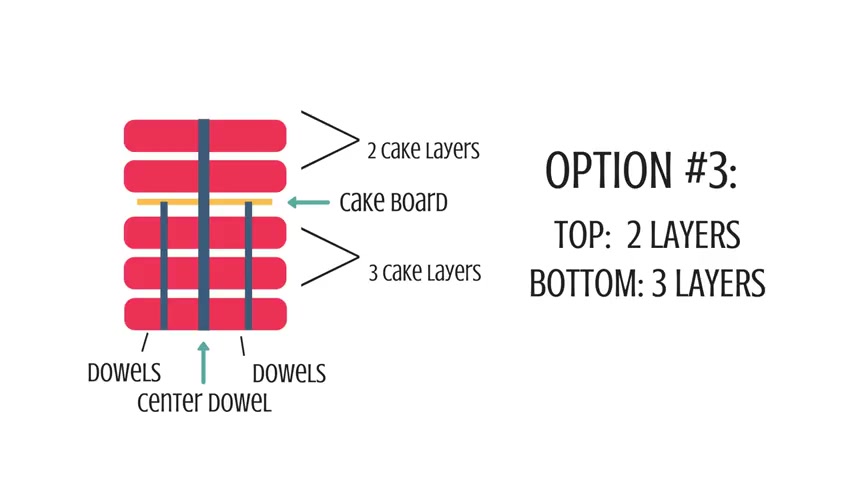
Option three is what I've done for you today and I've got two layers of cake on the top and three layers of cake on the bottom .
And I just went with a six inch round cake .
And so when I was building this , I did the three layers , the cake board and I added two more layers and I saw that it was getting a little too tall .
I didn't want it to go any taller .
So I just stopped at the two layers on top .
There's nothing that says that you have to have an even amount of layers on the top part as opposed to the bottom part .
So I just wanted two on the top and three on the bottom .
Just make sure you have that cake board in between and you do .
Ok .
So let's get started making the tall cake .
So first you want to make sure that all of your cake layers are completely level .
And I'd like to use a little piece of nonstick on my turntable .
And then I'm using a thicker cake base and then I'm going to add a little bit of melted candy melts to the middle of the cake base .
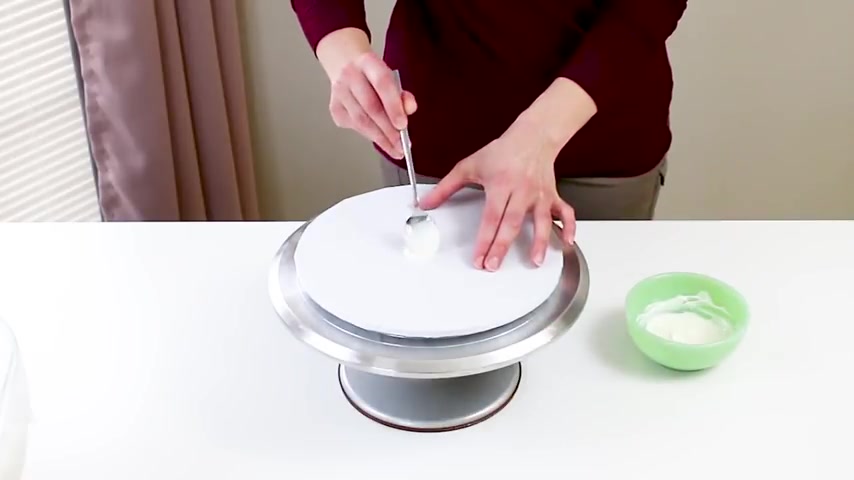
And that's what I'm going to put my actual cake board that goes right underneath the cake .
But this way the cake board doesn't slip around on me .
So I'm just gonna attach the cake board the same size of the cake layers .
And I'm gonna allow that to firm up .
Sometimes I even put it in the refrigerator to kind of cool it down a little bit .
And I just like to add a little bit of the melted candy melts to that cake board before I stick my first layer of cake on it , kind of holds it in place .
And now we're just going to start stacking cake layers and filling them with butter cream .
And I do have a recipe for the butter cream .
If you want to go to the blog and grab that , I will put a link in the description below .
OK ?
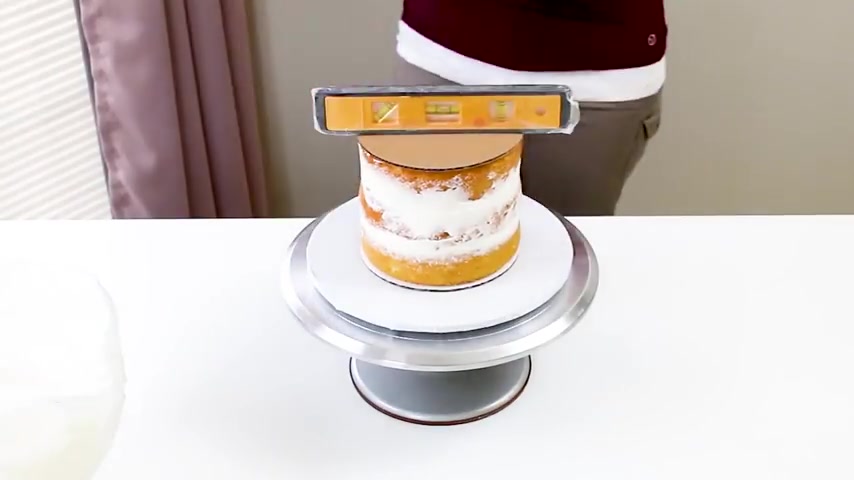
I'm gonna put another kate board on top and use a little mini level just to make sure I've got everything kind of looking pretty level here .
OK ?
I'm adding a little butter cream on top and we are going to add in some dowling and then another cake board before we add our other two layers of cake on top .
I'm using an edible marker to mark my dowels and I'm using some heavy plastic dowels .
If you do use straws , don't use those cheap mcdonald's straws or anything like that , that you can get in a little package um from your grocery store .
Those are too cheap and too flimsy .
If you use straws , you can use the bubble tea straws depending on how heavy your cake is .
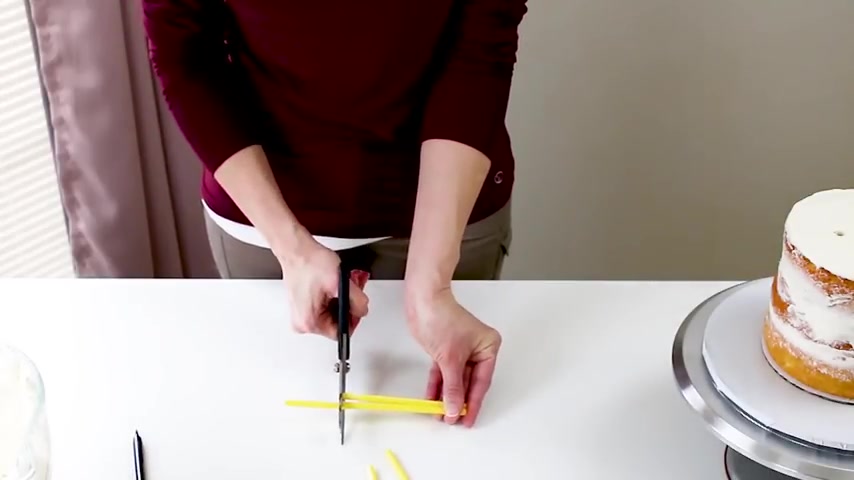
Those are kind of thicker straws or you can get these plastic dowels or you can use wood towels if you want .
So I like to cut every dowel the same size .
So I know that the cake is level and then I'm just going to insert them into the cake and leaving the middle part without a dow because we're gonna put a center dow right to the middle of the whole cake .
And now I'm going to take another cake board the same size as the bottom cake board , the same size as the cake layers .
And I'm going to cut around it to make it a little bit smaller because once we get the icing on the entire cake .
We don't want any of that middle cake board peeking through .
Ok .
So we just pop it on the top and I'm just checking to make sure that everything looks pretty level and I'm just gonna add a tiny bit of the Wilton melted candy melts just so this next layer sticks to it pretty well .
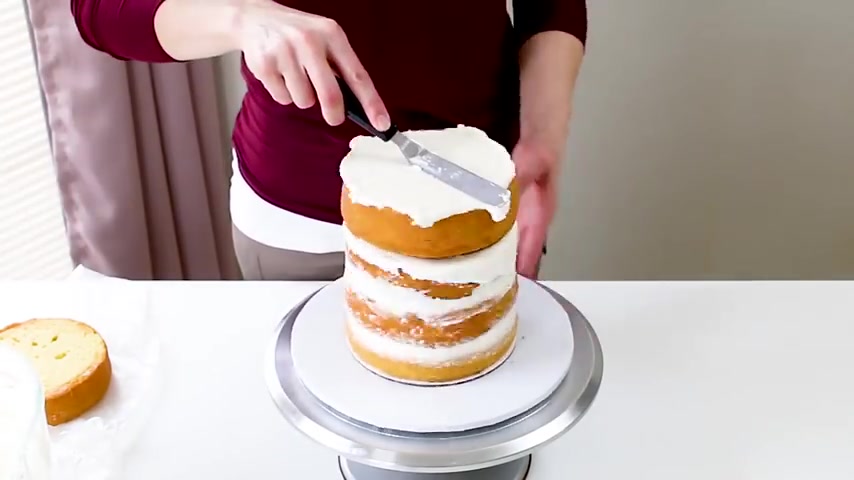
And then we're just going to continue on filling and adding our last layer of cake and I'm just making sure it's level .
OK ?
Now I'm going to measure for the center dowel .
I'm just using a wooden dowel here and you wanna cut it long enough so that it's gonna go through the entire cake and through the bottom of the cake base .
And I just want to sharpen one end of it so that it goes in easily .
So on top of this , you're gonna add another cake board and then you just want to see if there's gonna be any cake that's gonna be sticking out once you add the icing to it and just trim that off .
You may have to trim a little bit less than I did .
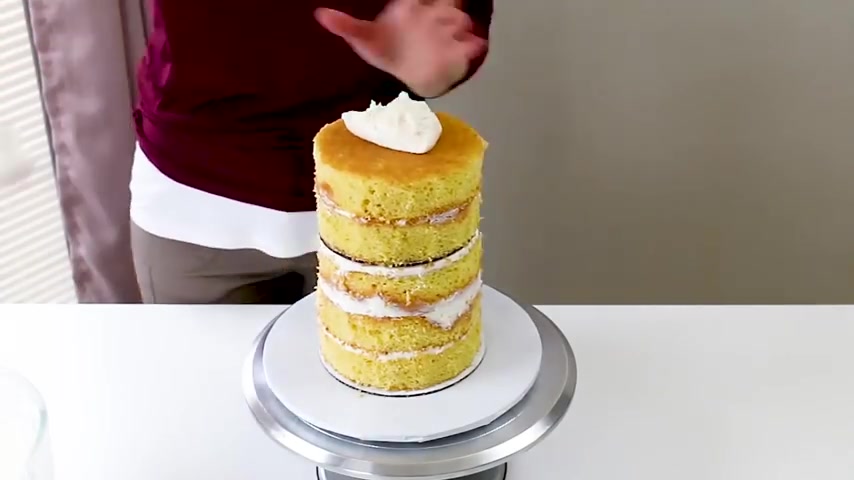
I'm just checking to make sure because once you go around the cake with your icing smoother , you don't want any cake picking out and I trim quite a bit off of mine .
OK ?
Here's the fun part .
You're just gonna be adding the butter cream .
You wanna add the butter cream to the top and what we're gonna do .
Here is we're gonna add a little bit of butter cream to a cake board the same size of the cake .
And we're going to stick on a piece of wax paper onto that .
That is cut the same size as the board , pop it on top and make sure it's pretty even top and the sides .
This is gonna help us get a smooth finish to our cake .
It kind of gives us a little guide and I'm just making sure the sides and the top are even .
And then we're just gonna add the butter cream around the side .
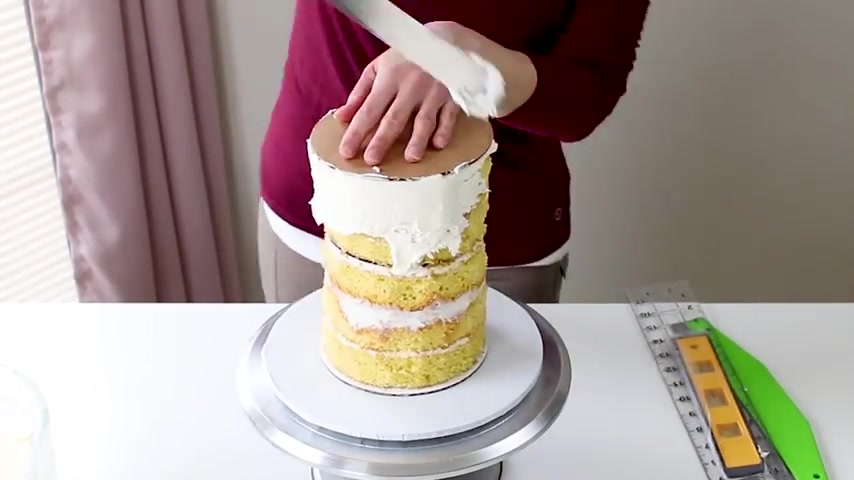
I like to use the method of the board on top and board on bottom because when I smooth the cake , it kind of gives me a guideline to make sure that it's , the cake is not gonna look leaning , it's gonna be straight up and down and just keep adding more butter cream and smoothing as you go .
You may have to add in a little bit here and there to clean up any little spots .
Sometimes I switch my smoother , OK ?
And now we're getting ready to uh work on the water color for the cake .
And so I'm just adding a little bit of white butter cream and I'm gonna be adding pink on the bottom just to give it a little water color look .
And then you just smooth it with your butter cream smoother until it's completely smooth .
You can even put your butter cream , smoother in some hot water and smooth it around too to get it even smoother .
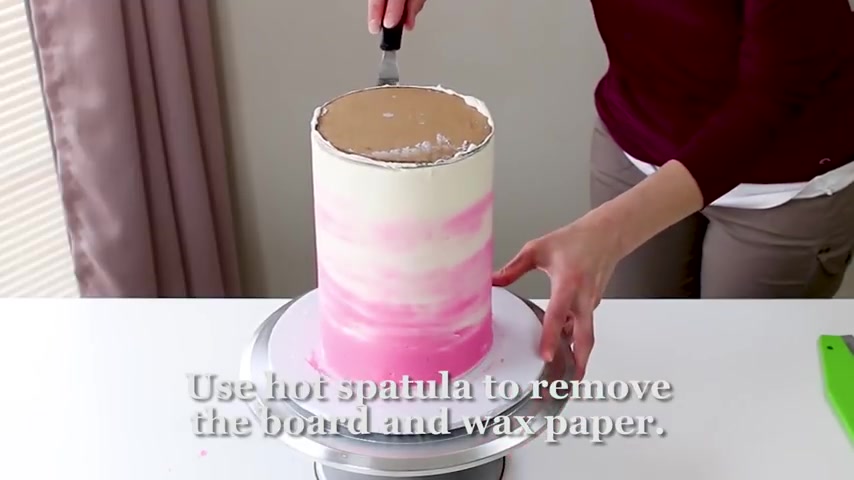
And I'm just using a small butter cream spatula here that I have gotten really hot with some hot water .
And I'm going underneath that top board to slide it off .
Just go slow and make sure you peel the wax paper off .
Then I'm using a hot spatula to smooth the very top of it .
I'm just dipping it in water , wiping it off and then making sure the top is real smooth .
Once you've got your top smooth , make sure to clean off around the base of your cake and then you can just pop on whatever decorations that you want .
So I added this gum paste rose and if you're interested to know how to make this , I'll put a link in the description below .
I have a three part series that will tell you all about how to make a large gum paste rose .
OK ?
That's how you make a tall cake .
So if you have any questions , just be sure to let me know in the comments below .
Thanks for watching and I'll see you next time .
Are you looking for a way to reach a wider audience and get more views on your videos?
Our innovative video to text transcribing service can help you do just that.
We provide accurate transcriptions of your videos along with visual content that will help you attract new viewers and keep them engaged. Plus, our data analytics and ad campaign tools can help you monetize your content and maximize your revenue.
Let's partner up and take your video content to the next level!
Contact us today to learn more.