https://www.youtube.com/watch?v=lqpoG2nJOw8
How to Make Cake from Scratch _ Global Sugar Art
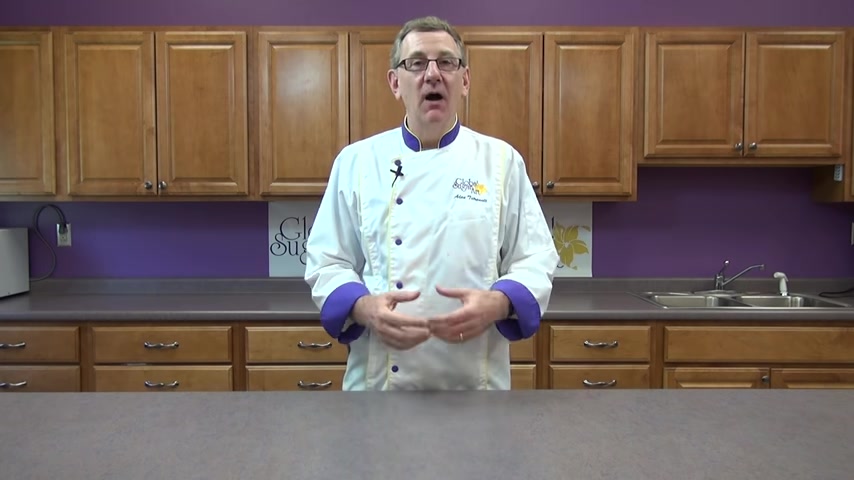
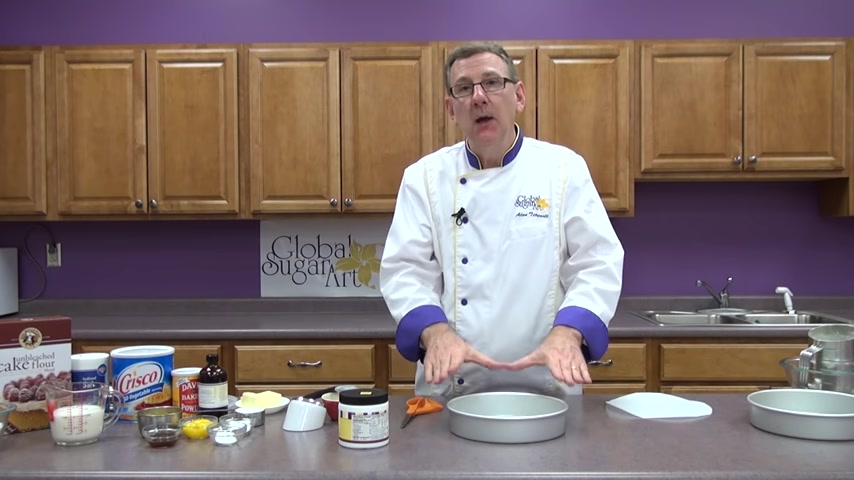
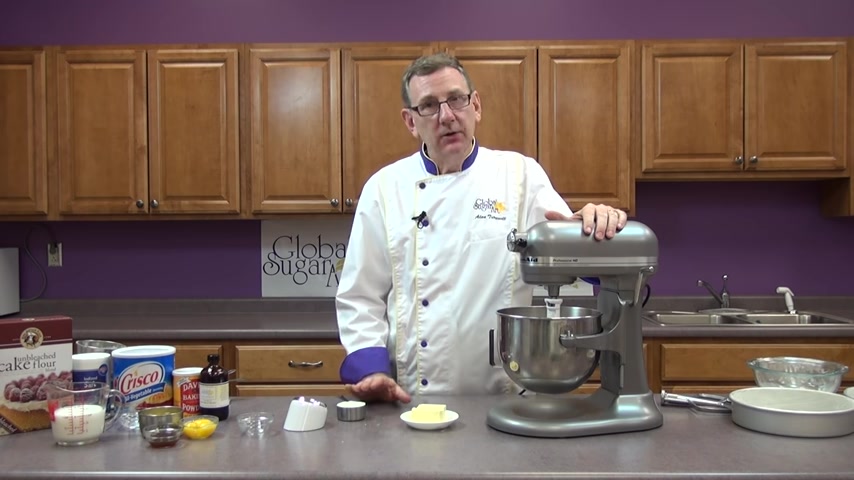
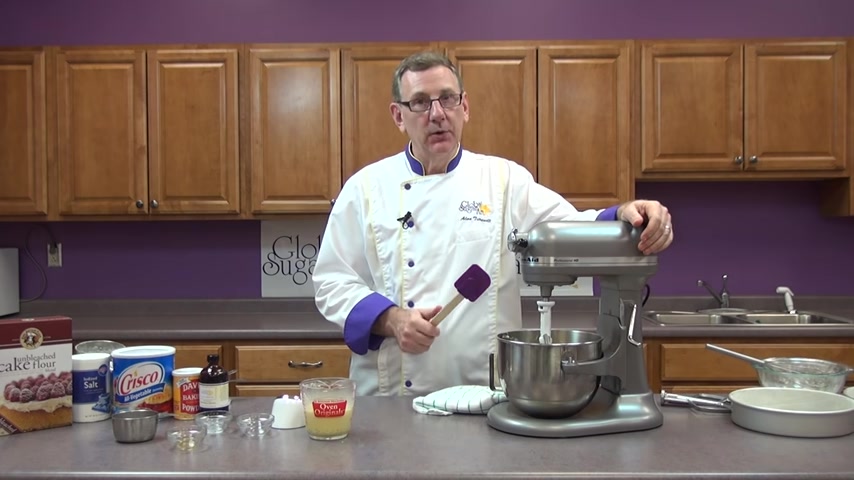
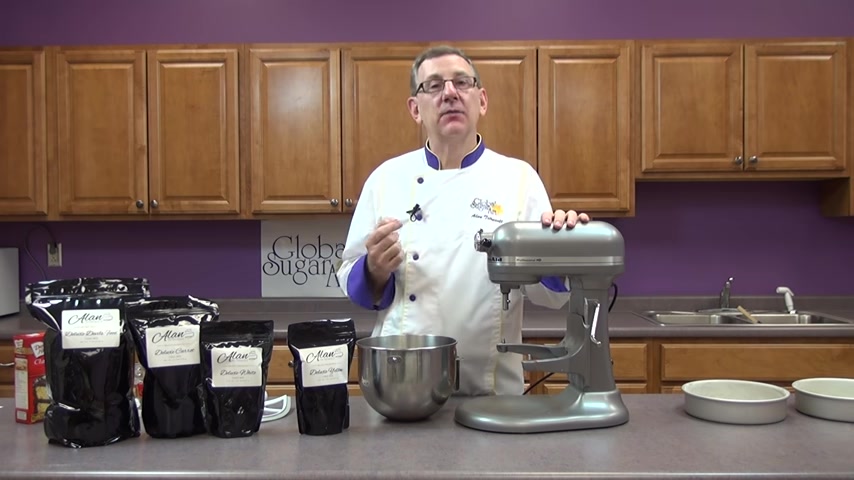
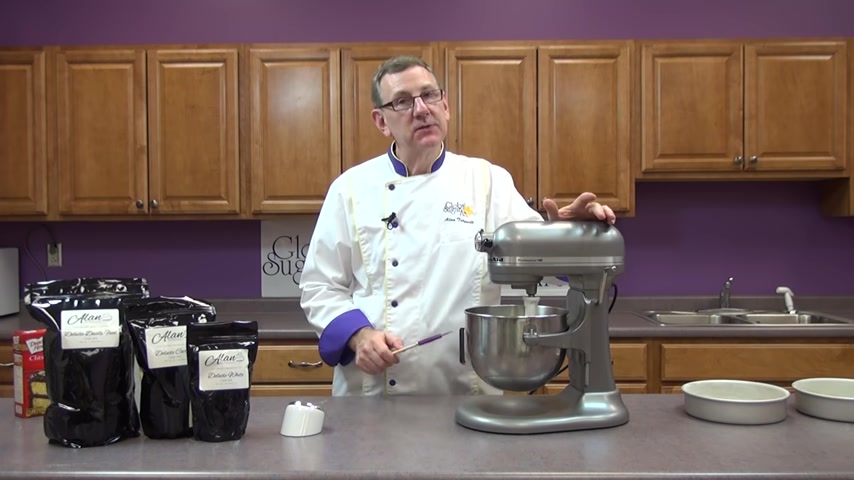
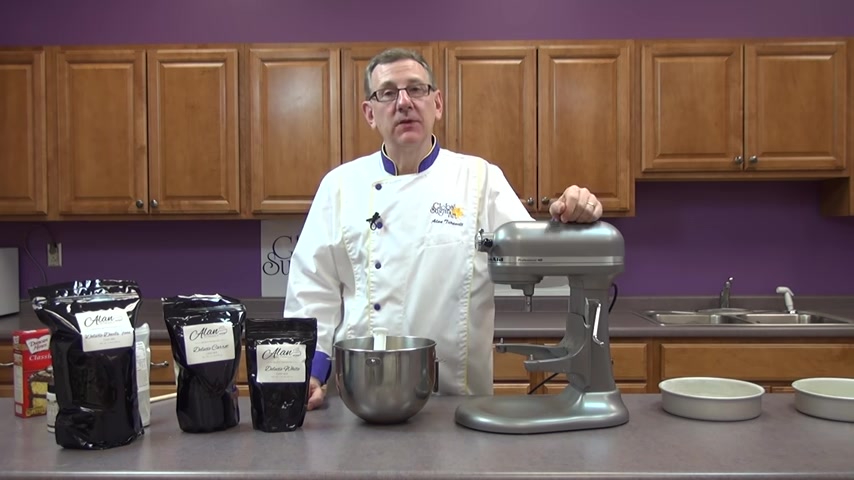
Hi , I'm chef Alan with Global Sugar Art .
We've had a lot of requests to do a series of youtube videos on basic cake decorating and basic techniques .
So today's video is going to start the program and today we are going to work on basic techniques of baking a cake .
I'm going to be showing you how to bake a cake from scratch and also the best way to use mixes to , to get the best cake you possibly can out of a prepared mix .
This is just the first in a series we'll go on in the next video to work on icings and different types of icings .
I'll teach you how to make those and then we'll go on from there on basic piping techniques .
So I hope to show you a lot of the basic skills that everyone needs to become a great baker and a great decorator .
Let's get started .
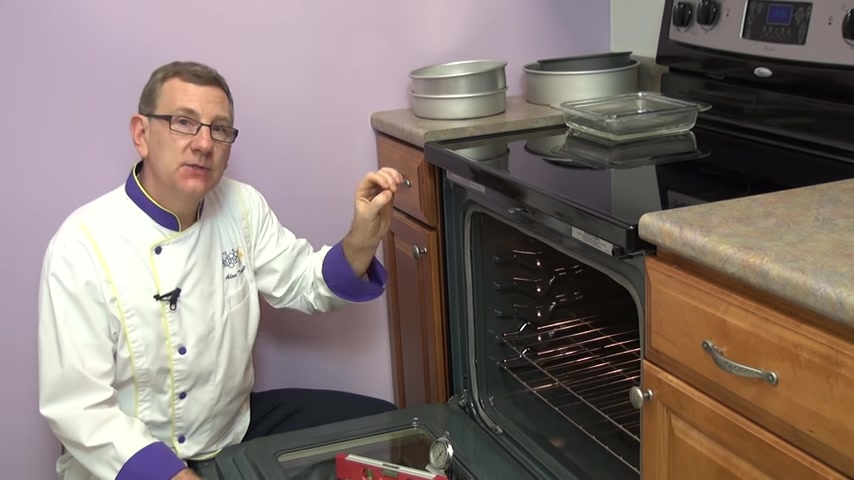
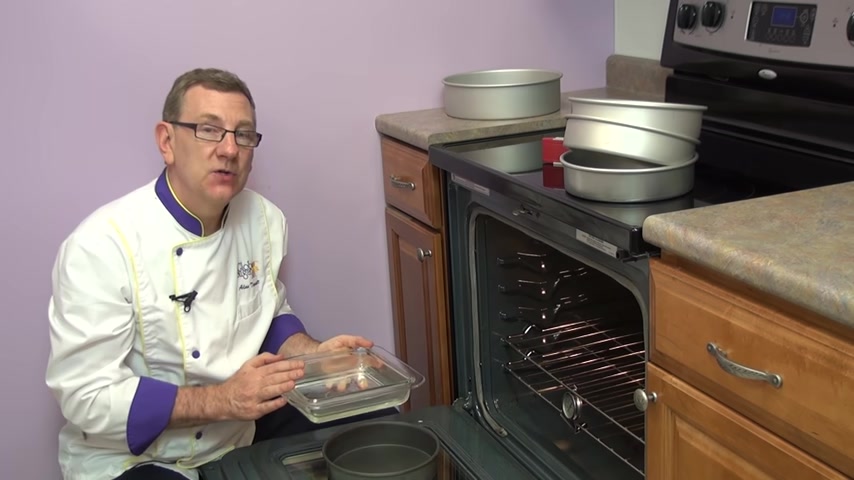
The most important part of baking any cake always starts with your oven .
Most people don't realize that you can calibrate your oven on the dials on the top of your oven .
One of them usually comes off and there's a mechanism there that can calibrate your oven .
So to do that , you need to start with an oven thermometer .
And I always put an oven thermometer in my oven .
I set my temperature and then I check to make sure it's reached the proper temperature .
You'd be surprised how many ovens are inaccurate and bake maybe 10 or 15 degrees hot or cool .
And that makes all the difference in the world on your final cake .
So , buy yourself a good oven thermometer and just hang it from one of the racks and leave it in the oven all the time .
So you know that your temperature is going to be accurate .
The other problem with ovens is they're not always level .
So buy yourself a little level and set it right in the oven when the oven is cold and check to make sure that your oven is perfectly level and put it going across in a couple directions .
And that way you'll ensure that your cakes rise very evenly .
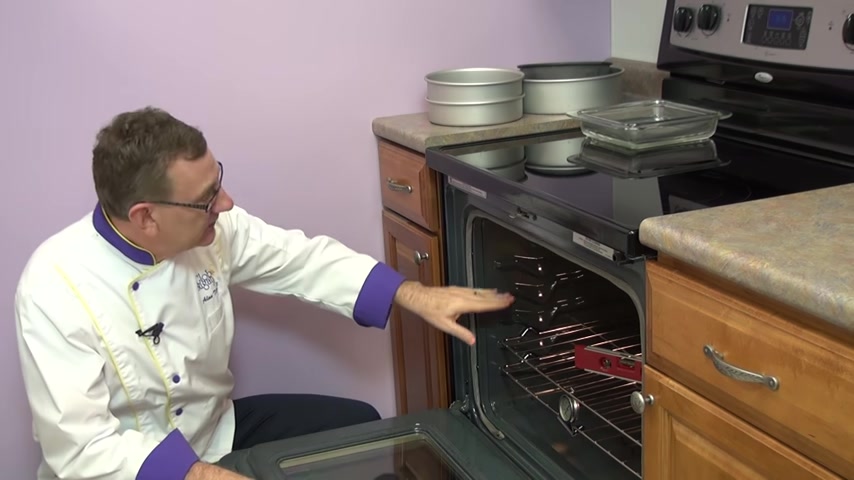
The placement of your cakes in the oven is also very important .
Most ovens have about five shelves that you can adjust the racks on for a regular round two inch cake .
You usually want it on the second one up .
You want it between the middle of the oven and just below the middle of the oven .
For a sheet cake , you always want it just below the middle , never ever bake your cakes higher than the middle level on a standard oven because as you know , heat rises .
So as the top of that oven gets hotter , the top of the cake will bake too fast .
It forms a crust .

And then as the rest of the cake rises , that crust will split and it will be almost like a little volcano , the batter sort of erupts over the baked crust and it really ends up being a mess .
So always be sure that you place the cake properly in the oven .
Now , many people today use a convection oven where there's actually a fan in the back .
The elements are behind the oven and the fan pushes the warm air through on most of the convection ovens .
Today , there's a setting for baking cakes and what that does is it lowers the fan speed so that it just creates enough circulation in the oven to keep an even heating without blowing the batter out of the pans .
So be sure if you're using a convection oven that you put it on the setting for baking a cake , the temperature of your oven is also critical for a regular cake pan , a regular aluminum cake pan that is not anodized .
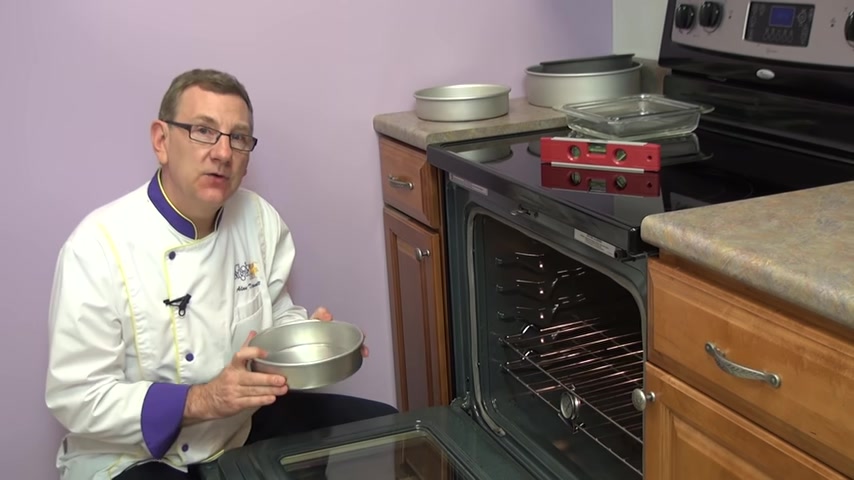
You want to set your oven at 350 degrees .
Now , that would be for an inch and a half or a two inch pan if you're using an anodized pan , and you will know if it's anodized because when you buy the pan , this happens to be a fat dados , it'll say right on the pan that it is anodized .
The anodizing process molecularly changes the metal and it conducts heat much better if you're using an anodized pan , make sure that you lower your temperature in the oven by 20 to 25 degrees .
So today we're going to be baking at 3 25 because I will be using a pans .
Also , if you're using a dark metal pan , whether it's anodized or not , you want to lower your temperature 25 degrees .
If you're using a glass pan to make a sheet cake or any sort of cake glass , always bakes at a lower temperature as well .
Lower the temperature 25 degrees .
And lastly , if you're baking a deep cake , if you're doing a three or four inch cake , you always want to lower your temperature down to about 3 25 .
So the only ones that really bake at 350 are your classic aluminum pans that are not a and that are an inch and a half to two inches high .
Everything else needs to be in a little bit cooler oven .
That's the basics of baking with a cake .
Now , let's get going and we'll make a cake from scratch now that our oven is ready to go and it's preheating .
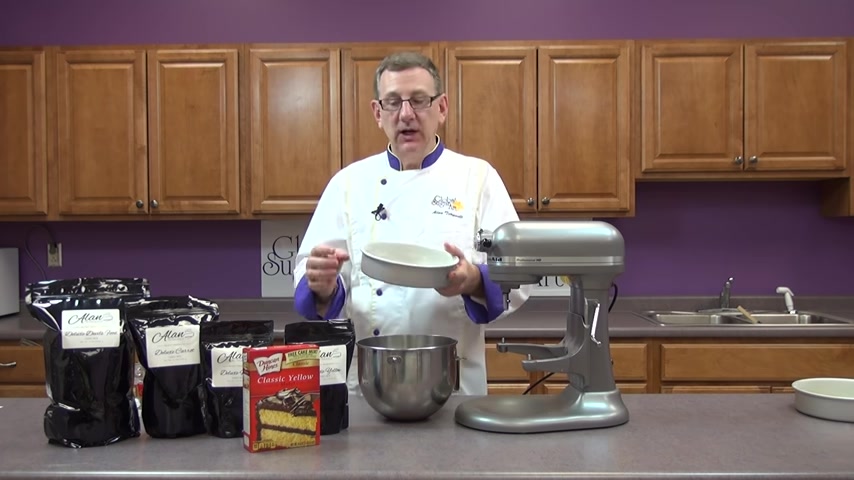
I want to show you how to prepare our cake pans for today's class .
I'm going to be teaching you how to make a scratch yellow cake and I'm also going to be teaching you how to use a cake mix and get the best results out of a cake mix .
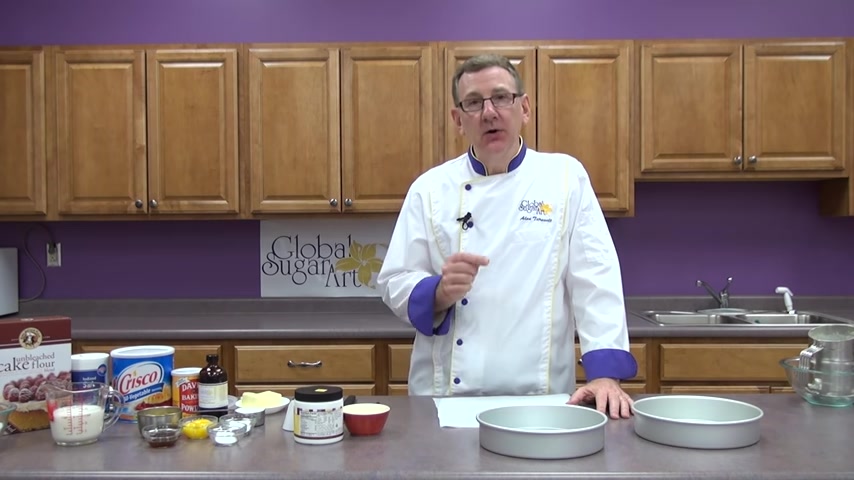
So for the scratch yellow cake that we're making , I'm going to be using 29 inch pans .
These are nine inch round by two inches deep and these are aid aluminum .
These happen to be fat Daddio pans .
Now when you're baking a homemade cake and you're using butter , that cake will stick in a pan far more than any other cake mix on the market because the cake mixes use oil or a different sort of fat in them .
Butter Caramelizes with the sugar and the flour inside the , the cake and it just sticks like glue on your cake pans .
So if you're used to using a spray that you can buy in the grocery store to just spray your pans , it probably won't work for this .
You can use the spray , but you still have to dust the pan with flour or even better use a piece of parchment and that's what we're going to do .
So I took a piece of regular kitchen parchment .
I folded it in half place your pan on there and then just use a pen and go right around .
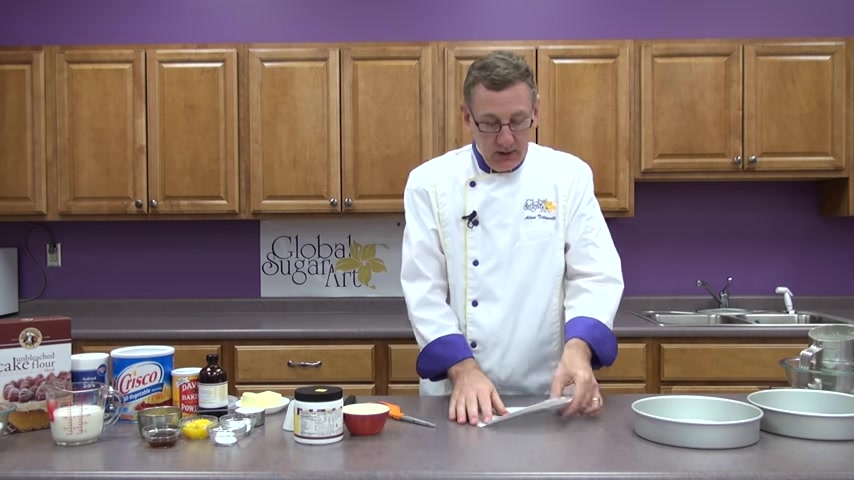
If you don't have parchment paper , you can use regular wax paper .
It works very well and just cut the circle out .
OK ?
Now , most of the parchment paper that you buy today um will have a silicone finish on it and that will help release the cake but not all of them have it .
So to be sure the cake comes off the paper , we're also going to grease this paper .
So I'm going to use a brush and today I'm just going to use a little bit of Crisco or you can use a pan grease that's available from Global Sugar Art or you can use your spray shortening that you can buy in a grocery store .
Any one of them will work to the sides of the pan .
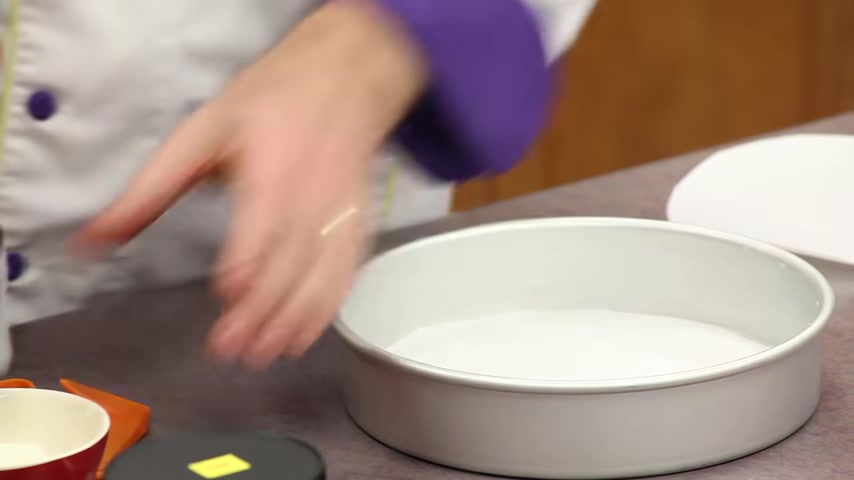
Whoops and then just put a little bit on the bottom and then lay your paper in there .
And now we're going to grease the paper as well .
So just hold down one side and then you can just grease the paper a little bit .
All right now to make sure that the cake rises properly .
If you have greased the sides of the pan , you have to flour it .
Otherwise , as that cake starts to rise , the grease from the side of the pan just makes the cake fall down .
It doesn't get that strength that it needs as it's baking along the sides of the cake to continue rising and hold it up there .
So if you grease the sides of a pan , make sure that you flour them , just gonna take a little pan of flour and just put a little bit of flour in the pan , you can dust right over the paper that you've greased .
It doesn't matter at all .
But I do want to make sure that the whole pan , especially the sides have some flour on it .
Now , I'm ready to make my cake and deposit the batter in here .
So I'm going to go ahead and prepare the other one .
We'll come right back and we'll start mixing the cake .
Ok ?
The oven is set and the pans are prepared .
We're ready to start really making cake .
Now , I'm going to go through the ingredients and what they do to a cake as well and how they affect it .
The recipe that I'm going to give you does allow for substitutions .
And I'll go through those substitutions as we go through .
So we're going to begin with 2.5 cups of cake flour .
Now , I've pre sifted this into the bowl and now I'm going to measure out 2.5 cups into the sifter again .
So the proper way to do flour is to fill the cup and then use a knife for a straight edge and go right across the top .
So I want 2.5 cups and then a half a cup .
It's just easier to sift all the flour ahead of time into a bowl and measure it from there .
All right , if you don't have cake flour , you can use two and a quarter cups of all purpose flour and one quarter cup of corn , starch and sift those together , the cake will not be quite as light , but it will still be much better than just using all purpose flour to this .

I'm going to add three teaspoons of baking powder and one teaspoon of salt .
Now , the baking powder is your leavening agent .
That's what's gonna cause the cake to rise and the salt is just going to give flavor to the cake and then just sift that together in a bowl .
Sifting is an important part of baking .
It actually separates the flour molecules so that the fat , whether they're using butter or oil or a shortening can , can envelope those little molecules of flour and coat them better and you get a better , a better cake that's more tender and has better crumb .
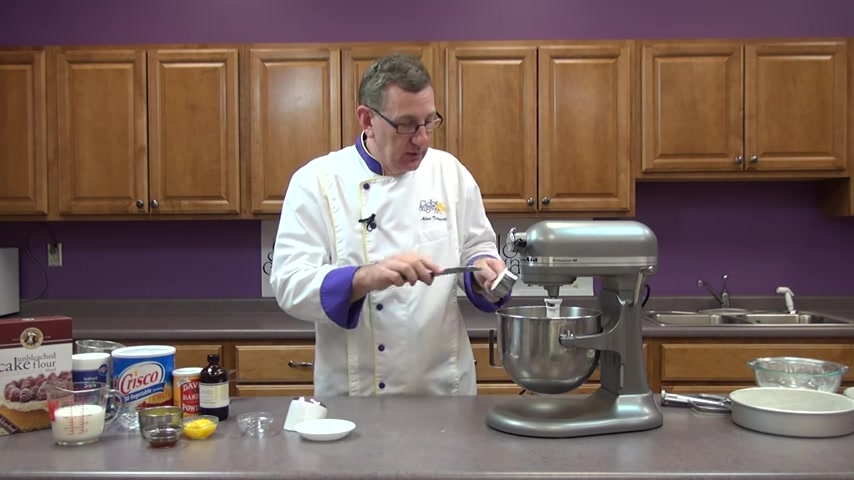
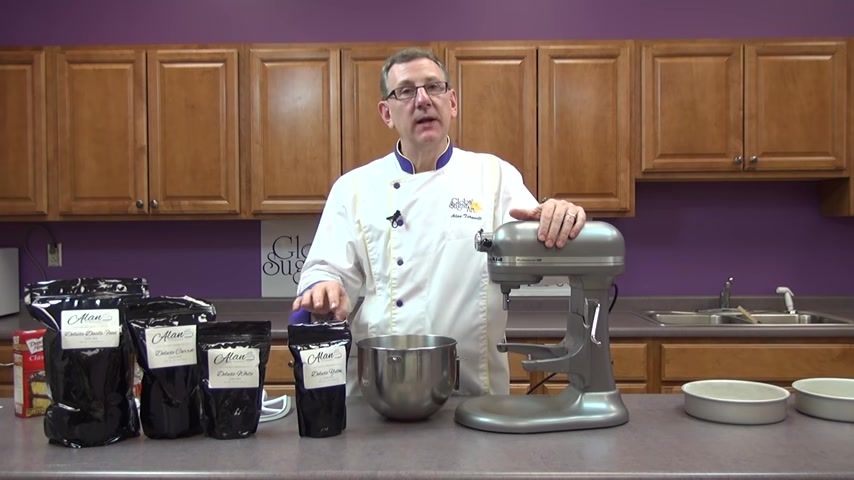
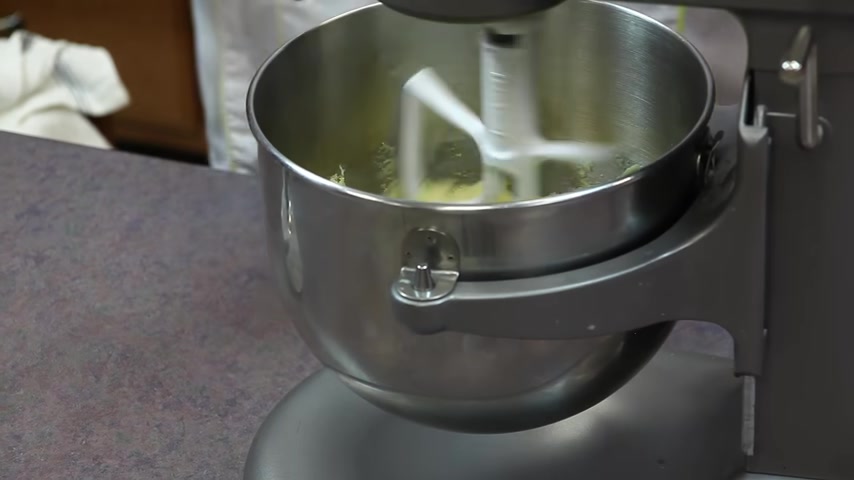
Today , I'm going to be using a Kitchenaid mixer .
If you don't have a Kitchenaid mixer or some sort of a commercial mixer like this , you can use a small handheld mixer , but the speeds will be different .
When I refer to this being on medium speed , you want to use a high speed on a hand mixer .
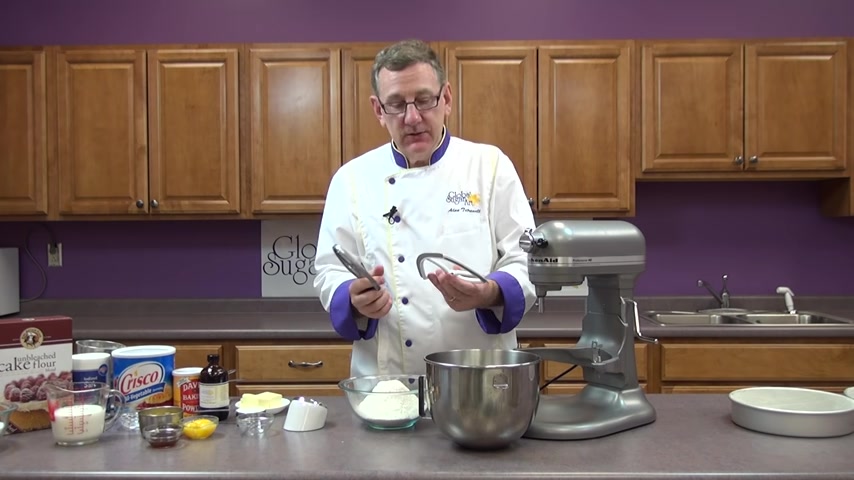
And when I'm talking about using a medium or low speed here , you'll probably use about a medium speed on a on a hand mixer .
Now , the mixers today come with a regular beater blade and the newer ones come , you can buy them that have a rubber edge on them .
And I believe that Kitchenaid makes one called flex edge and this is actually a beater blade that fits this .
These are really nice because they actually scrape the bowl for you and you don't have to stop and keep scraping down the bowl .
So this is what I'm going to use today .
So we'll start with our flour in the bowl .
This is called a two stage method .
This is not the creaming method .
This is a much easier way to make a cake .
My whole project today , my initiative , my goal is to teach you how to make a cake .
The easiest way possible with the most accessible ingredients and to have the best success making the cake .
So the flour , the salt and the baking powder are in the bowl and I'm gonna add the sugar and there's one in three quarters cups of regular granulated sugar .
If you want to substitute , use one in three quarters cups of super fine sugar .
And that is available in some grocery stores .
The finer the sugar , the more tender the cake will be but don't use confection or sugar because confection or sugar or powdered sugar actually has corn starch in it .
And the fine fine sugar will actually make a gummy cake .
So super fine is OK or granulated .
And we're gonna put this on the mixer , attach our blade , we're just going to put this on low just for a few seconds to incorporate the ingredients .
And that's all it really takes .
Now to this , I'm going to add the butter and the Crisco .
Now you can use all butter if you'd like .
Um , I'm using eight ounces or , excuse me , four ounces , which is one stick of butter and I'm using a third of a cup of Crisco .
You can use all butter or you can substitute the Crisco with oil .
Here's the difference .
If you use all butter , the cake is gonna be a little bit heavier and it actually will be a little bit drier .
Butter adds a wonderful flavor to your cake , but it does dry them out a little bit .
Just the addition of a little bit of the um of the Crisco with no trans fats in .
It makes a big , big difference in the final cake .
So we want to make sure that the butter is soft but not room temperature .
It should still be cold and I should just be able to cut through it easily .
And that works great .
If you're taking the butter right out of the refrigerator , just place it on a plate and put it in the microwave for about five seconds .
That's all it takes and it will soften it enough .
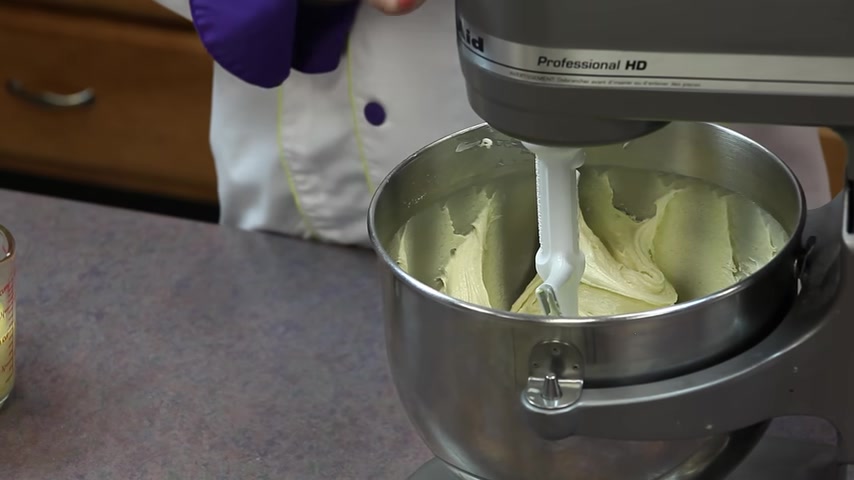
So I'm gonna add the butter to the flour as well as the Crisco and I'm gonna mix this on low for about maybe a minute , maybe a little more .
What we're looking for is a sandy consistency .
We don't want it to gum up into a dough .
We just sort of want a nice sandy consistency .
So this is just about ready .
This has been mixing for about two minutes and I'm just going to turn this back on .
So you can see the consistency .
It's just sort of a sandy consistency .
You don't want to keep mixing that until it comes up into a really stiff dough .
That would be way , way too far .
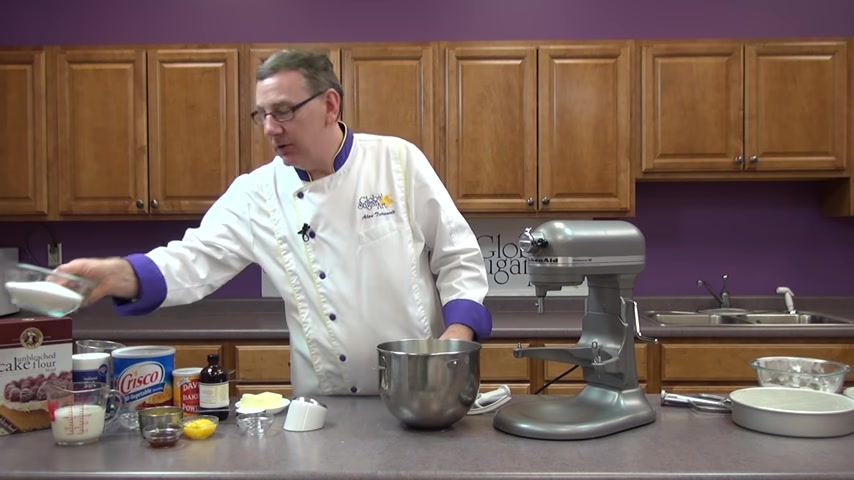
Now , we're going to take one cup of whole milk .
Now , you can substitute skim milk or 2% but you'll get a better cake with whole milk .
It has a little bit um richer fat content content .
The milk has protein that actually helps the structure of the cake .
It gives tenderness to the cake and it also gives color to the final cake .
Make sure that all your ingredients except for your butter are at room temperature .
If you're uncomfortable leaving milk or eggs out until their room temperature , mix them all together and then put them in the microwave for 10 seconds at a time and stir them in between until they come up to at least 70 degrees .
But being room temperature is very important for a good quality cake bakeries , commercial bakeries and retail bakeries spend a lot of time making sure that all their cakes and their doughs and batters come out at the proper temperature and they actually take the temperature of every ingredient and then they can calculate how warm the water or the milk or the liquid has to be .
So that their batters and doughs come out the exact temperature and that's how you get real consistent results in making a cake .
So I have one cup of whole milk .
I'm gonna add three whole eggs and I'm gonna add three egg yolks and the egg yolks are gonna give it a richness and a color .
And I'm also adding three teaspoons of vanilla and I'm using pure vanilla and I'm just gonna blend that a little bit until the eggs are just broken up .
Now , I'm going to add half of the liquid to this mix while it's running on low speed .
Ok .
The ingredients are incorporated .
Now , they're certainly not smooth , but they're all incorporated .
If I wasn't using a blade with the , with the rubber edge on it to scrape the bowl , I would stop at this point and I would scrape down the bowl .
That's a very , very important point .
Always make sure that the bowl is continually scraped so that all your ingredients are mixed properly .
I'm now going to set my kitchen timer for two minutes and I'm going to put this on , on around a medium speed on the kitchenaid .
And that's about between three and four on a kitchen aid mixer on a hand mixer , you can go right to high speed for two minutes , ok ?
Our first two minutes are over .
Now , I'm gonna put the mixer back on low speed and I'm going to gradually add the remaining egg and milk mixture with the vanilla in it .
And I'm adding this slowly so I don't get it back in my face .
All right , that's just blended .
Now , once again , if I did not use that beater blade , I would put this down and I would scrape the bowl really well , I'm gonna put this back up .
I'm gonna set one minute on my timer and this time I'm gonna put this on medium speed , which is just between two and three on a handheld mixer .
You can put it right around your medium speed as well .
Ok , my minute is over .
My cake is completely mixed just to make sure you can use your blade or your spatula and just scrape the bottom of the bowl .
And if you see that it's not completely blended , just blend it by hand for another couple of seconds .
But this is completely blended and you can see the consistency of the batter .
It's very light and it's very uniform .
It's very creamy .
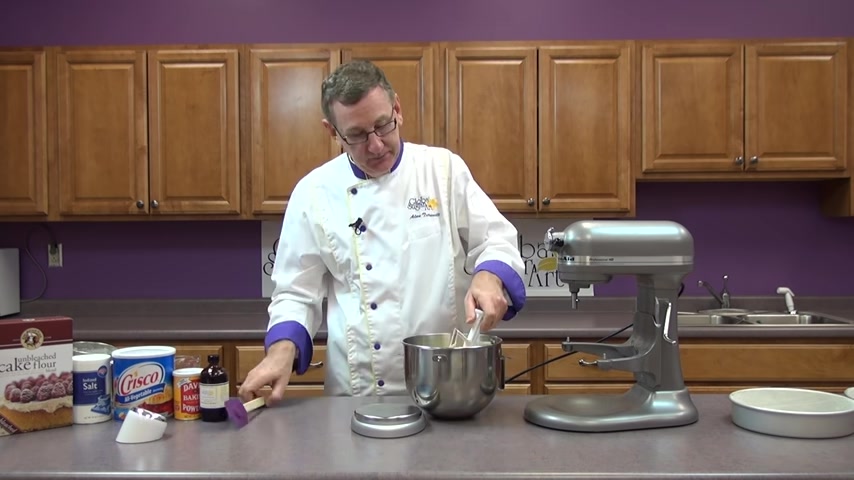
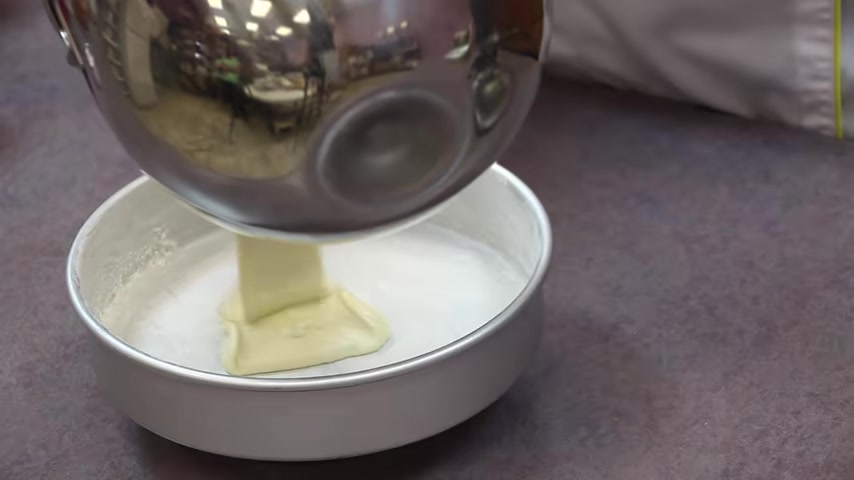
So we'll scrape this off batter and I'm gonna show you an easy way to divide cake batter in into two pans .
You can eyeball it and you can just sort of guess or you can actually do it like bakeries do and make sure that you have the exact same weight on every cake .
So I'm using a scale .
I'm going to put my pan on the scale and I'm going to hit the tear button and that brings my settings down to zero .
And I know from having made this before that it's going to be about 22 ounces of batter in that pan .
So I'm just gonna dump that right in the middle .
There's 21 and there's 22 ounces in that one .
There's 22 ounces in that one .
And I have just about two little spatulas left and I'm gonna put one in each then just spread the batter with your spatula until it reaches the edges .
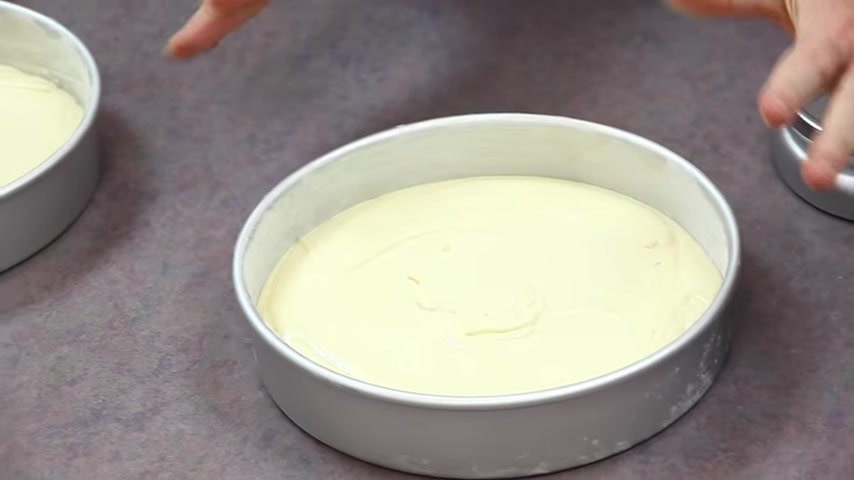
And the final thing that you want to do is just tap them on your table that will level the batter .
And if there's any big air bubbles in there , they'll pop right out .
So those two cakes are now ready to go in the oven .
Again , this recipe is for 29 inch cakes or you can make 38 inch layers .
Now , I want to talk just for a second about a regular cake that you would serve at dinner versus a wedding cake or a professionally decorated cake where you want a full four inch height .
These cakes will come up almost to the top of the pan and this is going to give you about a 3.5 inch cake .
If I were making a wedding cake and I wanted a full four inches , I would put this batter in 28 inch pans , not three .
And those cakes will rise just above the top of the pan .
And after they're cooled , I'll put them back in the pan and I'll slice even at the top of the pan .
And that gives me two perfectly symmetrical , two inch high layers that are perfect for making a wedding cake .
But for the average home use 29 inch pans will give you a really nice cake .
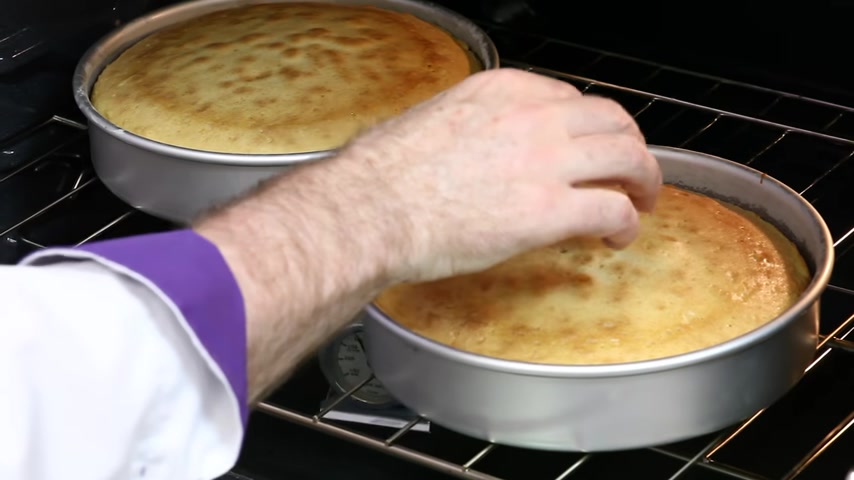
So I'm going to go pop these in the oven .
I used a pans .
So I've set my oven at 325 degrees and I'm going to bake these for about 30 minutes .
When we come back , I'll show you how to test to see if the cake is done while our scratch cake is baking in the oven .
I'm going to quickly show you the best way to make a cake from a mix .
Now , I want to talk about mixes in general .
One of the most popular mixes on the market is probably a Duncan Heins cake mix .
And 20 years ago , this was a very different mix than it is today .
Today .
This package weighs just a little over 16 ounces .
It's just about £1 of mix .
You used to be able to bake 28 inch cakes with a Dunkin Heinz cake mix and it would come right over the top of the pan .
Today , we're making homemade fondant , 4 to 5 ingredients in 15 minutes .
And you have something that's homemade , something that is delicious and also even more elastic and easy to work with than that stuff you buy at the store .
Plus you don't need the stove .
We're doing this in the microwave .
First thing we're gonna do is add two tablespoons of water to our marshmallows , taking this to the microwave .
40 seconds full power .
This might be hot .
This one isn't but in case your bowl is be careful , we're gonna stir this .
Oh Look at that .
So we still have some lumps in here .
We don't want lumps .
Lumps are not good .
So we're gonna put it back in the microwave for another 30 seconds .
Just gonna stir this and keep repeating the process .
30 seconds in the microwave , stir , 30 seconds in the microwave stir until all the lumps are gone .
So this is great for parties , weddings , large cakes and sculpted cakes as well .
Uh In this case , we're going to start with a cup and a half of room temperature water again , just like the scratch cake .
Always be sure you use room temperature , room temperature ingredients .
So I'm gonna put three quarters of a cup in there .
We're gonna make the yellow cake and I'm gonna put all the mix right in here at one time .
Now , this particular mix , we we have a second mix that will be coming out very soon .
But this particular mix already has the eggs in the mix .
So it's great to have on the shelf at home because you never have to worry whether you have enough eggs in the refrigerator to make a cake at the last minute .
So put that on the mixer and I'm just going to start this at low and then I'm gonna put this up to medium speed around four for three minutes .
I always like to use a timer because it's very easy to get distracted when you're baking and start doing something else .
And you really forget how long a cake has mixed and you can under mix or over mix a cake very easily that way .
So I've got three minutes on my timer .
I'm going to start it .
You go right up to about a number four on here , ok ?
For the last 20 seconds or so , I'm going to slow the mixer down and I'm going to slowly pour in one quarter cup of vegetable oil .
And again , I'm just doing this slowly so that it doesn't splash out if you have the oil in .
Add the remaining water Trump .
That's my timer .
Time for the chocolate .
And you're probably wondering why we're using chocolate .
But that's the secret ingredient to this recipe that makes the fondant both firmer and more elastic .
And that combination is what makes this really easy to use .
We're just going to keep stirring this until we have no lumps , it's very sticky .
This is looking really good .
Everything is incorporated .
We have no lumps .
So it's time to add the color .
I really like to use gel food coloring because you can control the color a lot more than if you use candy melts from the beginning and using gel rather than liquid does not change the consistency of your fondant , which is really important .
So we're gonna use a toothpick and just add a few drops at a time .
I think we need a little bit , a little bit more food color .
You always want to add this a little bit at a time because you can always put more in , but you can't take it out .
This color is looking really good .
Everything's smooth .
So now we're going to make a little well in our powdered sugar and put this into this .
But before I do that , I'm taking off my rings because I don't want any of that all up in my jewelry .
So I'll get rid of that .
This is so sticky , but it's a good sticky , all that sugar .
It's actually kind of satisfying because this is very warm .
It feels like something you play with when you were a kid .
Our next step is mixing , which is followed by kneading .
So we're just gonna get all of this incorporated and try to keep the powdered sugar in the bowl .
Let's see how that goes .
This feels really nice .
It's like a , a spa experience .
You can see the sugar strands coming together .
Ok .
It looks raggedy now , but it's gonna come together and be smooth .
Like so many things , it has to get worse before it gets better .
This is getting pretty close .
So I want to dump it out onto my work surface and start kneading .
It's like needing really overworked bread dough .
Just want everything to come together .
So use your muscles .
So we have a real thing .
This is fondant .
It all came together .
Still getting some breakage though .
So we're gonna keep needing a little while longer .
So you can see that this has gotten so much smoother .
We're not getting those cracks .
Look at that .
It's a thing for real .
What's really great about this is you can keep it at room temperature for two months .
You can put it in the fridge and keep it for four or put it in the freezer and keep it for six .
Very easy storage option plastic bag .
I'm gonna use just a little bit of kitchen spray font goes in .
Push as much air out as you can and you're good to go before you use this .
Definitely bring it back up to room temperature and microwave it if you need to .
If it's not soft and pliable , microwave it for about 30 seconds before you start rolling it marshmallows and sugar fondant get everything you need to create at my blueprint dot com .
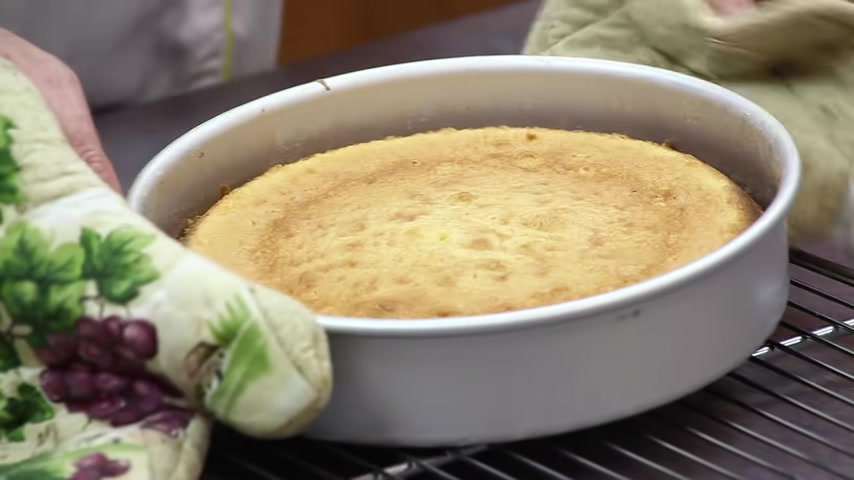
And you can see , even though I greased the parchment paper , you can see how some of the crust actually stuck to the parchment paper that shows you how much a butter cake can actually stick to a pan .
If I didn't have this on here , I'd have had a hard time removing it from the pan at this point .
Let this cool completely .
Don't wrap it in cellophane or put it in a plastic bag or refrigerate .
It don't do anything in this to this cake until it is thoroughly cooled .
Give it at least an hour outside on your , on your counter or a little bit more when it's completely cooled .
Then you can either ice it and go forward and decorate it or you can put it like in a Ziploc bag or you can wrap it with some sort of a cellophane wrap and leave it on the counter overnight or you can refrigerate it .
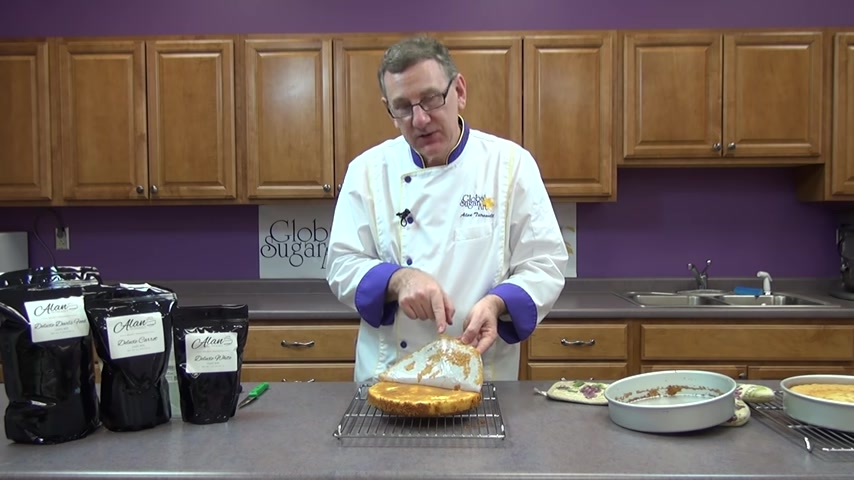
Whatever you choose to do , we could be right back to finish this video and we'll take the cake , mix cake out of the oven and show you what that looks like .
And the last thing we're gonna do is we're going to actually cut into one of these layers .
So you can see the texture inside the cake .
We'll be right back .
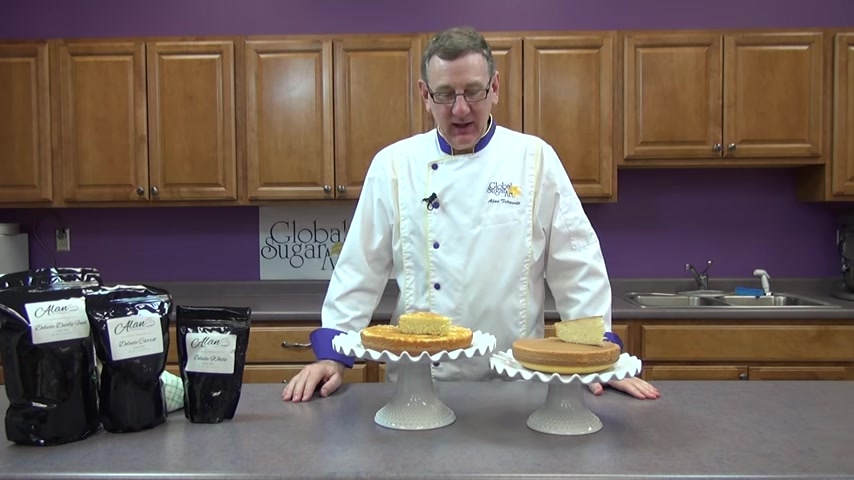
Well , we're finishing up our lesson in cake baking and I wanted to cut both the cake mix and the scratch cake for you to see the final results .
You can see the difference in coloring and texture on the outside .
And that's just because this one is mostly butter and this is all oil in this cake and it really does make a difference .
The cake mix with the oil in it is going to be a very fine grain .
It's very soft and it's very moist .
The scratch cake is gonna have a wonderful , wonderful butter flavor .
Uh You just , you just can't compare the two flavor wise , although I think this is an excellent mix .
If you don't want to use a mix , this is a fabulous recipe to try .
You'll find that it's very soft , it's very tender and it's also very , very moist .
This whole video that you just watched is sort of a prequel to a series that will be coming up next .

In my next video , I'll teach you how to make a couple of different kinds of butter cream and we're going to slice a cake , fill it and ice it in two different methods .
And from there , the series will continue on and I'm going to teach how to decorate with butter cream .
There's been a lot of education on how to decorate with fondant , but Butter Cream has not gone away .
And I would like to teach you how to use a pastry bag and star tips and round tips and specialty tips and flour tips and how to get beautiful results with good old fashioned butter cream .
Stay tuned .
I hope you've enjoyed this video .
The products are available at Global Sugar Art and thank you for watching .
Are you looking for a way to reach a wider audience and get more views on your videos?
Our innovative video to text transcribing service can help you do just that.
We provide accurate transcriptions of your videos along with visual content that will help you attract new viewers and keep them engaged. Plus, our data analytics and ad campaign tools can help you monetize your content and maximize your revenue.
Let's partner up and take your video content to the next level!
Contact us today to learn more.