https://www.youtube.com/watch?v=_UhcL0EH1DY
How to Make an Affiliate Price Comparison Website with WordPress, ReHub & Content egg -2018 Tutorial

Hello friend Sam Na Sheikh from blog two dot com .
And thank you for watching this video .
In this video .
I'll show you how to create an affiliate marketing price comparison website in the most easiest way possible .
I'll teach you everything from scratch , everything from setting up and hosting account to installing wordpress , designing your website , creating affiliate account with Amazon flip card , ebay , Ali Express , etcetera .
I'll also teach you how to generate affiliate links and how to easily earn commissions on each affiliate sale .
I had seen the top websites on internet that do affiliate marketing through price comparison website and I have tried to design our website exactly like that .
Now , let's see the demo website and compare it with the top affiliate marketing websites on the internet .
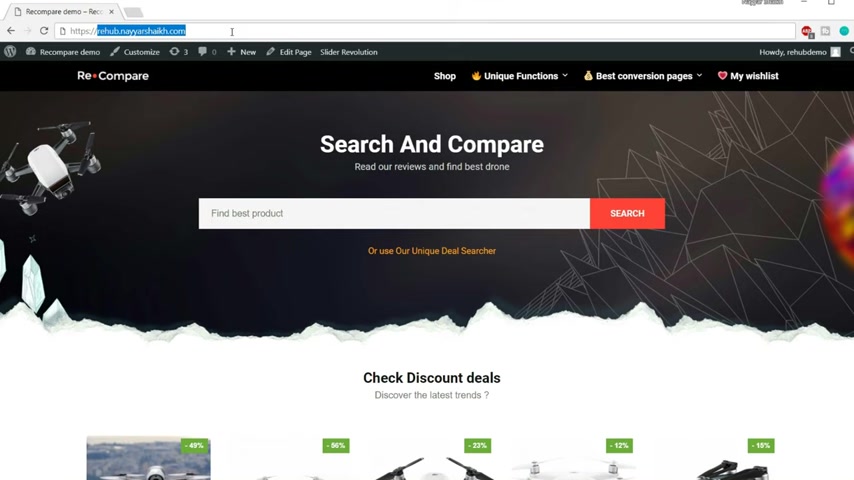
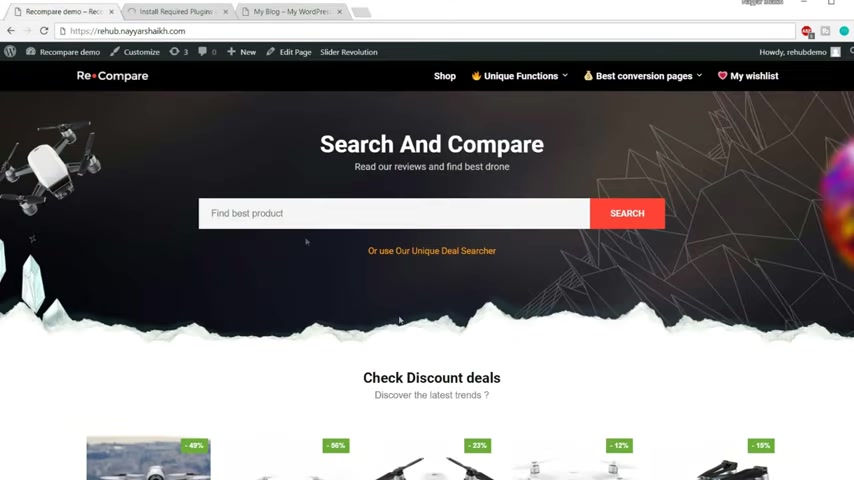
So as you can see over here , this is the demo website which we will be creating in this video .
This is the home page .
This is the top panel at the top .
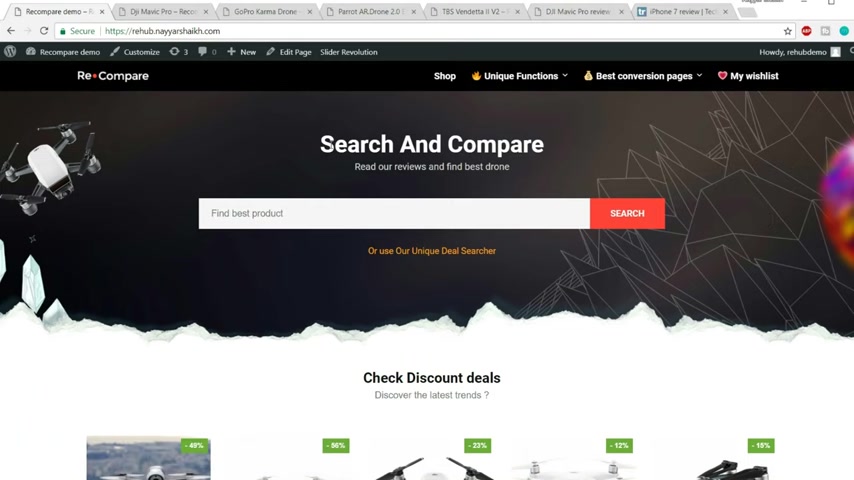
We have our logo over here .
Then we have our navigation bar and as you can see , we have beautiful icons at the navigation bar and we have our menus .
Then after that , we have our first section .
As you can see , this is the first section , we have a beautiful background image .
And after that , we have a title subtitle .
And after that , we have a beautiful search bar .
Now , this is Ajax search , which means that whenever you try to search something over here , it will automatically show you the result as you can see over here without typing , without going to the search page , you can see the live result over here .
So this is a search .
Then after that , we have our second section .
This is the discount section .
So in this section , we will be showing all the product which are on discount at present .
As you can see all the product over here are on discount .
Then after that , we have this small section which says we are tracking prices from more than 20 most popular shops to give you best deals .
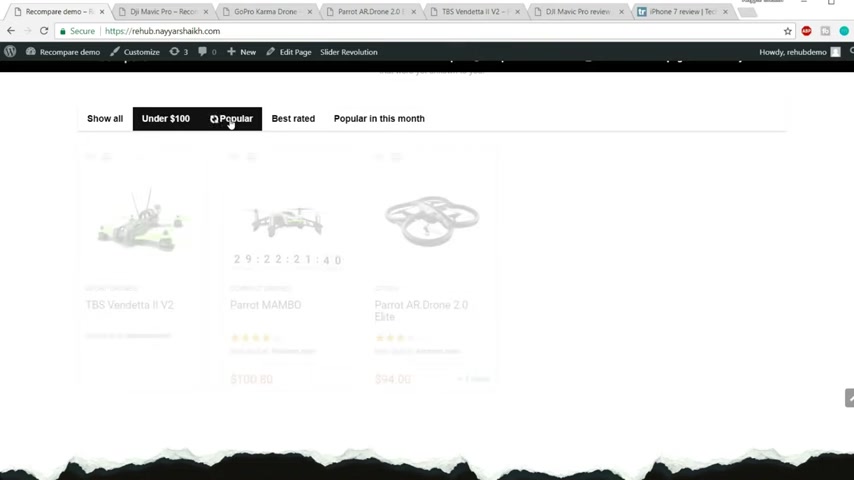
Then after that , we have another section and this is a tab section .
As you can see , we have different tabs over here .
When we click on this tab , it says under $100 we get all the products which are under $100 .
Then we have the popular tab .
When we click on this tab , we get all the popular products on our website .
Then we have best rated that .
When we click on that , we get the best rated products .
Ok .
Then after that , we have popular in this month and we get all these products .
Now it's all up to you .
You can have any criteria over here , for example , you can have , you know , under or about over $100 and you can show products which are over $100 and so on .
It's up to you .
Then after that , we have this section .
This is actually a slider as you can see very beautiful slider with beautiful animations and we have different videos over here .
These are youtube videos .
When we click on this , the video will start playing .
After that , we have this section here .
We have all our posts , then we have the food section .
Now let's come at the top .
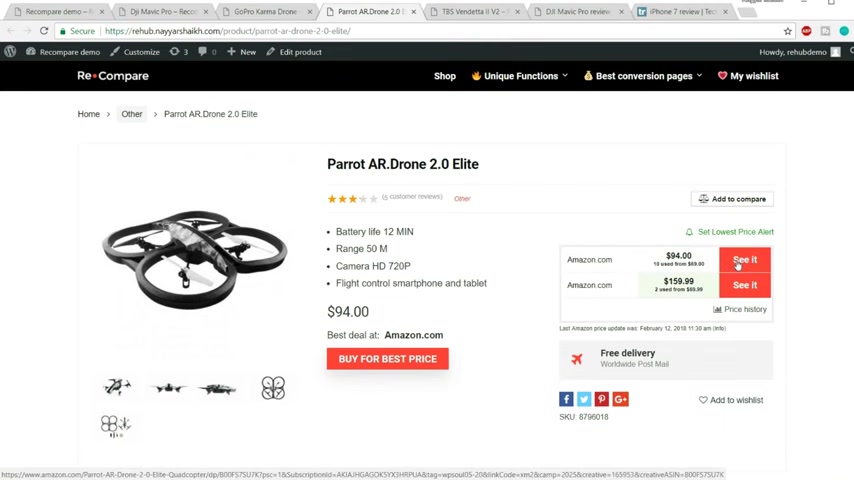
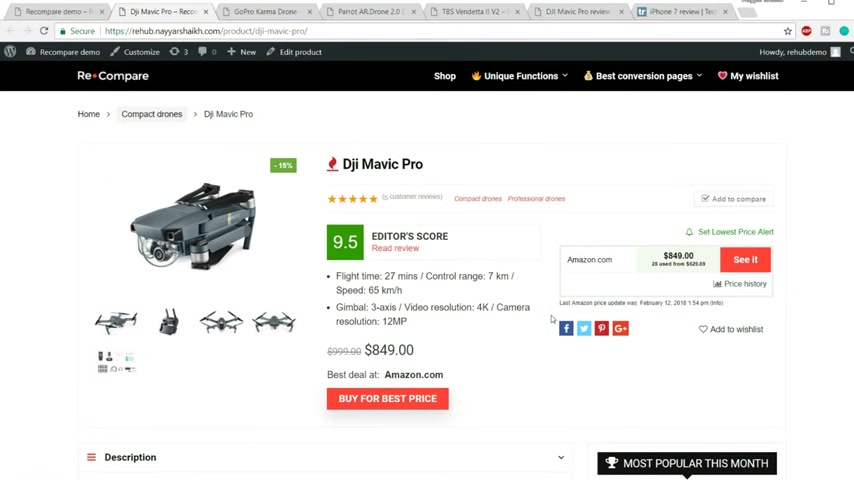
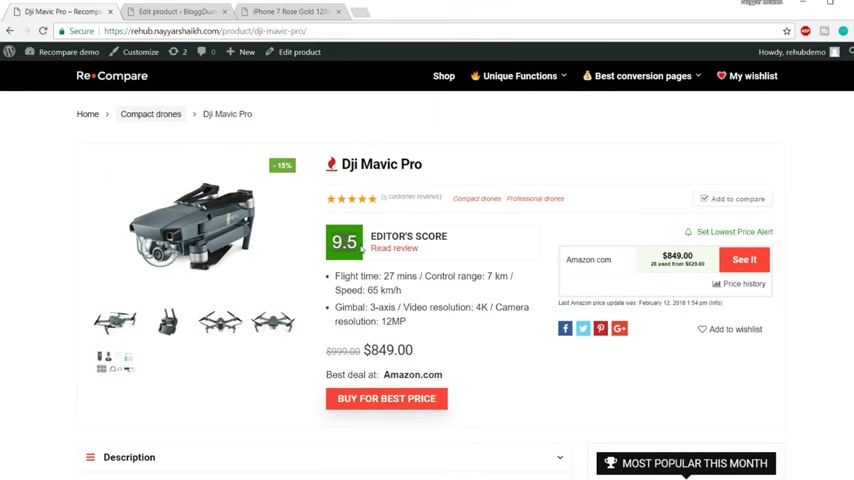
Now let's see how our product page will look like .
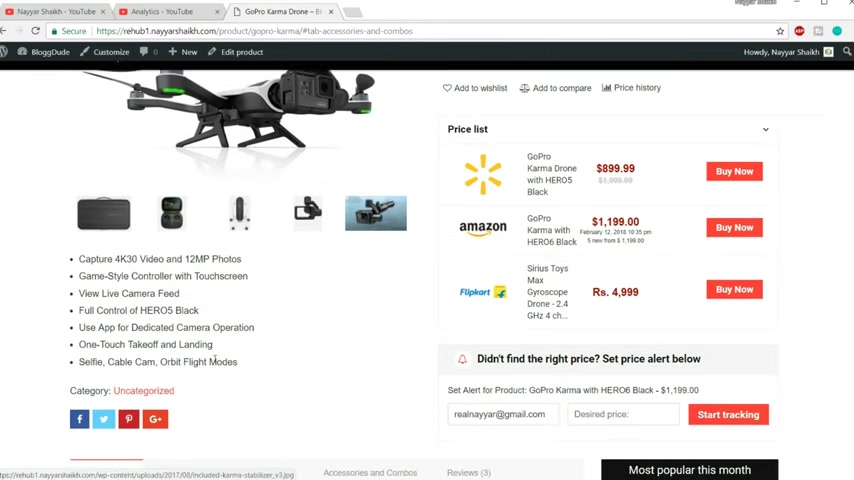
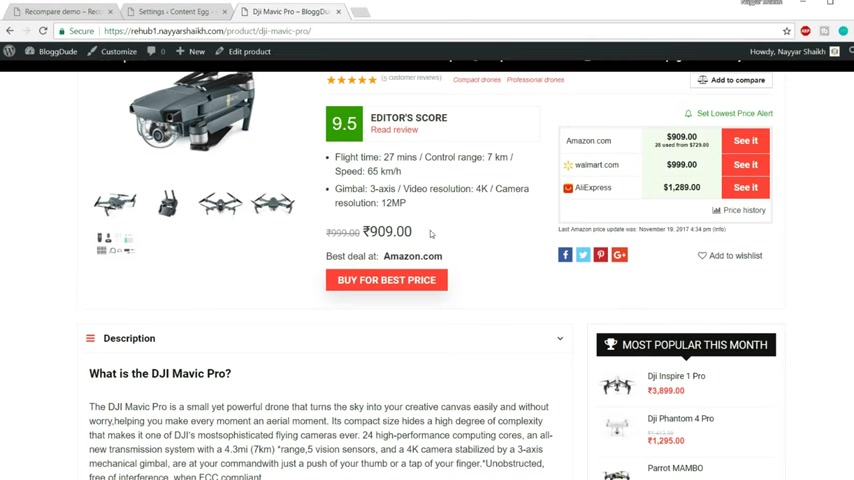
So this is how our product looks like we have our images over here .
We have the short description , we have the name of the product and here is the price list .
We have this product on Amazon at this price on Walmart at this price on flip card at different prices .
So you can see all the prices over here and you can buy it from any website you want .
We also have this price alert .
So because if you if the user doesn't get the price , you want to see he can enter his email address and click on this button which says start tracking once you do .
So he'll be getting email notification whenever there is some price change in this particular product , this is all automatic .
You don't have to do anything over here .
In fact , you don't even have to upload these images .
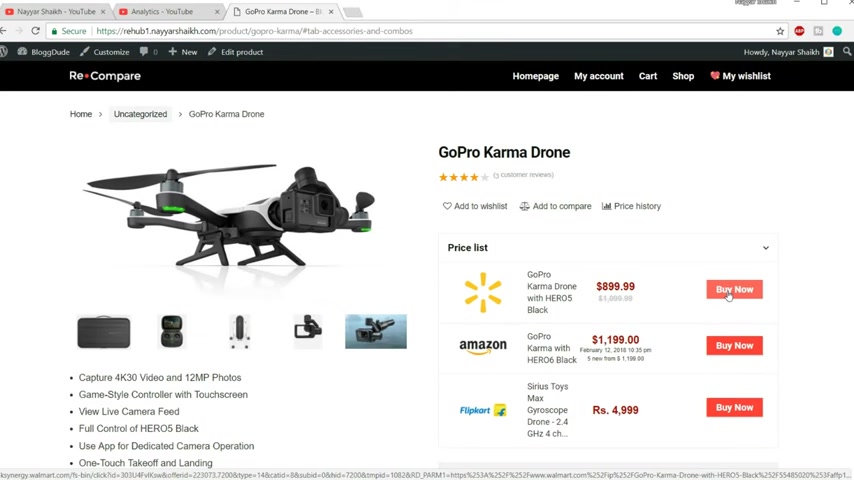
All these images will be automatically imported from Amazon or whatever website you are importing the product from all the prices will automatically change whenever the price of the product changes on the main website that is on Amazon ebay or flip card , any any website .
Then after that at the bottom , we have the description as you can see we can use no bullet points , images , videos , everything in the description .
Then we have an additional information section , you can see all the information and then we have a video section .
We'll be integrating with youtube to see how to integrate with youtube and we'll be importing different , you know videos over here .
Then we have a custom section .
I'll show you how to do this custom section , accessories and combo so that we can promote other accessories .
Also with this product .
The reason behind doing this is you know , getting more sales and more commissions .
Then at the end , we have the review section .
So this is our product looks like this is one design , but we can you know show the product in different designs .
Let me show you another design .
So this is another design .
We have the description and best buy for best price at the in the middle .
We have the images over here and we have all these Amazon and different logos .
All here , we can also use some shops codes and html to write some extra codes .
For example , over here , you can see this thing , it says free delivery , worldwide post mail .
So most of the things are similar , but this is extra .
So you can also add something like this .
Now whenever someone you know when clicks on this button , for example , they want to buy it for the best price , they'll click on this button , it will redirect them to Amazon .
And when they will make any purchase , Amazon will see that they have made purchase and Amazon will give you some commission on that .
Now let us scroll down and see the second design .
Now here in the first design , we have , we had the tab section as you can see over here .
And in the second design , we have something different .
The first description at the top .
Then after that , we have additional information .
So this is not tab section .
Then after that , we have videos .
Then also we also have this prize section .
Now you can add all these sections anywhere on the page .
There are short codes available .
We can just paste that short code and we can have this prize history section anywhere we want all this video section anywhere we want on this page .
OK .
So it's all up to you .
You get a lot of , you know , flexibility in designing the way you want your website to look .
Now at the right hand side , we have this sidebar which says most popular this month .
So these are the products that were most popular this month .
Now , we can also add some extra information , extra banners .
For example , if you see , oh , here we have added this banner which says 20% discount till end of this month .
Ok .
So you can also do something like this and the most amazing feature , most cool feature .
In fact , all the features are cool over here .
This theme , the rehab theme is really amazing .
Now there is another amazing feature if you see this product here , it says editor score 9.5 rating .
So using this , you can also create a review post .
Now that is very , very important .
Many big giant websites use this criteria of this method to generate more sales , more affiliate sales .
For example , cnet dot com or Tech radar .
For example , if you see Tech Radar , they use the same strategy as you can see this is a review post , ok ?
They have given a review for iphone seven , it says iphone seven review , they have given four stars .
And after that , we see they have given their verdict , they have shown the and cons then they have this thing .

This is very important , you know , you can buy it from flip card , Amazon , New egg and so on , you can click on this button , you will see all the deals .
Now whenever you click on this button and make a purchase .
Tech Rada will get a nice commission on that .
So we'll see the same thing and you have all these things over here , all this , you know , review .
So we we can do a very similar thing .
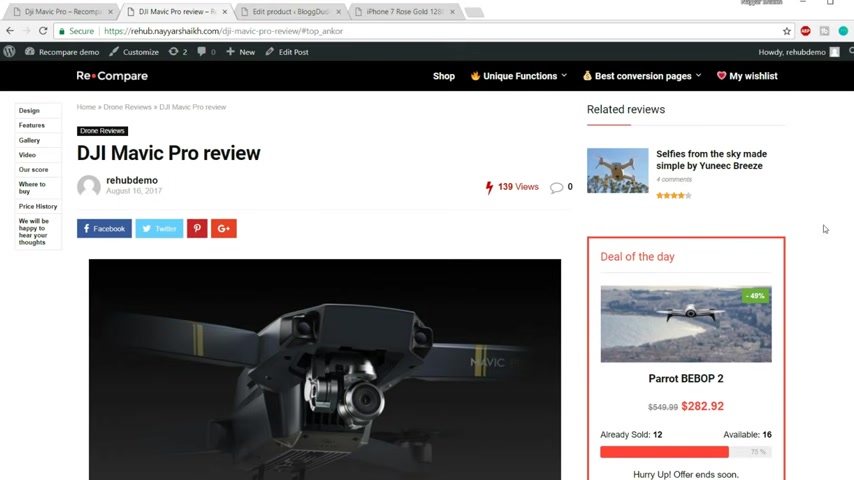
Let me show you when you click on this button which says read review , you will be redirected to this page .
Now this is a review page .
OK ?
And we also have this sticky panel .
This is a very cool feature .
For example , you see design features , gallery .
Now you want to go directly to the video section .
So you'll click on over here and you are now redirected to the video section .
Ok ?
Now here also we have given some scores .
So this is all is done by me or by you .
Whenever you try to create a website , I have given my score , I have given the pros and cons over here .
Then after that , similarly , we have this thing where you're right to buy .
Now , whenever someone clicks on this button and makes a purchase , we'll get a commission .
Ok .
Again , we have prize history and we have the review at the top .
OK .
This is the review of this particular drone .
Now let's see this shop page .
So when you click on this button which says shop , it will be redirected to the shop page .
OK ?
So this is our shop page and we have this nice criteria over here .
We can you know , sort it by different brands , you know , camera or different criteria .
For example , we can sort it by brands .
So suppose I want gopro so I'll click on over here and I'll get only go pros , ok , drone , which are using GoPro camera .
So I can just unti this and everything will be normal .
Now , we can also sort it through pricing .
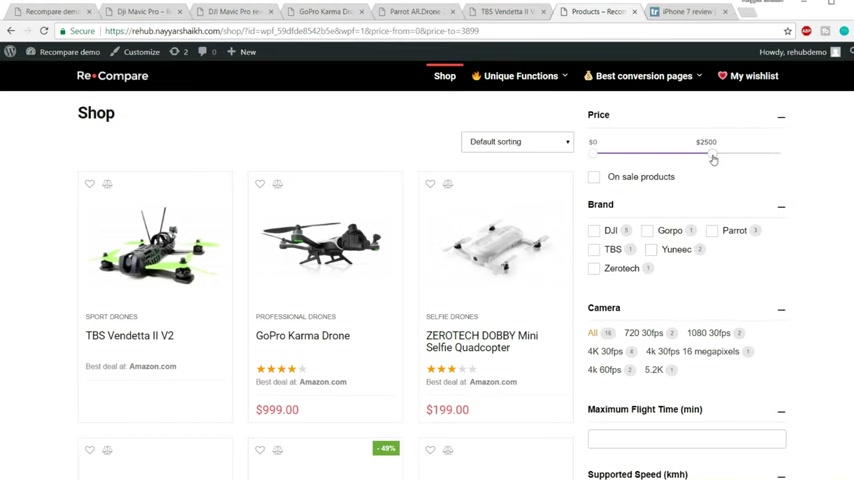
For example , suppose I want a drone from 0 to $2500 then I'll get all these drones which are priced between 0 to $2500 .
Now , when you click on this button on sale products , you'll see only those products which are on sale .
As you can see , it is 49% sale , 56% sale .
So only the products which are on sale are shown over here .
So I think this is it for the demo website .
Actually , the website is quite huge , but it is very easy to create .
So if I go on showing all and every features in of the demo website , it will take some time .
So I'll stop over here .
I hope you guys now have a good idea about the website you're going to , you're going to create .
Now , let's move forward .
Let's proceed and let's see how to get a hosting and a domain for those of you guys who don't know what a domain is .
It is very simple .
The website name which you see at the top here , it says rehab dot naik dot com .
This is the domain name , for example , google dot com , youtube dot com .
You know Facebook dot com .
All these things are domain name .
It is the name of the website which you type on your URL bar to reach the website .
For example , suppose you want to go to Google , you type google dot com or Google dot in and you go to Google .
So that is what basically a domain name is .
So in this step , we'll see how to get a domain name and also how to get a hosting account .
Now , we'll get the perfect hosting account suitable for our website because this is not a regular website , a normal website .
This is an e-commerce website and this is an affiliate e-commerce website .
So for this , we need a different kind of hosting , not the regular hosting .
So we'll see how to get that , how to do everything in this step .
So to do so first open a new tab and type in blog to dot com slash T MD .
This link is also given in the video description below .
You can just click on that link .
It will redirect you to this page .
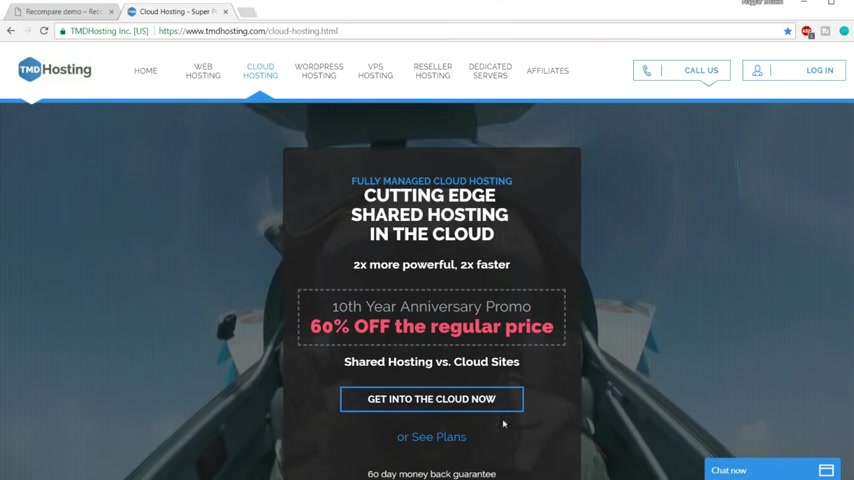
Now they are giving some discount on the regular host , regular shared plan , but we don't want shared plan .
As I said to you a few moments ago that we won't be using the regular , you know , hosting .
We'll be using something robust because our website is totally different .
It's an affiliate e-commerce website .
So what we'll do , we'll skip this and we'll click on this button which says get into the cloud now because we'll be using cloud hosting , which is the perfect hosting for our website .
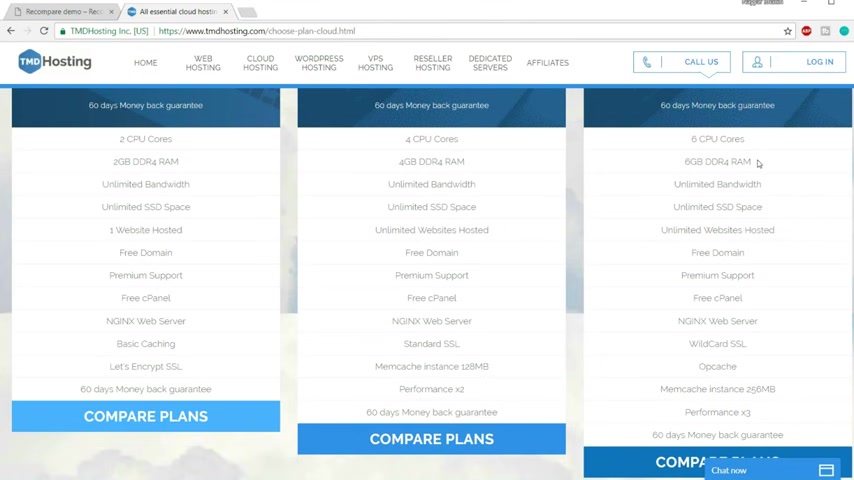
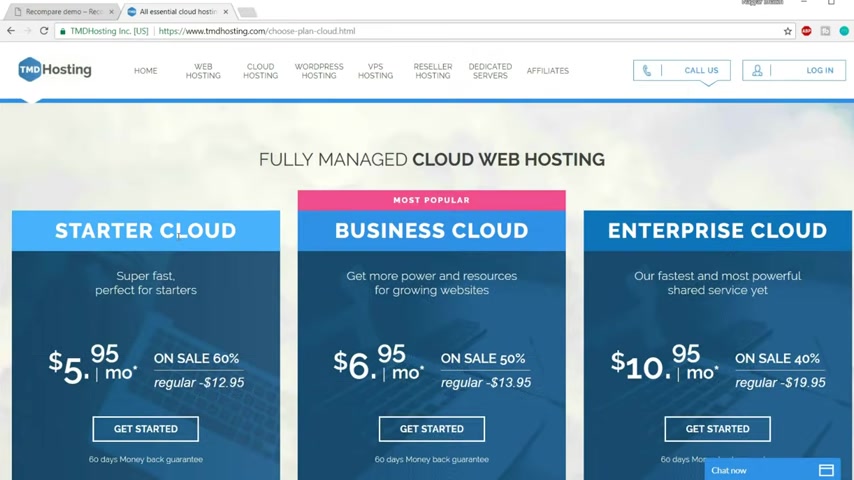
Now , when you do so you'll see three different plans , starter cloud business , cloud and an enterprise cloud .
Now , let's see the different features and why we are choosing this hosting plan .
So the first thing is six core CPU and six GB DDR four ram .
Now , for those of you who don't know , in fact , everyone should know this is basically related to computers .
The computer which these guys are using is a very nice , very robust computer .
It has got a six core CPU and six GB of DDR four ram .
Now , why is this important ?
Why seeing the computer configuration is important because a hosting is nothing but a computer or a hard drive which is running 24 7 some in some part of the world .
So that whenever someone comes to your website , they can see all the data on your website because all the data on your website , whether it be the images , the codes , whatever is there on your website , all the data are stored in these hosting plans and you know , they have to be available 24 7 .
So that whenever someone comes or visits your website , they can see the data .
So the computer which has your data , which runs , your data has to be really robust , really fast so that it doesn't , you know , you know , slow down your website or so .
So the computer which these guys are using is really nice .
After that , we have unlimited bandwidth .
Now , this is basically what does this mean ?

This is the amount of or the limit of upload and download your website can have , so we can have unlimited amount of upload and download data on our website .
So user can download unlimited amount of data from our website and we can upload unlimited amount of data on our website because it is unlimited bandwidth .
After that , we have the most amazing feature that is the SSD space .
Now , most of you guys should know this , that SSD is way more better than the regular HDD .
You know , it is a basic computer thing .
But if you don't know this , you can just go to Google and type in SSD versus HDD web hosting and you'll see the results .
Now , there are many different articles and posts written , you can read them .
You'll get a better idea .
Now , let's click on images so that you don't have to read anything .
Now , when you see the first result , this is the first result that pops up .
Now , here there are three different criteria and the first one is speed .
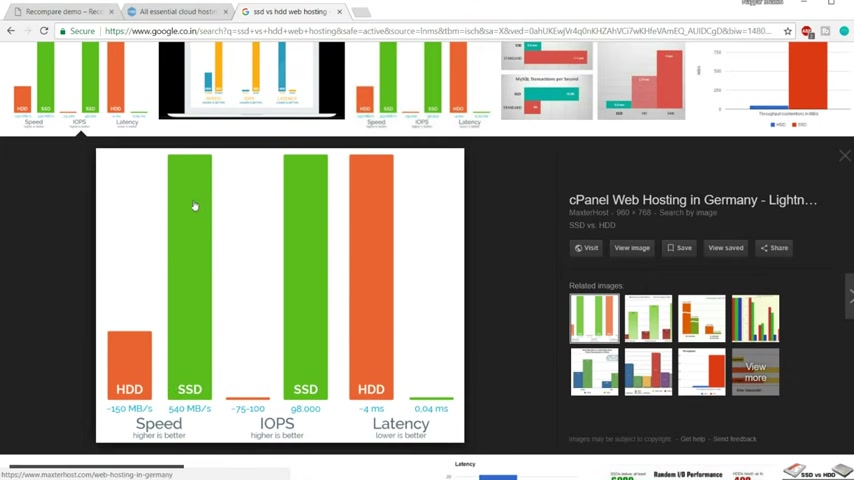
So as you can see over here , the speed of SSD is way more better than the regular HDD .
And here at the bottom , it says higher is better .
And you can see the green one , which is the SSD is way more better , way higher than the regular HDD .
The next one is IOP S here .
Again , it says higher is better now .
And you can see there is an insane amount of difference between both of them SSD is really , really higher over here .
Then the third one is latency .
Now this time , it says lower is better .
Again , you can see there is a really insane amount of difference between both of them .
And this one is really low , which means this is better .
So this is a basic thing , you know , SSD is way more better than the SDD .
And these guys have unlimited SSD space , which is amazing .
After that , we have another awesome feature which is unlimited website hosted .
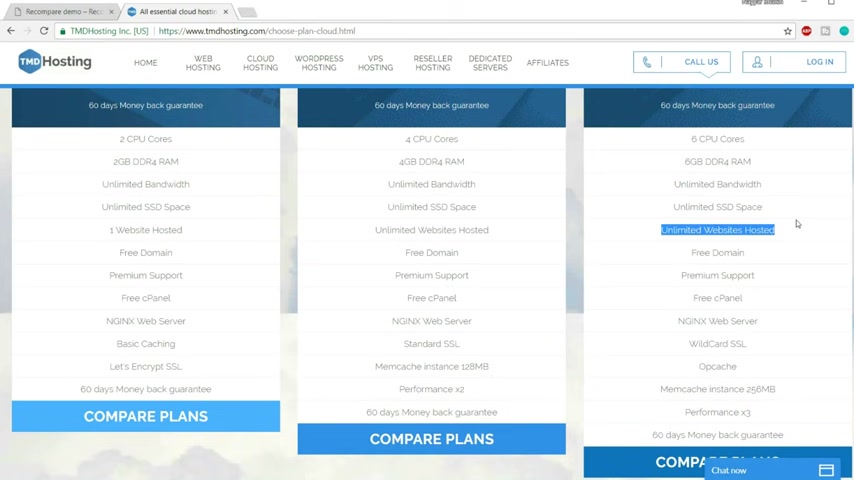
Now , this means that you can host unlimited website on this particular hosting account on one single hosting account .
Now , today we are creating this affiliate website .
Now , tomorrow you might need to create a different kind of website or just a regular website for your business .
So you don't have to purchase a new hosting account for that .
We can use this same hosting account and we can host that website or any other website in the same hosting plan .
So we are saving a lot of money over here .
After that , we have free domain .
So when you sign up with any one of these three plans , you get a free domain , for example , naik dot com is a domain name which I got for free .
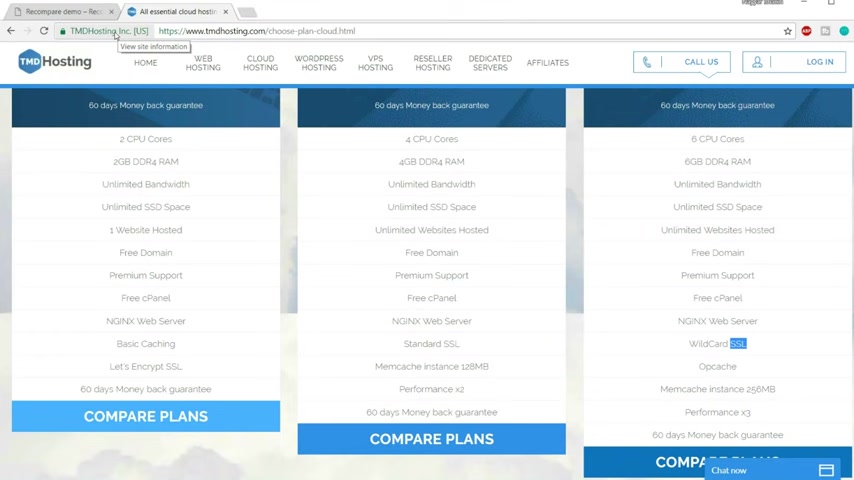
When I signed up with T MD hostings , then we have premium support , free C panel , nice web server , wildcard SSL .
Now this is very , very important in today's time because recently I read an article , I don't know where if I remember , I'll give you the link in the description below .
You can read that .
Now , that article says that from July onwards , July 2018 , Google will see all those website which don't have SSL certificate .
Now , this is the SSL certificate .
If you see over here , this green socket over here , this is the certificate .
Now , all those websites which don't have SSL certificate , Google will mark them as not secure .
So whenever a user visits on their website and they , if the website doesn't have the SSL certificate , the browser , the chrome browser will say that this website is not secure .
Now , we don't want that .
We don't want anyone coming on our website and chrome should pop up saying you know what this website is not secure .
We don't want that .
So with this thing is very , very important , certificates are really , really important .
It says the user , it gives confidence to the to the user .
It certifies the user that this website is a legit website .
It's a secure website .
Now , this is really crazy feature .
According to me , it has wild card SSL .
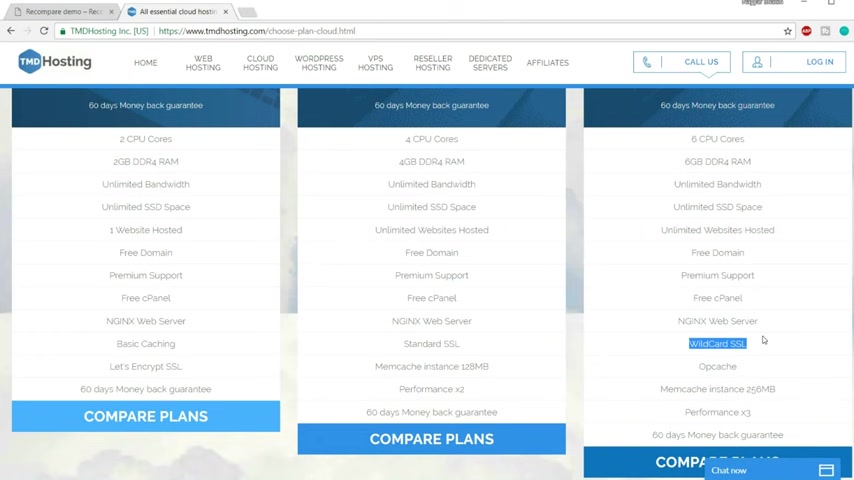
Now , Wildcard SSL means that you can have SSL certificates on unlimited number of domains and also on subdomains .
Now , this is really crazy because if you see the price of one single SSL certificate is , you know , anywhere between 40 to $400 .
So you're saving a lot of money over here .
After that , we have optimum cash memory instance of 2 56 MB performance is three times better than these two plans .
And we also have a 60 day money back guarantee .
So all these features are really , really amazing .
And this is why I choose T MD for e-commerce websites .
It has everything that we need for e-commerce website .
So once you're satisfied with the plan , I would recommend you to select either the business plan or the enterprise plan , enterprise cloud plan , don't select the startup cloud plan .
The reason is very simple here , you can host only one website .
So in the starter cloud , if you want , if you select Starter Cloud and if you want to create another website tomorrow , you will again have to purchase a new hosting plan .
So that is not recommended , either go with the business plan or the enterprise plan .
So I highly recommend the enterprise plan because that is what I am using right now .
Now , once you're satisfied , just click on this button which says get started .
Now , here you have to put in the domain name which you want for free .
It can be anything .
For example , let me type in NAIK one .
Now , I cannot type Naik because that is reserved .
So I'm typing in .
So I'm typing in naik one dot com .
And you can also select different extension from your , for example , if you're creating an NGO or a nonprofitable website , then you can use dot org or if you're creating any organization , then you can use this dot org .
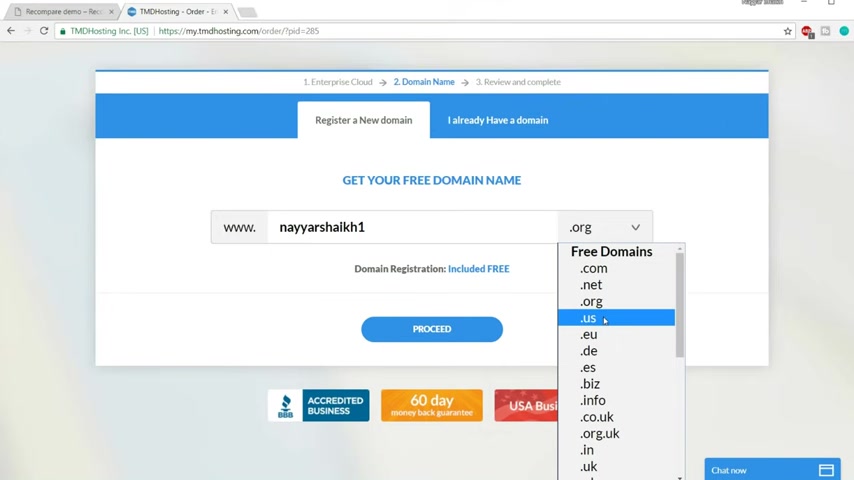
If your website is country specific for , for example , if your website is specific for one country like United States , then you can select dot us .
If your country is specific for India , you can select dot in , you can select dot net as well .
But I highly recommend using the dot com one because that is the most used and most reliable one .
So type in your website name , whatever website name you want and select the extension and click on .
Proceed .
Now here you have to type in some basic information about yourself , like your first name , last name , phone number , email address and so on .
Then after that , we have payment information , you have to put in the payment information through which you want to make payment .
For example , if you want to make payment through credit card or debit card or your ATM card , you can select this and you can select the type of your card and you can make payment for Indians .
Those who are using Rupe card .
Rupe is not accepted or your .
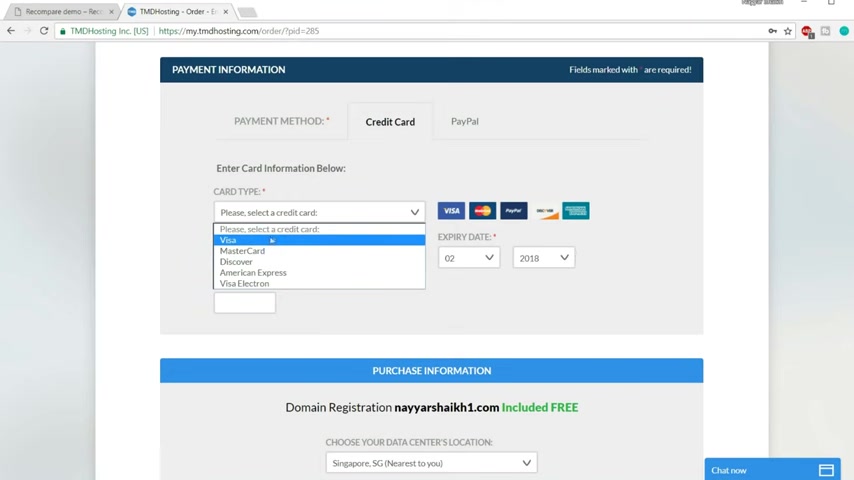
So I would recommend you to use any card like mastercard or Visa Card , something like that .
Or if you don't have that , you can also use paypal to make a payment after that .
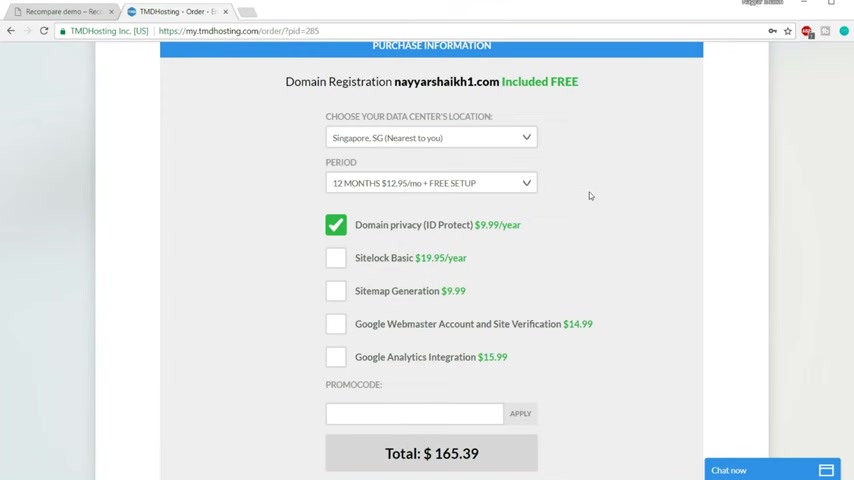
It is a very important step , purchase informations .
Now , the first step over here is data center location .
Now , if you open this , you have a drop down , you have few options over here and you have to select the one which says nearest to you .
For example , for me , Singapore says nearest to me .
So I'll select Singapore .
After that , we have period number of period .
You have to select , I highly recommend select 12 months .
OK ?
Don't ever select one month .
The reason is very , very simple .
If you select one month , you will have to pay $7 extra each month .
So by the end of the year , you're already paying more than $80 extra .
So don't waste your $80 a year , select 12 months and you will be saving a lot of money .
Also , you don't have to , you know , to renew your website every month or your website is going down .
So down every month because of the renew , renew plan and so on .
So select 12 months .
That is the perfect thing .
Now , by default , domain privacy is already tick mark .
Now , domain privacy is nothing .
But you know , whenever you put in all this information , like your basic information , like first name , last name and email address .
If you don't have this domain privacy , anyone can see your , you know , name , email address and last name .
But if you want to secure them , you can select this if you don't mind .
You know anyone seeing your name , your email address , you can just un take this thing after that .
We have the most important plan .
Most important step over here because this is the step that will save us some money .
Now , this is a promo code you have to type in N seven N A double yar seven numeric seven and click on apply .
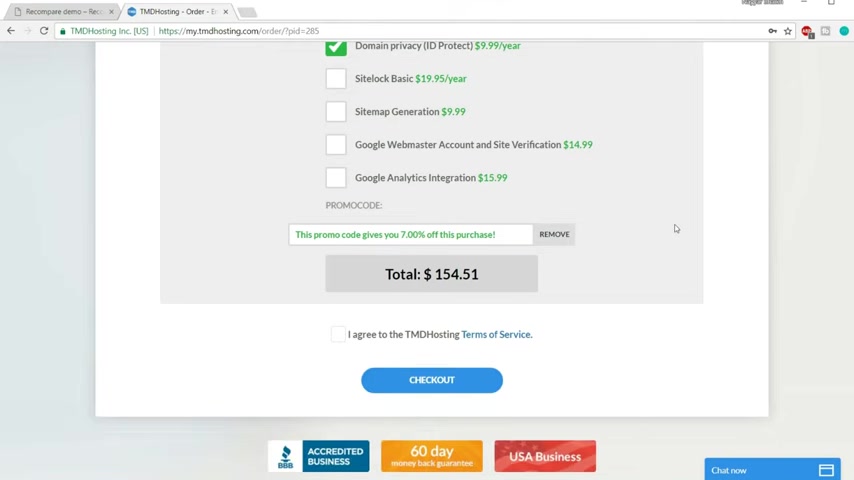
Now when you do so you see it says this promo code gives you 7% off this per purchase and 7% is the highest discount that T MD offers on cloud hosting .
So indirectly , you are getting the highest discount possible .
So once you are done with all this steps , just take my code here which says I read , I agree to the TMD hosting terms of service , you can click on this link to read the terms of service and once you're satisfied with everything , just click on this check out button .
Now , once you click on that check out button , you'll receive an email from TMD hosting .
Now , this email is very , very important because it has all the important information about your website .
It has your FTP user name , pass word , your server , I name servers and so on .
So it has all the important information that will help you every time you get into problem .
So I would highly recommend you guys to save all this information somewhere that you can remember .
If you have multiple email addresses , you can forward this to those different email addresses .
Do anything .
Just make sure all this information is saved somewhere .
Ok ?
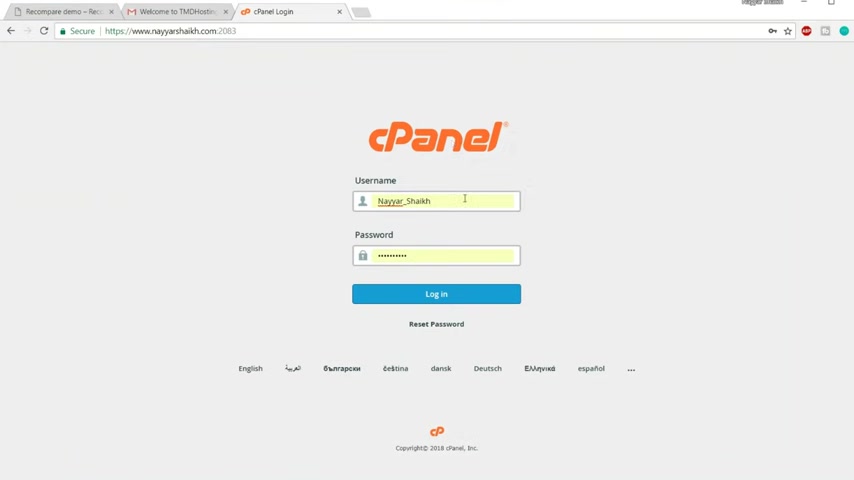
Now , here at the bottom , you'll see a link which says control panel now open that link in a new tab , Ok .
So this is your control panel .
Now , whenever you go , you want to go to your control panel , you don't have to search for that link .
You just have to type in your domain name slash C panel .
For example , my domain name is Naha dot com or blog dot dot com .
So I'll type in blog dot dot com slash C panel and I'll go to my C panel now from that email address , copy the user name and password and click on login .
Ok .
So this is our C panel .
Now , what we have to do , we have to go at the bottom under soft tacular app , install a section and the first one is wordpress .
Now we have to install wordpress on our website because we have registered the domain name .
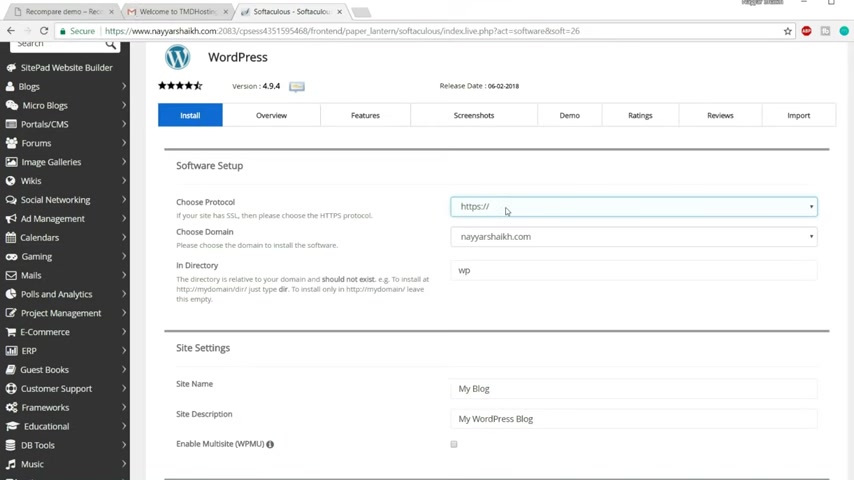
Now it's time to install wordpress on that domain name .
So click on wordpress .
Now , click on this install now button .
Now from here , make sure http S is selected so that you know we have this secure socket .
This SSL certificate on our website .
Ok .
So make sure https is selected and select your domain name from here .
Ok , let me select mine .
You will see only one domain name over here if you're doing it for the first time .
But I know I have done it for 100 of times .
So I'm seeing different , many different domain names over here .
Now , in directory , you will see WP automatically typed in over here .
You have to delete that .
Ok .
Now make sure everything over here is empty .
The indirect box indi directory thing is empty .
There is nothing over here .
After that , we have site settings , you have your site name and description over here , you can change it .
Ok ?
Your site name can be anything or your and your site description , you know , in few words , you describe your website .
So that is what your site description is .
So make sure to change the site name and site description and you can also change these things later on from your wordpress dashboard if you have not decided any site name and description yet .
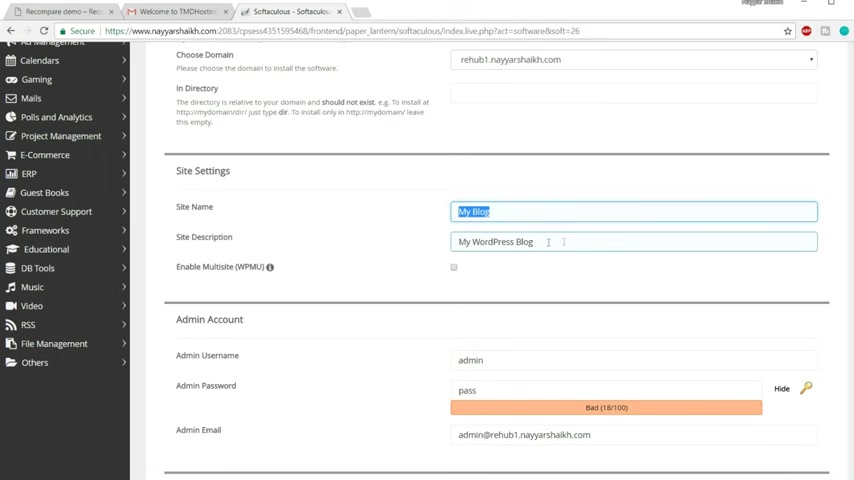
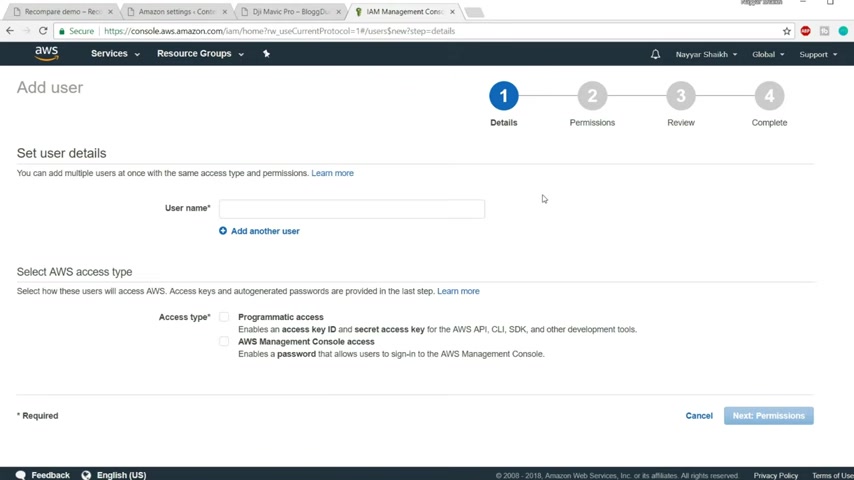
After that , we have a very , very important step , which is the admin account .
Now , make sure you change your default user name and password and you know , put in your own custom user name and password .
So I'm putting my custom email , user name and putting a default password for this one .
And then we have the admin email , just delete that email and put in any email which you use .
Ok .
So I'm putting my email address over here .
Then after that , go to the bottom and click on this button which says install .
So wordpress is getting installed on your website on your domain name .
It will take a few seconds .
Just relax as I said to you .
It took a few seconds .
Now we get two different links .
The first one is your website is just your domain name , your website link .
And the second one is your dashboard link .
So click on the second link .
Now we can get rid of this .
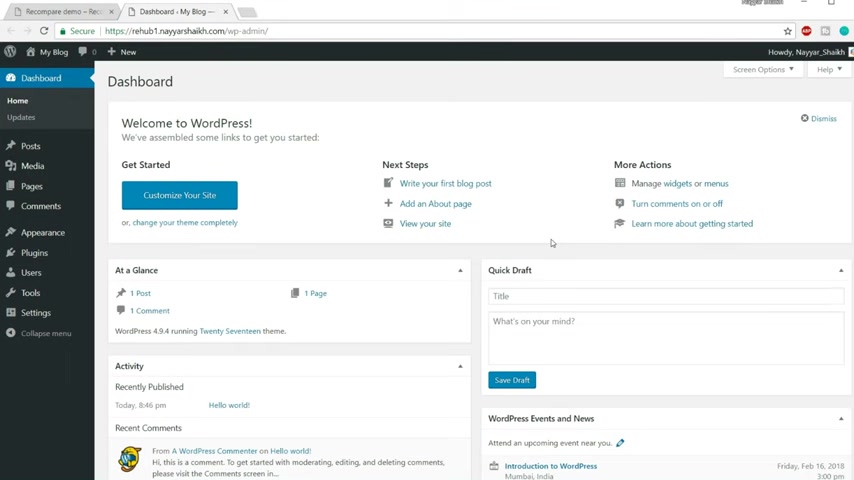
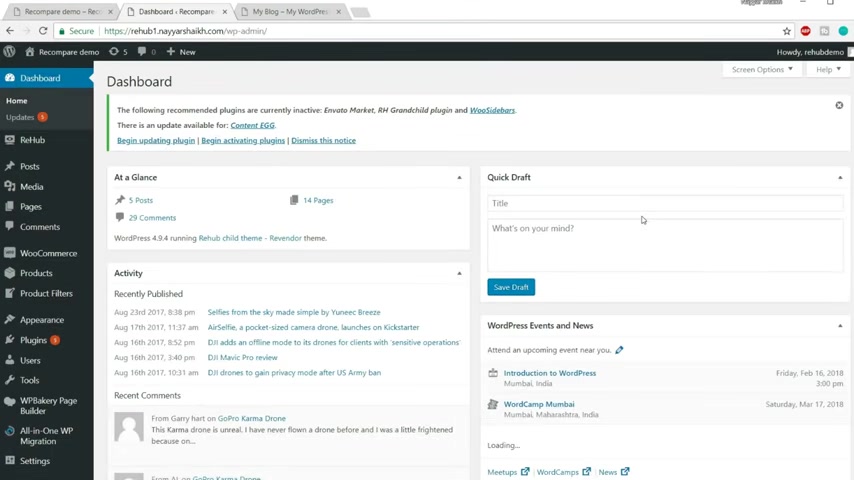
OK , guys , this is our dashboard .
This is the area from where we can control everything that happens on our website .
OK ?
The first thing that we have to do , we have to click on this link which says appearances , click on appearances from the left hand side .
Now , as you can see over here by default , two or three themes will be automatically or will be already there on your website .
Now , we don't want these themes .
So what we'll do , we'll delete them , we click on video and click on delete , click on .
OK ?
Same thing with this one .
Now , for those of you who are , you know , very new to wordpress , who are , who don't know anything about wordpress themes are nothing but the design of your website .
It's a premade design .
So you don't have to do any coding or so on .
You just install it a new theme and boom , your , your website has a new beautiful design .
And if you want to see how your website is looking at present , you'll see this link over here my blog .
And after that , we have this visit site , you can open this link in a new tab .
Now , this is how your website is looking at present , but we don't want anything like this .
We want a beautiful website like this one .
OK ?
So we'll see how to do everything from step by step .
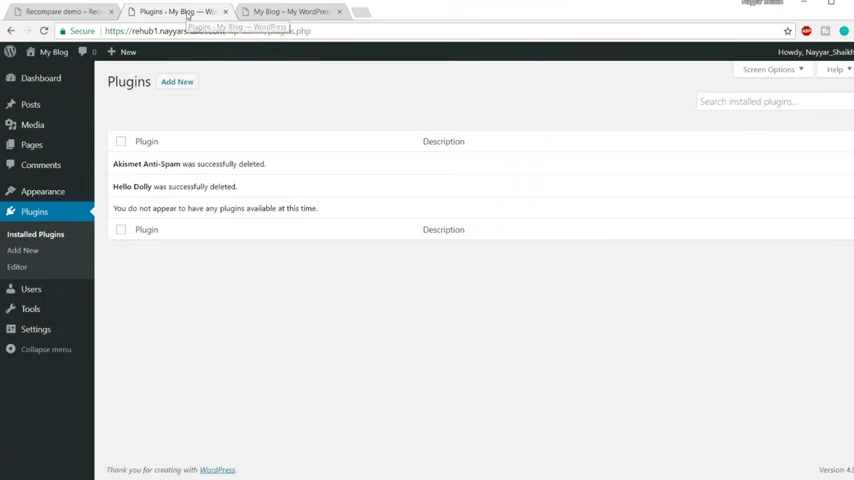
First , come back over here and now go to plug ins from the left hand side .
You'll see this link plugins , click on plugins .
So you'll see there are already few plugins installed .
We don't want any of these plugins .
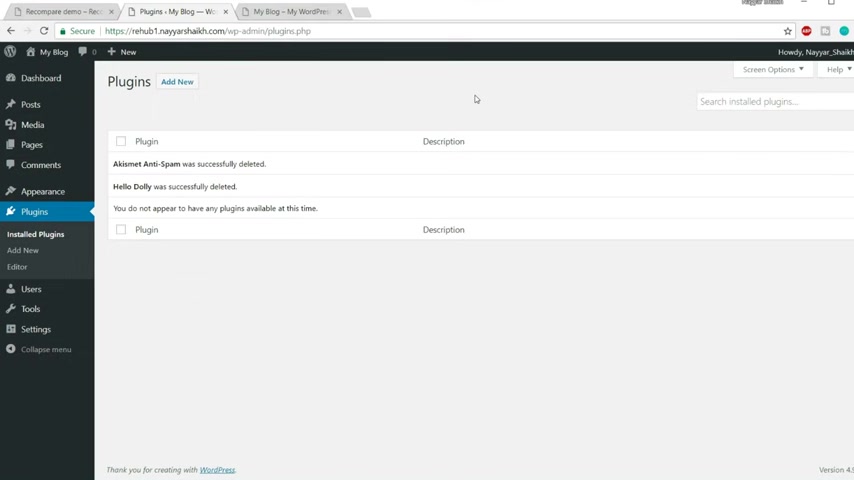
So I'll select this one and from bulk action , I'll delete them .
And now for those of you guys who are again new to wordpress , who don't know what are plugins .
Plugins are actually ways to increase the functionality or to expand the functionality of your website .
For example , by default , you know , Wordpress is not an ecommerce platform .
It's just a simple website platform .
So you can create simple blogs and a simple website using wordpress .
But because you want to create an e-commerce website , so this is not the default functionality of wordpress .
So to make your website e-commerce friendly , what you do , you install a new plug-in that would expand the functionality of wordpress and that would you know , enable your website to be ecommerce ?
Ok .
So for that , we have a plug in called Woocommerce that makes wordpress websites ecommerce .
OK .
I hope it is clear now .
So now let's start designing our website .
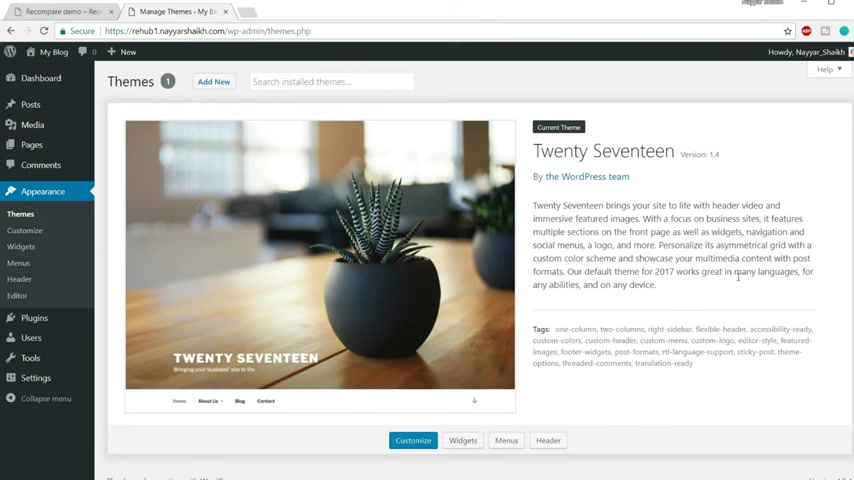
So to do so , first , we need a theme , a beautiful theme .
So we are using the most perfect theme for this uh for this website for this tutorial .
So to get that theme , what do you have to do ?
You have to open this in a new tab and type in blog two dot com slash rehab .
Now , this link is also given in the video description below .
You can just click on that link and it will redirect you over here .
So this is the theme that we need .
It is the rehab price comparison blah blah blah theme .
OK ?
It has got around 10,000 sales and it is , it has got a really terrific rating as you can see 4.92 rating .
Now , this is one of the best rated theme on this platform .
Ok .
700 people have rated this theme .
This is really amazing .
You can see everything about this theme .
You can just scroll down and you can read everything about this theme .
So this is the theme that we'll be using .
So what you have to do , you have to go at the top and over here and just click on this buy now button and purchase this theme .
Now I won't be doing that because I have already purchased this theme .
So let me cancel this thing .
Now , come back over here and click on appearances to install this theme .
Now , before installing this theme , there could be one problem for most of the websites .
Now , let me explain you what that problem is .
Power media from the left hand side and click on add new .
Now , here , if you see it says upload , uh maximum upload file size is only two MB .
Now we'll have to increase this .
We'll have to make it 64 MB .
Now it is really easy to do .
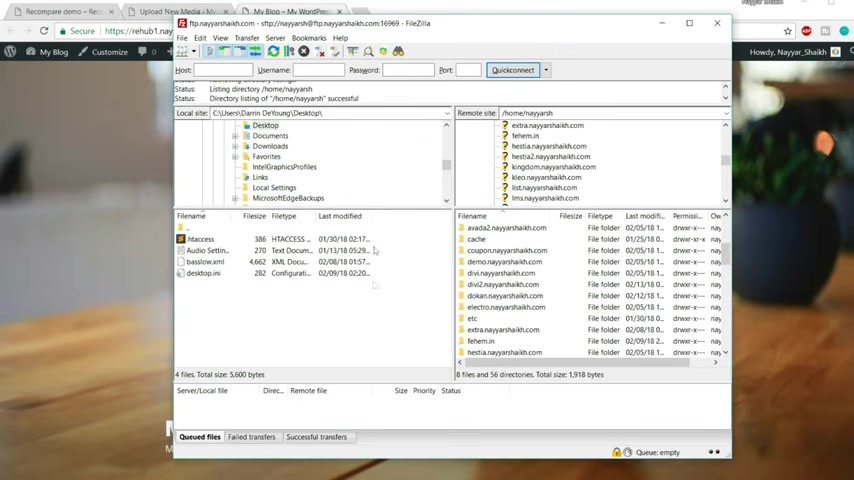
So just open file Zilla .
If you're using file Zilla , if you don't know how to use file Zilla , how to set up file Zilla for your website .
There is a video on my channel .
You can search for that .
I recently uploaded it .
I'll try to give that link in the video description below that will help you .
That link will help you in setting up file Zilla .
So if you don't know how to set up Fila , you can watch that video .
So open Fiza and search for your website .
For example , here , my website name is rehab one dot dot com .
So there will be one folder with your website name .
So let me find that rehab one here it is rehab one dot dot com .
Open this and here we have a file which says dot HD access .
Now we have to you know , move this file or you have to just drag this file to your desktop .
If you don't know whether your desktop is selected or not , you can see from here and you can select your desktop from here and you can just drag this file on your desktop .
OK ?
So let's see .
Let's visit our desktop here .
As you can see this is the file .
Now , let's open this file .
I'm using a text editor , sublime text .
It is free .
You can use the same text editor to open this .

So let's open this one .
OK ?
So when you open this , this is how it will look .
OK ?
This is the thing .
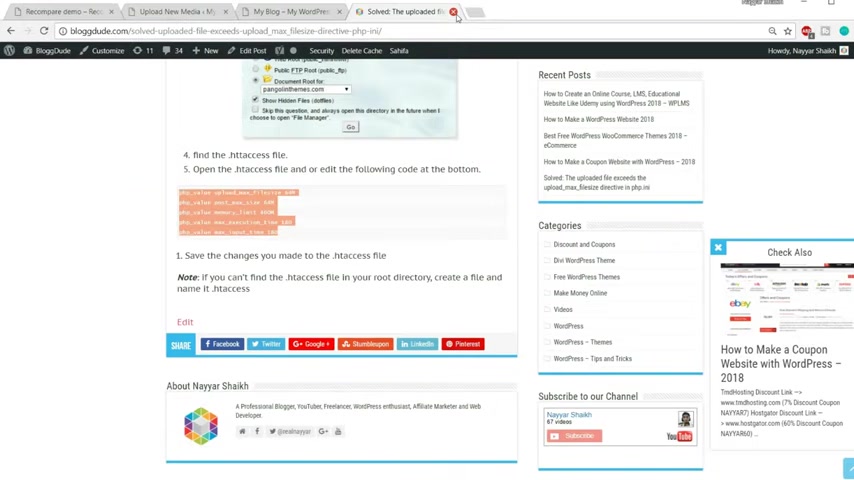
Now we have to paste in some code over here that will solve the problem .
So that is really easy .
Just go to my website blog dot com .
In fact , you don't even have to go to my website .
I'll give you a link to the exact you know , post which I'm talking about .
This is the post , you know , I'll give a link to this post just in the video description below .
Click on that link and it will redirect you over here .
And here we have some line of code at the bottom .
Copy this go to that file and you can paste it over here .
OK ?
Let's paste it .
OK .
Once you paste it over here , just press control S to save the file and just cut this thing .
Now again , go to file , Zilla refresh this section , the desktop section .
Now drag this file again to your website file .
It will ask you to overwrite it as you can see here , just select overwrite and click on .
OK .
It says transfer finished .
Now , the problem should be solved .
Let's see .
So again , come back to a year earlier , it said 22 MB .
Now let's refresh and this time it should say 64 MB .
Here it is 64 MB .
Now that is fine .
Now come to appearances and click on add new .
Click on upload files , choose files and choose the file which we have downloaded .
Now , you'll see you'll , when you download that file from that theme forest , the link which I have given you , you'll see a file , something like this .
Here it is theme forest and it will say some number like this .
Now you don't have to upload this file or don't do the mistake of uploading this file .
This is not the file which you have to download , you have to extract this file .
So when you extract this file , you'll get a folder by the same name and inside that folder , you'll see this file rehab file .
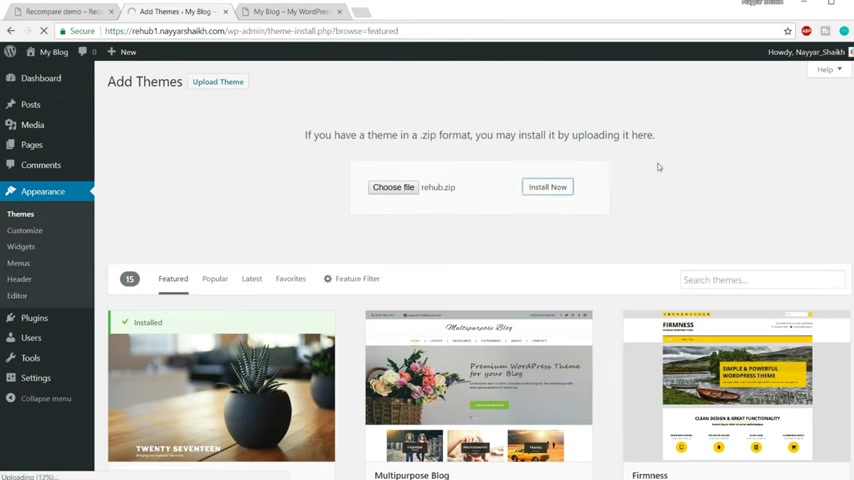
Now , this is the file that you have to upload .
OK ?
So select this file and click on open .
Now , click on install now .
So your file is getting installed , your theme is getting installed .
You can see the progress at the bottom left corner of your browser if you're using Google Chrome .
And by the time your theme is getting installed , I would request you guys to please like this video .
Comment in this video .
If you have any doubt , you can put them in the comments section below .
If you have any request for me , if you want me to make you know , a particular kind of video for you , a particular kind of website for you , just let me know in the comments section below and also don't forget to subscribe to my channel and click on that small bell icon so that you don't miss any future videos .
So the file is uploaded , the theme which we wanted to upload is uploaded .
Now we have to activate the theme .
So just click on this link , activate link fine .
So it is activated now you have to enter the theme for this user name and purchase code over here to register the theme .
Registering the theme is very important .
If you don't register the theme , it will be very difficult for you to proceed further in this video to follow me further in this video because you know you have to have these things .
So I'm putting my user name over here and the first purchase code over here and click on submit .
So as you can see it says registration complete , you have full access to the theme .
Now now after completing the registration , what you have to do , you have to click on this link which says begin installing plugins .
So click on this link now , Tik Marco here it will select all the things and from the bulk action , click on install and click on apply .
So we are installing few plugins , you know , very useful plugins that will help us you know , create , convert this website into something like this .
Ok ?
So all the plugins are installed now it's time to activate .
So click on this link , return to required plug in installer .
Now in Tima , it will select everything now from bulk action , select , activate and click on , apply fine .
So now there is no plugins to install or update or activate .
Now , let's come back to our website and let's refresh and see the changes .
Ok ?
So our website is looking totally different now , but still , it is not like the demo website .
So let's do that .
Let's start creating and let's start making our website like the demo website .
Now , it is really , really easy to do .
So now let me show you one thing , you know , normally if you have followed any one of my previous video , any one of my videos , you will see that I don't install the demo site to create the website to make the video tutorial .
I do everything from scratch .
But there is a problem over here .
For example , let me show you something .
Now when I try to add a new post , when I try to type a new post when I , you know how this post and click on add new .
Now , let's see what happens .
OK ?
As you can see , I can type it over here , but I'm not able to type in this section , OK ?
Also , I'm not able to create a new category .
As you can see when I click on this button which says add new category , nothing happens .
So there is a problem over here and I tried to fix that problem .
I tried a lot but I just failed .
So there is only one solution to this one .
And that is installing the demo side .
Now that is what that is not what I do .
But here I have to do that because this is not working .
There's something wrong with this .
Whenever you install this content I plug in , this is what happens .
OK ?
So to solve this thing , we'll have to do that .
So to do so just have a rehab and click on demo stacks .
Now before proceeding further , just remember the login and password , you can just copy it and save it somewhere .
Ok ?
So the login is rehab demo .
You know everything in small letters and the password is rehab pass , triple nine , triple seven .
Just remember this .
Ok .
Now , here there are many different designs .
As I said , you theme is nothing but a design .
You can select any one of these , ok ?
You can select anyone and click on this link , download it and install it .
Now , the one which I have installed is this one , first one recomm compare .
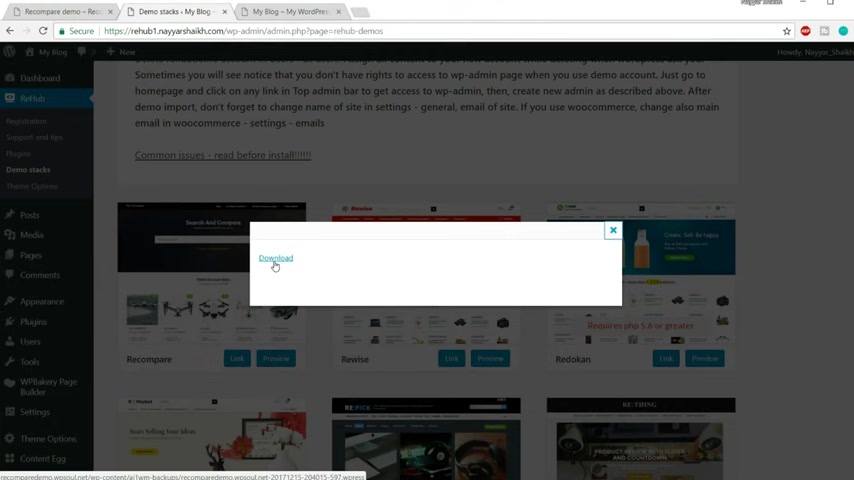
So what I'll do , I'll click on this link button and I'll get another link which will , you know , allow me to download this file .
So click on this file .
Download , as you can see , one file has started downloading .
Now , I won't download this thing .
I'll just cancel it because I have already downloaded it .
So I'll just cancel this one .
Now , what I'll do , I'll install these things manually because I have already downloaded these things .
So after you download the file , what you have to do , you have to add a new plug in .
So , however , plugins and click on add new .
Now , the plug in that we need is all in one migrate , all in one WP migration .
OK .
Here is the spelling as you can see all in one WP migration and this is the plug in .
Ok .
This has got more than 1 million active installs and around 4000 people have rated it five style .
So this is a perfect plug in .
There is nothing wrong with this one .
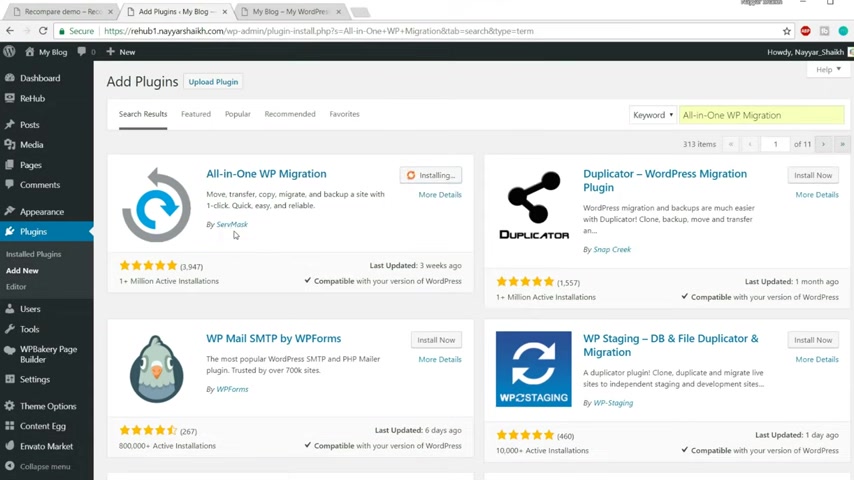
So click on install now and this one is by serve mask .
So just make sure you're installing the one by serve mask .
Now click on activate .
Ok .
So as you can see it is now activated .
So once it is activated , you'll see a new link over here at the left hand side , all in one WP migration .
However , that and click on import now from your select import from and select file the first option because we have to input from a file and select that file which you just imported .
Now , select that file .
So here it is recomm compared demo dot WP .
So something , something just select this file , click on open and now everything is getting installed , all the demo website , all the demo data is getting installed on your website .
So this will take some time .
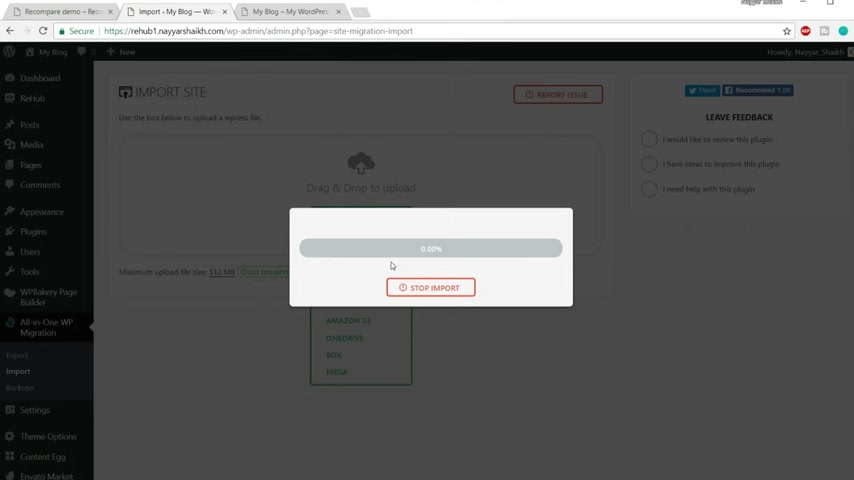
So by the time it's getting installed , by the time everything is getting installed on our website , I'll pause this video and once everything is done , I'll continue .
Ok ?
So as you can see now , it says this will overwrite your website , including database and everything .
Now you just have to click on this proceed button , ok ?
So it is preparing something it is , you know , now it again , it will be restoring all the files again .
It will take some time .
So let's wait , I'll fast forward this one so that you don't have to waste your time over here .
Well , as as you can see now , it says your data has been imported successfully .
So just click on this close button .
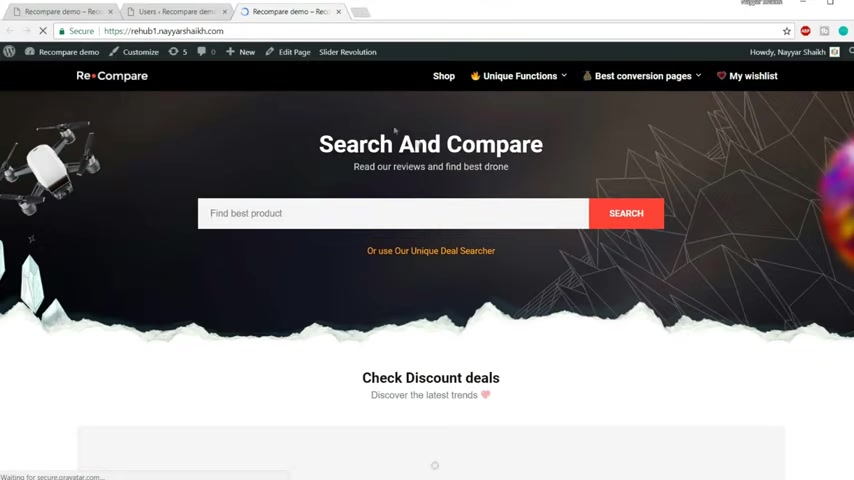
Now , click on over here to visit the site and you will be shocked .
As I said , you guys , you'll be shocked .
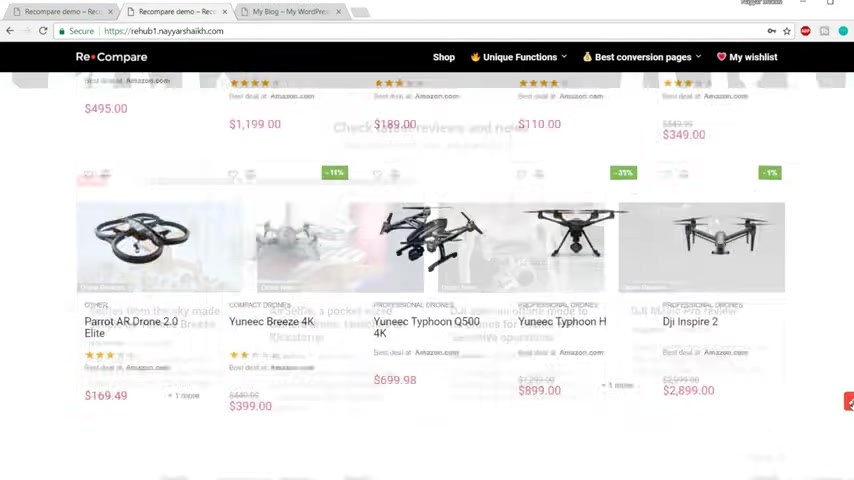
Now , you don't have to do anything and you have the complete website in front of you .
Ok ?
So we have created the complete website .
But don't worry , I know what you guys are thinking .
You know , I'm not , I'm not gonna do this .
I'm gonna show you everything , step by step from scratch how to do everything so that you , because I know this is not the website that you have to create , you have to change everything .
You have to change the , you know , title subtitle or something .
You have to change your product .
This is not the product you're going to sell .
You might , you know , want to sell some mobile phones or something like that .
So I'll show you everything .
Just don't worry .
But the thing here is the main reason was so that we are able to , you know , upload data and we are able to create new posts and new products , which we are not able to do earlier .
Now , if you see the Wordpress Bar is gone from the top , which means we are locked out and again , we'll have to log in to the website to the dashboard .
So to do so go to your URL type in your website name slash WP admin press enter .
Now , first you'll have to type in this rehab demo and in the password type in rehab demo , R and D should be capital triple nine , triple seven and click on log in fine .
So the first thing that we have to do is , you know , create a new user and delete the rehab demo user .
OK ?
Because that is dangerous .
Anyone can use that rehab demo because everyone knows that that is the user name and they can come to your website and they can , you know , do some damage .
So first we'll have to create a new user .
So how users from the left hand side and click on add new .
Now , let's put in a user name .
So I'll put in real email address .
I'll put in my email address , real Nair at gmail dot com .
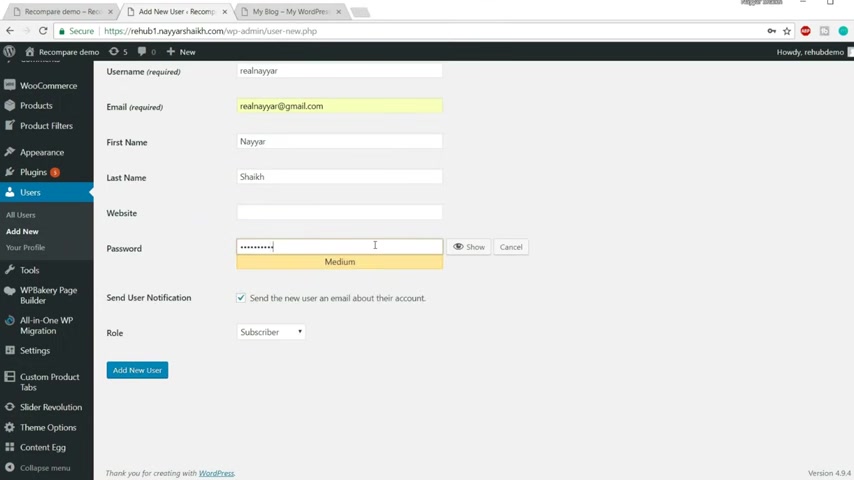
First name Nair , last name Shaik website , show password .
Now I'll put in my own custom password .
So I'll type in the password which I want .
Ok .
So this is the password which I want a role you have to select administrator .
Ok ?
This is very important .
Make sure all the uh things are right over here .
All the data is right , user name , email address , password and everything .
Once you're done with this , click on add new user .
So the user is now added .
So what we have to do now , we have to log out from this account , the rehab demo account and we have to log in with the new account .
Ok .
So type in the user name and password over here and remember me and click on log in fine .
Now what we have to do , we have to delete the user name , the demo user name .
So again , click on users , you'll see this one now , delete this rehab demo , delete all content .
No we don't have to delete all content .
We have to attribute all the content to this user which we have just created .
OK ?
So don't delete all content , just attribute all the content to this user , new user and click on confirm deletion .
Fine .
Now let's come back to our website .
Let's refresh again and see the changes .
OK ?
So everything is there nothing is deleted .
Now , we'll have to do some changes as you can see the uh the title and the description are recomm compared demo and recomm compared demo site .
You have to change this , you have to put in your own website name and in your own description .
So again , come back to this dashboard .
So come back to your website and click on settings .
Here .
It is site title recomm compared demo .
You can change this .
So I'll type in my site name , you can type in anything you want and tagline , you can put anything .
So I don't know what to put .
So I'll just put in tagline over here and rest .
Everything is fine .
Just click on save changes .
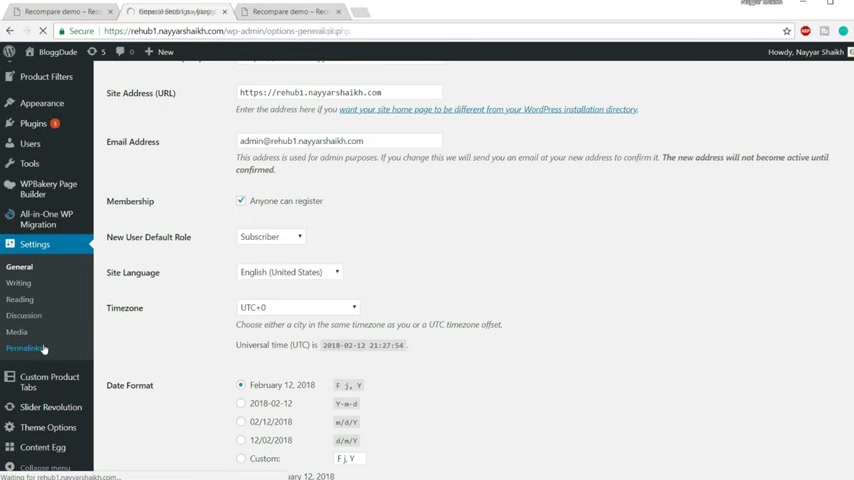
Now , there is one more important setting that is a Perma link .
So let me see whether that is correct .
So under settings you will see the last option is Perma links .
Click on that .
OK ?
So this is the perfect setting , but I know one setting which is better than this one .
So now from here instead of post name or any other name , select custom structure and delete everything from here .
Now select category , then post name .
So just have to click on category first , then post name .
And after that click on save changes , let's come back to our website refresh and everything should be fine .
Ok ?
So nothing has happened .
Everything is fine .
Now we'll have to do some changes in the woocommerce because the Woocommerce which we installed because this is a demo website .
all the data are according to the demo website , which they created .
Now , we'll have to change those data .
So how woocommerce and click on settings ?
Fine .
So you'll have to put in your address or your .
So let me put in my address , Mumbai now , country and state now put in type in the state names .
So I'm from Maharashtra , which is in India .
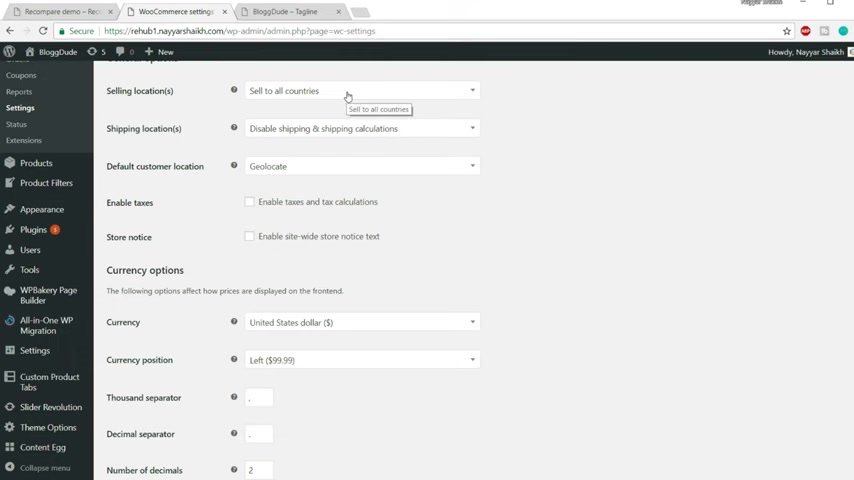
So I'll type in that now to which all country you're selling to .
So we are selling to all the countries basically over here or if you're selling only in one country .
So you can select , sell to specific country and you can select that country .
But this is basically uh affiliate website .
You're not selling any physical product yourself , you're just redirecting people to different websites .
So we can easily select set to all countries or sell to all countries and we don't want to enable any taxes and calculations .
So as I said to you earlier guys , this is a very simple website .
You know , the , the idea is quite , you know , sophisticated but creating it is really simple .
Ok .
So we don't have to do any taxation and everything .
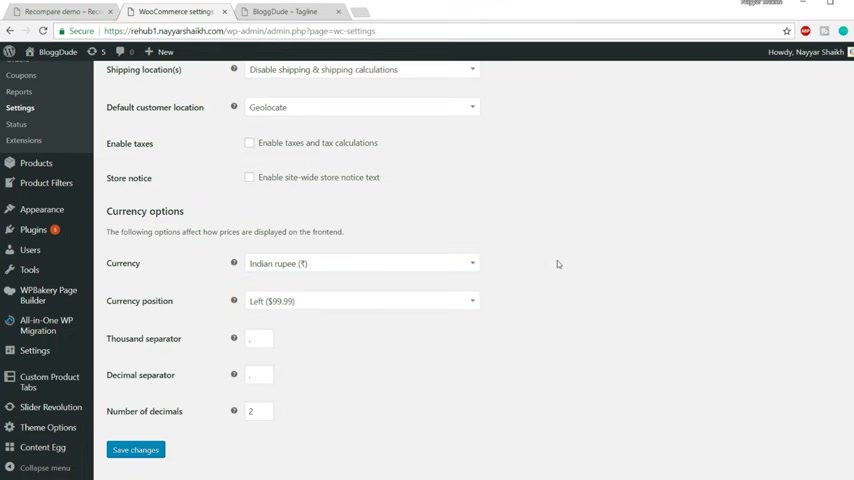
You have to select the currency .
So I'll select Indian rupee over here .
Ok , because I want everything in Indian rupee .
I'll be selecting only Indian websites like Amazon dot in flip card and so on .
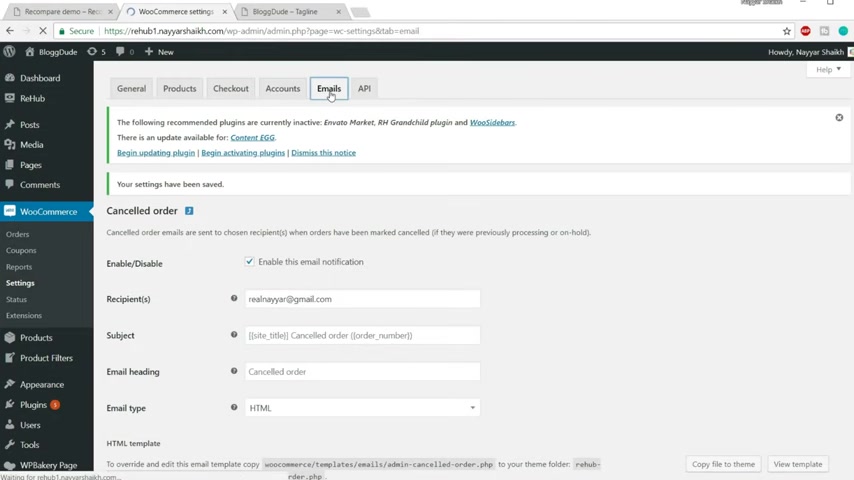
So click on save changes after that rest , everything you don't have to do it .
You just have to go to the last one emails and make sure your email address is proper over here .
If your email is not proper , just you know , click on this button configure I can and put in a proper email address .
Ok ?
So I'm putting my email address and I click on save changes .
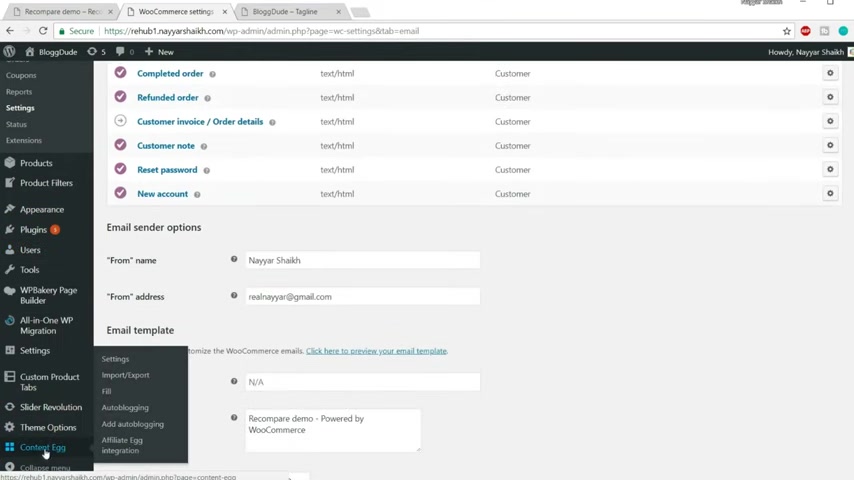
Ok ?
Now go back again , click on emails .
Now let's change the second one .
Ok .
Save changes again , come back to emails .
Let's change the third one .
Ok .
Now this is very important .
Ok ?
Because whenever some new orders or anything is there , you'll get a notification on this email address .
And here also we have at the bottom , just type in your email address right here .
Fine and from your name .
Ok , your name or your website name , your company name , whatever you want .
Click on save changes .
Ok .
So this is the only setting that we have to do in Woocommerce .
Woocommerce is actually a very nice plug in , but we don't have to do much setting because we are not actually selling the product .
As I said , you , we are just redirecting users to different websites and those guys are selling the product , Amazon ebay and they are selling the product , not we .
So we don't have to do much setting over here .
So once doing all these things , you will see a new tab at the left hand side , which would say content egg at the bottom .
OK ?
Follow my cursor and you'll see it .
Now , click on content egg .
Now , this is the most important plug in to create this kind of website .
OK ?
Now if you see this is the uh everything is filled automatically because we have installed the demo website .
But you don't have to worry .
We'll , I'll show you step by step how to put in your data over here .
And this step is very , very important because if you don't change these test settings from here , then the person who has created the website , the website creator will get all the commissions because he has put in his affiliate link and we have to change that and we have to put in our affiliate link so that we get the commission , not the website creator .
Now , from before proceeding further , let me tell you one thing guys , the content egg plug-in which is installed in this website is , is a free version of the content egg .
So you get only Amazon option over here .
So if you want to use ebay pay TM flip card , those kind of services , Aliexpress and those kind of services , then you'll have to install the premium content at plug in .
Ok .
But if you're fine , only with Amazon , if you're going to do only Amazon affiliate marketing , then you can , you're , you know , you're all right with this free plug in .
But for most of you guys , I , I think you will be using multiple , you know , accounts , multiple websites to do affiliate marketing .
So I'll show you how to use the pro plug in as well .
Ok ?
So to get the pro plug in to get the paid plug in premium plug in , just open a new tab type in B block two dot com slash egg , OK ?
Blog two dot com slash E double GE .
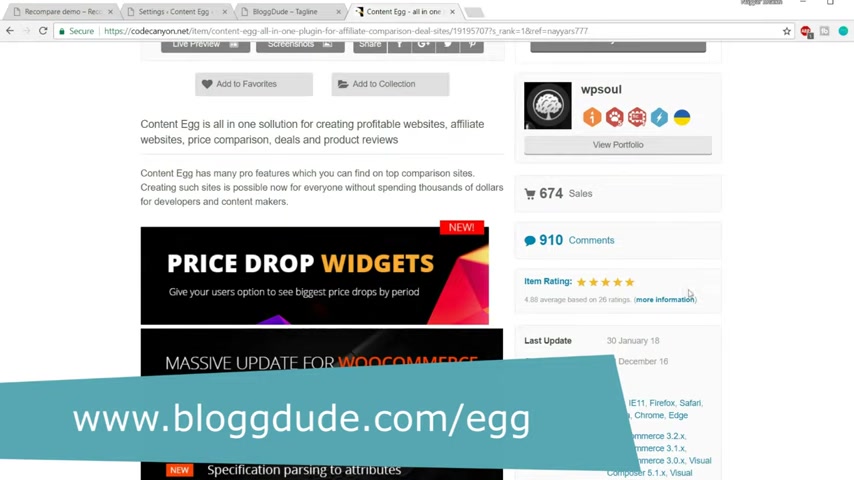
Now , this link is also also given in the video description below .
So you can click on that link and you will be redirected to this page .
So this is the plug in the most important plug in .
OK .
This is also a very nice plug in .
It has got around 700 sales and this also has a very terrified rating of around 4.9 which is really amazing .
So again , you have to purchase this , but I won't be purchasing it because I have already done that .
So once you purchase this , once you download this thing , cancel this thing come back to your dashboard .
And first thing if you want to use the pro plug in the premium plug in .
You'll have to deactivate the free plug in .
So click on plugins and first let's update everything .
Ok .
There are a few plugins that needs an update .
So what I'll do , I'll click on this thing .
It will select everything and from bulk action , I'll select update and click on apply now .
It will update all the plugins one by one .
Ok , guys .
So all the plugins are successfully updated .
As you can see , it says updated , updated , everything is updated .
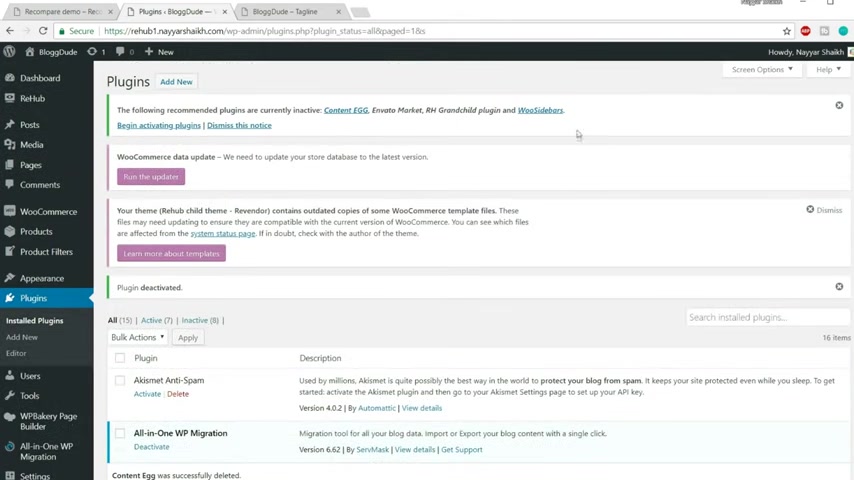
Now we'll have to deactivate and delete this content at plug in .
So let's click on , deactivate .
Now let's delete this plug in .
Click on .
Ok .
Now we'll have to upload the new plug in the premium plug in .
So click on add new now , click on upload plug in , choose file and select the premium plug in file .
So this is the plug in file , premium plug in file and select it .
Click on open now , click on install now it will take a few seconds .
Ok .
It is install now , click on activate , plug in .
OK .
So to proceed further , first , you'll have to uh enter the license key only .
Then you'll be able to proceed .
Uh you'll be able to proceed further .
So I have my license key .
I'll put it over here and click on save changes .
OK ?
Once you put in your license key .
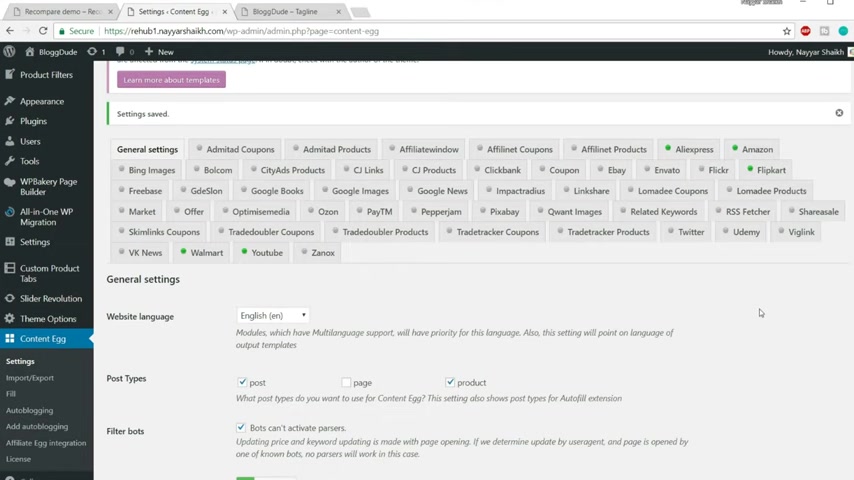
Now , as you can see , we have so many different options earlier , we had only Amazon .
Now we have a express Amazon , flip card , Flickr and Vato ebay , click bank coupon .
You know , so many different things , youtube Walmart , we can use UD wigg links , so many different options .
So obviously , we cannot go uh you know , behind all each and every option to see how everything is done .
But I'll show you how to do the major , major companies like Amazon and Flip Cart .
Amazon is the number one company we all know and Flip Cart is the leading company leading e-commerce company in India .
So I'll be covering those two plugins .
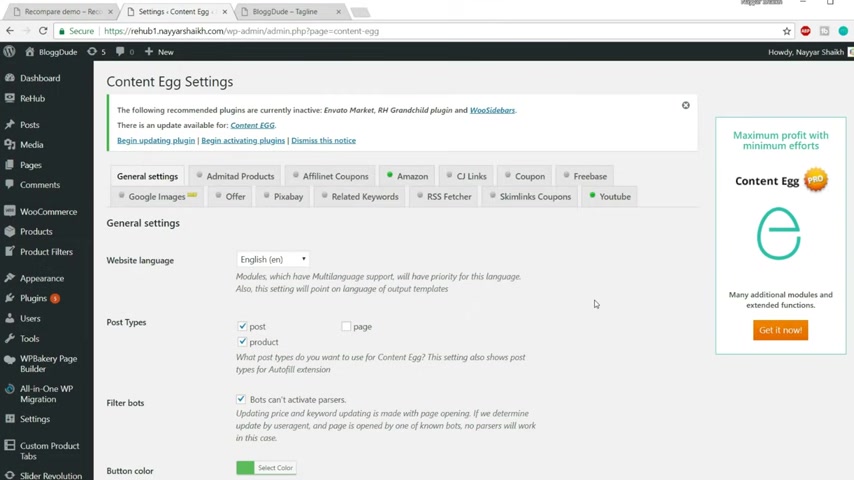
First , we'll see the general settings .
So click on general settings , which is the first option over here .
Now , first option is website language .
It is English post type .
I would recommend you to select all the post types .
Now , what does this mean ?
So this means that you can uh what , what type of post do you want to use content and plug in ?
So I want to use this plug in on all type of post , whether it is post page or product , everything .
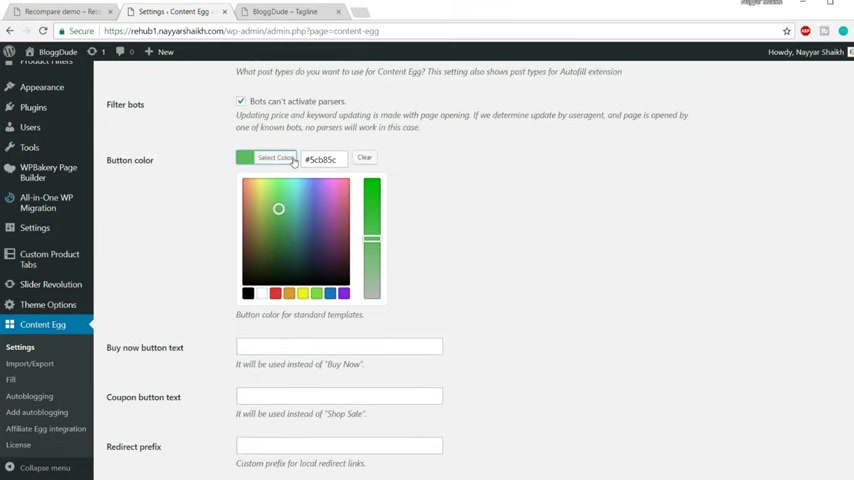
Now , filter box , make sure this thing is take button color .
You can select any button color of your choice .
It's all up to you after that .
Buy now button text .
So by default , if you see in this website , let me open any one of the product here .
The button says buy now .
So by default , it says buy .
Now as you can see at the bottom , it says it will be used instead of buy now .
So instead of buy .
Now , if you want some this button to say something else , you can type it over here like you can if you want to this button to say click here , you can type in , click here .
Once you type in , click here over here , all the buttons over here will say click here instead of buy now .
So you can do so you can add any button link over here again for shop sale .
If you want something else , you can type in some different texts or anything like this prizes .
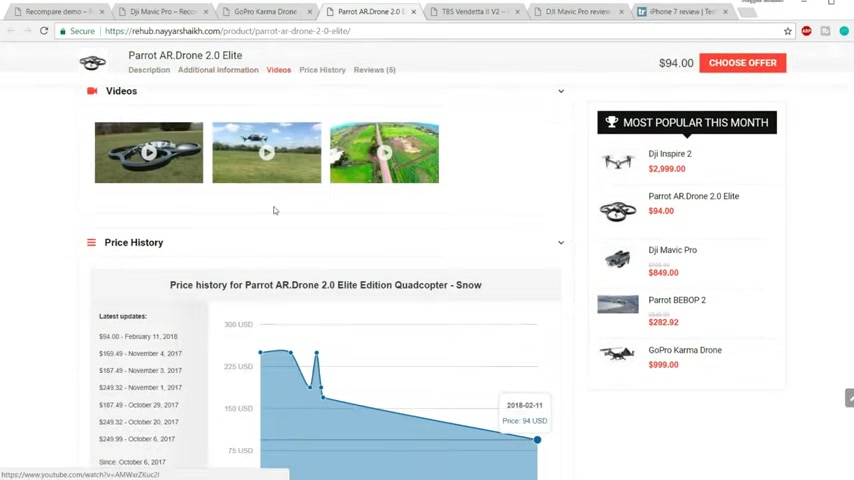
Now , if you see at the bottom , we have prizes not in this product .
Ok ?
But we have seen that in the demo website .
There is something called prize history over here .
Let me show you .
Ok , I think which product it was , let me find that product which has a prizes tree .
Ok .
So I think this one has prize history .
Let's go at the bottom .
Ok .
Here it is .
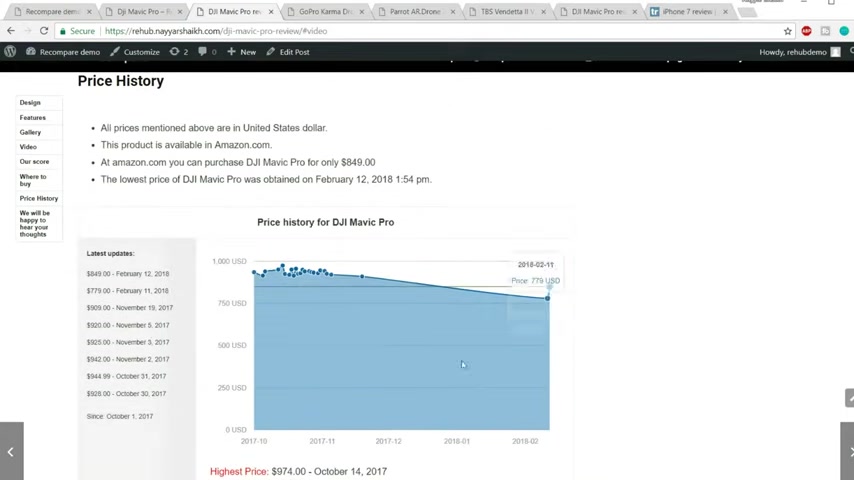
So as you can see over here , it shows the price uh history of 1 80 days .
So you can select 1 80 days .
If you want , you can reduce or increase this number price drop period used for last 30 days .
You can select anything from your price alert , allow members to subscribe for price drop alert on email .
Now , this is this option over here .
Ok .
We had one option new year , which will , you know , when user want to get price alerts regarding this product , they'll put in their email address and click on .
You know , I want to get the alert and whenever some , whenever Amazon drops this price or any other website drops this price , that user will get a , get an alert and when they will get that email alert and they will click on that link and they'll make any purchase again , you will get some commission .
So this is very important step .
Make sure it is take now from here type in the name of your company from which they will be getting the email .
So you can type in the name of your company or you can just type in your name and email address from which they'll getting , they'll be getting all these things .
Now search modules , just select one or two from here .
For example , I'm selecting only Amazon and flip card .
Don't select too many modules over here .
It will make your website slower .
OK ?
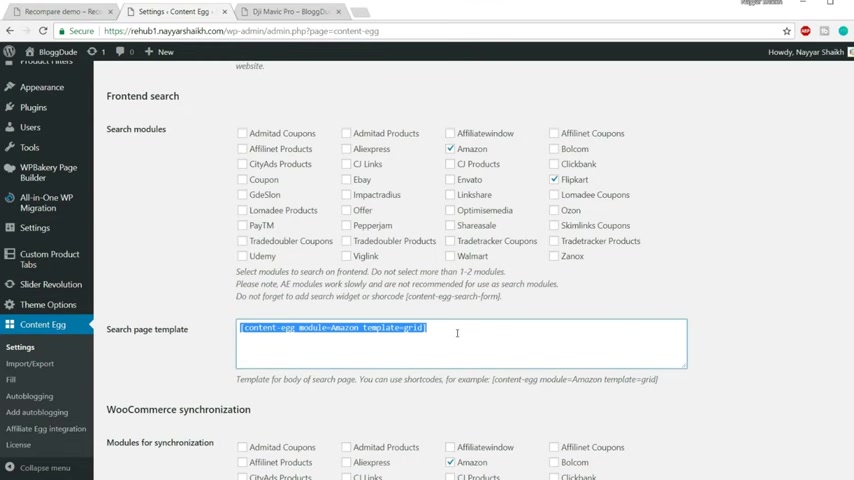
Now , don't delete this thing , don't do anything with this one .
Just let it be as it is now modules for synchronization .
Select all the ones which you plan to use .
For example , I plan to use Amazon and flip card .
So I'll select Amazon and flip card from your NAMI automatic synchronization , select minimum price attribute synchronization .
Also synchronize attributes automatically for synchronized product .
Just select this one if you want .
So you know if the , if the product has different attributes , all these attributes will also be synchronized .
For example , if you're selling iphone seven , it has an attribute of maybe 1 28 GB , the color is rose gold .
So all those attributes will also be taken will be imported from Amazon or different website .
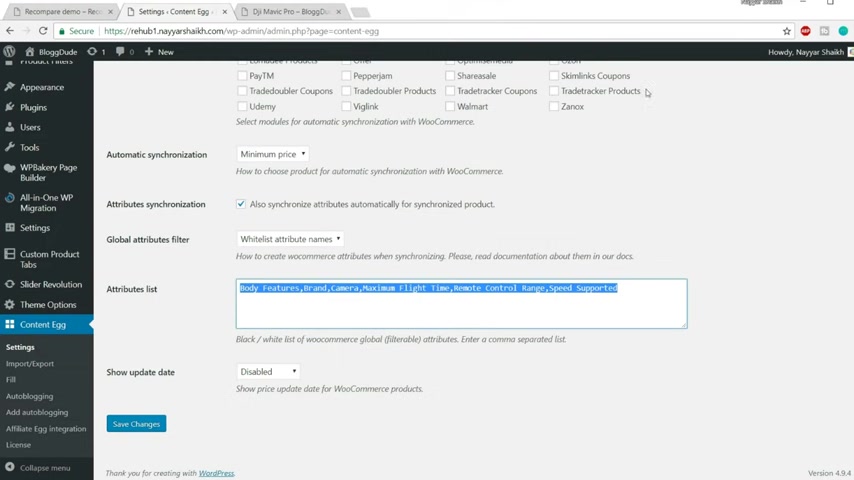
So if you want that , just take mark this thing , now you can white list or blacklist , some attribute name , for example , you can just select blacklist over here and you can put in the attribute name .
OK ?
It's all up to you .
Now , how is that important ?
Suppose you don't want the attribute to maybe color on your website .
So you just select blacklist and just type in color over here in this column .
So the color attribute will not be imported on your website .
That is what it means .
OK ?
Now click on save changes .
So these were our basic settings , our general settings .
Now let's go to Amazon , click on Amazon from here .
Now we'll have to do all these settings over here .
So the first thing that you have to do is make sure this thing is stick mark enable module .
OK ?
After that , add , what type of uh how do you want to add this thing at the end of the post ?
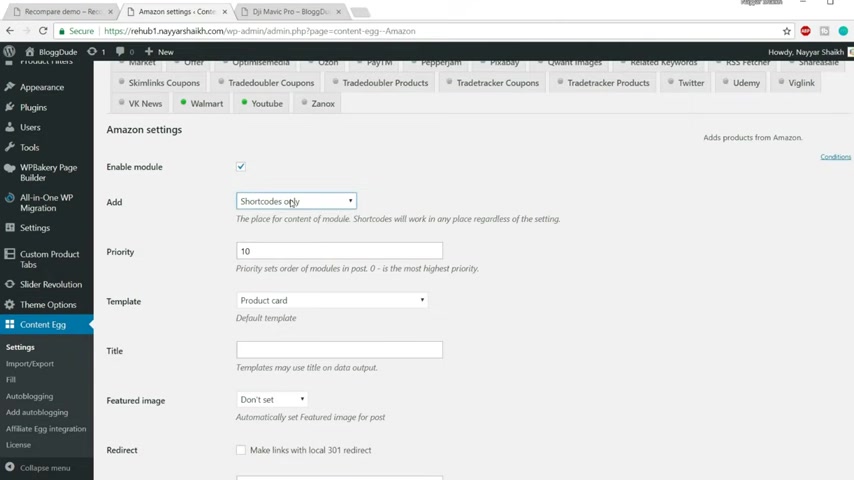
And the beginning of the post are short codes only make sure short codes only selected because that is the most amazing option because you , you know using short codes .
You can put this thing , these products anywhere on the page at the beginning , at the end in the middle , anywhere you want priority type in 10 template , you can select any template , a template from here .
I'm selecting the product card you can put in it any title you want .
For example , for Amazon , the title will basically be Amazon .
So just type in Amazon featured image if you want to set , featured image , the first image is the featured image .
You can select it .
I would recommend you to select don't set because it is automatic .
It is automatically set .
I'll show you you will understand more .
When we'll start importing product , you'll understand all these settings more at that time .
Update by keyword .
Now , how many times or at what time do you want your keywords to update ?

So you can enter that time in seconds .
So if you want to increase the time , you can increase the seconds .
If you want to decrease the time , you can a second .
Now price update again .
How many times do you want or your price on the website to update ?
So I have put in this number .
I want this , I want the prices of my website to update every this much second .
I think this is one R I don't know .
Let me find out seconds today .
OK ?
It is one day .
OK .
So I , so we have selected one day .
So every single day , the price will be updated .
So this is what it means , update mode by page view , make sure page view is selected .
Now , this is the most important step access key .
Then we have key id and default tracking id .
Now you have to change these things because this is the most important thing .
So instead of these keys , we want our own keys .
So open a new tab and just type in Amazon affiliate program .
And let's see here .
It is affiliate program dot Amazon dot in or if you are from us dot Amazon dot com or if you're from Canada dot Amazon dot C A accordingly , you can select your country from here .
Also , I'm selecting India , click on login and make sure you have created an account already .
You already have an account , affiliate account with Amazon .
It is really easy to create , it will take two minutes or so I have already created it .
Now , click on login .
Ok , fine .
So first thing that we need is our access key id and the access key , secret access key .
So to get that , you'll see at the top , we have tools , our tools and click on product advertising api fine .
Now we have some different options .
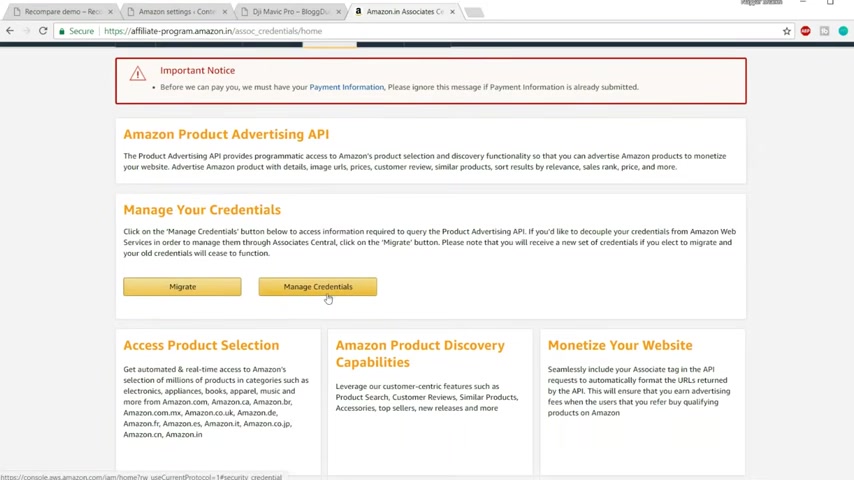
So here here it says manage your credentials .
Now click on this button which says manage credentials .
Now type in your email address where you click on next and type in your password .
Click on sign in .
Now you can just click on this button , continue to security credentials and you will see all your credentials and you can just copy and paste it over here or if you want , you can create a new user and that is more easy and that is more suitable .
Let me explain .
You just click on this button .
Create , started with I am a user .
I already have one user over here .
Now what I'll do , I'll add a new user .
Now , there are many benefits of adding a user so that you can track the , you know how much sale this particular user is doing or how much sale this particular key is doing .
For example , your user Amazon affiliate link , but you might be creating different websites , different websites for different niche .
For example , this website we are creating for phones , cell phones , smartphones , but you will , you might create another website for drones and third website for computer peripherals and so on .
So you'll be using the same keys .
But what we can do is we can use the same key but assign different user names so that we can see what user name or what website is performing better if you don't do this user name thing , if you have one single key for all the websites , you won't know which website is performing better .
OK ?
I hope you guys understand that .
If you don't , don't worry , just , you know , follow me , you'll understand everything when the right time comes , you can type in any user name .
Now , what I would recommend you is to type in the website name so that you can track the success or the progress of the website .
So I'll just type in rehab .

Now , access type , just select the first one , programmatic access and click on next .
Now , click on this button , attach existing policies directory .
And the first option is administrative access .
Select that one , just stig mark that .
OK ?
And now scroll down and click on next review .
OK ?
So you can see now if you're giving administrative access to this user name , which is good .
Now click on create user .
Now we have a access key and the secret key .
So just copy the access id from here .
Come back over here , delete the old one and paste in the new one again for the secret access key , copy it , delete the old one and paste in the new one .
Now we have the default tracking id again , come back to this website and now this , you know , come , let's just click on this back .
I can come back to the main page or you can just type in the main page or link which is affiliate , which is affiliate program dot Amazon dot in , I guess .
Yes , that is the link .
Just type in that link .
You will be redirected to the main page .
Now , here at the top you see your store name .
Now this is what you have to copy , it will have some number dash 21 something like this at the end .
So just copy it from here , come back , delete it and paste it over here .
Fine now , default location for me .
It is India .
So I'll select India O year results , number of results for one search query .
You can increase or decrease this one .
You can have 10 , you can have five .

It's all up to you results for update , you can increase or decrease this number link type .
Make sure it is product page , not add to cart add to cart will you know , add the product to card and they will have to check out .
So that is what we want .
We just want the product page .
So when the user clicks clicks on this button , they are redirected to the product page .
Now categories for search , make sure all is selected .
Now we can just leave all these things blank because these are not really important steps .
And uh if you want , you can just type in , you know the ID for different locals like US UK and all these things I already have for India .
So again , you can type it over here and click on save changes .
Ok ?
So this is it for Amazon .
Once you do all these settings , you'll see this green dot before Amazon .
Now let me show for flip card as well because there are many people who will be from India watching from India .

And flip card is the leading e-commerce giant in India .
So I wanted to show the steps for flip card as well .
The steps are basically same for all the companies like Aliexpress , Flip card , ebay , whatever it is , the steps are almost same .
So let me go to flip card , affiliate .
So open a new tab type in affiliate flip card , you'll get the link here .
It is affiliate dot flip dot com .
Just enter your user name , password , click on log in or you can just join , join for free .
Now , from the left hand side , you'll see affiliate tools or maybe API just click on API .
Then the second option is a P token , click on API token and you will have your tracking id and your token .
So very simple .

Just copy your tracking id from here , come back over here and here it is just paste your tracking id , then copy the token from here and paste in your token over here .
Fine .
Now let's see other options here .
Also , it will be short code only 10 big product card theme don't set , which is the same options .
You can you know , change the price update and keyword update from your results .
You can increase or decrease this number stream description .
You can , you know have this description thing over here and click on save changes .
Now , similarly , you can do it for any website you want , you know , for Walmart , for Ali Express , whatever you want , but I don't want to do this .
I just want to use these two things , ok ?
And youtube is already done , but you have to .
And what if you see Voe Walmart is also active ?

Now , make sure you deactivate that because you don't want other someone else getting commission for your work .
Ok ?
So make sure you go to Walmart and just take my Voe or just remove stick mark which says enable module .
But I don't want to do that .
I want to use that because that looks cool because this is not the website , this is not the actual website .
This is just a tutorial purpose demo website .
So I just want to use that .
Ok .
So I don't want , I won't , I won't remove for Walmart and Aliexpress .
I want to have it because I want to have more options .
Now go to youtube .
Now , this is also very important because we want short youtube tutorials at the bottom of the video .
Now all the options will be same template , simple priority 10 short codes only .
You just have to enter the API key .
Now to get this API key , you will have to follow these instructions .
OK ?
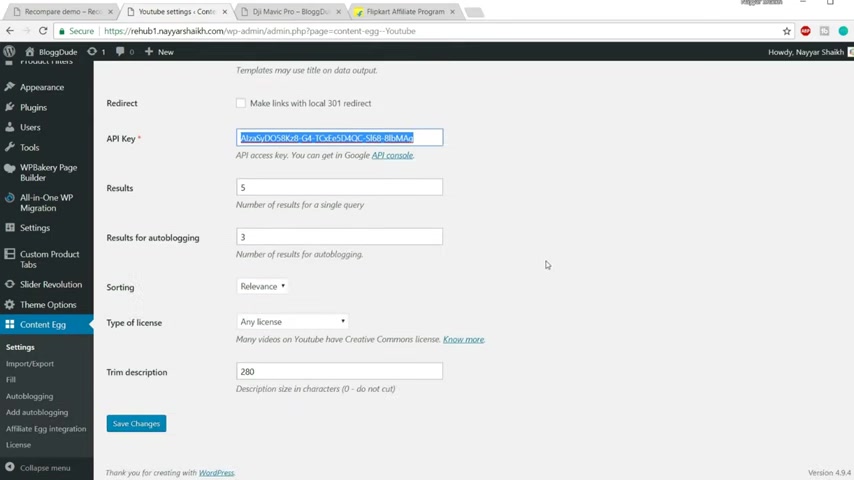
You have to click , create a new API console and paste in the API key over here .
So I won't show that that is very easy .
I have shown that many different times .
You can just follow this link and click on , create a new API and just paste it over here and click on save changes .
OK ?
So the main settings are done , which was the woocommerce settings and the content settings .
Now it's time to create the product .
So let's start and let's create our first product .
So to create a product , how products from the left hand side and click on , add new .
OK .
So the first product that I want to create is maybe iphone .
Let's create , let's create something different because we don't want to create these drones .
We want something different .
So I'm just typing in maybe iphone seven , OK ?
Or maybe a very specific iphone seven rose gold 1 28 GB .
Very specific .
OK ?
Now you don't have to put in the description and image and so on it .
Everything will be done automatically .
OK ?
So I won't put anything over here .
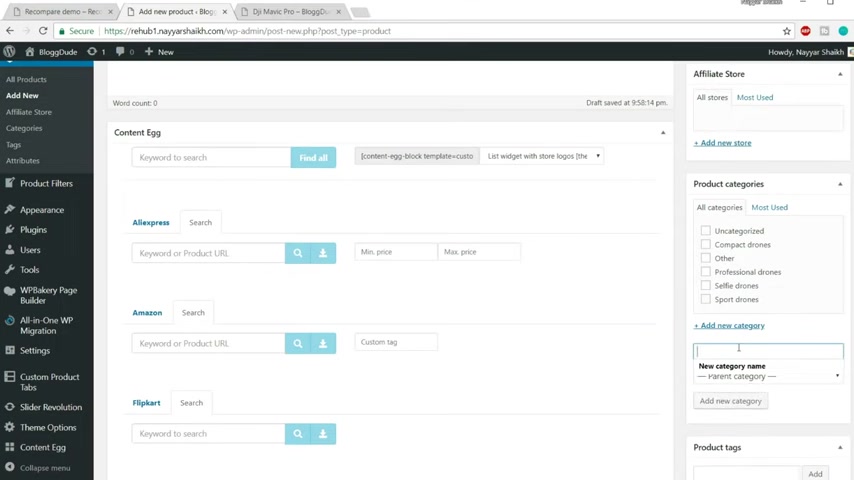
I'll simply scroll down and you can create a new category .
You can just click on add new category and let's create a new category of mobiles and click on add new category .
OK ?
So this will be under this category .
Now under Ali Express under Amazon and under flip card , you just have to type in the product name and you can find the product .
So let me type in this under Amazon and click on this search bar .
OK ?
Fine .
So we can see different options over here .
This is the one apple iphone seven rose gold 128 GB I select this one .
Now , I'll type in the same thing in flip card .
OK ?
Again type in , click on that search bar .
OK .
Here is this Apple iphone seven dose gold 1 28 GB .
Now same for Ali Express .
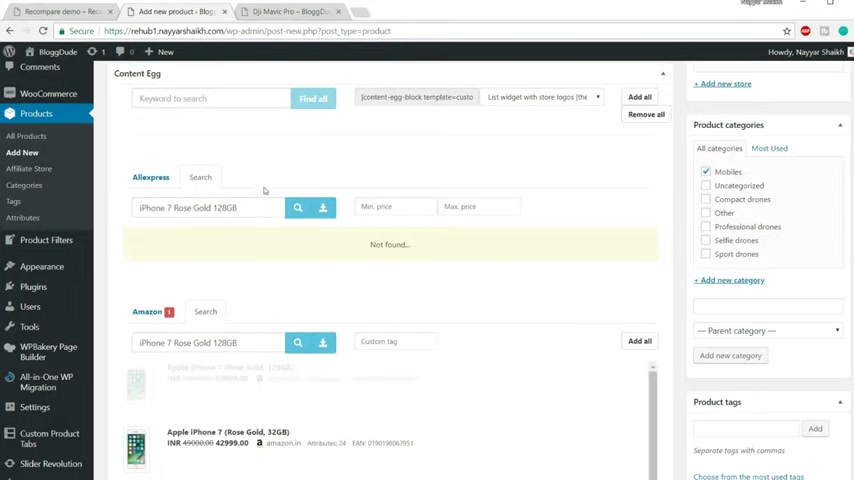
OK .
Let's see this where we have this product over here .
OK ?
It says not which is not a problem .
Now , what I'll do , I'll include some youtube videos related to these keyword .
So I'll just type in the same keyword and click on search and let's include four different videos .
Let's select first four videos fine .
So we'll have these videos over here and you don't have to put in any price or anything over here .
Everything will be done automatically , everything will be imported from those websites and it will be put over here .
You don't have to put in anything .
You also don't have to put in any images here .
It is product image and so on .
Everything will be imported because as I said to you earlier , guys creating this website is really , really easy .
Everything is just imported .
You don't have to do anything at all .
So once we are done with this , just click on publish .
Let's cut this thing .
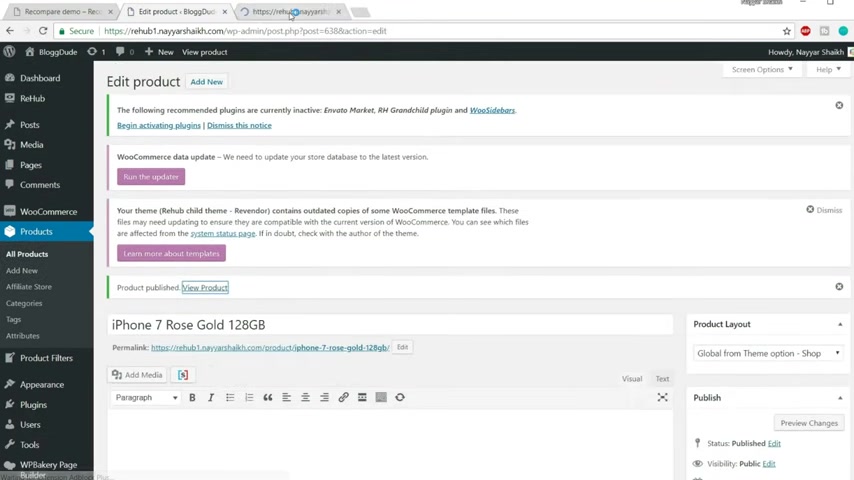
Now , let's view this product in a new tab .
Now if you see , oh here , this is actually not the type of product that we want .
OK ?
We are getting this option which says add to cart and so on and it is looking ugly .
Now , that is because we have selected a different layout .
We don't want this layout , product layout , we have to change it .
Now , there are two layouts that you can select one is content egg list and the second one is content ag auto sections .
So let's select the first one , content egg list .
Let's click on update .
Now , come back to this page refresh and let's see the changes .
So as you can see , this is how it looks .
Now , this is the , this is the kind of design that we want here .
We have the image as you can see .
Now , there is some discount going on 3% discount .
And we have this thing over here .
We didn't have to put that discount manually .
We have it automatically , we have all the images on automatically over here and we have the price list over here on flip on Amazon .
It is for 59 55 999 and on flip card for the same price 55 999 .
Now , user can purchase it from anywhere they can purchase it from Amazon .
If they want , they can just click on this button by now , they can purchase it and we'll get a commission .
Now , if you see here in the in the UR bar , I have my link O here .
This is my ID .
OK ?
So we know that this thing is working .
OK ?
This is my ID .
So this thing is working fine , then we have this awesome feature over here .
The user can put in his email address and desired price .
For example , when this , when the user wants to get alerts , whenever the price drops , he can just , you know , put in his email address and the desired price he want and click on the start tracking and whenever the price drops , he'll get an email from us .
So that is very important .
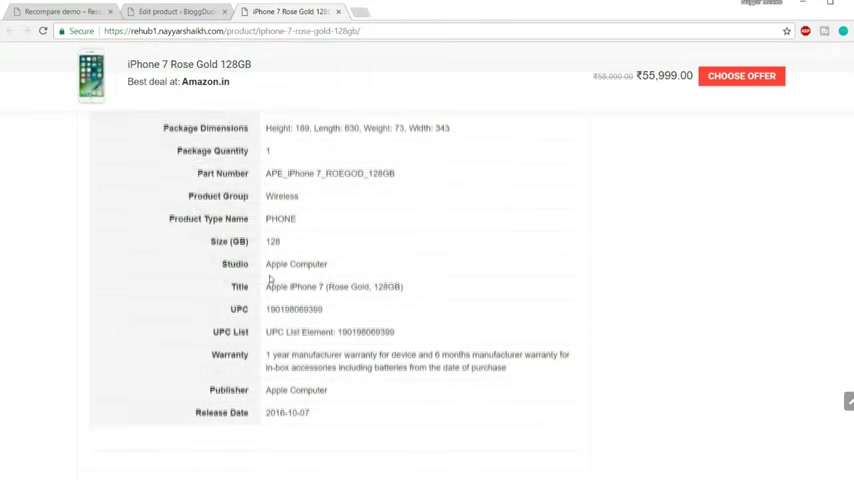
Now , we have additional information over here .
Now , as I said to you earlier , we don't have to do anything .
Everything is imported from Amazon .
We don't have to do anything .
We didn't type even a single thing and everything is imported .
Ok ?
Now , when you click on videos , these are the four videos that we selected , there are no reviews available , but you can import reviews as well from Amazon , which I don't recommend by the way .
Ok ?
And we have most popular this month .
So this is how we create a simple product , a single product that is very , very easy .
So I know creating this product was really amazing , really awesome .
Now , let me show , show you some more awesome stuff .
So if you see the demo website , II , I have shown you this thing that we can have a connected review with the website or with the product and that is very , very useful .
I have shown you if you , if you have seen , if you are seeing the this video from beginning without skipping , you might have seen at the beginning in the demo section I showed you how you can , you know , add this section over here , we can give some rating to the product according to us .
So I have given 9.5 rating to this thing and we have this review over here , OK , which is connected to this product , OK ?
When whenever someone clicks on this , this review , they'll open this link and this is the review of this product , we have all this uh design and features .
We have these images , we have the gallery over here , OK ?
Videos .
Then we have given our scores , the pros and cons of this product where to buy .
So we have given some links over here .
Prize history and at the bottom , we have this prize prize alert whenever something happens .
So let's create this review so that , you know , we can create our website more stronger and we can , you know , increase the chances of getting sales of getting more commissions .
Because when whenever someone searches on Google for reviews on that particular product , there are very high chances that your website will also rank high and user will come to your website , they will read the review and if they are interested , they can purchase it from here , they can click on this link and you'll get a commission on that .
OK .
So let's see how to do this .
So let let us add a review to this product .
OK .
So first what we'll have to do , we'll have to create a review .
So at the top over here you'll see new plus new .
So how that and click on post or maybe open this link in a new tag .
So we'll have to create a new post .
So I'll name it or I'll give it a title .
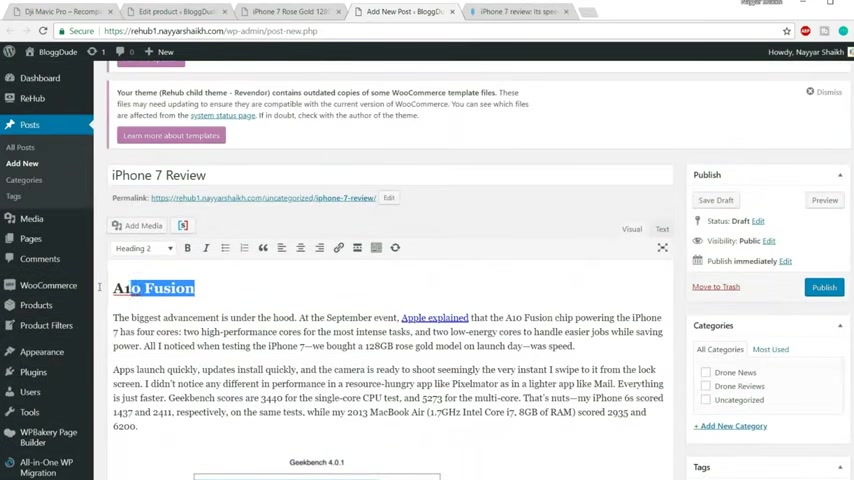
Very simple iphone Seven Review .
Fine .
Now what I'll do , I won't type anything over here because that will take a lot of time .
I'll go to Google type in iphone seven rose gold review .
OK ?
So that we can do some copy paste .
Now , let's select this link , see it .
Let's see how it looks .
OK ?
Not bad , but I don't want to copy it from here .
Let me cut this , let's open this second link , Macworld .
Let's open this one macworld dot com .
OK ?
So this looks quite decent .
So I'll copy something from here .
Let me copy till camera .
OK ?
I don't want to copy much .
I , I just want to copy it till here .
Fine , copy it and paste it over here .
So we have everything , we have the images and so on .
Now , make sure you have the title at the top and make sure that title is heading to if you don't know how to do that .
Let me show you let , for example , this is your title .
So just select this title and select this paragraph and select heading to .
OK ?
So make sure you have titles .
OK .
For example , this is the title , then this is the second title , better Screen storage .
And after that , we have the third title camera .
Now , I'll show you and I'll explain to you why did I say that ?
Why do I want you to have a title or this is very important .
I'll explain you in a moment .
OK .
So once you have this thing , let's see in the demo website , what we have next , where is that gone ?
Let's read this review and let's see what we have next .
So after all these reviews , we have this gallery section .
OK ?
So let's add the gallery section over here .
Let me add a title of gallery .
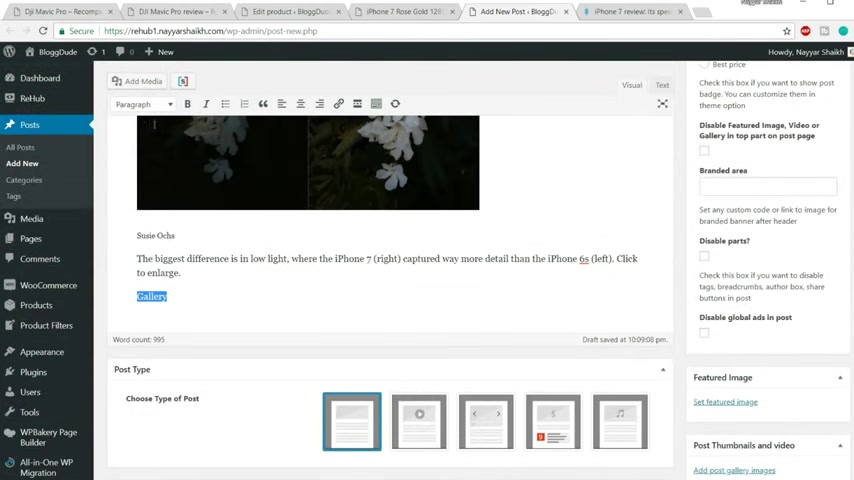
And as I said , you if you add a title , just select that and select heading to from here .
And after that , we'll have to add the galleries .
So instead of adding all the gallery , what you have to do , you have to upload the images , gallery images .
So here at the right hand side , you'll see post thumbnails and videos .
So click on add , post gallery images and you can select some files , you can upload some files , but I won't do that .
I'll go to media library and I'll select any images .
So OK , not necessarily , you know , related to iphone or something , I'll just I just select these four images , OK ?
Drone images and click on add to gallery .
So once you do so at the bottom , you'll see something called short code .
Here it is ok .
If I don't know if you could see , OK , make sure you watch this video in the full screen on a laptop , on a or on a computer so that you can see all the details clearly .
So here at the bottom , there is a short code .
If you don't see these things , don't worry , there is a link in the video description below .
Go to that link and download a file which is for free .
I have given that file for free and then you will find all the short short codes that you can use on this website .
So let me show you that file .
It's OK .
So the link is given in the video description below .
Go ahead and download it , it's free .
So this is the file short codes file , ok ?
These are all the short codes .
So the first one , the gallery one , ok ?
Here it is the gallery short code as you can see here , it says gallery and after that , we have the short code , OK ?
This is the exact short code which is there over here .
I have just , you know , collected all the short codes in one single file for your convenience .
So you can copy it from here and come back over here and just paste it under gallery .
OK ?
Now , before proceeding further , now let's do some more important settings because we have to do something more we have to add video section , R score section .
But before that , let's let's cut this thing first , all these things and this as well .
First thing is to choose the type of post .
Ok ?
So by default , the regular post is selected , but we don't want the regular post , we want a review post .
So if you see this one is a review one , if you select this one , it is a review .
And when you select this , you get some more options at the bottom .
We'll see all these things later on first .
Let's see the progress till which we have done .
So click on publish .
Now , let's view this post in a new tab .
Let's see how it looks at present .
OK ?
So this is how it is looking .
We have this post over here , we have these images and as you can see after gallery , we have our images .
We didn't put our images over here .
We just put this simple short code and it had put all these images which we uploaded over here .
Now after gallery we have , let's see what we have .
We have , I guess videos .
Yes , we have videos .
So let's type in video over here and because it is a title or it , I'll , I'll just select this and select heading two .
And after that , we want to add some videos so we cannot add videos over here .
So what we'll do , we'll go at the bottom and here we have youtube section .
So from here just type in iphone seven or whatever product you have iphone seven rose gold and click on the search bar .
Ok , let me select four videos , four beginning videos .
Fine .
So this is looking better .
So we have our videos over here now under video section .
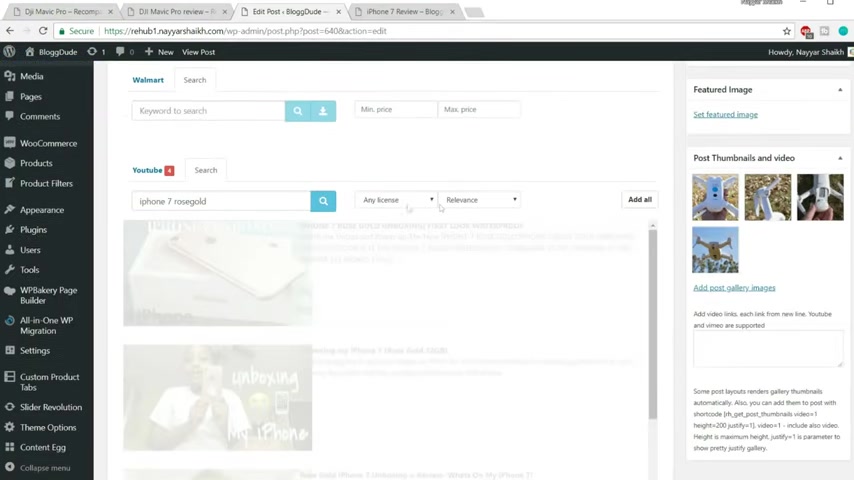
What you have to do , you have to add the short code but you , you won't get the short code .
Now first you'll have to publish this post or you have to update this post .
But before updating that post , if you see in the short code file , the first short code is sticky panel .
So copy this short code , the sticky panel , short code and paste it at the top .
OK ?
At the top of your post , the first thing should be this and select it and make sure it is paragraph .
Now you'll understand the reason I always why I always say that you have to select your , you know , title and make it heading to after putting this thing , click on update first .
Now if you see , oh here , let's go at the top .
We don't have anything over here .
Now , after we refresh , you'll see something .
Now we have this section over here .
We have eight in fusion camera gallery .
So this is this section is because of this beautiful short code , this sticky panel short code .
So it detects all the H two on your post and it makes a list like this So if you want to go to the camera section , you can just click on camera .
And if you want to go to the video section , you can just click on this video .
So we don't have any video over here because first we need short code .
So scroll down .
Now we will find the short code .
Now , as you can see uh after this video , we have this short code , you can just copy it from here and you can select short code template as well .
Now simple title slider theme , responsive theme .
Now these these are different templates .
Now the one which I have used over here is slider one .

So you can select a short code template slider theme and you can click on this short code , copy it from here , go at the top and paste it after this video section , click on update .
OK ?
Uh Once we refresh , we'll have videos under this video section .
Let's see , let's refresh .
OK ?
As you can see we have four different videos under the video section .
So all the work is done by short code .
It is really , really easy and this short code is also given in the list .
If you see over here , it is under videos .
This short code is also given so you can use this short code from there as well if you want .
Now let's see what we have next .
After videos we have the most important thing which is R score .
Now we can you know , just change the direction or change the place where you want this thing .
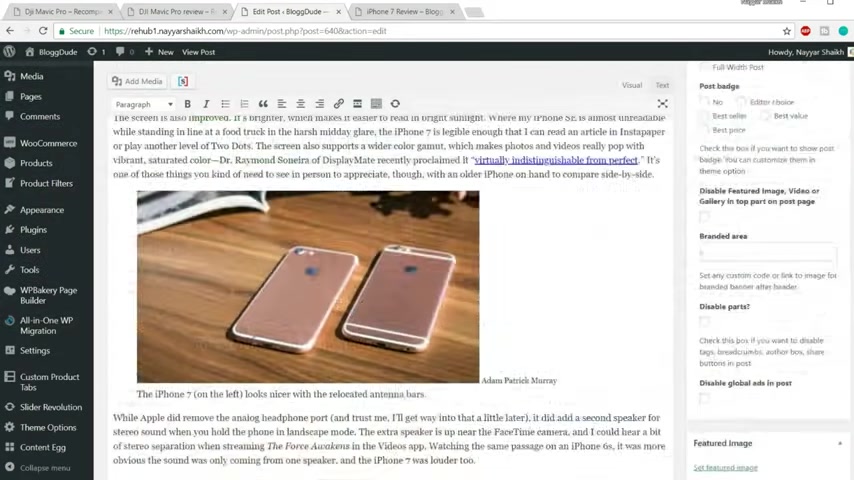
For example , if you want this thing , our score section at the top or if you want the video section at the top , you can just you know copy this thing , the video short code , this section , you can copy it and paste it at the top .
So this section will be at the top .
So you don't have to follow my structure .
You can create your own structure .
Now let's put this thing .
So the title is R score .
So come back over here , let's type in our score as the title .
So let's come down type in our score and because it is a title , we'll make it heading to select it , select heading two .
And after that , we have all these review , the actual review .
So let's add the review over here .
First thing is review heading .
So how this would look , this is how this is the heading .
Best drone .
So I'll put in best phone , maybe or maybe best smartphone now , summary text .
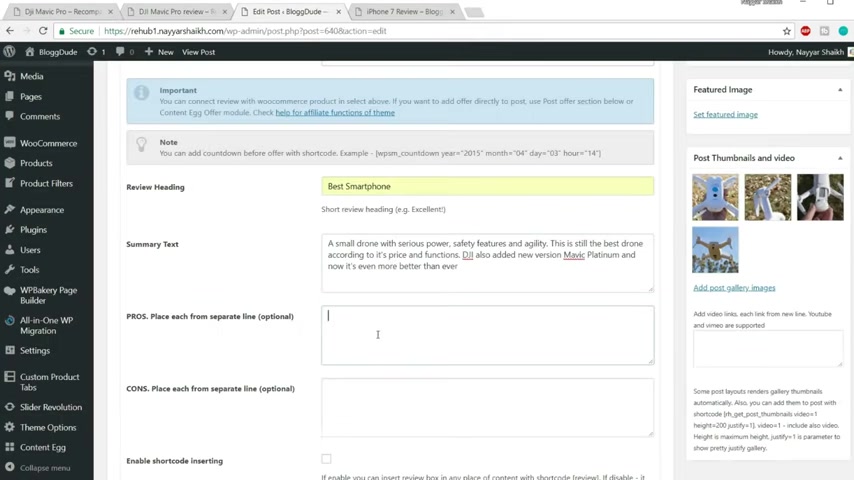
Now this is where this summary text will come .
So I'll just copy the same text and paste it over here .
Now , what are the pros which you find in this phone ?
And what are the cons that you find in this phone ?
So pros can be like camera or design color .
It's all up to you .
You can just type in anything actually just cannot type in anything .
You have to type what are the pros of the phone and what are the cons of the phone ?
It's all up to you .
Now , cons can be , I don't know , no cons , no issues .
I would , I'll type in no issues and make sure this thing is enabled enabled , short code inserting so that we can use this short code .
OK ?
The short code is very simple .
Review , short code , copy it and come at the top and just paste this short code .
OK ?
And we forgot one thing to give this score .
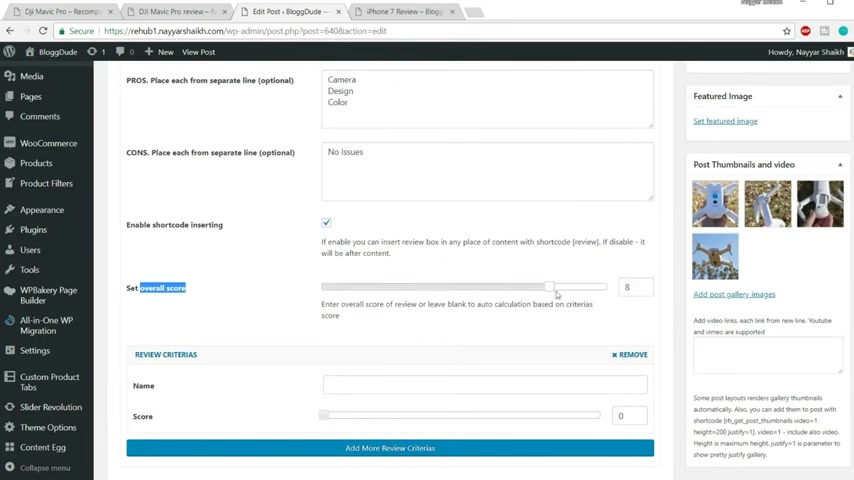
Let's give it a score of maybe 8.5 or nine .
Let's give it a score of nine .
And let's come at the top and click on update , come back here .
And now after we refresh , we should have that section below this video section .
Let's see , let's refresh .
OK ?
So up below this video section now we have our score section .
Best smartphone nine score .
We have this thing where your prose camera design color cons no issues .
OK ?
So this is how it works .
Now , let's see what we have next .
So after this , we have simple text which says where to buy this thing from .
And after that , we have some more short codes which , which is giving us this section .
So let's do that .
Let's come over here , let's put where to buy thing , OK ?
Where to buy this product from ?
And let's come at the bottom .
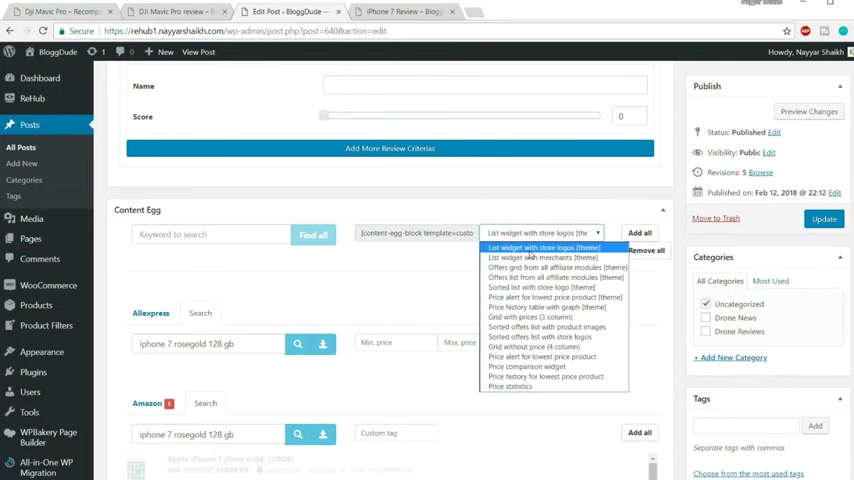
And let's search for this product which is iphone seven rose code .
OK .
Rose gold .
It was , I guess 1 28 GB , you have to be very specific .
I think it was not available on Aliexpress .
I'll not search on a express .
Let's go to Amazon .
Click on search .
OK .
The first one select it .
Let's go to flip card , click on search again .
The first one .
Now let's also use Walmart .
Select this click on search I think .
Is it this one ?
Maybe ?
Yes .
Yeah , iphone 71 28 GB grows code .
Select this one .
Now we have to copy this short code .
OK .
Here it is .
So you can just copy this short code and you can change this style .
It is list widget with stored logos .
You can just change this style of how it looks .
Then after that , you can just copy this short code and paste it over here .
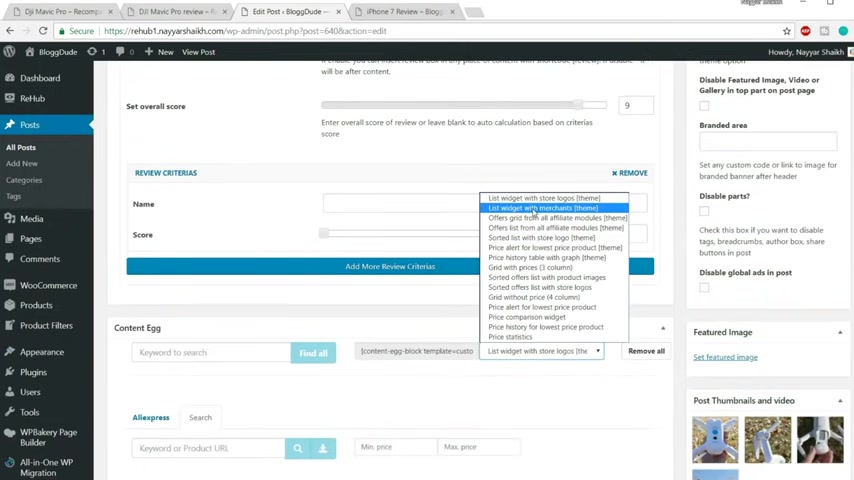
Let's see how it looks .
OK ?
Go at the top and click on update .
Now come back to this page refresh and everything should be fine .
Hopefully .
OK ?
So this is how it looks .
You can buy it from Walmart , you can buy it from Amazon , you can buy it from flip card wherever you want to buy it from .
OK ?
You can change the style of this thing .
It's all up to you .
Let's change this style and see how it looks .
OK ?
So this was list view .
Now let's select the second one or maybe .
OK , let's select this one grid with prices three columns .
OK ?
And see how it looks after you change the design , you after you change the style again , you'll have to copy the short code and replace the old one .
Let's replace this one .
Click on update , come back to this post and refresh and let's see how it looks now .
OK ?
Now , as you can see this is how it will look .
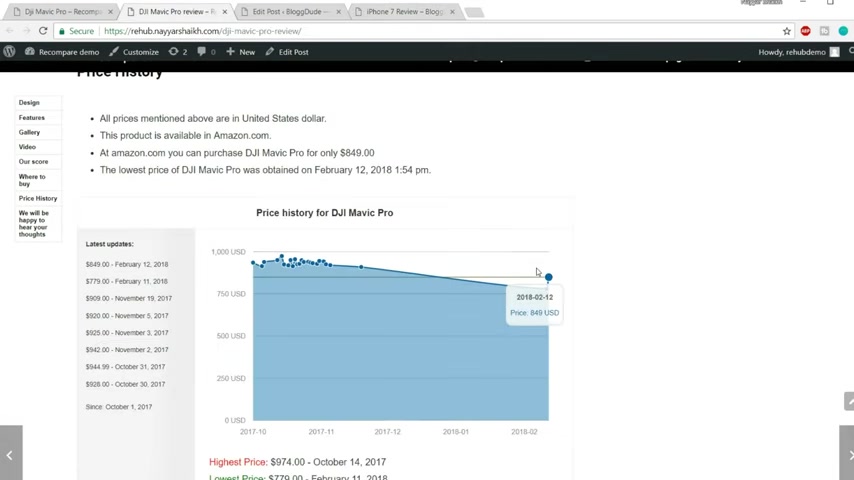
So you have many different designs available for you .
You can use any one of them .
And after that , we have prize history .
So first let me copy the title , prize history .
Come over here at the bottom , this past in the title and this short code you file in , you'll find in the file which I have given .
This is here .
It is prizes .
There are two different short codes , OK ?
Just copy it .
The first one is still here and the second one starts from year to year .
So you just have to copy both the short codes which is under prizes tree and paste it over here .
Now , as you can see that two short codes , the first one is for this section , OK ?
This written section and the second short code , this one is for this section , this chart section , you won't see the chart section .
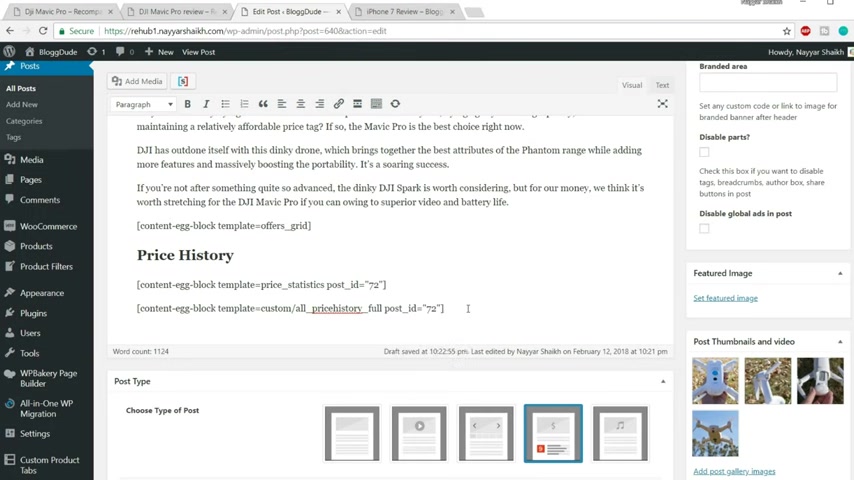
Now , the reason is very simple because we have just created this product and to see that chart section , you'll have to , you know , your product should be at least a few days older only then you can see the history .
You have just created a product .
So you , you won't see any history obviously .
Now , here you have to do one change .
Always make sure you do this change , you have to change the ID , OK ?
Every time you create it , you use this short code , you'll have to change the ID .
Now you have to put in the id of the product which you're going , which you're going giving review to .
OK ?
So we are giving review about the iphone seven .
So let's see the id of that product .
At the left hand side , you will see products open this link in a new tab so that we can get the ID .
And let's search for iphone seven .
Here it is .
Now when you have this , you'll see this first option here .
It says ID , it is 6 38 .
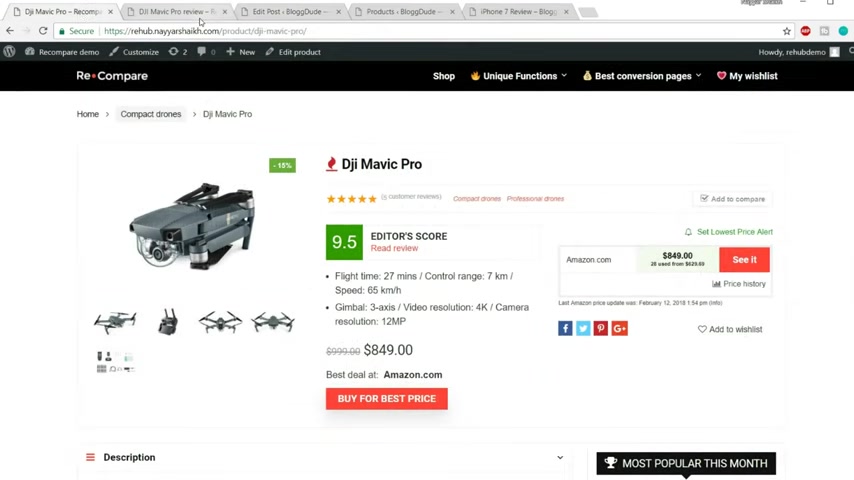
I hope you can see this copy this come back over here and replace this 72 with that ID .
OK ?
And let's see what we have next .
Now , after that , we have this section , the final section which is the price alert section .
So again , go to this file and copy this last shot code which is the price alert and come back over here .
And after this paste in this one and again , don't forget to change the ID .
OK ?
Very , very important .
OK ?
So I'm putting the same ID .
Now again go at the top update and everything should be fine .
This is the final setting .
So let's refresh this .
Ok .
So we have the price history .
As you can see it is giving the price , the lowest at present is at 55 999 .
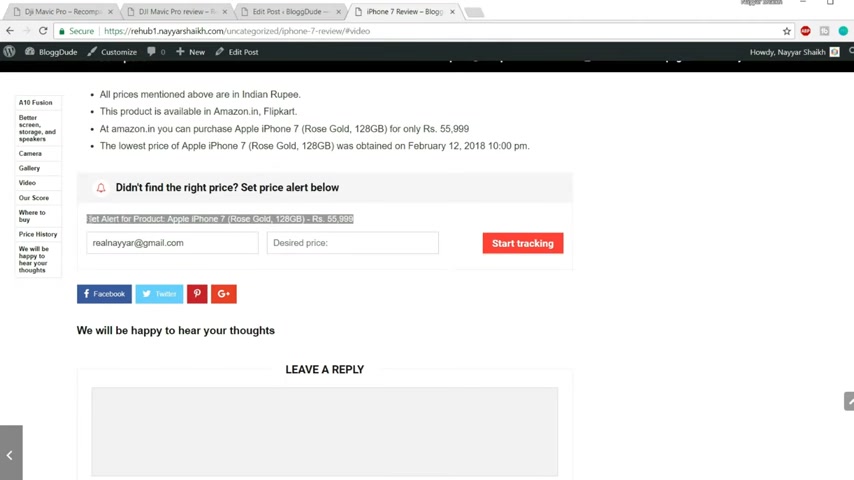
And we can see when this was recorded , it was recorded on 12th of February 2008 7 p.m. fine .
And if the user want to get any alert about price changes of this product , they can enter the email address , decide price and click on start tracking .
So this is very , very important guys .
The reviews are very , very important .
This will , you know , drastically improve your sales on your website and sales and indirectly , it will increase your commissions and so on .
I think I need some rest , but you don't have to worry , I'll need some , I'll take some rest and after that , I'll continue the video .
Welcome back guys .
So we have seen how to create a product and how to create a review for that product .
Now we'll see how to create custom accessories tab and notice area and banners .
So let's see what those things are first .
So first let me show you what a custom accessories tab looks like .
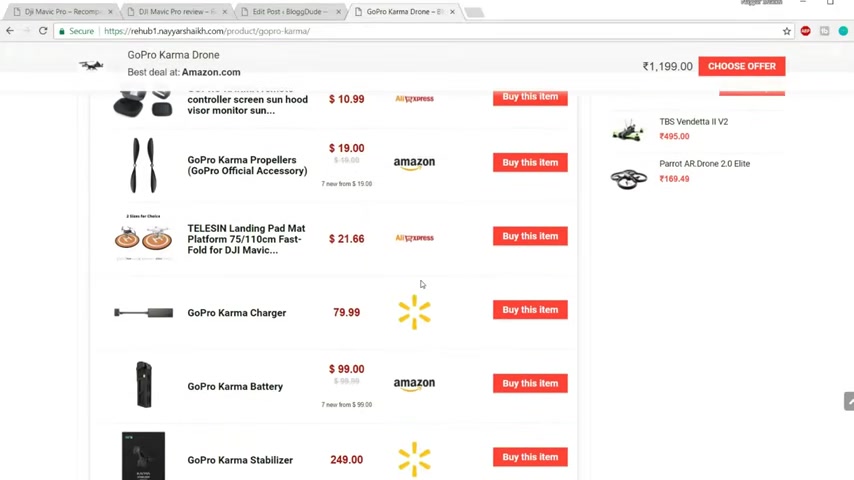
So let's see that product .
Ok .
So let's scroll down .
I have shown this thing in the demo section , but for those of you who have skipped the video , you can see it from here , you get this custom tab at the bottom , OK ?
And which says accessories and combos and you sell all the accessories related to the product .
Ok .
Now , so this is very useful .
We all know that whenever someone is purchasing a product , there are very high chances that they are also interested in accessories and combo packs .
So this is this is the you know reason behind creating this kind of product .
So let's see how to do that .
So first we , we know that we have created a product which is iphone seven .
So let's create a new product which includes the combo or the accessories of iphone seven .
So we'll have to create a new product .
So how our products and click on add new and we can give it any name .
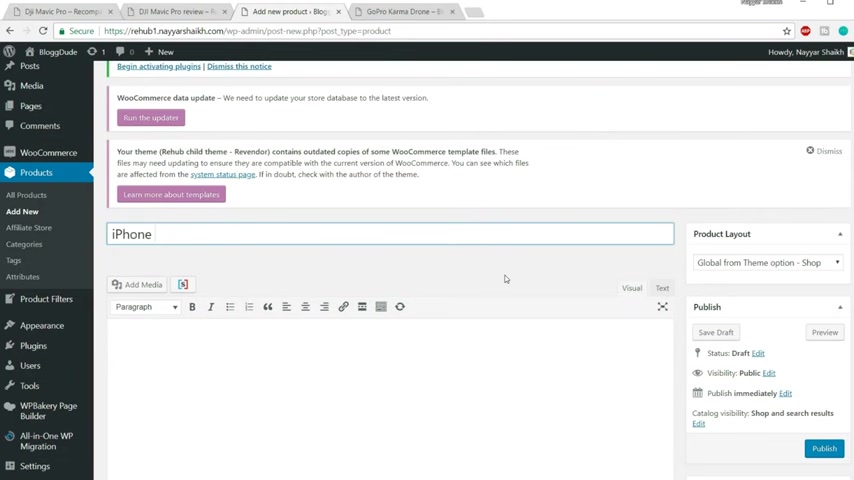
This will won't be shown because this will be used only as an accessory .
This won't be a separate , you know , this won't be a separate or a different product altogether .
So I'll just type in iphone seven accessories and uh let's search for something .
We can give it a product category .
Let's give it mobile and let's search on Amazon for iphone seven cases and let's click on this search bar .
Ok , let's search again .
Ok .
Let's select the first one .
You can select any one of these .
It's all up to you or you can select multiple one .
Ok .
Suppose you are selecting this one , but I don't recommend selecting multiple accessories or multiple case for the same product .
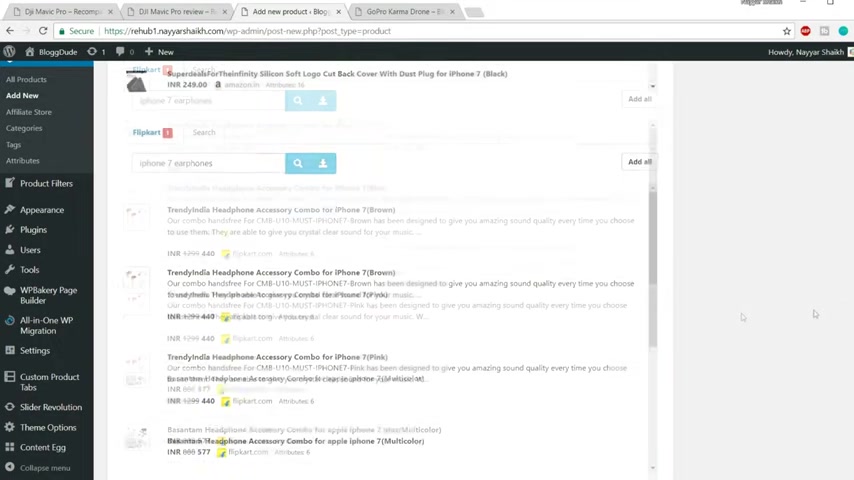
Now , on flip card , let's select iphone seven earphones , maybe let's see whether we have something .
OK .
So there are many things .
Let's select the first one again .
Obviously , you'll have to see the one which you like and you have to select accordingly .
Now , once we are done with this , just click on publish .
After you click on publish , you will see that there is a post ID given to this which is 649 .
So this is very important .
We will be using this .
If you see in the , you know in your URL address part you have this post is equal to 649 .
So this is the post ID , we have to use this thing .
So first go to all products .
Now select iphone seven .
This is the one iphone seven rose gold 1 28 GB , click on edit .
Ok .
Now first let's see how this looks at present .
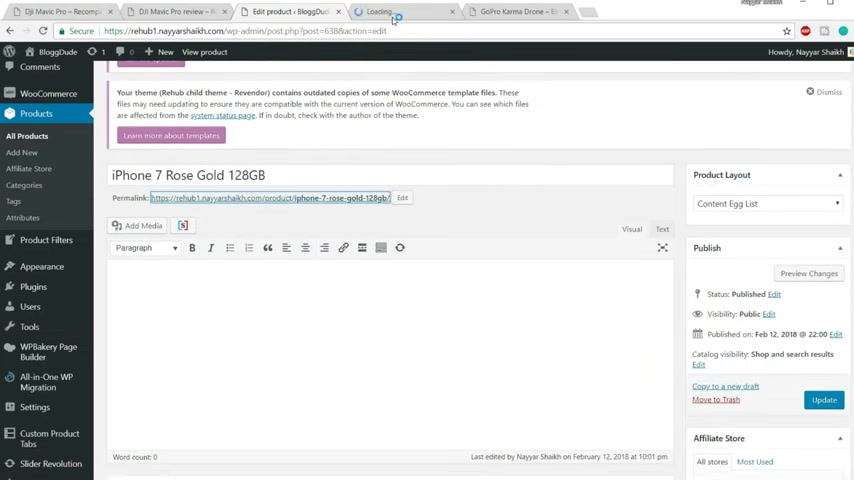
So I'll just open this link in a new tab to see how it is looking .
So this is how it is looking at present .
We have only three tabs , additional information videos and reviews .
We don't have any accessories tab , so we'll have to add that .
So scroll down and under this section you'll see .
The last option is custom tabs , click on customs tabs and click on add a tab , you can give it any title .
So let's type in accessories and combo pack or just combos , accessory spelling is wrong and you can just paste in the ID so that you remember it , it was 6 38 .
Now , if you see the short code file , you'll see a file which says custom attributes and combo short code .
Now copy this short code from here .

This is the short code for custom attributes and combos and paste it over here and just replace the ID with this ID .
OK ?
Just replace this ID with this one and click on save tabs .
Now click on update and come back to this page .
Let's refresh and see the changes .
Now , as you can see , we have a new tab over here which says accessories and combos and when we click on this , OK , wait a minute , we have the same product .
I think we have done some mistake .
I think we , you know , we had put the same post ID , which is a mistake .
Let's see what happened actually go to custom .
OK ?
OK .
That is the problem .
This is not the post ID .
Let's find out the post ID .
So just click on open this all products in a new tab .
OK ?
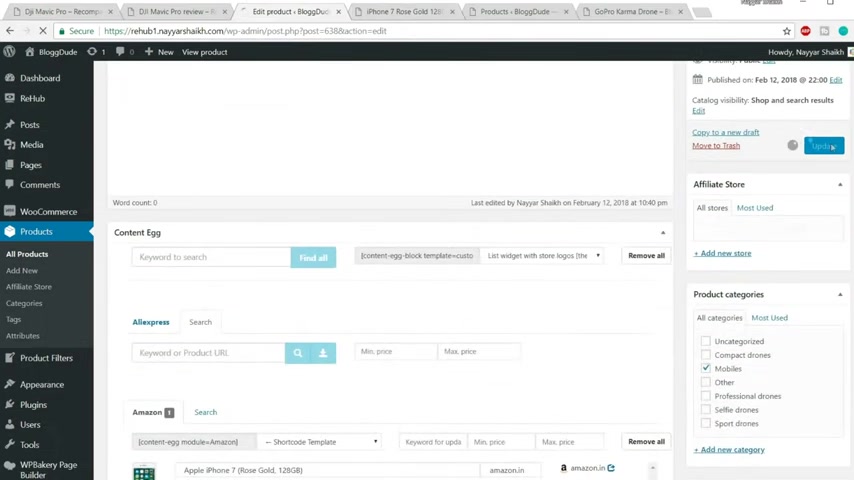
It's really easy to find out our post ID product ID and this was the one iphone seven accessories and here it is 6 49 .
Ok .
So come back over here , let's change it to 6 49 instead of 6 38 .
Let's delete it and let's put it 6 49 click on save tabs .
Ok .
Now click on update again , come back to this page .
Let's refresh it .
Now again , go to accessories and combos .
Now we have it , we have the headphone and we also have this armor , the case , whatever it is .
Now , they can also purchase the accessory and combo pack .
We have the image over here , the title , the prize and the company Amazon and flip card .
Ok .
So this is how we create accessories and combos tab .
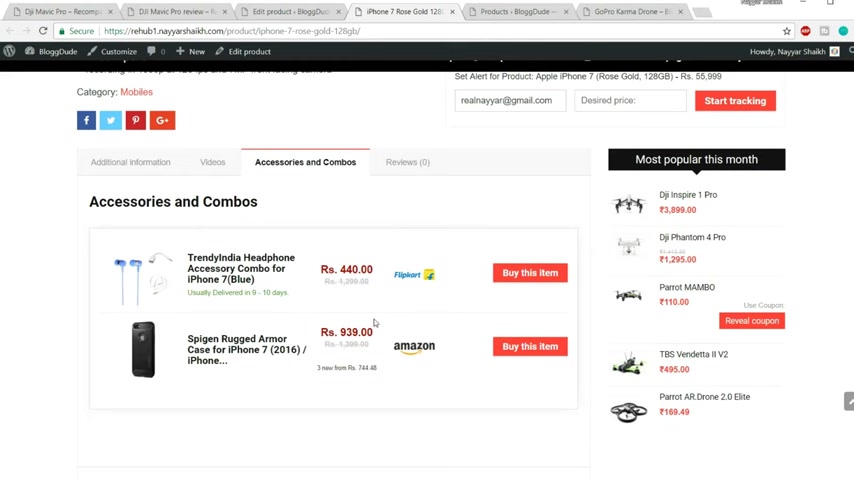
Now let's see how to add something in the notice area , something you might be interested in adding some bonus or some notice in the uh in that area .
So let's see how to do that .
So again , come back to this page , the edit product page , go at the bottom , scroll at the bottom and you'll see some options over here , custom short code which will be rendered near button , which will be rendered before content .
So you can paste uh html over here in any one of these .
So again , in the same short code button , in the same short code file , you'll see this thing notice area worldwide delivery .
You can copy this html from here and paste it in any one of these .
Let's paste it under this one before content .
OK ?
It says before content .
Let's paste it over here .
As you can see here .
It says free delivery worldwide delivery and the icon which is used is plain .
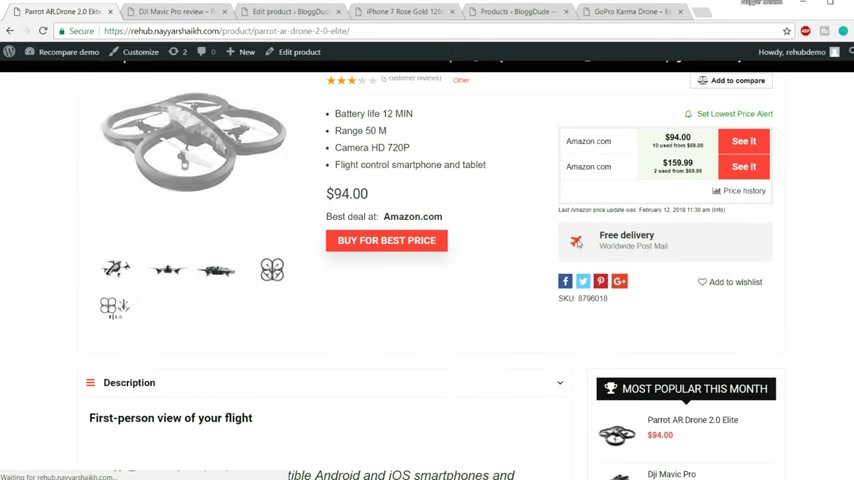
OK , let me show you that product .
Actually .
Let's find out that one .
I think this is the one .
Let , let me see .
OK , this is the one we have used a plain icon .
The color is red .
It says free delivery , worldwide post mail .
So this is what we have put over here .
OK .
Here it is just in HTML format .
So you can use STML as well .
If you want to change this thing , you can change the icon from here instead of plain , you can use any icon .
And if you want to change the text here , it says free delivery , you can change the text .
And here it says worldwide post mail .
So instead of worldwide you can put in uh maybe throughout India .
So free delivery throughout India .
OK .
I'm just showing you , OK ?
I think there's some spelling mistake over here .
Ok ?
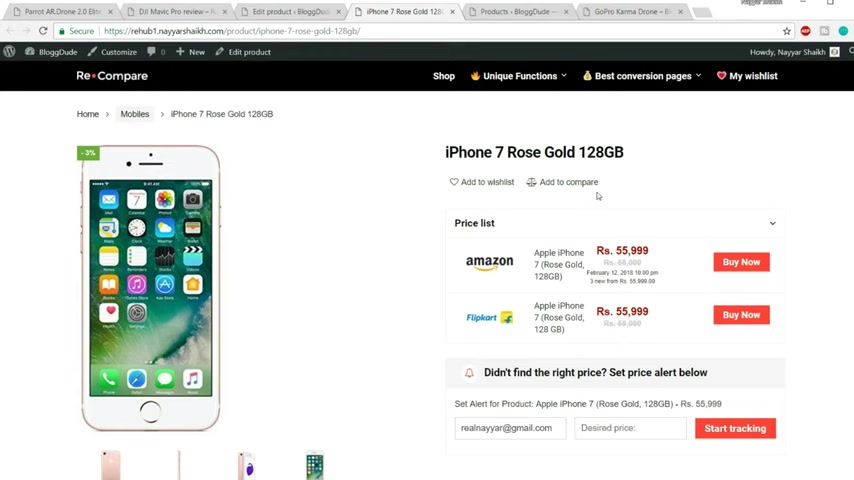
So I'm just showing you that you can do these things .
You can change it like this .
Ok ?
Now let's see , let's see whether this happens or not .
Let's update this page .
Come back over here , let's refresh this page .
Now , if you see over here , it says free delivery throughout India .
So you can use these things if you want .
There is another option to use some banners or to create some banners using short codes .
So we can also do that .
So again , you'll you can use some different short code option .
Now , now this was before content , we can render this short code near button .
So again , go to that short code page and the last one is this banner copy this short code till the end and paste it over here .
Now from here , you have to change a few things .
For example , first let let's see how it looks .
Then I'll explain to you how you can change or how you can do some changes .

First , let's update , come back to this page and refresh and let's see the changes OK ?
Here it is we have something uh there is an image in the background , OK ?
That green image that is not a color , it is an image and here we have some text 20% discount till the end of month and we have some border .
And when we how this it is actually a link , when you click on this thing , it will redirect you to something or or to somewhere .
So let's see how to make changes to this one again .
Come back over here , let's increase this size .
Now here we have image URL .
So suppose instead of this image , you want to use some other image , you just have to enter the URL of that image OK .
Over here you have to cut , cut this thing or delete this default URL and put in your URL .
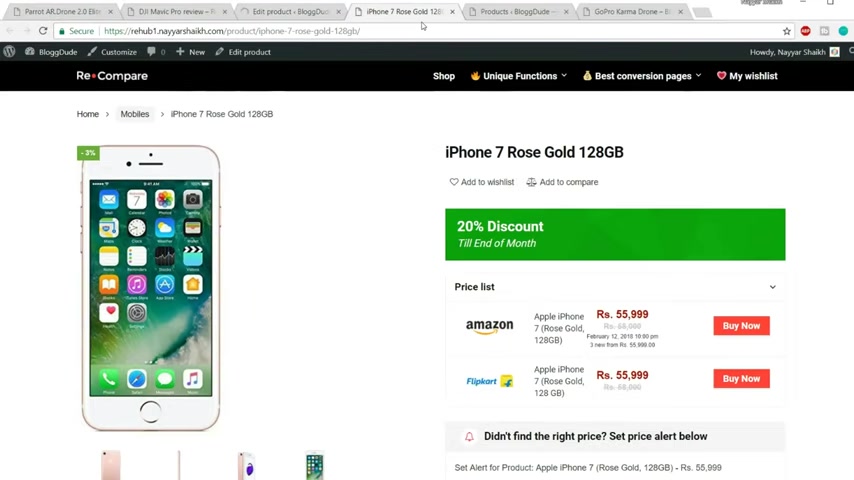
And here it says 20% discount or suppose instead of 20% discount if you want to say something else like free delivery .
So let's type in free delivery instead of 20% discount .
And after that , it says till end of month .
Now let , let that text to be the same .
Ok .
You can also change the text color .
Ok , here it says white .
Uh the this is the code for white hash FFF six times or three times .
F this is the hex code for white color .
So let's see whether these changes take place or not .
Let's click on update , come back over here and again , refresh , let's see the changes .
OK ?
As you can see now instead of 20% discount , it says free delivery .
So this is how you do all these changes .
This is how you create a product .
This is how you write a review and you use some more features , additional features like accessories tab and to add some html and some banners .
OK ?
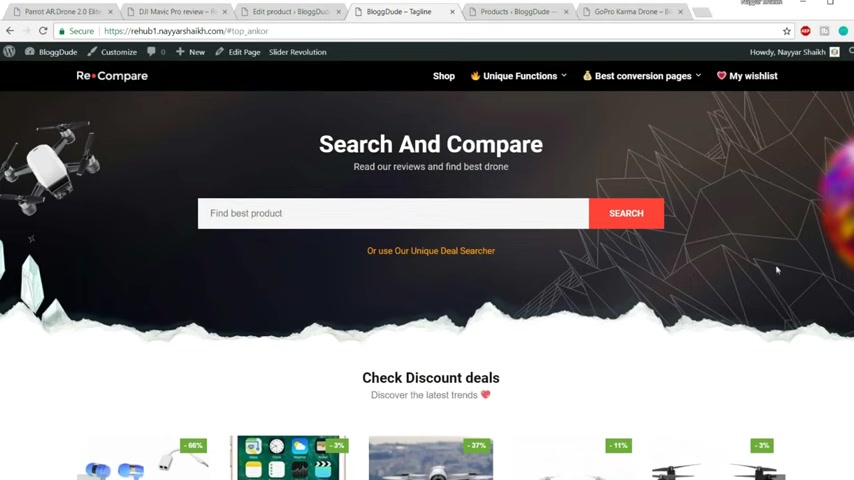
I , so this is how you do it .
OK ?
So almost most of the things are ready .
Now it's time to start creating our home page to start designing our home page .
So let's go to the home page first .
If you see we have , we already have the home page which we want to create .
But suppose if you don't want to use this home page and you want to learn how to create it from scratch , then I'll show you how to do it .
OK ?
So first come back to your dashboard , let's cut all these things .
Now click on this button plus new and select page or you can just have pages and click on add new .
Both the thing will do the same thing .
So we are adding a new page over here .
Now , let's give it a title .
So I'll type in home new because this is the new page which you are building and from the template , you can select anything .
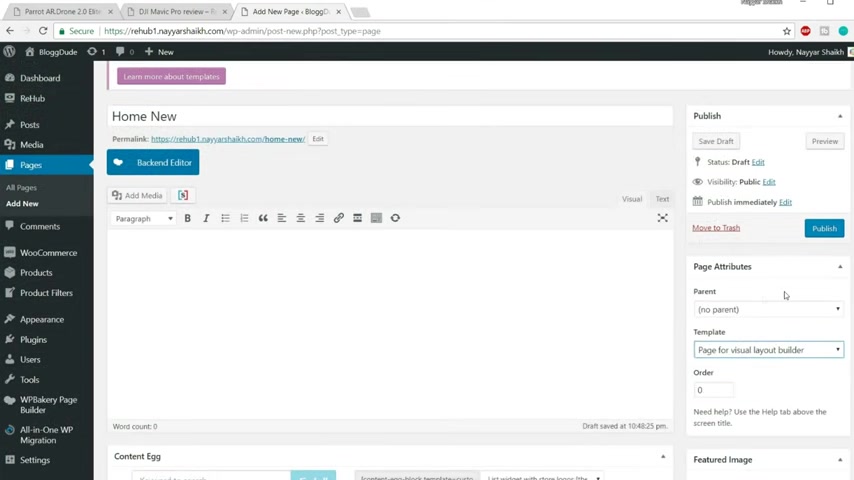
I'm selecting page for visual layout builder because we'll be using a visual builder to create this website to create this home page .
Now , after selecting this click on publish , first , let's go to the home page in the demo website so that we can see everything and we can create accordingly .
So first we'll have to create this section .
We have some image in the background .
We have this title subtitle and this search bar .
So let's do that come back .
Now , click on this back end editor to enable the visual builder editor or now it is called WP bakery page builder .
The name is changed earlier , it was called Visual Builder .
Now we have to first we have to add this title search and compare .
OK .
So to do so click on add element and search for heading , custom heading .
So you can just type in custom heading .
You'll get this module you or you can get this element .
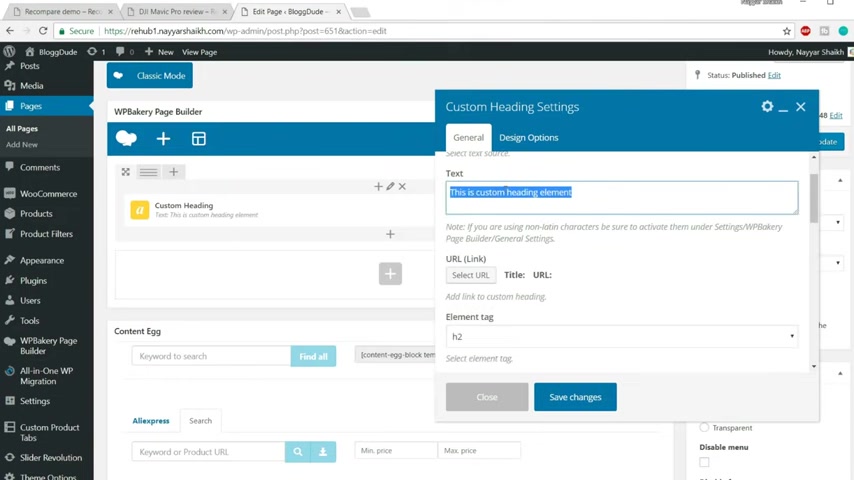
Click on this custom heading element .
Now from here , make sure custom text is selected and you just type in the text you want .
So I'm typing search and compare .
OK , let me cut this thing .
So I'm typing search and compare with your element tag .
I'm selecting H two text align center because this text is aligned at this center .
Then after that font size , I'll put in 40 pixels uh line height , maybe again , 40 pixels text color .
It is white but I am I will not put in white at present .
Uh I'll tell you the reason very soon .
You can have some custom font family font style , but I'll take my here to use the default font family and font style and click on save changes .
Now , after that , we have some more text , it says read our reviews and find best drawn .
So let me put this one .
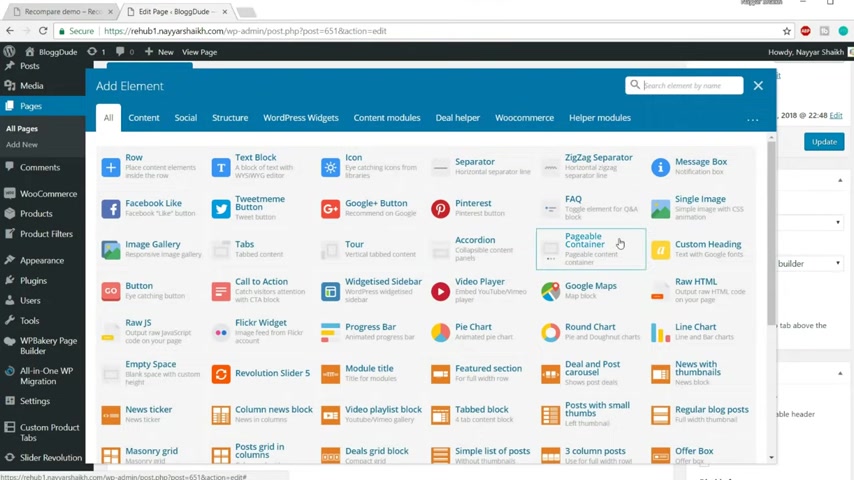
Now click on this plus button to add a new element and let's search again for heading , custom heading , select this one this time type in the text you want .
So I'm typing , read our reviews and find best drawn element tag .
I'll select to H three texture line Sanel font size , maybe this is quite smaller size , select 16 pixels , both line and height text color .
I won't do any changes over here .
I can use some different fonts and some different font style over here and you can see the font preview over here .
For example , let me use Roboto .
OK .
So I can use Roboto and we can see the font preview over here .
It is loading at present .
So this is how your font will look .
I like this one .
I click on save changes .
And after that , we have this search bar .
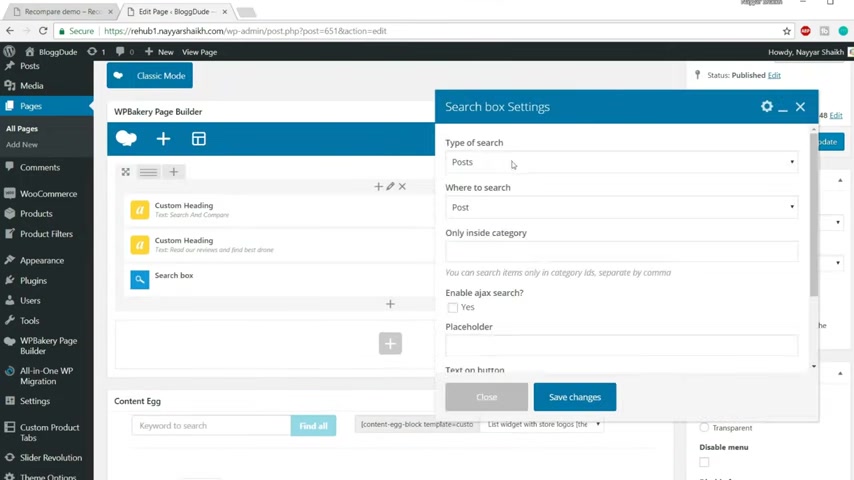
So let's put that search bar again .
Click on this add button .
OK ?
Now search for a search bar search box .
This is the one selling this one .
OK .
Type of search .
What do you want to search ?
Make sure posts is selected where to search product .
OK ?
We want to search product and make sure enable Ajax search is selected .
Now , this is the reason because you know , whenever you try , you type something , OK , you get the real time search .
For example , I typed drone and I I'm getting the real time results over here .
So when you enable a search , that is what happens after that , we have place folder .
So this is the placeholder as you can see , it says find best products so you can type in anything or your type in , find best smartphones .
Maybe if I am creating this website for smartphone niche , then text on button .
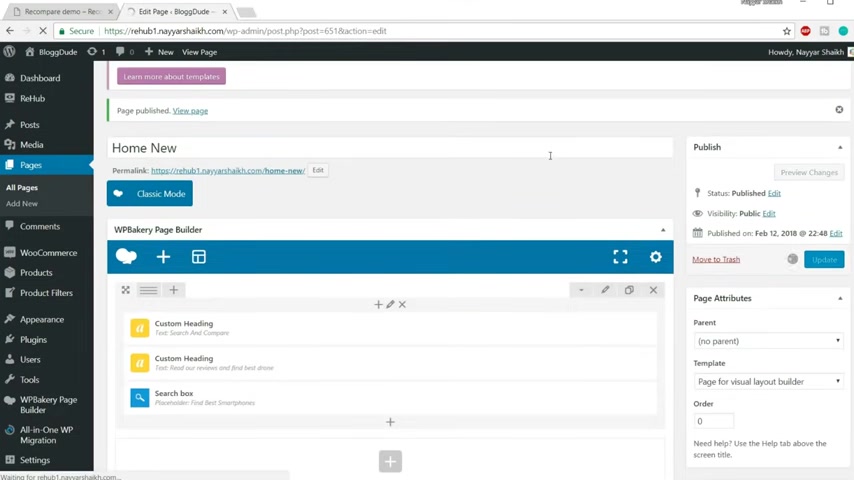
So here on the button , it says search .
So let's type in search , fine color of the button .
You can select any color , let's select to green and let's click on save changes .
Now let's update this page and let's see how our page is looking at present .
OK ?
Let's view this page in a new tab .
Let's open this link in a new tab .
OK ?
So this is how it is looking Now , let's see what all are , what are the different changes that we have to do ?
First , we have to change the color .
It is not black , it is white .
OK .
So we'll have to change the color .
After that .
We'll have to add some gap at the top .
If you see there is no gap at top of this end here , we have a nice amount of gap uh about this title .
So we'll have to add some gap over here .
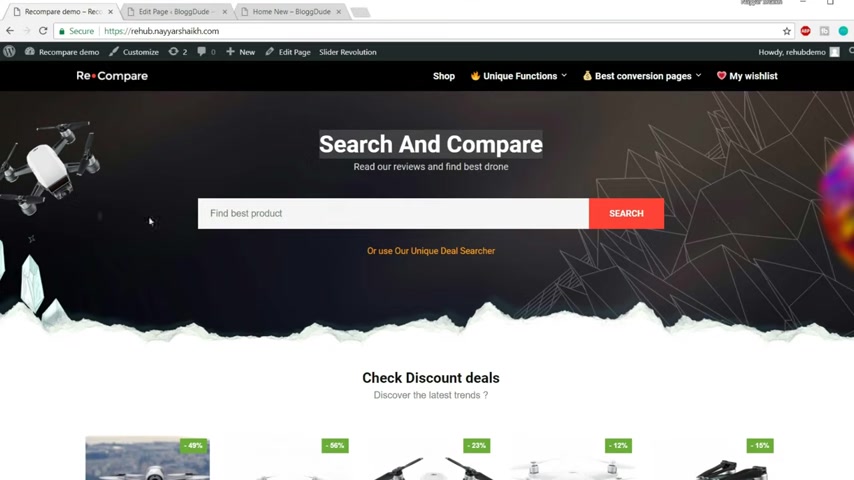
And we'll also have to add some gap from left and right side because our search bar in the demo website is quite smaller and we have a nice amount of gap from both the sides .
So we'll have to do that as well .
And we also have to put a background image as you can see , this is actually a background image .
And after that , we'll have to add some gap at the bottom .
OK ?
So let's do all these things .
And also I noticed one thing there is no , there is a very nice gap between the title and subtitle .
But here there is a lot of gap .
Now that is because the because of the custom thing that happens , let me show you if you select this and click on inspect element , you'll see that when you have this thing , you'll see that there is 30 pixels of margin .
So we'll have to decrease this thing .
OK ?
So again , come back to this page , let's start doing thing one by one .
First , let's change the color .
So select the custom adding , click on this edit button , this pencil icon and go at the bottom and select the color text color and make it white .
And let's change the margin instead of 30 .
We want only 10 .
So I'm typing margin bottom .
This is the bottom margin and let's change the subtitle color .
So click on this pencil button , come at the bottom and we have color over here , text color again , white , click on save changes .
So this will change the text color for both of these and decrease this gap over here .
Now let's add some gap at top .
OK ?
Top of this thing .
So there are many ways of doing that .
The easiest one is to add a new element called space .
OK ?
Empty space .
This is the one , this is the easiest way of doing it .
And let's add maybe 60 pixels or maybe not 60 .
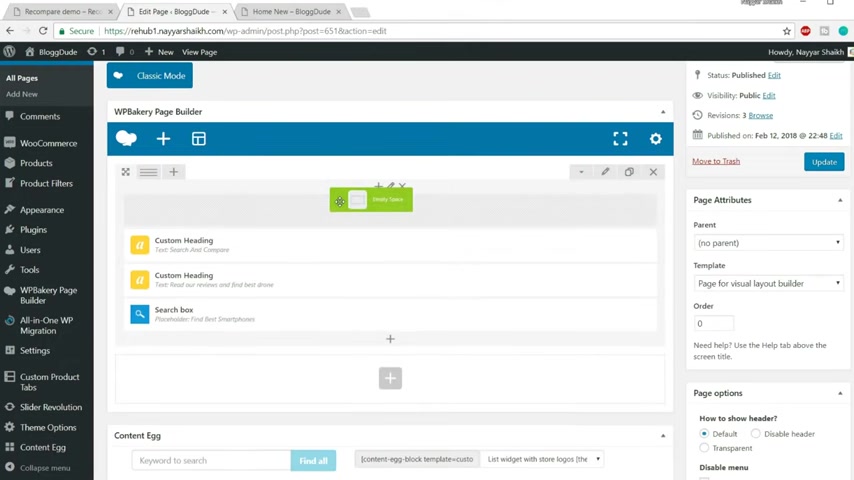
Let's add 50 pixels , click on save changes and let's drag this empty space at top because we want space uh about this thing about this heading .
So this will add some space at the top .
And after that , what we need is we want to make this thing smaller , this search bar smaller , we want to give some gap from both the sides .
So let's do that .
Now , we cannot do it like this .
So before that first , we'll have to add a new row So click on this button again and type in row .
Now select this row and click on save changes .
Now drag this search bar in this new row .
OK ?
And we have to change the column settings because we want gap from both the sides .
So we want to change the column settings .
So we'll ho here on this column settings and we'll select this 11 by six plus four by six plus plus one by six .
And we'll drag the search bar in the middle .
OK .
So we have some gap from both the sides because these two columns are empty .
So this will be gap and we have this search box in the middle fine .
So everything is working fine .
And also we need some gap at the bottom .
As you can see below this , we have a nice amount of gap .
So let's add some empty space .
Now we have already added some empty space .
So what we can do is we can copy this , we can duplicate this .
So we don't have to do it again and we can just drag this thing at the bottom .
So this is also a very nice feature of using this visual builder or page builder .
And we also have this background image .
So let's add that background image .

So to add that we'll click on this pencil button now to edit the row because this background image is you know , in the background of everything it is in the background of this title subtitle in the search box and everything is under this single row .
So that's why we'll have to add the background image in the row .
So click on this pencil button , edit this row .
Now go to design options and here you'll see background image over here , click on this to add a new image and you should have all the images because we have imported the demo data .
So let's search for that one .
I think it is this I guess .
Yeah , this is the one I guess , select this one and click on set image .
And after that instead of theme defaults select cover and click on save changes .
Now let's click on update .
Come back here , refresh the page and let's see the changes .
OK ?
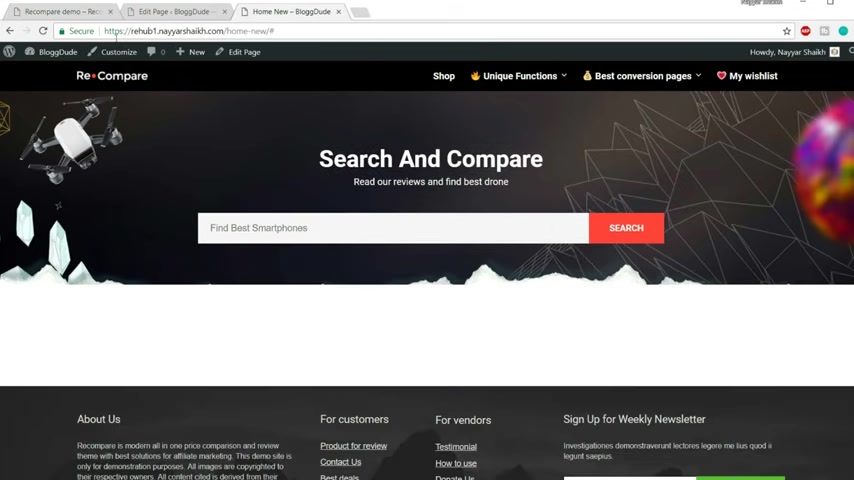
So this is looking much better but still I think we need to do some more settings .
We not we need some more gap at the bottom .
OK ?
We need some more gap at the bottom .
After that , it will look something amazing like this .
OK ?
But most of the things are looking very much similar .
OK ?
As you can see it is looking very , very much similar .
So let me add some more gaps .
So we have empty space .
It is 50 pixels .
Let's increase this to maybe 110 pixels .
Click on save changes , click on update , come back to this page .
Let's refresh and see the changes now .
OK ?
So this is now looking much better .
We have a very nice look .
Now , now after that , we have to add these things .
And now if you notice that I'm doing the same thing that is basically to show you guys how to do it because you have the demo data , but you don't know how to make any changes .
Now , I'm showing you this so that you know how to make changes , how to do it by yourself .
OK ?

Even if you don't have the demo data , you can follow my instructions and you can create a very similar homepage .
Now , let's add this section first , we'll have to add this title and subtitle .
And after that , we'll have , we'll have to add these things , the tabs , the products .
So here , so again , come back with your .
Now , this time , we will not use this plus button because we are done with this row .
Now , we don't want to add anything in this row as you can see over here , this was a , a different row and all these things are in different row because we don't have the same background color .
OK ?
We have something different , we have something different background because this is a different row .
So let's add a new row .
So this time we'll add , we'll use this plus button , the big one , click on add element first , let's add some empty space at the top .
So search for empty space .
Here it is .
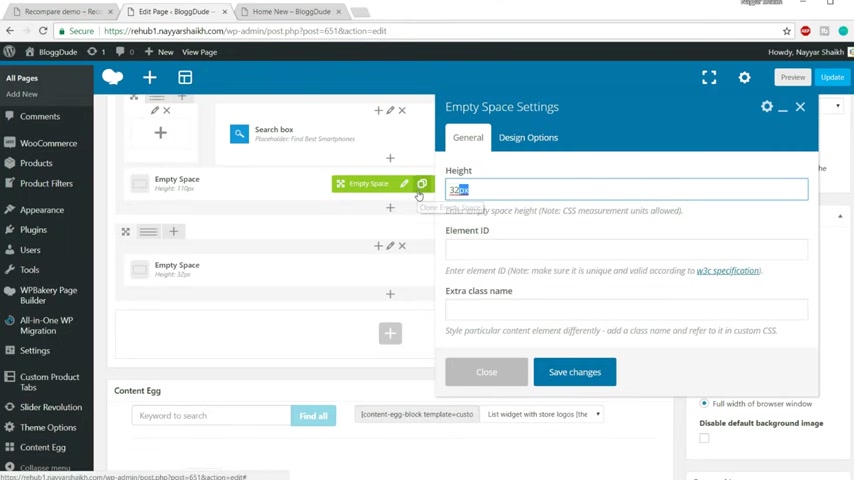
And let's add maybe 60 pixels at the top type in 60 pixels , click on save changes .
And after that , we have this title and subtitle .
So let's use custom adding for that .
Click on plus type in custom heading .
Select this one type in any text you want H two .
No , this time , I think it will be H four because this is quite smaller than this one .
OK ?
If you select H two , H two is bigger than H four and H one is bigger than H two .
So that is how it works .
So I'm selecting H four and the alignment in center font size .
Let's select maybe 25 pixels , line height to maybe 24 pixels .
Text color is fine .
We don't have to change that and use the default font family .
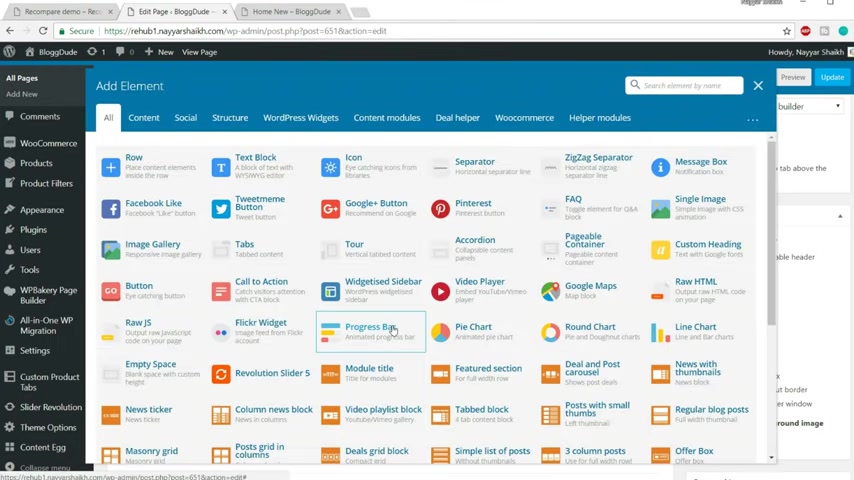
Click on save changes after that , we have another custom heading and this time it says discover the latest trends .
So copy it and paste this text over here or you can obviously you won't copy and paste the text but you will put in your own text over here .
I'm just showing you how to create a very similar website now , instead of H one H two select D because if you see , oh , here this text is totally different .
The design , the style of this text is different .
So select D from your and alignment should be central font size .
Let's make it quite smaller .
16 again or maybe much smaller .
OK ?
16 is fine .
I guess .
So , let's put 16 pixels and line height to 24 pixels .
Don't put any color over here or maybe , I don't know .
Yeah , we have to change the color because here the color is gray color , not the black color .
So let's select some gray color like this fine .
Now use the font , default font family and click on save changes .
And after that , we have this section , we have these products .
But before that , we have some gap between this subtitle and this product .
So let's add some gap .
Let's copy this gap and drag it over here and let's reduce this instead of 60 .
Let's make it maybe 20 pixels , click on save changes .
And after that , we'll have to add those products .
So click on add new and go to this V commerce section here .
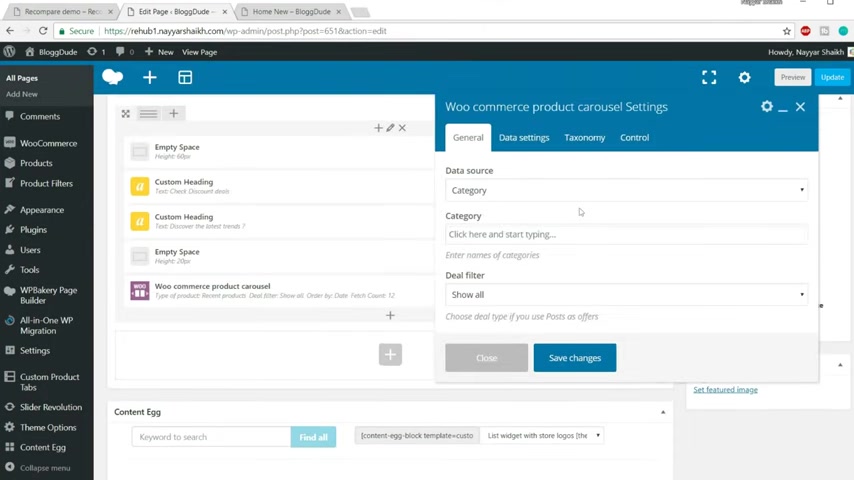
It is Woocommerce section and I think it is this uh let me think it was , I guess it was um I think it was this one Woocommerce product Carousel .
So select this one .
If you don't find it , just type in carousel , you'll find this one Woocommerce product carousel .
Select this one .
Now , data source category or type of product , what type of product do you want ?
So you can select one category to show one product from a single category or you can select different type of products .
So I'm I'm selecting type of product and what type of product , recent product feature , product sale product .
So because we here we have sale products .
So I'll select sale product from here deal filter .
So all after that , we have data settings , you can set price range .
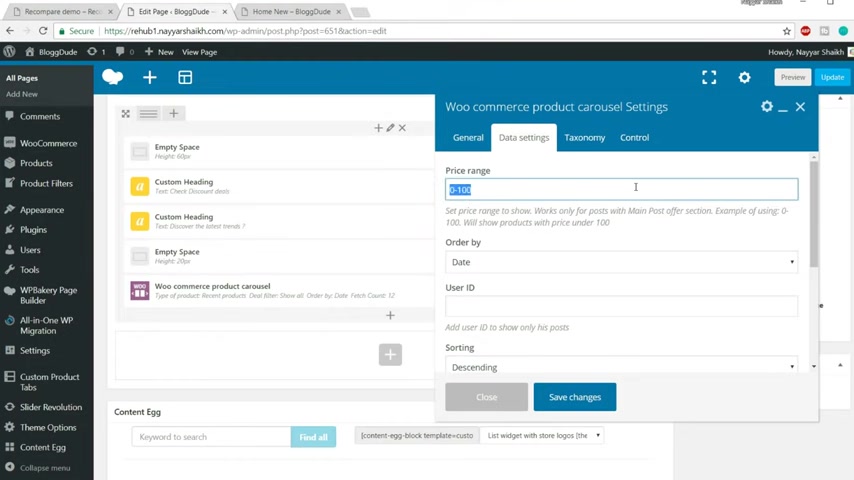
For example , if you don't want to show products over $100 then you can just type in 0-100 that will do the work .
Ok ?
Then control make link as affiliate or to rotate number of items in a row , you can control it from your , once you're done .
Click on save changes and update .
Now come back with your OK ?
The update is not done again .
Click on this update button .
OK ?
Now it is updating and come back to this page and refresh it .
OK ?
So we have our product .
So here , OK ?
It is a carousel as you can see , you can move it using your cursor and you can also use these things , these arrows .
So we have all these products which are on sale as you can see with these , all the products are on sale .
So this is how you create this section .
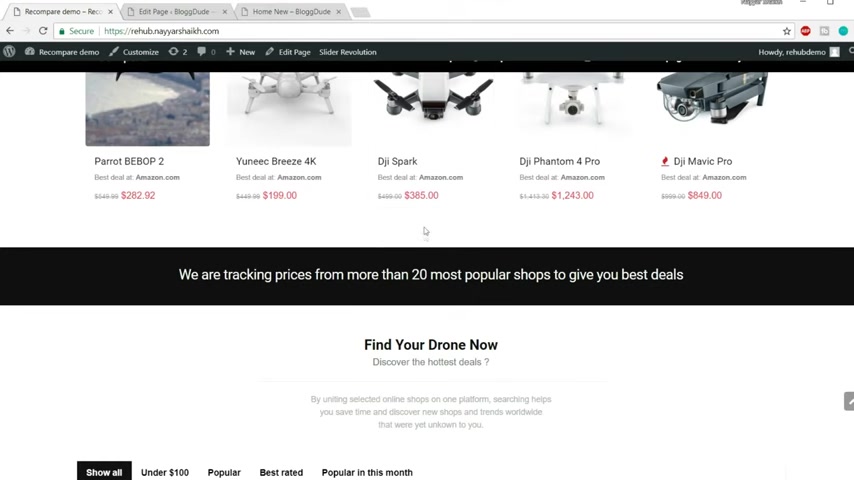
Now let's add , let's add , create this section .
Now this simple section .
But before that , we'll have to add some gap at the bottom .
As you can see here , there is some gap .
So let's add , let's copy this empty space of 20 pixels and drag it at the bottom .
So this will add some space below this thing which means below this .
And after that , we'll have to add this section , so copy it , copy this text from your come over here .
And again , we'll use the plus section because this is a new section , a new row .
So use this one and we want simple heading , simple custom heading and just paste in this text .
Now element I think it is uh H four I guess .
Yeah , it is H four center font sizes .

So maybe 25 pixels line height , 24 pixels , text color .
This time it's white .
As you can see , the text color is white and the background color is black .
So we have text color white , use the default font family .
Yes .
Now go to design and in the background section , select black because we want black background color and click on save changes .
Now click on update again , come back to this page and refresh .
Let's see what happens .
OK ?
So this is what happens and this is looking really bad .
So let me fix this again .
Come back here .
We'll have to make this thing full with .
We'll have to make this room full with OK .
So come back to this page and click on this button , edit this row , go to design options and we have to add background color over here .
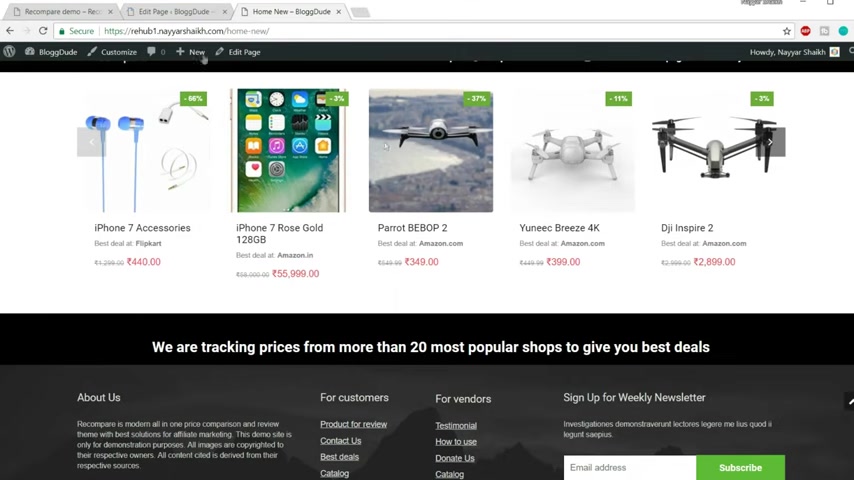
Click on select black , click on save changes and click on update again .
Come back over here and refresh this page .
OK ?
So this has solved the problem .
So that was the problem .
And after that , we have some more gap below these things .
And then we have simple title subtitle .
And again , we have some tabs over here .
As you can see , we have different tabs for different categories or different criteria , popular product product under $100 best rated products and so on .
So let's add that first , we'll have to add some gap below it .
So let's do that .
Come back .
Let's copy this empty space of 20 pixels and drag it below this .
And now let's add a new heading and subheading for this thing for this one .
So add a new , add this element , click on this button , add element , search for custom heading , select this one , copy this , find your draw .
Now paste it over here .
Let's make it edge four central line font size .
Let's make it 25 pixels or yeah , 25 pixels is fine line height 24 25 .
You can select anything you want .
Default font family .
Click on save changes now again , come back to this page and now this time let's copy this subtitle .
Come back over here , click on this plus button , custom heading .
Select this based in this text or type in any text you want H five , center line , not H five .
I think it is two selective center line .
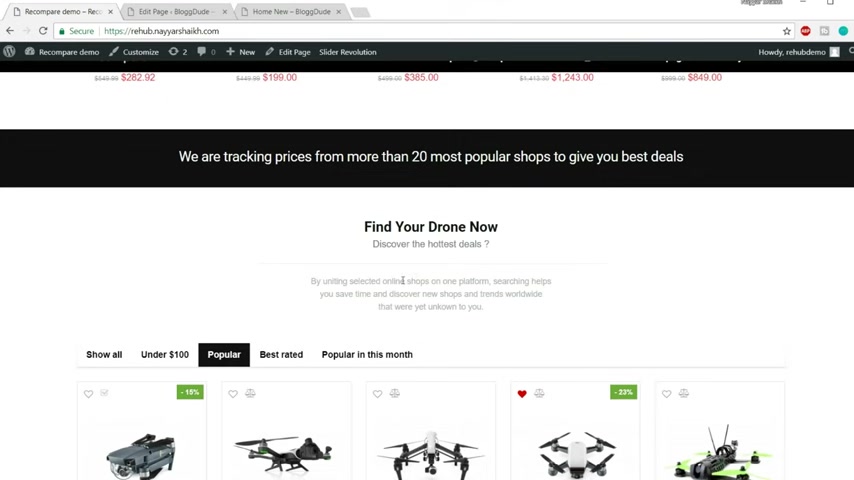
Font size is 16 pixels line height .
You can select 24 if you want text color , select some gray colors .
I'm selecting 9999 and use the default font family , click on save changes .
So this will add this title and this one .
And after that , if you see we have a very thin border over here , a very thin separator .
And after that , we have some more text .
So let's add all these things .
Now , first , we have some gap between the separators .
If you see we have the gap between the separator .
So let's add some gap , let's copy this 20 pixels .
Let's drag it over here .
And I think the gap is not 20 pixels , but it is around 10 pixels .
So let's edit this and let's make it 10 pixels save changes .
And after that , we have the separator .
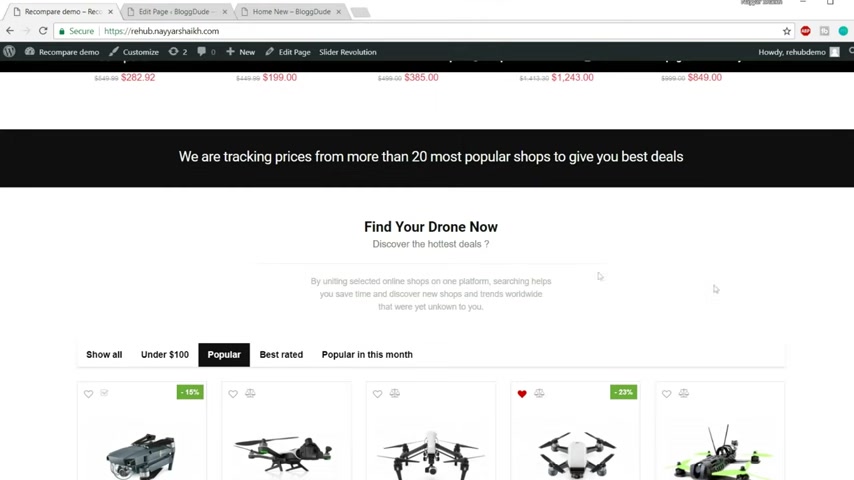
So click on plus button , select separator , select this one color of the separator , gray center line border , one pixel element with I'm selecting uh if you select 100 100% the border , this separator will go throughout the page .
If you select 90% it will be quite smaller if you select 50% more smaller and so on .
So I'll be selecting 50% and rest .
Everything looks fine .
Click on save changes .
Now again , some space below this separator .
So I'll just add this space or maybe I'll Yeah , fine .
So we have some space above the separator and below the separator .
And after that , we have this simple text .
So copy this from here .
Come back when you click on this plus button , custom heading again .
OK .
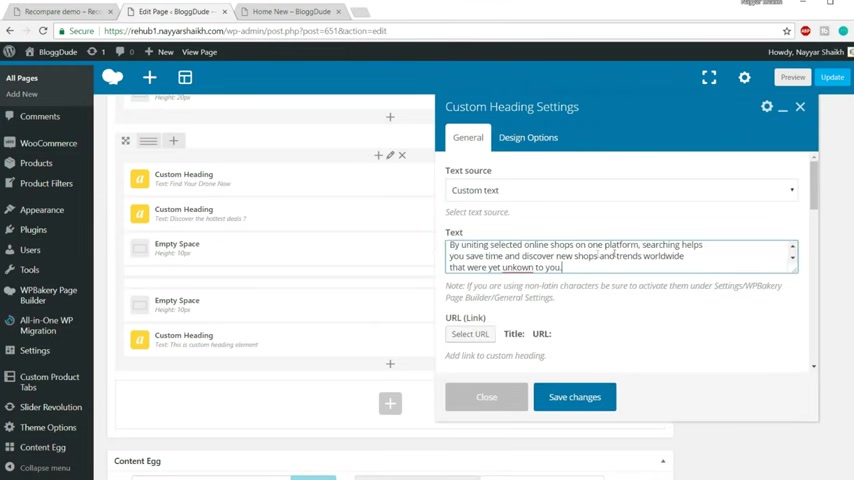
So let it load first , you can paste in the text or you can just type in any text you want element tag .
I'm typing Dave text , align center font size .
This is quite smaller .
So I'll put in 12 pixels line high to maybe 22 pixels .
Let's try text color , gray color .
So you can use the same color .
We earlier used 999 code .
So just type in hashtag and six times nine .
This will give you a gray color , use the default font family .
Yes , click on save changes .
So this will give you this text over here .
Now , before adding this first , let's see how it looks .
And first let's add some gap below this one as well .
So let's add this 10 pixels gap and drag it at the bottom .
Click on update , come back to this page and refresh it .
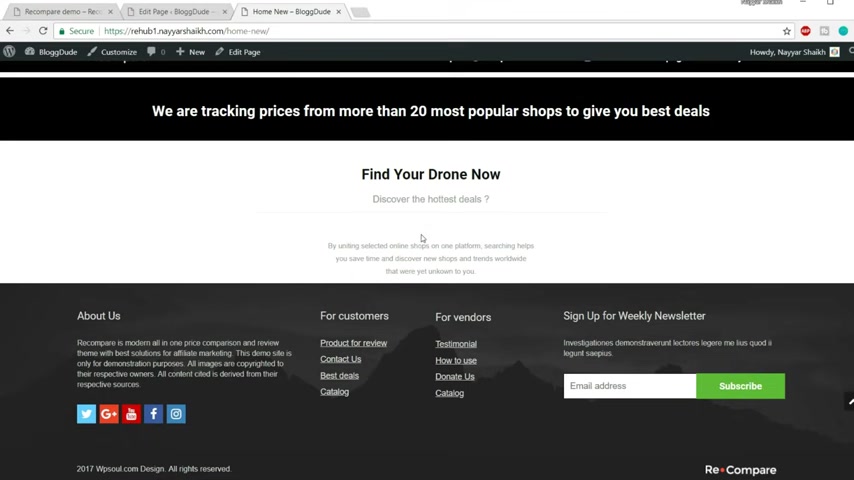
Let's see how it looks now .
OK ?
So this is how it is looking and I think it is looking much better .
We just have to decrease this gap .
I think we don't need this gap .
OK ?
The below gap below this separator , we have to delete that separator gap .
OK ?
So below the separator , we have something we need , we don't need this empty space so we can delete it .
And after that , we have some space , but I think we have to increase this space below this from 10 , maybe 20 or 25 .
So let's make it 20 pixels And after that , let's now add this thing , very important thing , this tab section .
So click on this plus button and search for grid product .
OK .
So we have to select this one grid of woocommerce products , select this one .
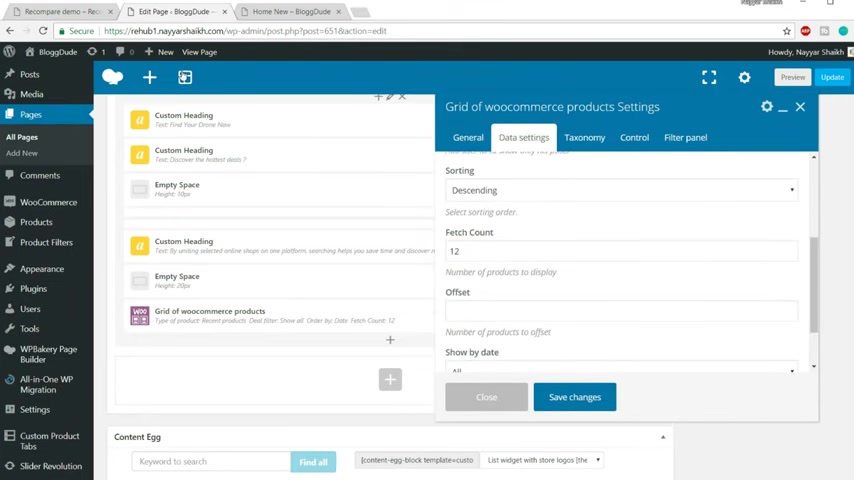
Now data source category show filter all data settings fetch , count the number of products you want to show .
For example , here it is 1234 and actually it is five and five .
So we have two columns , five product at the 1st 15 product at the bottom , which is total 10 .
So we can type in 10 over here .
Now , control number of columns you want .
So we want five columns .
As you can see , we have 12345 columns over here .
So we will select five product page which is fine filter panel .
Now we have to enable this , this is the most important step in this widget .
The first one is by default , show all if you want to see some settings regarding this , you can click on this button toggle row and you can change the label or the title .
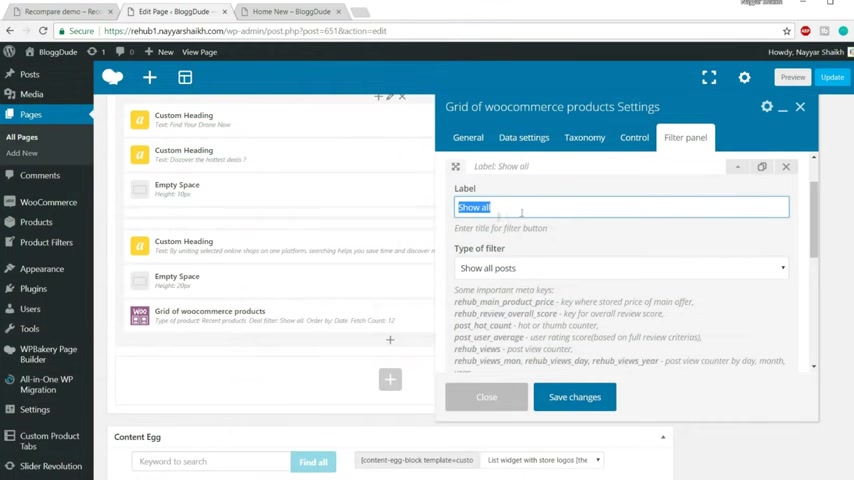
For example , here it says show all so you can change this label or if you want , you can have this label .
OK ?
So we have show all type of filter .
So we'll select , show all post or you have some different .
So because it is showing all the post , we'll select , show all post over here and we'll minimize this .
Now let's click on add new and let's add this one product under $100 ok ?
So now again , expand this one and type in the title under $100 .
Now we have to select the type of filter .
OK ?
So this is very important .
Now , sort by price range , we can use this one price range and we have to put in the price range we want over here .
So we want product under $100 .
So we'll type in 0 200 .
So 0-100 .
This will do the work .
Now we can minimize this thing .
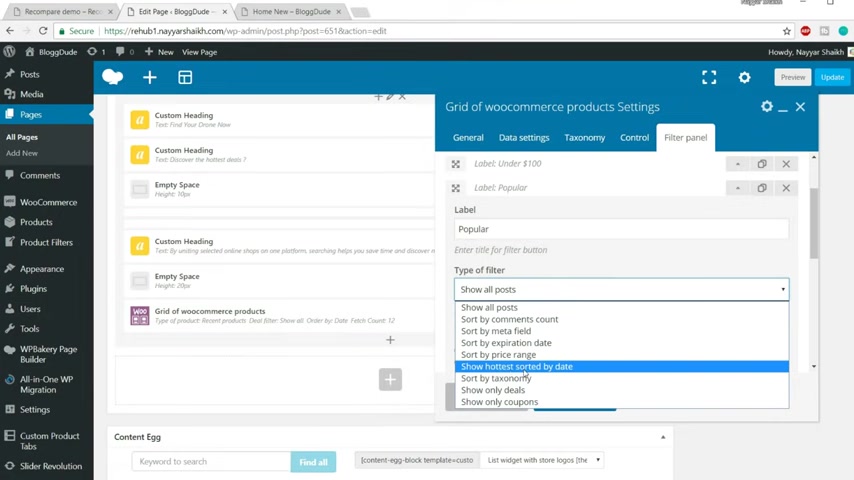
The third one is popular products .
So again , we can click on this plus button .
Now maximize this and in the label , we can type in popular .
So all products know we want to select to , let's see which one we want to select this one show hottest , sorted by date .
This will give us the popular products .
So select this one and rest .
Everything is fine .
So similarly , you can have many different tabs and you can have multiple tabs over here .
So let's add three tabs and save changes .
And let's see what happens whether this thing looks nice or not .
So click on update , come back to this page .
Let's refresh it .
OK ?
So we OK .
So we have the thing over here .
We have three different tabs when we click on this under 100 .
So we don't have any product under $100 .
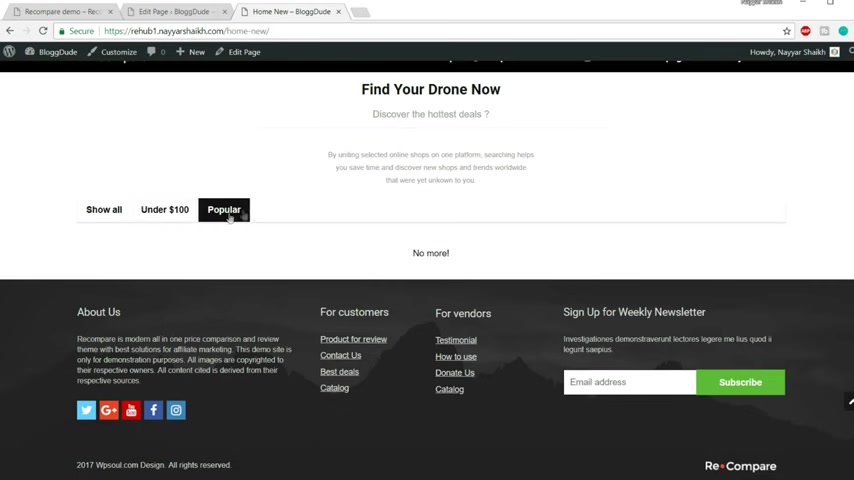
So that , that's why we are not seeing anything .
Now , let's click on popular now , there is nothing unpopular as well .
And the reason is very simple because we have created all the products just now and it takes some time for the algorithm to read all the products and to select the popular products .
OK .
But after some time , it will start showing everything .
Now , when you go to show all , you'll see all the products over here .
So this thing is working and this is really looking nice .
Now , let's see what we have next .
So after that , we have this thing .
But before that , let's add some gap at the top .
I think we are , we are missing some gap below this button below this next button .
So let's add maybe 20 pixels .
OK ?
So let's copy this 20 pixels , empty space and put it below this one and click on update .
And after that , we have this section .
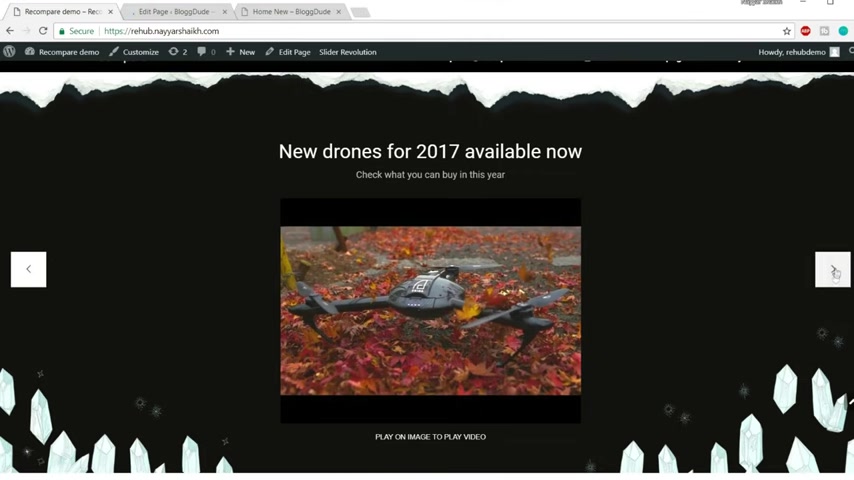
Now this is not , you know , created using the visual builder or the page builder .
This is actually a slider .
If you see we have this slider , we have all the animations going on .
So this is created using a slider revolution .
So let's see how to do that .
It is also very easy and very interesting .
I love creating sliders , especially using slider revolution that is a very beautiful and very nice plug in .
So let's come back to our home page or to our dashboard .
And from the left hand side , you will see slider revolution click on that .
We don't actually have to create this slider because it is already created .
This is the one video youtube slider .
You can just use this one , but I'm creating one because I want to show you guys how to do that .
We can just , we just cannot use the default one .
I want to , you guys to learn how to create a slider so that you can you know , create your own slider according to your choice .
OK .
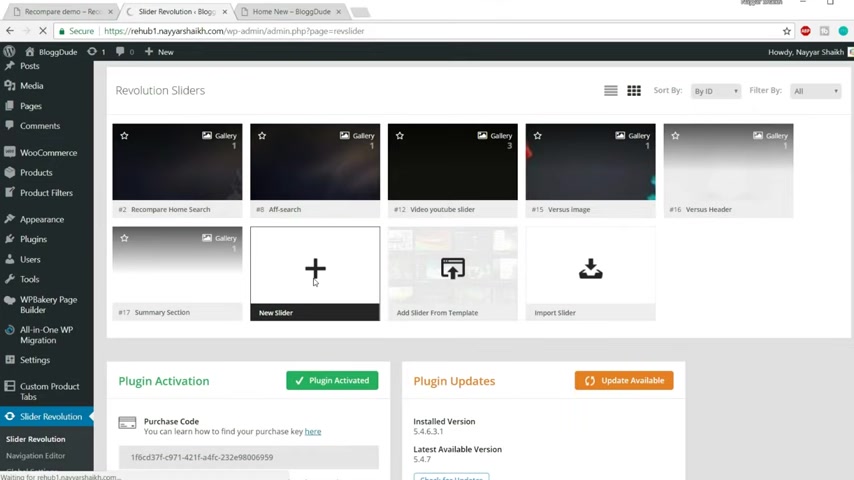
So to create a new slider , first click on this button which says new slider .
Now first make sure default slider is selected from the first step and the second step , you just have to name it anything .
So I'm just naming it a home page slider .
Maybe I'm just naming it home pit slider .
You also have to give the same name .
After that , we have , what kind of slider do you want ?
So we want standard slider , then slider layout , there is auto , full width and full screen .
I want the full screen one .
Now , what is that full screen ?
If you see the demo website , when you go to the slider section , if you you see that the slider is covering the full screen , OK ?
It is covering my full desktop screen .
OK ?
So that is what full screen means .
Now we have to edit some data from here for this desktop size .
The size is perfect , which is 8 68 pixels .
But for notebook , I'll have to adjust this size .
I think it is fine .
7 68 for tablet to it is ok .
So all the sizes are fine .
I guess you don't have to do any changes .
Please ignore that dog parking sound from outside .
I know that is disturbing , but please ignore that .
Ok , let's move forward .
So everything is fine over here , we just have to do one setting .
That is the navigation setting .
So select navigation from here and enable rows .
Because over here if you see we have this rows working , you know this forward and backward row .
So we have to enable it .
So it is under navigation .
First option enable rows just make this thing on and click on save settings .
Ok ?
So all the settings are done .
Now it's time to start creating this slider .
So this is the canvas .
Let me do one thing .
Let me you know , decrease the size of the browser so that you guys can see everything more properly .
Now , I don't know whether you can see or not this too thin line , blue color line .
Now make sure whatever content you put over here , all those things fall under these two lines or else the user will not be able to see those content .
Ok ?
So first let's see what we have .
First , we have a background color .
As you can see there is some different something like black kind of background color in to the slider .
So let's add a background color first .
So to do so scroll up and here we have , where is that background type and select this colored one ?
Let me zoom in again .
OK .
Background type type color and select the color from here .
Now I'm entering a new color .
You can just select any color from here .
You can select red , blue , whatever you want .
I have a , you know , and if you see any color , you can see the changes at the background .
Now , I have a specific color type .
So what I'll do , I'll type in that code which is 15 10 , 10 .
OK .
So this is the color which want and this is the color which is used in the demo website .
Now click on OK .
So we have the background color .
Now after that , let's see what we have .
After that we have to put in this image .
This is actually an image .
Let me show you let's right .
Click on over here and let's type in , let's click on this .
It says open image in a new tab .
Now , as you can see , this is just an image which is at the top .
Now , this bottom thing is also simple image .
OK ?
Let me show you just right click over here and select open image in a new tab .
And as you can see , this is also just image OK ?
So we have to just put in this image at the top and this at the bottom .
So let's do that .
Camo first click on add layer and select image .
Now this image will be there on your website .
So let's search for that one .
I don't know which one is that .
But let's search , let's see .
Is this the one I think ?
No or maybe yes , I think .
Yes , this is the one .
No , this is not the , I don't know .
OK .
OK .
OK .
OK .
Yeah .
This is the one R IP over .
The name of the image is R IP O dot PNG .
This is the one selected click on insert .
Oh Yeah .
Here it is .
And just drag this thing .
Let me again zoom out and drag this thing accordingly .
OK .
Find .
Now we want to add that image at the bottom .
So let's search that image also .
So again , click on add layer image .
Now let's select the second image .
Now let's scroll down and this is the one the image name is crystal dot PNG .
Select that click on insert here it is .
Let's drag it to at the bottom .
Let's decrease the size of this image .
So you can just is the size more .
OK .
Let me use it fine .
This is looking much better .
So we have the crystals we have this , I think we need to increase , decrease the size of this one as well more a little bit more fine .
So we have both the images now and after that , we have this title , whatever title you want .
So here it says new DG I , whatever you want .
So I'll put in my own title .
Come over here , click on add layer , select text or html and put in any title you want .
So I'll type in because we have created iphone .
So let's type in iphone seven per rose gold , fine and let's increase the size .
So to increase the size you have font size , let me zoom in again , fine .
So we have the font size and line height over here .
So let's increase the font size .
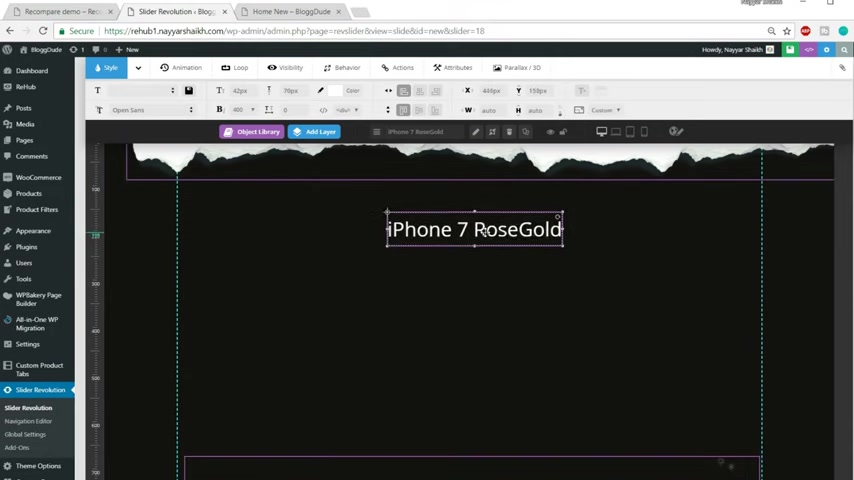
So let's increase the font size maybe to 42 pixels and line height to anything you want .
I'm putting 72 pixels fine and let's put it at the middle in the middle over here and this is looking much better .
This is the title and after that , we have a subtitle as well , which is check what you want to buy in this year again , click on add layer text and I'll just type in , check out the new iphone .
Although this is not the new iphone obviously .
And again , let's change the text , font size and line height .
Let's make it to 2020 and uh let's bring it over here .
And after that , if you see we have a video over here .
So let's add a video add layer and select video from here .
Now we have to put in the youtube ID or URL .
So let's search for a video on that .
Let's go to youtube dot com .
Let's search for iphone seven rose gold .
Here it is .
Let's copy this video , copy , video link address and paste it over here and we just need this thing .
OK ?
The ID , let me zoom in a bit .
We just need the ID .
So we , we have , we can delete all these things and we just had the ID till here .
Fine .
Now you can click on search and you'll find this video and rest .
Everything is fine .
Just go to settings and allow full screen so that anyone who wants to see this video in full screen , they can see it and click on add this video .

Now again , let me zoom out and let's OK .
So this is how the video looks .
We can put this video in the middle and at the end we have some text at the bottom which says click on the image to play the video .
So again , let's click on add a new layer text or html type in the text , click on the image , play the video and let's bring this thing at the bottom .
OK ?
So everything is done .
Now , main things are done after this 1st 1st , let's save everything so that we don't miss any changes , save changes .
After that , we have to add some timing to this because if you see , oh here there is some animation going on as you can see when the new thing comes .
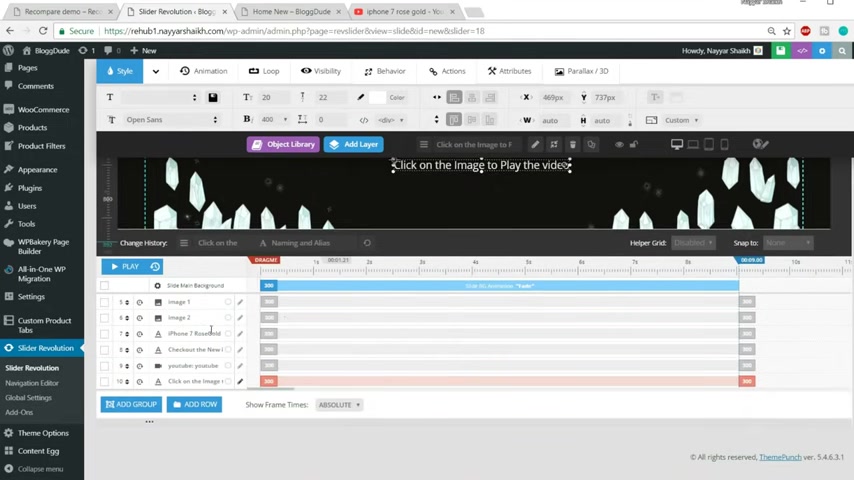
First , the title comes , then the subtitle , then at the end , these crystals come OK , you can see it again , title subtitle video , then the crystals .
So we have to add some ti timing to this .
So again , let me zoom in a bit .
First one is the title .
So the title is this one iphone seven row gold .
So first the title comes so you can put in any timing to this one if you want .
So I'm putting uh maybe let's start with the images first .
Let's add this image .
So you can click on this image , go at the bottom and you will see this image .
One is selected .
So this is the one so you can click on this edit button .
So when does this frame start or when does this thing start ?
So if you put in 1000 then it will be one second because 1000 milliseconds is equal to one second .
So here I'm putting in 100 milliseconds which is 1/10 of a second .
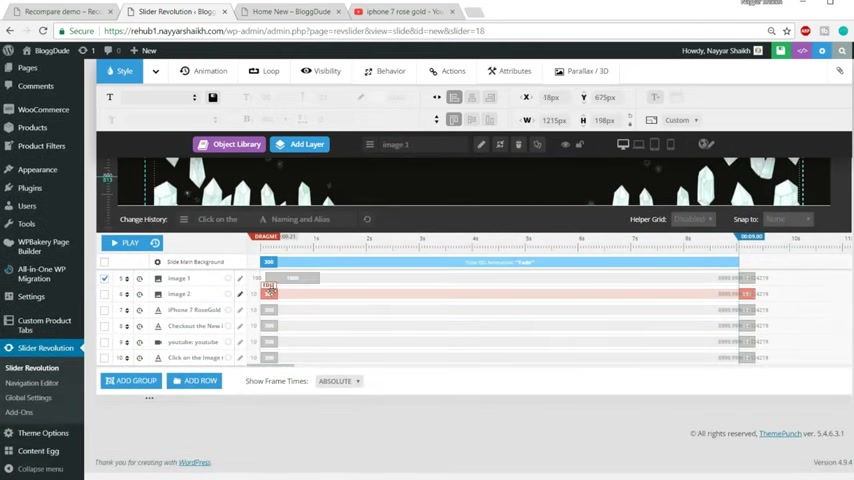
And duration will be again just 1000 seconds which means one second .
Now what is this duration ?
Duration is the animation duration ?
How long the animation should go on ?
OK .
After that , we have the second image which is the bottom crystal image .
So let's select that one .
Now click on edit .
Now , I want the crystal image to come at the last .
So I'll select 1500 milliseconds and I want the animation of the uh this image should also be a long lasting .
So I'll select two seconds which is 2000 milliseconds .
And also if you notice over here when this thing disappears , there is some animation for disappearing when this thing will disappear .
As you can see , the crystal goes at the end , I don't know whether you noticed or not , but that goes at the end .
So let's come over here and click on this edit button .
And now this is the last duration .
This is the duration when the animation ends .

So I want 1500 milliseconds , which means after these sliders changes .
After this first slide changes , I want the animation for 1.5 seconds , you guys will understand what I'm doing once we do all the settings , don't worry , click on .
OK .
First , then we have the title .
When do you want the title to come ?
So I want the title to come at maybe one second .
And I want the animation to be very quick .
So I want it 500 milliseconds which is half a second .
After that , we have the subtitle .
I want this subtitle to come after the title .
So I'll select 1200 .
OK ?
And the duration , this also will be very quick , 500 milliseconds .
So what I'm doing here is first , the title comes then the subtitle .
Now you can see a very short , you know , demo , you can click on this play button and you can see , let me zoom out again .
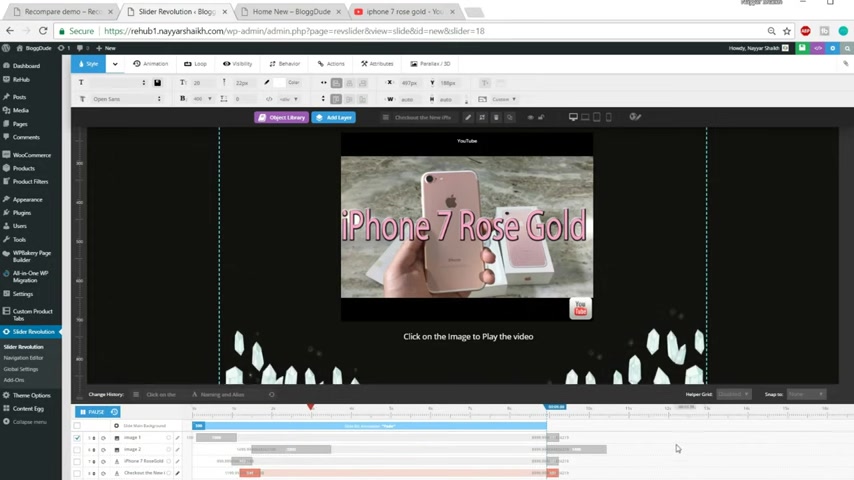
Now if when I click on this button , you can see first the title comes then and at the end , the crystal comes OK .
This is what happens .
So this is all the animation game again .
Let's see first .
The title will come .
Just , just keep on seeing first the title will come .
Then the subtitle at the end , the crystal will come .
Let me show you again .
Let me play this video title subtitle at the end the Crystal .
OK .
So that is what it means .
Let me zoom in again .
OK .
So that's why we are setting timings over here .
Now we have the youtube video .
When do you want the youtube video to come ?
So let's select this .
You can select any timing .
So I want this video to come at one second .
Animation should should be very quick , 500 milliseconds and last the text at the bottom .
So I'll select that .
I'll click on edit again .
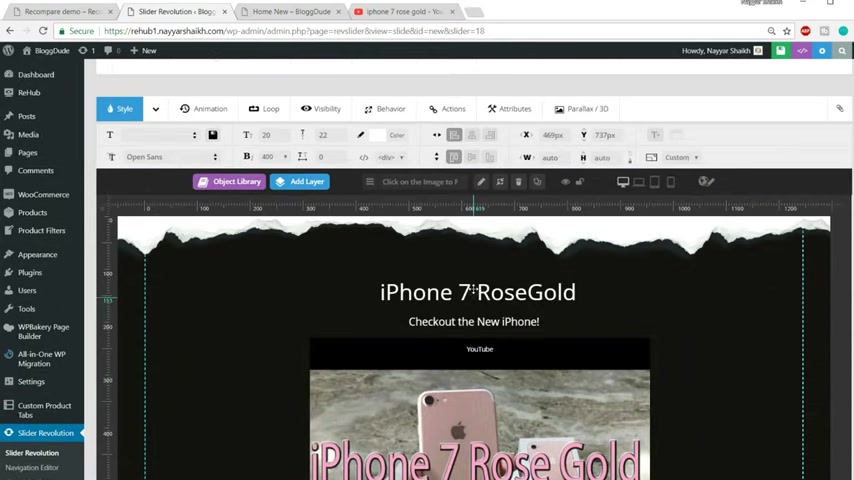
I want this to come at one second and animation will be very quick .
Fine .
So we have the timing now , we can change the animation .
For example , when you click on this title and when you select animation , you can see by default , fade in , animation is selected for everything , but you can change the animation instead of fade in , you can select something like letter fly from bottom .
Let's see how the animation looks .
Now the animation has changed .
OK .
So you can select , click on all these things and you can change the animation for everything .
So this is how you do these settings .
Now , I hope this is clear , you can change the animation and everything will be done .
Now , this is it and click on save slide .
Now just notice one more thing and remember one more thing .
These are the changes for desktop .
This thing will look totally different on a smartphone .
If you see , oh here there is an icon for a smartphone .
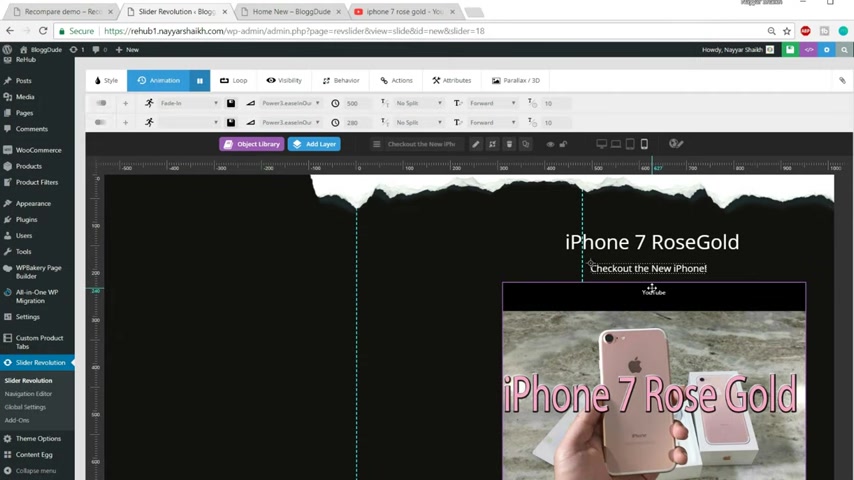
When you click on this now your your slider is looking terrible .
Now you have to adjust everything according to smartphone .
I'm not doing that because that will take a lot of time .
I need another video one or two hour video just for the slider revolution plug in .
It is so deep but I'm just showing you so that you don't do this mistake .
For example , this is cell phone so you have to drive this thing under these blue lines .
Everything .
Take take this video also and you have to decrease the size of the video .
OK ?
So you you click on this and you have the size of the video .
When you go to when you double click on this one , you will get two sizing and I think where it is OK .
I think of , I think we have to decrease it from here .
OK ?
Yeah .
From here just decrease it from here fine .
OK ?
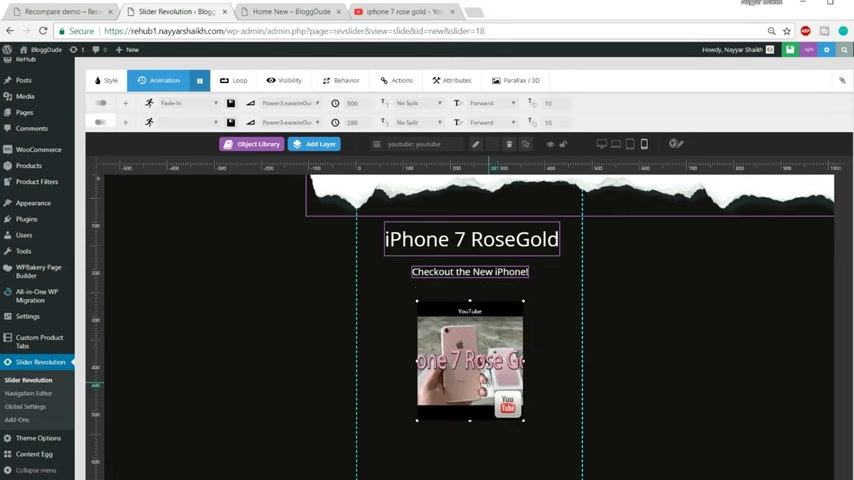
So we have to decrease the size of the video .
Also according to the mobile , you have to decrease the size of the image .
OK ?
Let us let me do it decrease the size of the image and put it at the top and also the image at the bottom .
Here it is decreases size as well .
Let me do this .
OK .
This is OK .
Here it is .
OK .
So make sure you see all these settings .
Now this is how it will look on a cell phone .
Let's play it .
OK ?
You can see the animation .
So just make sure you don't miss this thing and also select the this one , the tablet and laptop and do all the settings respectively .
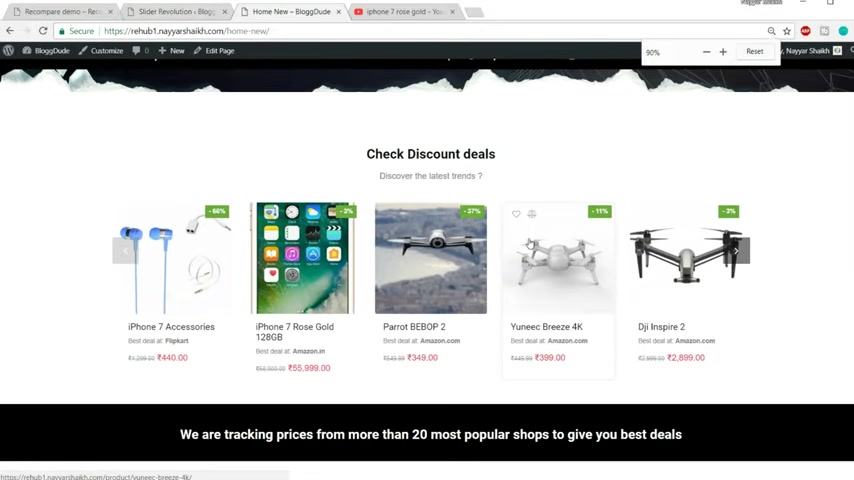
After you do all these settings , just click on save slide .
Now come back to this page and let me first zoom into normal fine .
This is the normal settings .
Now we have completed till here .
After that , we have to add this slider which we have just created .
So edit this page in a new tab and let's get rid of this one .
Now let's scroll down to the bottom .
Now click on this add button , search for slider revolution , select this one revolution slider and select this slider which we have just created , which I think this is the one home page slider , click on save changes , click on update , come back to this page and refresh it .
OK ?
So this is how your slider is looking at present fine .
So this is how it looks .
Let's see what we have next .
After that , we have the last section , OK ?
We have these title subtitle , then we have the posts .
So let's do that .
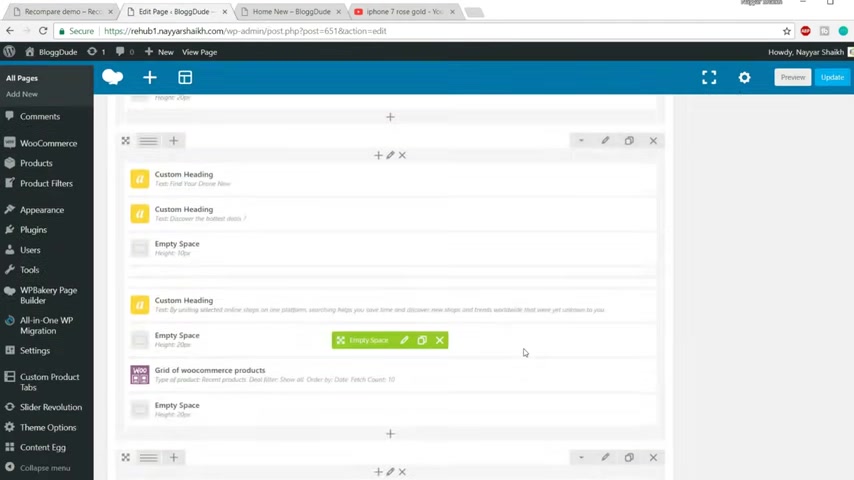
Come back to this page .
Scroll down .
We have seen already how to do this slider sub .
We have already seen so many times how to put that heading and sub .
So we'll do , we won't do that thing again , we'll just add this news heading and this post .
So first click on this plus button and search for news and select this thing new sticker .
Now label what should it say ?
Now here it says news as you can see , it says news .
So type in news over here category name , which is the category name which you want to show over here .
You have to type in the category name .
For example , here it is drone news , OK ?
The category name is drone news .
So I'll type in drone news .
Now , this is the category name for the post or the reviews which we have created .
OK ?
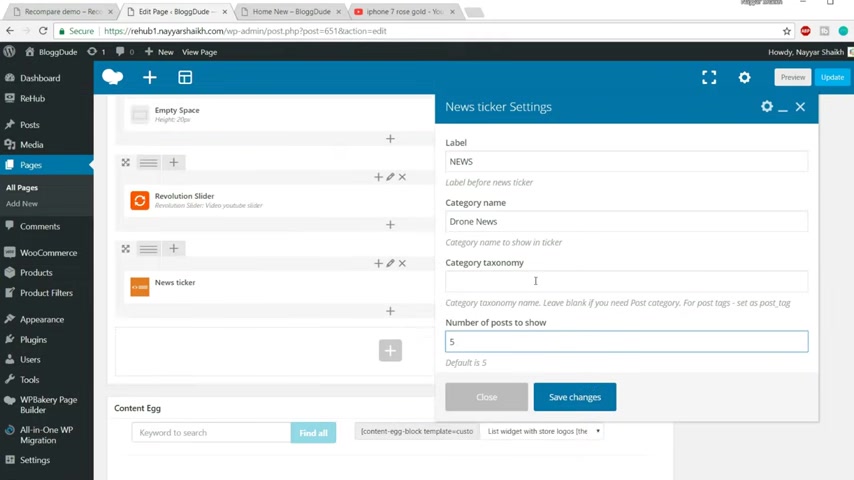
So make sure you put this name over here , number of posts to show , you can select five , you can increase or decrease the number and uh now click on save changes .
This will add the tier new sticker and after that , we have this post .
So let's add that again .
Click on this plus button and search for post and I think it was , let's see , this is the one post grid in columns .
We have to select this one post gride in columns category or tag what you want .
We want categories and you can select any specific type category to show over here .
Uh You can exclude some category to , to be shown over here .
It's all up to you .
You can exclude some tags or you can include only a few tags .
It's all up to you .
You can , you have all the controls over here .
Fine .
So we don't have to do much changes over here .
Just click on save settings and click on update .
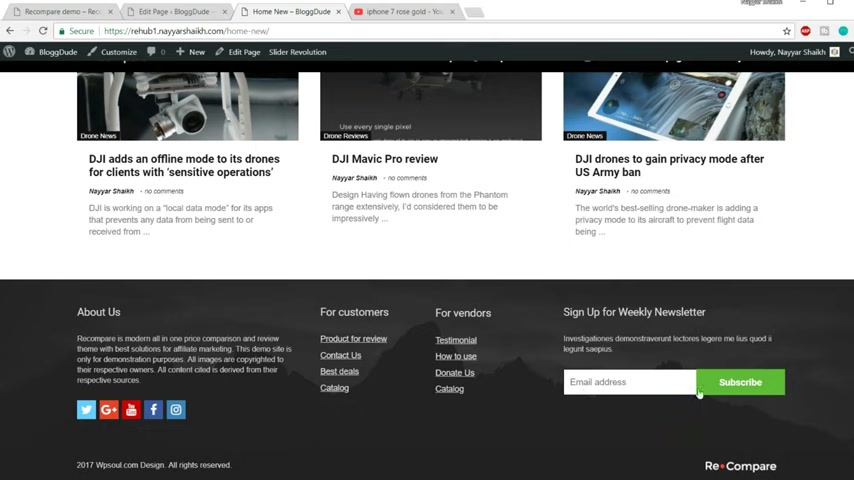
Now , come back to this page and let's refresh it .
Ok ?
So we have these things over here , ok ?
We have six different posts .
And after that , let's see how to change all these things .
We have to change the food section .
For example , instead of uh this thing , we want to write something about our own company instead of all these different links , we want our own links and we have to change this newsletter thing over here .
Ok .
So let's see how to do that .
Come back to this page .
And now from the left hand side , you'll see appearances , however , appearances and click on widgets .
And first one is footer widget one at the , at the top , you'll see text which is about us .
Now , this is the one which is used over here .
Ok , about us the title and after that , we have some text .
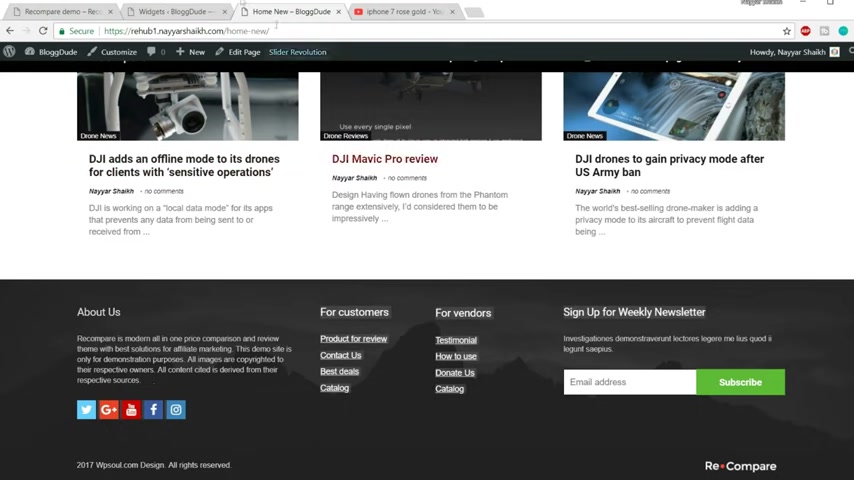
Now suppose if you want to add in your own text , then you can just delete this text which is recomm compare this more modern all in one price comparison blah , blah , blah .
And you can add in your own text about about your own text .
OK .
So this is footer one .
Now we are footed too .
Again , it is the same thing .
It is simple text .
You can see this .
We have some text over here uh product for review and all these things .
Instead of this , you can add your own uh links over here .
It's all up to you .
OK ?
You , you can delink , you can remove the link , you can select this thing and you can link it to some different page and so on .
It's all up to you .
Click on save if you're satisfied .
Now for this , this also is same , same link is a very simple thing .
Now this is something different and we have to see how to do this .
So let's see how to do that .
Go to photo three .
OK ?
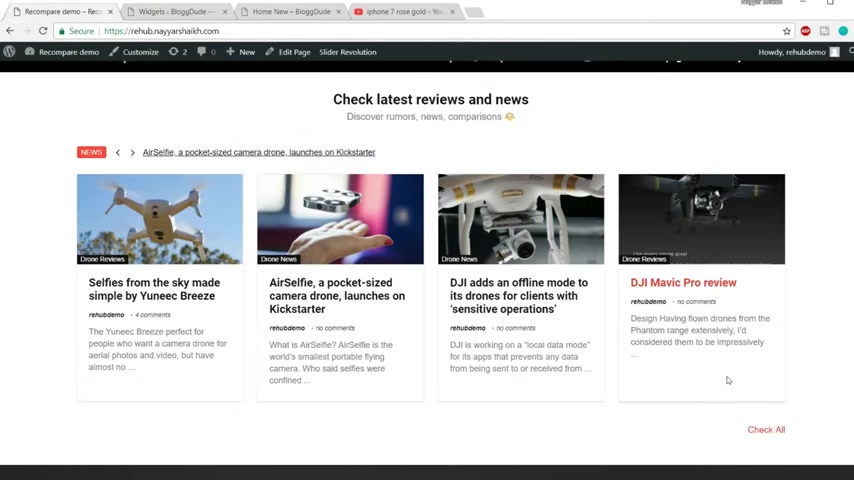
Firstly , if you want to change the text from here , it's here .
It says newsletter , sign up for weekly newsletter and all this text .
If you want to change this text , select the first one and change the text if you want .
Now , the second one is the most important , which is the custom STML .
You have some code over here .
Now we have to change this code .
Ok .
So this is integrated with mail chimp .
So go to mailchimp dot com .
And if you want to learn more about mailchimp , you can go to my channel and I have a video on uh you know , email marketing , free email marketing using mailchimp .
I recently uploaded that I guess .
Ok , I think that is gone .
Uh I uploaded it more than a month ago .
So .
Ok , let me see .
First , I'll try to give this link in the video description below .
Here is the video two months ago , free email marketing , mailchimp tutorial .
You can watch that video one hour long video to understand more about mail chiam .

Ok , so come back over here , click on login if you don't know more about email marketing or mail , go watch that video , everything will be fine .
Ok ?
Or you can just follow my steps .
I have already created an account .
So that's why I'm logging in .
If you are not created an account , watch that video , learn how to create an account , how to create a list , how to build a form and everything , then you can follow the tutorial .
Ok ?
Or you can just watch it and you can come back later on and you can do this step .
Now , we have to change this thing because this is the default things and we want , when someone enters their email address , we want this email address to be collected by my account .
So it is very simple .
Go to lists and select any one of the list you want or you just create a new list .
So we I'm selecting this list in a year .
There are three subscribers at present .

Now , what I'll do is I'll select this list and now go to sign up forms and go to embedded forms .
Fine .
Now , here in the , in this uh text code , we , we are searching for some code .
Now let me show you an easy way .
Go to super slim .
OK ?
So it will be more easier to find the code .
Now , here it is a form action .
OK ?
This is the code we need so select the form action and we need this much code , everything that is under this thing , OK ?
This much good under everything form action , select this control c copy it , come over here and replace this with this one .
OK ?
Now zoom in and try to see what I'm replacing .
OK ?
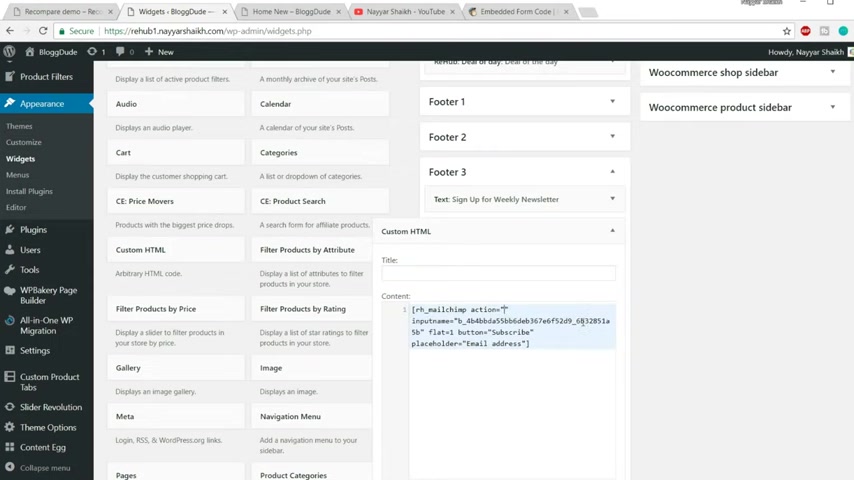
Select this one , delete it and under action , paste it , you paste in your own code which you copy from here .
OK ?
Now click on save now come back to this website .
Refresh it .
Now let's see whether it is working or not .
Now let's put a new email address first , let's go to our list .
OK ?
As you can see we have three subscribers .
Now once we put the new email address , uh the subscriber should increase .
So OK ?
So I'm putting some random email address , clicking , unsubscribe .
OK .
So if you are subscribed , let's see , it becomes four or not .
Let's refresh the list .
OK .
Now , as you can see it has become four , which means this is working .

So we are successful .
So the footer section is also done .
Now , let's see what is left .
I think this is left .
Now the bottom footer .
Now we have to change this thing WP soul dot com and we have to put in our own name .
We , we also have to change this logo from here .
We want to put in our own logo .
So come back over here and at the left hand side , you'll see theme options , click on theme options .
Now from here , select footer options from the left hand side and this is the footer image .
If you see over here , the footer image , this is the one used .
You can change it , you can remove it and you can do it anything you want .
And this is the footer text 2017 .
Now it is 2018 , 2018 and it is not WP So I'm putting my website name over here , blog dot dot com design .
All right , reserved and you can put in your own logo instead of this logo , you can upload your own logo over here .
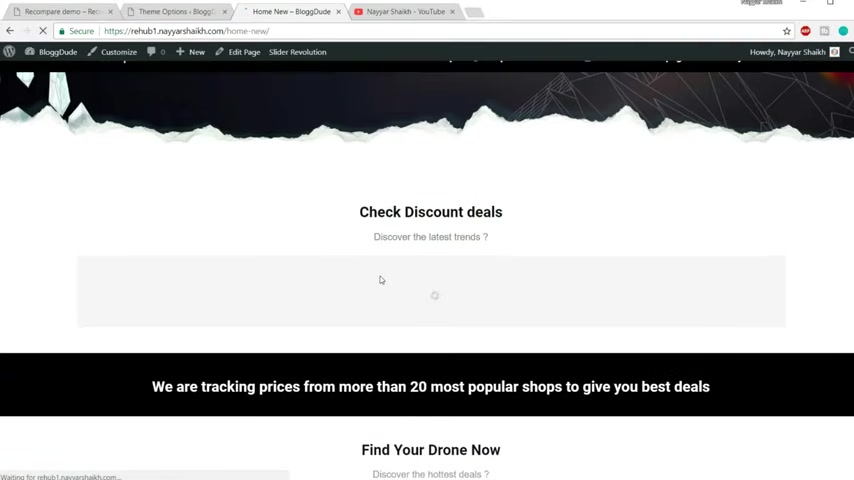
So I don't have any logo to upload now .
So I'll , I'll just leave that click on save changes .
Come back to this website , refresh it .
Let's see the changes come at the bottom as you can see 2018 block two dot com and all these things .
Ok ?
Now let's see how to change this menu .
So again , come back with your power appearances and click on menus .
Fine .
So we already have one menu over here .
If you don't want this menu , what you , what you can do is you can just tick unti this thing .
Primary menu and click on save menu and let's add our own menu .
Let's create a new menu for us .
So click on this , create a new menu and let's name it anything .
So I'm naming it new menu .
Click on create menu and make sure to tick mark this thing primary menu only .

Then it will become your main menu and it will show up over here .
Now , let's see what all page we need over your first thing is we need the home page .
OK ?
Then we need the my account page , the shop page card page and all the pages which you need my wish list page and click on add to menu and you can adjust it .
And according to your choice , click on save menu .
OK ?
Let's refresh the page and let's see the changes .
OK ?
So as you can see , we have home page , my account card , my wish list and so on .
Now if you want to add , you know , cool uh emojis like this one you can easily do .
So I think the website is Emojipedia .
Yeah , it is Emojipedia dot org .
Go there .
Search for one .
For example , let's search for heart , OK ?
Orange heart , beautiful heart , sparkling heart .
Let's select this one sparkling heart and just copy it .
OK ?
Just select it or you can just click on this button which says copy and come back to this menu , select the my wish list .
And before my wish list , just add this heart , click on , click on save menu , come back to your website and refresh it and you have your emoji over here .
So similarly , for all these things , you can add your own emojis .
OK , guys .
So I think this is it for this video .
I hope this video was helpful to you guys .
I hope you guys enjoyed it .
Obviously , there are still a few things left , but I think uh uh we need some different videos .
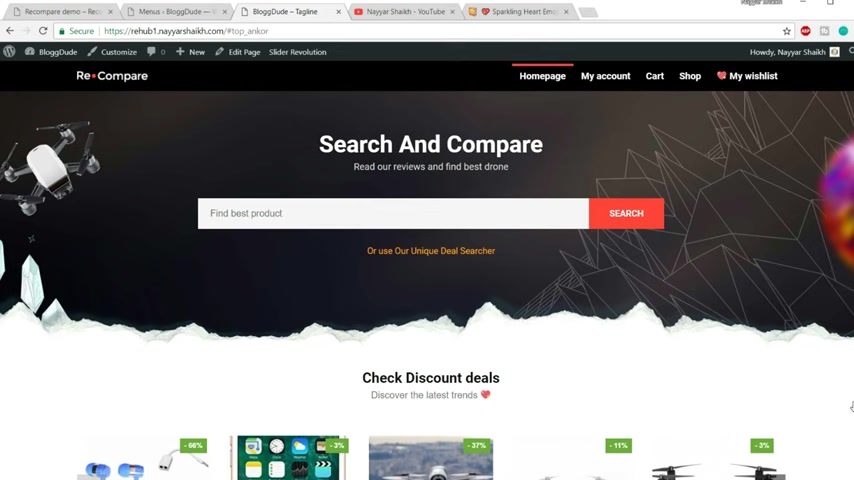
I'll be creating more bonus videos on this particular subject because if we go to cover each and everything , I'll think that will take a lot of time that will take more 34 hours , I guess because it is just , you know , it is really a very vast topic with a very different kind of website .
We can add many different things .
But at the last , don't forget to do a few things first delete all the pages and all the uh demo products which you downloaded .
For example , when you go to products because we have imported the things .
So we get all the imported , the all the products which are imported .
So from here , you can delete all these products and just leave the iphones or whatever product which you have created .
Ok .
So we can , you can select all these products and click on delete , also delete the categories and so on .
If you don't know where you have your category , you have under products , you have the categories , you can just select this thing .
Bulk action delete , click on apply and everything will be deleted .
OK ?
So to make sure you do all these things , this is very important so that you don't have the demo data on your website .
OK ?
And also uh for example , we uh I forgot one more thing .
We created a page called Home New , I guess Home New .
This was the page .
Yeah , this is the page which we created .
Now , this is not yet our home page .
We created our home page , but we have not set this as our home page .
So if you want to set this as your home page , you go to your dashboard and how our settings , which is .
Let me see here it is settings and I think it is under readings .
Click on reading .
Yeah , here it is homepage .
Now select this and select home page new , home new .
This is the one home new and click on save changes .
Now , when you refresh this page , home new things should be gone , which will mean that this page is now set as our home page .
Let's refresh .
Now as you can see that thing is gone .
Now this thing is set as our home page .
So these few things were left .
Uh I think I know there are still many things left , but no , I have to cover them in another video because this video is already a very long video .
So I hope you guys enjoyed this video .
If you have any doubt , any suggestions for me , any request for me , you can leave them in the comment section below .
Please let me know how you like this video .
If you like it , give a thumbs up to this video .
Also click on that subscribe button and also click on that bell icon so that you don't miss any future videos .
Thanks a lot for watching guys .
See you very soon .
Are you looking for a way to reach a wider audience and get more views on your videos?
Our innovative video to text transcribing service can help you do just that.
We provide accurate transcriptions of your videos along with visual content that will help you attract new viewers and keep them engaged. Plus, our data analytics and ad campaign tools can help you monetize your content and maximize your revenue.
Let's partner up and take your video content to the next level!
Contact us today to learn more.