https://www.youtube.com/watch?v=MjlsWI91xvY
How to Create a Website For Your Business _ Step-By-Step with WordPress!
What's up guys ?
Welcome back to another tutorial .
My name is Dale from Creative Pro website .
And in this video , I'm gonna show you how to create a website for your business and this is going to be completely step by step .
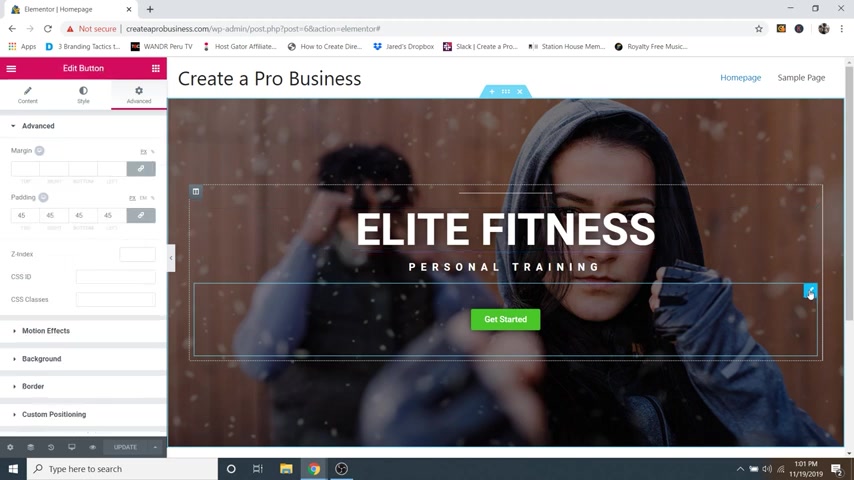
So let's go ahead and take a look at the website that I'm gonna show you how to make .
So this website has an awesome one page design , meaning that all of your sections are right here on the home page and I'm gonna show you how to edit all of them and change all of the colors , all of the text .
I'll show you how to create these hover animations .
I am going to show you how to do an about me section like this .
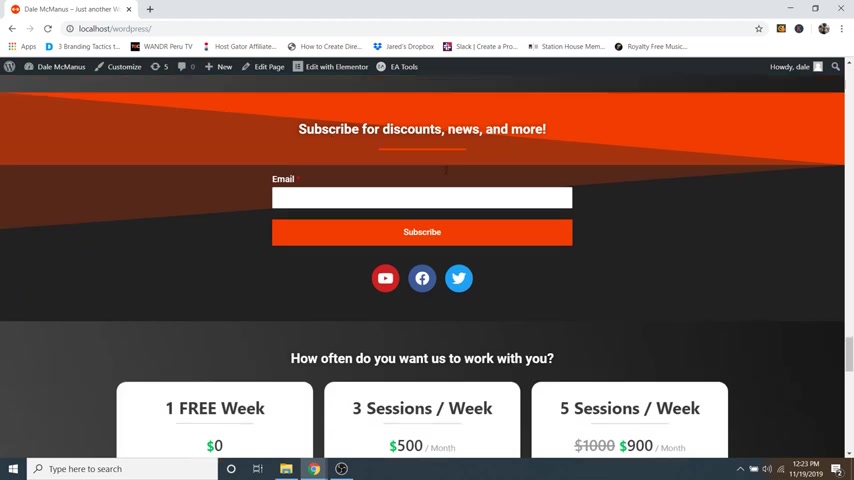
I'll show you how to create blog posts like this and you can even load more and then I'll also show you how to create testimonials as well as create a subscribe so that when somebody puts their email in here , they will be added to your email list in case you want to send out broadcast emails , I'll show you how to create these pricing tables and edit all of them And then I'm also gonna show you how to create an awesome contact form so that people can contact you any time that they need .
And the whole thing is built with an awesome drag and drop software which makes it super easy to design your website .
Even if you're a complete beginner , even changing text is as simple as typing right on the screen .
And I'm gonna show you how to create a logo for your website with a completely free online software .
So you don't have to download anything and it can be done in just two minutes .
Ok .
So hopefully that got you psyched up .
Now before we get started , let's go over a few things that we're gonna need to get during this tutorial .
So the first thing that we're gonna be needing is a domain name and this is your domain dot com and this is gonna be somewhere around $5 .
And this is because I have a special discount code for all of my viewers here at Creator pro website to use .
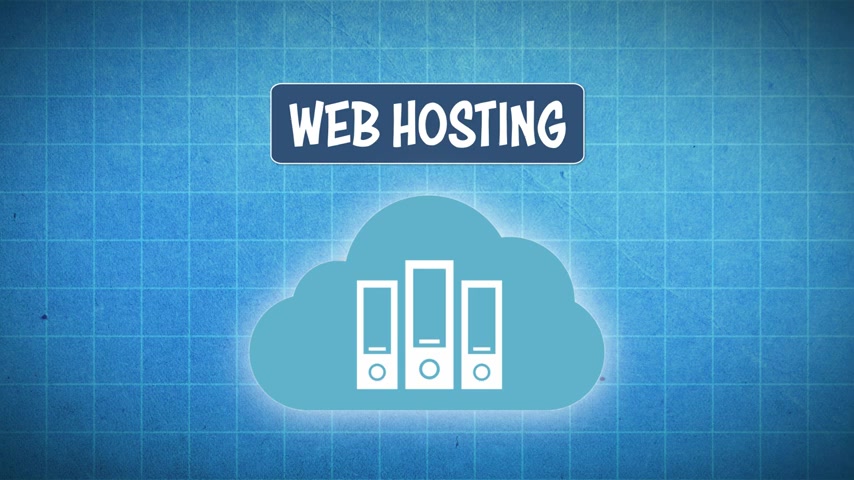
Now , the second thing that we're gonna be needing is web hosting and web hosting is going to be anywhere from 2 to $7 a month depending on whatever plan that you pick .
And web hosting is basically just renting space on a server somewhere that's connected to the internet so that you can fill that server with all of your text , pictures , videos , et cetera .
That's on your website .
And then go live .
And then the third thing that we're gonna be needing is wordpress and wordpress is just the software that we're gonna be using to design our website and Wordpress is absolutely free .
So , going back to the web hosting , I highly recommend having web hosting because otherwise you won't own your website .
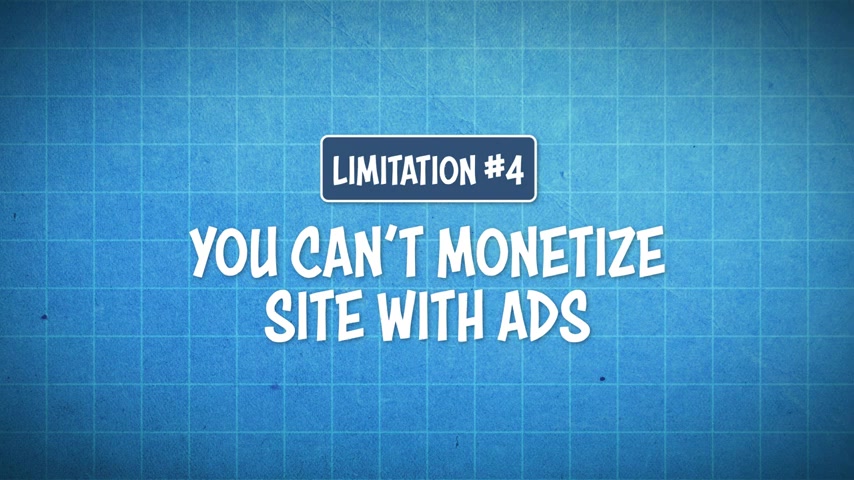
So if you do a free website , well , you're gonna run into a few limitations which are number one , you will not own your domain name .
It will be something like your website dot wix dot com or dot squarespace dot com or whoever is hosting this website for you .
Number two , you can't install helpful plugins to increase the functionality of your website .
Number three , you're stuck to a very limited option of themes and you can't upload new themes to help customize your website .
Number four , you can't monetize your website with ads because you don't own it .
And number five , your website could be deleted at any point if the host feels that you've violated their terms of service .
So what I recommend is getting web hosting because then you own 100% of your website .
Ok .
So with all that said , let's go ahead and get started .
Step .
Number one is to get a domain name and web hosting .
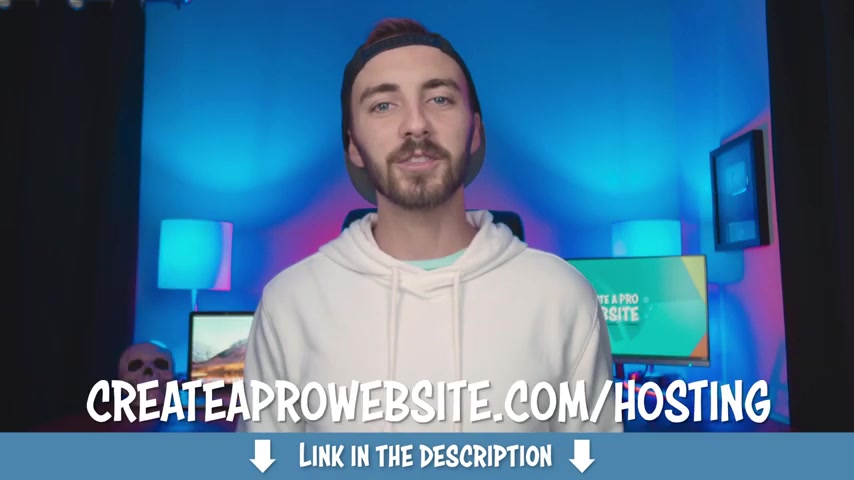
So in order to do this , just go ahead and click on the very first link in the description of this video or you can go to create a pro website dot com slash hosting .
And this will take you to a special co branded landing page that I have with host Gator and host Gator is where you can sign up for web hosting and get your domain name .
And host Gator is fast , reliable and affordable .
I have dozens of websites and I host them all with host Gator .
So as you can see , we've got three different plans here .
Now , we've got the hatchling plan , which is just a single domain and it is my recommendation .
If you're just starting out , maybe this is your first website .
I highly recommend doing that .
And then the baby plan is if you want to do unlimited domains underneath one account , and then the business plan is what I would recommend if you start making a lot of money with your website , but you can always upgrade to that later .
So what I recommend doing is starting out with the hatchling plan and then you can eventually upgrade .
But the hatchling plan is going to be your cheapest plan .

So let's go ahead and just click on buy now .
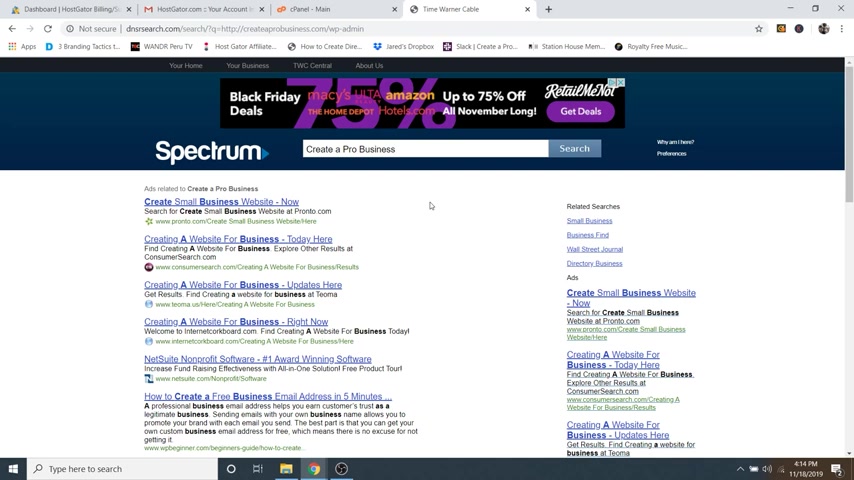
And then here is where you're going to be able to search for your new domain name .
And if you've already got a domain that you want to use , you can just click on the I already own this domain tab , but in this case , I'm going to search for one .
So if it's unavailable , it will look like this .
So I'm going to search for my own website that I already own and it's gonna say sorry , this domain is available or is unavailable in red .
Now , I'm gonna search for create a pro business dot com and I'm gonna buy that one .
So there we go in green .
You can see that it is available .
So make sure that that's checked and then you can also buy one of these , but honestly , these dot net dot online dot space , uh they're not as legitimate as a dot com .
This is a really professional domain here with the dot com .
So I recommend sticking to that .
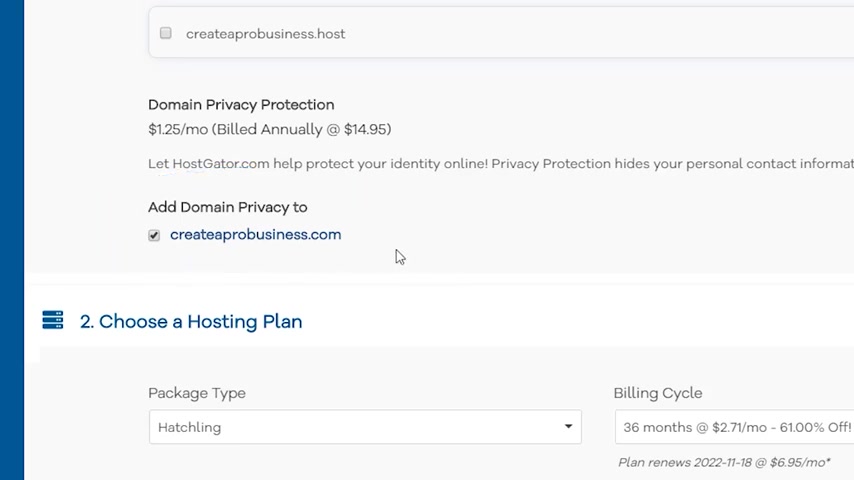
And then you're also gonna want to make sure that you have a domain privacy protection checked because if not , your personal information will be public and then you can get called by telemarketers and spammers that will say , hey , we're going to build your website for you and it's really annoying .
Some of them are legit , but you're gonna learn how to build a website with me anyway , from the comfort of your own home .
So I highly highly recommend adding domain privacy protection .
Otherwise you will just get called nonstop .
I made the mistake on my very first website and I will never make that mistake ever again .
Ok .
So make sure that that's checked and then just scroll down and then make sure that your package type says hatchling , which it does or if you chose a different plan , you can change it here if you'd like .
And then the billing cycle is automatically set to 36 months , which is gonna be your most savings .
Now , you're gonna pay this up front , but it's going to be a full 61% off .
So you're gonna save that much .
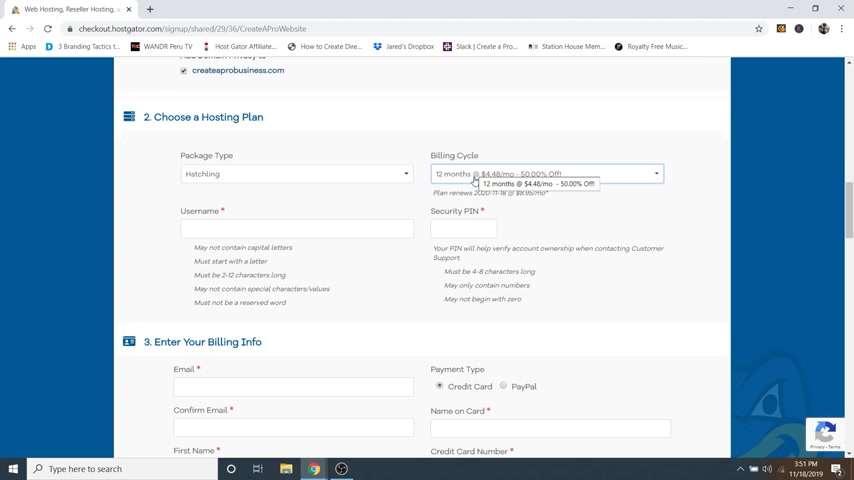
Now , if you just want to go for 12 months , this is my recommendation because you're buying your domain name for 12 months .
Anyway .
So you might as well get 12 months of hosting to go along with it and it's still 50% off , especially if you clicked on that link below the description .
Now , let's just say that you are just starting out .
You just want to get your feet wet .
You're not really sure if designing a website is something that you want to continue doing , then you can always go to the one month and just try that out .
It's still 30% off , which is great .
But again , 12 months is my main recommendation .
But let's just say you're just starting out , let's just do the one month , ok ?
So now just create a user name and then a security pin and then just scroll down and then here is where you're gonna put in your billing info .
Now I've already got an account , so I'm just going to put in that info and it'll automatically go to my account .
But otherwise you can fill in all this information and you can pay by credit card or you can use paypal if you'd like .
So I'm gonna go ahead and fill out my information now and again , I already have an account made .
So all my information is saved .
Now , if you don't , then it will automatically create a new account for you once we check out .
Ok .
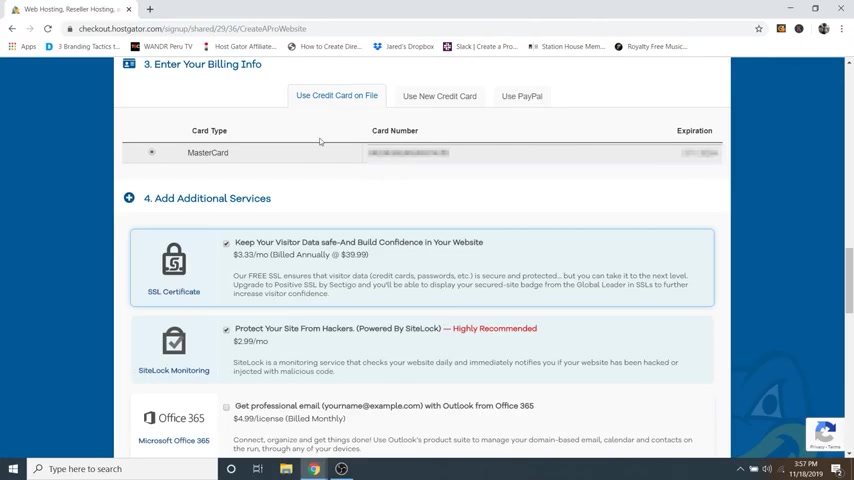
So scrolling down , we're at the additional services .
Now , what I highly recommend doing is uncheck , protect your site from hackers .
Make sure that professional email and back up your hard work are unchecked because I've got videos on my channel that show you how to do this stuff completely for free .
So you do not need to include them in your monthly billing .
So check out my channel for those .
But what I do recommend keeping is a free SSL certificate , which on my screen is not going to show you because I already have an account made .
Now , if this is your first account with host gator , you will get a free SSL certificate , which is this little lock symbol up here that tells everyone that your website is safe and secure .
And I highly recommend this if you're doing a business website like this tutorial .
So make sure that you have that checked .
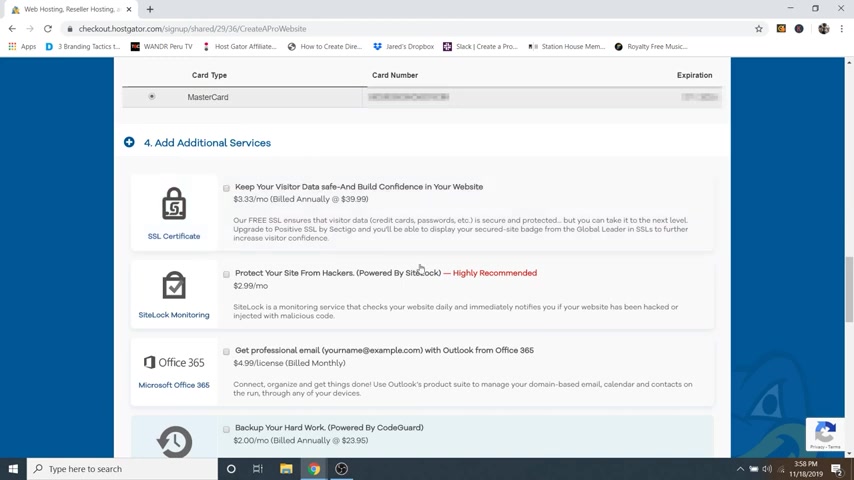
But again , in my case , I'm gonna uncheck it because I've already got an account with that on there .
Ok .
So scrolling down , make sure that your coupon code says create a pro website .
And again , this is my affiliate link , but it does save you a lot of money .
So that is going to bring our domain registration down from 17 99 over to 4 99 as well as our one month of hatchling , brought it down to 7 67 and then the add-ons is just your domain privacy protection .
So all in all grand total of $27 not bad at all .
So we're gonna go ahead and agree to the terms and then just click on .
Check out now .
Cool .
And now it's just setting up your account .
So just give that about a minute .
Ok ?
Cool .
So now it'll bring us inside of our host gator dashboard and your screen may or may not look like this depending on when you're watching the video .
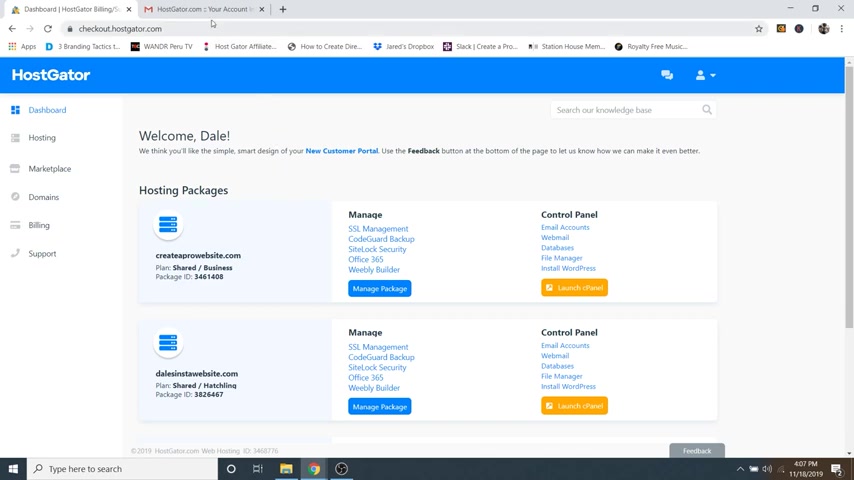
But what we're gonna do is go over to our email , the one that we signed up for host gator with and we're gonna have a recent email that's gonna say your account info and it's from no reply at host gator dot com and it's gonna have a bunch of information to get to your account .
So what I first recommend doing is copying the crazy password here and then you'll see a link that says your control panel .
We're going to go ahead and click on that and then it's gonna ask you to sign in .
So I'm going to use the user name that I created and then I'm going to paste that crazy password in and then just click log in .
Cool .
And then that's gonna bring us inside of our C panel for our account .
And our C panel is where we can uh manage everything with our hosting , which brings us to step number two , which is to install wordpress .
So , Wordpress is the free software that we're going to be using to design and customize our website .
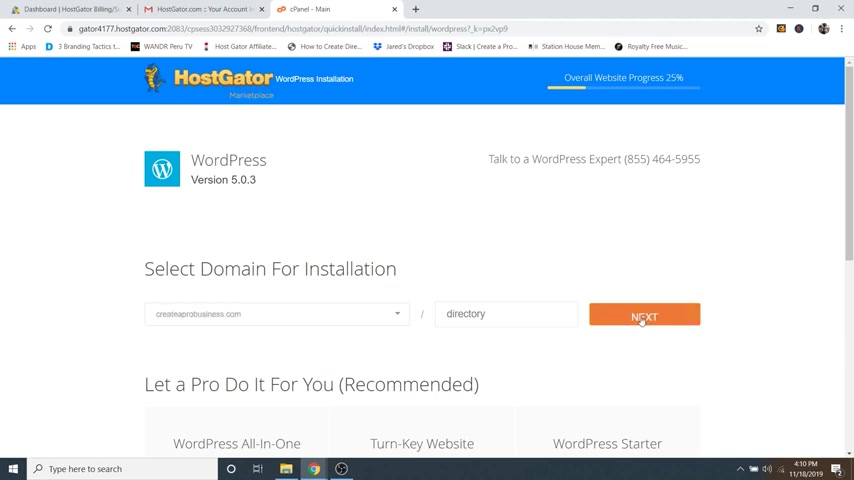
So in order to install it to our domain name , what we're gonna do is just going over to website essentials and just click on that and then you'll see site builder and C MS here , which is also right here and you'll see wordpress right here and it's free .
So we're gonna go ahead and click on that and then you can just select your domain name from the drop down .
So mine was create a probus dot com and then we're just gonna click on next and then just give it a title and then admin user , I'm just gonna put my name and then first name , last name and then email and this is the same one that you signed up for host skater with and then just agree to the terms of service and then just click on install and boom , just like that .
It is done .
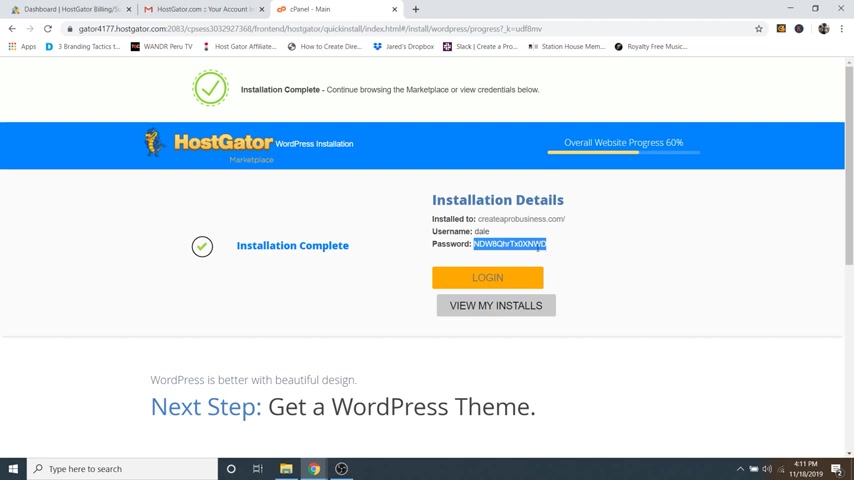
So now what we're gonna be doing is copying this information right here because you're gonna want to save this ridiculous password somewhere on your computer , maybe in your notes because we're gonna need it in order to sign into wordpress for the first time .
And don't worry , I'm gonna show you how to change that password .
So I'm gonna go ahead and copy that now .
Instead of logging into wordpress using the little yellow login button here , I want to show you the right way that you should always get used to signing into wordpress to edit your website because eventually this button is going to go away .
So what I recommend doing is opening up a new tab typing in your new domain name and then doing forward slash WP dash admin .
And this is what you should always use to get to wordpress to edit your site .
Now , it's gonna take us to a page that looks like this because host gator still has to send out your new domain name across the entire planet .
It has to let every system in the world know that hey , this domain name now exists and is registered .
So this process is called propagation and it could take anywhere from 30 minutes to an hour .
Now , they say it could take up to 24 hours .
So if it does take longer than an hour , then just give it time .
But honestly , I've never had it take longer than about 30 minutes .
Usually in about 30 minutes , I can come back and I can log into wordpress , which will look something like this .
So if you see that screen , that means , hey , your website is now ready to go and we can start editing it .
So in the meantime , we are going to take a 30 minute to one hour break and then come back .
OK ?
So we're back and I'm gonna check on my new domain name .
So I'm just gonna type it in up here and then I'm gonna do forward slash WP dash admin and then click enter .
Awesome .
So now it is working and we can log in whenever you see this page .
Ok ?
So I'm gonna go ahead and type in my user name and then I'm going to paste that ridiculous password from earlier into here and then just click on log in .
Cool .
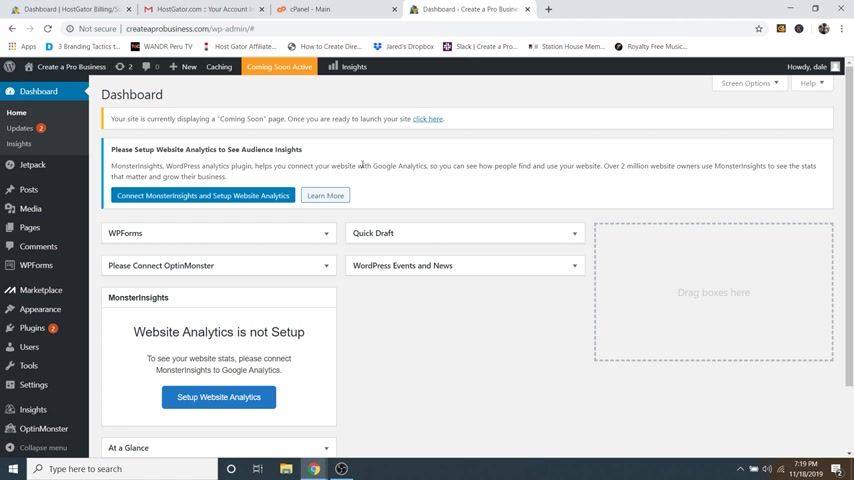
So now we're inside our wordpress dashboard and it looks a little crazy .
So we need to make sure that we clean this up and make it a little bit less daunting .
So just go ahead and just start exiting out of all these windows that you see , dismiss them , et cetera .
Cool .
So that looks a lot better .
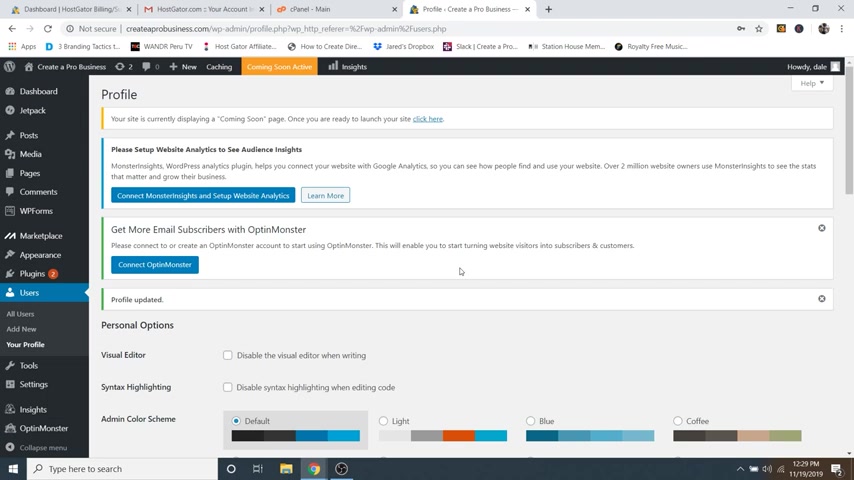
So now let's go ahead and change that password .
So in order to do that , you're just going to go over to the left hand menu here and then just go to users and then go to all users and then just click on your name and then just scroll all the way to the bottom and then you'll see new password .
Just go ahead and click generate password and then we're gonna delete that crazy one that it gives us .
And then we're gonna put in our new one , which is going to be something that we're going to remember like that and then just go ahead and click update profile .
Cool .
So now we can move on to step number three , which is to install a new theme .
And the theme basically just determines the style of your website .
So some of them determine the overall style of the entire home page while others are really just focused on the header and the footer , which is what we're gonna be using because we're gonna be getting a page builder that we can drag and drop and design our entire home page .
So I'll show you how to do that next .
But first , let's go ahead and get the theme that we're gonna be using for this tutorial .
So in order to do that , we're just gonna go on over to appearance and then go to themes and then here you can see all of our installed themes .
Now , if I go to my website , I can show you what that looks like .
So if you just go up to your website name up here and go to visit site , I'm just gonna open that up in a new window .
And as you can see our theme is super boring , super plain .
So let's go ahead and exit out of that .
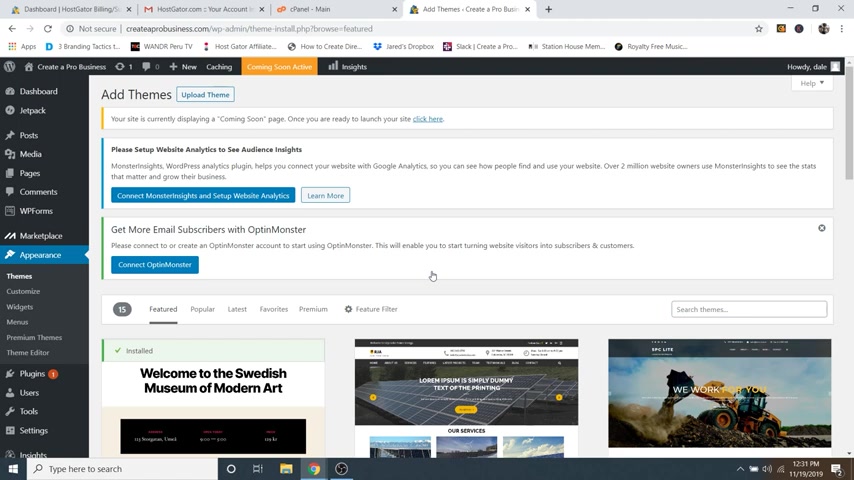
And we're gonna go down here to add new theme and then you can see there's a search bar over here on the right and we're gonna go ahead and type in Astra Cool and then you can see it right here , the Astra theme .
So we're gonna go ahead and click on install Cool and then just click on activate .
Cool .
So now that we've got our theme , we can move on to step number four , which is to install plugins .
So we're gonna need a couple of plugins and the main one is going to be our page builder plug in .
This is what's gonna allow us to drag and drop and design our website and it's gonna be super easy , especially if you're a beginner .
So let's go ahead and grab that first .
So if you just go on over to plugins and then just go over to add new and then again , just like the themes , you'll see a search bar over here on the right and we're just gonna type in to just like that and then you can see element to our page builder right here and it's got 3 million active installations and five stars .
So it's pretty awesome .
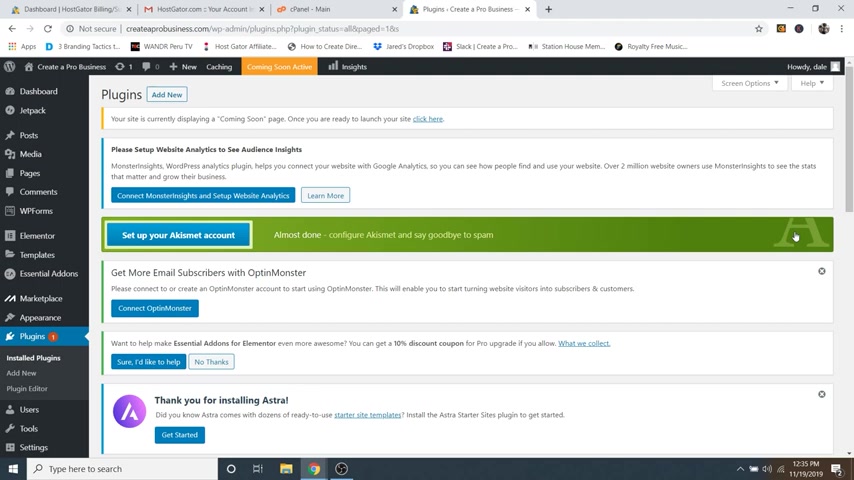
So we're gonna go ahead and click on install now and then just click on activate .
Cool .
And then the next one that we're gonna be getting is the essential add-ons plug-in for element to .
And it's gonna give us some really cool tools that we can use inside of mentor .
So what we're gonna do is just going back over to plugins and then go over to add new again and then again , go to the search bar and you can just type in mentor again and then you should see essential add-ons for mentor right here .
So just go ahead and click on install now and then just click , activate .
Ok .
So now we can move on to the fun part , which is step number five , customize your website .
So in order to do this , we're gonna need to create a new home page , which means we need to create a new page .
So in order to do this , just go on up to pages and then go over to add new .
And I am just gonna go ahead and clean things up here .
I'm actually gonna exit out of all these windows here so that we're just stuck with our wordpress .
OK ?
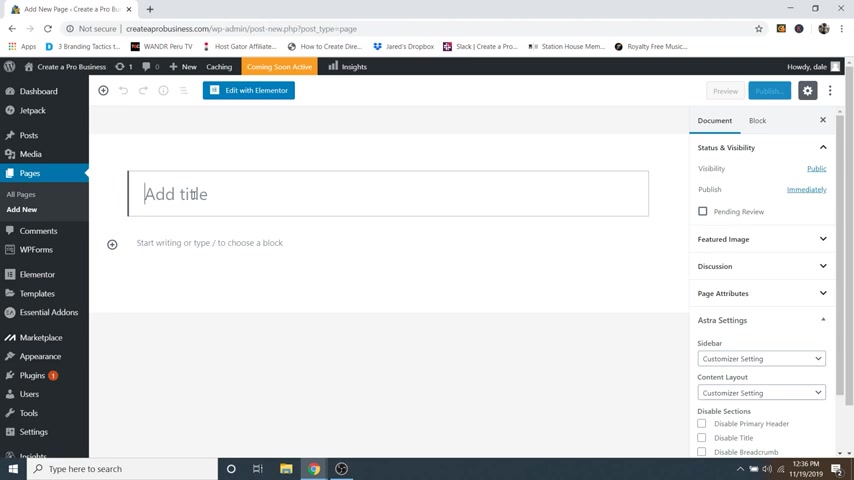
So for this page , this is gonna be our home page .
So I'm just gonna call it home page and then over here you'll see a menu on the right .
So first what we're gonna do is close page attributes and then you'll just see template right here .
It says default template .
Very important is to change this to element or full width just like that .
And then we can go ahead and publish and then click publish again .
Cool .
So now what we need to do is tell wordpress that , hey , we want to use this blank page as our home page So let's go ahead and go up to our website name and then just go to visit site and again , it looks pretty boring right now .
But don't worry , we're going to fix that .
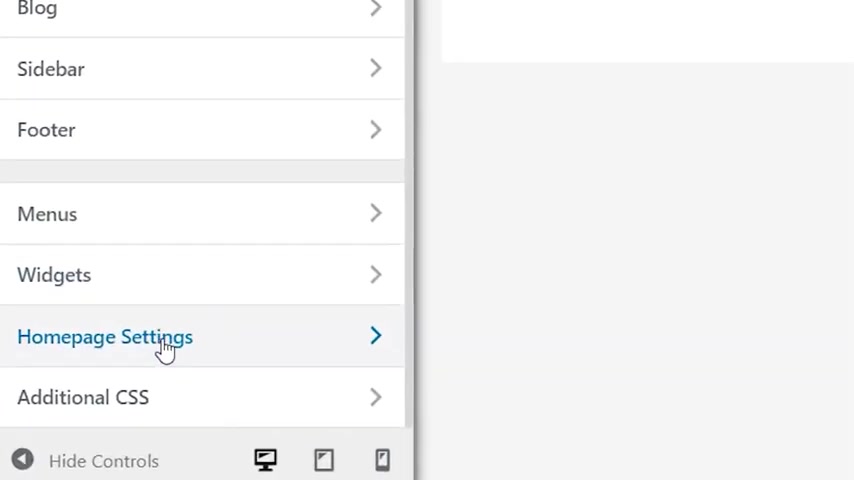
So , what we're gonna do is just click on customize and now we're just going to scroll all the way down to the bottom of this menu over here on the left and go over to home page settings and then we're just gonna change our home page to a static page and then underneath home page , we're just going to tell it that we want to use that new home page that we just created just like that .
As you can see , it's blank , there's nothing in here , but we're gonna be adding to it .
So now just go ahead and click publish .
Cool .
So now we can just go ahead and click on the X and then we're just gonna go to edit page and then from here you can just click on edit with mentor .
Cool .
So here we are inside the element or page builder .
And again , this is our drag and drop software .
So really it's as simple as just clicking on the plus icon and then you can select a new structure which is basically the amount of columns that you want .
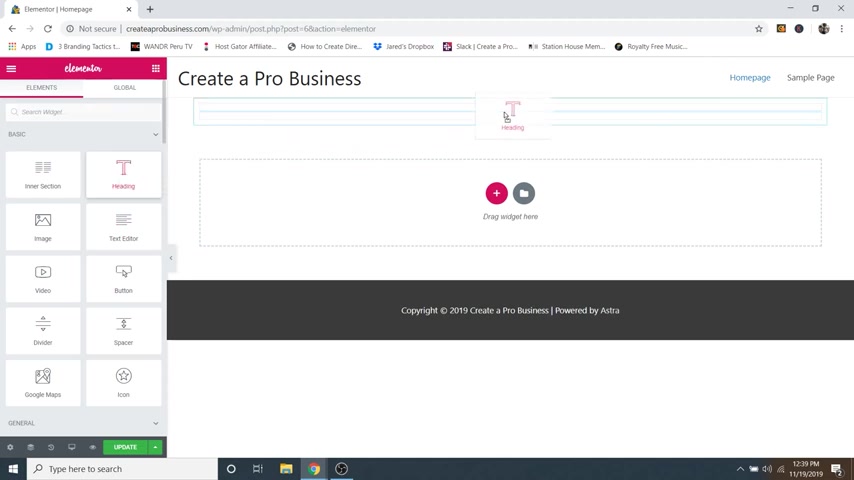
So in this case , I'm just going to select one big column here and I'm just going to show you right now how to use element to .
But I did make this so much easier by creating a template website that we're going to upload and then we're gonna change everything within that template .
But first , you should really know how to use element to .
OK ?
So with that section created , what you can do is if you want to add a widget to it , you can just go up to this little symbol that looks like a Rubik's cube and click on that and here's where you're gonna find all of your widgets that you can drag in there .
So that could be like a heading text .
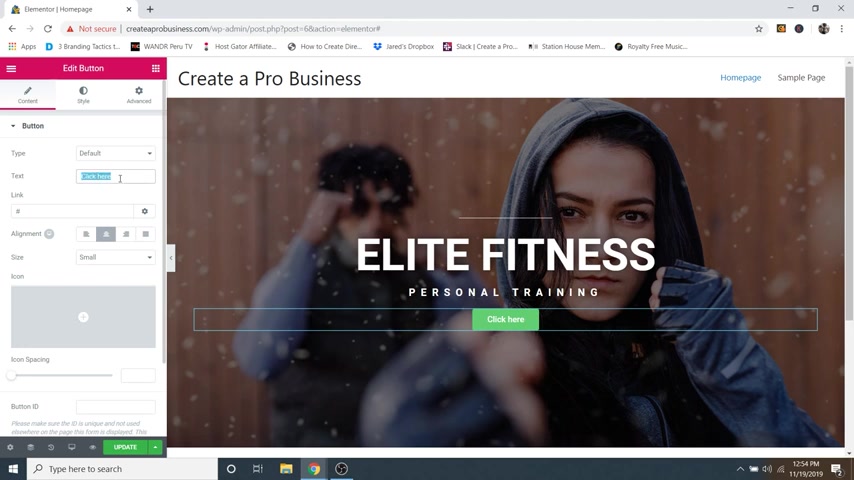
Let's say you want to add a title , you just drag that in and then you can just drop it wherever that blue line pops up and you can either change the text over here by typing in this box or you can actually triple click and type right on the screen .
So I'll just say something like elite fitness .
Actually , let's capitalize elite Fitness just like that .
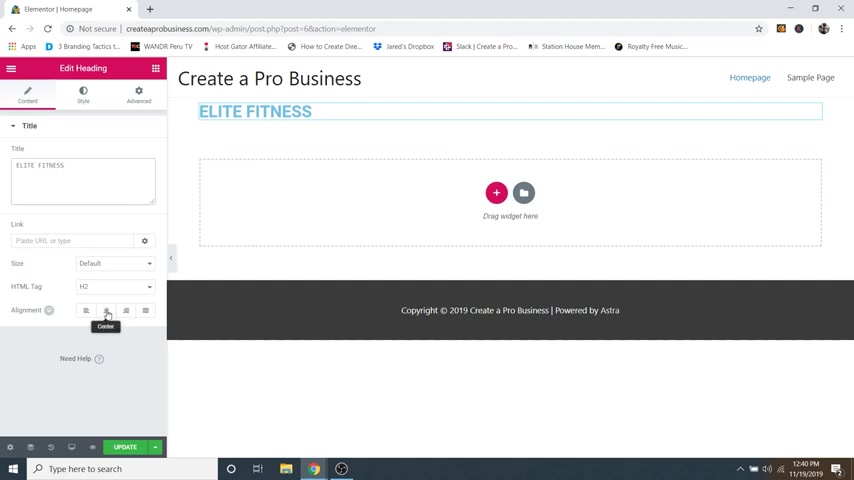
And then you can change where the alignment is .
So I'll just say it's in the center like this and then underneath style , this is where you can change the text color and the font and everything else .
You can give it a shadow as well .
So for text color , I'm gonna make it white and then we're gonna put in a background .
So first let's actually put in the background because if I make the text white , you're not gonna be able to see it .
So in order to put in a background for this section , what we're gonna do is click on the little six dots up here and then that's gonna open up our section settings right here for this section .
So no matter what you're editing , you can edit it over here on the left hand side , whether it's a section or a column or a actual widget itself .
So right now we're in the section .
So with that said , we're going to go over to style and then underneath background , you'll see background type , we're just gonna click on Classic and then you can either add a color or an image .
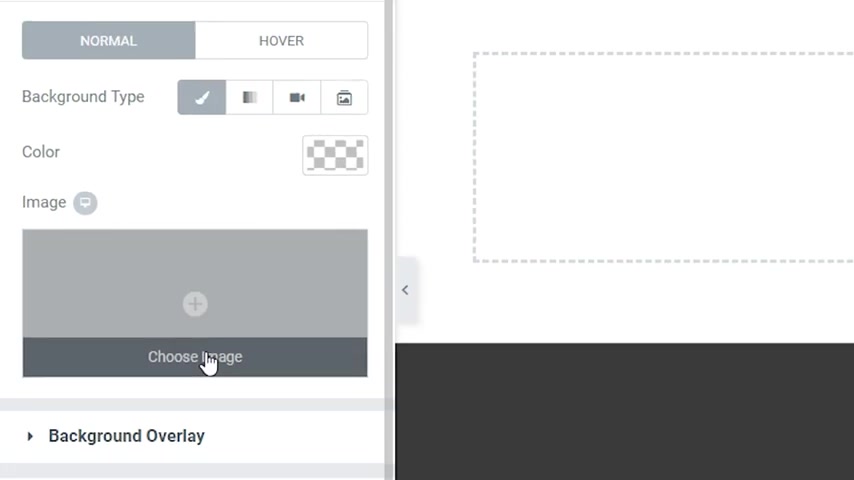
So I'm gonna add an image by just clicking on choose image .
And then here is where you're going to be able to upload those pictures .
So once you upload them , they'll go to your media library , which is empty right now .
So if we go to upload files , I'm just going to go to select files and then I'm just going to navigate to where my pictures are .
And then I'm gonna grab my Hero image .
And by the way , I've got all of these images in the description in a folder if you would like to download that folder and follow along with this tutorial .
OK .
So I'm gonna grab my Hero image .
And if I hover over that , you can see that the dimensions are 1500 by 1000 pixels .
And I would not recommend going any higher than this because the larger that your images are , the slower that your website is gonna go because it's gonna have to take a while to load these really large images .
So the key is getting the smallest picture that you can without a drop in quality .
And the hero image is gonna be your largest image because it's the largest image right at the top of the screen .

OK ?
So I'm gonna grab that and I'm just gonna click on open .
And then by the way , if you would like to edit your photos , let's say you don't have an editing software .
Well , that's OK .
If you just go up to a new tab and type in photo to dot com and click enter , this is a free tool that you can use to edit your photos .
So you can just go ahead and click on edit a photo and then what you can do is just click on the open button right here and we're just gonna grab one from our computer and then let's just grab that same hero image and then just click on open and there it is .
Now if you want to resize it , you can just click on resize over here at the bottom left and then you can type in your new values here .
So let's say that I didn't want it to be 1500 .
Let's say I wanted it to be 1200 .
Well , it will automatically , as long as this lock symbol is locked , it will automatically change our height as well to a respective aspect ratio .
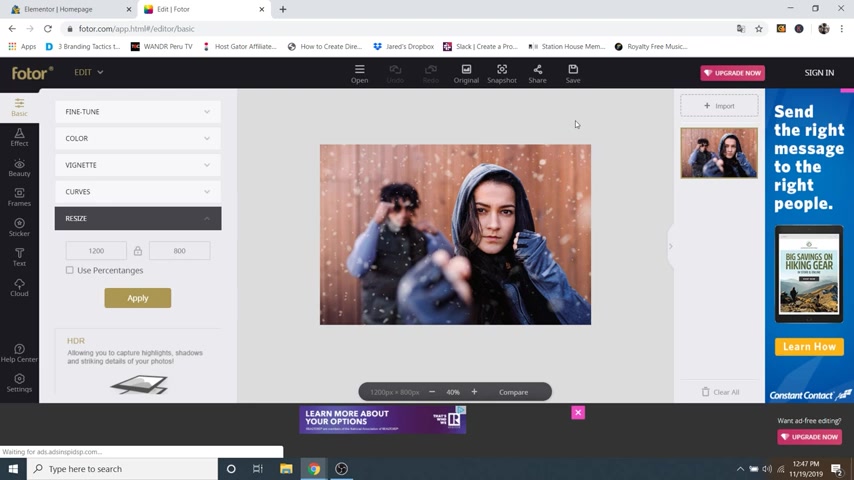
So now we can just click on apply and then it would resize that image and then you can just click on save and save your image and it will likely ask you to sign up with Facebook or something like that .
But it takes one click .
It's super easy and they never send you any sort of spam or anything like that .
I've been using this uh website for a long time now .
So that's just how to edit a photo if you need to , but I don't need to edit this one .
So I'm just gonna click on leave .
So anyway , I'm gonna grab my picture and then just click on insert media and then as you can see our image is in here , but the whole section is really small .
So let me show you how to increase that .
So what we're going to do is just going over to layout and then you'll see height right here .
We're going to change that from default to minimum height and then you can just drag the slider up and down to increase the height of that section .
So let's just say something like that .
6 29 6 30 ish .
And then the picture is also not really sitting right in here .
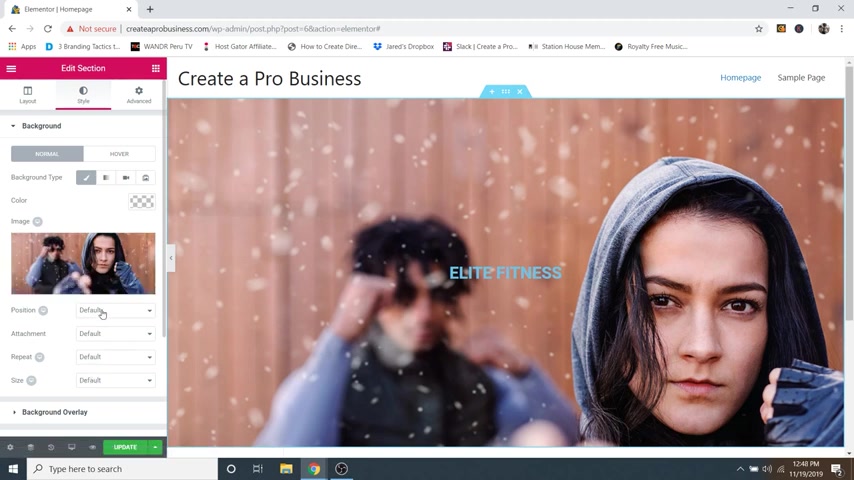
So let's go ahead and fix that .
So I'm just going to go back to style and then underneath the image you'll see position and size .
So for position , we're going to change this to center , center like that .
And then underneath the size , we're gonna change that to cover basically to cover this whole section , no matter how big or small that it gets , it will resize the image .
So that's looking pretty good .
And while we're here , I'm gonna show you how to create a background overlay so that it will make our text easier to read .
So to do this just close background right here and then just go to background overlay and then underneath background type , you can just click on classic and that will open up our little color picker right here and we're just going to select a color .
I've found that black is the best way to go , but you can change it to any color that you want right here .
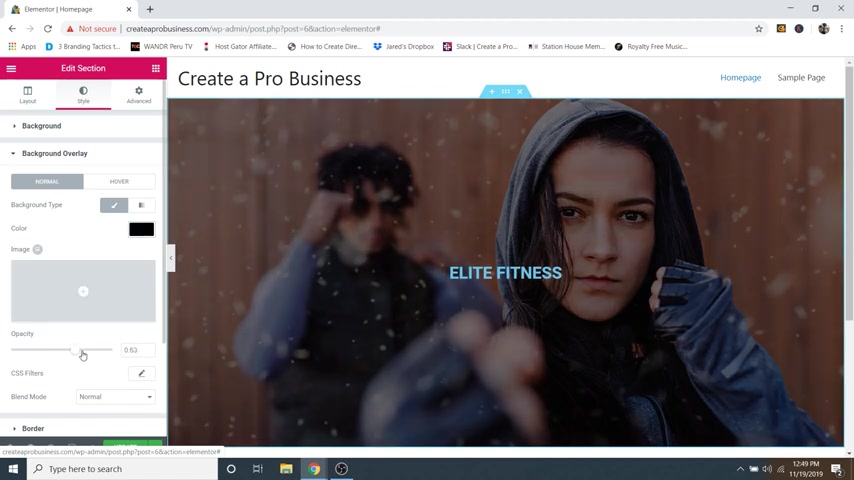
But I'm just gonna go with black down here and then close that and then you can change the opacity right here so you can make it a lot darker or you can make it lighter .
So I think somewhere around a five , anywhere between five and seven is a pretty good way to go .
There we go just like that .
So now let's change our text .
So if we just want to change our text , you can just click on the little pencil icon for the text widget and then I'm just gonna say got it saying that we can right click .
OK .
So now for text color , I'm just gonna change that to a white and you can change it to any color that you want .
But white is usually a good way to go with text .
Now , typography is where we can change our font .
So let's just click on the little pencil icon for that and then go to family and then these are all Google fonts .
So if you scroll down and then you give it a second , it will update with what that font actually looks like .
So we can choose any one that we want .
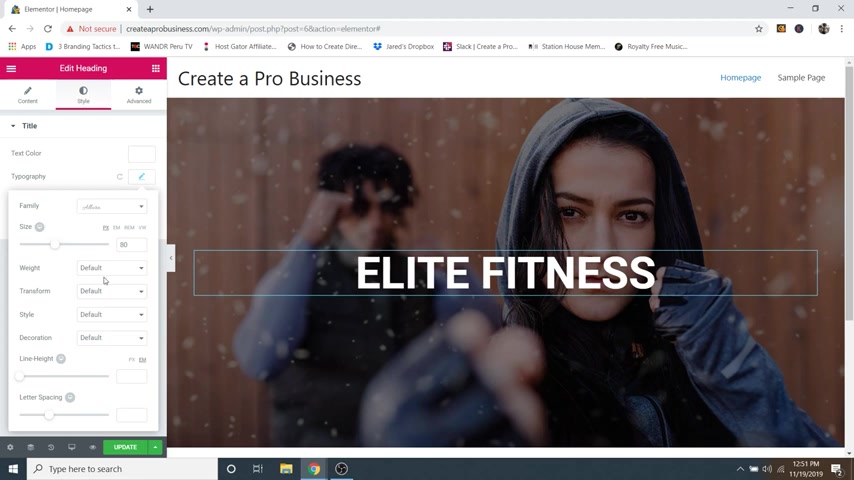
Let's just say we chose , I don't know this crazy one here .
That looks awful to read .
But that is how you can change your font .
And if you want to undo anything , you can just do control Z , that's just a little quick tip and it really comes in handy .
So yeah , you can change font here and then size , you can change the size of your font like this .
So we'll just bring that up maybe something like that like an 80 .
And then you can change the font weight .
You can change the style to italic .
If you want the line height , the letter spacing right here , you can also change , but I'm not gonna do that for this one .
So I'm gonna hit control Z and then you can also add a text shadow .
So if you click on that .
It will add kind of a shadow behind the text .
It's a little hard to see with our black background .
So if you want , we can just make this really dark so you can see it and then we're also going to bring that up .
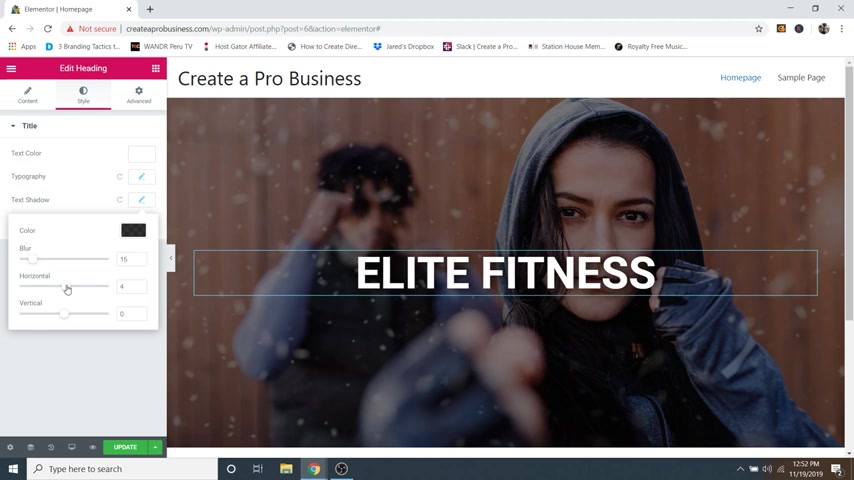
So as you can see if I increase there we go , you can see the text uh shadow behind there .
So I like a little bit of text shadow .
I'm just gonna do maybe a lighter color kind of like that .
Something really subtle .
Cool .
Now we're gonna put some uh subtext underneath here .
So what you could do is you could actually just right click and then click on duplicate and that will duplicate this text and put it right underneath and we'll just change that to personal training .
And again , you can do that here or you can click right on the screen and edit it there .
OK ?
So from here we're gonna go to style and then I'm gonna go to typography and I'm gonna change that size to be a lot smaller , maybe something more like that like a 21 22 .
And then for letter spacing , I'm gonna space that way out all the way to a 10 like that .
So that's looking pretty good .
Maybe we'll make it a little bit smaller , more like an 18 .
So that looks pretty good .
OK ?
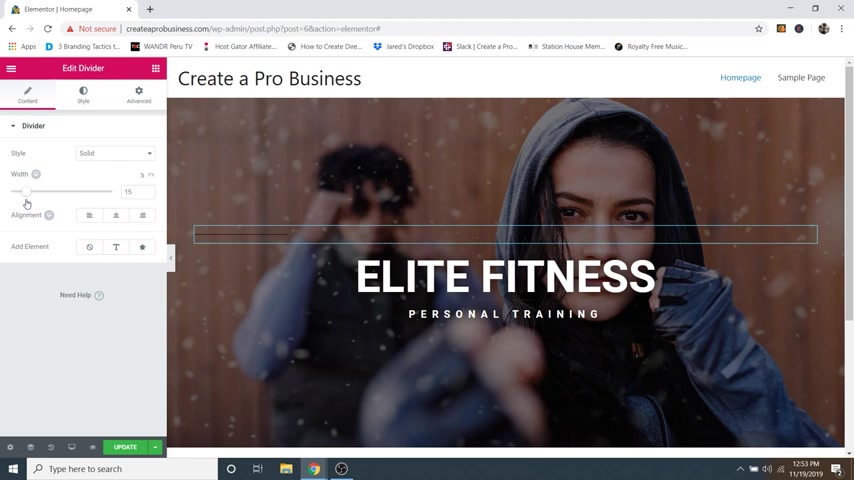
So now if you remember from the website I showed you in the beginning there was a little line up here , so I'll show you how to add that if we just go up to the little widget area and we just scroll down to divider right here .
You can just drag that in and again , wherever that blue line pops up is where you're gonna be able to drop this widget .
So I'm gonna drop it at the top like that .
And then as you can see our line is huge and it's black .
So first , what I'm going to do is change it to be a lot smaller .
So I'm going to drag this width down kind of like that to a 15 and then I'm gonna center align that .
So it's in the center and then I'm just gonna go to style and change the color to a white just like that .
And if you wanted , you could make it a thicker line if you change the weight .
So let's just say I wanted to go to maybe a 4.9 I'll show you how big it can get .
So that's a pretty thick line .
So I'm gonna stick with something like a two .
Actually , let's do a one .
I like the nice thin line and then underneath gap , you can change how much of a gap is on the top and bottom .
But in this case , I'm gonna make it pretty low like a five .
Cool .
So that's looking pretty good .
Now , let me show you how to add a button .
So let's just go up to the Rubik's cube symbol up here .
And then if you just see the button widget right here , you can just drag that in and we'll drag it underneath just like that and it's automatically aligned on the left .
So let's go ahead and change the alignment to make it in the center and then you can change the text on the button right here underneath text .
So let's just say something like get started like that .
And then the link is actually where that button is going to take them .
So if it is a part of your website that's on the home page , then you could do a hashtag and then whatever that section is , which is called a jump button .

And I will show you more about setting that up later .
But for right now , let's just say that you had a different website .
So what I could do is just go to my youtube channel , create a pro website and then I will just grab this right here , this URL up at the top and then we'll go back and then you would just delete that hashtag and then put in your link right there .
And then whenever somebody were to click on that button , it would go over to that site .
But in this case , what I'm gonna do is get rid of this like that and we're gonna leave it blank for now .
And then I'm going to show you where we're going to link it later as we create more sections .
So if you want to edit the button a little bit , so you can add an icon .
So if you go over to icon library right here , you can click on that and you can add any sort of icon .
So let's just say like an arrow , you can grab that or you can actually uh search for an icon up here .
But I'm just gonna grab this little arrow and then click on insert .

And as you can see there is our icon and then you can change the position to before or after the words before is a pretty good way to go .
But in this case , I'm not even going to add an icon .
So I'm just gonna click on delete and then to change the button color , we're going to go over to style and then underneath typography , you can actually change the button text if you want and then you can also give it some text shadow .
But in this case , I just want to change the button color .
I don't really want to change the text .
So for background color , make sure that you're on the normal tab and then go to background color and then we can change that button color here .
So if we just click on one of these colors down here at the bottom , it will open up all of our colors and we'll just do kind of like a green , like a greenish yellow , maybe something like that .
I like that color .
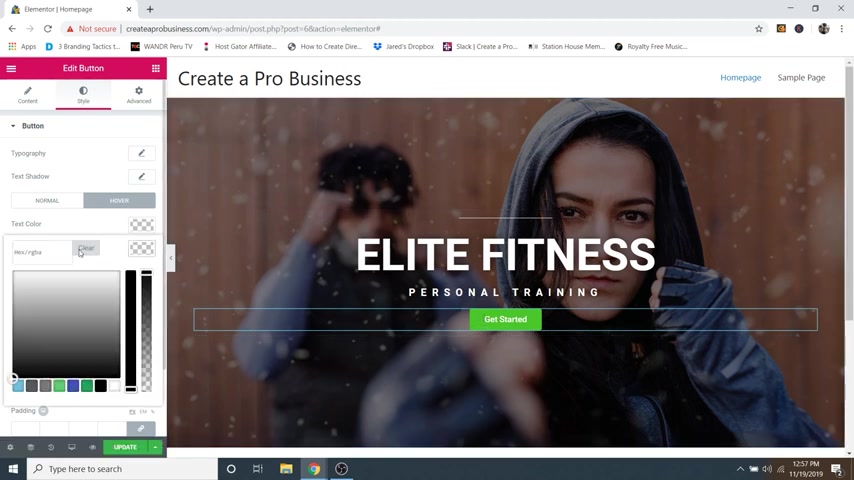
And what I'm gonna do is copy this color code and then close it and then I'm gonna go to hover and this is what the color is gonna be once I hover over the button .
So just go to background color again .
We're gonna paste that in , click somewhere off in this blank area .
And then what we're gonna do is drag that color to be darker , kind of like that like a dark green .
So that when we hover over it , you can see that , hey , now we can click on this button .
Cool .
And then you can also give it a hover animation .
So underneath hover animation , we'll just say grow and then that way when we hover over it , it kind of grows a little bit , which I think looks really good , but you can get all sorts of crazy ones like let's say bounce in , you know , it kind of like does this little bounce ?
There's like some really cool ones in here , but they're a little obnoxious .
So I really just like to stick with grow and you can also add a border to your button .
So let's just go over to border type .

We'll change that to solid and then underneath width , we'll just give it a with uh let's say two or three .
So you can see it and then you can change the color right here and then border radius is basically how circular you want that button to be .
So if you go up to like a 40 it's pretty circular .
But if you go back down to a zero , it's really boxy .
But in this case , I don't really want to add a border .
I'm not really a huge fan of that look for this particular website .
So I'm just gonna go to border type and change that back to none .
But what I could do is add a box shadow and that's just a shadow behind our button .
So I'm gonna click on that and then I'm gonna click on the color and make it a little bit darker , kind of like that .
So that just adds a nice subtle shadow behind our button .
And then while I'm here , I'm gonna show you the padding .
So you can either change the padding here or if you go up to advanced .
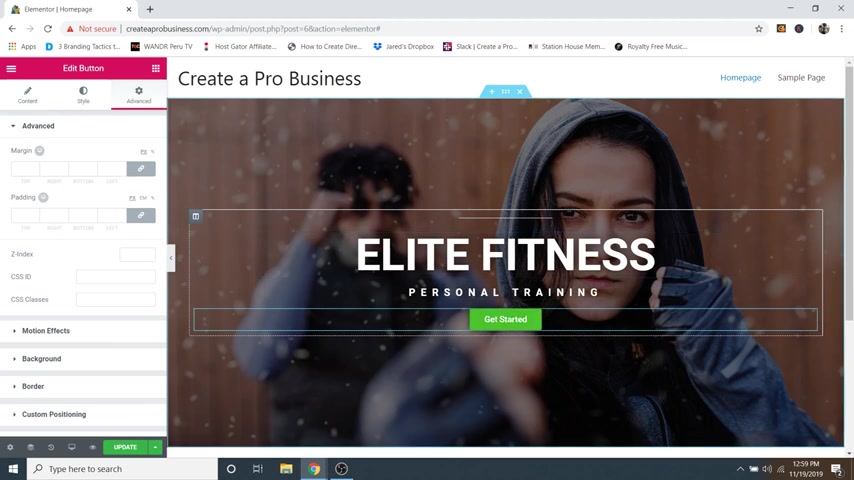
This is where you change the padding for any widget and basically padding is just the space around that widget .
So if I go to padding and just increase this value up to , let's say a 50 it's gonna add all this space around the button .
And what I highly recommend doing is keeping space around your text and around your buttons .
So the text is one whole group and we want to make sure that the text is kind of close together with space around it as well as the button .
So I'm kind of liking the way that this looks maybe come down to like a 45 and then one very helpful quick tip is to save .
So just click on update in order to save your work , I should have been doing that earlier .
But yeah , you're gonna want to do that every once in a while because it really sucks to lose all of your hard work .
And now let me show you how to add animations .
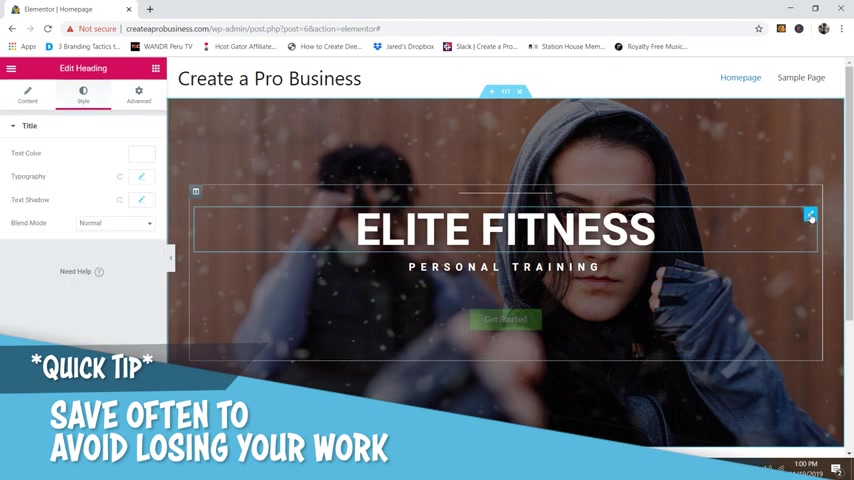
So if I wanted this text to kind of fade in as soon as the website loads up , what I would do is just click on the little pencil icon for this text and then I'm just going to go to advanced up here and then underneath motion effects .
I'm going to open that up and change the entrance animation .
I'll just change it to a fade in .
But again , there's all sorts of crazy ones like Zoom , you know , bounce all that stuff , but I'm gonna just click on fade in .
It's very subtle and then you can change the speed right here from slow , normal to fast or you can set a particular one right here and that's in milliseconds .
But I just found that normal is a good way to go and then that way , so let's just click on update and then we're just going to go over to preview changes every time the website loads up .
Boom , that text is going to fade in like that .
So I really like that style .
So I'm just gonna click on X and you can add that to everything .
You can add that to any widget , this little line , the text , the button , everything is in the same place .
So if I just click on the button to edit it and then I just go over to advanced and then go to motion effects again .
It's right there and I can just change it to fade in and then the button will do the exact same thing .
Cool .
So that in a nutshell is how to use element or to drag and drop and design a website from scratch .
Now , I did make this super easy by creating a template for the website in the beginning that I provided for free in the description .
So go ahead and click on that link in the description to download the website template that's going to save us a lot of hard work .
OK ?
So once you've done that first thing that we're gonna do is just click on the X for this section to delete the whole section .
I know it hurts my heart to get rid of all that hard work .
But don't worry , we have got the website template ready to go .
So what we're gonna do is upload that new website template .
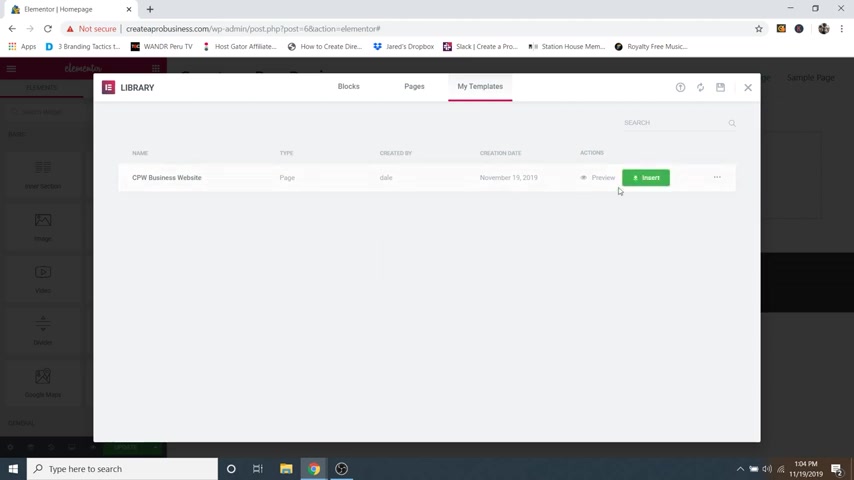
So we're just gonna click on the add template button and then we're just going to go up to this little import button .
Right here .
It's an arrow with a circle around it .
We're just gonna click on that and then click on select file and then I'm just gonna grab that creator pro website business website template right here .
And it will likely be in your downloads if you download it from the description on this video .
OK ?
So now just click on open .
Cool .
And then there it is right here .
So underneath this little uh template right here , we're just gonna click on the green insert button .
Cool .
And here is our website template .
Now there are no images or anything like that yet .
So we're gonna be replacing all that stuff , but we've got the whole foundation already laid for us and I spent a few days working on this one to make sure that it was responsive and clean and can be worked with any type of business that you have .
So let's go ahead and start replacing everything .
OK ?
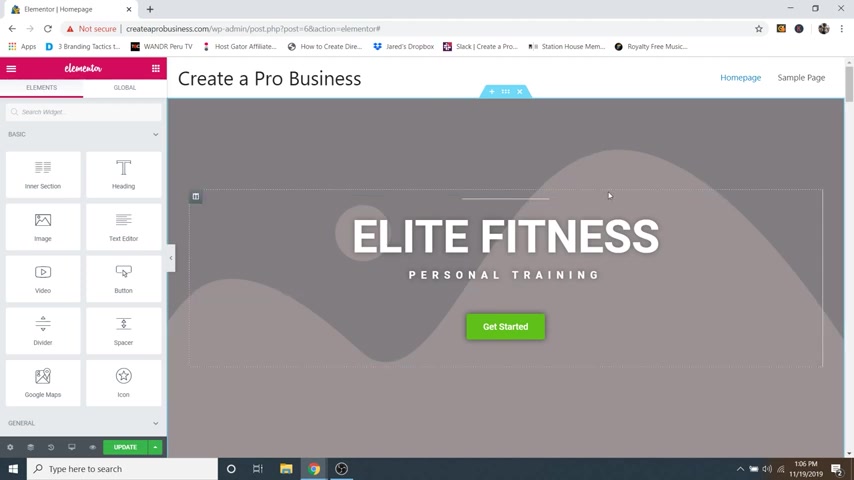
So I already showed you how to do this whole section with the background overlay and the tax and the buttons .
So really all we need to do is just go up to the six dots and then we're just gonna go over to style and we're just gonna change the background image again .
So just go to choose image , grab your hero image and then just go to insert media and then all of your settings should already be set to center , center and the size is to cover .
So that's already looking pretty good .
So now we can move on to our next section , which is this one , it's kind of a divider between this section and the next one , which is our programs .
So if you want to edit the background color for this , let's say that your colors are a little lighter .
You know , this website's a little darker .
We've got dark colors with the orange , but let's say yours is lighter .
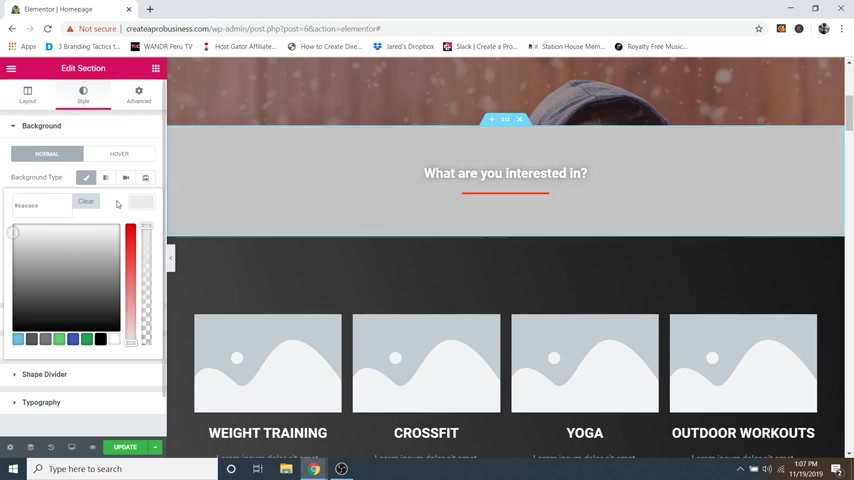
Well , you can just go to the six dots to edit that section and then just go to style and then underneath background type , you'll see color and then you can change that , you know , so you could do like a light gray or white or whatever it is and then you would change your text to black to make sure that it stands out .
So you can do that here .
But in this case , I'm just gonna click on control Z and just go back to the way that it was .
And by the way , you can also add video backgrounds as well .
So if you wanted , you could just click on video and add one from youtube to play in the background of this section , which is really cool , but I'm just gonna leave it as a color .
So next thing we would do is change our text , which I showed you how to do earlier , just triple click and you can type right here on the screen and then change the font and the colors in the style tab up here , but I'm just gonna leave it the way that it is .
And then for the divider , you can change that color by just clicking on it and then going to style and you can change the divider color right here .
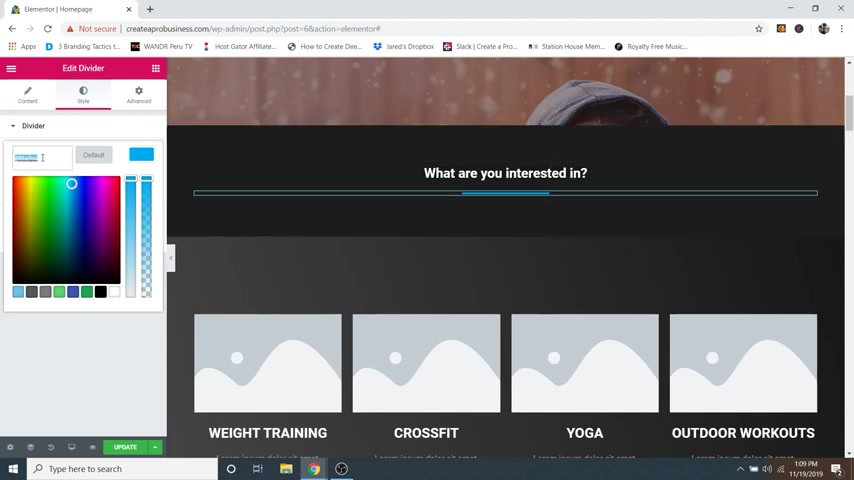
So let's say you have like a blue website , you can just change it to blue and these little orange pieces everywhere .
So these lines and these sections right here , these are going to determine all of your branding .
So I would pick a certain color .
So let's say it was this blue color .
Well , then you would just copy this little color code right here and you would save it somewhere and then you would use that same color all throughout your website .
So everything is fluent , but I'm gonna go back to my orange color and I'm actually gonna copy that so that I can use it .
All right .
So now moving on to our next section , this is our programs and as you can see for the background here , we've got dark up here and light gray over here and this is a gradient background .
So if we just click on the little six dots and then go over to style for this section and then you can see we've got a gradient right here underneath the background and we've got two colors , a dark and a light .
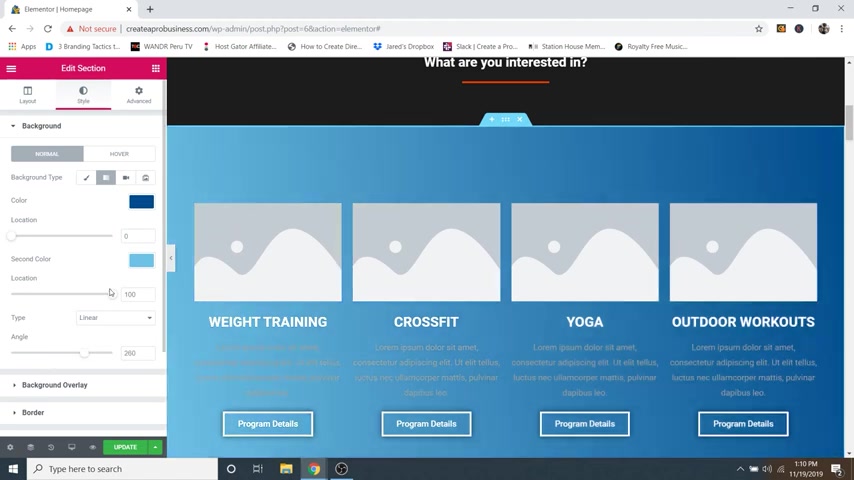
So you can change these to whatever you want , let's say , you know , it was a blue , you could do kind of like a dark blue like that .
And then you would close that and then go over to second color and you could make that more of like a light blue like that .
So it's pretty cool .
And then if you close this , you can change the angle like that and it'll change where the dark and the light are .
Or if you drag these location sliders all the way towards the middle , you can get a nice hard line like that .
So maybe that's more of the style that you want to go for .
That's pretty cool looking .
But again , I'm gonna just control Z go back to the dark and the light gray because that kind of works with any type of website .
OK ?
So now let's work on our little image box section .
So these are for our programs .
So whenever we hover over people can click on these .
So I'm just gonna click on the little widget for this image box .
And then this is where I'm gonna put my weight training image .
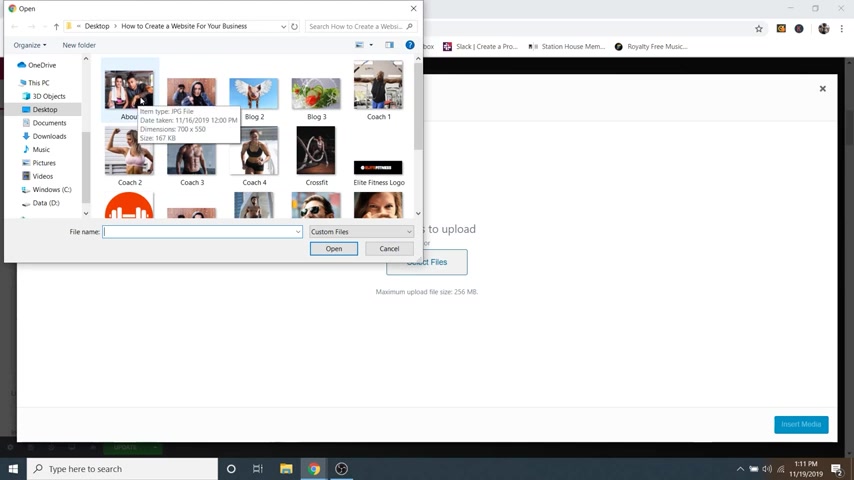
So I'm just gonna click on choose image and then go to upload files and then select files and then I'm gonna grab all of my images because we're gonna need all these at some point anyway , so we might as well upload them all now .
So I'm just gonna click on each image , we can actually go all the way down here , grab every single one except for the hero image because we've already uploaded that one .
Cool .
So once all your images are selected , you can just click on open and it's gonna take a second to load all these images .
Cool .
So once those have loaded up , I'm just gonna grab the one for weight training , which I have named right here weight training .
And then I'm just gonna click on insert media and all of these images have to be the exact same size .
Otherwise they are gonna look all off center and kind of some are gonna be higher than the others .
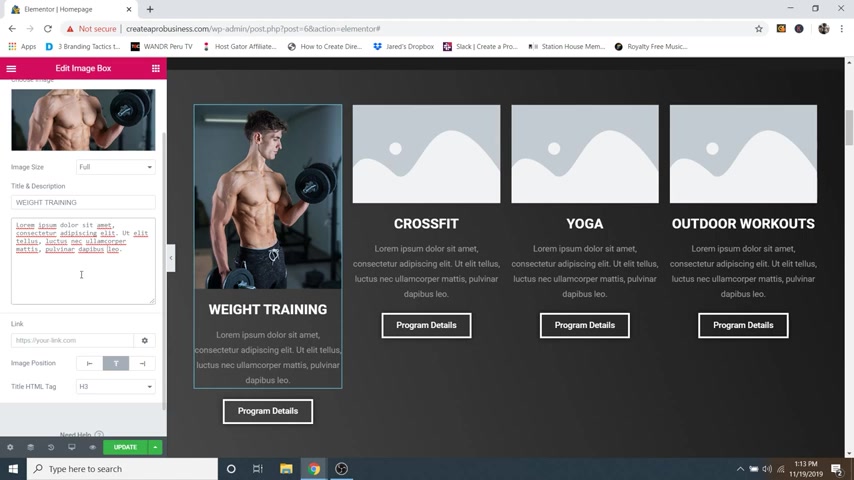
So I'm gonna go back to choose image and show you that this image is 3 60 by 4 50 pixels and that's a pretty good size for that section .
So if you have different images that you're using , maybe you're not falling along with the images that I provided , make sure that they're 3 60 by 4 50 pixels or at least around that area , but all of them should be the exact same size .
Cool .
So from here now we can change the title right here if you want or you can change the description which I just have some dummy text in here right now .
And then if you go over to link down here at the bottom , you can provide a link that goes to a different part of your website if you want or you can go to a different page .
And then that way when they click on the image , it will take them there .
So that's pretty cool .
And then if we go to style , you can change some , some of the image settings , you can change the animation , you can change how big the image is .

I have it just set as 100 but you could make it a little bit smaller .
But I think leaving it at full value is the best way to go as well as the content at the bottom .
You can change some of the text content .
So the spacing of the description text here , you can change the typography , the colors , everything .
So I've just had this set to white and this to a light gray and that is my recommendation and then whatever link that you put on this image to click to , you're gonna want to put the exact same one here for program details and this is just a separate button .
So we're just gonna click on that .
And again , I showed you how to edit these buttons already at the top section .
So really what you would do is just put in the exact same link right here and it would link them to both .
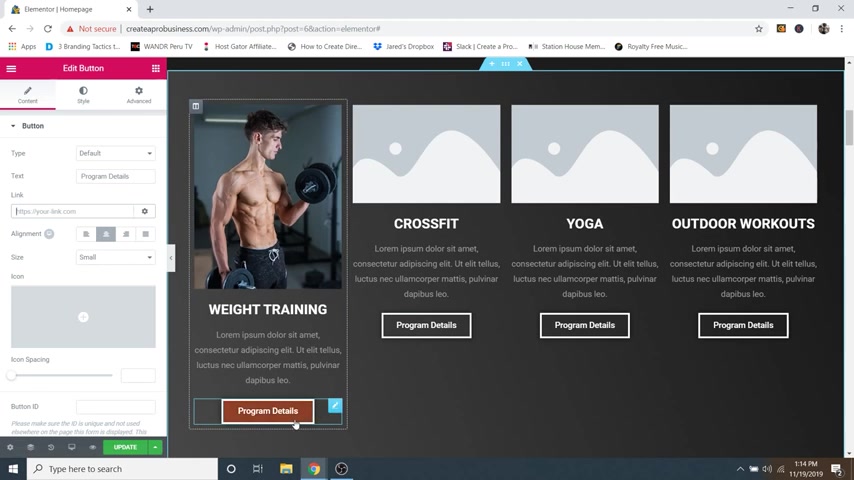
So it doesn't matter if they click on this image or the button , it will take them there and then you can change the hover color if you just go to style and then go to hover and then I have it set as kind of like this transparent orange color but you can change it to whatever you want .
Cool .
So now I'm gonna just go through real quick and change all of these images .
Cool .
So like I said , all these images have the same pixel size so they look nice and fluent .
And if you have an image that has maybe fewer pixels than another , it's gonna be a little bit higher and things are gonna be kind of wonky looking .
So make sure all your images are the exact same size .
Cool .
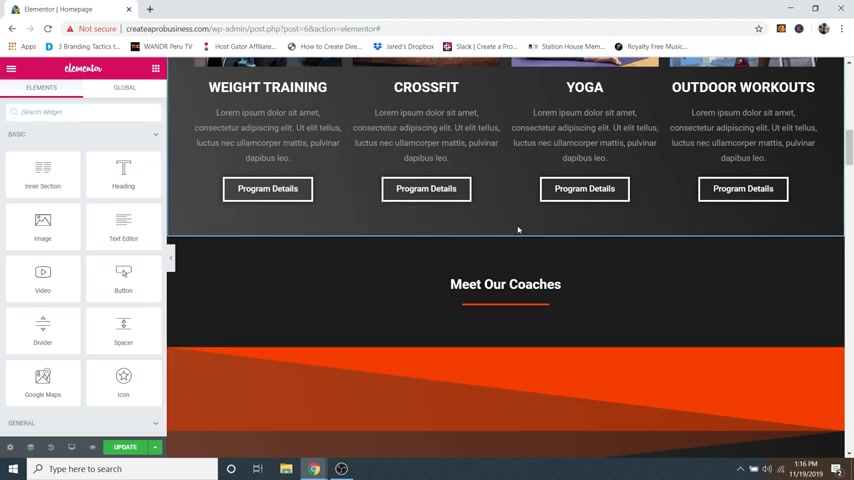
So now let's go ahead and move down to our next section .
And again , I showed you how to change these are ready .
So I'm gonna go ahead and skip that section .
And by the way , if you change this one up here to maybe a different color , a different text or so on , you can just go ahead and right click and then you can just duplicate that section and then you could just drag it down and then replace each one .
But in this case , I like the way that they look .
So I'm just gonna delete that one .
Ok ?
So moving on , this is our coaches section and this is also just a meet , the team section doesn't just have to be coaches , it could be all of the members on your team or maybe it's just you , you know , it could be like meet your personal trainer and then you could just put yourself on here or meet your web designer or whatever it is that your business is for this website .
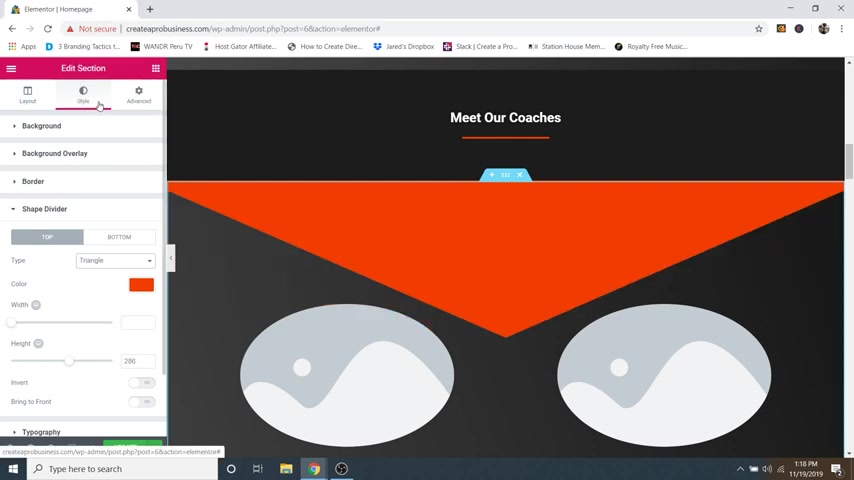
So , what I'm gonna do is show you how to change this little divider thing up here with this orange .
This is a really cool branding opportunity .
So first , let's just go up to these six dots and then I'm just gonna go over to style and then I'm going to close background right here .
And if you wanted , you could change the background color .
So I've got that same dark gray to light gray going on right here .
This gradient in the background , you can change that here or you can put a video or just a solid color or even an image if you wanted or sorry , a slideshow or an image .
But I kind of like this dark gray and light gray gradient .
So I'm gonna go ahead and leave that .
OK .
So now if I go to shape divider , that is this thing right here , this kind of , you know , tilted looking triangular design .
So right now I'm at the top .
So you've got the top here and then you've got the bottom of the section here , which you can go to here , but I'm on the top and I have it set as tilt opacity .
So there's a lot of different ones .
So you know , mountains changes to kind of some upside down mountains , triangle waves , there's all sorts of ones in here and you can just play around in here and see which ones that you like .
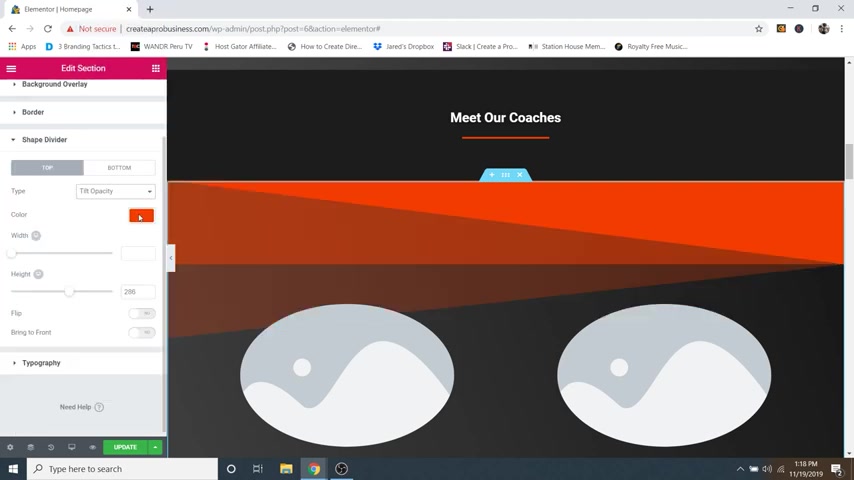
But I'm gonna go back to the tilt opacity and then you can change the color here .
So if I change the color , maybe you want to go to like a green or blue , it's just a really good opportunity to change your branding .
So if your color is blue , I think blue looks amazing against the dark gray and the light gray , which is why I designed this website with a lot of gray because really any color looks awesome against black and gray or light gray and dark gray .
So you can change that here , which is really cool .
So I'm gonna go back to control Z and leave it as the orange and then you can change the width here .
So if you change the width , they kind of straighten out and then if you change the height , it will get a lot lower or you can kind of squeeze them together .
But I like the way it was kind of a good middle point that kind of bleeds into these images a little bit , kind of gives it some depth .
So that is how to change your shape divider .
And that's going to be important for all of these sections that have that shape divider .
So again , this one as well , it's a really good branding opportunity .
OK .
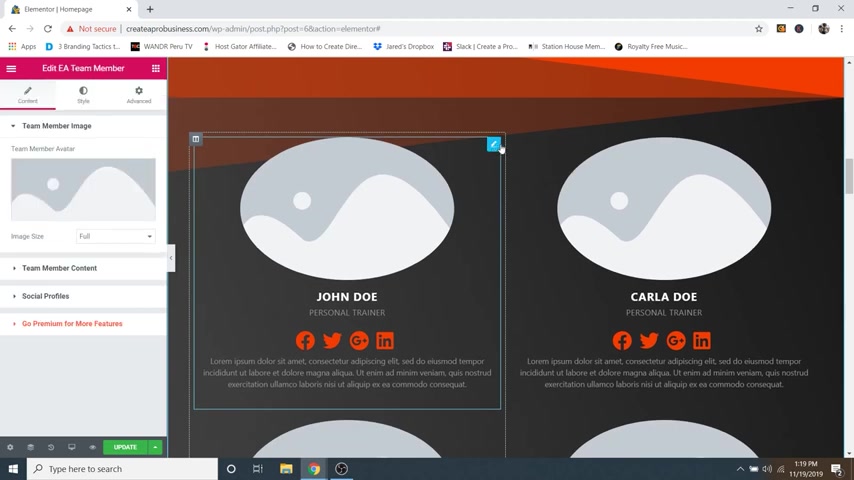
So I'm gonna go ahead and change these images .
So I'm going to just click on that and this is a E A team member , so E A stands for essential add-ons .
And that was that plug in that we got earlier in the tutorial .
So if you didn't get that plug in , I highly recommend getting it because then these uh widgets are actually going to work .
So if you didn't get the plug in , then these won't work .
So I'm just gonna click on that and then you can change the image here .
So team member Avatar , I'm just gonna click on choose image and then we're just gonna go to this guy right here , which I have set as coach one and these are all the same size images as well .
So all of my coaches have 700 by 700 pixels and I could probably get away with a little bit lower , but they're pretty big images on the screen .
So I just wanted to make sure I wasn't gonna have too much of a drop in quality .

Ok ?
So with coach one selected , I'm gonna click on insert media and then there we go .
There is our coach .
So now we can just go to team member content .
And here is where you can change his name , you can change his job position and then you can also write a description for this person right there .
And then if you go to social profiles , here is where we've got Facebook and Twitter and Google plus and all that stuff .
So you can either choose to display them or not if you click on that button and it will get rid of them , but I like them because it adds a little bit more of our color to our website and really increases our branding .
So if you want to add a Facebook profile , you can just click on that and you can actually change it to whatever you want .
It doesn't just have to be Facebook .
You can go to icon library and you know , let's maybe say that we wanted to do Instagram .
We could type in insta appear at the search bar and then click on Instagram and then click on insert and then that will change it to the Instagram symbol .
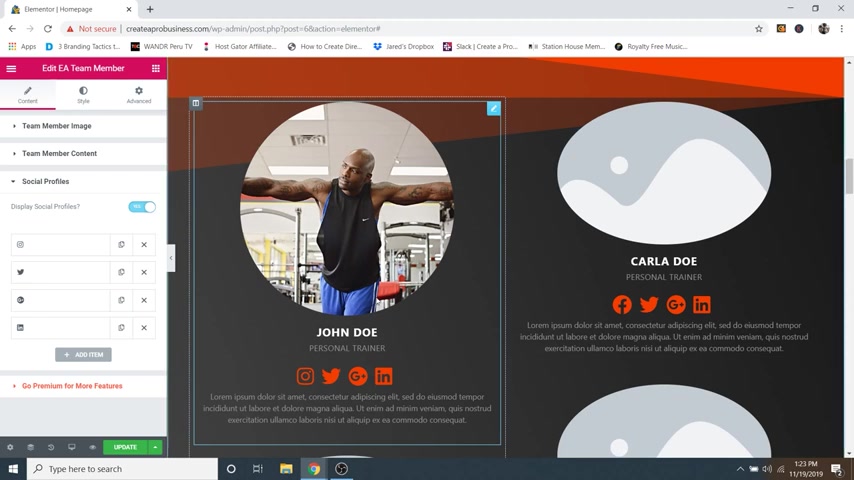
And then you could just put your Instagram link right here and then you close that and you can do the same for all these sections .
And if you want to add more sections , you can just click on add item or you can duplicate them by clicking on this button right here .
But I'm gonna leave him the way that they are because he's a fake person and doesn't actually have a profile .
And if you'd like to change the colors of the social icons , you can just go over to style and then underneath team member styles , we can just go to actually sorry social profile styles .
If you click on that at the bottom , then you can just go to icon color and change that here , but I'm gonna leave it the way that it is .
And then you can also change the hover color as well by going to hover and then change that .
So right now I have it set as black , which I think looks pretty good .
Cool .
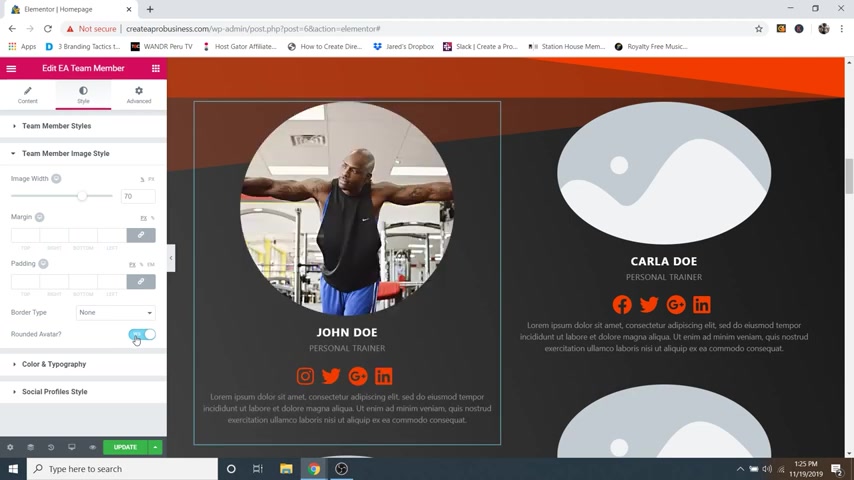
And then now I'm gonna close this and I'm gonna go back to team member image style and then you can just go over to rounded avatar and you can uncheck that and it will make it a square .
So maybe you like that style a little bit more , but I kind of like the circle .
So I'm gonna leave that on and then you can change the image with up here .
So 70 you can bring it down , make it a lot smaller or make it really huge .
But I've found that 70 for this website is a good way to go .
Cool .
So now that I've showed you how to edit that , I'm gonna go ahead and quickly change all the rest of these so that we can move on .
OK .
So now we can move on to our next section , which is a little divider between the about me and this section .
So I already showed you how to change this shape divider here as well as the background .
So really , if you just wanted to make this section bigger or smaller , you just click on these six dots and then go over to minimum height and you can drag that up or down .
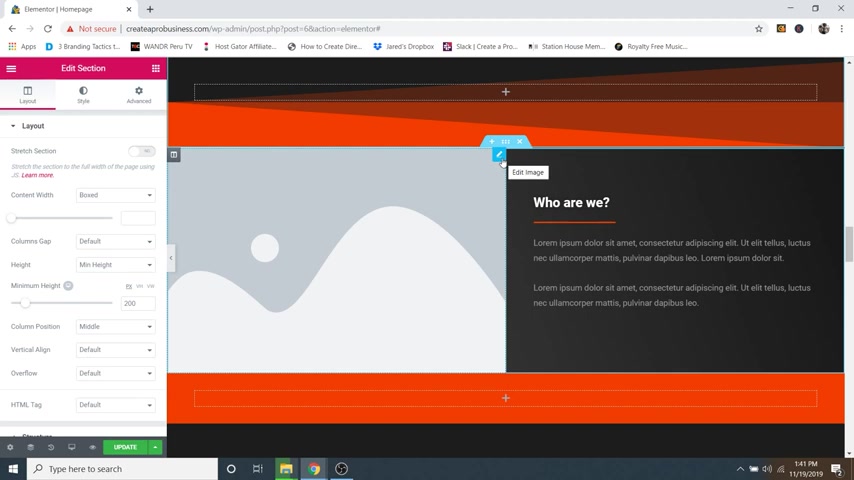
But I'm gonna just leave it back where it was at 200 and then move on to the about me section .
So first let's just replace the image .
So I'm going to just click on the edit image button because this is an image widget .
And then I'm gonna click on choose image and go to our about image , which is these two right here and then go to insert media and there we go , there is our image and then you can change the text as well as the divider and the description text here , which again , I showed you how to do all that stuff so we can get moving on to our next section .
And this is just a color section right here .
Uh I did kind of run this section right into the from the blog section like that and I don't know , it just kind of looked funny .
So I went ahead and added this color section , but you can delete it if you want to and then we're gonna scroll down and do the blog .
So right now , we've only got one blog post .
So that's the only one that's actually going to show up here .
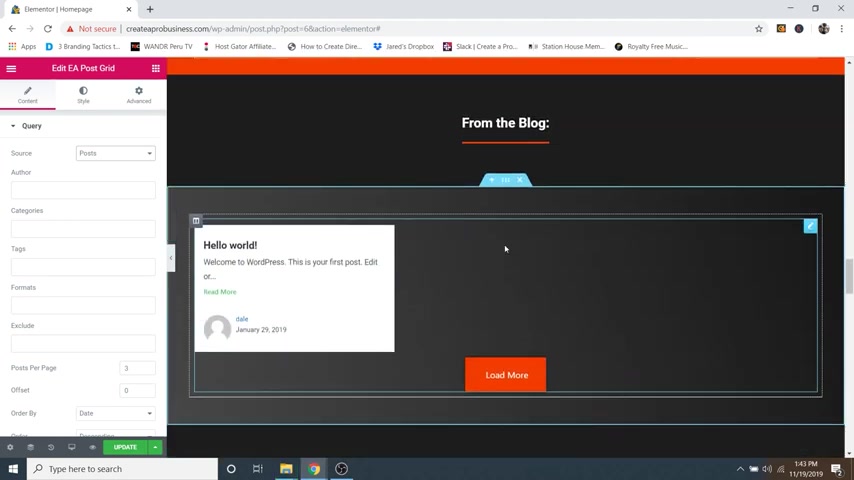
So I will show you how to create new blog posts , but I'm actually going to be doing that later for right now , we're going to continue editing our home page .
But if you want to edit this blog section , you can just click on the little pencil icon and this is an E A post grid .
So again , E A is essential add-ons .
So this is an essential add-ons tool .
And right now we've got sources , we've got posts and then you can change it to pages .
So if you have different pages , you can display those , but I haven't set as post because if you wanted to have a blog for your business , then you could write new blog posts and they'll automatically get generated in this section .
And a blog post is basically just a webpage that's continuously updated with helpful information for people .
So a blog post could be something like 10 tips to lose belly fat or , you know , 10 vegetables that you need to be eating on a regular basis basis or something like that .
So you can change the author in here and then the categories and everything for your blog posts .

But again , I will show you more about creating blog posts later and then if we close this and go to layout settings , you can change it .
So right now , we've got three columns .
So if we had multiple blog posts , one would show up in the middle as well as on the right , you can change that to one single column and it's just going to have this one blog post or , you know , you can do multiple .
But I think three looks pretty good whenever we have more posts in here and then the load more button , you can change the text .
But I think load more is pretty self-explanatory and then you can mess with all of these settings here .
You can get rid of the metadata if you click on show meta and that will get rid of the author and everything like that .
But I kind of like that you can see who the author is and when it was written , cool .
And then you can just go to style and then you can change the background color .
So right now it's just set as white , but you can change it to anything that you want .
I think white looks pretty good though .
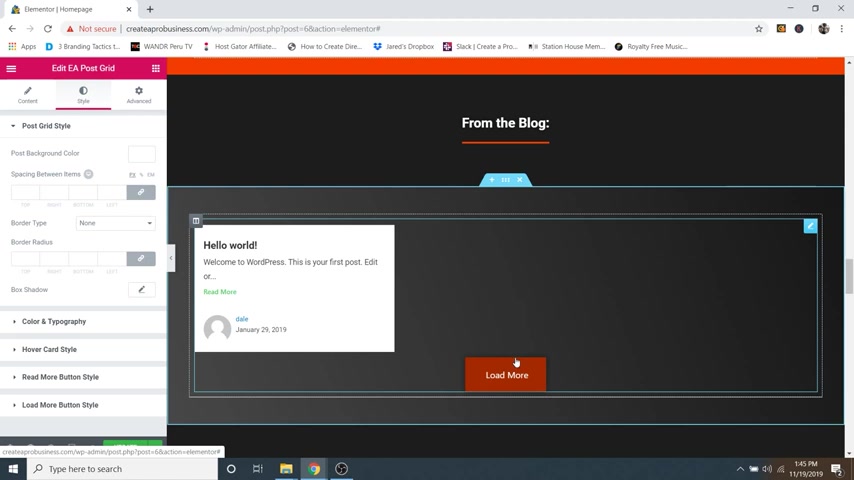
And then if you want to change the color of the load more button , then you can just go to load more button style and scroll down and then change the background color right here and then just make sure you don't forget to change the hover .
OK ?
So now moving on to the next section , we've got our testimonials and these testimonials are their own little widget .
So if we just click on that , it is a testimonial widget as you can see up here , so you can change what they say .
So I recommend starting with quotes because this is what somebody else is saying about your business .
So it's either about the service that you provide or your products .
So you would write what they say here .
And then you can give them an image .
So I'll go ahead and click choose image and I am just going to select one of these guys .
So we've got testimonial 12 and three .
So I'm gonna grab number one and then click insert media and then we can change his name right here .
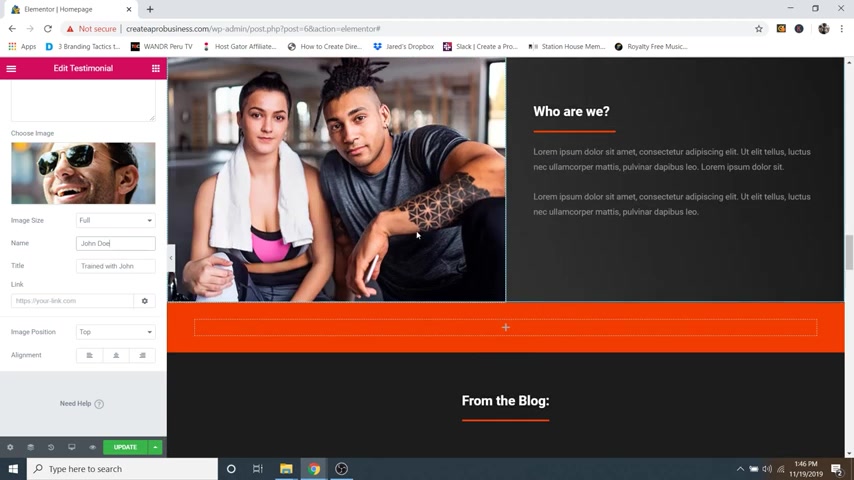
And then I I just have in the title section trained with John .
So you know , trained with one of our trainers up here .
But you know , you can actually just delete this and it will say nothing underneath if you want to or you can change it to whatever you want .
And then you can also put a link .
So if somebody were to click on it , maybe there's an extra page that has a longer testimonial , you could put that in the link section .
All right .
And then we're just gonna go up to style and then you can change the text color as well as the font .
If you go to image , you can change the image size .
So image size I have set as 1 40 but you can make it as small or as big as you want , which is cool as well as the name .
You can change the text color and font for that as well as the title .
So pretty self-explanatory .
So now I'm gonna go ahead and just change these other two real quick .
Cool .
So that's looking pretty good .
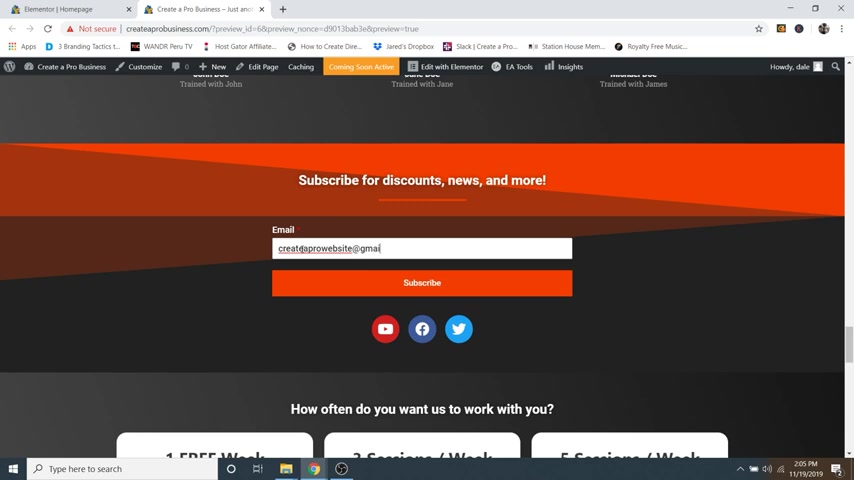
So now I'm gonna move on to my subscribe section .
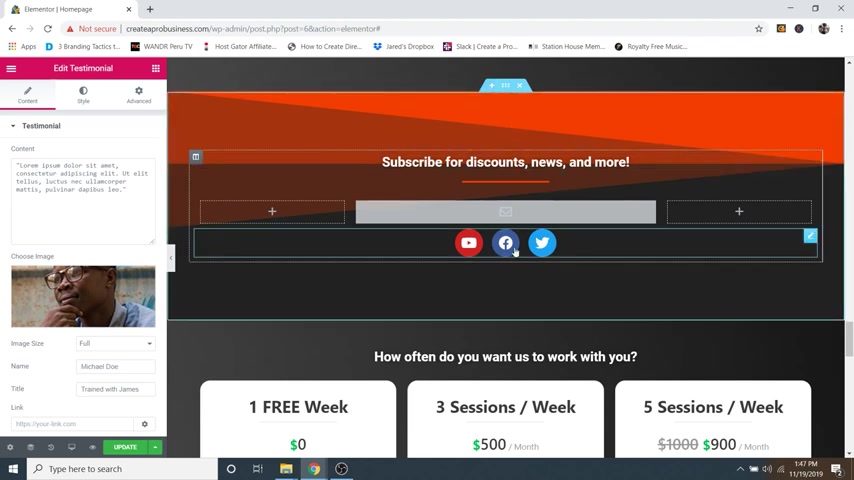
So this is a really cool section and this is really helpful for a business because collecting emails is a great way to market your products further to people that are interested in you because anyone can just come along your website .
But the people that are truly interested and more likely to buy your products or maybe sign up for your service , maybe it's personal training or whatever it is , then they will put their email in here because they're gonna want to get some discounts or you know , coupon codes and news and things like that .
So having this section is really important .
So first of all , you can change the text just by clicking right on the screen , you can change the divider right here as well .
And then I have empty sections on either side to make sure that this subscribe form stays right in the middle .
So in order to do this form , what we're gonna do is just click on this and you're gonna see that we've got a WP forms uh widget over here .
And if we go to select a form , there's nothing in there .

So we need to actually create a form first and then go in here and select it .
So what I'm gonna do is just click on update to save our work and I'm gonna show you how to create this form .
So just click on the little hamburger symbol right here at the top left and then just go to exit to dashboard .
Cool .
Now you're gonna see a WP forms menu item over here .
And if not WP forms is a free plug in .
It should automatically come with wordpress .
So you really shouldn't need to install it .
But if for some reason it's not there , you can just go to plugins and search WP forms and install it .
Ok .
So underneath WP forms , we're just going to go to add new and then you're gonna see that we've got some templates to choose from .
So we've got a blank one which we can create from scratch .
We've got a simple contact form which is just a name and an email and just a message box and then you've got a newsletter signup form .
So this is the one that we're going to start with .
So we're just gonna click on create a newsletter signup form .
Cool .
And then it's gonna tell us , don't forget you have to sign up for an email service which I will show you how to do .
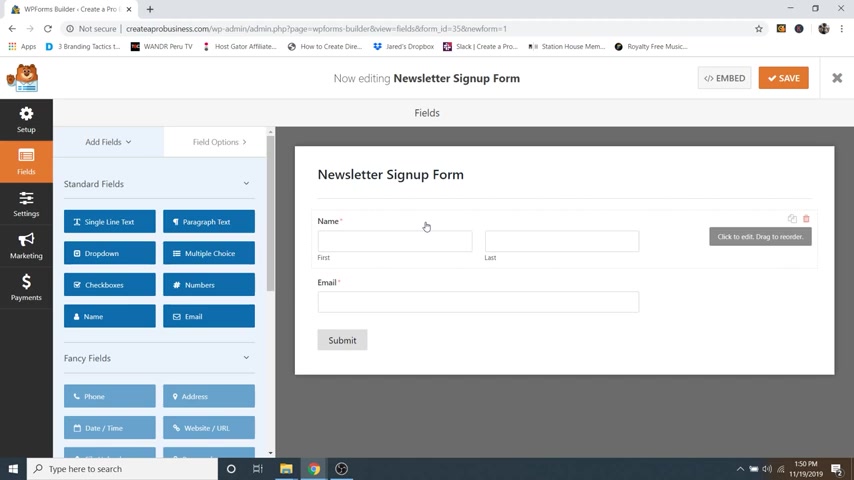
So we're just gonna click on close and then here you can see is kind of a preview of our form .
So right now I've got a name in an email section .
Honestly , I don't even really think that we need the name unless you plan on customizing your emails with that person's first name .
But in this case , I'm just going to go ahead and get rid of it .
Keep it nice and simple .
And it's gonna ask me if I want to delete it .
I'm just gonna say yes .
So if you go up here and you click on the title right here , it'll take us to where we can change that title .
So , newsletter signup form , nobody's gonna actually see this title .
So it really doesn't matter too much .
So I'm just gonna call it my subscribe form just so I know which one that it is .
And then also while we're in this menu , you can change the submit button text .
So right now it's submit as if it's sending an email .
So what we want to do is just change this to subscribe .
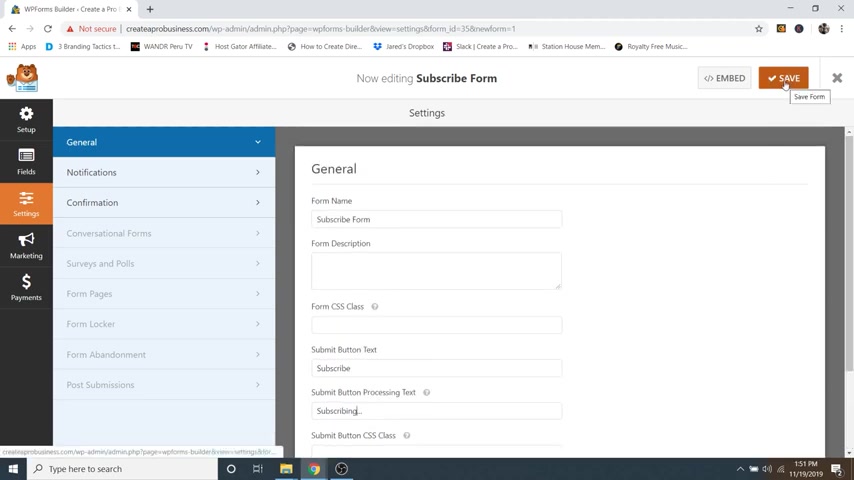
And then whenever it's actually processing , we want it to say subscribing like that looks pretty good and then just go ahead and save your work .
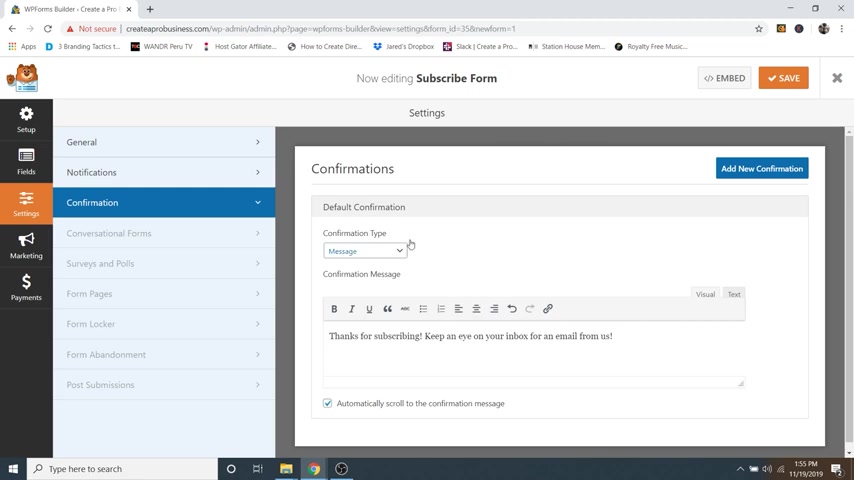
And then from here , if we just go on over to confirmation , this is what's gonna show up after they click subscribe .
So right now it says thank you for contacting us .
We'll be in touch with you shortly .
We would want to change this to something like thank you for subscribing .
Um Keep an eye on your inbox for an email from us , something like that .
There we go .
And that's just a message .
Now , if you didn't want to do a message , you can actually go to a completely different page on your website or go to a completely different URL on another website if you wanted to .
So right now as this form is , if we were to put it on our website and somebody were to put their email in , it would just send an email to whatever email we have set up for wordpress , which really doesn't do us any good .
What we want this form to do is sign up those people on an email list .
That way we can access that list and we can send a mass email or a broadcast and contact that entire list all at once .
So that's what a newsletter subscribe is .
So in order to do this , we're gonna need a email marketing service .
So what we're gonna do to get that is just going over to marketing and then you can see we've got a bunch in this list here , but a lot of them are grayed out because we're using the WP forms light .
So that's the a free version of WP forms which only allows you to use constant contact , which is a great service .
But with the paid version , you can do mail champ and a bunch of other ones .
And I know that mail Chimp is one of the best .
I use it for a few of my websites , but I also use constant contact for a few websites as well and it's just as good of a service .
It's really the same thing .
So let's go ahead and sign up for that .
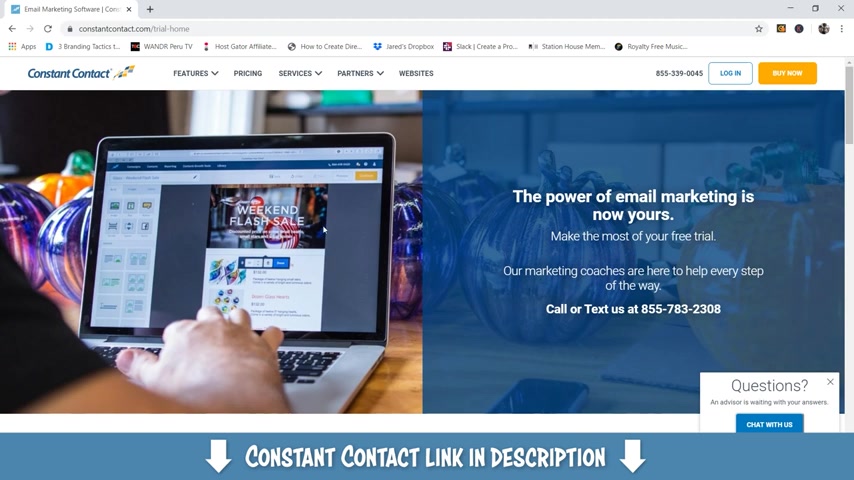
So what I'm gonna do is just tell you to go to the description of this video and you will see a constant contact link .
Go ahead and click on that and it's gonna take you to this website here where you're gonna be able to get a free trial and it's anywhere from a 12 to 14 day free trial for constant contact .
So now we're just gonna go over to pricing and then here's where we can sign up for our free trial .
So first I'm just going to put in my email and then just click on , start your free trial .
And then again , I'm gonna put in my email up here and by the way , this is no credit card required .
So that's awesome .
It's not gonna charge you after the 14 days .
Ok ?
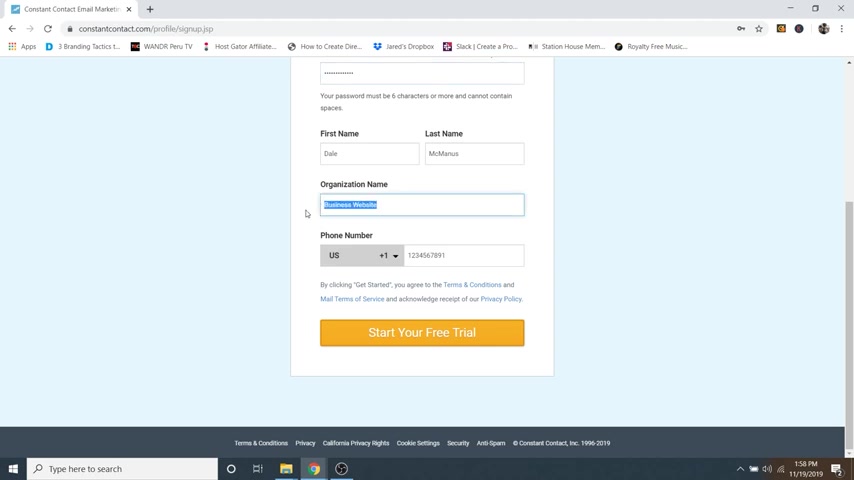
So password , I'm just gonna create a password and then I've got my first name , my last name and my organization name .
I'm just gonna say , uh Elite Fitness because that's the fake one that I'm coming up with .
And then phone number you can put in here and then I'm just gonna say , start your free trial .
Cool .
And then we're just gonna go ahead and scroll down and just say , let's go .
We'll say , what's your industry ?
I'm just gonna say professional services or other good enough for me .
Click on next .
What's your number , number one marketing goal ?
I'm just gonna say , drive more business or actually let's say grow my list of email contacts and then I'll just say next , none of these really matter that much .
Do you already have a list of email contacts ?
We're just going to say no because we're just starting out and then click next .
And then do you already have a website ?
We're going to say yes .
And we're going to put in our website here .
So create a pro business dot com like that and then just say get results .
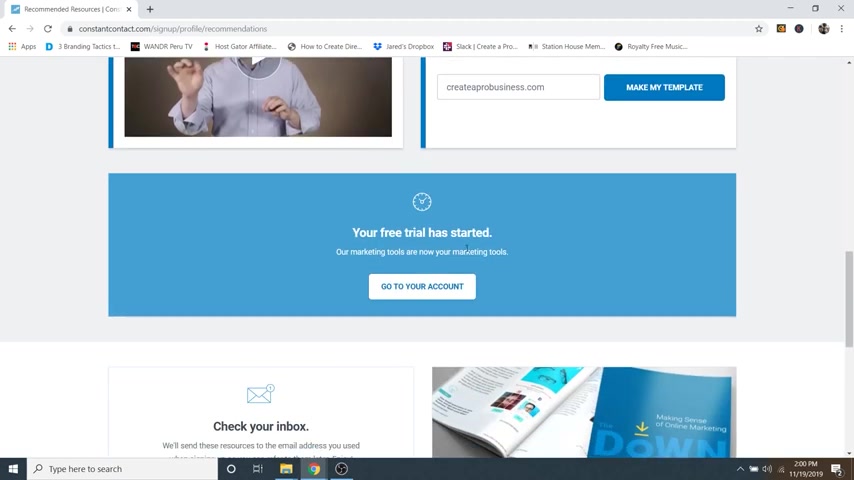
Cool .
OK ?
So now we can just scroll down and you'll see this big blue area and it says go to your account .
So let's just go ahead and click on that .
All right .
Awesome .
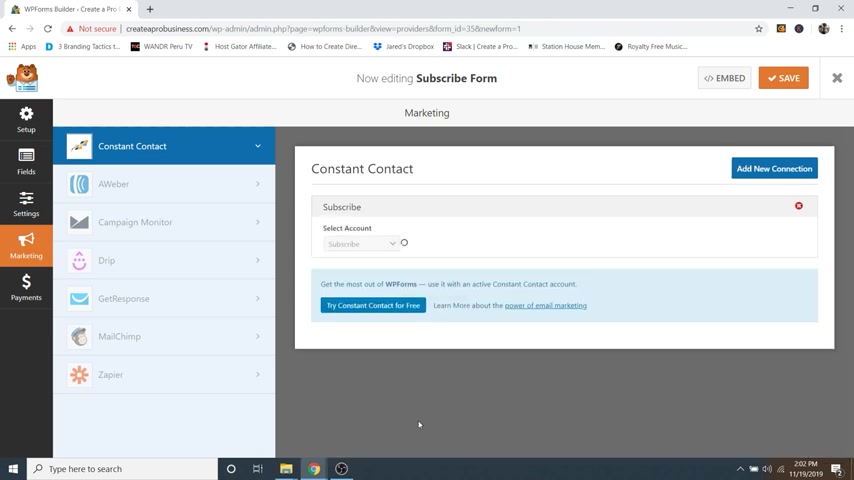
So now what we're gonna do is just go back to our word press right here and we're just going to say add new connection and then it's just gonna ask us to give it a name .
So we're just gonna say , subscribe like that and then we're just gonna say , OK ?
And then from here it's gonna ask you to add a new account and you'll see , click here to register with constant contact .
So we're just gonna click on that and then it's gonna ask us to log in .
So we're just going to put in the same credentials that we just created to create our account with constant contact and then just click log in and then it's gonna ask us to allow access .
We're gonna say allow and then all you want to do is just copy this code .
So just triple click and then click copy and then you can exit out of this .
And then we're gonna put in that authorization code right here and then just click on connect .
Oh , I forgot to put in the account nickname .
So let's put in , subscribe .
It's the same one that we created up here and then just click on connect .
There we go .
Cool .
So here is our new account that's hooked up , ready to go .
So select account we have that set us subscribe and then we've got our fields here .
So for email right here , which is the only one that's required .
I'm just gonna go to email right there , make sure that that's set and then just go ahead and click save .
Now , what we're gonna do is just click on the X and then we're just going to go back to our website .

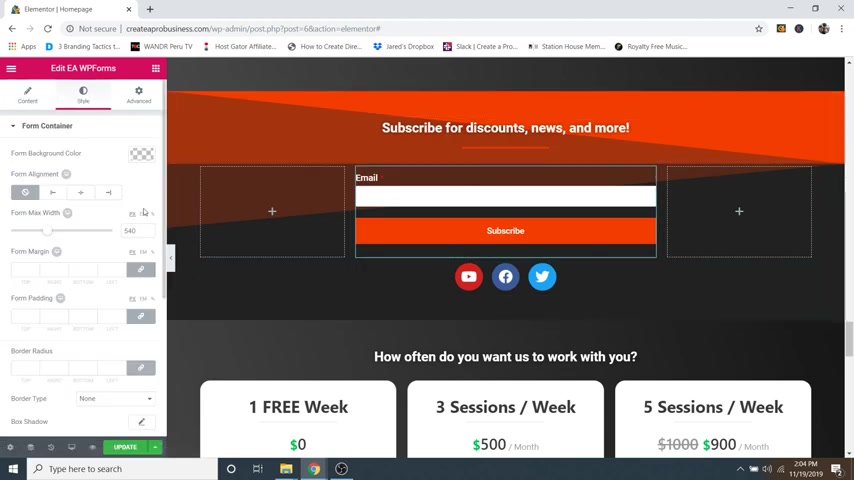
So I'm gonna go to visit site up at the top and then I'm gonna go to edit with mentor and then I'm just going to scroll all the way down to the bottom to where our subscribe is .
And I'm just going to click on that edit eawp forms , little pencil icon right there and then go to select form and then I'm gonna go to subscribe form and there we go .
There is our subscribe form and you can toggle on the titles and labels and things like that if you want to .
But honestly , I think it looks the best just really simple .
So now I'm going to show you how to change the button here .
So if we just go to style , so you can actually change the uh background color of the entire container itself .
So if you just change that , you know , you can do that .
I don't think it looks that great though .
So I'm gonna go back to how it was just clear that and then if you go to submit button down here and then you can change the submit button color right here , changes whatever color that you want .
But I like it just the way it is .
I don't know what happened to this .
Let's get that back .
Select form , subscribe form .
I don't know what that was a little weird glitch .
OK ?
Back to style .
So I showed you how to change the submit button color .
So if you go back to submit button again , then you can change the width .
So the width is gonna make it , you know , smaller .
Maybe you just want a button like that or you can make it the full width of the form , which I think looks really nice just like that .
Cool .
Now , let me show you that this form is working .
So I'm just gonna click on update down here at the bottom and then I'm gonna click on the little eyeball to preview changes and then I'm gonna scroll all the way down to the bottom where our subscribe is .
And I'm just going to put in an email , a different email than what we signed up with .
So just like this and then I'm just gonna click on subscribe as if I were any other person .
As you can see it is subscribing .
And then boom , there's our little success message .
Thanks for subscribing .
Keep an eye on your inbox for an email from us .
And then inside of constant contact , you could create an automated email that as soon as they put in their email there , that email will automatically get sent to their inbox .
You can schedule all this stuff out .
It's really cool .
Constant contact is a great service .
So I'm gonna go back to constant contact and then I'm gonna show you where you can see all a , a whole list of all the people that are signing up for your emails .
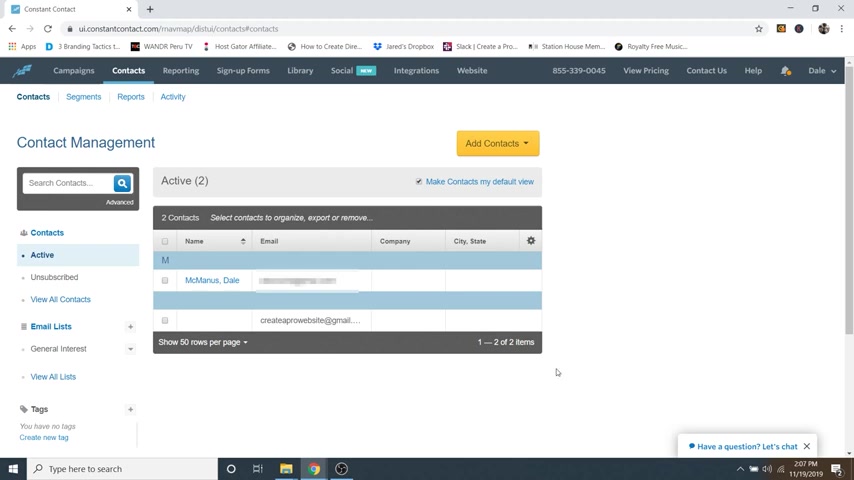
So to do that just going up to contact and then there we go .
There is the email that we put in uh just now on the website and it's already showed up here in our list of contacts .
And then the one at the top is just the original email that I used to sign up for constant contact , which is your email .
So if you'd like to send out an email to the entire list of contacts that you have , maybe you , you know , let this go for a few months and you collect some emails or if you want to send an email to all those people do a broadcast , I mean , just go over two campaigns and then it'll say you don't have any set up yet .
So let's go ahead and create one .
So you can click on start by creating an email or you can click on the create button up here .
But I'm just gonna click on this little link here and then it'll say , what do you want to start with ?
These are kind of a bunch of templates that you can use .
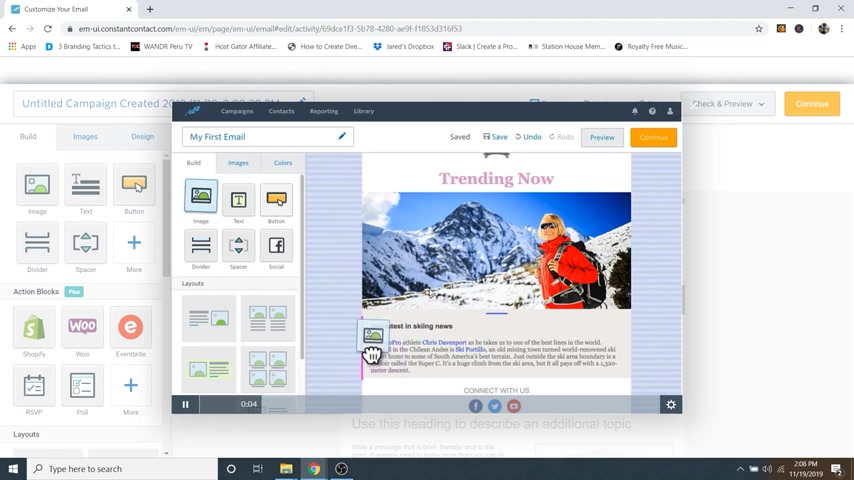
So I'll just go with a basic announcement and then it will walk you through the whole process and you can watch this video here and it'll show you how to create these really awesome branded emails .
So I'm not gonna get too far into that because it's gonna make the video really long .
But I do recommend checking this out and then you can just send out a broadcast to all of those people in your list .
OK .
So I'm gonna go ahead and X out of this and get back to wordpress .
I'm gonna exit out of this as well and let's get back to customizing our website here .
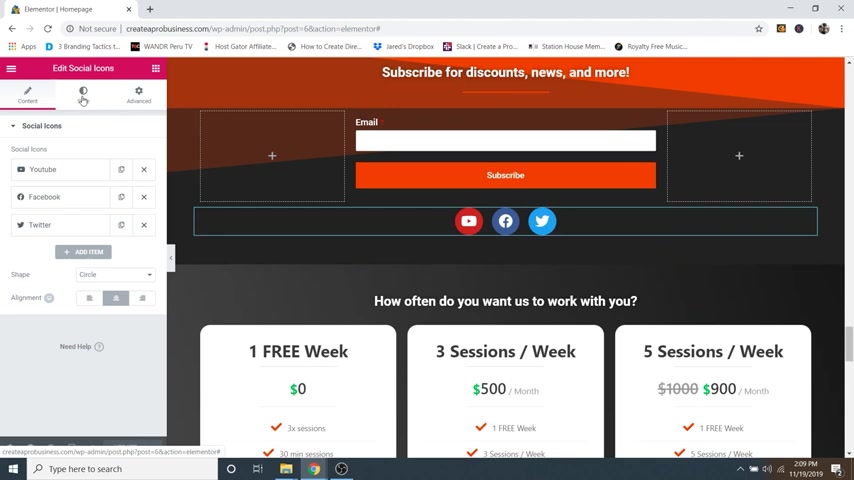
So next , we've got these little social symbols .
So if we just click on that widget to edit these social icons , you can change them here .
So we've got youtube , you can put in a link right now .
It's going to uh my creator pro website , youtube and again , you can change the icon in the icon library and make these whatever social symbols that you want as well as add new ones .
It's very similar to the ones that are on the coaches that I showed you earlier .
Ok .
So with that said , let's go ahead and move down .
Oh , and by the way , you can change the colors of these as well if you just go to style .
Ok .
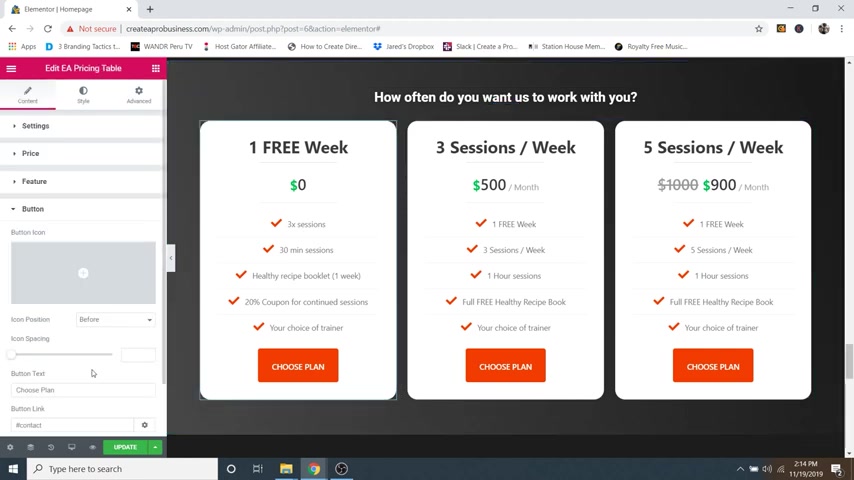
So moving down , this is a really important section for a business because it's your prices and allows people to uh choose certain plans that they want to sign up for .
Ok .
So with that said , you can change the text right here , which I showed you how to do and then we can go to the pricing table and edit that .
So just click on edit E A pricing table and then underneath settings , you've got the title here which we just have set as one free week .
So right now I've got a free option and then a couple of paid options .
So this kind of just gets people in the door .
It's kind of like a little sales funnel .
So I'm gonna leave that as one free week and then I'm gonna go to price and you can change the price here .
I just have it set as $0 but you can change it to whatever you want like that .
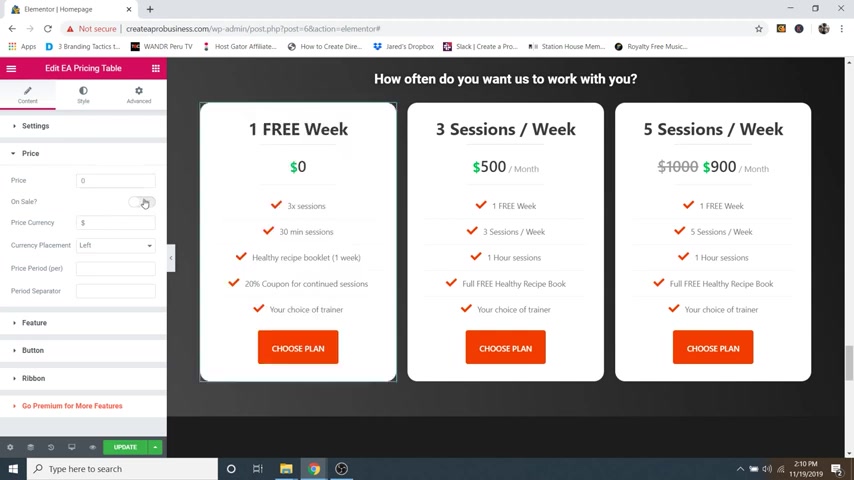
But I'm gonna leave it as zero and then you can change the currency here and you can even do on sale .
So right here , you can see that I've got this one on sale .
So normally it would be $1000 but we're gonna do a deal of 900 .
So you can do that just by clicking on this button here for on sale .
And then it will , you know , allow you to add a sale price in here , but I'm gonna exit out of that because this is a free week and then the separator .
So this is the price period in the separator .
So let's say that we did want to charge right now .
We've got $500 a month on this one .
So you would just do a month in the price period and then the period separator , you would just do a slash and then that would be $0 a month .
But I'm just gonna leave it as a one time of $0 by deleting those .
Cool .
And then if you go to feature , here's where you can change all of these items next to these checkmarks .
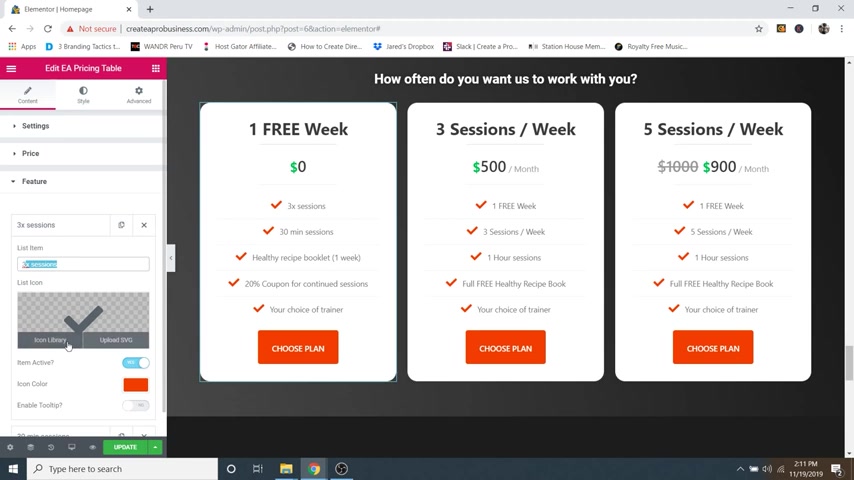
So all you have to do is just click on it and then you can change the title here as well as the icon and you can change all of the icon colors here as well .
But I just have them set as the same orange that I have branded throughout this whole website .
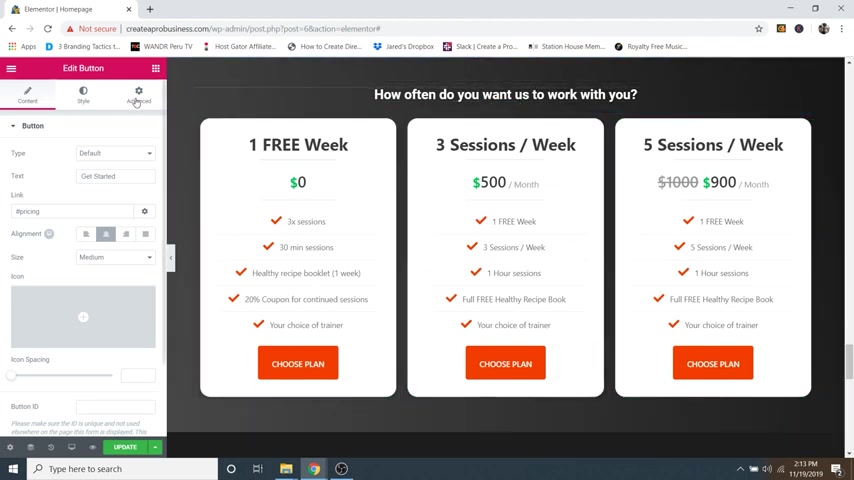
But if you want to go ahead and change them to your colors , you can just do that right there and you can do the same for all of these and then go to the button and then you can add an icon to the button .
You can change the button text right here as well as a link .
So right now this is going to hashtag contact instead of an actual link .
So whenever you do a hashtag it will go to whatever you have created a CS S ID for on your website .
So let me show you what I mean by that because that was a little confusing .
So if I were to click on this button , it would go to contact which it jumps to my contact section , which we don't have set up yet .
But if you click on this uh divider right here , if you click on that and then go to advanced , you can see CS S ID , we have set as contact .
So there's no hashtag on this , just contact .
We've ID ed this section .
And that way when we go to our button and then we add hashtag contact , it will then jump to that section .
So if we wanted to edit our button back up at the top again , if we go to get started and we click on that button right now , I have it set as going to hashtag pricing .
So that's gonna jump down .
So if I click on that , that's gonna jump all the way down to our pricing , which is the section that we're editing now .
So if I go to advanced , actually , if you go to the uh six dots , so it's not just this widget , it's the six dots for this whole section .
So it's wherever you want this line to end up at the top of the screen .
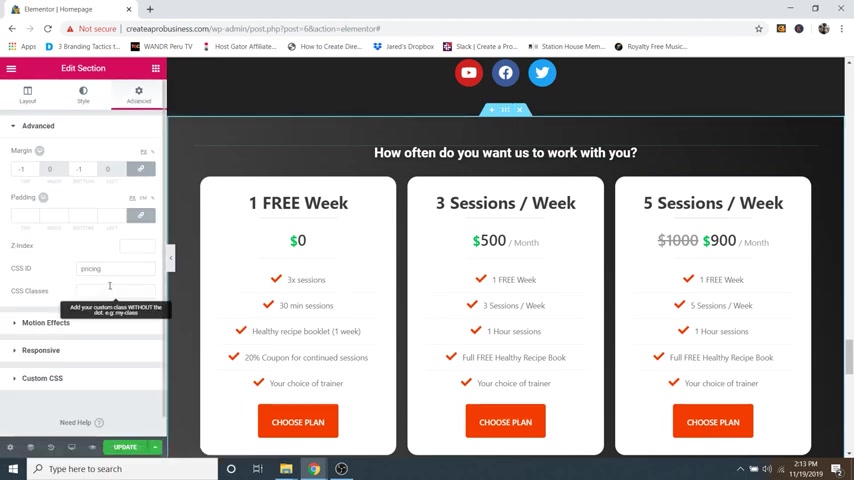
So if we want it to end right about there , then you would want to pick whatever section will line up with that .
So in this case , it's the whole section .
So I'm gonna click on the six dots and then go to advanced and then you can see I have it set as pricing .
So whatever the button is , as long as you put a hashtag in the link , it will link to whatever section that you ID .
So this section is programs .
So if you go to the six dots here , go to advanced , this is set as programs .
So you're welcome to come in and change these to whatever names that you want , but I have them kind of automatically set .
So this one is coaches and so on .
Ok .
So moving back down now that you know how to create a jump button .
So I'm gonna go back to this little widget here for the pricing and you can change the , let's actually close this and go to style and you can change the background color of this whole thing by clicking on background color and you can give it a border and pretty much the same editing that you can do for all the other widgets .
And then if we scroll down to button again , you can change the icon size , you can change the background color for the button .
And this is all within the style tab up here , but I'm gonna leave them just the way that they are cool .
So with that said , you can actually just duplicate one .
So once you create one and you change all of the colors here , you can just right click and duplicate it and then you can replace these ones here just by clicking and dragging over .
But in that case , I'm just going to delete them because these are all looking pretty good for me .
But if you need to delete just right click , click on delete .
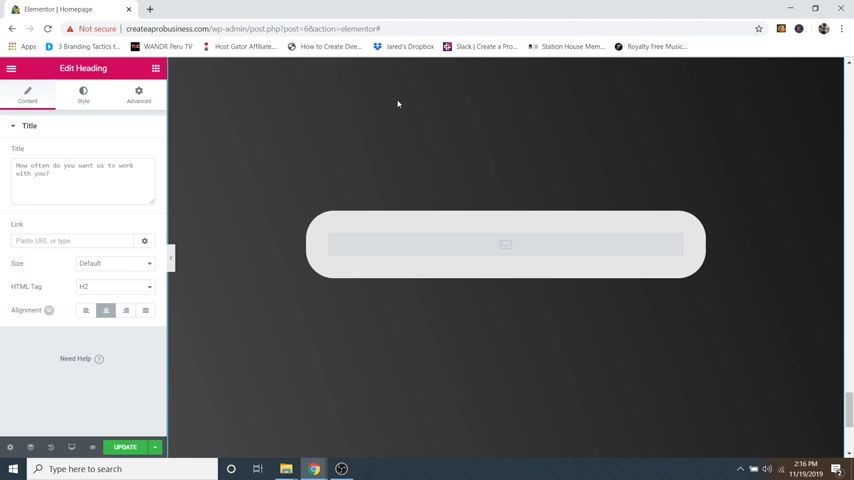
OK ?
So scrolling down , we've got our contact section .
So let's go ahead and get our contact form set up , which is step number six , create a contact form .
So a contact form is a must have for whatever business that you have , you need a way for your customers or potential customers to get in contact with you .
So if we just go ahead and click on this widget here , it's gonna bring us to our W uh WP forms widget , which is the same as our newsletter that I showed you earlier .
So if we were to click on that , we would want to select a new form which we don't have set up yet .
So we've only got our subscribe forms .
So let's go ahead and make a new form for WP forms .
So I'm gonna go ahead and click on update and then I'm going to go up to the little hamburger looking symbol at the top left and then go to exit to dashboard .
And then from here , I'm just gonna click on WP forms and go over to add new Cool .
And then it's gonna ask us to select a template .
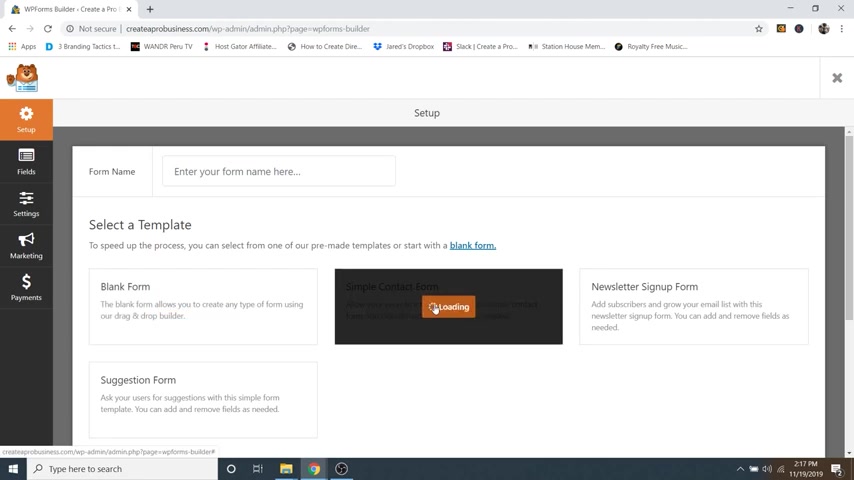
I say work smarter , not harder .
So let's go ahead and just select the simple contact form .
Because otherwise , if we do a blank form , we're gonna have to create it all from scratch .
So let's just do a simple contact form .
And then here you can see we've got our name , email and a message and then you can change the name of this .
So let's just click on this name right here and we'll change it to business contact form or whatever you wanna name it .
It could be , you know your name , contact form , whatever it is .
And then let's just go back to fields .
And again , you can change the submit button , text and everything within the general tab which I showed you how to do earlier with the newsletter sign up .
So I'm gonna leave this as submit and sending because that's pretty standard for just a regular contact form , ok ?
So let's go back to fields and then from here .
What we're gonna do is add a multiple choice up here at the top .
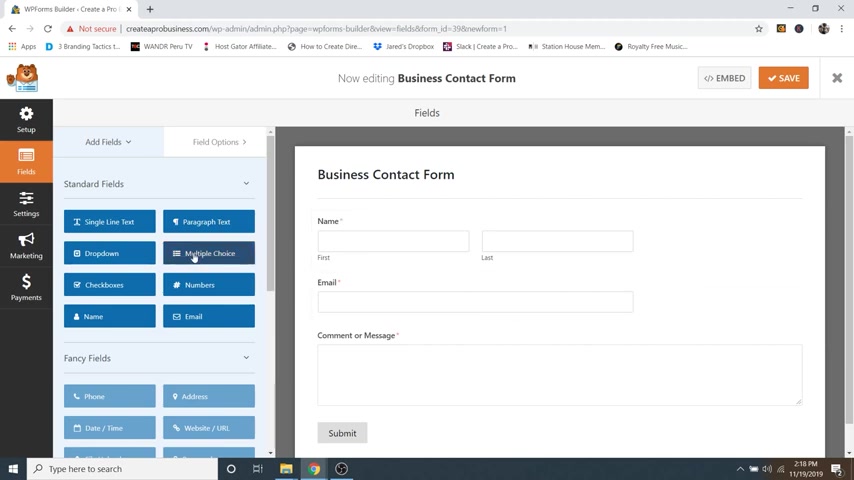
So let's say that they want to sign up for maybe a free week or three times a month , training or five times a month training , whatever it is that you're setting , you wanna have a multiple choice .
So let's go ahead and grab a multiple choice and just click on that and it'll add it at the bottom here .
So you can just click and drag and drag that up to the top .
And if you click on it , you can then edit it here .
So underneath the label will say which plan are you inquiring about like that .
And then underneath , first choice , we will just say one free week , second choice , three times a week , let's just say three times per week or five times per week .
And then we're gonna make this section required because we want to know which one that they are picking if you don't wanna make it required .
That's OK .
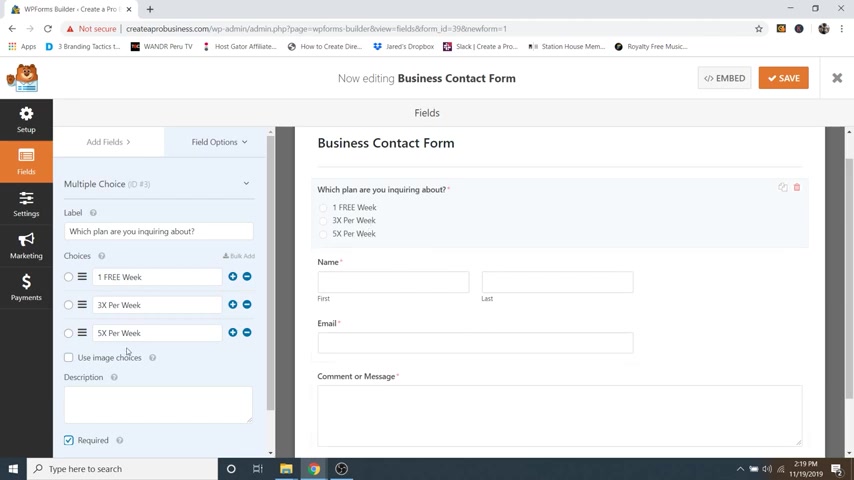
People can just send you a general inquiry or you can add an option here .
So it could just be general inquiry .
There we go .
And then what we're gonna do is just go on over to save , make sure that we're saving our work and then you can change the comment or message label to say whatever you want .
So if you just click on it , you can see comment or message right here .
So for this personal training , this fake personal training website that I'm doing , I'll say do you have any injuries or something like that , that we should know about like that and then they can write it in there and then this is also required .
Ok ?
So let's go ahead and click on save again and then let's just go over to settings and then underneath settings , we're gonna go to notifications and then it's gonna say send to email address and admin email this little short code right here .
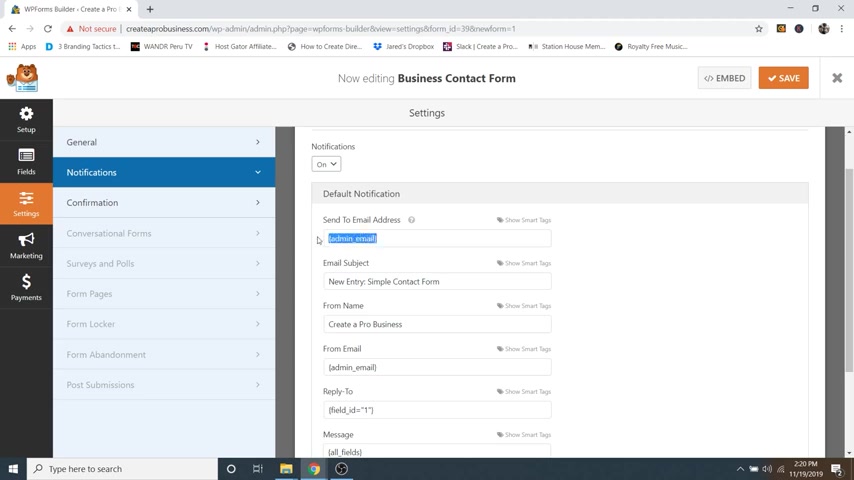
This is gonna go to whatever email that you use to sign up for wordpress with .
So if you've got a different email for your business , you can just delete that and put in your new email .
And if you hover over the little question , it'll tell you to enter email .
If it's multiple email addresses , let's say you want it to go to a few of them at once .
You can just separate them with a comma , but that's how to change it here .
I'm just gonna leave it as admin email .
So it'll just go to the same one that I used to sign up for wordpress with .
Ok ?
So again , just go to confirmation and you can change the success message right here , but I'm going to leave it the way that it is and then just click on save and then I'm gonna just hit the X and then I'm just gonna go back to my website .
So I'm going to go up to my name and then click on visit site and then edit with mentor .
And then I'm gonna scroll all the way down to the bottom again and I'm gonna put in that contact form right here .
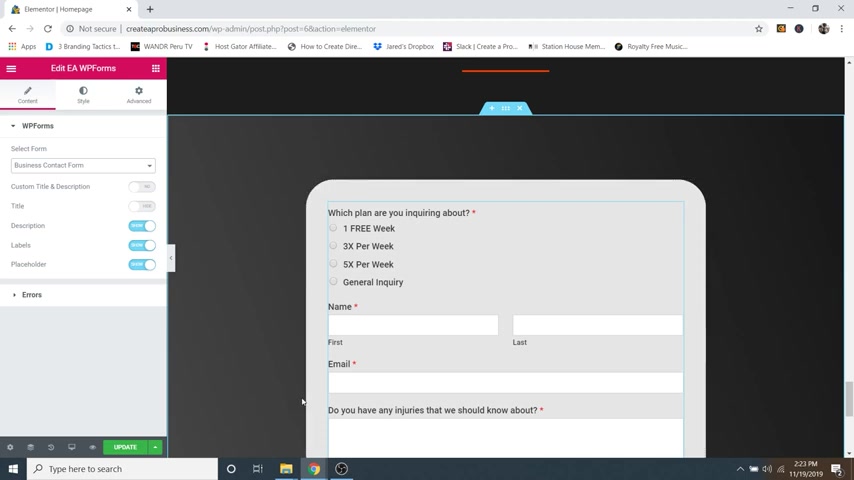
So I'm just gonna click on the widget E A form or eawp forms and then go to select a form and I'll say business contact form and there we go , there's our contact form .
It's looking good .
And then I already showed you how to edit everything for this as well uh with the newsletter .
So I don't think I need to go over all that a second time .
But really if you just wanted to change the background color , that's the only important thing .
So right now I have this set as the column because I wanted some space in between the words and the outside edge .
So I created a background with the column .
So if you want to edit the background , just click on the little edit column button like that and then go on over to style and then you can see color right here .
You can change that to whatever color that you want , you can do full white , more of a darker color .
But I think kind of like a light gray is a really good way to go like that .
And then I've also got these rounded corners on it .
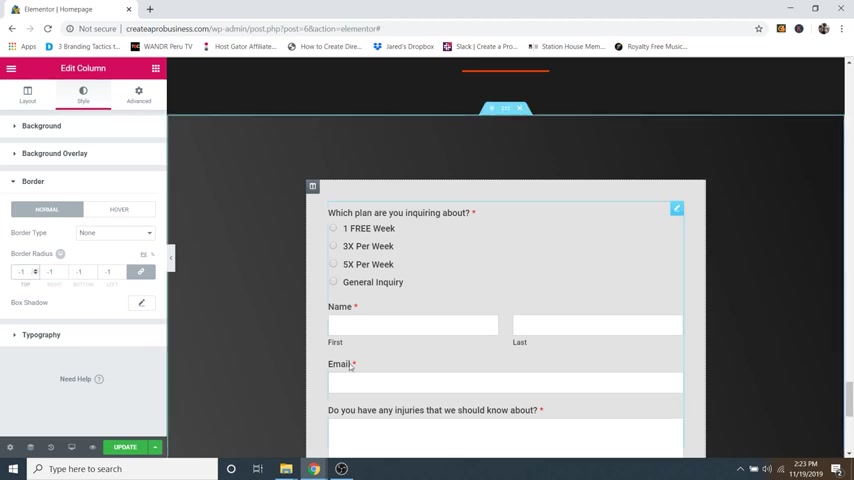
So if you go to border down here , you can see , I've got a 50 on the border radius .
So if we bring that down , you can see now it's a full box .
So it's totally straight .
But I really like the rounded corners .
So I'm gonna leave that as a 50 all the way across the board like that .
And then let's make sure that we click on update to save our work and then you're gonna want to set this up and then send yourself a test email to make sure that it's coming into your inbox .
And if it's not make sure that you go to your spam and then mark it as not spam and then they should come in normally after that .
But you always want to send a test email and make sure that you're seeing all of your potential customers emails .
Ok ?
So now we can move on to step number seven , which is to edit your header and your footer .
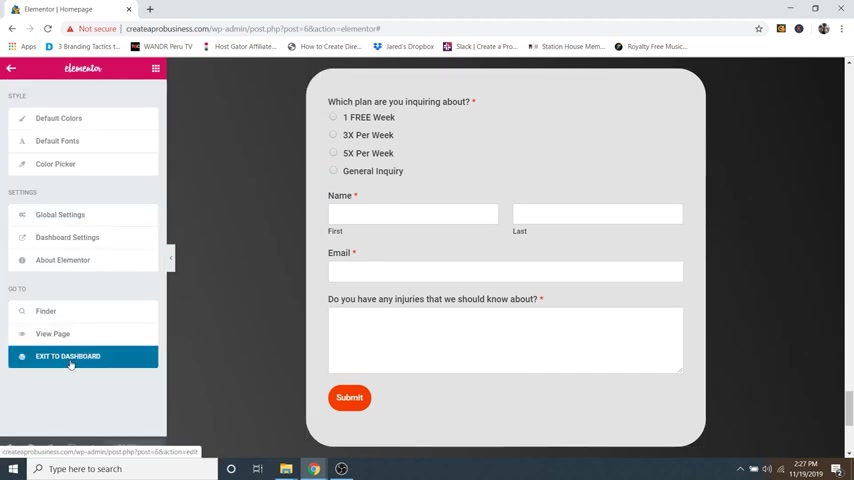
So in order to edit our header and our footer first , we're just gonna go up to the little hamburger symbol up here , make sure that you've saved your work , go up to the little hamburger symbol and then go to exit to dashboard .
And then we're just gonna go back up to our website name and then go to visit site .
And then from here we're just gonna click on customize and this is the menu that we're gonna be using to edit our header as well as our footer .
All the way at the bottom down here .
So first , let's just do the header .
So if you just click on the little pencil icon uh around your site title , that will take us to where our site identity is .
So it'll say site title and then you can just uncheck display site title because we want to get rid of this and put in our own custom logo .
OK ?
So from here , if we scroll up , you'll see site logo , you can select a logo .
Now , first we need to make one .
So first I'm just gonna save my work by going to publish .
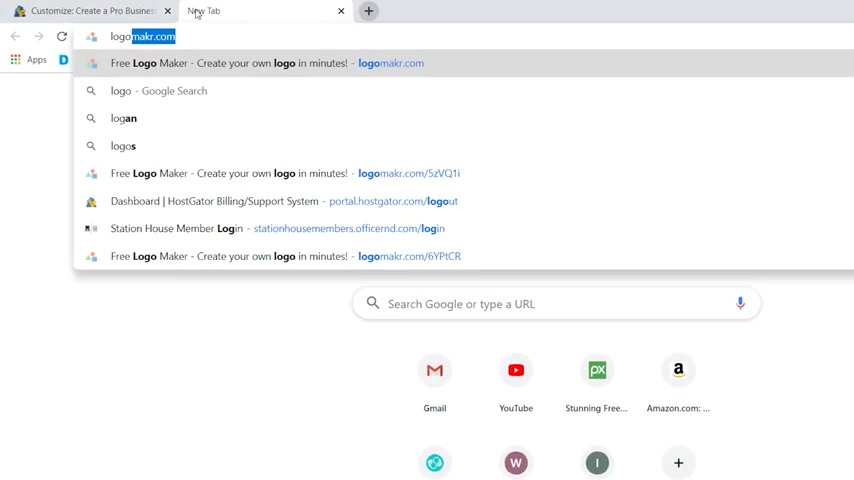
And then I'm gonna go up to open up a new tab and go to logo maker without the E dot com .
And then it's gonna try to walk us through it .
We're just gonna hit the X because I'll show you how to use it .
It's really easy .
So basically , you've just got this little search bar up here and you can search for any icons that you want .
So for personal training , I am just going to type in a dumbbell .
Oh Dum ba dumbbell .
And then you can just select , there's just tons of them .
I think there's hundreds and hundreds for every single category .
It's crazy .
So I'm just gonna go back up to the top and just grab a simple one that's got a circle around it like that and then you can just drag it up by just clicking and dragging on the corner and make it really big , but I'm gonna make it kind of small like that and bring it over to the side and then I'm gonna put some text right here .
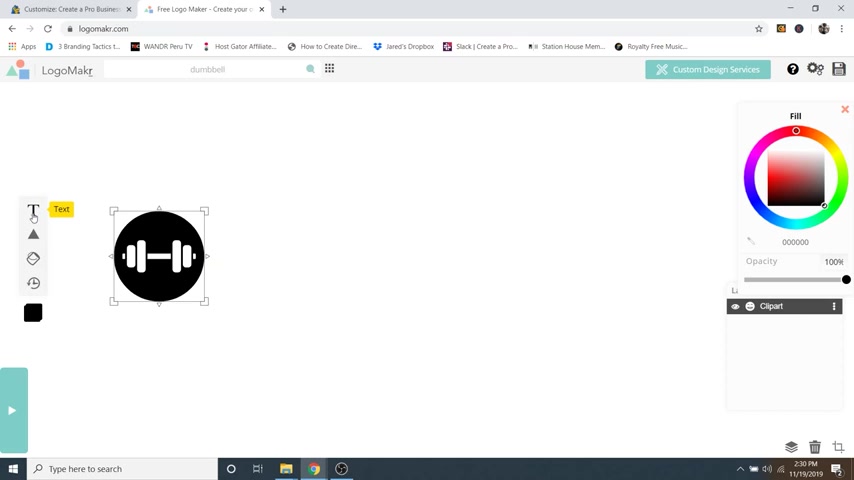
So in order to add some text , just click on the T for text and then I'm gonna type in Elite like that and I'm gonna make that my orange color .
So we'll just do kind of , we'll do it kind of crude like that .
And we'll just make that a little bit higher .
And then we're gonna change the text uh font .
So if you just go to simple and modern there , you've got a bunch in the font family over here or you can change the category to fun and funky and that's got some crazy ones .
You've got uh scary and dark .
These are all the categories and then if you go to font family , then you can change what's in there .
So I'm gonna go to the category and just go back to simple and modern .
And then for the font family , I'm gonna go to like open sands , extra bold like that .
Keep it simple .
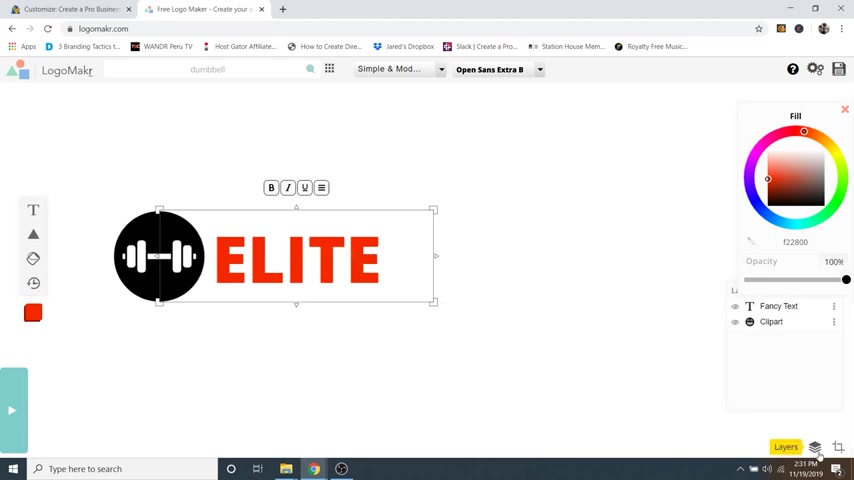
And then I'm gonna drag that over and then what you can do is just going over to fancy text over here in your little layers .
So if you click on this button , this is your layers tab here and we're just going to click on the three dots and go to duplicate and then we're just gonna drag that duplicated copy over like that and line it up and we're just going to triple click to edit it and we're gonna say fitness and then we're gonna just change that to black like that .
And there you go , there's a logo automatically and that took all of what , two minutes maybe .
So for this case , I'm actually gonna make it white because what we're gonna do over here is change this white uh header to be transparent and then we'll have our nice white logo with our color in it up here .
So I'm gonna go back to the logo maker , just drag this down just a little bit .
I think it was a little too big , maybe something like that .
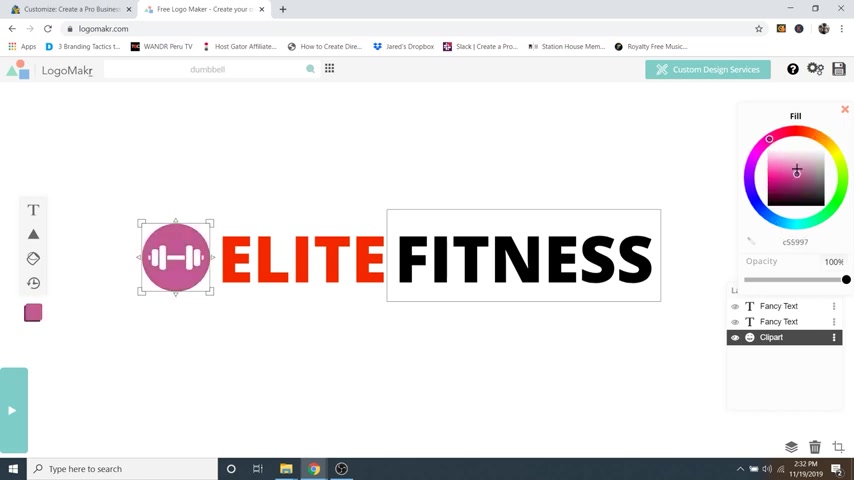
And I'm gonna change that to white over here in the little color picker .
So you can change the color on the outside and then you can change the saturation in the box .
So I'm gonna change it to white and I'm also going to change the text to white like that .
And then you can just go up to the save logo button right here and click on that .
And it's gonna say , hey , do you want to buy it ?
And it's a high resolution file ?
We're just gonna say no thanks right here .
I'm gonna download the low resolution file because it's just for our logo and that thing is tiny .
So there's really no point in buying it .
It's just gonna say , hey , can you credit logo maker for this ?
So we're just going to say sure and then just grab the low resolution file and you can see it just hit my downloads right there .
And I already have that included in the follow along images .
So once you have that logo , you can just go over to select logo .
And again , I already uploaded it earlier .
It's right here .
But if not , you can just go to upload files .
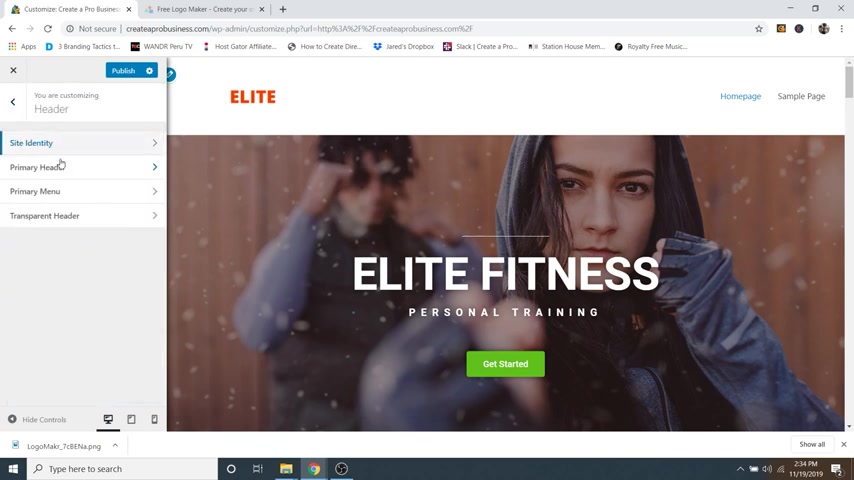
So I'm just going to select that logo and then go to select and then I'm going to skip cropping because we don't want to crop it because we can't even see it anyway .
So I'm gonna click on skip cropping and it's gonna add it in up here .
And again , we can't quite see it yet because it's a white logo against a white background .
So what we're gonna do is just go over to the back button and then we're gonna go to primary or sorry , we're gonna go to transparent header down here , click on that and then go to enable uncomplete website and then boom , there we go .
We've got a nice transparent header and our logo is a little big .
So let's drag it down .
So if we just click on the little pencil icon , that'll bring us back to our logo and you can see logo width , we'll just drag that down a little bit .
Keep it nice and small like that .
I think that looks pretty good .
And then the site icon is this little symbol right here .
So as you can see , host gator is a gator logo maker kind of has these shapes .
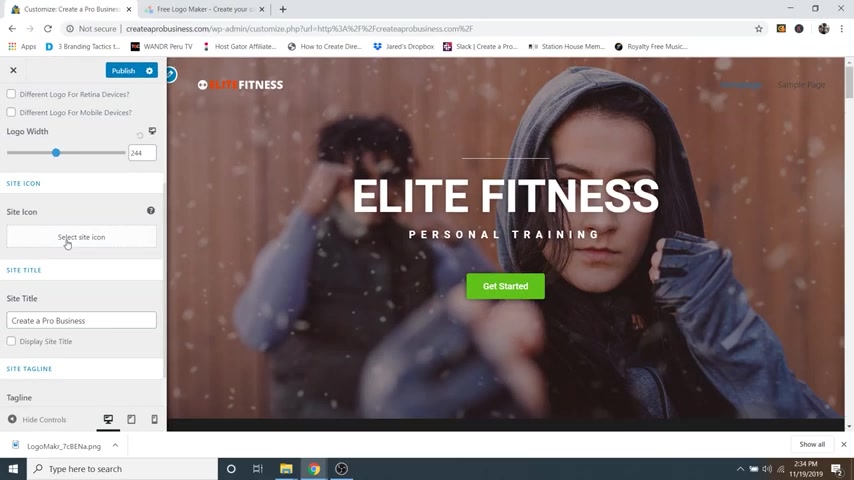
This is also called a Fava Con .
So you can change that as well .
So right now it's a gator because host gator is hosting this website for us , but we can change it .
So let's go ahead and click on site icon and I've already got mine in here .
But if you don't , you can just go back to logo maker and we're gonna hit X and we're just going to take both of our text .
So if you click a box and drag , you can delete both of the text and we're just going to grab our um icon here and we're gonna turn it back to that kind of orange color like that .
And then you can just drag it up , make it nice and big .
Let's make it huge like that .
And then you can just click on save logo again and then just do .
No , thanks .
Download the low resolution file down here and then it just hit our downloads again .
So that's how you create a Facon .
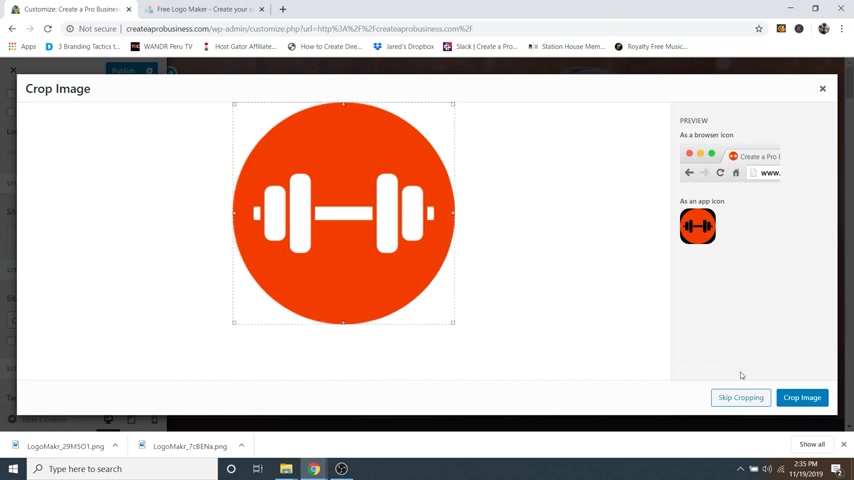
And then you would just upload that here and then just click on select and then we're going to skip cropping again and it'll give you a little preview over here of what it's gonna look like , which looks pretty good .
So we're gonna say skip cropping and then there we go , you can see up at the top left there is our facon or our site icon .
Cool .
So now I'm just gonna click on publish .
So now let's add a menu over here in our header .
So right now we've just got our home page and a sample page , which is not correct .
So let's go to the back button and then back button again and then go down to menus and then go to create a new menu .
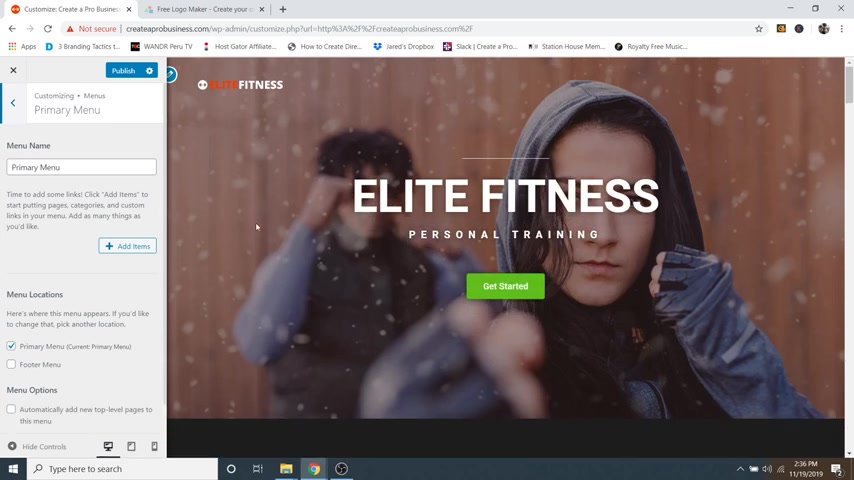
And we're just gonna call this primary menu and then we're just going to say the menu location is primary menu , which is this section up here and then click on next and while that's loading , I'm gonna go ahead and click on the little X to get rid of my downloads down there and make sure we got some more real estate to work with .
All right , cool .
So now it's gonna say add items .
So menu name , primary menu , we're gonna add some items to it and then um automatically it's gonna open up pages and pages are pages that we've created for our websites .
Remember we created the home page in the beginning .
Well , we don't want to add pages to that menu .
We want to add some custom links .
So I'm gonna close pages and go to custom links .

And for the first one , let's just say it's going to be programs like the programs that we offer and then for URL , I'm gonna say hashtag programs because remember I was talking earlier about jump buttons and using CS S ID to ID , each of the sections on your website .
Well , we've got a hashtag programs uh section .
So if I hide the control , I'm gonna say , add to menu right here and then I'm just going to go down to hide controls and you can see we've got programs now up here , if I were to click on that , it jumps to our programs , which is really cool .
And remember I added for this section right here , this little banner , I went to the advanced tab underneath CS S ID and added programs to the SI CS S ID .
And then that way when we put in hashtag programs , it will jump to that .
So let's add some more .
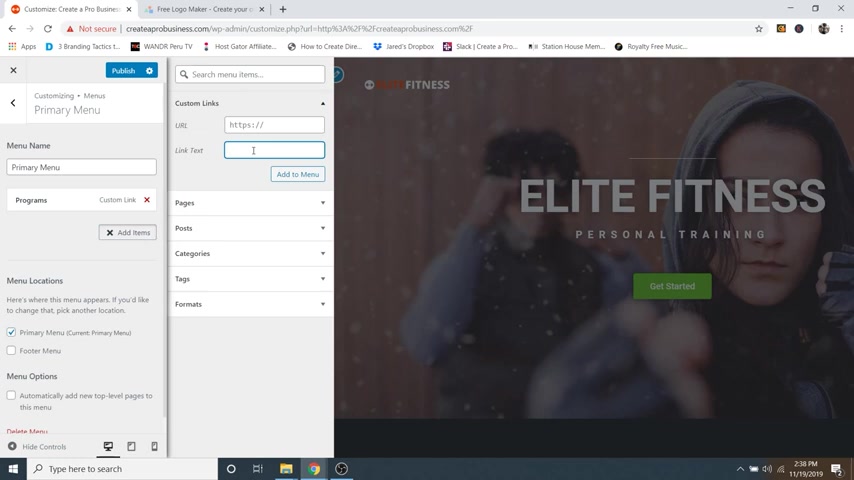
So I'm gonna go to add items and we'll do about and then we'll do hashtag about add to menu and then we're gonna do contact and then we'll do hashtag contact that , add to menu and we could do pricing and then hashtag pricing , you can change these to whatever is going to suit your website the most .
And then let's just hide the controls and then we'll just scroll down and see if there's anything else that we forgot .
Ok , so we need a coaches section and a blog .
Ok .
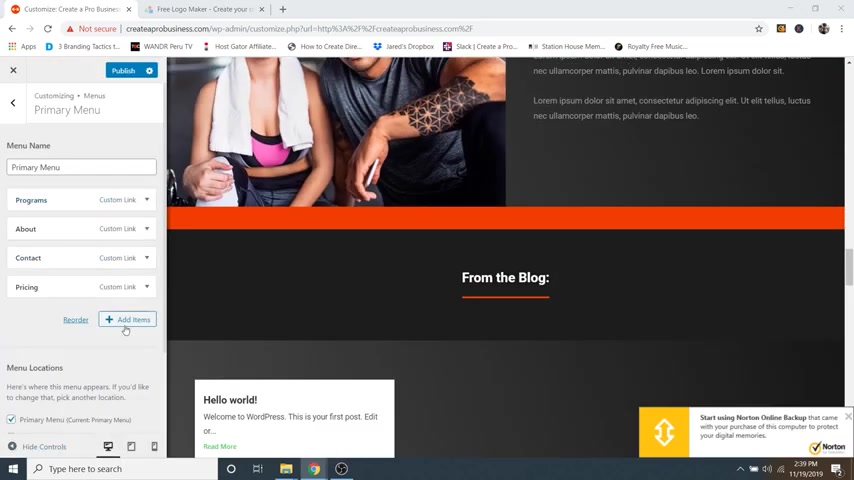
So let's open up the little arrow here to open up our menu , go to add items again and let's just do blog and then hashtag blog add to menu and then we'll do coaches and then we'll just do hashtag coaches and then add to menu .
Cool .
So now let me show you if I hide the controls again and go back up to the top , we've got all of them here .
Don't worry , I'm gonna show you how to change the color .
So they stand out more .
But if you want to change the order in which they happen , so left to right , if you open up your menu again and you can just click and drag these around in whatever order that you want .
So top is all the way to the left and then the bottom is all the way to the right .
So let's just say I want to rearrange these , I'll do programs , I'll do coaches next .

Then about then I'll do contact at the bottom and then I'm just gonna click on publish .
Cool .
So now let's go ahead and change the color .
So I'm just gonna click on the back arrow and then back again .
And then we're gonna scroll down to header right here and then we're gonna go to transparent header again and then we're gonna scroll down and you'll see colors and background over here and for menu , we're gonna click on the little pencil icon for menu , then scroll down and you can see link text and color .
So we're just going to change that to white like that .
And now all of them are white .
And if you want to change the color , the hover color , uh just go over to hover and then scroll down , you'll see link active hover color and then you can just change that to whatever you want .
So we'll just do kind of like our orange color .
Again , this is kind of , it's not the exact um color code but close enough .
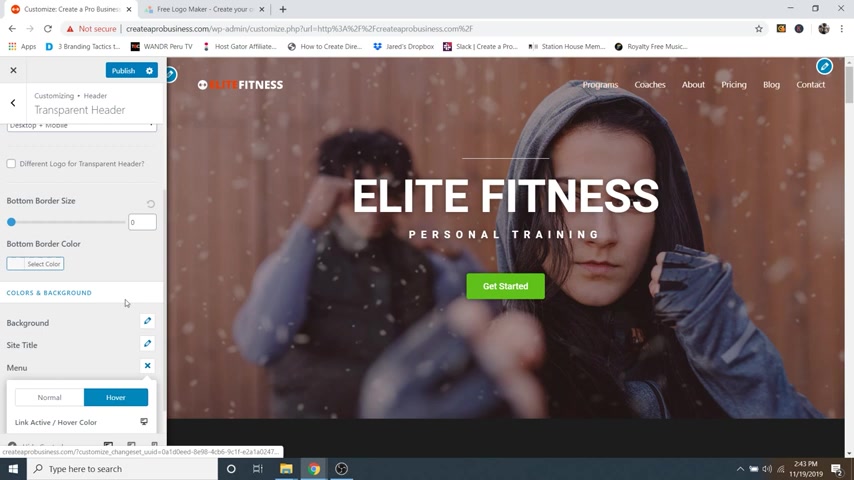
So now I'm gonna close that and that's how to change the color of our menu .
And again , that's in the transparent header section .
Ok ?
So now let's save our work and then we're gonna edit our footer at the bottom .
So if we just go to the back button and then back again , we're just gonna go down to footer and then we're just gonna go to Footer Bar and then we can change that here .
So let's scroll down .
So you can see what we're working with or you can just click the pencil icon and that'll get you there as well .
So here we can add our copyright stuff .
So I'm actually gonna delete powered by Astra like that .
And we've just got the copyright the current year and then our site titles , I recommend just leaving these little short codes because as the years update and your website updates , it will automatically update them here .
And then as you can see , there's a little border right here .
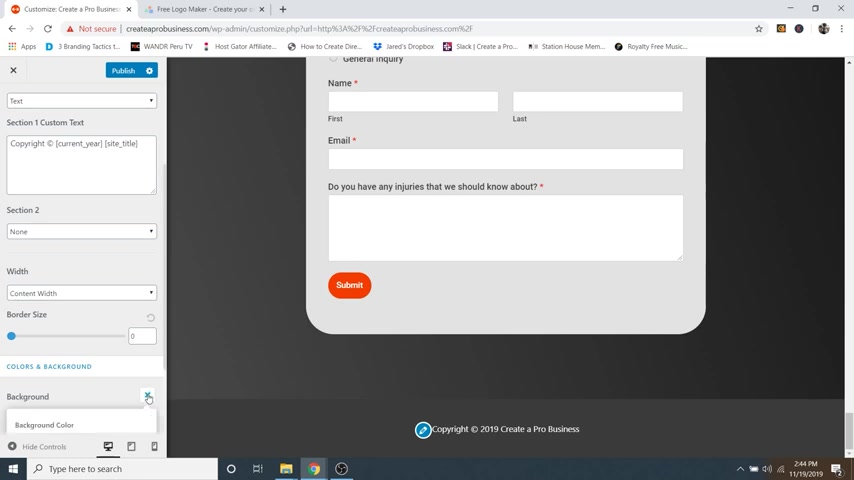
So let's go ahead and get rid of that .
So if you scroll down , you'll see border size , let's just change that to a zero and that will get rid of it , which is really cool and then you can change the background color as well .
So right now it's kind of blending in with the section above it .
So let's just click on the little background symbol right here .
A little edit pencil icon and we're gonna change the background color to kind of like a dark gray , like a really dark gray like that .
I think that looks really nice .
OK ?
And as you can see , we've got a section one and a section two .
So section one is our copyright stuff .
And then section two , you can actually add a menu in here .
So you could create a new menu and you could add , let's say like a terms and conditions or a privacy policy and things like that and they'll all just show up underneath here .
But I already showed you how to create a new menu .
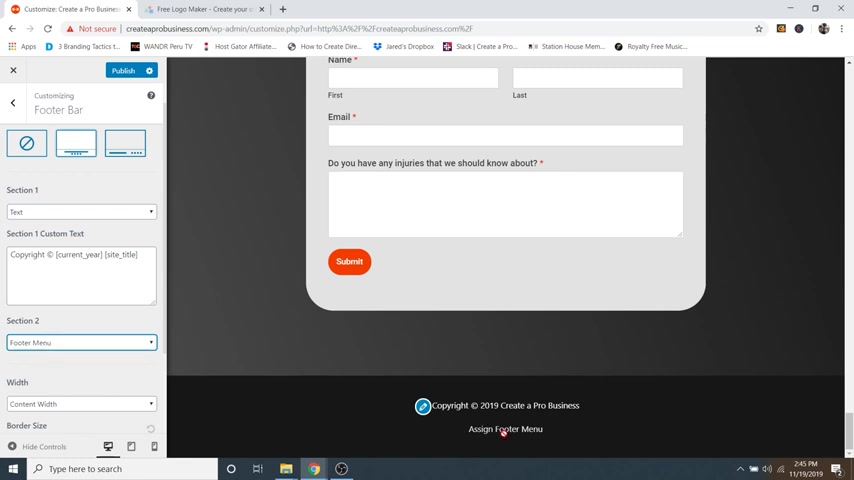
I don't want to get too far into that because it will really lengthen the uh the length of this tutorial .
But that is how you could add a terms and conditions and all that stuff to your footer down here .
But I'm just gonna leave it as none for right now .
Cool .
So that was how to edit your header and your footer .
So let's just go ahead and click on publish and then now we can move on to step number eight , which is to edit for mobile and tablet .
Making sure that your website looks great on a mobile device as well as a desktop is really important because over 52% of global online traffic is done on a mobile device .
Meaning that more people are actually searching the web on their phones than they are on their desktops .
But it's almost even .
So you want to make sure that your website looks great on both .
So let me show you how to do that .
So first we're just gonna click on the X to get out of this menu and then we're just gonna go back to edit with mentor .
OK ?
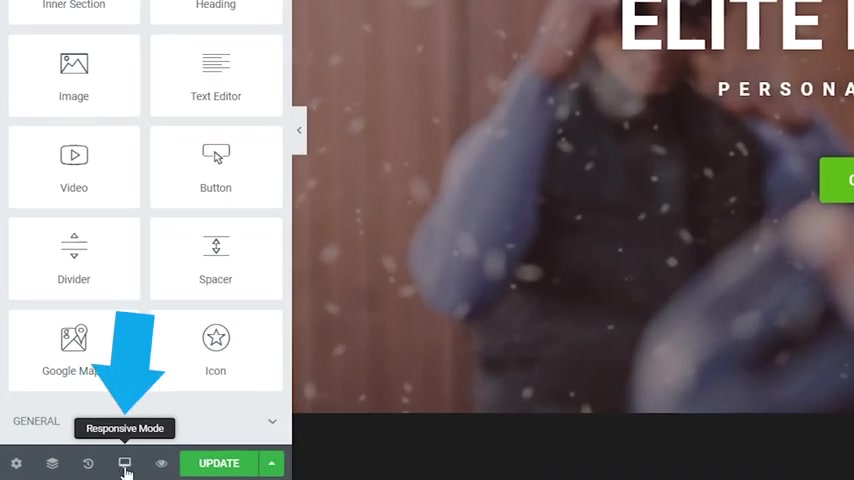
And then at the bottom , you'll see this little symbol that says responsive mode .
It looks like a little desktop .
You can just click on that and then you can change from a desktop to a tablet to mobile .
So let's just start with mobile .
And as you can see , it kind of creates this little simulator phone and you can scroll through your website and make sure that everything is looking good on mobile , which it is .
I've spent some time making sure that it was going to be responsive on all devices and it looks like it's working out pretty well .
There's really nothing that we need to fix as far as far as uh spacing goes .
But whatever you change on mobile won't change on desktop if it has a certain symbol .
So let me show you if I go to tablet .
So now you can see our contact form for tablet is a little weird .
It's really skinny for this space .
So let's go ahead and fix that and I'll show you what I mean about changing it on one device and not the other .
So I want to edit the spacing in here .
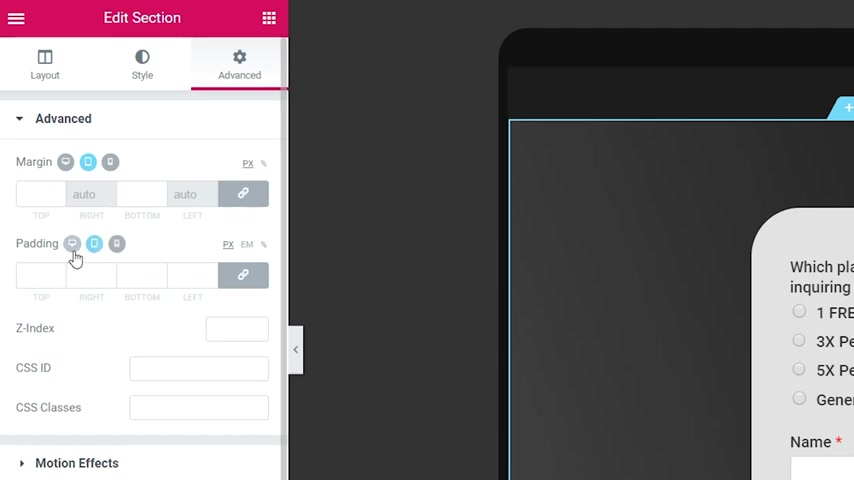
So I'm gonna just go to this section and then I'm gonna go to advanced up here and then you can see I've got padding .
So with padding , what I would do is make sure that it is on the tablet symbol .
So you can see I've got a desktop , a tablet and a mobile .
So as long as I'm changing it on just one , it's not gonna change it on the others .
So with the tablet selected , I would just increase this value and just go to wherever I like it , let's say like a 50 I think that looks pretty good .
And then that way when I go back to desktop , it's looking good as well as mobile is looking good .
So as long as you're changing something that has these symbols and it's B blued out on whichever uh device that you want , it won't change it for all the other devices .
Now , let's say if you wanted to put in a new CS S ID , you know , let's say that this is a contact , you wanted to change it to let's chat or something .
If you change that here , then it's going to change it for all three devices .
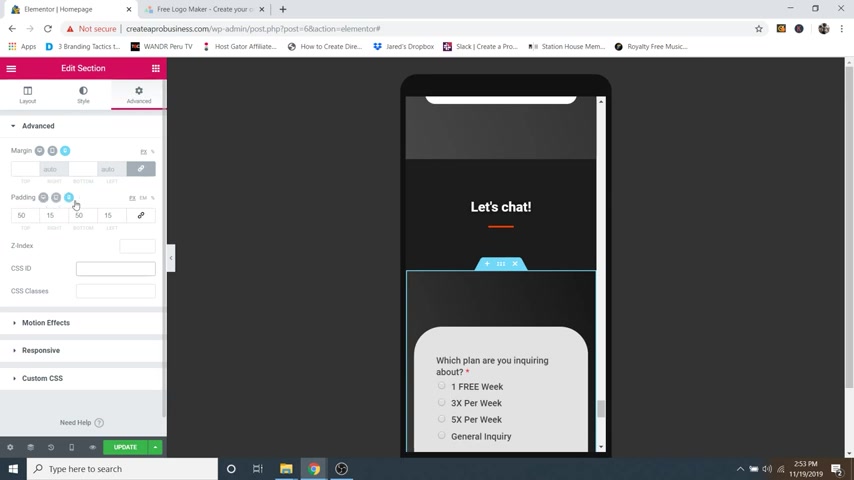
So you can only change things that have these symbols on them .
OK ?
So with that said , let's go ahead and click on update and now we can move on to step number nine , which is to create a new blog post .
So on our website , if we just go back to desktop , you can see that we've got our blog post section and there's only one in here .
So let me show you how to create a new one .
So I'm just going to go up to the little hamburger symbol and then go to exit to dashboard and then over here on the left-hand menu , you'll see posts and then you can just go to add new to create a new one .
And then from here , you could just add a title to your post .
So it could be something like 10 tips to lose belly fat or something like that .
Oops , 10 tips , not exclamation 0.10 tips to lose belly fat .
And then you would just hit enter and you could start writing in here .
So you could be like uh tip number one is and then you know , write your tip .
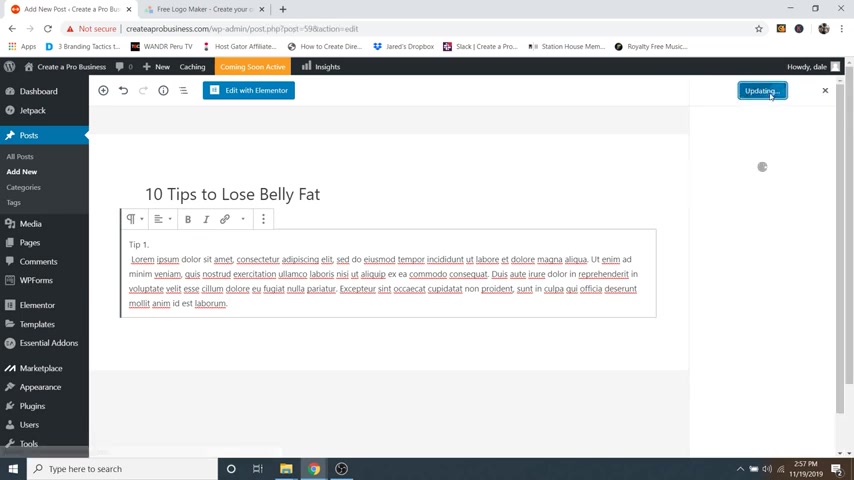
And then for now I'm just going to put in some dummy text like that .
But this is how you would write these really helpful articles that you could host on your website .
And then you would just go up to publish , to save your work and publish again and then just click on this little X to close out of that menu and we're gonna add a featured image .
So if we just go to document up here at the top , right , and then go down to featured image , you can set a featured image .
So we'll just say uh this is , you know , the one with the healthy uh meal here .
And we'll just say set featured image like that and then just click on update .
There we go .
So now if we go back to our website like this and then we scroll all the way down , you can see that it has now added our new blog post and it's got an image on it .

So what I would want to do is go back to Hello world and add an image there and then create a new one .
So we've got three right here .
OK ?
So now we can move on to step number 10 , which is to publish your website .
So we want to make sure that now everyone can see our new website .
So to do that , we're just going to go up to our website name and then go to dashboard and then you'll see a symbol up here that says your site is currently displaying a coming soon page once you're ready to launch your site , click here .
So all you have to do is just go ahead and click here and then there we go .
You've got a congratulations message right here that says your site is now live .
Click here to view it .
Cool .
And our site is looking great .
And if we click on our buttons , they go to all of our different sections which they're all working properly .
So that is awesome .
All of our sections are looking great and our contact form is hooked up to our email .

So as our subscribe is hooked up to our new email marketing service and everything is looking great .
All right guys .
So that was how to create a website for your business .
I really hope you enjoyed the tutorial .
And if you did , please hit that like button on the video because youtube's algorithm loves that stuff and it'll help my channel blossom .
And also if you want more awesome website tutorials , tutorials on how to make money with your website , how to create e-commerce stores , then please consider subscribing to my channel .
You will not be sorry .
All right guys .
Thank you again for watching and I will see you on the next video .
Are you looking for a way to reach a wider audience and get more views on your videos?
Our innovative video to text transcribing service can help you do just that.
We provide accurate transcriptions of your videos along with visual content that will help you attract new viewers and keep them engaged. Plus, our data analytics and ad campaign tools can help you monetize your content and maximize your revenue.
Let's partner up and take your video content to the next level!
Contact us today to learn more.