https://www.youtube.com/watch?v=50m263vX0Uw
How to Make a Website (Step by Step)
Are you finally ready to create your own website this year ?
Great .
In this video , you'll learn how to make your own website and we'll cover it step by step so you can get it up and running quickly building any website , whether it's your site project , a hobby , your next business venture or an e-commerce store .
It requires usually the same basic steps .
So we'll cover all of those .
Don't worry though .
I'll explain what each step means as we go along .
But this is the broad outline that we'll cover with this video .
First , you'll get a hosting account , then you'll get a domain name .
That's your web address that everybody will go to next .
You'll learn how to install wordpress , then you'll choose a theme .
That's the look and feel of your site .
We'll set up pages for your website and then we'll add plugins .
Plugins are little apps that make your site do more things than what it can already do .
And then we'll wrap everything up and then you'll see that you have a working website to share with the world .

So if you're ready , let's get started when you're building site , it's very similar to what's happening when you build a house , you have the land that you need to use to put the house on .
That's the same as the hosting provider .
The hosting provider has servers that all of your files and folders will go on .
Next , you have an address and that's so people know where to find you .
And the address is your domain name or your web address .
You want to start building your website and your website is your home .
That's what houses all of your files , all of your images , the color structure , the way that looks the functionality of it via the plugins .
Finally , you have your mailbox , which is your email address and that's how people can contact you and all of these come together to make up your whole website on the web .
Now , at WP beginner , we recommend using blue hosts as your hosting provider .
They have great customer support .
They are one of the oldest , most established hosting companies out there .
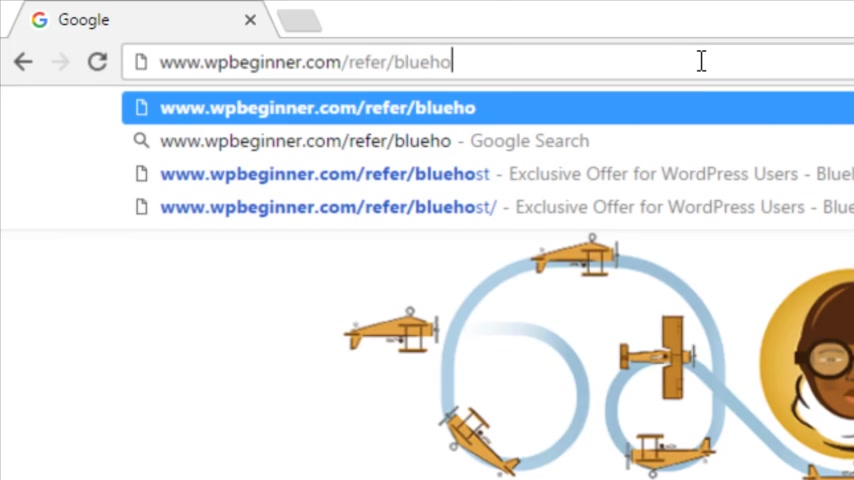
They're officially recommended by the wordpress dot org organization and WP beginner users can get 60% off and a free domain by using our discount code to get that discount .
Just go to wwwwp beginner dot com , forward slash refer forward slash blue host hit enter and it'll take you to that page .
We also have a link below that you can use as well from here .
Just click on the big green get started button and it'll take you to the select your plan page , you can choose your plan here .
The biggest difference between these two is with this one , it's very basic and you're only allowed one website .
Whereas with this one , if you have web addresses or multiple websites that you want to set up , then this might be the best one for you .
After you've chosen , which setup you want .
Go ahead and sign up with a new domain name that you want .
Since it comes free and click next from here , you want to go ahead and create your account by filling in all of this information .
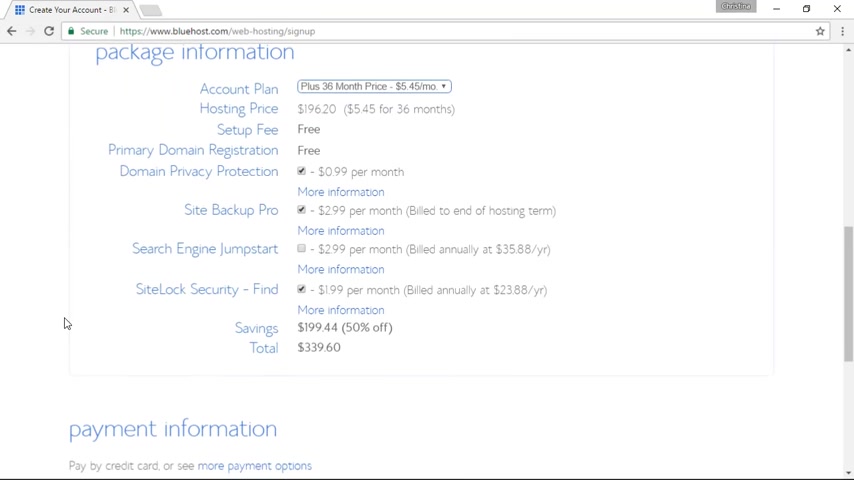
And then down here , you want to verify the package information .
I would say that your domain privacy you don't need .
We normally just turn that off things like backup site and site locker .
There are a lot of great plugins and features available within wordpress .
So you don't need that either .
Once you fill out all the information , you see the amount that's being discounted .
Now , just fill in your payment information and you'll have your hosting account set up now that we've signed up , we'll get a congratulations screen and we'll just need to click on the next screen where we can create our password .
This password will be used to manage our hosting account .
Once you create the password , they will start setting up the account for you .
One of the great things about blue hosts is now they've made installing wordpress even easier from here .
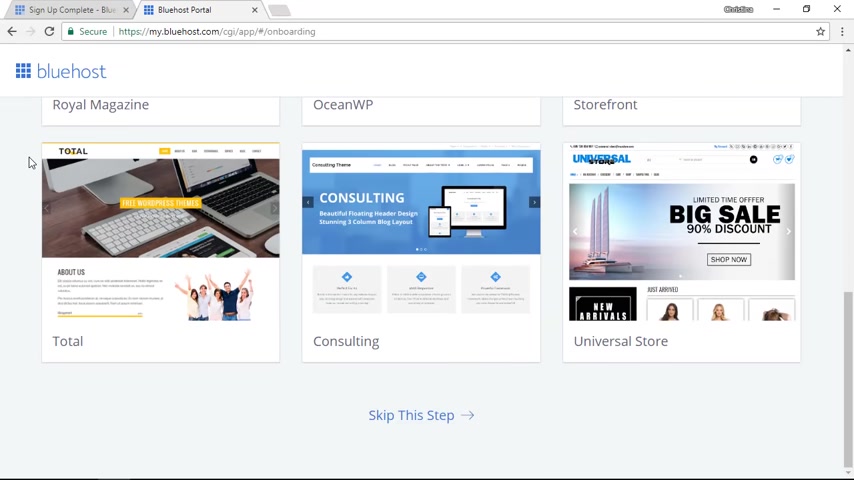
You can select a theme that you might like to go with your site since I'll be walking you through the whole process .
Let's go ahead and skip this step and now they automatically set up wordpress for you .
You no longer have to go into your blue host account and install wordpress and go through that process .
Once we get everything set up , you can click start building and we'll be taken to the back end of our Wordpress dashboard where we can start customizing it .
Great .
Now , that Wordpress is installed , let's take a quick look around first .
This is the admin area or your dashboard .
You'll use a lot of this area on the left .
The posts are , if you are writing a blog , these will be your chronological date and time stamped posts that you can create the media is where you'll add your images for your website .
And the pages are the more static like your about page things that don't ever change and shouldn't have a time stamp on them , your services .
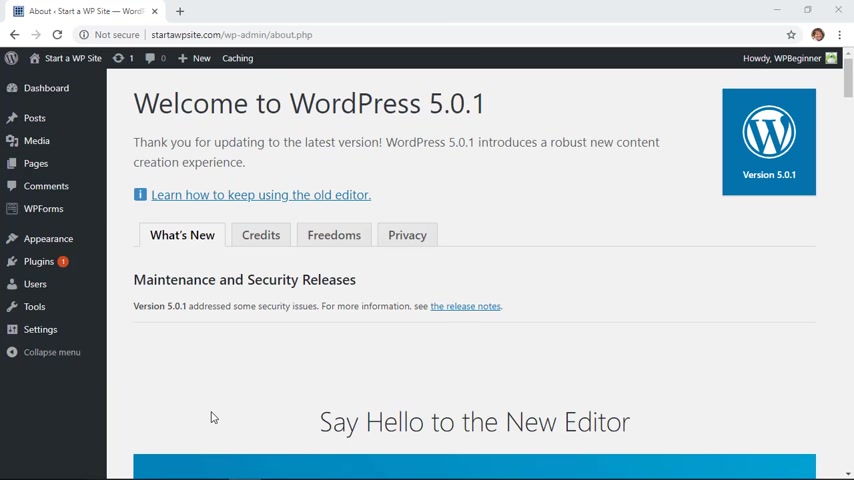
If you have a business , that's where all of these pages will go .
And then depending on the way that your setup is , if you have plugins , you'll see some of them here and then others you may see under tools or settings .
And we'll get to that later .
The appearance area is where you go to set up the look and feel of your website and we'll touch base with that soon .
And then the plugins are the little apps or the little features that extend the functionality or make your website do things that it can't do right now .
That is one of the most powerful features of wordpress is practically anything that you can think that you want your website to do .
There is probably a plug in or a little app that you can install to get that functionality for your website .
And then our settings area will go over that shortly .
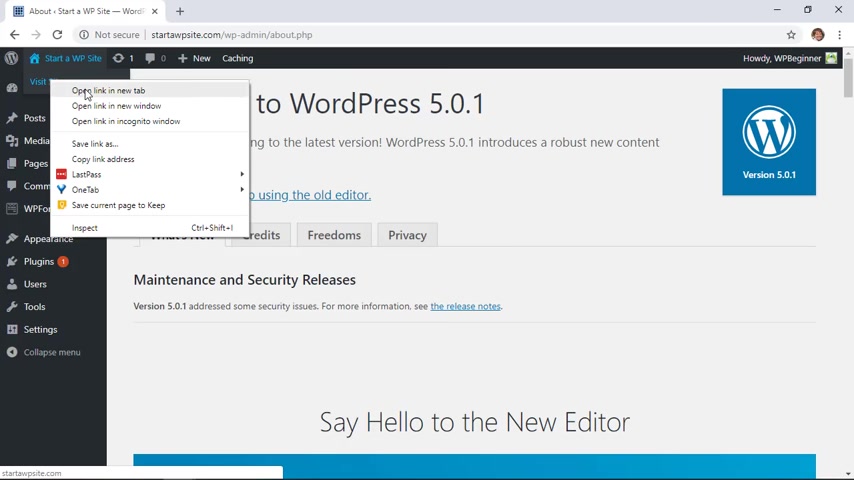
But technically your website is actually online and functioning and we can go up here to visit site and we'll open it up in a new tab to see it in action .
And don't worry if you see something like this at the top , we'll be setting that up shortly as well .
So this is our website as it is now and we'll be making some changes to it .
So I'm gonna close out of this so we can get started if you noticed from our website .
It looks very simple in a lot of white space .
That functionality is set up by the theme .
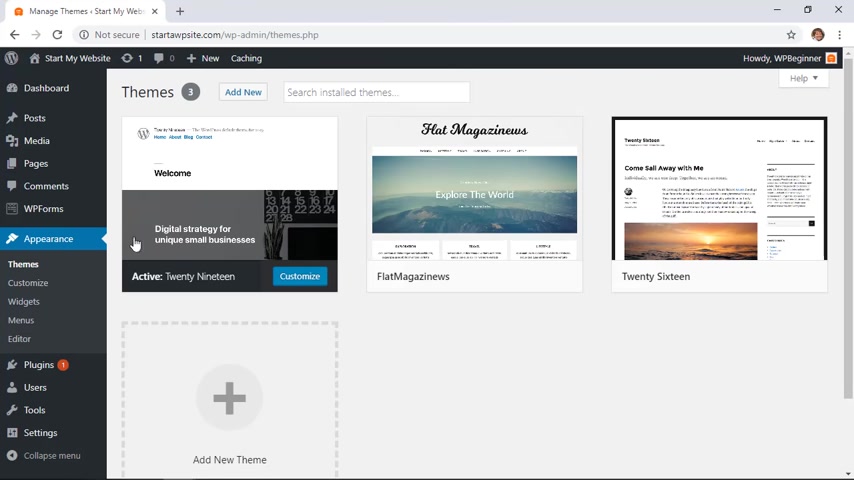
The theme is what controls the look and feel of your site and to change that up or to look at that , we can go to appearance and go to themes to see what's going on .
Yours will probably have different ones , but I wanted to show you what this looks like .
This is my current theme and that is active .
It is 2019 .
Yours may look different depending on when you see this .
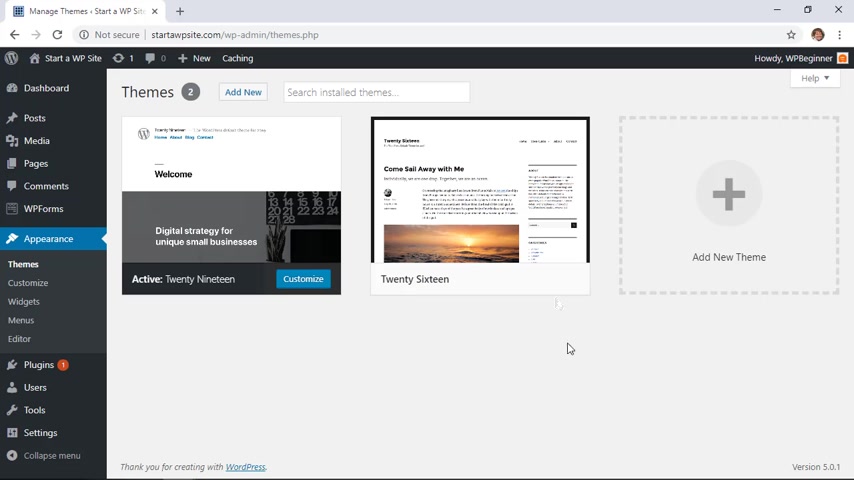
And if you have multiple themes , like I'm showing you here , then you'll see them here as well .
Now , like I said , the theme covers the look and feel of your site and you can add anything from a free theme all the way up to a premium or paid for theme and to do that , most of the themes can be found here where you can click add new .
And what this does is it pulls in all of the themes that are approved or looked at and tested by wordpress dot org to make sure that they work properly .
So you could go through here and you could spend hours and hours searching for the right theme for your business or your website .
And the featured one are the ones that they are showing and featuring for you .
You can click on popular , see the most downloaded themes out there .
You could view the latest ones that have been uploaded and approved on the theme repository .
If you created favorites , then you could click on that .
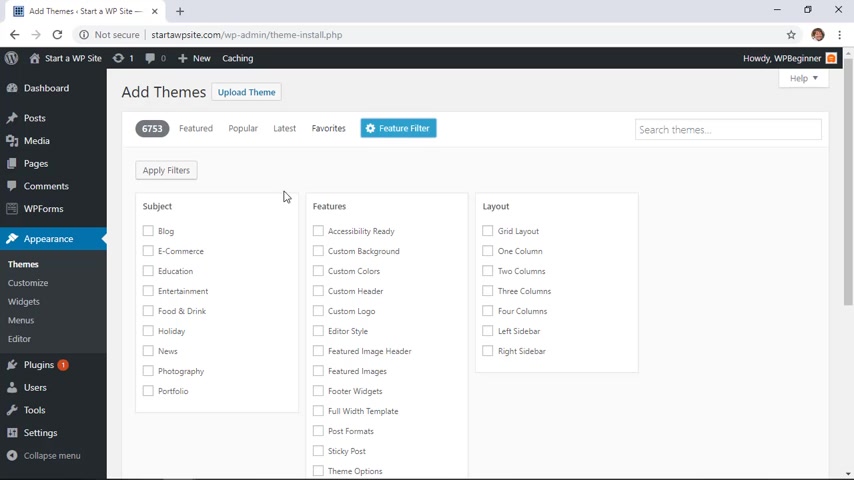
One of the best things you can do is also do a feature filter .
If you know the general look and feel that you want your website to have , then you can go through here and select filters for that .
For instance , if you are creating a website for your photography business or your restaurant , if you're building up an e-commerce website , then you can go through here and select those items .
If you know the features that you want for your website , then you can select them here .
Or if you know the layout that you want a lot of mobile friendly layouts now have just one column .
If you've purchased a premium theme , then you can upload that here and the documentation from that premium theme will walk you through that process for the rest of the video .
I will be customizing the 2019 theme .
But let me show you how easy it is to install a new theme for you .
So you can scroll through , find one that looks close to what you're wanting your website to look like .
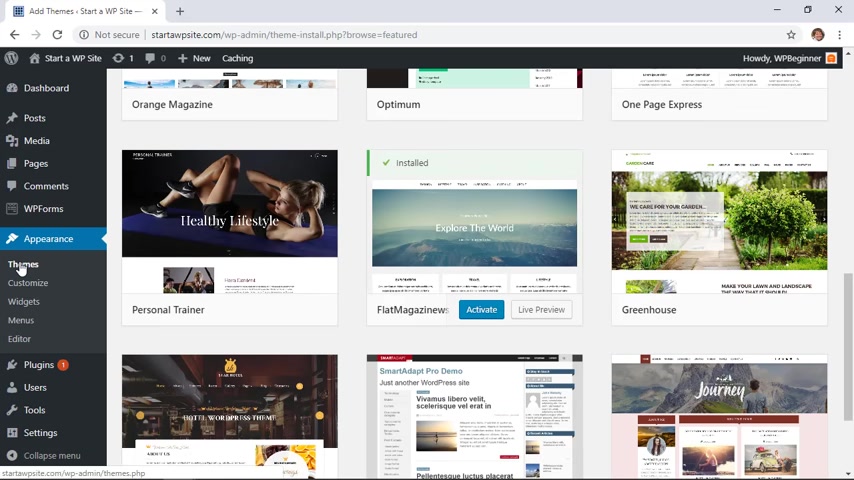
Say this one , you can click install now and you can see it installing , you want to stick around and watch that it's finished installing because you can either activate it , which makes it the active theme on your site now or we can head back over to themes .
And now you see it here along with my other two , it's not active yet , but you can activate it here if you want .
So I'll be using the 2019 to customize .
We can either customize here or there's also a customized button here whenever you want to come back to this .
So let's go ahead and customize it .
This will open up a great feature and what I like about this feature .
Is , it allows you to make changes on the left and then you can see the changes somewhat in action on the right to see if that'll work for you .
Now , depending on what theme you have , this area may be different .
It just depends on the theme itself and that's what triggers all of these tabs .
You can see the little pencil area .
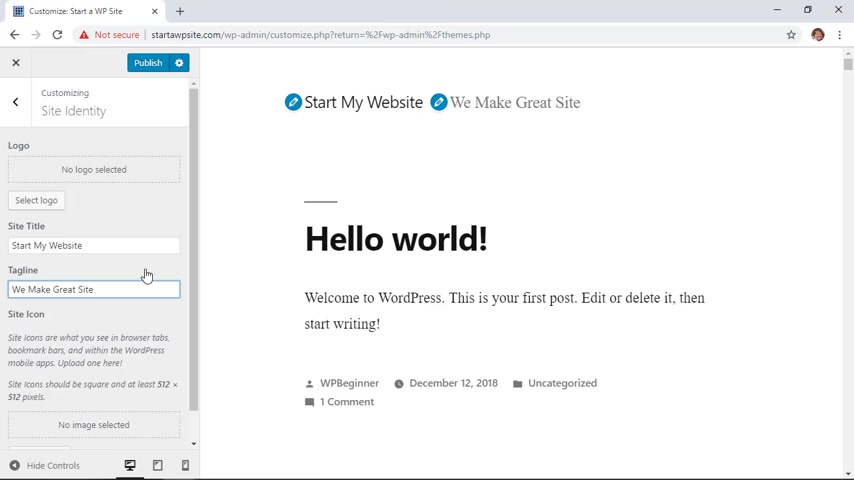
These are the areas that you can change .
So if I click on this area , then this is the site title and you can change that here .
If you wanted a tagline for your business , you can change that here .
Again , this is dependent on your theme .
Then here you can add a site icon .
And what that will do is it will change this little what's called used to be called the Facon .
Now , it's called the site icon .
You can select an image here .
You want to make sure that it is a square image .
If possible , I selected the image from my computer and it uploaded into my media library .
You see that here and these are the images that are currently on my website that I could choose from .
I want to copy the title and you'll always any time you add an image to your website , make sure you add the alternate text or the alt text .
This is great for accessibility as well as seo for your website .
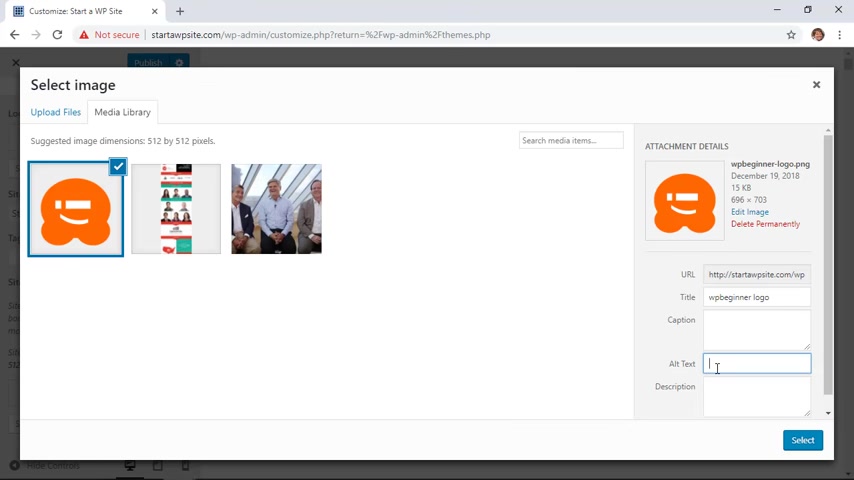
That means for people who use a , a computer reader because they can't see .
The reader will tell them what an image is about .
Also , if you are wanting to do search engine optimization for your site , then having descriptive alt text will help in that way too .
So I'm going to select this and this is why you want it to be square because then it will tell you to go ahead and crop it .
So we'll do like that and crop image and now you see it's up at the top .
So perfect .
So that's for my site identity .
Let's go back and we'll keep working through this list .
For the colors you can choose primary color .
This is for things like highlights .
You see how if I change it , it changes these hyperlinks .
So you want to pick which one you want or you can simply go with the default going back .
Let's choose menu .
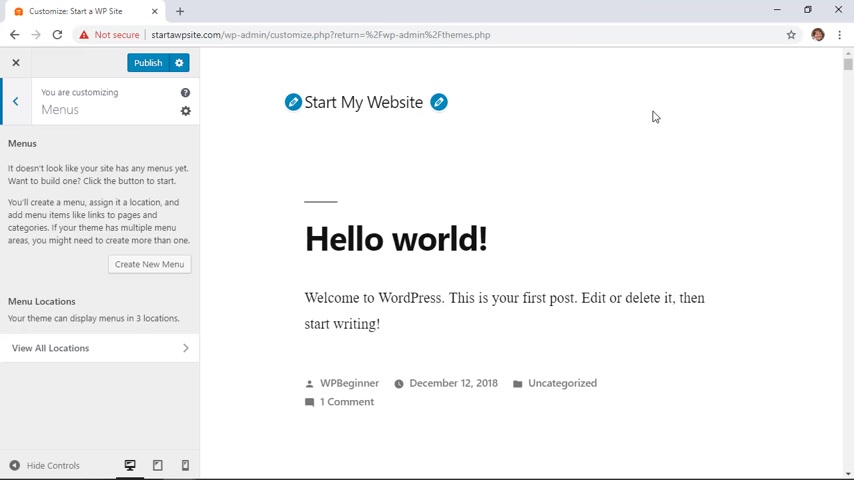
Normally you have a menu navigation menu up here so we can create a menu here .
Click on create new menu .
Let's go ahead and name it .
I'm gonna call it main .
The menu location is different for each theme .
This particular theme has three menu locations and the primary is likely up here .
The photo menu will be down at the bottom of the site and the social links menu .
We'll just have to see where that goes .
But for the main menu , let's click primary and we'll click next to get it set up .
We'll click on add items and from here it'll start adding different pages .
You want to keep the home page .
Most people are used to seeing home that they can click on .
These are the pages that are available to us .
I'm gonna go ahead and click on the home page and we'll want to create a couple of other pages .
They will be blank , but at least they will show up on our menu .
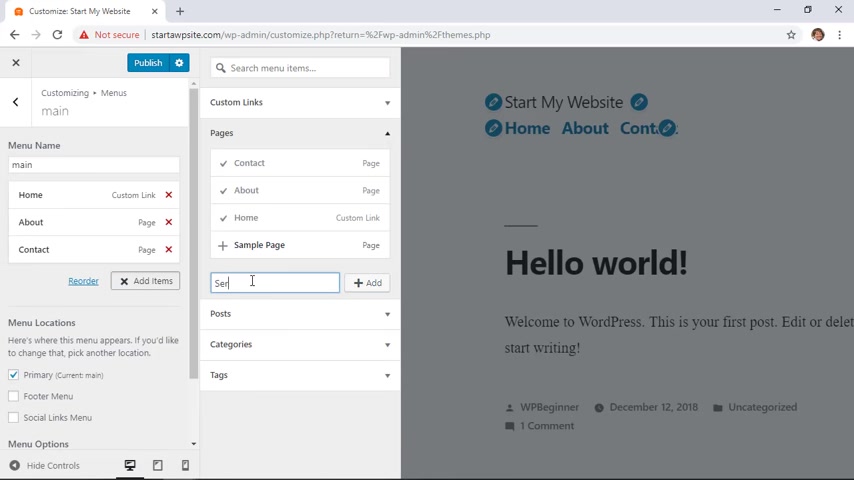
So I'm going to do about click add and we'll do contact so that people can contact us if you're setting up your business site , which you probably are , let's do services .
You could either do services or something like a portfolio if you need to show them your work .
So we'll do services and click add and that looks like a really good beginning to a menu structure .
We'll do one more and we'll call it a blog .
You can name that news if you want .
So now we have a good structure .
You can also go through here and rearrange these as you see here .
If you wanted to , you could also nest them .
So say I want my blog under my about then you see that here .
It's nested and then over here you notice that there's a little dropdown like that .
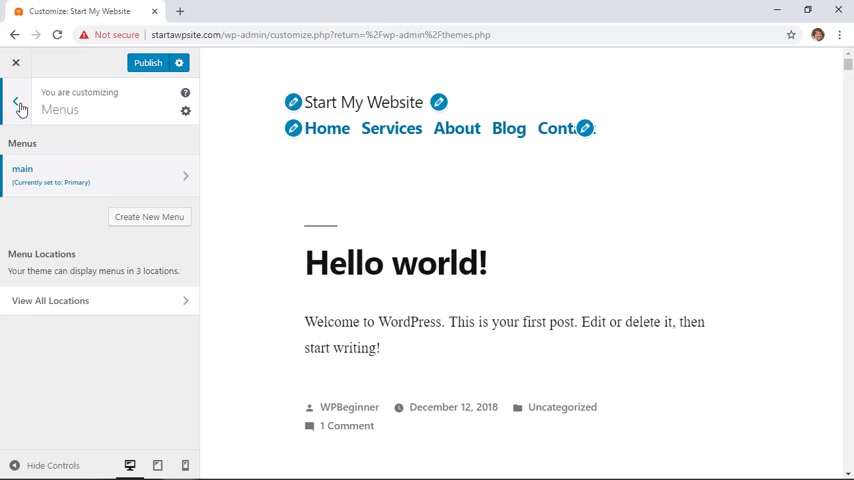
So you could do that if you want , I'm gonna bring that back out and make it its own page .
So that looks pretty good .
I'm happy with that and that is our main menu moving along .
I'm gonna go back , go back again .
And now let's head over to widgets .
Widgets are great for showing little pieces of content on your site .
For instance , for instance , I'm gonna click on this page .
Hello World and I'm going to scroll down to the bottom .
All of these widgets are showing up here .
First , you have the search widget area , then you have the recent posts .
We have our comments , all of the archives .
That's all of the , that's the list of all of the blog posts that we have created , sorted by the month and year .
And then finally , you have all the categories that you have on the site .
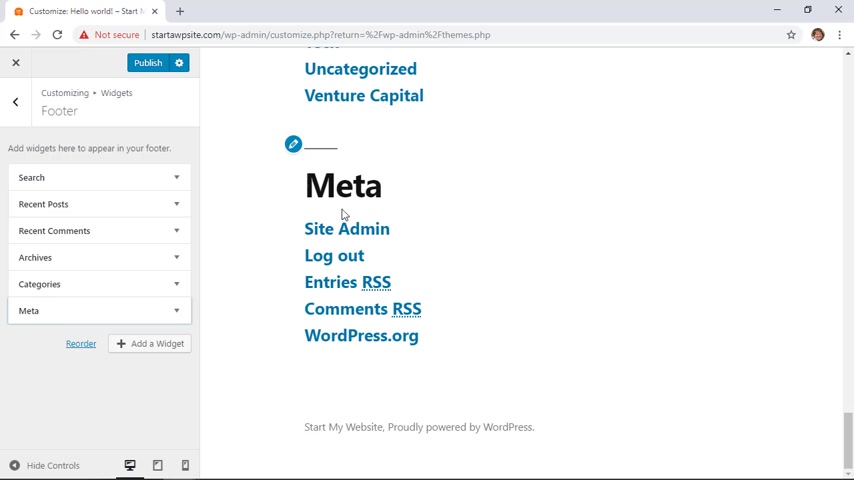
And then all the way down at the bottom is something called meta , which you can have on your site to give you an easy way to access site admin area .
You can remove these and you can choose to not have any widgets .
You can add a widget and there are several to choose from here .
There are also several to choose from , depending on what plug-in you install .
Certain plugins have their own widgets .
For instance , when we installed the WP forms plug in , it also adds a for WP forms , widget area .
So we could add a contact us on the widget area here .
So you can choose to have these rearrange them , how you want or remove them if you don't want them on your site .
Most of the time these are up at the sidebar area if you notice here is this is the footer widget .
And so that's why it's showing down at the bottom , each theme will have its own widget area .
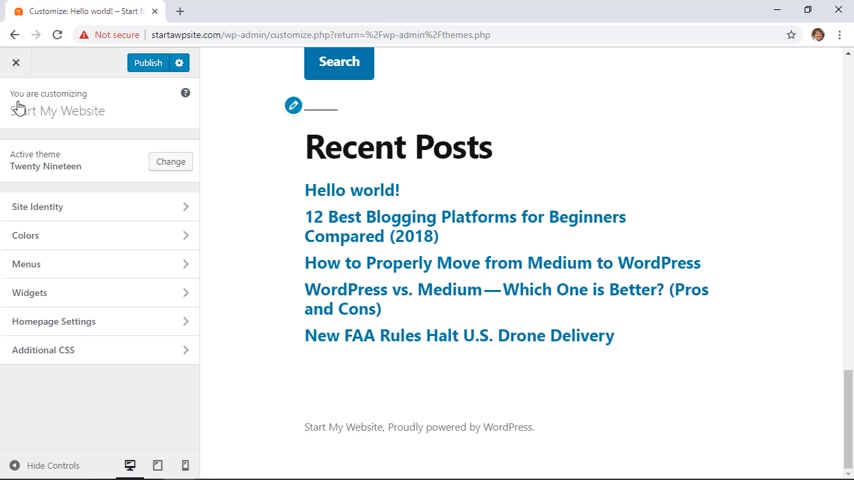
So you want to play with that to see where you want it for your site going back .
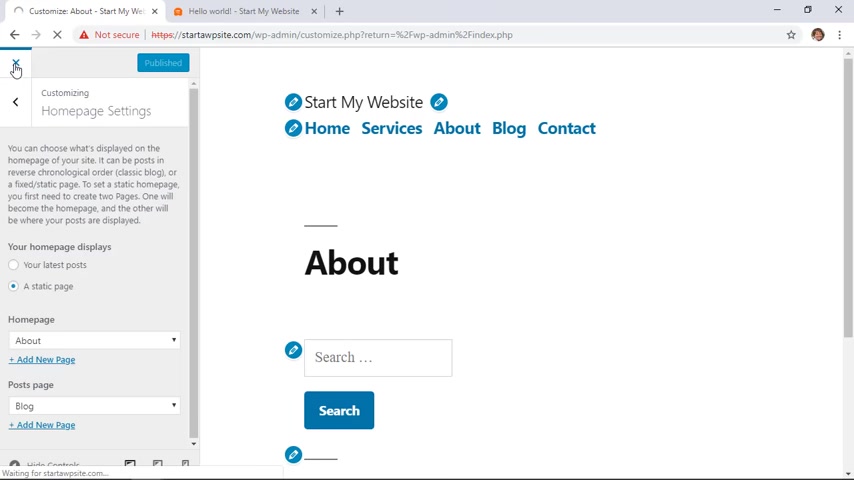
Let's click on the home page settings to set this up .
And what you can do with this is you can choose to either have your blog posts or your most recent posts show up on your home page .
If you prefer to have a static page , that means that you'll dedicate a page that has all the information that you want on the home page .
You can choose a static page as your home page .
And then if you want , this is where choosing a blog page for all your blog items .
That means when somebody clicks on the blog page , all of your blog posts will show up in chronological order like you see here .
So let's click back .
The additional CS S is if you're going to get into some particular coding for your site , then you can add that here easily .
And one of the greatest things about this customized is nothing has actually changed on the website yet .
So if we've made any mess ups or anything , then you can go back and fix it , but nothing gets set in stone until you click publish , which is what we'll do now .
Great .
Now that we're done .
With that , we can exit out here and it'll plop us back into the area where we were before .
You can always tell where you are in your admin area by looking to the left and you see we're in appearance and themes .
And one of the things I like to do once I'm done with an area is I simply like to go to my dashboard and make sure I'm at home just as a place to start off from .
Since we're setting up our home page to be a page .
Let's go ahead and go in and create this page .
So it will show on our home page properly .
This will also show you how to work inside a post or page and how to write your content .
So let's go and do that next .
So I'm gonna close that out here .
I want to go back to my dashboard .
Let's head over to pages .
You can go to all pages and you can set up a page .
However you want , you may name it home page .
So I want to set up the about page and you see here , it's showing me that it's my front page .
I want to create some content on there to welcome people .
We'll go in and they will edit this and I'll show you a little bit about how you can write in here for me .
You can give it a title and these little block areas are for when you're writing .
If you want a paragraph that will be most of the things that you're writing .
If you want to add images or headings , if you want to add bullet list , quote out what somebody is saying .
If you have a link you want to share from say youtube or Facebook , then you can add those here and it will bring in that information and it'll look really good for your site .
I have some copy content from WP beginner website .
So I'm going to right click and paste it just to show you what some of it looks like .
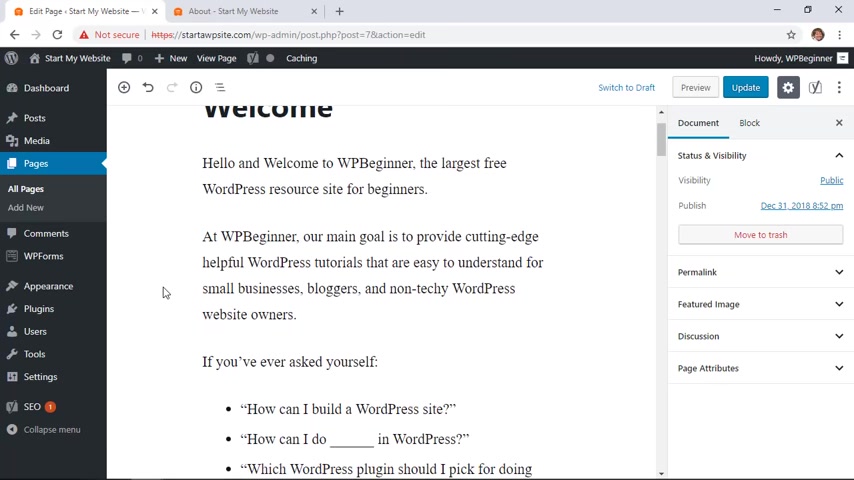
And I'm going to click update and now this will be the home page for the website and I'll show you what it looks like .
And so you could do something similar to that for your site and your thing now that we have the theme set up and a few of the pages set up on our site , let's add some functionality .
The way that you add functionality to your Wordpress website is through plugins .
So let's head over to our plugins area by default .
If you remember when we first installed wordpress , a couple of plugins were installed for us as well .
If you see here , there are several that are deactivated , they're installed , but they're not actually working .
You can either activate any of these by clicking on the activate button and then it will bring it to live , so to speak .
And then you can either set up an account or go through the process of whatever it's asking you to do .
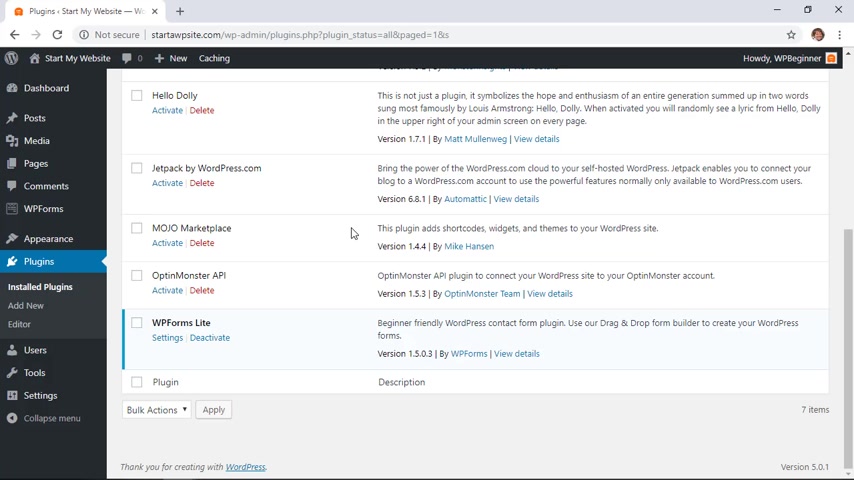
If there is a plug in that you want that you don't currently see here , then you can go up here and click , add new and then it will go through and just like with the themes area .
There is a plug-in repository where wordpress goes through and , and make sure that they are appropriate to use with wordpress .
And from here , you can search for the plugins that you need .
You can also take a look at the popular plugins or recommended or favorites , just like with the themes area as you go through and set up your site and design your site , the way that you want , you will probably come across plugins that people have recommended .
So you'll go here to search for them for an example .
The Yost plug-in is a great plug in to help you with SEO and a lot of people install this so you can go into the keyword area type in Yost and you'll see a few results here .
This is the one we're looking for and you'll see that they have more than a million active installs and they have a great rating system here just to show you what you can see when you're going through a plug-in on whether or not you should install it .
This one will click install now and it's going to install it , but you'll want to hang out and wait for it to finish installing so that you can also click , activate and then it will be live and available for you .
With most plugins .
Once they are activated , you will either notice the notification somewhere , depending on what the plugins functionality is .
It'll show up in different areas .
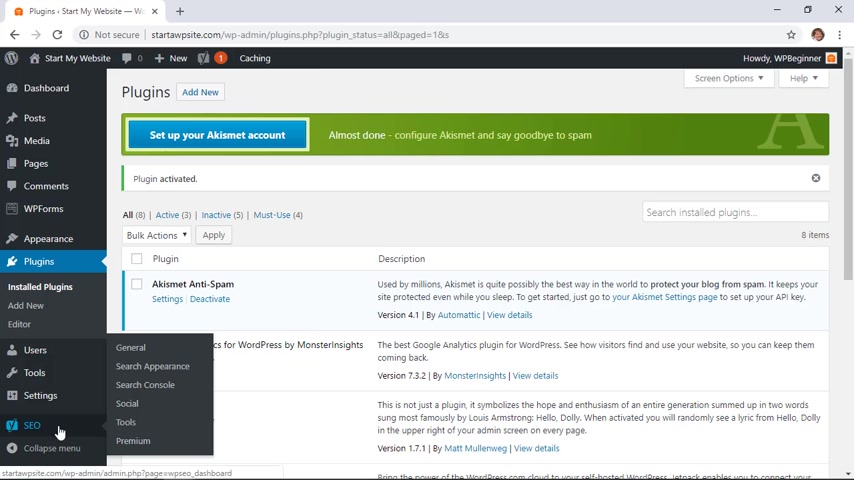
The use will show up here .
You'll also on the left have a new tab that you can use now to set up a plug-in .
I want to show you how you can easily use a plug-in that was already installed .
And that is the WP forms plug-in .
WP forms is an easy to use plug-in that allows you to add a contact form easily .
So let's go over to WP forms .
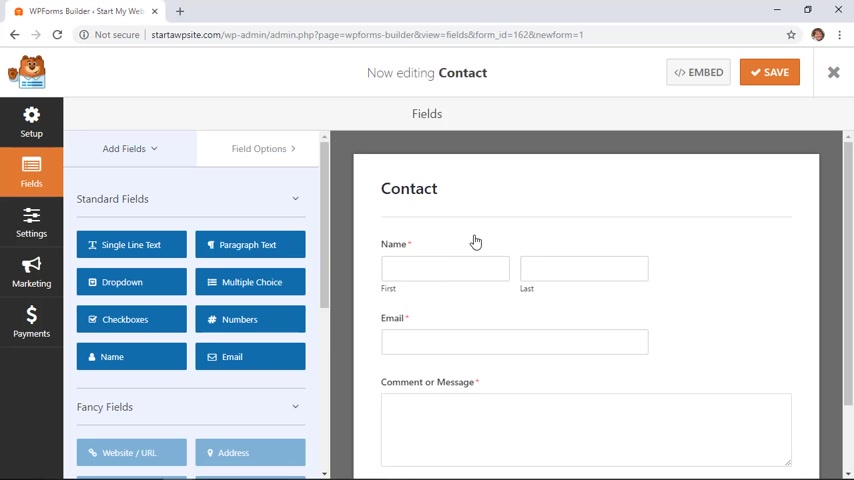
We'll go add new because we'll want to add a contact us form on our contact page so we can name it here .
I'll just say contact and out of the box .
The light plug in has a few templates that you can choose from .
The simple contact form will be great for us .
And as your website grows , the WP forms plug in has a pro version that will allow you to handle a lot of things such as payments on your site , maybe surveys that you're looking for , even quizzes and several other things like that .
So for this , we'll just set up a contact form .
So I'm gonna click on this area because personally , I like to simplify it .
So uh click on this come over here and format it and I'll choose simple .
You can make these required or not .
We need a , a name , we want an email , we need an email address so that we can respond to them .
And then we want to make sure that they tell us something .
So we're going to make all of these required .
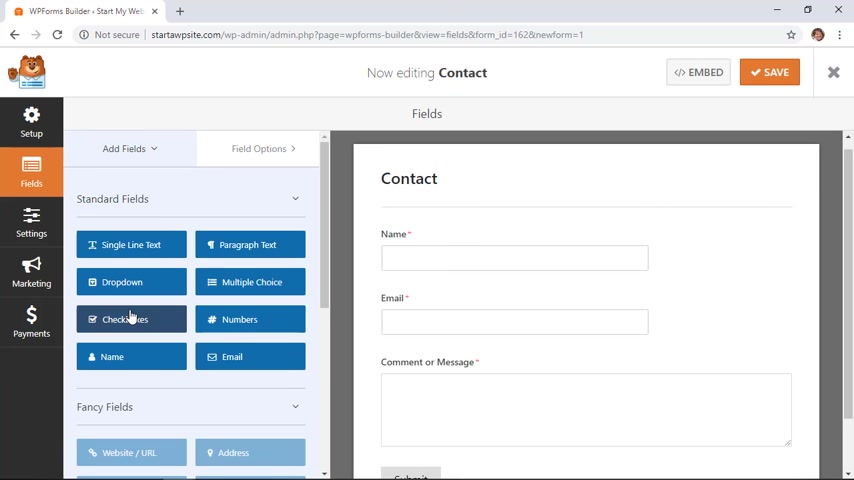
You can , if you wanted to , you could drag these up or down to move them around .
If you want , you could also click on the fields and choose other things to add if you wanted to as well .
Since this is a simple form , I'm just going to stick with what we have .
And now I'm gonna click save .
Now we can exit out of here and it will take us back to our wordpress dashboard .
We have our contact here .
So the next step we want to do is let's go ahead and add that to our page and that will also introduce us to pages .
So we go over to pages all pages and you can see right here all the pages that are associated with our website .
We created the about page when we were setting up the menu .
We also created the blog page and you see that the blog page holds all of the blog posts that are associated with our site .
And then here's the contact page that we created as well .
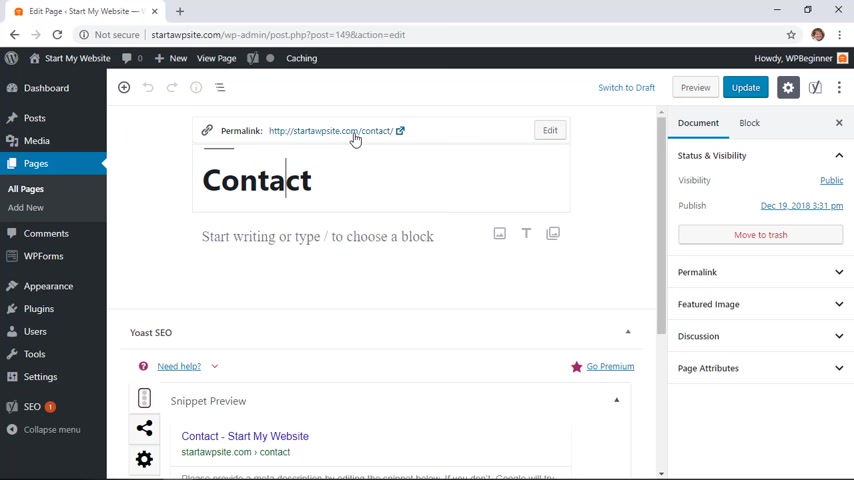
So let's edit this and this is the area for creating pages , you'll get a little tool tip that you can go through if you want and it'll tell you a little bit about everything , but we'll cover that right now .
So this is the Contact Us page and this is the title of the page .
You see that here and then you also see that that's the URL of our website .
You can change that here if you want , add a little bit of information And then once you hover over , you see this little block , we can click on that to find the form that we're looking for .
And these are all of the things that you can use on your page scrolling down .
You see that these are the most used items you can also search for it .
This is the widget area that we were talking about .
We'll select the form that we want to add and now you see it showing up here and it gives you a nice preview of what it might look like .
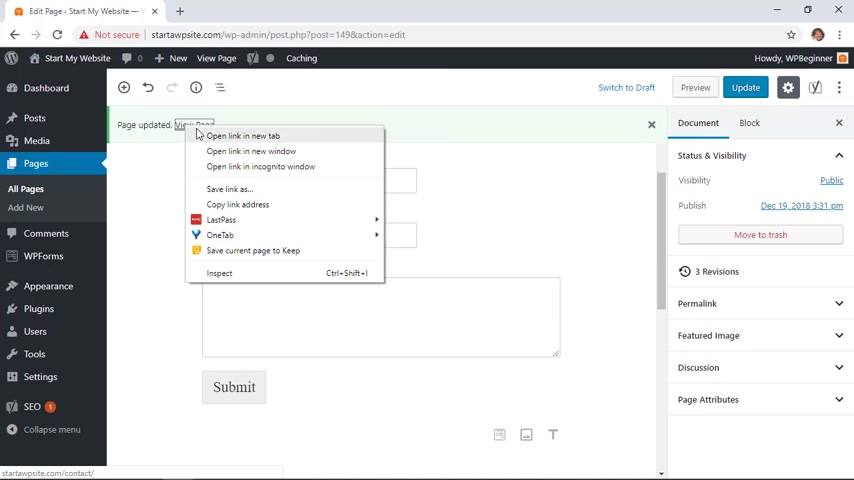
We can publish this or update it .
And now that it's updated , we can click view page and I'm gonna open that in a new tab to see it in action .
And now we have a plug in working properly for our site and it's creating contact form for us .
So as you can see , plugins are a powerful way to extend the functionality of your website and make it do exactly what you want for your visitors on your site now that we've looked at plugins , let's take a look at one of the final areas and that's the settings area in this area .
You can make some changes to your site straight from here .
So first , let's go up to the general area up here .
You know , is the site title .
We also saw this in the customizer , but you can change it here as well .
This is your website , your address , I would recommend not ever changing that .
Then here's the admin email address .
This is where most plugins will use .
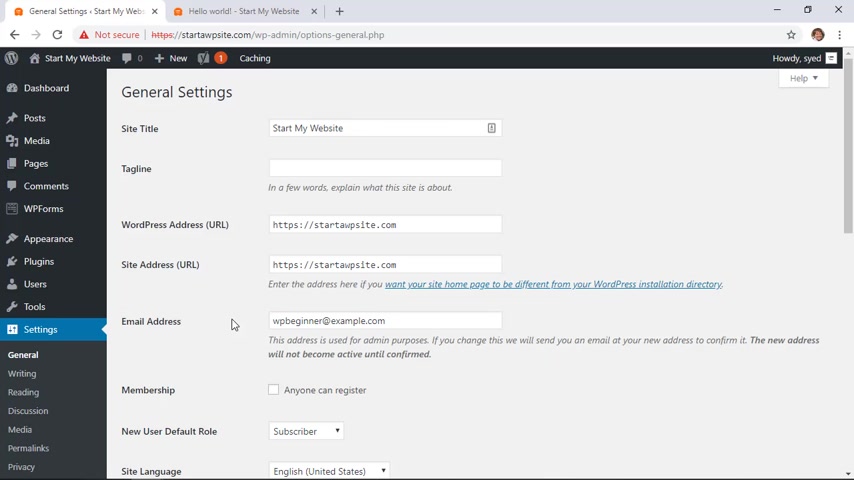
For instance , the WP forms contact us page .
This is the email that those forms will be sent to .
And down here , you can choose whether or not you want to allow people to register for your site .
And if you do let them , these are the default roles that you can put them in .
By default , you are set as the administrator and you have all the administrator access to your site down here .
You can set your time zone and when you publish posts , this is the time that it's pulling in for publishing those posts .
You have the time and date format and you can choose when things start .
Here are some writing settings .
You can have multiple categories and this is where you can set the default category for all of your posts .
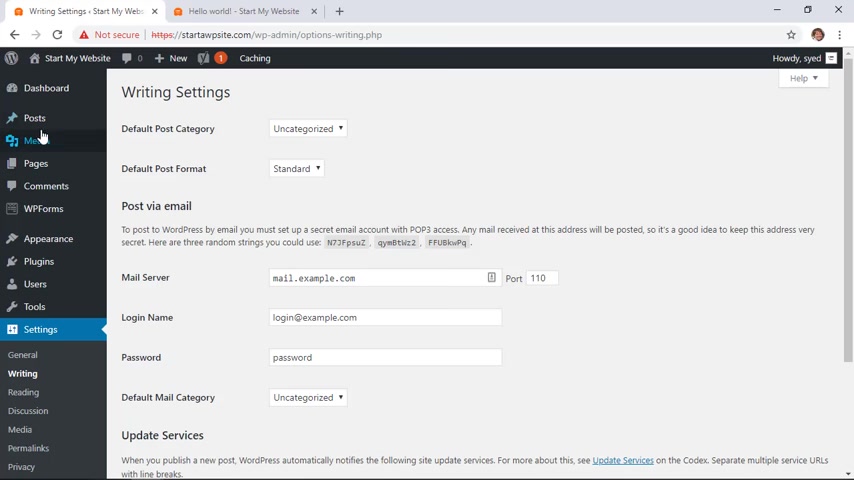
If you want to set any categories , you go under posts to categories , to set that up , you can create different post formats standard would be great for most of your blog posts under reading .
This is also under customizer where you can choose your latest posts or a static page and how you want that set up from here .
You can also choose how many posts automatically show on the blog page and we have it set for 10 .
And then here is where you can choose to do full text or summary .
Most websites do summary .
So we'll keep that there .
And finally , when you launch your website , you do definitely want to make sure that this is not checked this in , discourages search engines like Google from finding your site .
So you don't want that you want this unchecked .
Finally , I want to show you Perma links .
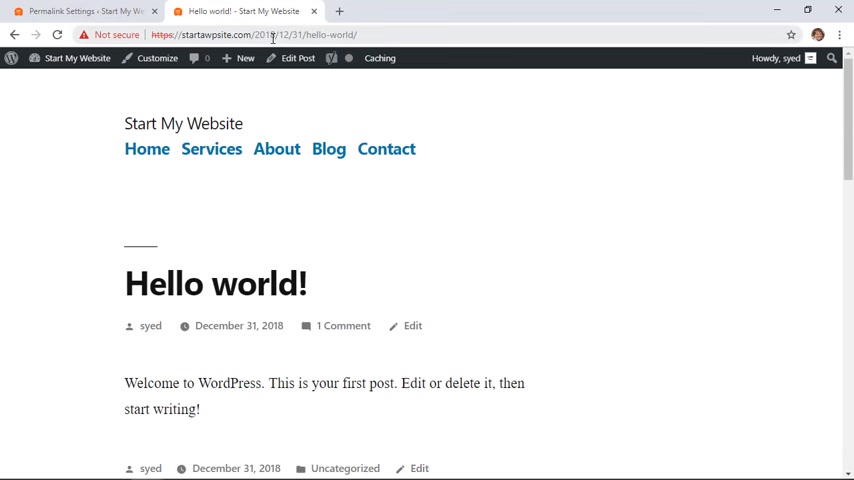
This is the site structure of your URL and I'm gonna open up this page to show you by default , it's currently set to show the date and month structure here .
A lot of websites have gotten away from showing the date structure simply because if you update a post , then it can be confusing for the users to see the older date structure .
What I prefer is if you come down here , you can go to post name and that simply will show the title of the blog post or the title of the page and it's a much cleaner URL structure for your site .
So once you're done with that , you can come down here and click save changes .
And those are the main areas under settings that will work for you .
And this is just saying that uh do be careful if you are changing your permanent structure on a live site , then that can impact things .
And yes , that can , but we're creating a website from scratch .
So you are all right to do that .
Congratulations .
You did it .
You have successfully set up your own website .
So real quick , let's just take a look at all of the things that we've done so far .
You set up posting , you got your domain name .
We installed wordpress .
We got a theme .
That was great for our site .
We set up some pages , we added plugins and extra functionality to make our site do what we want it to do and now you're ready to share it with the world .
Did you learn today's video ?
If so , subscribe to our youtube channel and we'll send more helpful tips to help you manage your wordpress website .
And thanks for watching , watching .
Are you looking for a way to reach a wider audience and get more views on your videos?
Our innovative video to text transcribing service can help you do just that.
We provide accurate transcriptions of your videos along with visual content that will help you attract new viewers and keep them engaged. Plus, our data analytics and ad campaign tools can help you monetize your content and maximize your revenue.
Let's partner up and take your video content to the next level!
Contact us today to learn more.