https://www.youtube.com/watch?v=w0YxylKDMKw
How to Create an eCommerce Website with WordPress FREE – ONLINE STORE – 2018 NEW!!

Hello friend Sam Nasik from block two dot com and welcome to a very special video because in this video , I'm gonna show you how to create a super professional , super awesome and a super beautiful free ecommerce website using wordpress .
Now to create this website , we'll be using the best free Ecommerce theme , which is Ocean WP , the best free page builder , which is elemental and free plugins to make e-commerce website professional and awesome .
And for the design of the website , I have taking inspiration from top e-commerce websites like Amazon , flip card , Walmart and Ali Express .
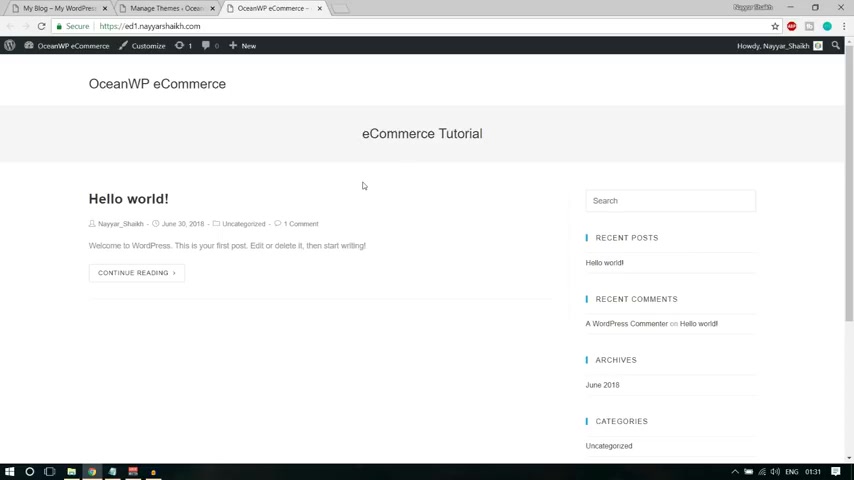
Now let's see the demo website which we have created or we shall be creating in this video .
And let's see how it looks .
Now .
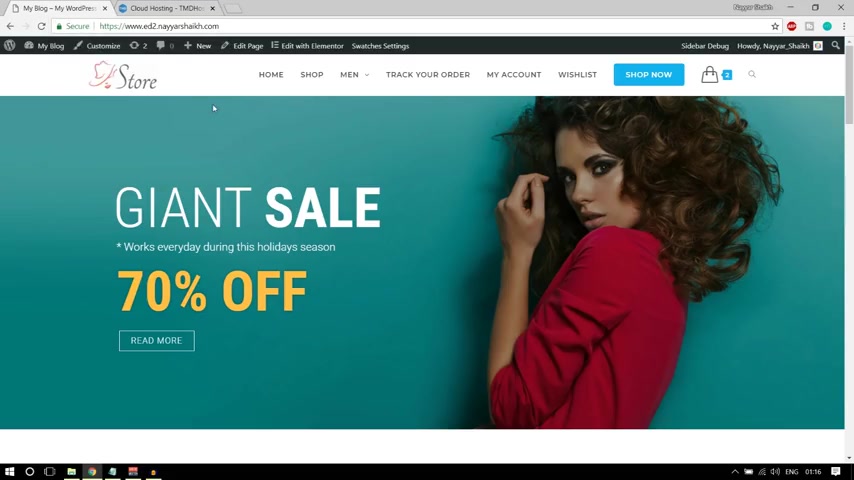
This is the home page , let me refresh this page so that you can see the animations as well .
So as you can see guys , this is the home page .
This is our first section .
You can see the animation over here .
The at the top we have our header , we have this beautiful and simple logo over here and whatever images were they be the logo or the slider image which you see or your whatever images CS s whatever I am going to use in this video , I'll be providing all those things for free to all you guys .
OK ?
I'll tell you how you can download them for free .
OK ?
Just stay tuned .
So first let's see the demo site that we will be creating and after that , we will see uh everything step by step , everything is going to be very , very easy .
Anyone can follow along , Even someone who knows , only knows how to use a mouse and a keyboard can also follow along in no prior knowledge of anything .
Any language , any html CS S is required .
This is for absolute beginners and also for professionals or experts , they can also join in .
OK ?
So let's see the demo side .
The first we have the header , we have a beautiful and simple logo over here , then we have our bar , our menu bar over here .
And the beautiful thing about this , if you see over here , we can also create a mega menu using this .
OK ?
So in this tutorial , I'll also show you how you can create a mega menu .
And again , I would like to remind you that everything that we are going to use is free .
OK ?
So being a free the the design is awesome and you can also create a mega menu that's really good .
Then we can also see how to use this thing , how to put this button over here .
After that , we have our car I can , when you have all the car , car , I can , you can see whatever you have in your card and you can increase or decrease the size of this card .
You can change the color , you can change the typography , the font size color , whatever you want , you can change the hider background .
For example , if you see header background color is white , you can change it , it's all up to you .
OK ?
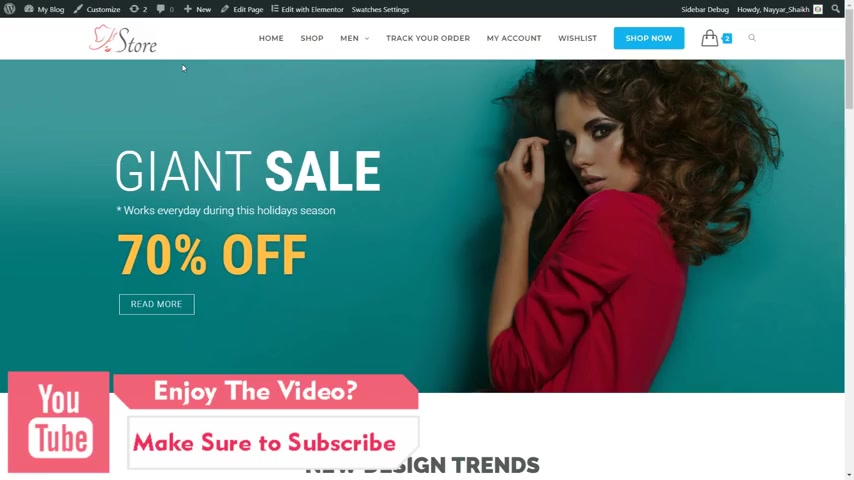
Then after that , we have our first section .
Very beautiful , very professional section .
This is also inspired from top business websites like Amazon and Friar .
When you open their website , you'll see something like this , OK ?
A small slider that you can see and you have some offer going on or something and you have a call to action .
And similarly , we have over here , we have some title over here , subtitle and then we have some sale going on and we have a call to action to you know , get this sale done .
OK ?
We have this beautiful image over here .
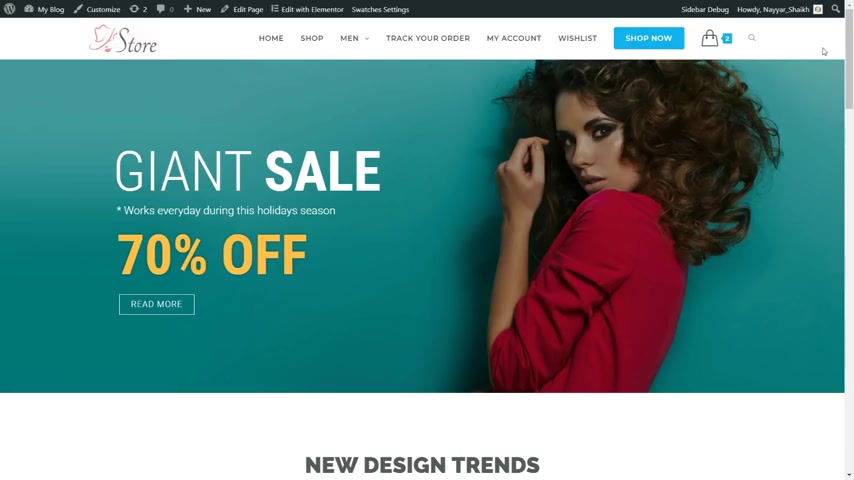
Then we have the second section in this section .
We have these beautiful categories .
You can see very easy and very simple .
It is whenever you have some category , the image zooms in and you get the name of the category .
For example , when you have all these jackets , the image gets zoomed in and we get this jacket .
Then we have the 3rd 3rd section over here .
We have three different things , season trends , mega sales , special offers , you can use different and beautiful itunes and different text as well .
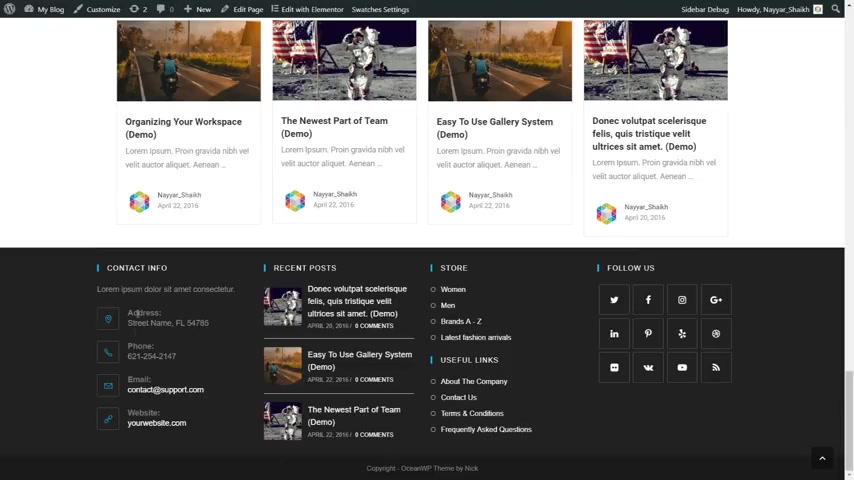
Then in the next section , we have the recent products , the newcomers as you can see the title over here , it says newcomers .
When you have this product , you will see the image changes .
OK ?
Very beautiful .
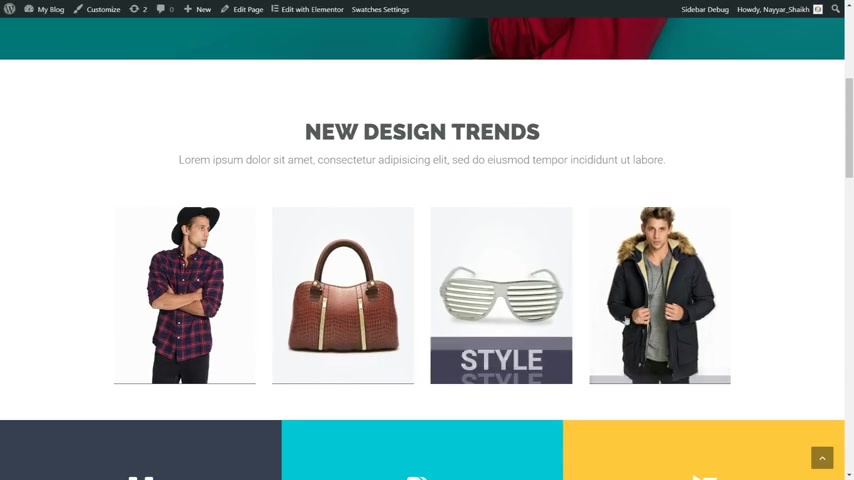
We also have this very special option which says quick view .
When you want to quick view this thing , you can just click on that link and you can see a quick view of the product .
OK ?
So you don't have to actually go to that product or open that product .
You can just see a quick look , have a quick look at the product .
OK ?
Very useful , very beautiful thing .
OK ?
If you want to increase the product or quantity , you can just simply do it from here .
We'll see these things later on .
OK ?
First let's see the home page .
Then after that , if you have the brand section , this is a carousel , this is on auto play .
It will automatically pay play by itself and you can put different things .
So here , for example , you can put all the brands that you sell on your website or you can put all the clients that are available .
If you have some big clients or you know , you know , you get the idea so you can use those I can so you very useful thing , then we will also see how to create different blocks and how to use them over here .
Then after that , we have the photo now photo will be similar throughout the website .
So let's see the photo is also very good .
We have four different sections in our photo .
In the first section , we have the content contact information , your address , phone number , email address website and so on .
Then we have the recent post and few links over here .
You can see useful links about the company contactor terms and condition and so on .
Then in the fourth section , we have some social icons and at the bottom , we have the copyright text .
Now I'll show you how you can change this copyright text and put in your own company name over here .
OK ?
Then we have this button which says top call to top button .
When you click on this , you'll be redirected to the top section .
OK ?
Now let's see the shop page .
Let's see how it looks .
So this is a shop page .
If you see the top section is same , you have the same header , although you can change the header for different pages .
If you want a different header .
For example , if you want different logo and different menu bar for shop page , you can do so I'll show you how you can do that .
OK ?
Then we have this bread crumb and you can see your bread crumb over here , the title and subtitles shown over here .
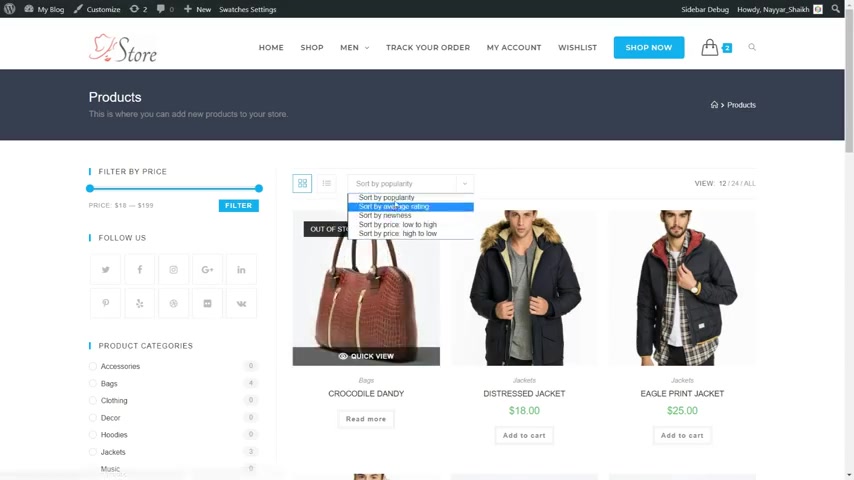
Then this is the shop page .
We have the products at the right hand side , you can change the number of products you want to display on your shop page .
Then a person can you know filter or shot by popularity average and so on and they can view in different style .
OK .
As you can see , this is one style , this is another style .
You have all the options over here .
At the left hand side , we have some beautiful options .
For example , a person can filter the product by price .
If they are on a budget , if they want to spend only a small amount , they can just select that price range and they can filter only those product .
Then after that , we have the social icons , product categories and top rated products over here .
OK ?
So this is also a very good page .
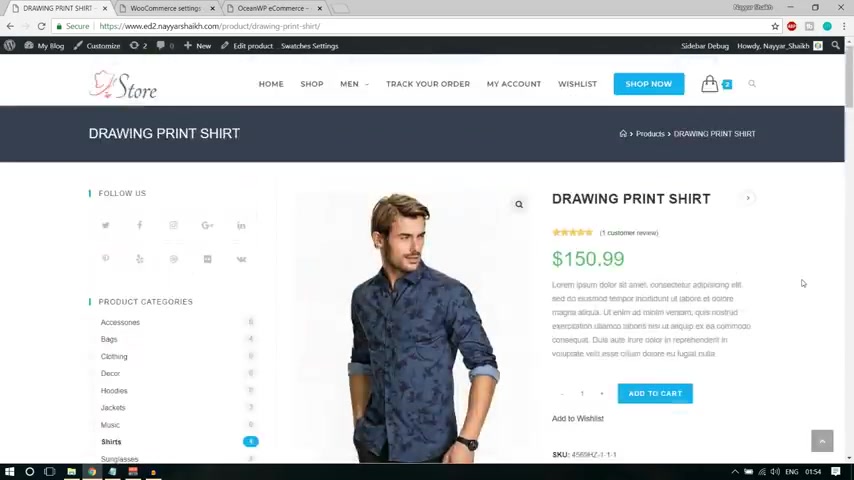
Then after that , let's see how a single product looks like .
So this is how a single product would look like .
Now there are two options .
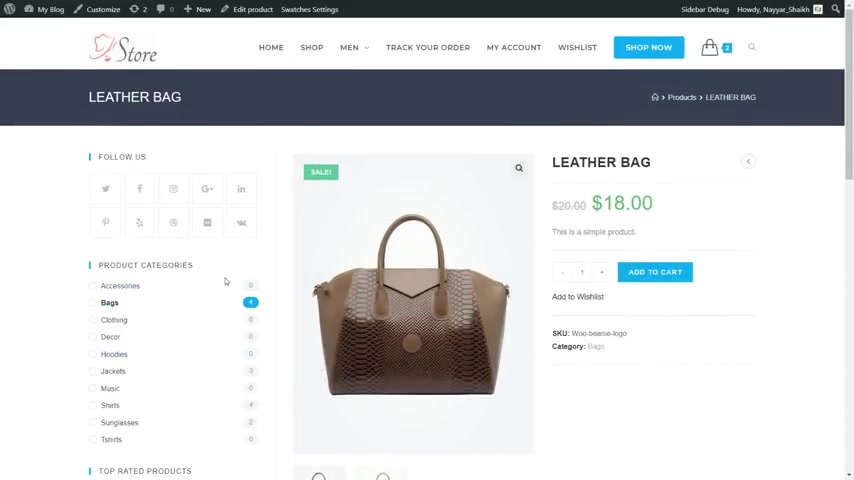
If you want , you can have this sidebar in your single product or if you don't want , you can just have a full with single product .
OK ?
So we have one with sidebar , but you can remove this sidebar for a single product if you want , it's all empty you .
OK ?
So here we have a single product .
When you have this product , you can see the image automatically gets zoomed in .
We have the title over here , the price this product is on sale .
So as you can see , $20 is striked out and we have $18 over here .
This is a short description .
We have add two card button over here and obviously you can change the design and color of the button and everything .
It's all up to you .
We have two different images , you can change it from here .
Then after that at the bottom , we have descriptions , some additional information , reviews , a person can come in and put in their review .
They can give the star rating over here and they can type in something like awesome product or something like that .
Ok ?
So it's all up to you and they can submit it and the product and now this product will have one reading as you can see here .
It says one customer review .
Now you can also control your reviews who can give reviews .
Suppose you want only the purchase person , only the person who has purchased the product can give a review .
You can do so .
Ok , I'll show you how you can do that .
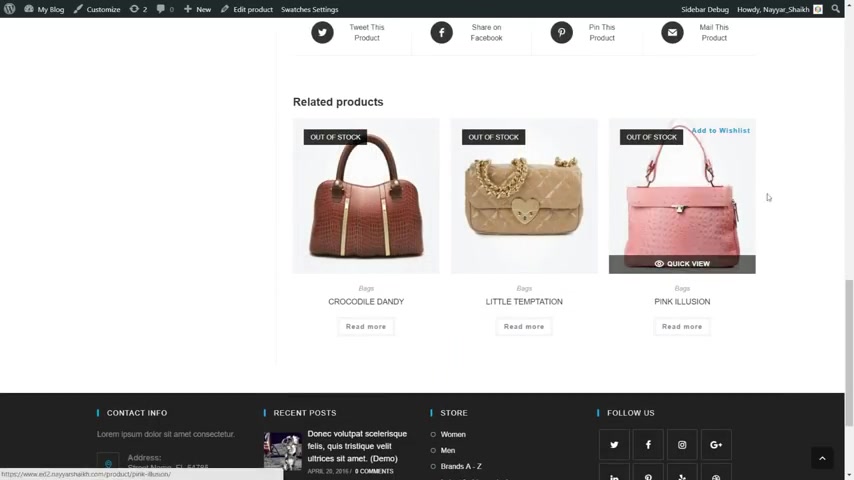
Then after that , we have how we can share this product .
Suppose someone wants to share this specific product or they are on Facebook Twitter or they can mail someone , then they can use these links , very useful links .
Then we have related products over here .
They can also add this product to wish list if they want , they can simply click on this link .
Which says add to wish list .
Then after that we have the same photo .
OK ?
Then let's see the next page which is the track your order page .
Now this is a very special page I would say because what happens is suppose someone has placed an order on your website .
Now they will get an order ID .
Whenever they place an order , they will get an order ID .
Now they can come to that this page they can put in the order ID .
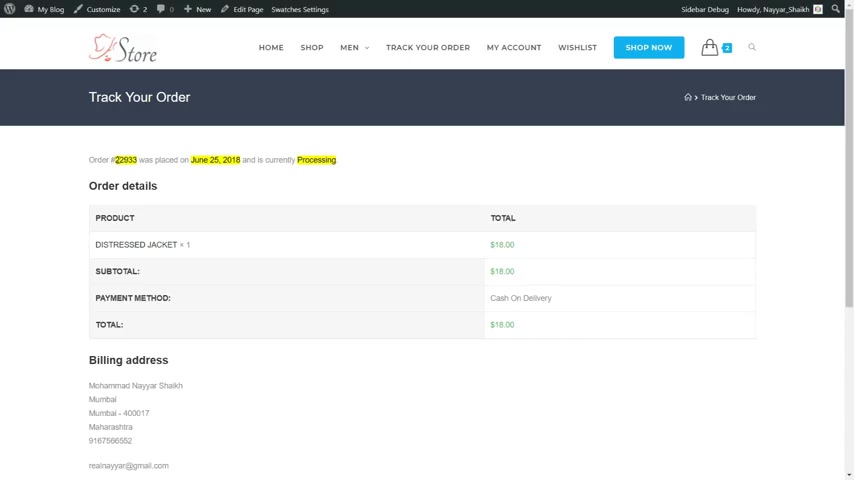
Let me show you , for example , this is the order ID and they can put in the billing email address and click on track , then they can track the order that they have booked .
Now as you can see , every important thing is highlighted .
For example , the order number , the date and the uh what the status is highlighted .
For example , the order number is this the , this is the date date on which the order was placed and this is the status that the order is still processing .
And the person can see the product they , which they have ordered the price and everything .
They can see the billing address and so on .
So again , very , very special and useful page .
Then after this , we have uh my account page , the person will get this page .
They can see the dashboard , they can see their orders .
Whenever they click on these orders , they'll see all their orders .
For example , we can see one order over here .
If they have some downloaded products , they can see over here if they want to change the address or if they want to add some new address , they can do it from here .
Ok .
If they want to see the wish list thing , whatever they are , they have saved in their wish list , they can click on this wish list page .
They will be redirected to this page .
As you can see , they have one thing over here , one item in wish list and they can remove this product away from you or they can add this product to the card .
So both the options are available over here .
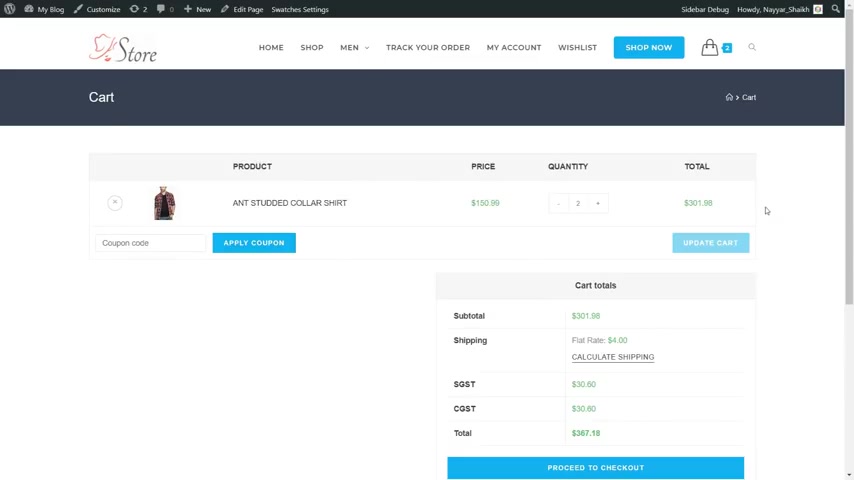
Then this is our card page .
This is how your card page would look like .
Now , this is also a very professional page .
As you can see , you have the card , you can see this is the item which you have in your cart .
Two quantities .
One product is at 1 50 99 .
And here you can see the total price then they can put in some coupon .
If they have some coupon code , they can put it , they can apply it , they'll get some discount .
Now , here is the main thing .
Now you can see the main price is $300 .
Then you can calculate the shipping fees .
Example , here the shipping is $4 .
You can set up different shipping rates for different countries or different states or even different cities .

So very useful thing .
Then you can also set up different taxes .
For example , here I have set up as GST and CGST .
So in India , we are basically following the GST model .
So you can see , I'm charging two different taxes a year .
SGST , central , uh state tax and uh central tax and state tax .
And you can see the total price including the shipping and tax .
Now , they can proceed to checkout .
They can pay through paypal , they can pay through credit card , debit card .
So all the options are available over here and you have a lot of customization options , which means that you can change the design , the font , whatever they want , you can change the layout .
Everything is free .
Everything is very , very easy to do , very easy to , you know , whenever even a 10 year old guy or a child can follow along and create their own website , e-commerce professional e-commerce website .
So I hope you guys like this demo website .
If you want , if you enjoy it , if you want to create this demo website for free , then stay tuned .
All right guys .
Now to create any kind of website , whether it be an e-commerce website website , which we are creating in this video or a simple website , a business website , whatever kind of website we need two basic things , a domain name and a hosting account , rest , everything we are getting for free , for example , themes , plugins , whatever we want , we are getting even the page builder is free , everything is free .
But these two things , in fact , I'll show you how we can get the domain name for free .
So you just have to pay for one thing just to get started .
And that is the hosting .
Now , let me explain to you what is a domain and what is the hosting for those of you guys who are new or 1st , 1st of all , if you already have a domain and hosting , you can skip this section , you can save some time .
You can go in the video description , you'll see the time frame .
So you can skip this section and you can proceed when I start creating this website .
OK ?

But if you don't have a domain name and a hosting account , very important section .
Stay tuned , you'll learn something new over here .
OK ?
So first thing is a domain name now , domain name is basically the name or the URL of your website .
For example , google dot com is a domain name , youtube dot com , facebook dot dot com , blog to dot com .
All these things are different domain names , domain name , which anyone will type in the URL bar to reach to a specific website .
So that is basically a domain name that is like the address , your home address .
OK ?
You need one address so that anyone can reach you .
That is what a domain name is and a hosting is uh basically a place or a hard drive where in all your data , all your website data is safe .
For example , if you see this website , you have all these images , these different products , these pages and all these things , every data is saved somewhere in some computer which is running 24 7 .

So that whenever someone comes to your website , they can see the live website if you have a domain name , but don't have a hosting account .
Whenever someone comes to your website , they will see a blank page because you do have an address .
But there is nothing on that address .
It's just an empty plot .
There's nothing , no house is built on that plot .
Now , if you want to build that house , you have to have a hosting account .
Ok .
So very easy .
Now , I'll go , I'm going to show you two options because this is a website how to create a free commerce website .
I know most of you guys who are watching are on a very tight budget .
So I'll show you both the options .
The first option that I'm going to show you will be uh what I recommend , which is for professional so that you can , you don't have any problem running your website or hand link the traffic and so on .
Ok , because e-commerce website is a bit heavy than the normal website .
So we need a more robust and a better hosting and a better perform , better performing hosting account .
But I'll show you both the options .
Ok .
So first , let's see what I recommend .
And after that , I'll show you the cheapest option , the cheapest and a very decent and good option that you can begin with .
Ok .
So first what you can do , you can open a new tab and type in blog to dot com slash T MD .
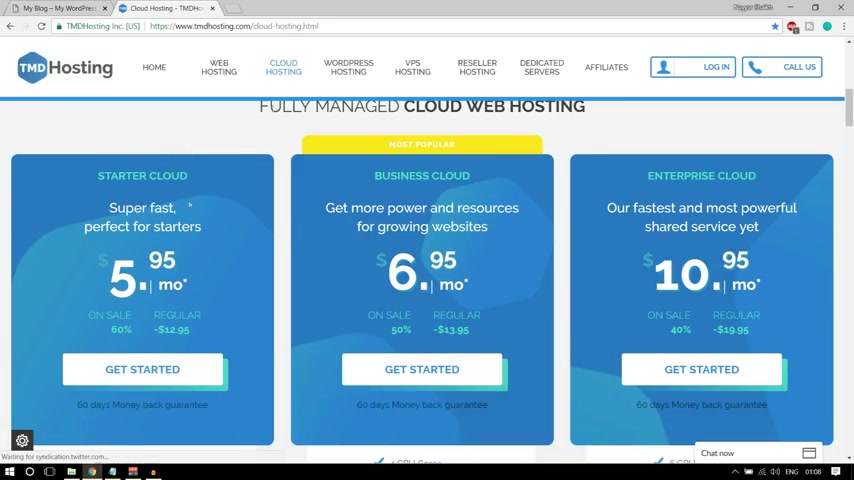
Now , when you do so , you will be redirected to this page , obviously , the design of the page might differ depending on when you're looking or when you're visiting this website .
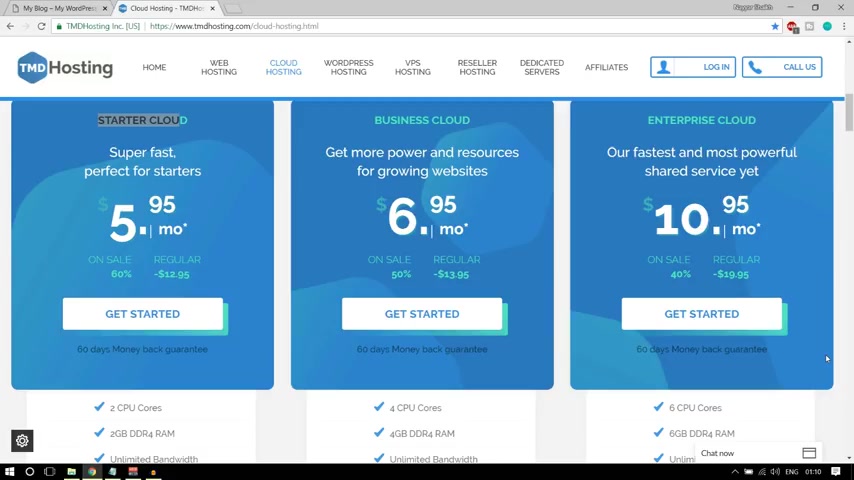
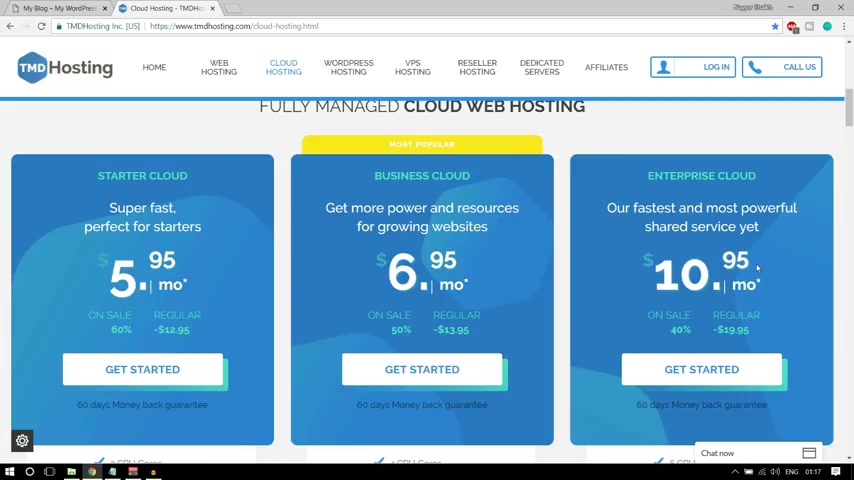
So if you see , oh , here this is the cloud hosting page , if you see the uh it says cloud hosting .
So this is what I recommend .
There are three different plans , a starter cloud business , cloud and enterprise cloud and the rate starts at around 5 $95 per month .
Ok ?
So not a very expensive thing , you can afford it .
And if you can afford it very good or if you don't , if you cannot afford it , what you can do , you can open this link , web hosting .
Let me open this link in a new tab .
Now if you see , oh , here the price starts at $3 per month .
So you can go with this plan as well .
If you're on a very tight budget , you can go with web hosting , starter cloud , ok ?
Starter plan , not cloud , this is not cloud , this is simple shared hosting .
So I'm just cutting this because I don't want , I would not recommend anyone to begin with this thing .
But still I'm saying if you are on a very tight budget , then you can start with web hosting starter plan .
Ok ?
And for most of you guys , I would recommend to at least select the starter cloud option .
Ok .
The cloud hosting now , why do I recommend cloud hosting or shared hosting ?
Very simple .
Uh I'll try to explain you as simple as possible .
Ok .
So there are two type of , there are many types of hosting as well , obviously , but the basic types are shared hosting and cloud hosting .

Now in shared hosting , there is one server and that server is , you know , you know , distributed and shared by many different websites .
For example , there are 10 websites running on one single server .
So everyone is utilizing the resources .
Suppose the computer which is running is one core computer , one GB of R AM computer .
So all the website which are running are using that same one GB ram computer , one GB , one core CPU thing .
OK .
So what happens is that , that is not a very good idea because what happens is all the website are using the same resources .
And if , if , if one of the website is having a greater amount of visitors or greater amount of traffic , then all the the other website will also have to suffer with that .
So that is what a shared hosting is in cloud hosting .
You don't , that is not the plan we hear here , what is happening is your one website , data is distributed among different servers and , and you're the only one who is using that .
And suppose what happens ?
Suppose your website goes down .
You , you have sudden traffic , very high traffic suddenly on your website .
And if your website is going down , then that your website data will be shared by some other server and they will keep your website up .
OK .
So I know it is a bit complicated .
I do understand that .
But in simple terms , shared hosting is for very , very beginners .
And for e-commerce website , that is not a very good idea for e-commerce website , you should have a cloud hosting SSD plan and all those things .
Now there are many different companies .
Uh People will try to sell you many different hosting accounts , many different hosting companies and that do happen .

I do agree with that and most of the companies are quite decent one but T MD is the perfect choice especially for e-commerce website .
And I'll explain to you why because of all the features that it offers you for this small price .
OK .
So there are three different plans .
As I said , you start up business and enterprise cloud .
Now let's see , all the features and all the options that this company or this cloud hosting is providing us so that we can decide whatever plan or whatever company that we can choose .
Ok .
So let's see .
So the first option is it gives you six core CPU and six GB of DDR four Ram .
OK .
So the , a few moments ago , I have just explained to you that hosting is nothing but a computer or a hard drive which is running 24 7 .
OK .
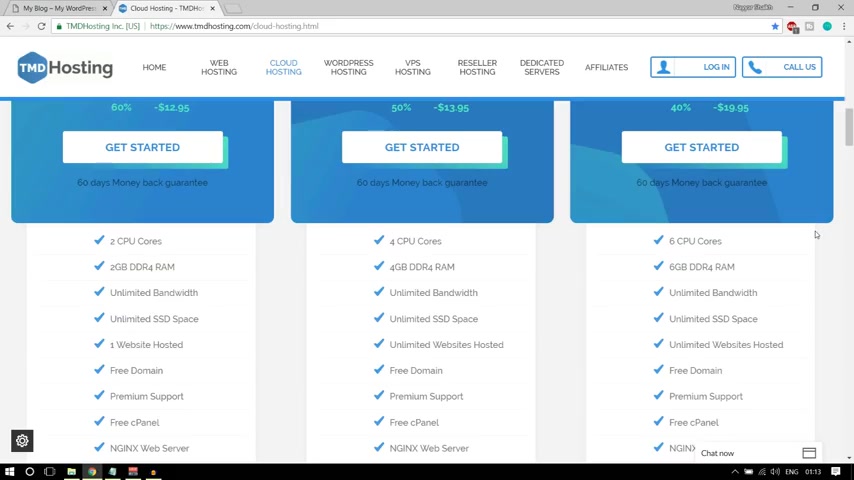
So the computer which these guys are using is terrific , is just mind blowing the computer which these guys are using is utilizing a six core CPU and a six GB of DDR for ram .
So really good , really robust computer .
Then the next feature or the next option is unlimited bandwidth .
Now , bandwidth is the amount of data that you can transfer on your website .
The amount of data that you can download from your website or upload to your website , so you can download and upload unlimited amount of data on your website .
Very important step again , very important option .
Then after that , we have SSD space .
Now this is the most important option and this is the main reason why I recommend T MD or any other hosting company .
OK .
So SSD is way more faster than the regular SDD .
If you're purchasing some other uh company hosting account , they , they are very , very , very high chances , more than 90% chance chances that they are using the regular HDD space .

OK ?
Which is way more slower than the SSD .
If you don't know the difference , you can simply type in SSD versus HDD web hosting on Google , you'll see all the results Now let me click on images and let's click on this thing for a .
Now , this is the first result that appears on Google when we type in SSD versus SDD web hosting .
And you can see the difference over here .
The first step is speed .
The first criteria is speed here .
You can see the speed of SSD is way more higher than the HTD .
The green one is SSD and this is the HTD .
Then the second one is IOPS again , at the bottom , it says higher is better and you can see the difference is around 100 times .
Ok .
So it is 100 times higher than the regular HTD .
Then we have the latency .
Now , this time it's space lower is better .
And again , you can see the difference is around 100 times .
So you , you understand that SSD is way more better , faster in terms of performance than the regular HTD .
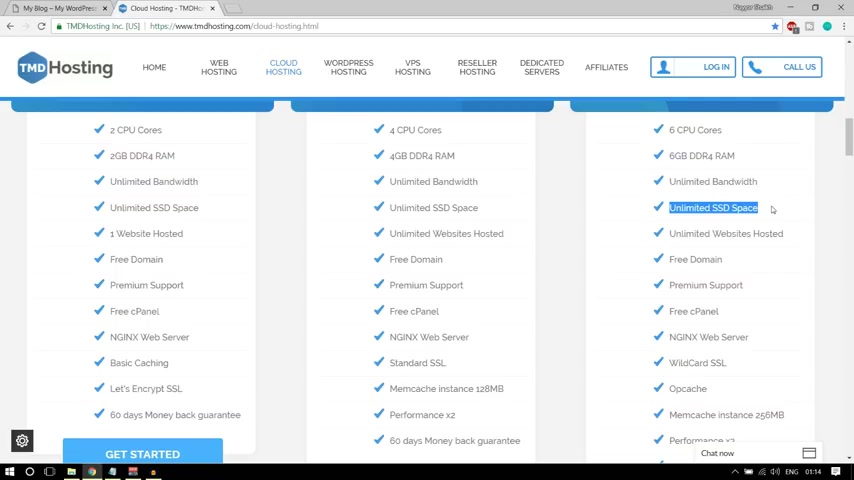
Now , not only that , it provides SSD space , it is providing unlimited SSD space .
Now , this is really crazy when you go to some other thing and you purchase a hosting account , you'll get one GB five GB or at the max , you'll get TG BS SD space .
But here you're getting unlimited SSD space , which is really mind boggling .
Now , after that , we can host unlimited websites over here .
So you can create 10 different websites , 100 different websites , unlimited number of websites and you can host all of them into one single plan .
You don't have to create new , you don't have to purchase a new hosting plan every time you try to create a new website .
Ok .
So very , very important feature .
And as I said , you in the beginning , I will show you how we can get a free domain with this plan .
With any one of these plans , you can get a free domain as well .
So you're saving around $15 a a year .
Ok .
Then we also get a very good support premium support .
They have a 24 7 live chat premium support .
Very very , very good .
You have this chat chat option over here .
You can simply open it from here and start chatting .
Very good .
Ok .
Then we have a free CP channel , NGINX web server and SSL while in fact , it is wild card SSL .
Now , this is also very , very important option over here .
Now , basically SSL C if you see the demo website , this is the SSL certificate , it says secure that this website is secure and if your website is not secure , it will say not secure .
And when someone clicks over here , it will say don't put your password , your credit card , debit card details on this website .
This is not a secure website .
So you leave , you lose all your credibility and potential customers .
So that is a very , very bad idea .
SSL certificates is compulsory from 2018 .
So we are getting wild card SSL .
Now , wild card SSL means that you can install SSL certificates on unlimited number of domains and subdomains .
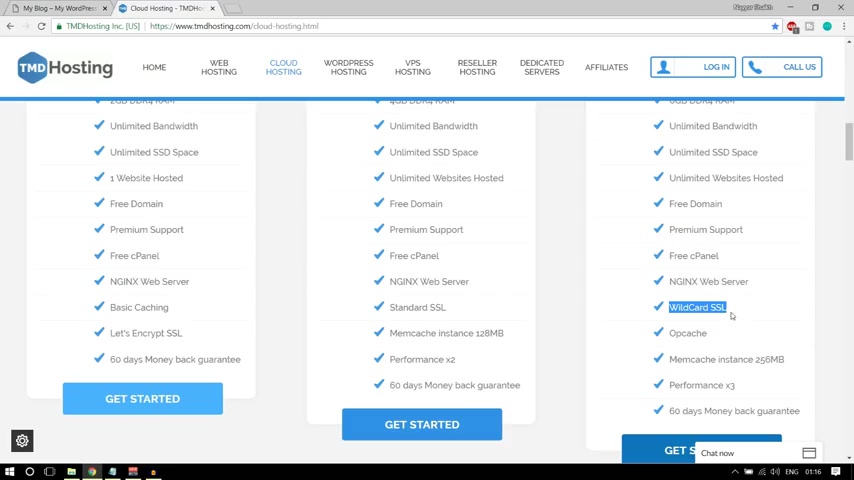
Now , it might not sound very good or very bad , big thing to you .
But let me tell you one thing , if you go to purchase a single SSL certificate that will cost you around $4200 .
And here you're getting unlimited SSL certificate so you can understand the amount of money you'll be saving .
Ok .
Then we have optimum cash , which which will improve the performance of your website .
Then we have memory cash instead of 2 56 MB .
Again , it will improve the performance and speed of your website .
Then the performance of this plan is three times better than these plans .
You also get a 60 day money back guarantee .
Now , mostly the most of the things are similar in all these three plans .
The most important thing to look over here is this 11 website hosted in Starter Cloud .
You can host only one website and in business cloud and enterprise cloud , you can host unlimited numbers website .
Now , suppose you are creating this website and you , you know for sure that you are not going to need another website for maybe 678 months or maybe a year .
Then I would recommend you to start with Starter Cloud and whenever you want to upgrade , you can upgrade it easily .
Ok .
So you whenever you want to upgrade to business cloud or enterprise cloud , you can do so .
But if you know that you are going to create different websites , more than one website , then I would recommend you to at least select the business cloud or if you have a budget , if you can push a little bit further , then you can also select this enterprise cloud .
Now , I personally am using the enterprise cloud .
So I'll click on this enterprise cloud get started button .
If you want start cloud , you can click on this get started button .
OK ?
So let's see what happens .
OK , guys .
Now , when you do , so when you click on that button , you will be redirected to this page .
Now , here you have to put in the domain name , which you want for free .
OK ?
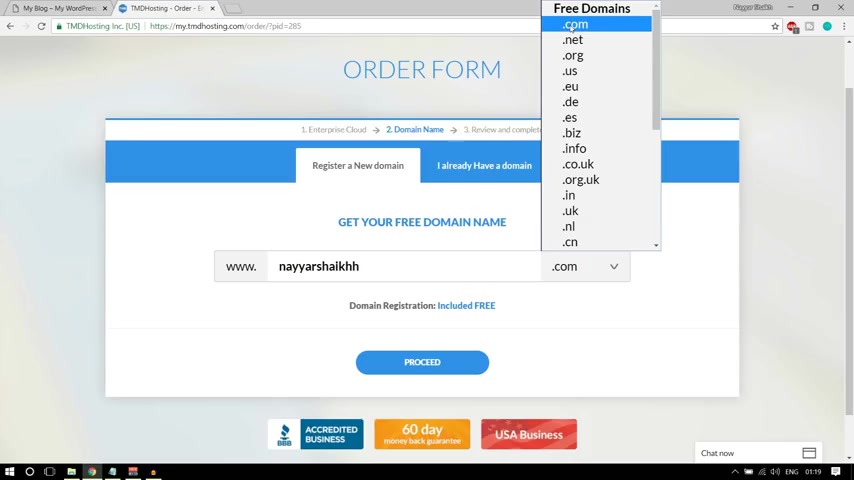
So you can put in some domain name over here and you can also select the extension .
Now , for most of you guys , I would recommend you to stick with dot com .
But if you're creating a website for country specific , for example , if you're creating this e-commerce website only for India , then you can also select the country specific domain name , uh domain extension , which is dot n dot UK dot us and so on .
So it's , it's all up to you .
You can select dot com or you can select countries specific if you are creating this website for a specific country .
OK ?
Now , once you have put in your domain name , and once you have selected the extension .
You can click on , proceed .
Now , here you have to put in your contact information , your first name , your last name , phone number , address or your state I code and so on all the basic information about yourself .
Then here you have to put in the payment information .
How do you want to make payment ?
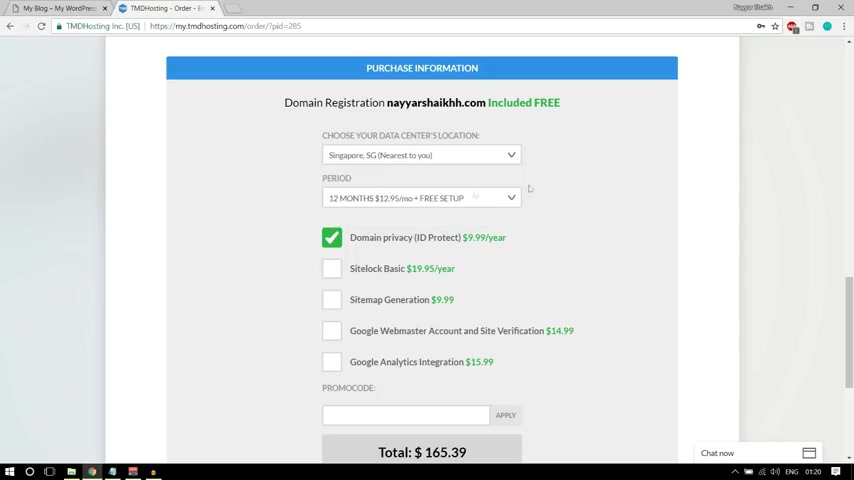
If you want to make payment through credit card or your debit card , you can select your card type , Visa , mastercard , discover , whatever it is and put in your card details , then you have the purchase information .
Now , this is also very important .
First thing is the data center location and here you have to select the one which says nearest to you .
For example , if you see Oyo for me , Singapore says nearest to you .
So I'll select this one then by default in the period 12 months is selected .
Now , I also recommend you to select the 12 month , never select the one month plan because here in , if you select the one month plan , you will have to , you know , spend 10 $7 extra , 7 to $8 extra per month .
Ok ?
So by the end of the year , you are already spending around $100 extra .
So not a good idea .
Select the 12 month plan .
That is the best plan .
Ok ?
Now , don't select anything over here .
You can , if you want , you can even undertake this thing .
Don't take mark all these things we don't need these things , OK ?
We can get all these things for free .
OK ?
So not a big deal , don't take mark anything from here .
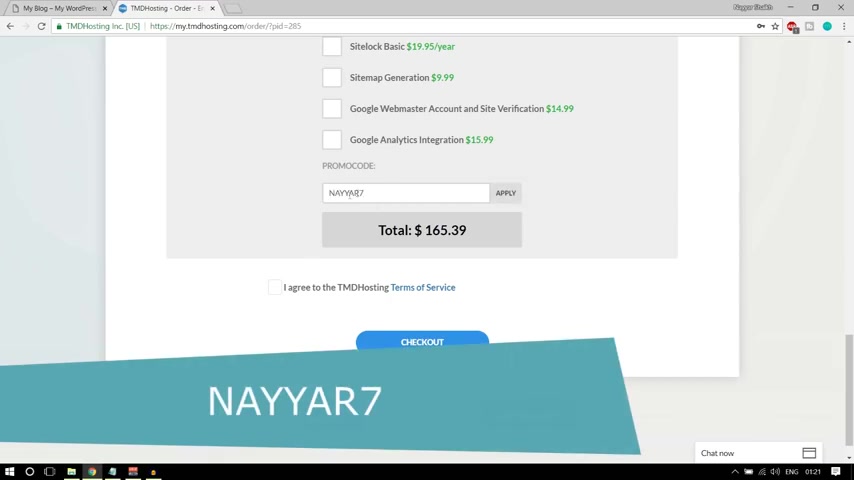
Now , this is also a very important thing over here , which is promo code .
Now here type in N A double yar and numeric seven , OK .
N A double yar numeric seven .
Now this promo code , this coupon code is also given in the video description below .
You can check that out , OK ?
You can copy and paste it over here , you can click on apply .
And as you can see this says , this promo code gives you 7% of this purchase and 7% is the highest discount that T MD offers .
OK ?
So you're getting the highest discount possible on cloud hosting .
So once you're done with all these steps , simply tick my , I agree to MD hosting terms of service and click on .
Check out .
All right guys .
Now when you click on that check out button , you'll receive an email from T MD hosting and that would look something like this .
OK ?
Welcome to T MD .
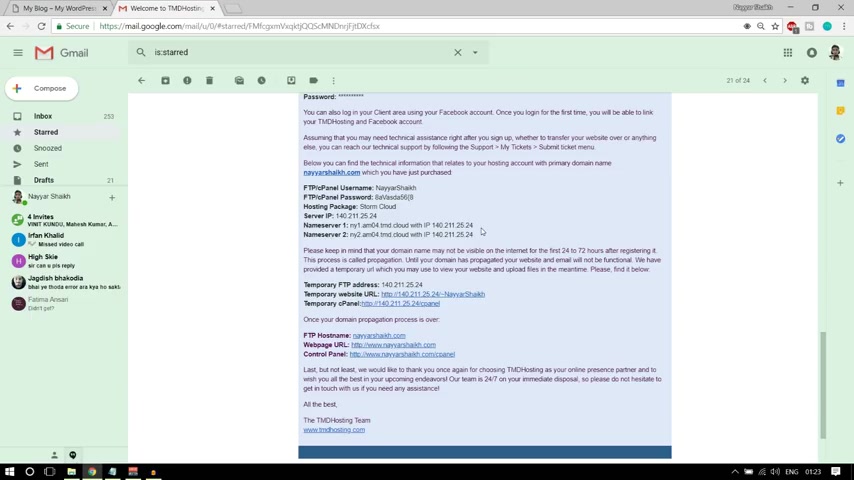
And so and so , and this email is a very , very , very important email .
For example , as you can see , oh , you have some really important and crucial information .
O for example , you have your user name , your password , your you know server IP your name , servers and so on .
So very , very important email .
Make sure you save it .
This email , you mark this email as star and you forward this email to 23 different email addresses .
If you want multiple email addresses , just forward it to those different email addresses .
Make sure this information is safe and secure , ok ?
This does not get deleted and so on .
If you want , you can also take a print out of this , it's all up to you .
Ok ?
So here if you see at the bottom , you have this thing , control panel link .
Now open this link in a new tab .
Now you have to copy the user name and password from this email address , paste it over here and click on login .
All right guys .
Now , once you do so you will be redirected to this page .
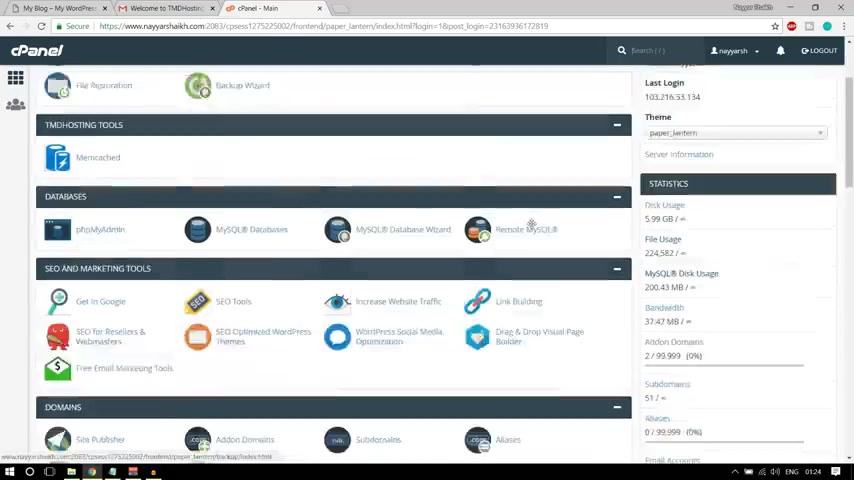
Now , this is your C panel .
Most of the companies have similar C panel .
There are so many different options .
You don't have to anyone right now .
First , we have to install wordpress on our website .
Ok .
So we have purchased a domain name and hosting now it's time to install wordpress on that domain name .
Ok .
So very easy to do .
Just scroll at the bottom .
Come under soft tacular app installer section and select wordpress from here .
Now , click on this install now button .
Now , from here you have to select the one which says htdps .
OK .
So there are two uh http and the other one is with the extension S http S .
So you have to select the HTTP S one so that you can have this certificate over here as you can see here .
It says http S ok .
So make sure you select the S one .
Now from here , you have to select the domain name , which you want for , which you want to install wordpress on .
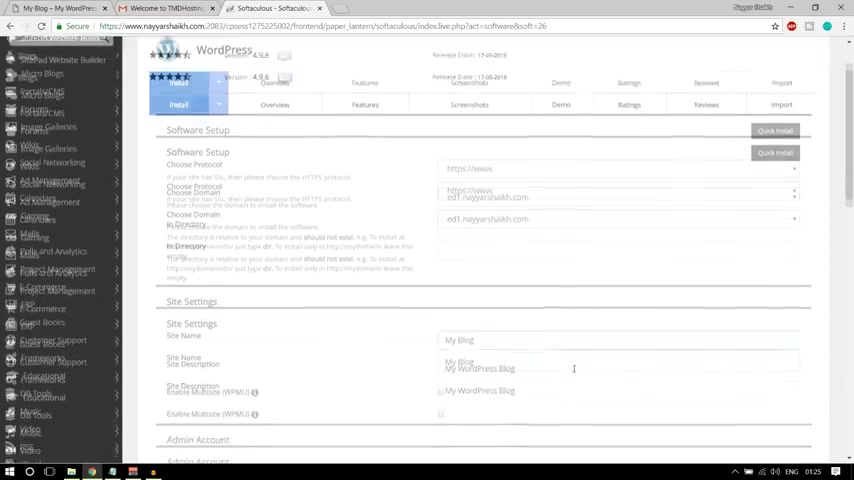
So I have selected my domain name if you want , if you're doing this thing for the first time , you will obviously see only one domain name over here .
Now , after this , we have this site in settings , you can give a site name to your website , so we can maybe give it Ocean WP e-commerce .
It's all up to you .
OK ?
You can put it in your website name , your company name over here .
Then you can put in some short description about your company or you can also put in your tagline , the tagline of the company .
OK ?
So I may just put ecommerce tutorial .
OK ?
It's all up to you .
You can put anything .
All right .
Now , let's proceed further .
Now , after this very important option , you have to change the user name and password .
You have this default user name and password , you have to change it .
So let's change it .
Let me put something like this .
OK ?
A user name which has uh some upper case , some lower case a dash or something like this .
So put something like this .
OK ?
Then after this , let's put a password over here .
So let me put in my password over here .
Then after this , we can also change the , in fact , you should change the email address from your and put in your own email address .
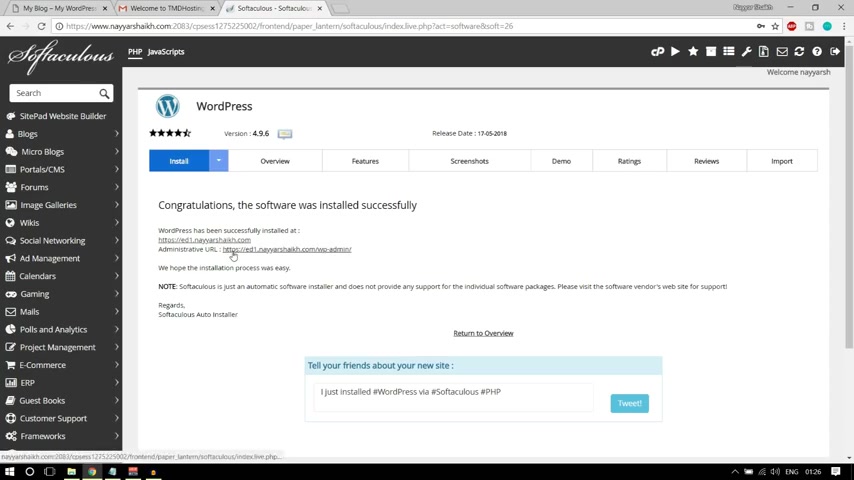
Then come at the bottom and click on install .
Now , wordpress is getting installed on your website .
It will , it will take a few seconds .
You just , you can just wait .
As I said , it took just a few seconds .
Now , we have two links .
The first one is your website link .
The second one is the administrative URL or the dashboard link .
OK ?
So let's open in the second link and let's cut all these things .
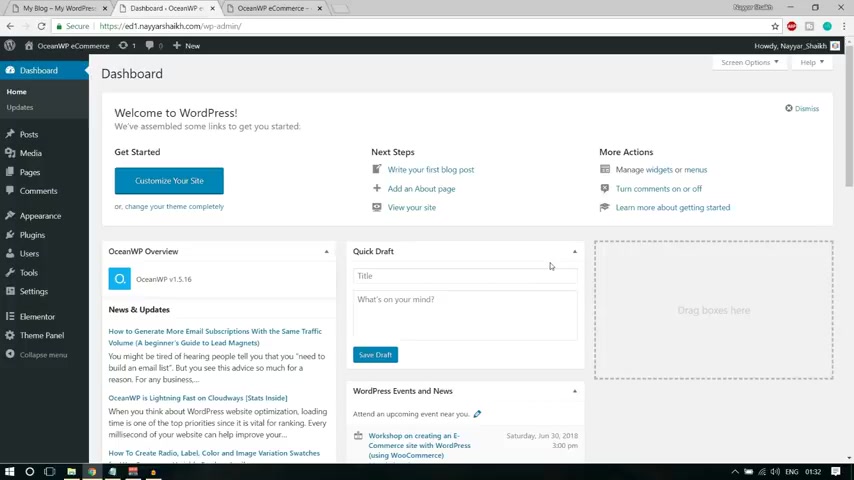
OK , guys .
So this is our dashboard .
OK ?
So whenever you want to come to your dashboard , you type in your website name slash WP hyphen admin .
OK ?
You can see it over here in my URL bar .
So whenever you want to come to your dashboard , you type in your website name slash forward slash WP hyphen admin .
OK ?
And this is the place from where we are going to control our website .
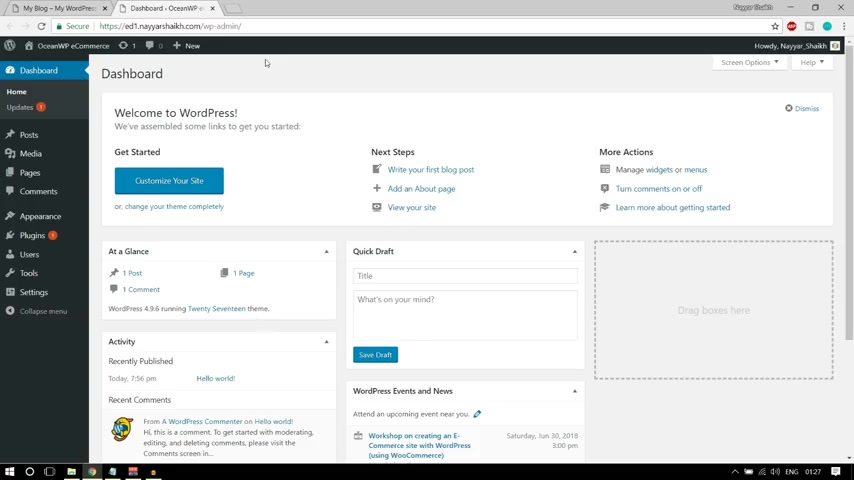
You , this is the place from where we will create different products , different pages , uh different tax rates and all those things .
OK ?
So very important link .
Make sure you see you remember this thing .
OK ?
So let's , let's start , let's see what we have to do .
1st , 1st , we have to change some basic settings .
So what we can do , you can click on this .
Uh First of all , if you see you have some links over here at the left hand side , you post to media pages .
We'll see everything one by one , don't worry .
So you have one link , we see settings , just click on that link .
Now , we we have to change some basic settings from here .
You can again change .
If you have not yet changed the site title , you can change it from here .
You can change the tagline from here as well .
OK ?
And make sure you tick mark this .
Anyone can register if you don't .
This is also fine .
If you want to create a multi vendor e-commerce website , you should tick mark this but it is also fine for normal website .
It is not required .
Ok ?
So you don't have to do any changes over here .
Just make sure you have your site name and your email address over here .
Ok .
Then after that click on this per links option .
Now , if you see o by default , this thing is select date and date and name .
Now you have to select this one post name .
Ok .
So make sure you select the post name and click on save changes .
All right .
Now let's go to appearances .
Let's click on appearances .
Now , we have three different themes over here and by basically a theme is just the design of your website .
Ok .
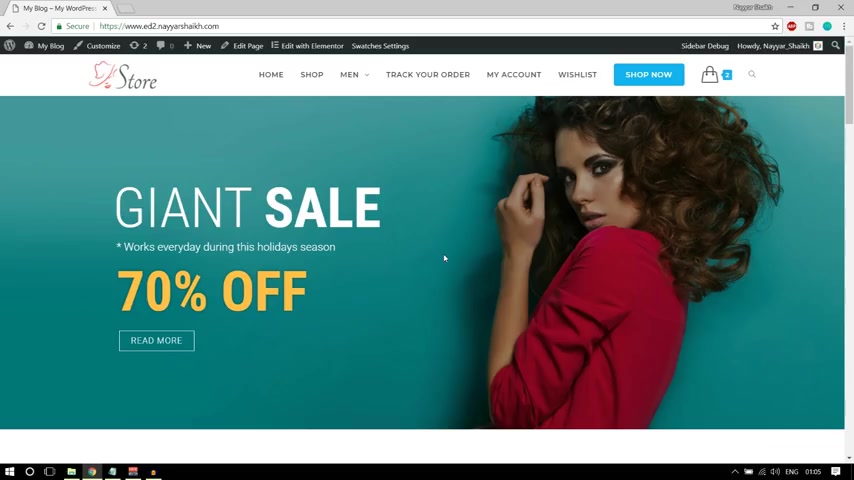
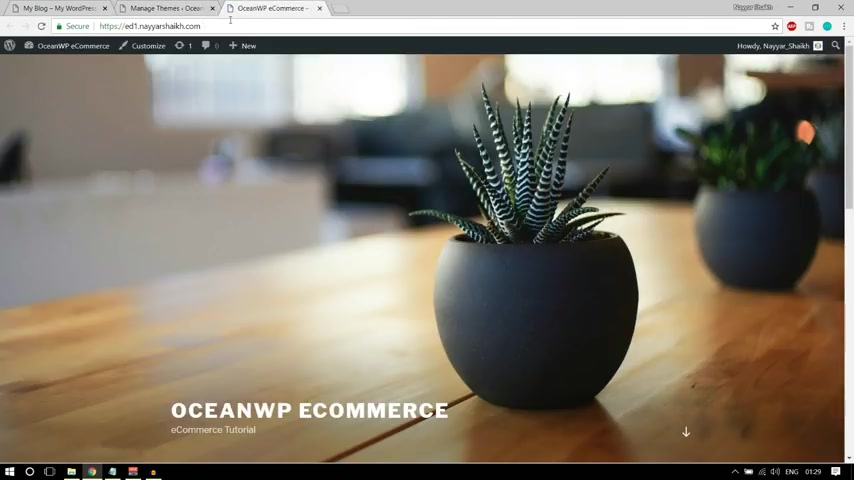
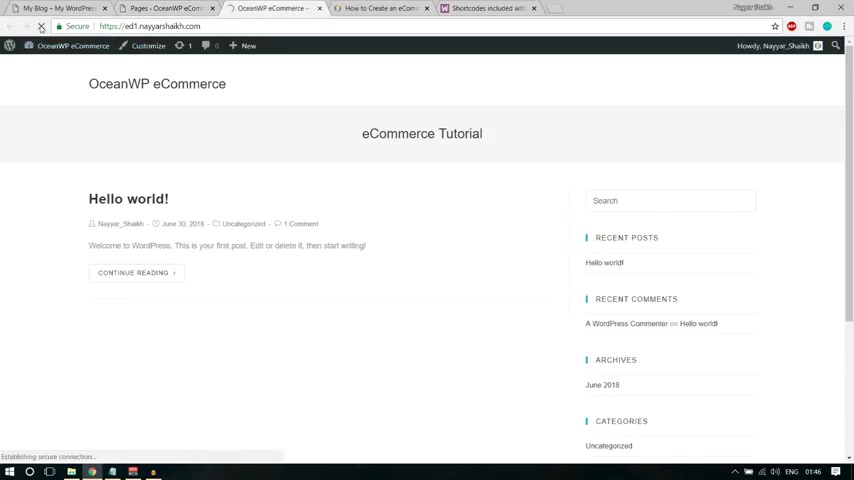
So first let's see how our website is looking at present .
So when you have this , you will see this visit side link .
Let's open this link in a new tab or you can simply type in the URL or the domain name of your website .
You will be redirected to this page .
So this is how our website is looking at person .
Very bad , not at all good .
And we have to create something amazing like this .
OK .
So we have to change the design of the website and whenever you want to do so you simply change the theme .
So by default , we have three themes .
Let's get rid of all these themes because we don't need these .
These are really boring ones .
And let's install a new theme , a free theme , a new theme .
Very good theme .
So click on add new .
Now in these search themes , just type in ocean .
WP you don't have to press enter , it will automatically load it .
Ok .
Now , this is the three theme .
You can simply click on this install button .
Now click on activate so that this theme gets activated on our website .
Now , this theme is activated .
Now , let's come over here , let's refresh it .
Now , you can see the design has tremendously changed .
Now , we have a completely different design .
Very simple and sober design .
Now what we can do , we can convert this thing into something amazing like this .
So very easy to do .
We'll see everything , step by step .
First , it says this theme recommends the following plugins .
Now let's click on this link , begin installing plug in all these plugins are free .
So instead of installing one by one , we can simply tick mark over here , it will select everything , it will tick mark everything and from the bulk action , let's select install and click on , apply .
All right .
So as you can see over here , all our plugins are successfully installed and activated .
Now , you can click on this link which says return to dashboard .
Ok .
So we are back on our dashboard now it's time to install some extra plugins because as I have explained to you earlier , there are many premium features available in this website that we are going to create .
Now to add those features , we need different plugins for different purposes .
Now , all those plugins that we are going to use are free .
So you don't even have to worry about it .
Ok .
So let's start installing the R plugins one by one .
First .
Let's click on plug plug ins .
As you can see we have five plugins .
Now , these three plugins are the one which we have just installed .
Elemental Ocean demo , import and ocean extra .
And we have two extra themes over here .
A Kmet and Hello Dolly , which we don't need .
So we can tick mark both of them .
We can go to bulk action and select delete .
Click on apply .
Now , both the plugins will be deleted .
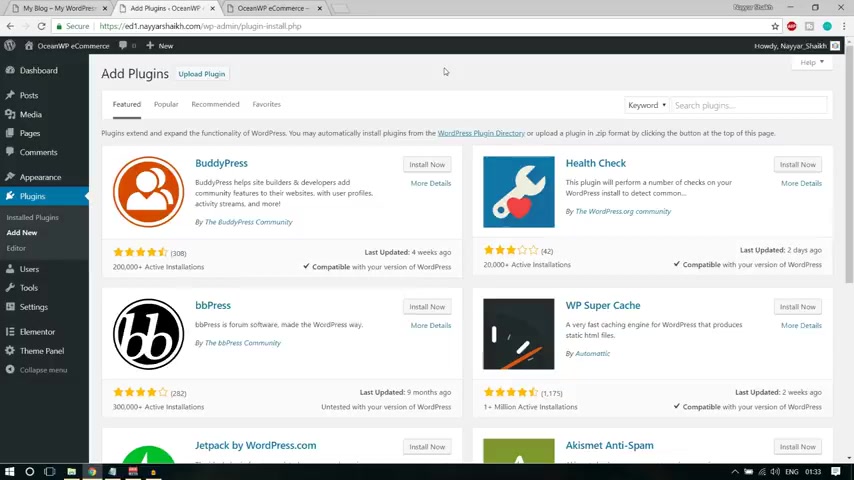
Now , let's start installing and adding the plugins that we need .
So click on add new .
Now , as I've explained to you and told you earlier in this video that I'm going to give you all the images , all the whatever file and CS that I have used in this video , I am going to give everything for free .
So what you can do , you can go to my website .
In fact , you will have this link in the description below .
So you don't even have to worry about it .
OK ?
You can , when you go go to that link , you can , you'll see this link over here .
You can simply click on this link and you'll see this link over here .
Images , CS S layouts , et cetera .
Download , you simply have to download this link and click on this download button and you will download a zip file .
Let me show you .
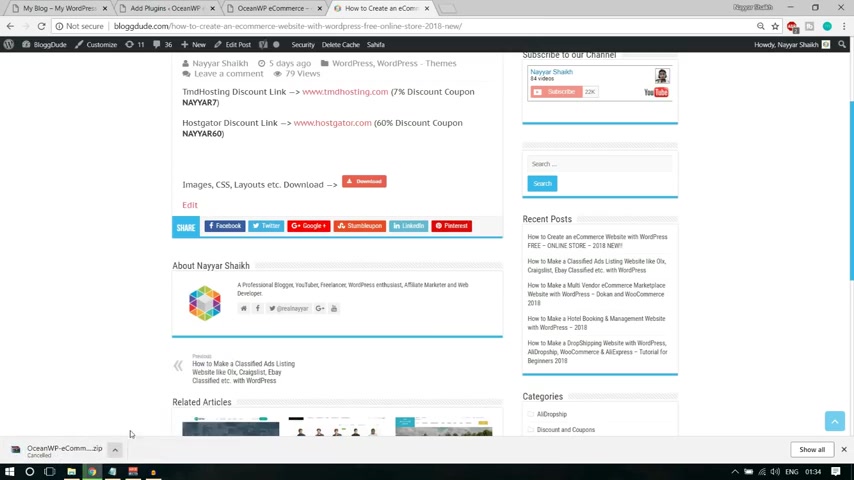
So when you click on this button as you can see one zip file has started downloading , I'm not going to download it because I already have it and sometimes you might not see this thing .
OK ?
So instead of this , you will see one want something like this that please subscribe to my youtube channel so that you can download everything for free .
So just subscribe to the channel and you will , you can download everything for free .
OK ?
So once you receive that zip file , unzip everything and in that you will have all the images , all the CS S and everything .
Now in that folder , you'll have one file , let me show , show you that file would look something like this .
Now , here are all the plugins that we are going to need .
Ok .
They have around 10 , 12 plugins .
So let's start installing all the plugins , one by one .
So I'll show you for two plugins how you can do it and rest all the thing .
You can just do it by yourself .
I'll just fast forward it so that I don't waste your time and my time .
Ok , especially your time .
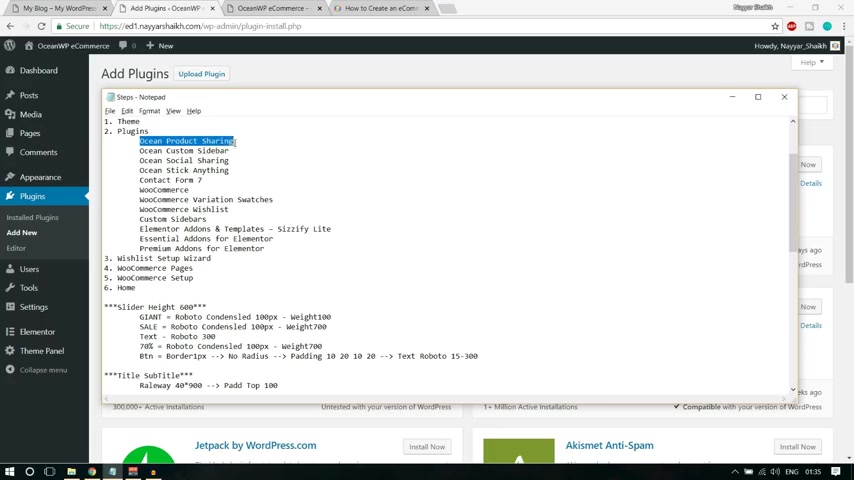
So let's select the first plug in which is ocean product sharing .
Come over here , type in under search plug in and don't have to press enter , just type in , paste in over here .
Now you'll see this plug in over here ocean product sharing .
Now , let's click on install now .
So this plug in is getting installed .
This is plug , this plug in is by Ocean WP , which is the theme developer , which is very good .
Now , let me give you a very small and very useful tip .
So don't click on this activate button now , because here , if you see the list is quite long when you click on this activate button .
Let me show what happens when you click on this activate button , you'll be redirected to the dashboard .
OK ?
As you can see now again , you have to click on this add new page again , you have to type in everything .
Then the repeat , you have to repeat the same process .
Now let's copy this second plug in .
Let's paste it over here .
Ok .
Now let me show you what happens if you don't click on that activate page .
Ok .
So second plug in is Ocean custom sidebar .
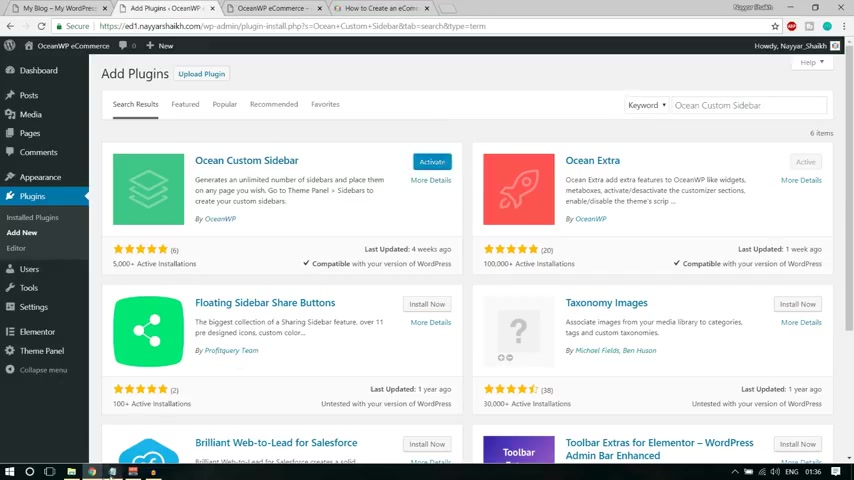
Just click on install now and don't click on activate so that you don't again , go back to the dashboard and to activate it .
Ok ?
So once you have active , install it , simply install everything one by one and we can activate everything at one time .
Ok ?
So let me paste this third one .
Ocean social sharing .
This is also by Ocean WP .
As you can see over here , let's click on install .
And similarly let me very quickly install everything one by one .
The fourth one is , I think it is quite simple .
We don't need to fast forward it .
Fourth one is Ocean stick .
Anything .
Let's click on install .
Now , let's see what we have next .
So we have contact form seven .
Was it click on install now ?
Again , come back to the list .
We have Woocommerce .
Very , very important the plug in that will convert our website into an e-commerce website .
OK ?
So this is the plug in .
Now , I forgot to tell you one thing for those of you guys who are new to wordpress .
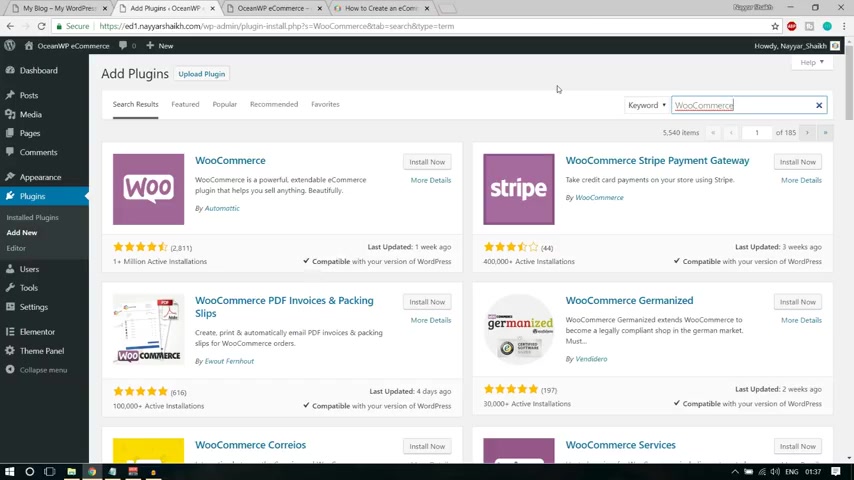
A plug-in is a way to extend the functionality of your website .
Now , this is the perfect example .
Woocommerce is the perfect example by default , Wordpress is not meant for e-commerce website .
But if you want to convert your website , a wordpress website into an e-commerce website .
You use a plug in to extend the functionality of your Wordpress website and to make uh it Ecommerce website to add the functionalities of all the e-commerce website like adding to card , check out shipping this and that .
So this plug in is the one that does all the work Woocommerce .
OK .
Select this click on install .
Now , then the next plug-in is related to Woocommerce , which is Woocommerce variation switches .
So you can again type in this and just paste it over here .
Install it .
Then after that we have Woocommerce wish list , copy it from here .
Come over here .
Let us let us first install this thing .
OK ?
Install it , paste it over here , Woocommerce wish list , install it .
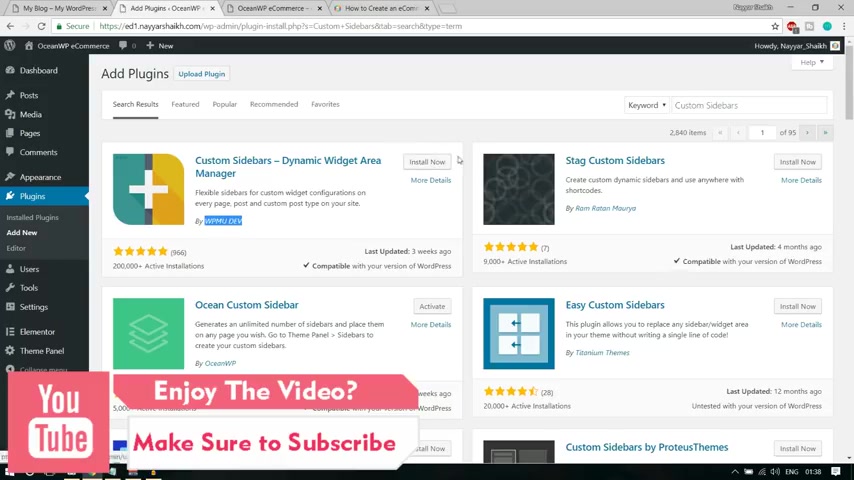
And after that , we have custom sidebars .
So simply copy it from here and let us first .
OK .
Installed Kajo past it .
Now we have to select this one custom sidebar by W PM U DEV .
OK ?
By this one by this author .
OK ?
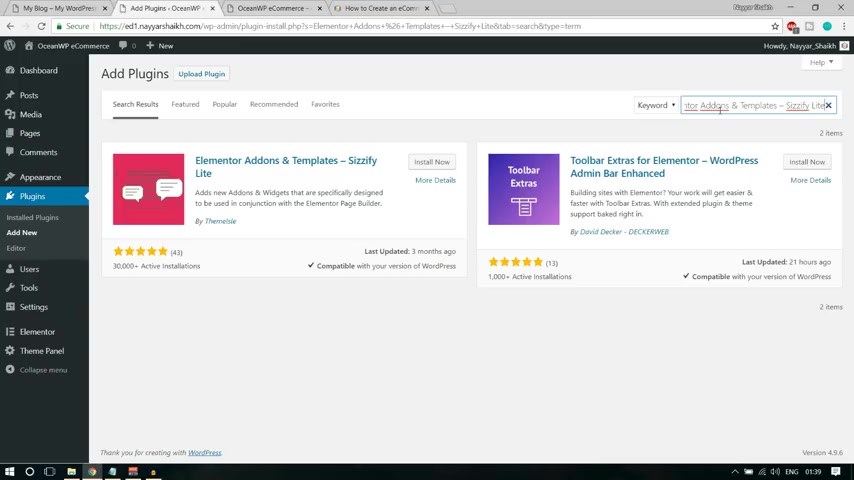
So install this one , come back to the list and after that , we have elemental add ons and templates , Zhi Light .
So you have this thing , just paste it over here .
OK ?
We , so because we are using the elemental , it is a free plug in free page builder .
Now they have many different uh modules in elemental which is , which are available only in pro version .
OK ?
So what we are doing is we are not installing and wasting our time or investing our money on pro version .
Rather we are using some extra plugins to add those pro version modules in the free version .
OK ?
So very useful and time saving money saving .
Then after that , we have essential add-ons for elemental .
Again , copy , paste it over here , install .
Now then after that , we have the last one premium add-ons for element or copy and paste over here .
OK .
Let's select this one .
Click on install .
Now let's click on install plugins from the left hand side and let's activate everything at once .
Ok .
So we have all these plugins over here .
Now , simply tick mark over here , it will select everything and from the bulk action select , activate and click on apply .
So this has saved a lot of time for us .
All right guys .
Now everything is successfully installed and activated .
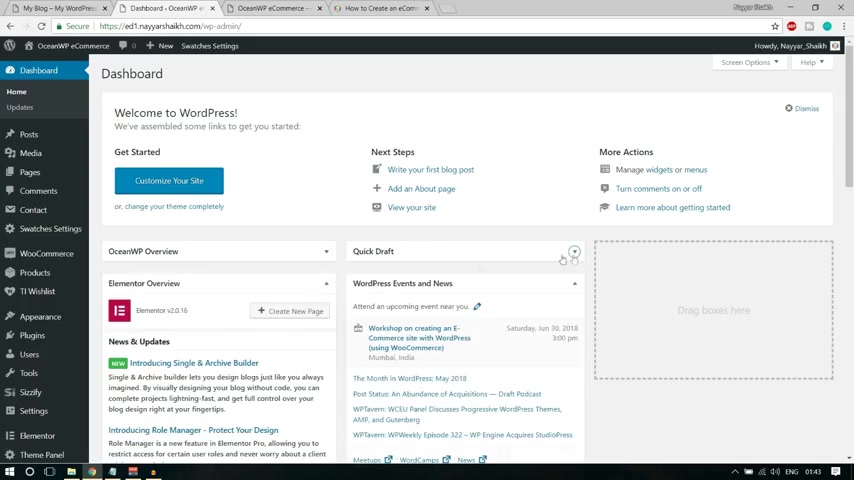
So let's cut all these things .
Let's click on dashboard now , as you can see over here , there are so many new options available .
Now , now we have CZ five element or this that everything .
Ok .
So there are many different options .
For example , we have products , we have Woocommerce and so on .
So because this is all because of the plugins that we have downloaded .
Now , let's dismiss all these notices over yours .
Keep , ok , we had , we should run that one .
Ok ?
No problem , no problem .
Just dismiss all everything that you see over here .
Now , if you see over here there is one notice which is quite important link to wish list does not work .
Please apply the wish list page or run this set of wizards .
So let's let's run this set of wizard .
Click on this link , run this set of wizard .
You'll see something like this .
OK ?
So you don't have to do anything .
This is a very quick set up .
So simply click on let's go .
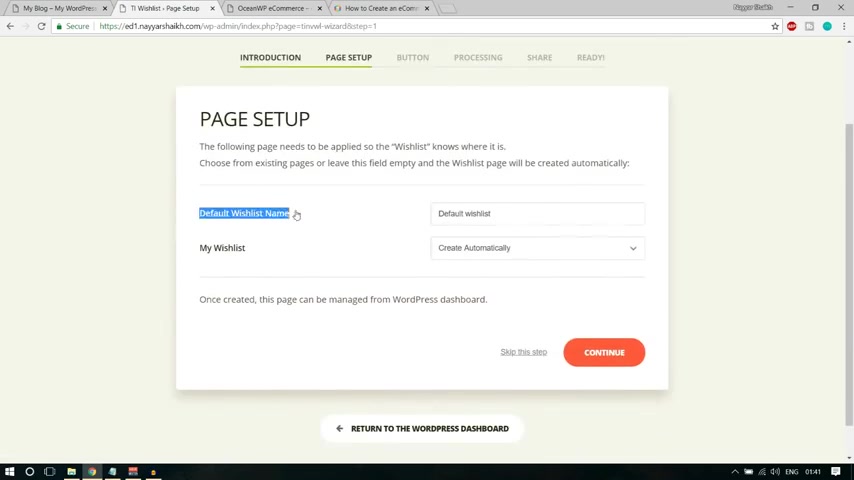
Now we can select default wish uh wish list name .
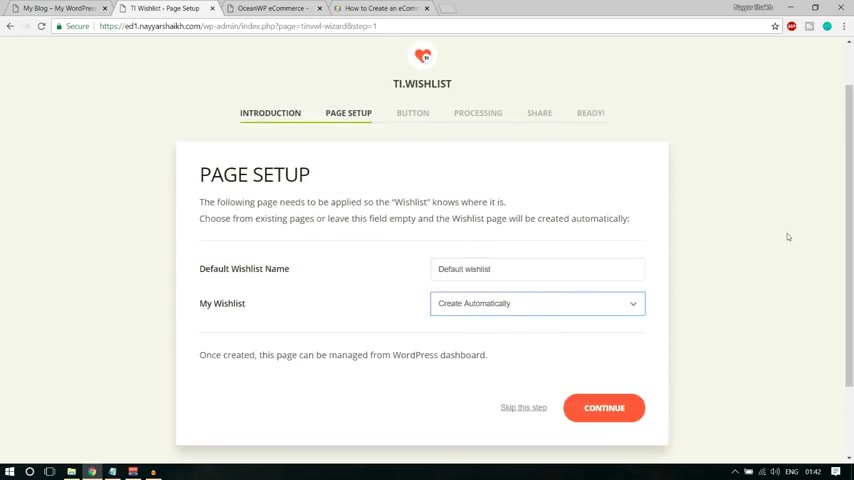
So you can simply , you can just type in a wish list name you want and you can select my wish list and you can select this one create automatically because we haven't created any page for wish list .
So we want this plug in to create it for us .
OK ?
So that we can , it can save some time .
Now click on continue .
Now , what should the button say ?
So button should say add two card button and button position .
OK ?
So first is after the add two card button and what should the button say ?
It should say ?
Add to wish list .
If you want to change this , you can change it from here .
It's all up to you .
OK ?
Now , do , do you want to show this button ?
Add to wish list button in product listing ?
If yes , then don't do anything .
If you know , then you can deselect this thing .
OK ?
It's all up to you .
Click on continue .
Now don't have to do anything over here .
Simply click on continue .
Everything is automatic .
OK ?
Do you want these share buttons ?
Yes , we do want so click on continue again .
Now everything is done .
Simply click on this link , return to wordpress dashboard .
So this was a very quick and simple set up .
Nothing to do more over here .
Now , I missed one thing over here and that was the woocommerce setup .
We should have done that , but it's not a problem if you even miss it .
First , let me explain you that .
So let's first see one thing .
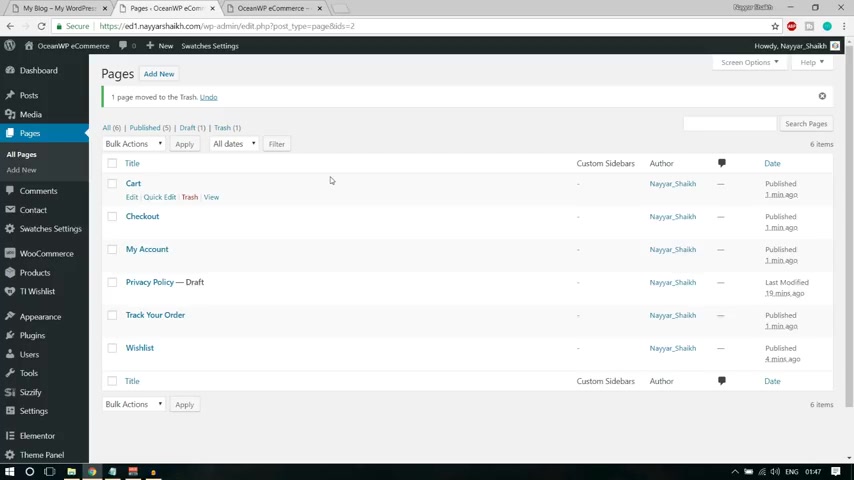
Let's click on pages over here .
OK ?
From the left hand side , now you'll see three pages over here .
First one is privacy policy and this is the page that is automatically created by wordpress .
The second page is sample page again , automatically created by Sam by wordpress .
And the third one is wish list .
Now this page is created because we have uh we have just run this set of visit for wish list .
OK ?
Now we need some more pages over here .
For example , we need the uh the card page , the shop page and those pages .
So what you can do , you can go to Google type in v commerce uh short codes .
OK ?
Here we have short codes or page short codes .
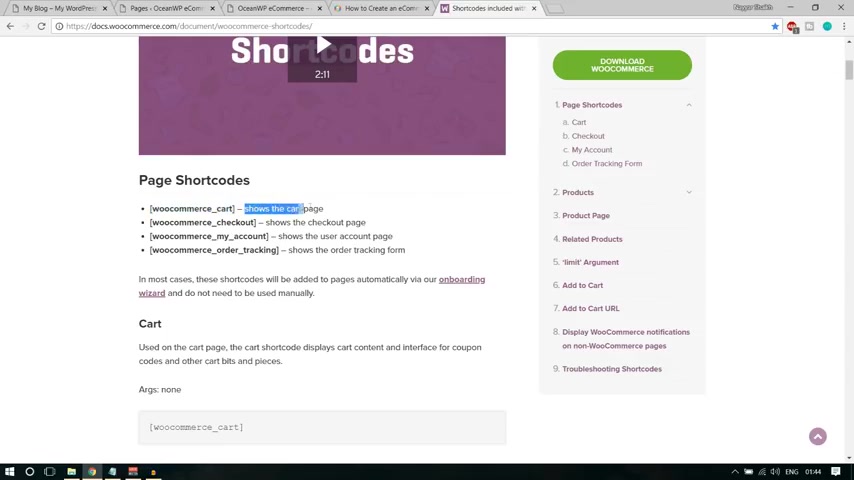
Everything will do V commerce , short codes and here it is uh short codes included with Woocommerce .
Click on this link .
Now , when you click on this link , you will see the page short codes over here .
You can see it over here and what you have to do first copy this short code from here .
Woocommerce dash card .
Just copy this short code from here .
Let me copy it properly and this short code is for cart pages .
You can see it says it shows the cartage .
So come over here .
Now click on this add new button over here at the top to add a new page .
Now let's add the cart page .
OK ?
So simply type in cart , OK ?
In the top title , simply type in card .
Come over here and paste in this code .
OK ?
Short code , you have copied it from there .
Simply paste it don't have to do anything at all .
Simply put in the page title , paste the short code and click on publish .
OK ?
With this easily , we have created a cart page .
You don't have to do anything .
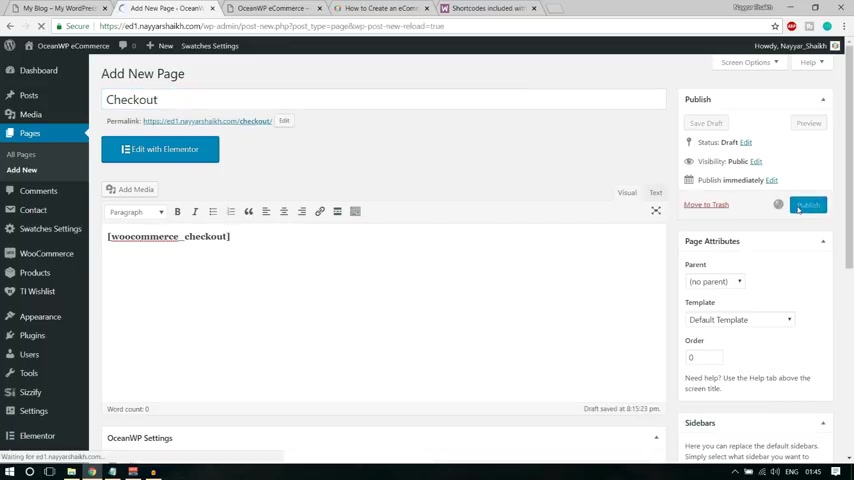
Now the second short code is woocommerce , checkout for checkout page .
So again , copy this short code , come again over here , click on add new page .
Now let's add a checkout page .
Let's enter the title of Checkout and let's paste in the short code .
Click on publish again .
Very , very easy to do .
The third page is my account page .
OK ?
So copy the short code from here .
Come over here .
Let's add a new page and let's type in my account , copy and paste the short code over here .
Click on publish , then after that , the last page that we have to copy and paste is auto tracking page .
OK ?
So copy the short code , add a new page and you can type in the title .
So I'm typing the title of track your order .
OK ?
So this title looks good .
Sounds good .
Now let's paste in this thing short code , click on publish .
So we have all the essential pages .
Now , now if you click on all pages , you'll see there are more pages that we have added card page , check out page , my account page and all those pages .
Now , you can delete this sample page if you want , you can click on this trash .
Now , that page is deleted .
Now , let's come back to this website .
Let's refresh it .
Ok ?
You won't see any changes because we haven't done any changes in the design of the website .
We have done all the changes in the internal thing , ok ?
We have installed new functionalities , but we haven't changed the design .
Now , we can get rid of these pages .
Now , let's let's do one thing .
Let's set up Woocommerce .
That is the , the main plug in that will make our website ecommerce .
Let's set up that uh plug in and let's see how and everything step by step , how you can convert your website into an e-commerce website , how we can set up taxes , how you can set up different checkout options like paypal stripe and so on how we can set up different shipping options for different countries , for different products and so on .
All these complicated things .
I will explain you in very , very simple steps and very easily .
No rocket science , nothing .
OK .
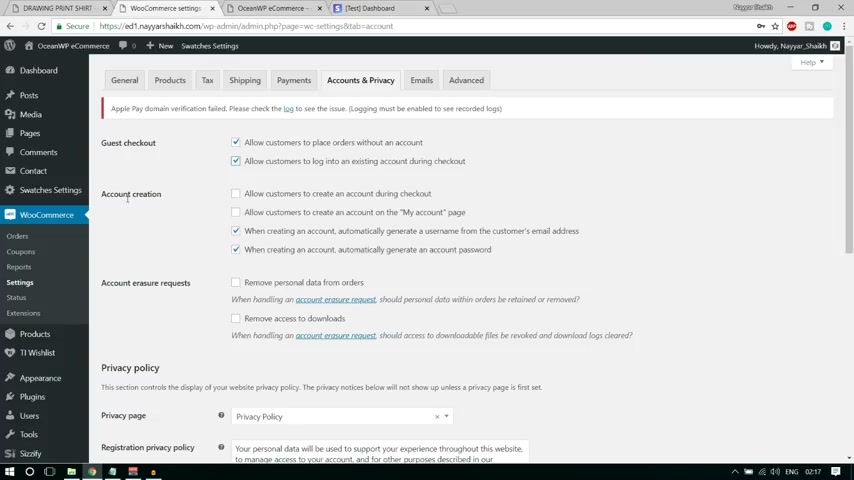
So if you want to do all the uh woocommerce settings , simply power woocommerce from the left hand side and click on settings .
All right guys .
Now , the first thing that we see is general settings .
So basic and general settings come , will come up over here here .
You have to put in the address of your shop .
OK ?
So I'm putting Mumbai , so my shop or my warehouse or whatever your company is , your your workshop , wherever it is based , you have to put in that address .
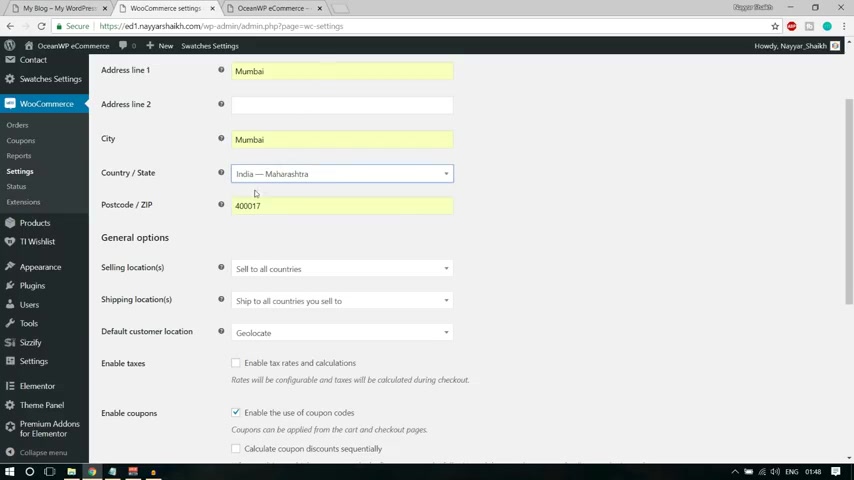
So OK , select your country , select your city and everything .
Now in the country you have to type in this state name .
OK ?
So I'm typing my state name which is Maharashtra .
So you can see India Maharashtra , the city is Mumbai and so on .
Now again , the next option is selling location .
Where do you want to sell ?
Do you want to sell only one countries or in different countries ?
Like four or five countries into one specific region like Asia or Africa or to all the countries like Ali Express does .
So all the countries , all the companies , all the e-commerce websites have different strategies .
It's all up to you .
Now , I would recommend you to start selling only within your country .
And after that , you can expand .
Ok .
So what I'll do , I'll select , sell to specific countries and from here , I'll select my country which is India .
Ok .
If you want to sell to 23 countries , then you can type other country name .
For example , let me type in Pakistan , which is the nearby country .

So I can also , you know , manage that or if you want , you can add one more which is United States .
Ok .
So I have added three different countries over here .
No shipping locations .
So I have to select this one ship to all countries .
No , I'm not shipping to all countries because I'm not selling in all the countries .
So I'm not selecting this option shipped to specific countries .
Yes , we can select this option .
Disable shipping and shipping calculations .
No , not at all because we are selling , we have to ship so we can we cannot just disable shipping .
So let's select the first option , which is the perfect option ship to all countries you sell to .
Ok .
Yeah , that sounds cool .
We are selling in three different countries .
So common sense is that we are also shipping in all those three countries .
Ok .
Now any year you don't have to change anything , make sure it is geolocation .
And if you want to enable taxes and calculations , you can simply take mark if you don't want taxes , you can just undertake this .

But I want to show you tax rates and calculations .
So I'll just take mark this thing .
Ok .
Now you have to select the currency from here .
So suppose you want Indian rupee , you can type in Indian Rupee .
You have Indian ru po here .
If you have Pakistani rupee , you want type .
If , if , if you want , you can type in Pakistani .
If you want United States dollars , you can select and type in United States dollars .
OK ?
Currency position 1000 separator .
Whether your country follows that comma 1000 separator or a dot com 1000 separate .
You can select that number of decimals you want .
So I'm selecting two decimals .
Let's click on save changes .
All right .
So with this and with so easily we have completed the general options .
Now , let's see the other option , which is products .
Let's click on products .
All right .
So first thing is shortage .
We don't have to do anything over here .
We have created a shop page .
In fact , shop page is already created for your website .
So you don't have to do anything .
Ok .
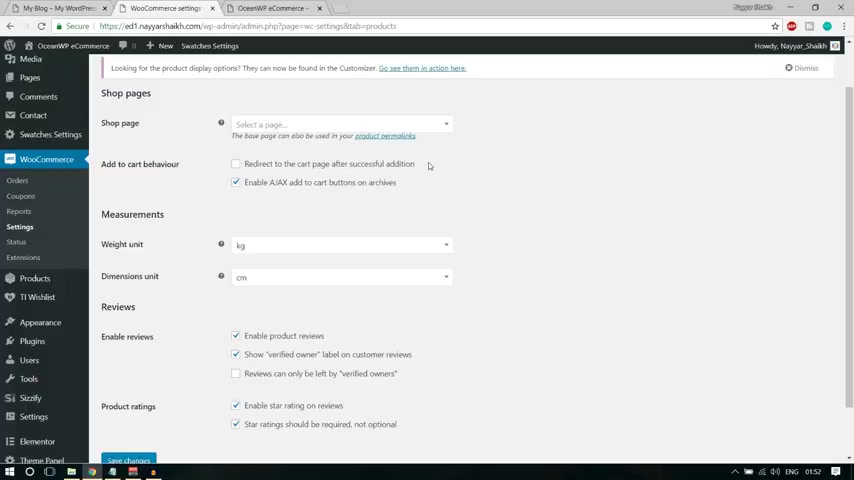
Now , here we have add two card behavior .
The first option says redirect to the card page after successful edition .
So what does this mean ?
Whenever someone clicks on the add two card button , do you want to redirect that person to the card page ?
I think .
No , because many times it happens that we want to add multiple uh pages or multiple products in our card .
So each time if we click on that add to card button , we are redirected to the card page .
That would be very annoying .
So I would not recommend you to say like this and make sure the second one is stigma or selected enable Ajax and add to cart on archives .
Ok .
Now you can select the weight you need .
It all depends on the type of product that you're dealing in .
If you're dealing in small products like t-shirts , cell phones and so on , you can select gram .
If you're selecting some uh if you're dealing in some bulky products like refrigerator television and so on , you can select kilograms .
Ok ?
It's all up to you .
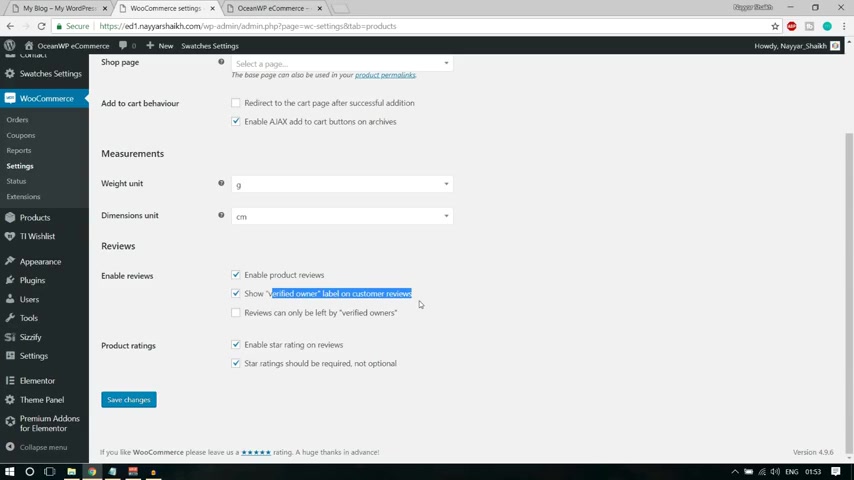
If your country is following these pounds and so on , you can select those things as well .
Now dimension unit also depends on what product you're dealing in .
Ok .
So obviously in yards and inches that is not most of the time required , most of the time you have to select the centimeter .
Ok .
Now review options .
Do you want to enable reviews ?
Yes , we want to enable reviews so that any person can come in , they can give a review .
Now show where owner label on customer review .
Very important .
Whenever a person who has actually purchase the product or gives a review , then you want this label to be shown .
Ok .
This person is actually the owner of the product , this person has purchased the product .
So this review is quite valuable .
Now , we have one option which says reviews can be left only by verified owners .
So if you want , you can take mark this thing .
Now , only the person who has purchased this product can only review this product .
So it's all up to you .
If you want , you can tick , mark this thing .
Ok .
Now simply click on save changes .
Now , if you see , oh , here under product settings , we have two more settings , inventory and downloadable products .
So let's click on inventory .
Now , if you want to enable stock management , you can do .
So let me show you one .
Let us see , let us open any product .
And I think we should see that .
I think in here , I think I have not enabled this stock management .
So what happens is whether if you want , if you just enable this stock management and as you can see , you have hold stock for 60 minutes .
Ok .
So all these things .
So when you enable stock management here , it will show that where somewhere , somewhere between over here , it will say that you have 60 products or 30 products in stock .
So that is basically what it means .
A person can see uh stock management , how many stocks you have in your product and it will automate a few things .
Let me show you what it will automate .
I think it is very important option .
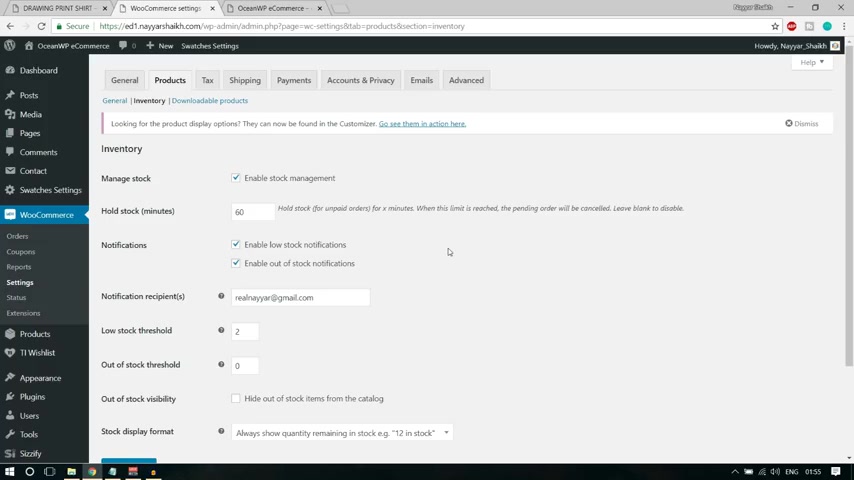
First is whether whether you want to enable not notification .
So basic idea of stock management is that we , you can uh give some authority to woocommerce and they will do the job for you .
So suppose I want the woocommerce to notify me whenever my product is on stock or out of stock , then I can use this option .
Very important option .
So notification , you can enable for low stock notification and out of stock notification .
So I have to mark both of the both of the things so that whenever my product goes low stock and out of stock , I want a notification on this particular email address .
Ok .
Now you can set a threshold over your low stock threshold , out of stock threshold .
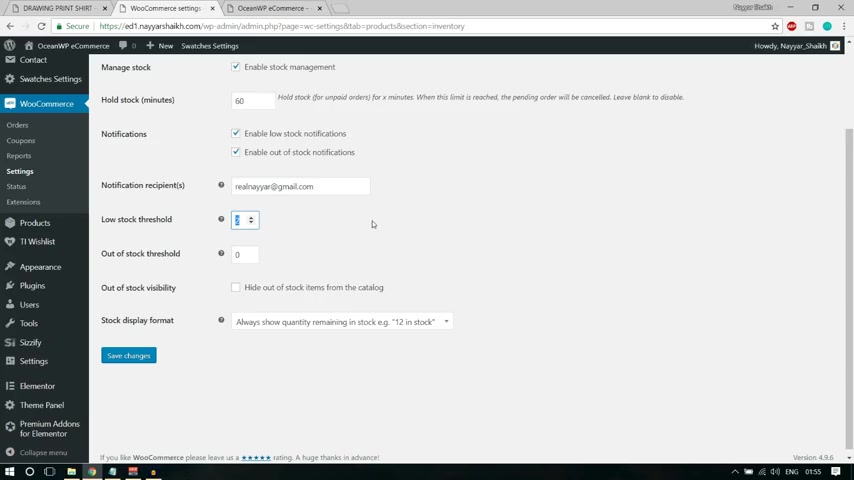
So whenever my product reaches two stocks , ok , when only two products are on stock in stock , then I want to get a notification on this email address that your product is low on stock and , and whenever the product reaches zero stock , I want to get a notification that your product is out of stock .
Ok .
So it's all up to you .
Now , let's click on save changes .
Now , downloadable products .
We are not dealing in this video .
So I'm not clicking on that .
Let's come to taxes , click on taxes .
The first option is prices entered with tax , select the second one .
No , I will uh enter prices exclusive of tax .
Ok .
So we don't want the price to be shown over here , like instead of 1 50 it will show 1 65.39 .
And so , so we don't want that .
Ok .
We want a simple product , a simple price to be shown .
We don't want the tax price to be shown over here .
Now calculate tax based on which address .
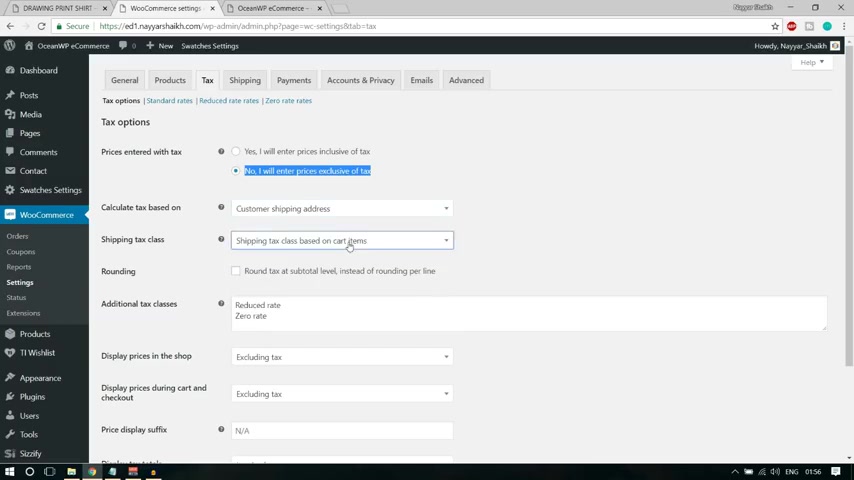
Now you want to calculate tax based on the customer's shipping address or billing address .
You can select this thing from here .
Now , shipping tax class , you can , you don't have to do anything over here .
Now , here we have some additional classes over here .
Ok .
So basically you can select our tax class from here .
Ok .
And you can add some more tax classes .
Now , reduced rate and zero rate are by default added .
We can add some more .
I'll show you how we can do .
So first , let's see .
The remaining options , display prices , prices in this shop excluding tax .
Right .
Right .
Everything is right over .
You just simply click on save changes .
Now , if you see over here under tax , we have four options .
First is tax option which we have seen , then we have standard rate , reduced rate , zero rate .
Ok ?
You'll see .
Now , suppose you want to add a new tax system .
For example , your country is following VAT or GST or whatever it is following .
You can you want to add that system .
So you can simply do follow my steps .
Ok ?

So first what we can do , we can expand this if you want .
Now come to next line , press enter and come to next line and type in the tax name .
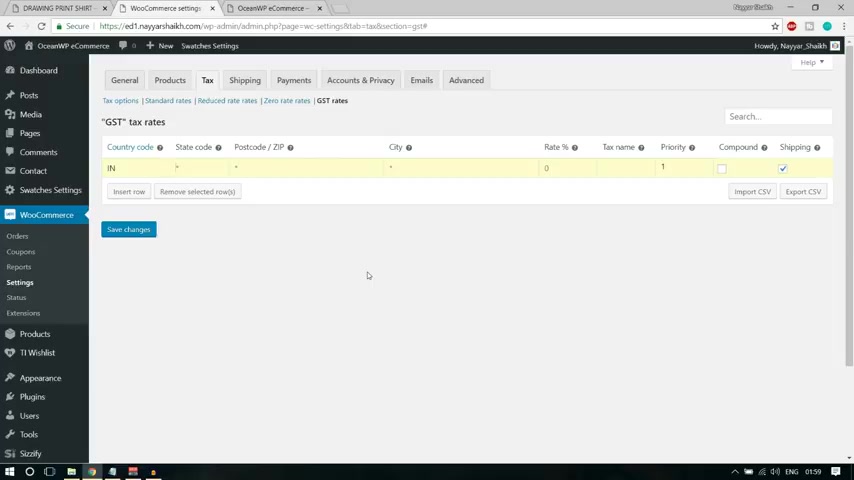
So I'm typing in GST .
So this is the tax name that we follow and click on save changes .
Now , when you do so you'll see when new option appears over your GST rates .
Now , let's click on that .
Now , we can add some more rates over here .
So let me click on insert role and you can type in your country code .
So I'm typing in and I'll get this India option so you can type in your country code for United States .
It is us for Bangladesh .
I think it is , you can search for whatever it is .
OK ?
Now state code .
Now , first let me explain to you in some , in simple words , the tax rate of the tax system that we are following in India .
So in India , I suppose you're dealing in your purchasing and selling your product within one specific state , then you have to pay half the tax rate , half the tax amount to the central government and half the tax amount to the state government .
For example , I'm dealing uh the both the buyer and seller are from Maharashtra , which is a trade in India .
Then we have to pay uh nine per suppose the tax rate is around 18% .
So we have to pay 9% tax to Maharashtra government and 9% tax to central government .
Suppose I'm the buyer .
I'm the seller .
I'm in Maharashtra and the person who is the buyer or is some is from some other state , for example , MB MP .
Mothers , which is the state next to Maharashtra .
And then what happens with you is I have to pay that person because he's the purchaser or he's the buyer still have to pay tax .
OK .

So what happens is that person will pay 9% GST to his , his state government MP government and 9% GST to the central government .
So basically this is the method that we are following .
So here also , I'll have to create two different type of thing .
OK ?
One for one rate for central government and one rate for state government .
So first let me create , create one for central government now because it is for central government .
I'll just type in India , I will not type in any state , any post code , any CV , I simply type in the tax rate .
For example , the product which we are dealing in uh has 20% tax rate .
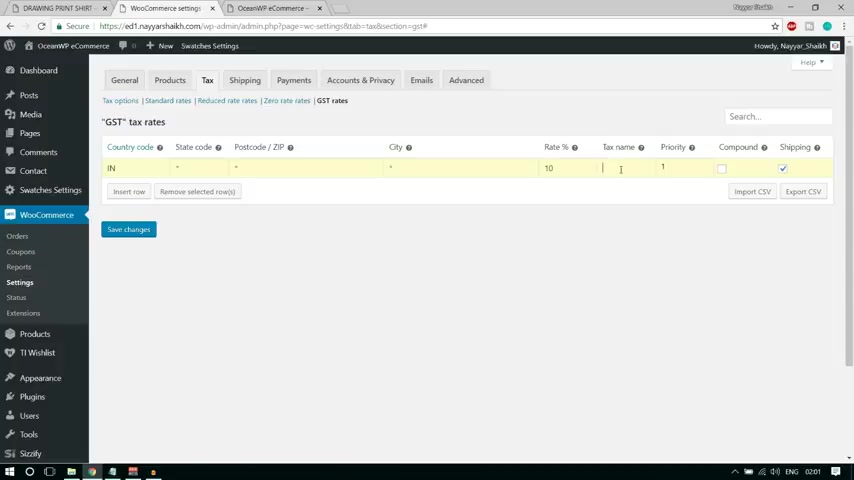
So I'll type in 10% to a year because 10% is going to the central government and in the tax name , I'll type in CGST which is central government GST rate , I guess now I'll type in , in and again , I'll type in India and because I have left the state code and the postal and city everything blank , then all this thing will be applied to entire India .
Navia .
I don't , I won't leave this state code blank .
I'll type in Mh for Maharashtra .
Now this thing , this state which I'm putting right now .
Will be applied only to this particular state .
So very important .
Now , while I'm just leaving the post code and CD , so whatever CD and postcode comes under master , this will be applied to all of them .
Now , I'm putting 10% over a year and here I'll put in sgst , OK ?
State tax , you can say , OK , and I'll take mark both this thing compound .
OK ?
Not necessary , but you can take mark over here and let's click on save changes .
Ok .
So we have created GST rate over here .
Ok .
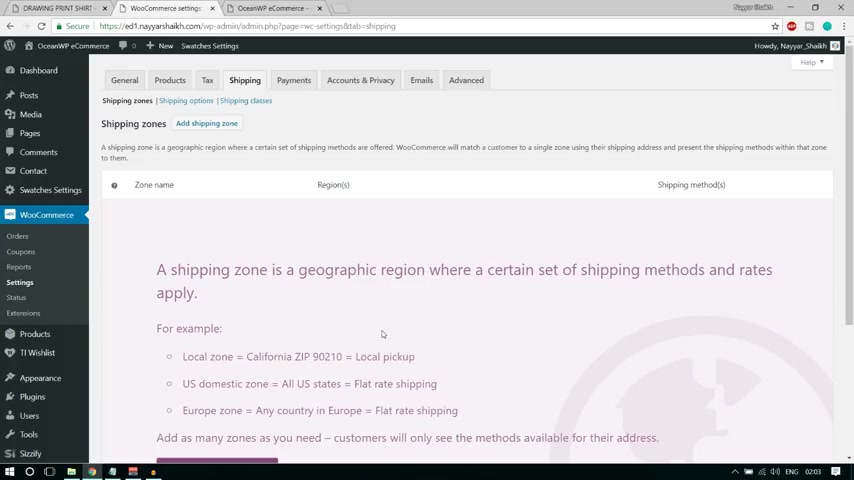
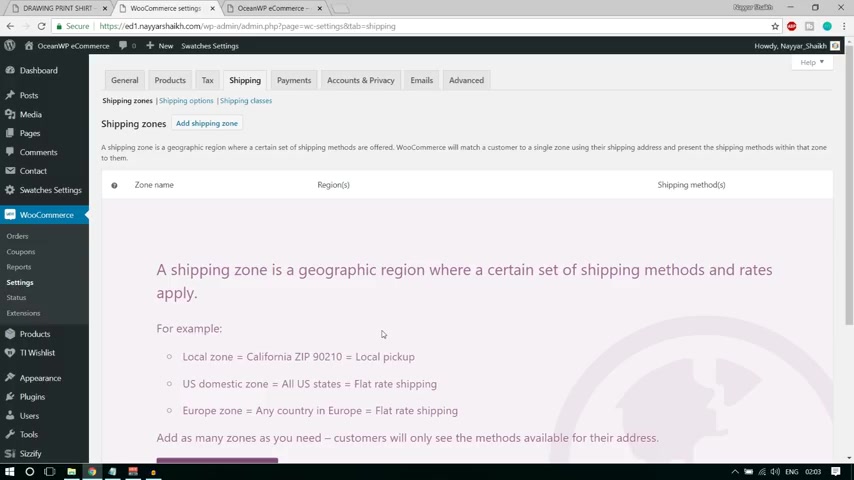
So now let's go and let's see , shipping rate .
So let's click on shipping .
Ok .
Now let us see .
Now , first let's see , let's understand one thing .
Now , shipping obviously will diff uh shipping cost will different depending on different factors .
Ok .
For example , if the person is purchasing from the same city , obviously the shipping rate will be quite low because we will have to incur uh less uh uh you know , cost on shipping that product because the person is very nearby in the same city .
If the person is in the same state or it will be a little bit higher , but still nominal cost .
If the person is from different city , then obviously the cost of shipping will increase .
And if the person is from different country and if you are selling that your product in that country as well , then the cost will be totally different .
Ok .
This is the first thing and the second thing is there are two type of product that you can deal with a normal product or a bulky product or a premium product you can see .
So the shipping cost for a normal product will be different .
For example , shipping cost for a simple smartphone will be different , but a shipping for cost for a refrigerator will be totally different .
Ok , so I'll explain you both this thing over here .
Ok .
So first thing is that we have to add a shipping zone .
Ok .
So first let's add a shipping zone .
And suppose we want , I want to add a shipping zone for my state first .
Ok .
So I'll type in here .
You can type in anything .
It's just your name .
Ok .
Now I'll type in this state name or your Matra .
Ok .
Now , first I'll click on save changes .
Now I'll add a shipping method .
So let me add this and I'll select this thing , flat rate , add shipping method .
Now we have the flat rate .
Now let's edit this .
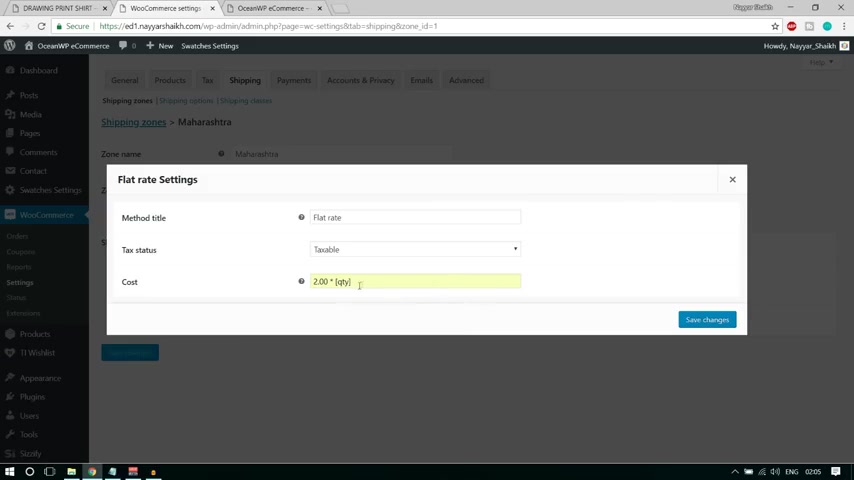
Now in the cost , I'll type in $2 .
So I'll type in two point .
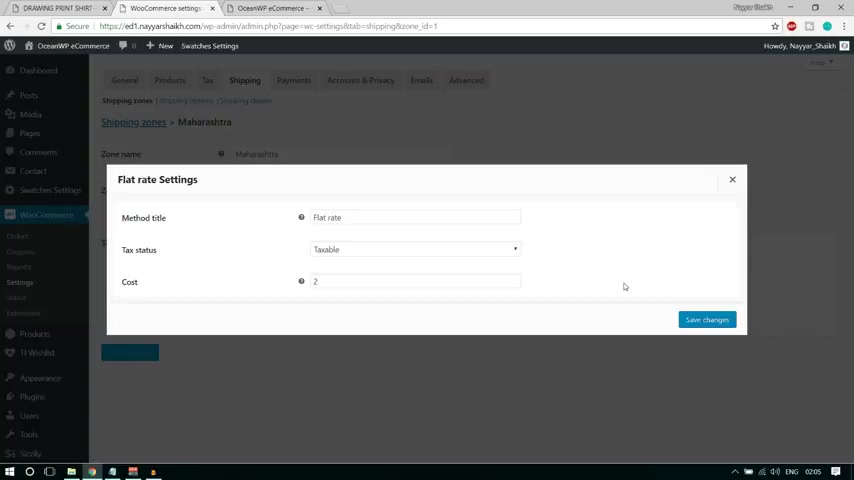
You can see I have already used that that .
So I'm getting this 2.00 .
Then after that put a space , then put a , a asterisk sign this star sign that we call .
Then again , space and after that under square brackets type in QTY which stands for quantity .
Ok .
So basically it means $2 into quantity .
If you simply put two over here .
Then that is a problem .
Basically what people do , they just simply put 20 here .
Now , this is a problem .
Now , why is it a , is it a problem ?
Suppose a person is purchasing one smartphone from , from your store ?
Then they are , you are charging $2 from them .
Now they are purchasing 100 smartphone .
Again , you are charging only $2 .
So that is a problem .
Now , what we are doing is we are saying $2 into quantity .
So if he's purchasing one , so $2 into one , which is two , if he's purchasing 100 then $2 in 200 which is 200 .
So that this is a better option .
Ok .
So select this , click on save changes .
All right .
Now you can come back or first let me explain you one thing what you can do and first let us create another zone .
Ok .
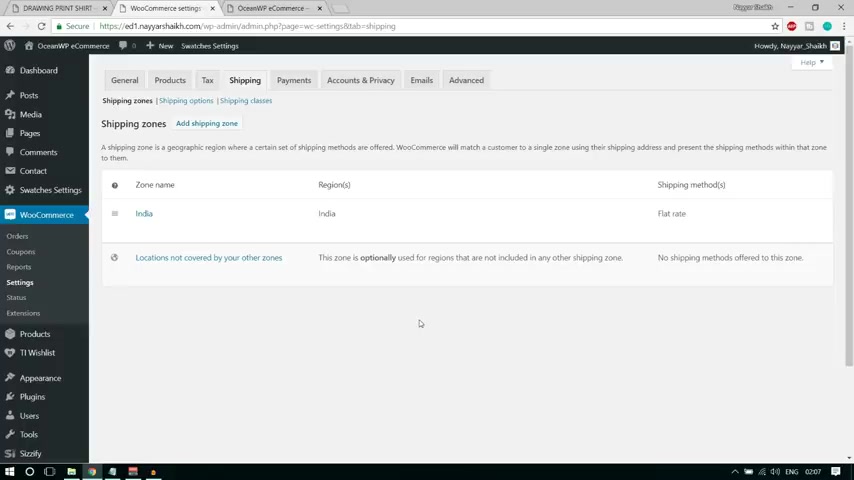
So I'll again , come back to shipping zones now again , click on add shipping zone .
Now I'll uh in this time , I'll type in India .
Ok .
So this is for the rest of India .
So I'll type in India over here .
Ok .
And I'll type in a shipping method , flat rate , add shipping method .
And for the rest of India , maybe uh I'll type in maybe $3 or $5 maybe so $5 into whatever the quantity is .
Ok .
So same thing , click on save changes again , come to shipping zone .
If you want , you can add some more shipping zones .
Ok .
It's all up to you or if you want , you can simply delete this .
And if you want only India , you can have , if you want simple , uh , shipping cost throughout the India , you can all have this thing as well .
Ok .
It's all up to you .
All right guys .
So this was the option for shipping cost for different places , for different shipping zones .
Now , let's see how uh shipping cost will differ depending on different type of product .
Ok .
So we have to product specify products under different classes .
Ok .
For normal product , you don't have to put any class .
Suppose you , if you have some special class like bulky product , you can do .
So let me explain to you what you can do .
You can click on this option , shipping classes and let's add a new shipping class .
So click on this add shipping class button and let's type a name of bulky and simply click on save sim shipping classes .
We don't have to do anything extra .
Now again , come back to shipping zones and we'll have to do some changes over here because we have added a new class .
Ok .
Click on edit again .
Now if you again , click on edit option and if you see we have the uh normal option and we have one more option which says bulky shipping cost class .
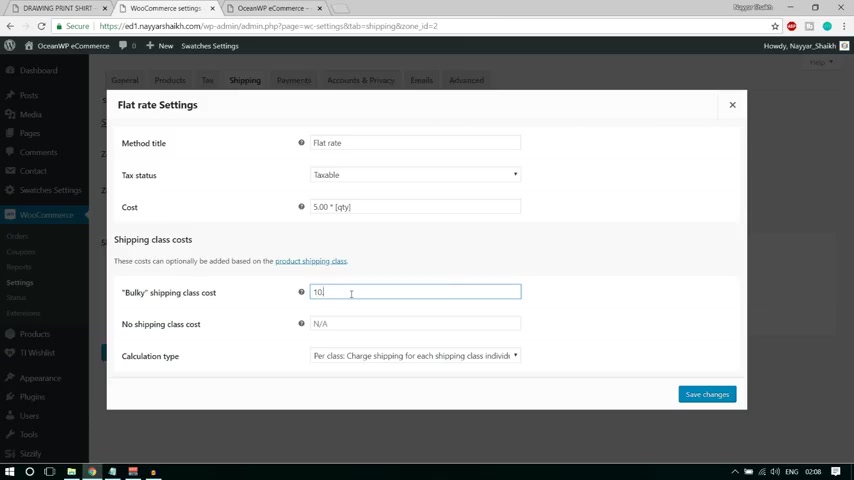
Now , for bulky product , obviously , the charges will be a bit higher .
So I'm putting $10 into whatever the quantity is .
Ok ?
So whenever we create a product and we select bulky as the shipping class , then that product will be charged $10 .
Ok .
So that is what happens and if the product doesn't have any shipping class cost , I can simply copy and paste it over here .
Ok .
So I want them to be charged this price .
Ok .
Now click on save changes .
Ok .
So with this , we have also completed the shipping options .
Now let's see the payment options .
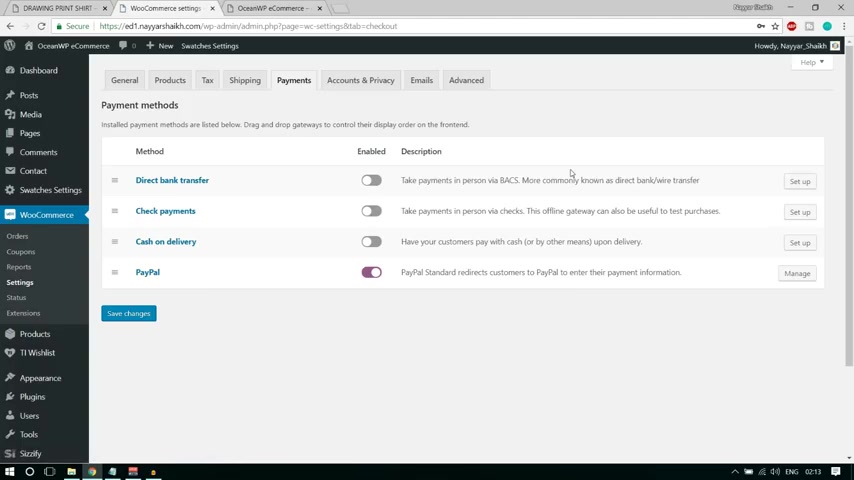
Click on payments .
Now we have different options over here .
If you want to enable direct bank transfer , you can enable these check payments , cash on delivery or paypal .
If you want , you can add some more options and obviously bank transfers , check payments and cash on delivery are not basically used .
The most used option throughout the world is paypal .
So I'll show you how you can set up paypal .
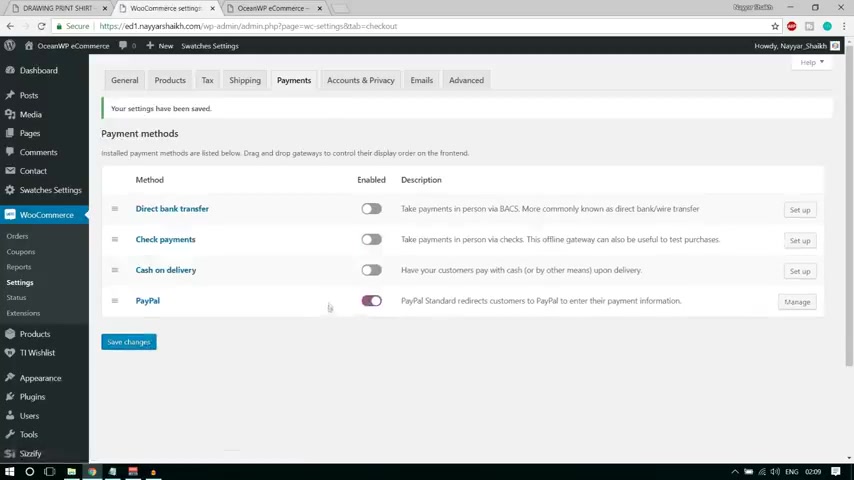
So if you want to enable paypal , you can simply make this thing like this and click on save changes now because we have enabled this now we can manage this so we can manage .
Make sure this thing is take mark and in the title if you want , you can change the title , your description over here .
Then in the paypal email , make sure to put in the paypal email address on which you want to uh accept the payment .
Ok , then simply go at the bottom .
And you have to put in these three different things over your API user name , API , password and API signature .
And if you want to get it , you can simply log into your paypal account .
Let me do so .
OK , guys .
Now when you log into your paypal account , you will see something like this .
You'll see this selling tools over here .
And we have three different options , manage invoices , seller preferences , merchant fees .
So you have to click on this one seller preferences .
Now you have some more options and here you have API access OK .
Here .
And besides this , you have this link which says update , click on that update link .
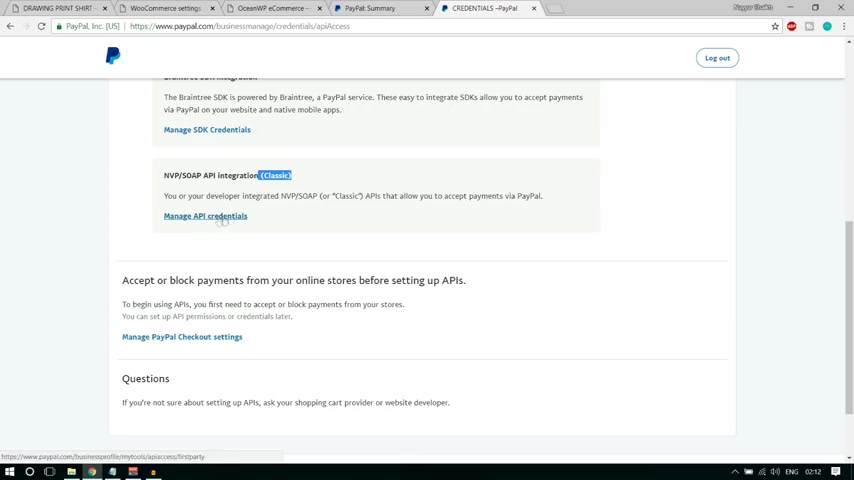
Now come at the bottom and select this one NVP slash soap API integration .
And in the bracket , it says classic .
So click on this link under it which says manage API credentials .
Now , when you do so you will see your API user name , password and signature .
So first let me click on user name .
When you click on user name , you can see your user name from here .
You can simply show it , copy it from here , come back to your website and paste it under user name .
Then similarly you can do the , do this for password and signature .
Now it is very easy .
So I I'm not showing this because there are some crucial information over here , but you can simply copy and paste it over there .
All right guys .
Now , once you paste everything , make sure you save all the changes .
So with this , we have set up paypal .
Now we can click on payments again if you want to add some more payment options .
Obviously , you can do .
So .
For example , in India , you have pay TM pay you money and those different options .
And every country has some , you know , local payment gateway payment systems .
So I would recommend you if you are a country specific , then try to select a local payment gateway .
Like I I just said that India has pay you money paypal and something like that .
So select those things that will be more beneficial .
Now , let me also show you how we can accept credit card and debit card on your own website .
Ok .
So for that , we need Stripe .
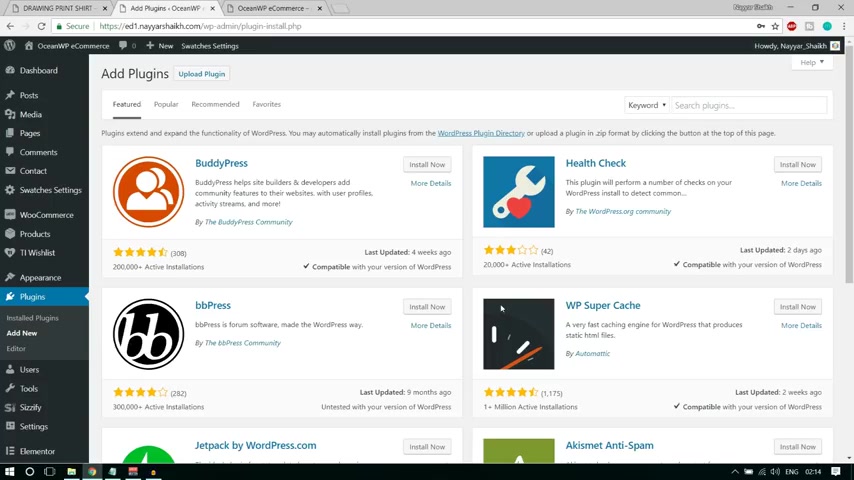
So what you can do , you can have plugins and click on add new .
Now let me tell you one thing that Stripe is still not available in most of the countries .
It is now uh I think available only in few developed countries and few developing countries .
So it might be possible that you are , you may not be able to uh you know , accept payment and credit card , debit card payment on your website directly .
Ok .
But there is one company , in fact , there is many companies in India , for example , there's one company called Insta Mojo .
Uh they allow you to accept credit card debit card payment on your website .
Ok .
In Indian Rupee .
So it's all , it all depends .
Try to select a local payment gateway , do some research , find out what is the local gate payment gateway available in your country and try to use that .
Ok .
So let me use stripe .
So simply type in stripe under add plugins .
Now select this one , Woocommerce stripe payment gateway by Woocommerce .
Click on install .
Now .
Now again how woocommerce and click on settings go to payments .
Now we'll have many different options over here .
Ok ?
So we don't have to do anything .
Uh We have to select this one .
It says stripe stripe , credit card stripe .
Ok .
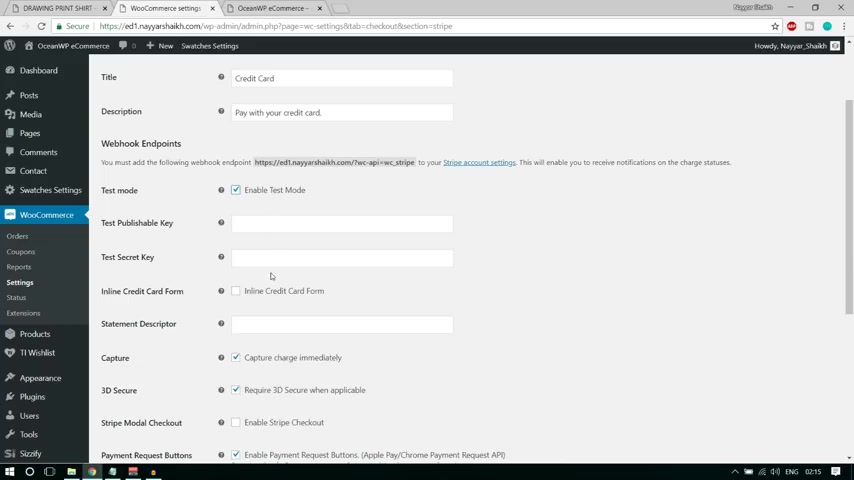
So let's make it on and uh let's set up this .
Ok ?
So click on set up , make sure stripe is enabled and we can delete stripe from here .
We can just have a credit card , ok ?
And we can also delete stripe from here .
Ok ?
Now come at the bottom and if you , if you are using , if you want to use this and see this under test mode , you can take this or if you want to use this on your live website , you can untis all up to you .
Now , if you want to get your publishable key and the secret key , you can simply go to your stripe dashboard .
Ok ?
So when you go to your stripe dashboard , you'll see under developers , you'll see API keys .
So when you click on API keys , you'll see your publishable key and secret key .
So let me copy the publishable key from here and paste it over here and copy the secret key from here and paste it over here .
OK ?
Now go at the bottom and click on save changes .
Now , this will allow us to accept credit card , debit card payment directly on our website .
So very good thing .
OK .
Now go to accounts and privacy .
Now this is a new setting .
Now , this is because of that GDPR thing that you have uh you might have heard of .
I'm very much .
Sure .
Ok .
Now it says guest check out .
Do you want to allow customers to place order without an account ?
Yes , we do want to do so .
And now do you want to allow customers to log into an existing account during checkout ?
Yes , we also want to enable this .
Ok .
Now , account creation allow customer to create an account during checkout .
Yes , we want to allow them allow customer to create an account on my account page again .
Yes .
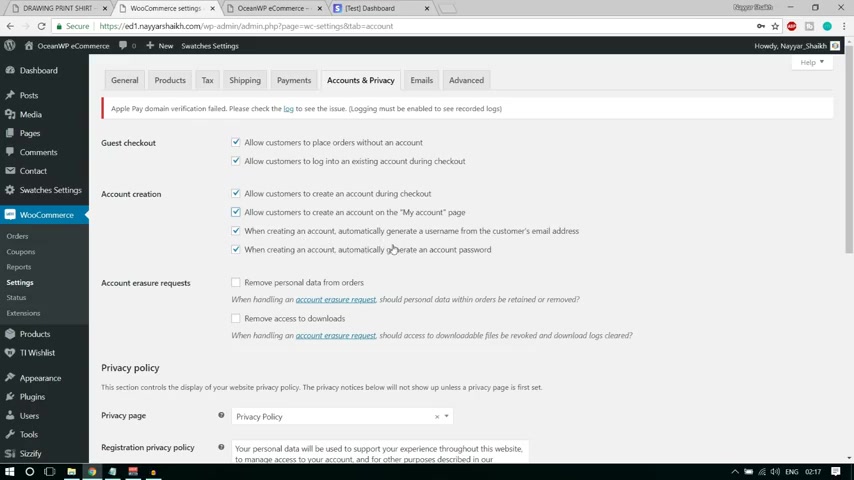
Then when creating an account automatically generate a user name from the customer's email address .
Not necessary .
So I'm just undertaking this when creating an account automatically generate an account password again .
Not necessary .
So I'm removing this .
Ok .
Now , remove personal data from or no , I don't want to do so .
I want to have their personal data so that it will be useful for me .
Remove access to download again , not required .
Now privacy page .
This page is already created as I've explained to you earlier privacy policy .
And if you want , you can change your privacy policy from here .
It's all up to you .
Now click on save changes , go to emails and just make sure that three at the top three emails are your own .
Ok , now rest everything will be fine .
Ok , now go to advance .
Ok , and the card page , make sure card is selected on the checkout page , select the checkout page .
We have created all these pages .
Ok .
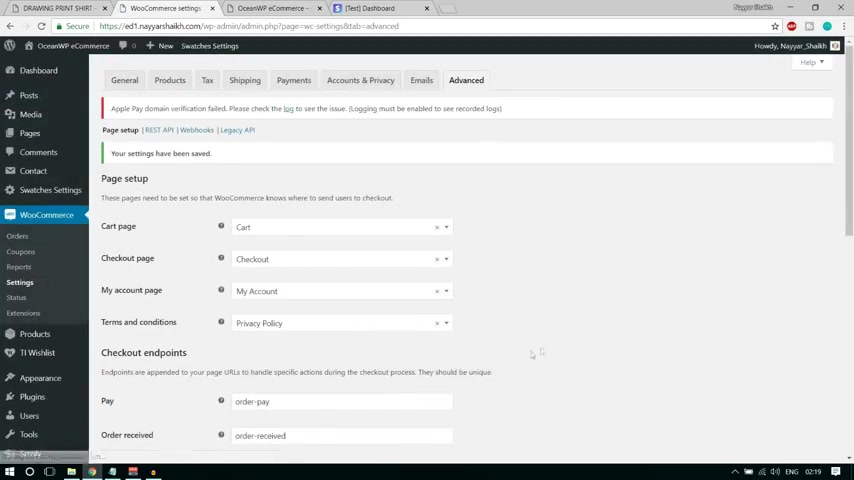
Under my account page , you can select my account page under the terms and conditions page .
You can select the for .
Now , you can select the privacy policy page .
Ok , which is automatically created and obviously you can go to that page , you can edit the page , you can edit all the privacy policy according to your according to your choice .
Ok .
Now click on save changes .
Come over here .
Let's refresh this page .
Obviously , no changes will take place .
But with this , we have successfully made our website 100% e-commerce friendly .
And now we are ready to create and launch our e-commerce website .
We are ready to create the products .
We are ready to create different tax rates and all those we have already in fact created tax rates and shipping dates .
But now we are ready to create products and different pages , home page and so on .
Ok .
Now before that , let me very quickly explain to you , how you can create coupons .
OK .
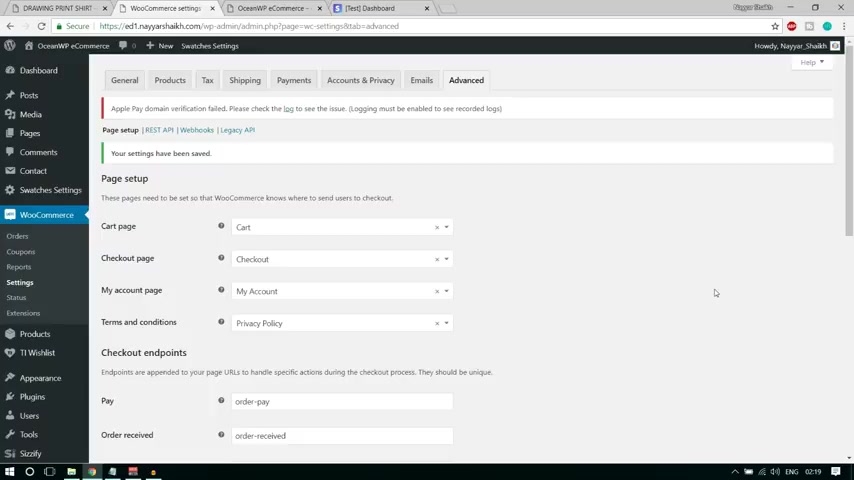
Very useful to promote different products and to promote your website because you offer some discount and you , you get customers attention .
So a very good option .
OK ?
So if you want to create coupons , how woocommerce and under woocommerce , you'll see coupons click on that .
All right .
Now , let's click on this button .
It says create your first coupon .
Now in the at the top you have to put in the coupon code that you want .
For example , I have just explained to you that I have a coupon code in a year seven .
and this coupon code gives you 7% off on T MD cloud hosting .
So you can type the same thing under description .
Ok ?
So maybe like , ok , this coupon gold , you see you 7% of the purchase , whatever it is .
Ok ?
Now , after that , we have some settings , general settings discount type .
What type of discount do you want to offer ?
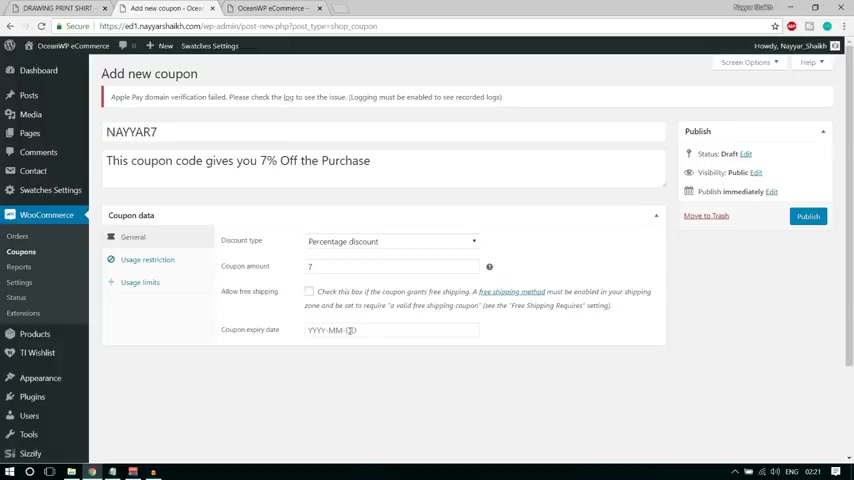
Fixed card discount , percentage discount , fixed product discount now because we are seeing 7% discount .
Then obviously we have to select percentage discount and you have to put in the coupon percentage .
So we want 7% discount to be shown over here .
Now , do you want to allow free shipping ?
No , because we don't want free shipping .
Uh For this one for this is a different coupon , you can create a different coupon .
For example , free ship .
You can name it free ship and you can check this thing , ok ?
So whenever someone puts , puts that coupon , they will see free , they will get free shipping and on all those things .
Ok ?
Now you can also put an expiry date to this .
For example , uh let this is the first of July .
So let me select 31st of July .
So for one month , this is available .
Now you can usage restrictions .
Now , minimum , how much amount the person has to spend to use this coupon .
So maybe maybe minimum $100 .
Now maximum , they can get this discount .
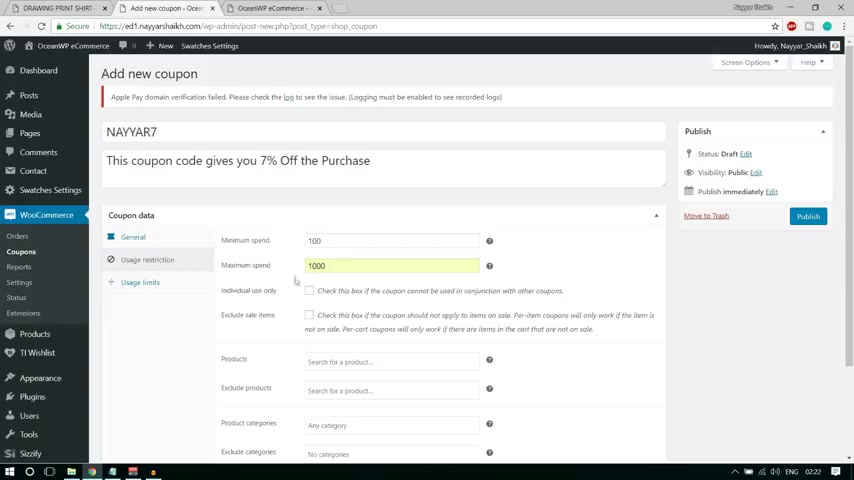
They can use this coupon only up to $1000 ok .
After $1000 they cannot use this coupon .
Ok ?
So it's all up to you .
If you want , you can just leave the maximum thing .
Ok ?
Then after that , it says individual use only make sure to check mark this because if this uh what this means is that this coupon cannot be used in conjunction with other coupons .
So we don't want person coming to our website and using three different coupons and getting the p product for free .
Ok .
So we don't want that .
So we are just uh selecting these things so that only one coupon can be used at a time .
Now , we also want to exclude sales items .
So make sure you select this thing because we , if the product is already on sale for 2030% we don't want extra 7% we don't want to give extra 7% with this coupon .
OK ?
Now , if you want , you can select specific product for this coupon .
OK ?
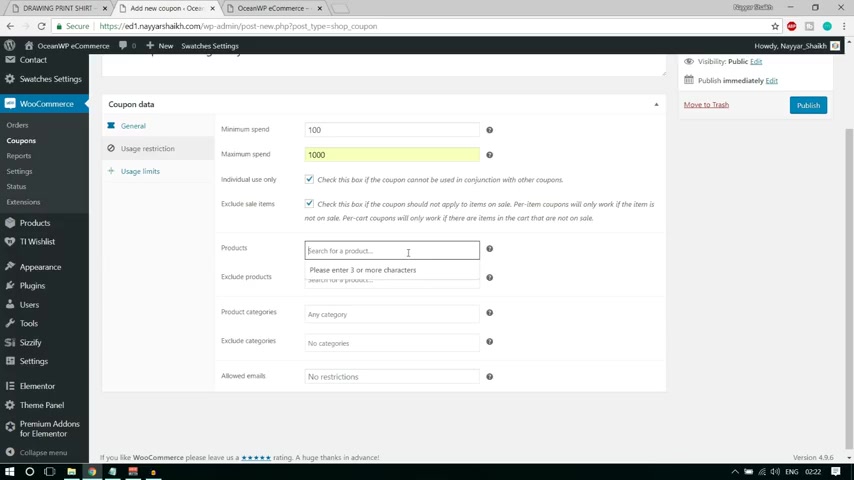
So only those product can be used or can use this coupon .
So because we haven't created any product , we cannot select it .
But if you have created , you can simply type the name and you can select it from here .
Similarly , you can create , exclude specific products .
You can include or exclude specific categories as well .
Ok .
Now click on publish , there's one more option left .
Let's see what that we have usage limits .
So click on usage limits .
Now , usage limit per coupon or per per coupon can be used how many times ?
So maybe 10 times ?
OK .
OK .
Usage limit usage to an X item .
OK .
To all the items qualifying item in the cart .
OK .
So all the items in the cart are only to one item in the car .
It's all up to you .
Usage limit per user .
Only one , only one person can use it only once .
OK ?
If you want , you can make it increase or decrease it .
Ok .
Let's click on update .
So this is how you create a coupon .
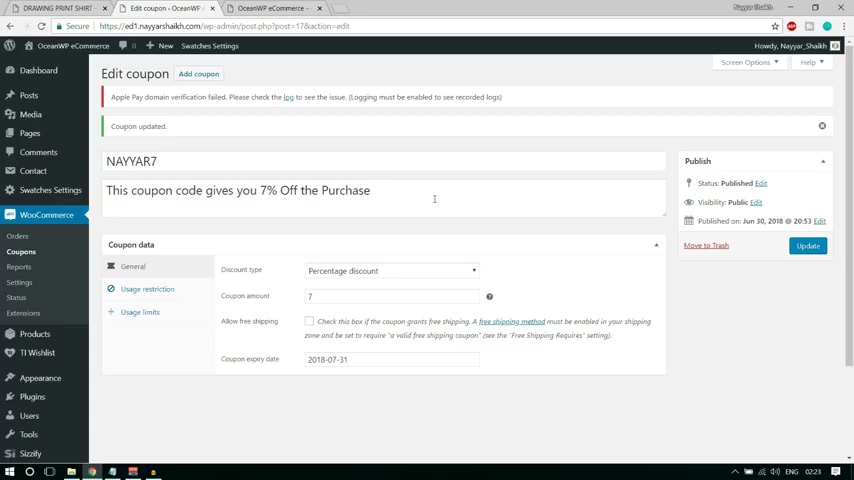
All right guys , I'm losing my voice .
I need some rest , but obviously you don't have to worry .
You will see the continue video .
Now , this was the first part of the tutorial , I would say when we have covered uh the most important things and a big technical things .
OK ?
After this , everything is fun .
OK ?
After this , we'll do all the important things like creating different products .
We'll see how you can create different products , how you can put those descriptions and so on those images and so on .
And after that , we will see the most important thing and most fun thing .
I really like that part , which is designing the website , OK ?
How you can design your home page and those different sections and so on .
OK .
So see you in the next section of this video .
OK , guys .
So welcome back and let's start creating the product .
As I said you in this section , we will be creating our products and we will be designing the website .
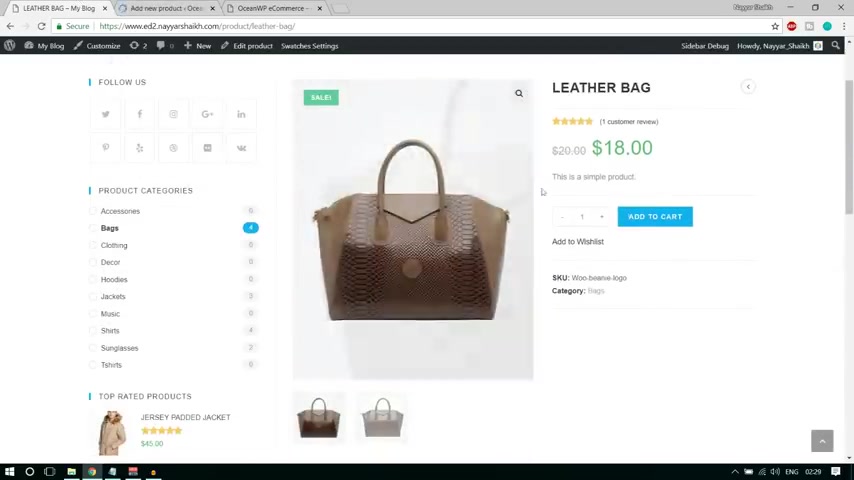
So if you want to create a product , simply how this product from the left hand side and click on add new and I have selected this product .
So we will be creating this product in this video .
OK ?
Obviously , you can create different products .
I'll show you all the things that are required over here .
OK ?
So when you click on that , a new , you'll see this screen over here .
So first at the top , we have the product name .
So we have to type in the product name and whatever you type in over here , it will show up over here under the product name .
OK ?
So as you can see , it says simple leather bag , OK ?
So let me type in leather bag over here .
OK .
So this is the name of the product .
Now after that , we have to put the description over here .
Now you have to notice one thing .
There are two places to put description .
This is one place , this is called short description .
As you can see , it says this is a simple product , very simple , one line description and one place is at the bottom .
This is called long description .
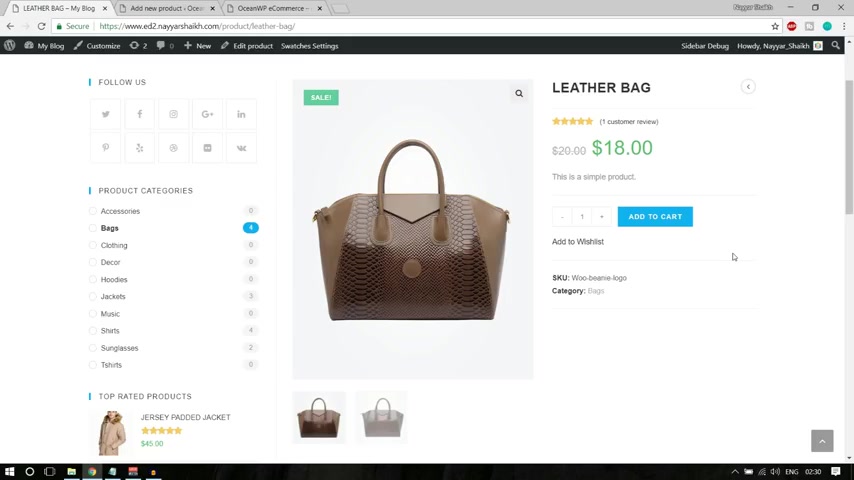
Now you can use images , images , medias , different audios youtube videos .
For example , if you are selling some smartphone , you can show you can use a youtube video which has unboxing or review of this product .
You can use those things over here .
OK ?
So this is the long description , whatever you put over here will show up at the bottom .
So let us simply copy this text from here , paste it over here .
And if you want , you can add some media .
For example , you can simply click on this add media , you can select files .
Now let me select the files as I said to you earlier that I'll be giving all the media all the images for free .
So you can see all these images are given , you can see a link in the description below .
I have already shown you , you can go to my website , click on that download button and download all the files from here .
OK ?
So maybe let's select this image from here .
Suppose we want to add this media .
So let's select this image .
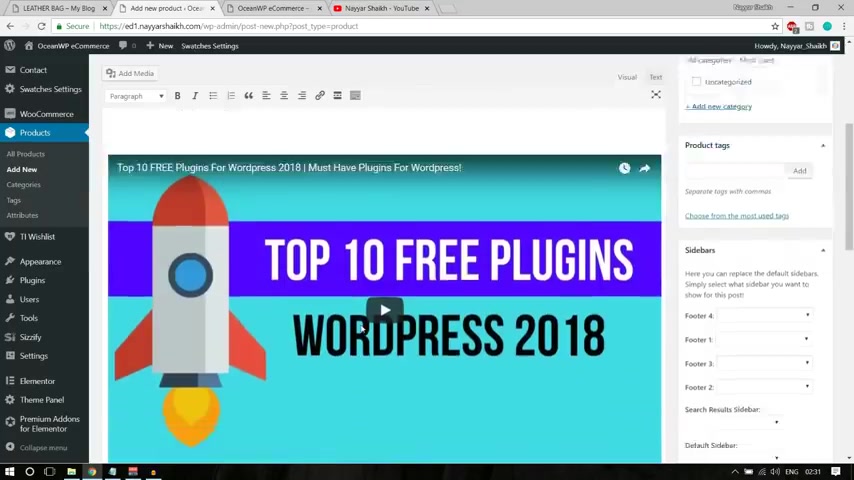
Click on open , click on insert into post .
We have this image over here and we can make it left line , center line .
We can instead of over here , we can copy and paste it over here .
OK ?
So this is left line now it's all up to you .
OK ?
So if you , you can add this media , you can add some video if you want , OK ?
You can go to youtube .
OK ?
If you want , you can go to youtube , you can search for some video .
Suppose I want to show this video so I can simply copy the link come over here , paste it over here .
OK ?
Very easy to do .
So I have this video link over here .
You can also make all these things bold italic , you can change the design .
If you , if you click on this toggle toolbar , you'll get some more option .
You can change the color of the font .
For example , let's change the color of the font to red .
You can add some links to this .
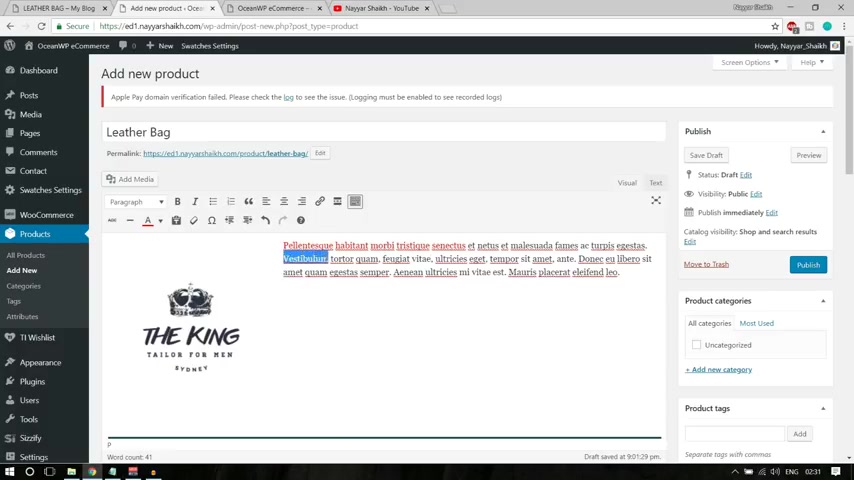
So I suppose if you want to add link to this word , you can select this word and you can simply click on over here , this pin button or this link button you can click on over here and whatever link you want to type , redirect this this thing to you can simply type in the link , click on this , apply .
OK ?
So you have all these basic options over here .
You can make it bold italic , you can increase the size of the font and so on all the basic options .
OK ?
This was the short long description , OK ?
Now , at the right hand side , if you see , oh , here we have product categories and obviously every product has to have a category .
So this is a leather bag .
So maybe this will come come under backs category .
So let's add a new category .
Let's type in bags .
Click on add new .
If you're dealing in many different products , then what you can do , you can add a category than a sub category .
For example , you can add bags and you can add a subcategory like leather bags in bags .
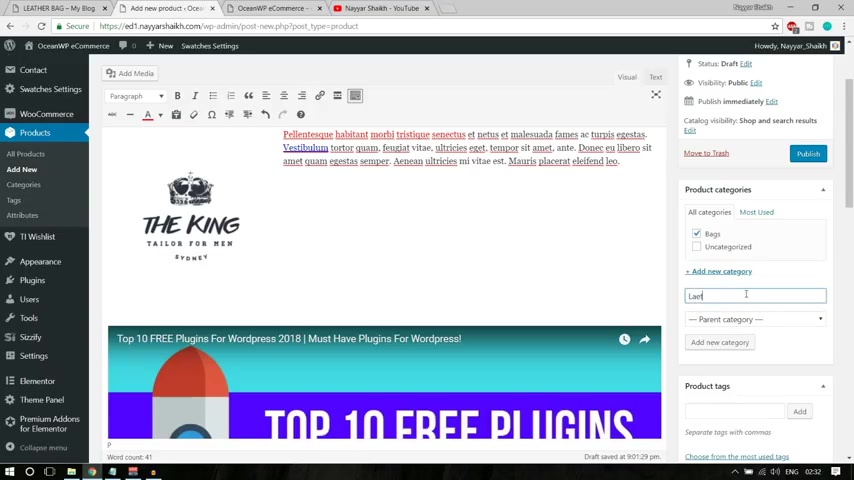
So suppose this is a leather bag , you can add a new category like leather bags , OK ?
And you can select the parent category as bags and click on add new category .
Now a new category will be added which will be under bags .
OK ?
So you can also do so you can also add some product tags like in tags .
We can add leather bag , OK ?
You can add these things , OK ?
Then after that , we have the ocean WP settings .
We'll see these settings later on right now .
We don't need this .
OK ?
Then after that we have this product image setting over here , we have to set an image like we have one image over here , we have another image .
OK ?
So this is the main image and this is another image .
So let us add a main image , main image will come under product image .
So let's set product image , upload files , select files and let's select both the images .
OK ?
Select both of them click on open .
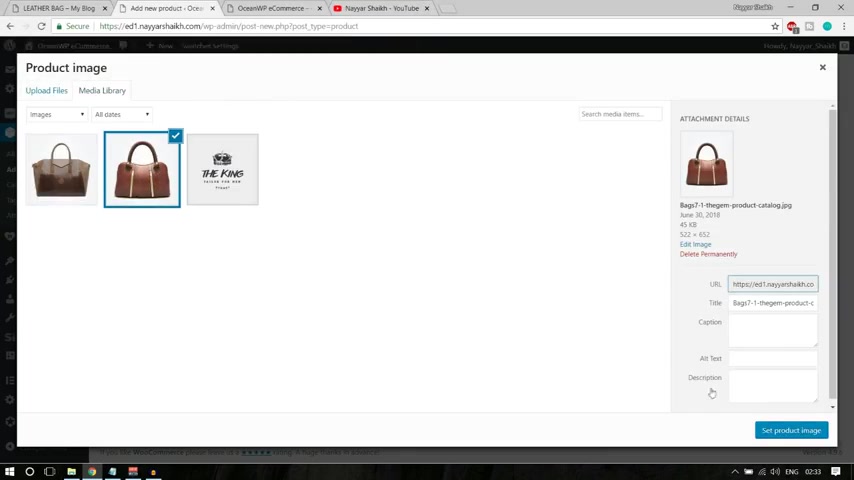
Now , suppose I want this image as the main image .
So I'll select this click on set featured image and I want to add a one gallery image .
So I'll select this one click on add to gallery .
OK .
So we have our image over here .
Now we can do some more settings .
Now , first of all , we have to create a simple product .
OK ?
So we have this simple thing , simple product selected over here .
We can put in the price .
For example , the price over here is actually the price is $20 and on discount it they are giving on $18 .
So if you want to give something like this discount thing , one price is striked out and other price is given so very easy .
What you can do , you can select the regular price and type in $20 and in the sale price type in $18 .
OK ?
Which type of tax do you want to select shipping only or taxable , select taxable and tax class ?
So suppose you want to uh charge that GST tax class that we have created .
You can select GST from here .
OK ?
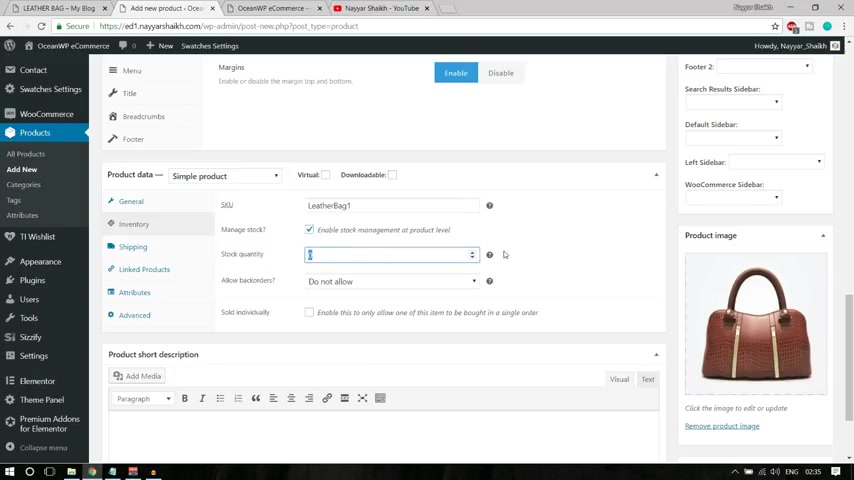
Now go to inventory and you have to put in you can put in a SKU .
Now SKU is a stock keeping unit .
Every uh every product has a different SKU or different unique number .
I would say , for example , you have 10 different leather bags .
So it's it's not a complicated thing .
You simply can say leather bag , one , leather back two .
So suppose this is a leather bag one , so we can type in leather bag one .
So this is this can be an sku for this bag .
Very easy , nothing complicated .
Now , if you want to manage stocks , you can simply take mark this .
Suppose I want , I have 20 of this product in stock .
I can select 20 .
Then you want to allow back orders .
Now , back orders is suppose the product is out of stock .
Do you still want the user ?
Do you still want to allow the user to place order ?
You can select yes or no .
OK .
So we have three options .
No , do not allow .
Yes , allow .

You have one more option which is very cool allow but notify customer .
OK .
Fine .
You can allow the customer to place an order but also notify them that this product is out of stock .
So cool option , nice option .
Now after that , we have shipping options , we can set a wait for example , this is grams .
So suppose this is 300 g .
You can set a dimension for for example , centimeter 50 50 50 whatever the dimension is and shipping class .
OK ?
There is uh If it is a bulky product , you can select bulky .
If this is a simple product , you can just select no shipping class .
Ok ?
If you select no shipping class , remember we have set around , I think it was $5 for no shipping class .
Ok .
Then leak product not required yet .
Attribute is also not required because this is a simple product .
I'll show you when is attribute required .
After we create , create this product , we'll see these options because after that , we'll have to create a variable product .
OK ?
A product which has different variations .
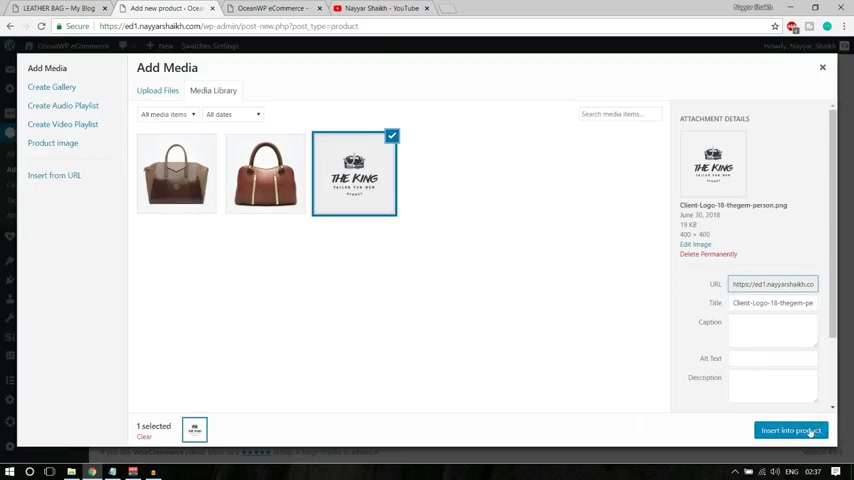
Now this is only one variation but a product can have different variations .
OK ?
So we are done with everything .
Just one thing is remaining short description and whatever you put over here will show up over here .
OK ?
It says this is a simple product .
OK ?
Now here also you can add media and so on .
For example , let me show you you can add a media , you can add this I can over here .
You can add some text to let us copy this text from here .
Only this much copy it from here .
Let's paste it over here fine .
You can align it left , right center , you can align it to the left , you can align it to the right , it's all up to you .
OK ?
So you can use , you can use the same things in the short description as well .
Now let's click on publish , let's see how our product looks like .
So once you click on publish , you'll see this link with your view product .
Let's view our product in a new tab .
All right guys .
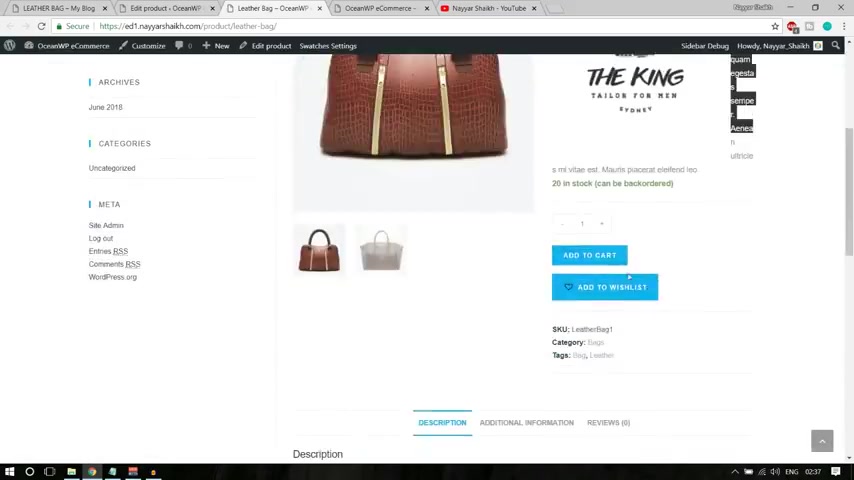
So this is how our product is looking when you have this , you can see the zoom image , this is the price and this is the description you have the logo over here .
We have add to wish list button , we have add two card button over here .
You can increase or decrease the uh quantity .
You have the sku the category , the tag over here , we have the description .
We have the beautiful image over here .
We have the color , we have the link , we have some additional information like the weight , the dimension and you can also give a review .
OK ?
So we have created this thing , OK ?
We also have this video link if you remember now anyone can share this product on different pages and so on .
Now below this , you will see related products but because we don't have any products , it is not showing at present .
OK ?
So this is how we create a simple product , very , very easy to do .
Now many products can have can be a variable product which means that they can have different variations .
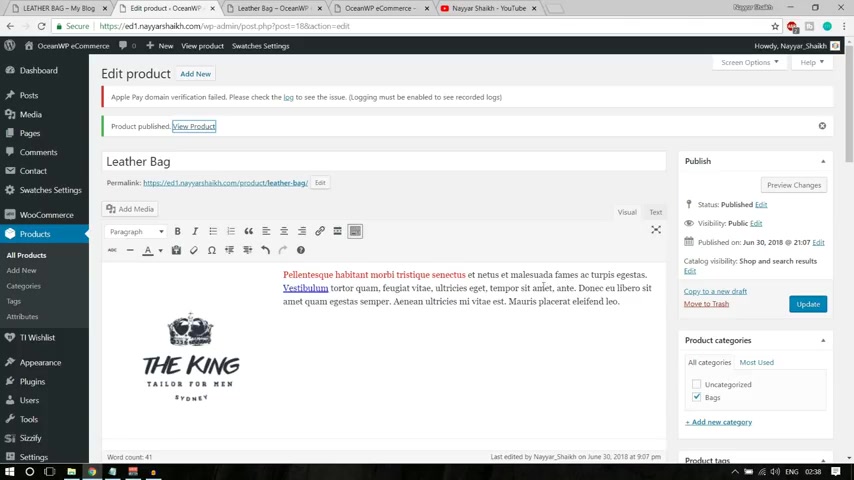
For example , this product can be available in two different colors or a few different sizes or a few different leather materials may be .
So there are different variations available .
So that is called a variable product .
Let's see how a variable product is created .
Now , most of the things will remain the same .
So what I'll do instead of creating a new product , I'll just show you in the same product .
So the title will remain the same .
You , you know how to add a description , a long description .
We have a category over here , we know how to put tags and so on .
Now , the main thing comes over here .
Now , instead of simple product , we want variable product , ok ?
So select this variable product .
Now all the options will change over here in the these options will say remain same tax status , taxable , tax class GST inventory .
We have the same thing , leatherback one , you can make it leather back to whatever you want .
We have this stock quantity .
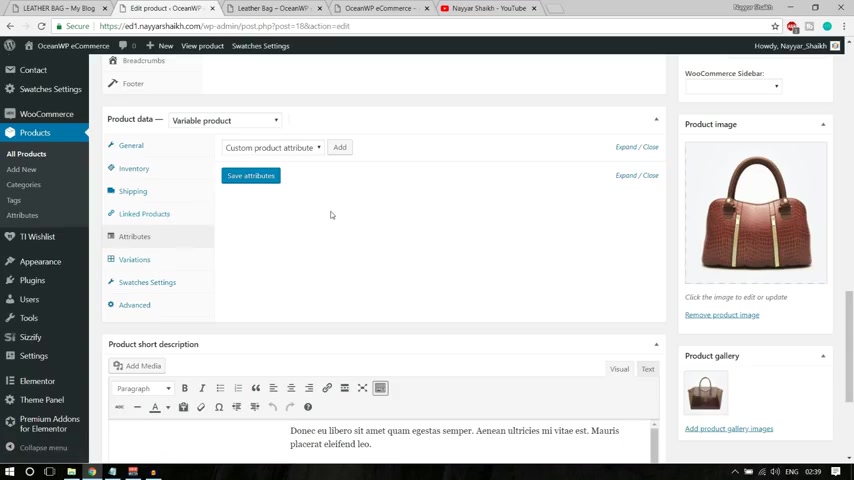
We have seen this , we have the , we have seen the shipping class link product not required attribute .
Now this is the place where we have to make changes .
Now this suppose this product is available in two different leather materials .
So what I'll do is I'll click on this add button , ok ?
And I'll get this option .
So here I'll type in material , ok ?
Because this is available in two different material .
If this is available in two different colors , what I'll type , I'll type in color simple , ok ?
But this is available in two different material .
I'll type in material and I'll type in maybe leather and other option can be pu Now , if you want to add another option , what you do is you , you add this thing , OK ?
Which is , I think it is called pi pin .
Uh When you see backward slash , you click on shift plus backward slash , you'll get this icon .
Ok ?
So one option is leather , which the spelling is wrong .
And other option can be pu OK ?
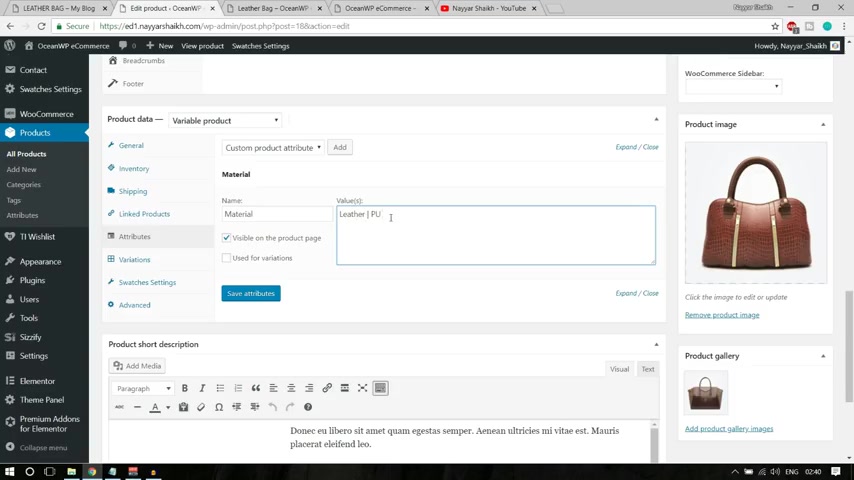
Now , if you want , you can add multiple options , you can again put this icon and you can add some more options .
OK ?
Option three .
Fine .
Now make sure you select this thing used for variation .
Now click on save attributes .
OK ?
So we have one thing and we have three different options .
Now click on variations .
Now instead of add variation , select this thing and select this one .
Create variations from all attributes .
OK ?
So create variations from all the attributes that we have set .
So select this click on go .
It will say just make it OK ?
It says three variations are added , click on OK ?
OK .
So we have leather pu option three .
So let's select leather .
So suppose in the leather the regular price is maybe $50 .
OK ?
Obviously not $50 because the price here was around $20 I guess .
No , it doesn't matter if this is a different product .
OK ?
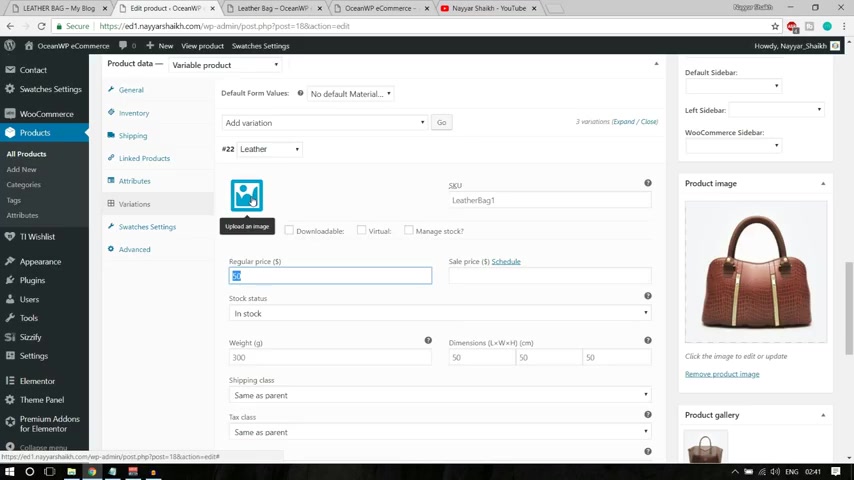
So let's type in $50 you can change different images for different products .
For example , for this leather one , we can select this product , OK ?
This product select this one .
OK ?
So this is the leather product , $50 price , you can say change all this weight dimension and all these things .
Now , after that , we have pu now obviously , this will be more cheaper .
So I'll just type in $30 and I'll change the image .
Let's put this one , click on set variation image .
The third one is option three .
So let's select this image , let's make it $10 .
OK ?
So this is what our variable product is .
Now , let's update this thing .
Let's see what happens .
OK ?
So let's come over here , let's refresh this page .
OK ?
Now if you see options are changed , now it says $10 to $50 .
And if you see over here , now we get an option material and we can choose an option leather .
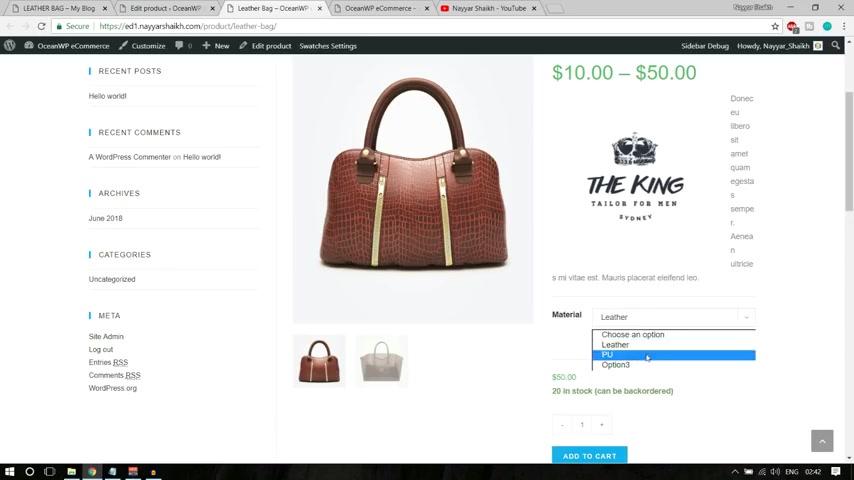
If you want , you'll see the prices change $50.20 in stock .
If you select pu you can say see the image is automatic changed and you see that the price is also changed , which is $30 .
And if you select option three , the images again changed and the price is also changed to $10 .
So this is our variable product .
So these are the two main type of product , simple product and variable product .
There are more , a few more types like group product , external affiliate product , which is , which are not very important .
But still if you want to learn them , what you can do , you can watch you can go to youtube .
Now , you can see that video on my channel or if you don't find it , if you are very lazy to find , you can simply type in my name and type in Woocommerce .
Ok .
Now , when you do so you'll see this option complete Woocommerce tutorial , this is more than one hour video just explaining the Woocommerce plug in .
So this can be a very useful plug in .
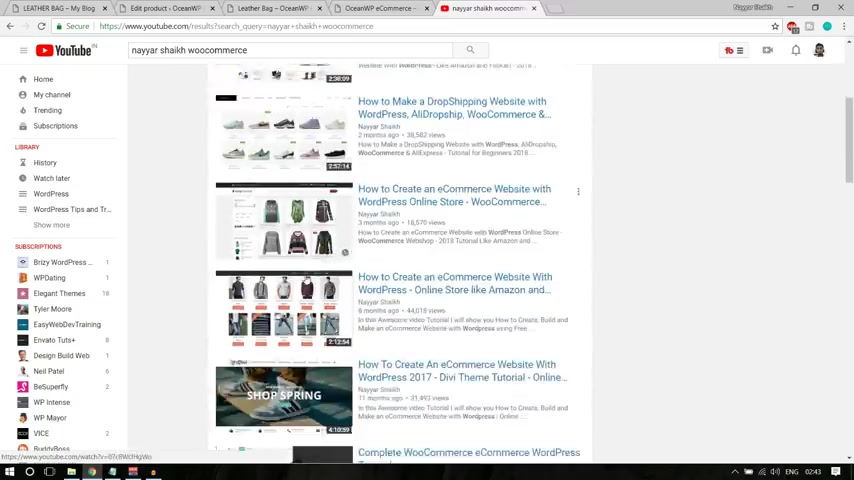
And I , as you can see , I am an Woocommerce expert , Ecommerce expert .
You'll see most of the videos related to Ecommerce .
I have around 1234567 , more than 78 .
I don't know so many different videos on e commerce , two RS , three R four Rs videos .
OK .
Now , most of not most , in fact , all of those are premium plugins and premium themes , but this video is the first video that I'm creating using a free theme and free plug in .
So this is a special video .
OK ?
So we can just cut everything .
And so with this , we have completed , we have seen how to create a product .
Obviously , we'll design it in a better way .
This is not at all designed , we'll change the sidebar , everything will be changed .
So don't worry about it .
OK ?
So this is just a very beginning thing .
OK ?
Let me change .
Let me remove this icon from image from here that is looking very bad .
So let me delete it from here .
Click on update .
I was just showing you that you can do so .
OK .
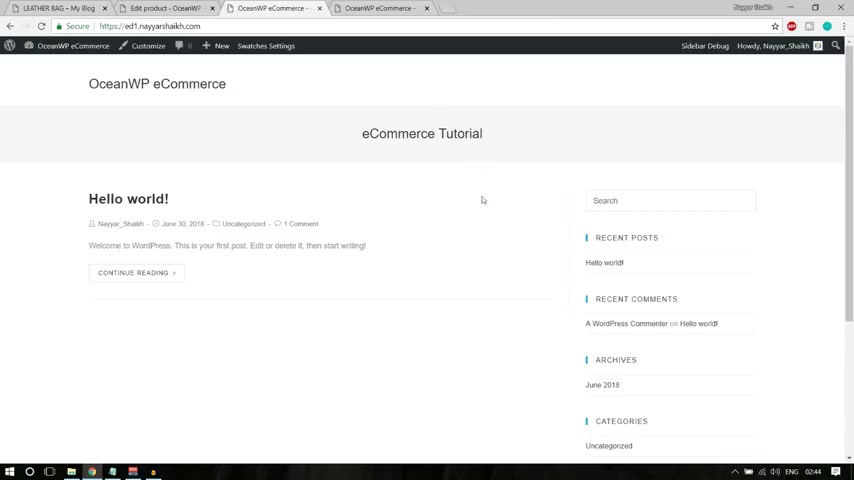
Now , looking , this is looking better .
All right guys , now let's start creating the uh page .
Let's start designing the page .
So the first thing that we have to do , we have to start with the home page .
OK .
So let's see , the home page that we have to create , we have to create a lettice code .
We have to create a beautiful home page like this .
OK ?
So first we'll have to create a home page .
So again , come back to your dashboard and how our pages and click on add new .
Now , let's type in home in the title and let's not do anything .
Simply click on publish because I want to explain to you everything .
Step by step .
Let's get rid of all these things .
Let's view this page in a new tab .
And if you see this is how your home page would look like you have your header over here .
We have the title Bread Crumb , then we have this sidebar .
Now in the home page .
Obviously , we don't have this title Bread Crumb .
And we also don't have this sidebar .
OK ?
So we have to get rid of this title Breadcrumb .
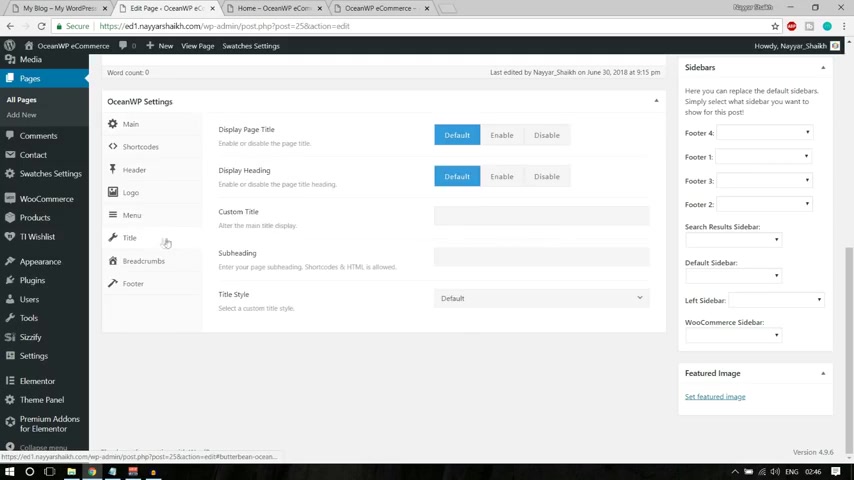
And we also have to get rid of this sidebar .
So it is very easy .
You can do so easily .
You have to come at the bottom and you'll see ocean WP settings .
The first option is contact la content layout , you have to make it full with .
OK .
For the first option is content layout , make it full width .
Then after that , go to , I think your title go to title and just disable it .
OK ?
Now again , click on update , come back to this page .
Let's refresh and see the changes .
Now , as you can see , we have a nice and simple blank page .
Now we can start creating everything step by step .
So the first thing that we have to create , we have to create this section , this slider type of section , we have a background image .
We have this beautiful uh different uh you know , text giant sale and then we have this text then 70% off and we have a simple call to action button .
OK ?
So it is very , very easy to do .
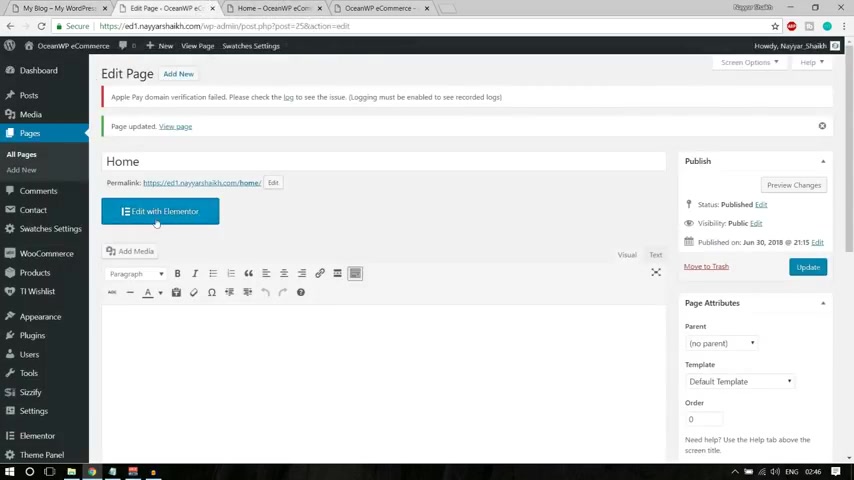
So come back to this page and click on this button which says edit with elemental .
All right guys .
So this is the free page builder , best page builder .
You'll enjoy creating and designing websites .
This is that fun .
OK ?
Very , very easy .
You can just have to use simple elements and you have to design everything step by step now .
And also it is very easy .
Let me explain to you .
Let me just show you and you can understand that .
So first thing if you see Oyo , we have used a few text o here .
OK ?
So first one is giant and we also have sale .
So first , the design for both of them is different .
So what I can do is I can bring this heading oyo simply bring Dr I can drop it over here , ok ?
You'll see this option over here .
Now , now if you want to make any changes , you simply click on this and you have at the left hand side , you can do all the changes , OK ?
So as you can see here , it says , add your text heading , text here here .
Also you have add your heading text here .
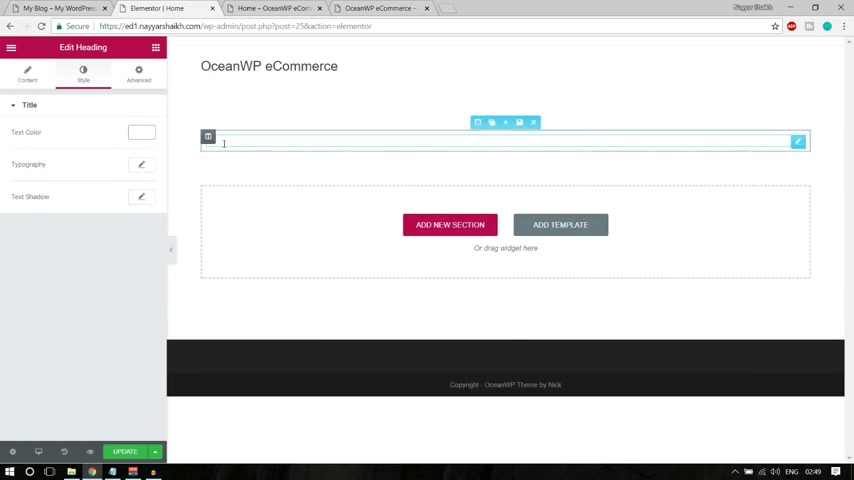
If I say next , you can see everything is changing in real time .
You don't have to do type in , then click on save , then reload and all these things , everything will be done in real time .
So I'm just typing in giant giant , same same thing that we have over here .
OK ?
And after that , what I'll do is I'll go to style and I'll change the text color to white because here also we have white .
But when I do , so what happens is the text disappears because the background color is also white .
So now what I'll do is I'll add this image that we have in the background so that we can start working .
OK ?
We have a background , we have something in the background and we can make this thing white or black whatever we want and it will not disappear .
OK ?
So if you want to add anything in the background , what you can do is you can .
However over here , you'll see this blue bar .
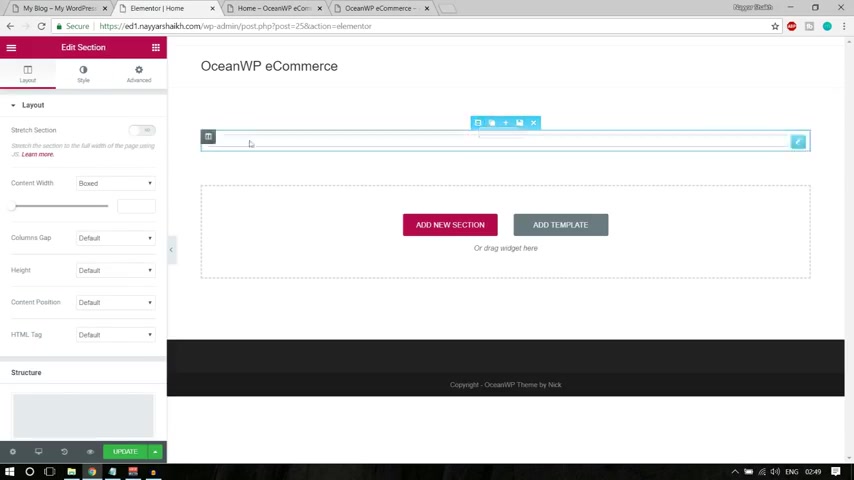
We have some different icons , click on the first icon , edit section .
OK ?
Now go to style , then we have background , select the background and select the first option , classic option and select the image option .
Now upload the image that you have downloaded .
This is the image , select this image , click on open OK ?
So select this image , click on insert media .
Now you'll see this image is showing over here , but it is showing only in this portion .
Now , first thing is that it is stretched , it , it does not have some gap from both the side .
It is stretching to both the corners .
OK ?
So what I'll do is I'll go back over here under layout and stretch section .
The first option is so I'll just make it .
Yes .
Now as you can see it is also touching both these sides .
So that is a cool thing .
OK ?
Now I'll again go to or maybe what I'll do is now let us change this size because here the size is quite good .
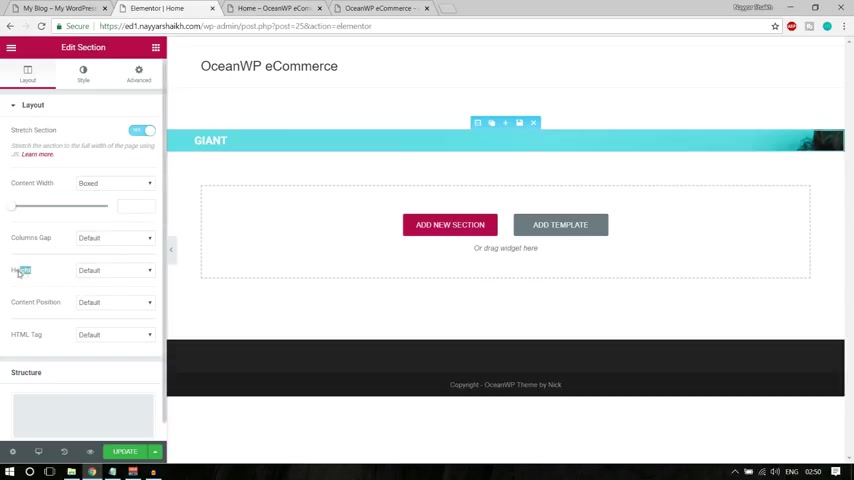
And here as you can see , this is the only size available .
So let us change this size .
OK ?
So first one is you have the height over here , select the height and instead of default , select minimum height and instead of 400 let's make it 600 .
OK ?
You'll see something like this , which is looking better .
Now , content position is middle content position .
Let's make it , OK .
Let's make it default .
OK ?
Now let's style it everything because the girl is disappearing .
We want the girl in the middle and as you can see this is quite light , we want to give a dark shade on this image so that it looks good .
OK ?
So let's see how we can do .
So we have to go to style and what we have to do , we have the position , which is default , which is fine attachment , which is also default fine or what you can do .
You can select the position and select center center .
OK ?
So this girl will come in the center then the size we can select cover .
OK ?
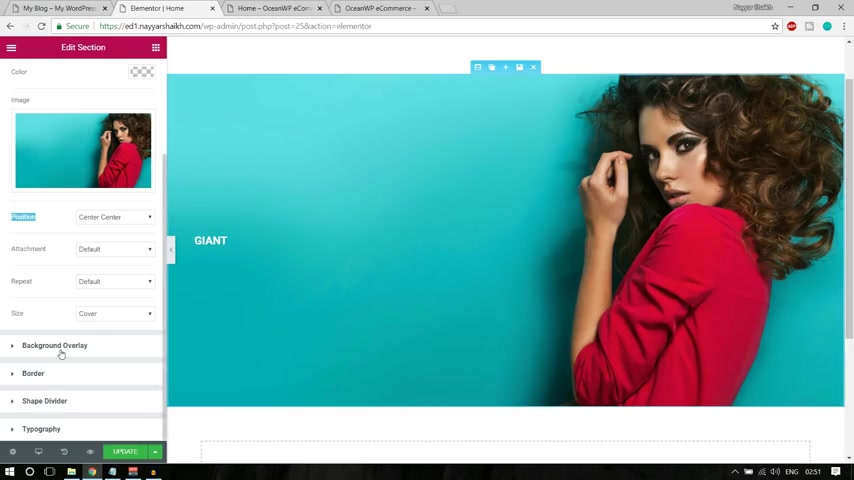
So two options will change position center , center size cover and we have to make it a little bit darker .
So we have to add an overlay on this image .
So we have this option over your background overlay , select this and select the overlay color .
OK ?
So select the color from here .
Suppose you want black color overlay , you can select black .
Now as you can see these images oh , overlaid by black color .
If you want blue color overlay , you can select blue green color overlay , green .
So I want black but I want to reduce this .
OK ?
I don't want this much dark .
I want something like this .
OK ?
This is looking better , I think looking quite similar .
So this is around this much .
You can see on your screen .
OK .
So this is this much .
Now , I can simply click on update to save all these settings that I have done .
Now , since we have our background , we can start working with these fonts and so on .
OK .
Now let's click on this giant .
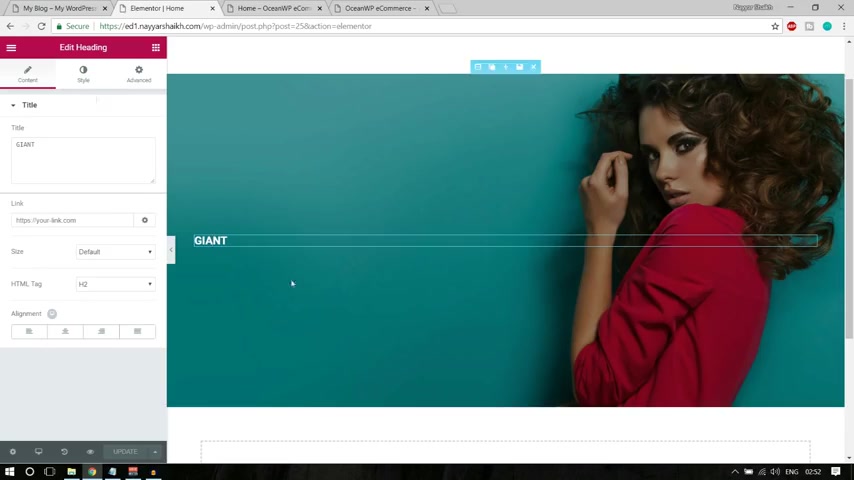
Now , whenever you want to do some changes to something , you click on that first .
OK .
So we want to change the text , we click on .
Now we'll see all the options and the at the left hand side related to this text .
Now let's change the size and style of the font .
So go to style first is text color .
We have already changed that to white .
Now go to typography .
There are so many different and beautiful fonts that you can select .
Now for this , I want to select uh maybe Roboto condensed , OK .
You have Roboto Roboto condensed , Roboto Mono Roboto slab .
So I want Roboto condensed , OK ?
And I want to increase the size of this one .
OK ?
Maybe to I think 70 pixels , 70 71 pixels looking fine .
So here we have 70 pixels or maybe let me increase these 200 pixels .
Yeah , this is looking better .
But if you see over here , this is quite thin .
OK ?
The weight is quite low .
So what we can do , we have the weight option .
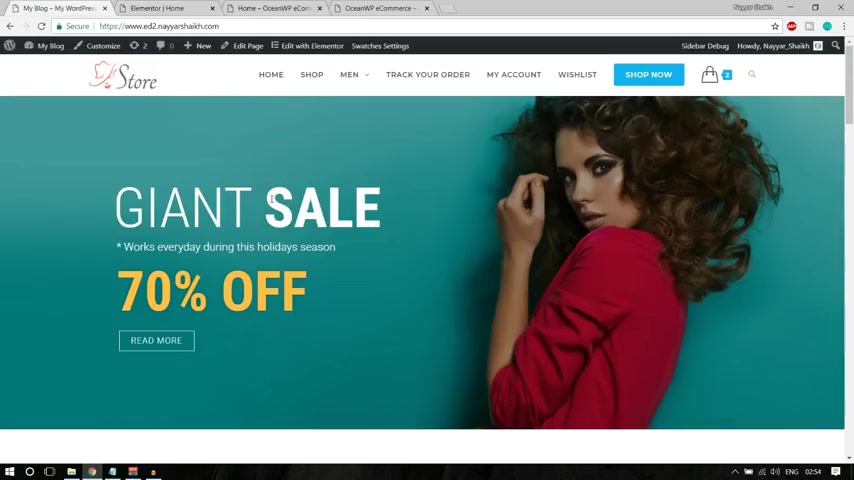
Let's decrease this 200 .
OK .
So this is looking exactly the same .
OK ?
We have 100 .
Now rest we don't have to do thing after that , we have to add this text sale .
Now , most of the thing is same , if you see the size , this style is same .
Only difference is that it is quite bolder .
OK ?
So what we can do , we can make this thing and we can add a new column .
Now , we don't even have to add a column .
We just can simply copy this same column .
So how over here under the gray section ?
And you'll see the second option is duplicate column , select that one and you'll see one new thing coming up over here .
Now , if you see over here , both the things are very close to each other .
So let's bring this thing close to this so you can simply drag and bring it over here .
It is that simple guys .
You can see everything is so simple and easy .
Now we have this thing over here now because we want to change this thing .
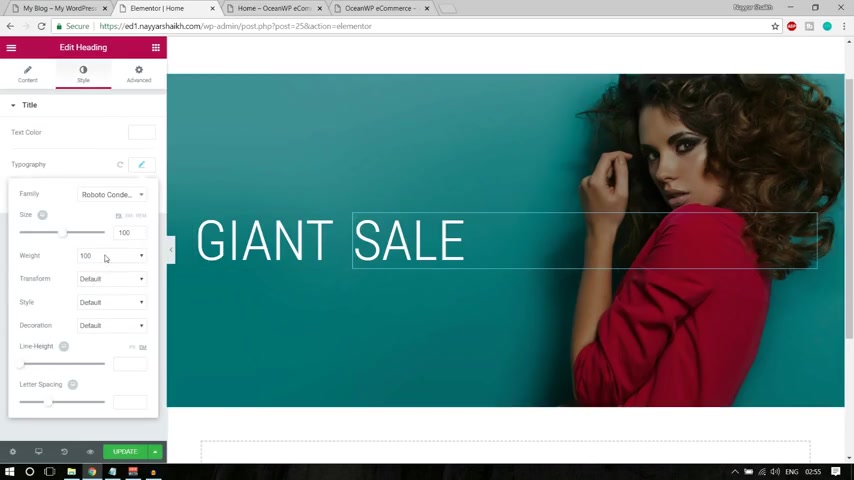
We click on this thing .
OK ?
So we have this giant now instead of giant , I want to say sale .
So I type in sale and I want to change this style .
So I go to style , I go to typography , I don't change anything .
I simply change the weight to 700 this is looking perfect .
Now , click on update .
I think this is looking amazing .
Then after that , we have this text works every day during this holiday season , whatever text you want this is quite simple and quite small text .
So because this is a text , we have to add another element .
So what we do is we click on this icon at the top , you can see my cursor over here , click on this icon to come back to this page , adding all the element .
Now again , we want to add some text , so we'll select this heading .
OK ?
Now , before this , let me do one thing , let me select a new row because in this row , we have two columns .
And after that , we want only single , single columns .
OK ?
Not a difficult thing .
Just try to understand .
OK ?

So what I'll do , I'll search for a row .
Let me search it or maybe not .
Let's add a row , maybe .
Actually , I have been done a mistake .
I would not say a mistake , but just another way around whenever you want to create different columns , what do you do ?
First you add different rows , then you add columns .
Now , you obviously won't understand that .
Now let me just show you how we can fix this thing .
OK ?
Because now if you want to add something new , for example , if you want to add this text , you have to bring this text heading either under this thing or under this thing .
OK ?
So , and you cannot bring up and down .
So this is a problem .
So what I'll do is I'll bring these columns over here .
OK ?
Under this thing , then what I'll do is I'll bring this thing under the second one .
Try to understand .
OK , I'll delete this column .
Now , now this is not required .
Then I'll bring this thing under the first one .
Then we have this thing , OK ?
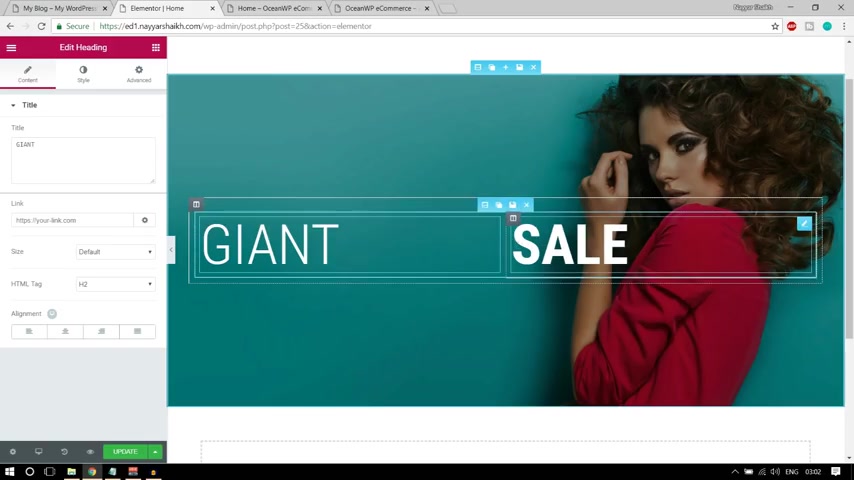
We have one column and under that we have another column .
Now , we can do everything perfectly .
Let's just bring this over here .
OK ?
Now , everything can be done very easily .
Just click on update so small mistake .
And I think it is sometimes very good to do mistakes so that you can also understand how we how whenever you get in this kind of problem or how you solve that .
OK ?
Because if I would not have done this mistake , then you know , many people wouldn't have been just stuck over here .
OK ?
Now let's move on .
Let's add this text .
Let let me first copy it from here .
Now again , because we want to add a heading or text , we can simply bring this thing uh over here .
OK ?
Now we can add it over here as you can see and let me bring it below this .
OK ?
So what I'll do , I'll just select this and bring , bring it below over here .
Let me select this thing past the code which I want or the text which I want go to style , select the color to white .
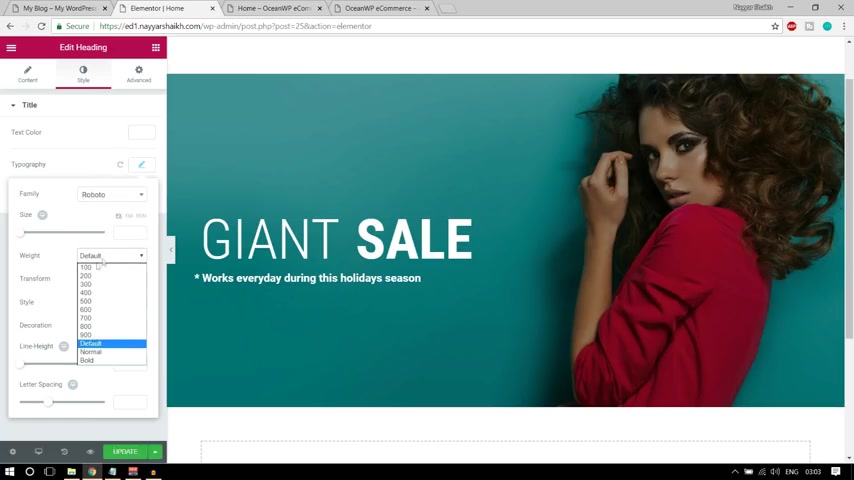
Now let's change the typography instead of default font .
We , I want to select Roboto and the font way to let me select 300 .
OK .
This is looking better .
OK .
Rest everything is fine .
Just one thing if you see .
Oh , here everything is very well aligned in the same corner .
And here this text is a bit at left hand side and this is starting from here .
So let's add some padding at left so that it also shifts to right a little bit towards right .
OK .
So again , I'll click on o here .
Now , I'll go to advance and I'll add some padding .
But before adding padding , I'll click on this link .
OK ?
Because if you don't do that , once you add one thing , everything will be applied .
For example , let me show you suppose if I want 10 per 10 pixel padding .
Now 10 pixel is padding is applied on all the sides as you can see 10 pixel top bottom and all these things .
But I don't want that .
Let me do it zero .
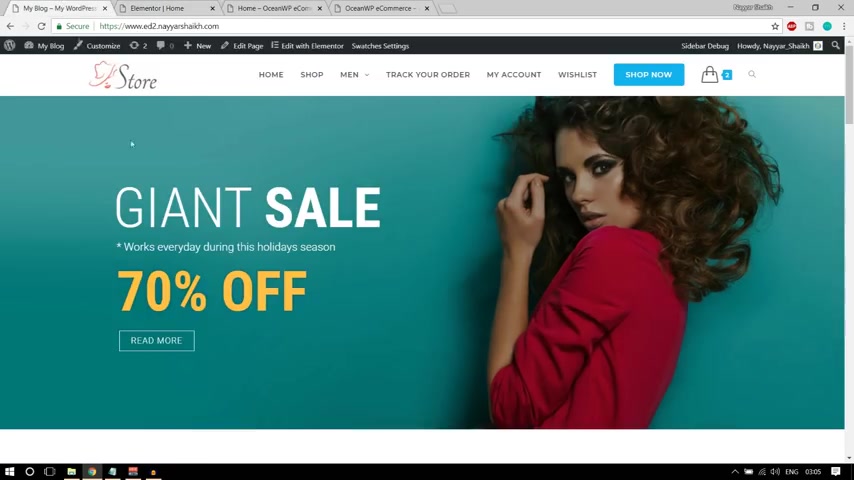
I want to add only left padding only gap at the left hand side , some margin at the left hand side .
And I don't want to add anything at right or top and bottom .
OK ?
So I'll unlink this , I'll select the left and I'll put maybe 30 not 30 .
I think 2020 is looking better , 20 pixels padding left so that it gets shifted towards right and everything is in one single line .
OK ?
Then after that , we have this text , OK ?
So very easy text , simply copy it from here .
In fact , it is similar to this text .
So what I can do , I can simply copy it from here .
OK ?
And bring it at the bottom or not copy the column , copy the copy this thing or don't copy the column copy how over here under this blue thing and copy this widget .
OK .
Now you can bring this at the bottom below this thing .
OK ?
We have it over here .
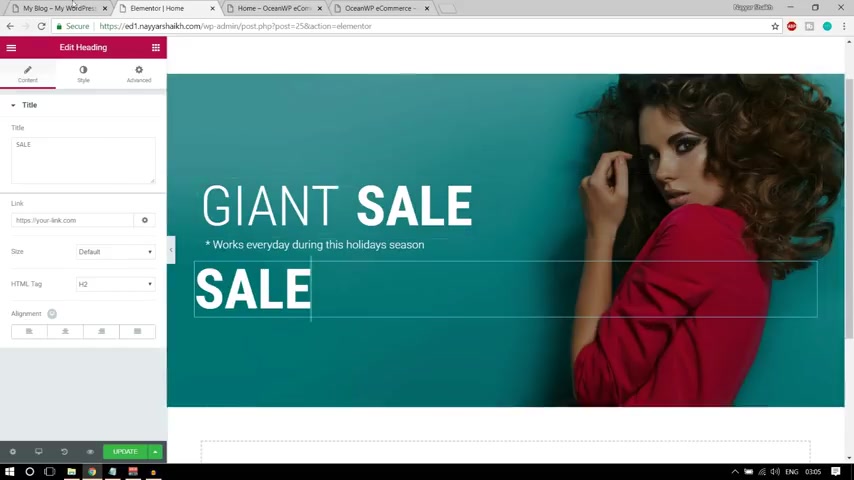
We have to change the text instead of sale .
It says 70% off .
So let's type in 70% off .
Let's go to style and let's change the color to something like this yellow color , whatever color it is .
OK ?
So I think it is something like this .
Yeah , this is looking better .
Let's also add some text shadow .
You can also add some text shadow if you want .
OK ?
As you can see , obviously this is not very much clear , but you can add some text shadow .
If I change the color , I think you can see it properly .
Nowadays , you can see when I do it blue , you can see some text shadow blue .
When I do red , you can see these changes now OK ?
Very clearly .
So this is how it happens but I want to add black shadow , OK ?
Now I will let's shift this thing also towards right .
So again go to advance unlink this and left padding .
Let's add 20 pixels looking perfect .
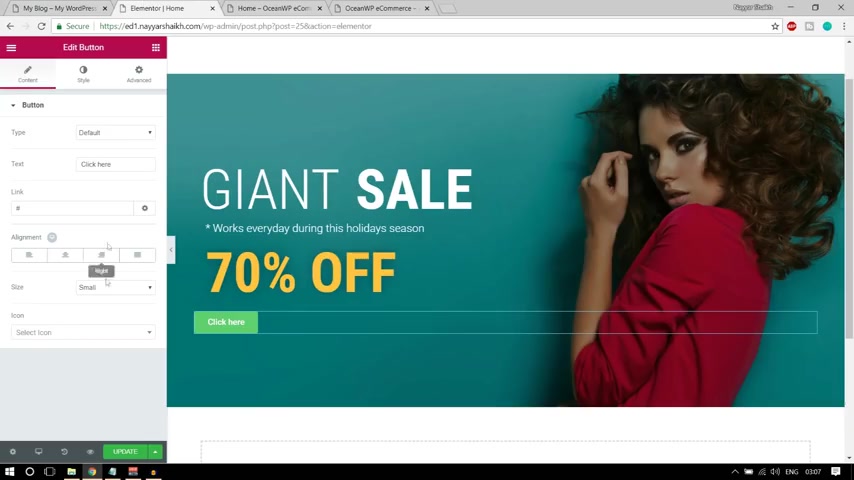
Click on update .
Then after that we have this simple button .
So again , come back to this , click on this link , click on this icon and you'll be redirected to this widgets thing .
OK ?
Now , because we want to add a new button , what we'll do is we'll add a button module or button element , whatever we call it here , we have a button element .
We simply drag and drop it over here .
This is the default button .
Let's change everything .
First thing the text it says read more .
OK ?
So let's change the text and here it is .
Instead of click here , let's type in read more .
OK ?
Then after that go to style OK ?
Typography .
As you can see the text is quite lighter , the weight is very low , very thin text .
Here it is totally different .
So let's go to typography and let's change the weight to maybe 300 .
Yeah , 300 is looking fine .
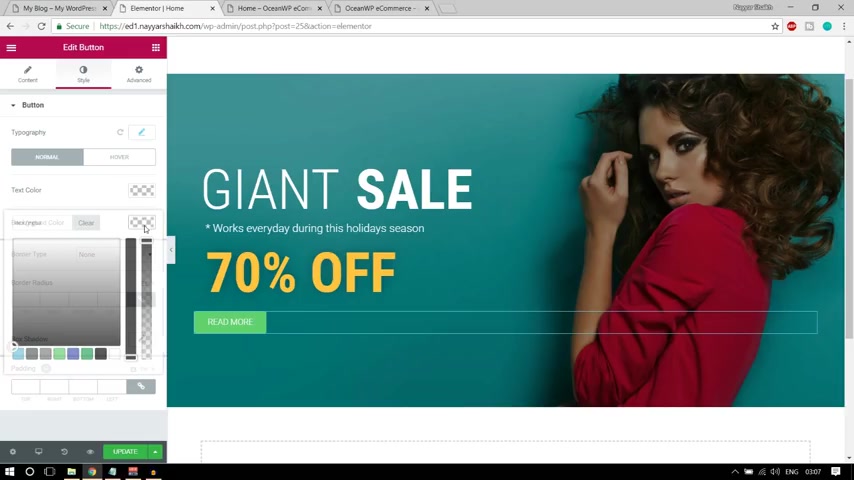
Then after that , let's change the text color is white .
Border color is white and there is no background color to the button .
OK ?
So text color is white , which is fine .
Now background color select this because you don't want any background color .
We have to make it transparent .
What you do is you have two different bars .
So a year you select the second bar , you make it to the bottom .
Now as you can see it is background less .
Now let's add some border .
So border type instead of none select solid with make it one from all this side .
We have this button over here and border color is white .
So we can simply select white from here .
OK ?
So we have this button and we don't have to add any border radius .
And so let's do one thing again .
Go to advance and padding left .
Let's add 20 pixels .
OK ?
Looking better .
Now if you see over here when I hover this button , nothing happens .
But when I hover this button , there is something happening .
OK ?
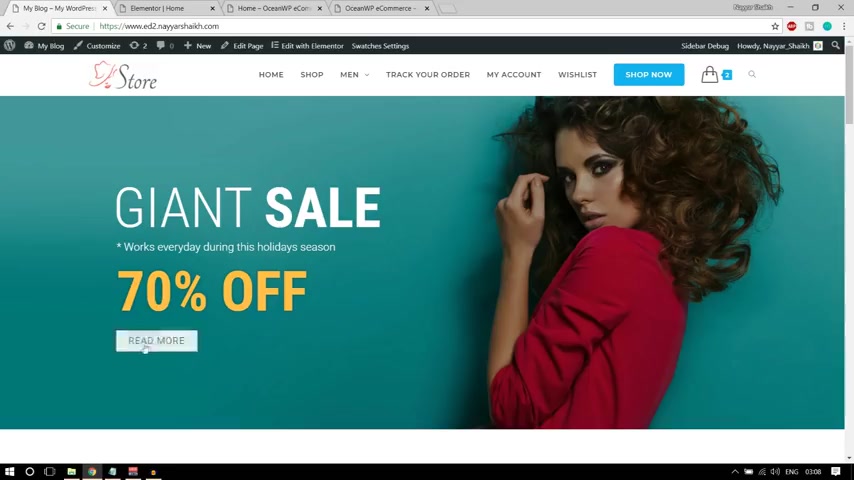
The button is getting zoomed in and the color is also changing the text color and the background , the text color and the border color is becoming black and the border color is becoming white .
So let's do that .
Let's see how we can do that .
So again , click on this button now again go to style and uh let's see where we have our options here .
You have , we are at present at currently at normal .
Click on how from here .
Now many how I want the text color to be black .
I want the background color to be white and the border color to be black .
OK ?
Let's have the button .
Let's see what happens .
Now as you can see the effect is happening , this one thing is left how animation when I have this , I want the button to zoom in .
OK ?
So let's select how animation and let me select this one bounce in .
OK ?

Now , as you can see there are many different animation .
You can select any one of these .
OK ?
So look , this is looking really nice .
Let's click on update now , once you update a page , what you can do , you can click on this button to preview changes to see how your page is looking at present .
Now , as you can see , this is looking perfect .
There is again one more thing which is left , I think the margin at top and bottom , we have to decrease that or delete that we can do it later on .
OK .
First , let's focus on designing the website .
Now , this was the most complicated part , believe me guys .
OK .
After this , everything is very , very simple .
OK ?
You don't have to do much thing over here .
Now , the next thing is that we have to add this title , this subtitle and after that , we have these four different columns , OK ?
Four different categories .
So let's add that .
Let's see how we can do that .
OK ?
So first we have to add this title and subtitle .
So first let me copy this title .
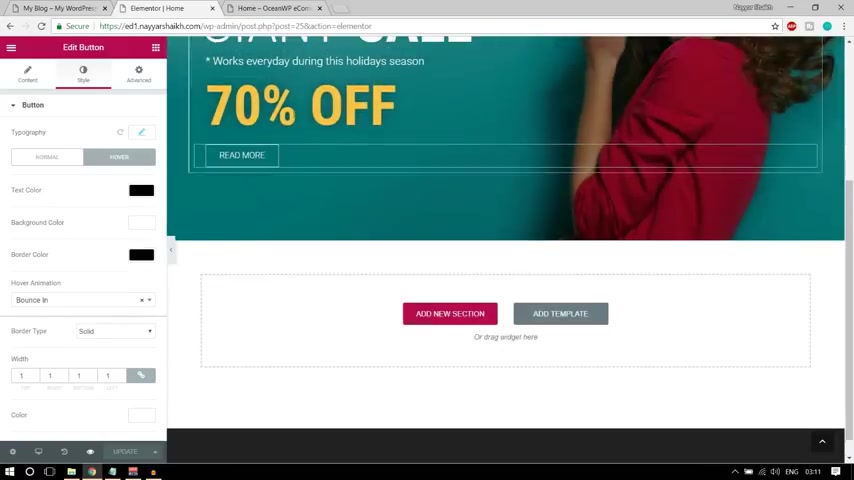
Let's come over here because we want to add a title which is a simple text .
So again , we'll go back , we'll bring this setting and now we'll create a new section .
OK ?
So we'll drag it over here .
OK ?
We have the title over here .
Let's change the title .
I'm typing new design trends and let's make it center align here .
You have the alignment option select center align .
Now let's design it .
OK ?
Go to style , select the text color and select the second color .
OK .
We have some predefined colors over here .
So I'm selecting the second one which is something like dark gray and you can see the color code over here which is hashtag 54595 F I guess .
OK .
Now let's change the size and typography and everything .
So for this font family , I want to railway Raleway .
OK .
This is the one that I have used and let's increase the size to No , this is quite big .
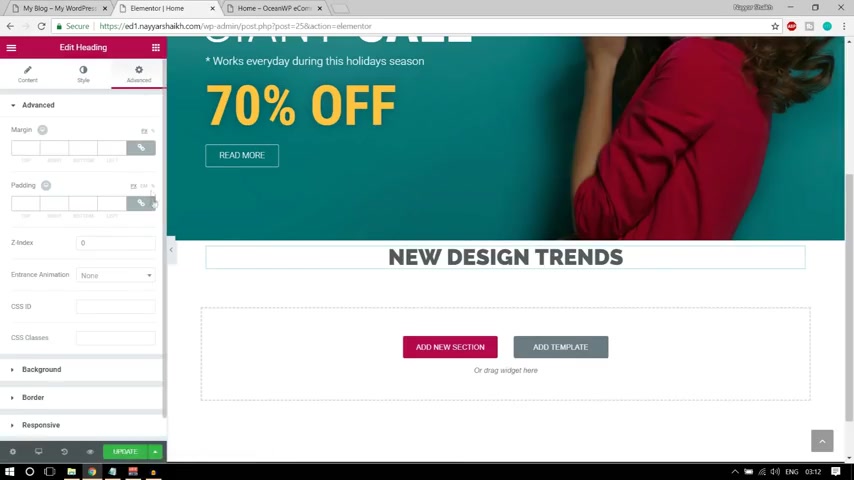
Let's make it 40 and let's make it quite bolder .
Let's select 900 .
OK ?
This is looking exactly like this one .
OK ?
Now if you see , oh , here we have a nice amount of gap at top of this title .
So what we can do , we can go to advance and we can again link dealing this and this time let's add some gap at top .
So I'm adding some padding at top and maybe 90 pixels I think is fine .
Yeah , yeah , 90 pixels is looking fine .
You can add 90 pixels top .
If you want , you can decrease this to 60 or 70 whatever you are like OK .
So I'm making it 70 maybe .
OK .
This is looking better .
Then after that we have this text , this simple text , copy this text from here .
Come over here again , click on this , I can bring this heading below this thing OK .
Paste in this text again , make it center align , go to style .
Let's change the color to white .
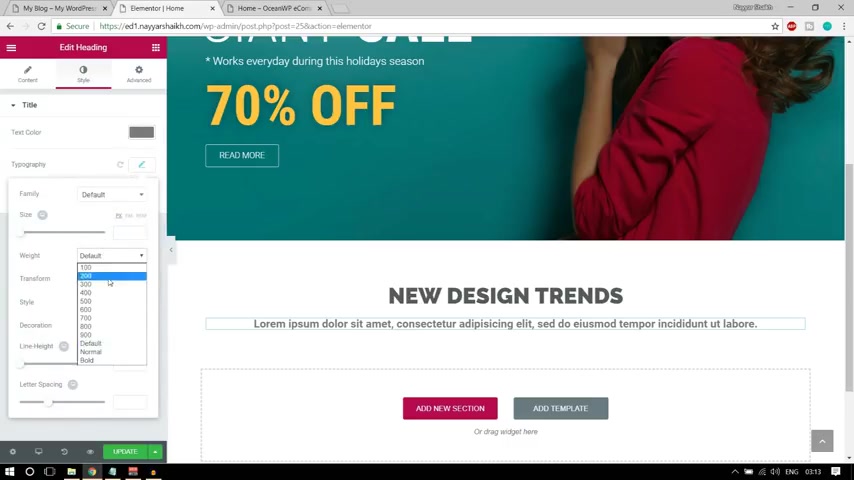
Very simple thing uh not white .
Uh uh Now let's select the third predefined color , which is light gray , go to typography and let's change the weight to 300 .
OK .
Rest everything is fine .
300 or 400 both are both would look good .
OK ?
And let's add some gap at the bottom because if you see below this subtitle and between this thing , there's some nice amount of gap .
Let me make it 300 .
OK .
Go to advance dealing this padding bottom .
Let's add 50 pixels .
OK ?
This is looking better .
Click on update .
If you want to see the changes , you can simply come over here , you'll see the changes over here .
This is looking amazing .
Now , if you notice one thing , this title subtitle , same design is used many times , for example over here , then again , we're here .
So we don't have to create it again and again , what we can do it , we can simply save this thing , save the complete section .
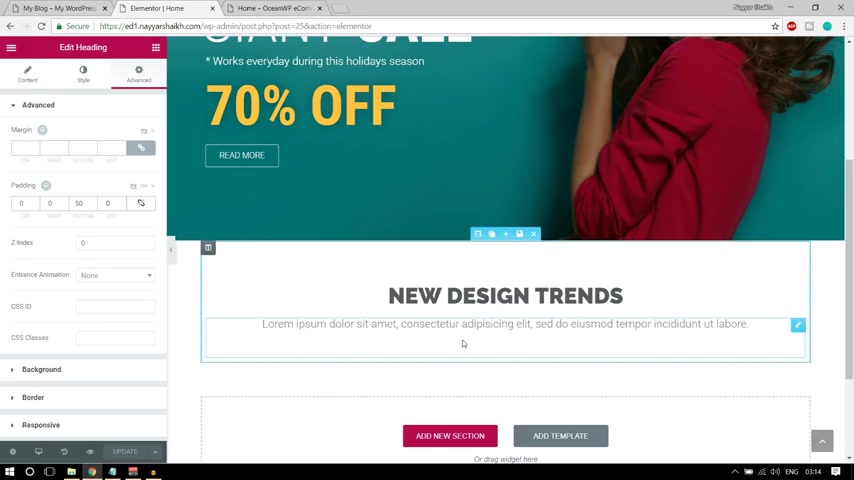
So we can save a simple element , a simple column or a complete section .
So here we want to save the complete section so that you don't have to apply this style again and again , a railway f this much size , this much gap and so on .
So what we can do is we can have over here , we can click on this disk icon to save section , save it and let's name it a type .
Let's give it a name of title .
Click on save .
Now whenever you want to uh add this title , we can simply copy it from there .
I'll show you how we can do that .
OK ?
Now , after that , we have to add these things , four different columns and we have different images for different categories .
OK ?
When you , how about this ?
It says shirt .
When you , how about this , it says bag and so on .
Now come back over here and let's add four different columns .
First of all , OK .
So again , come over here , let's add columns .
Let's add it over here below this thing .
OK ?
And let's increase the number to four .
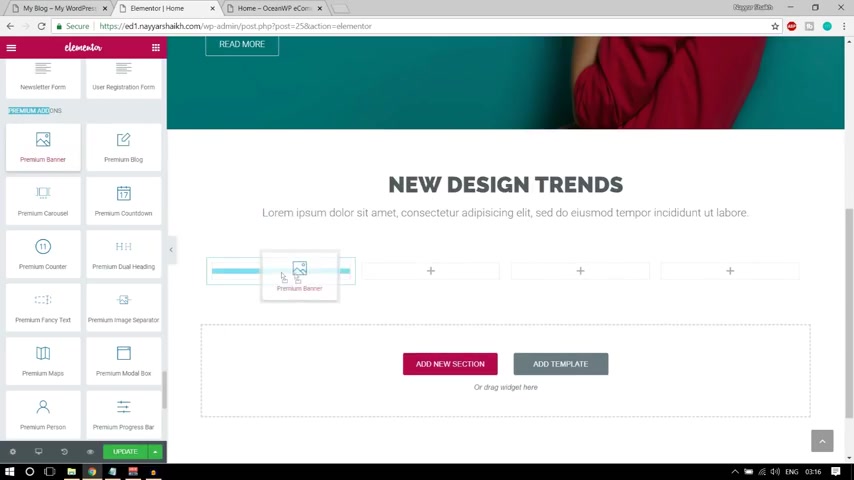
Let's copy it .
OK ?
So we have 1234 .
OK ?
So now what we can do again , come over here and let's scroll down under premium section .
Oh This is essential section and we'll see premium .
OK .
Here it is premium add-ons .
OK ?
Come under this section and select the first one premium banner and bring under the first column .
OK ?
Now first select the image .
Now first we have this guys image .
So let's select this image .
OK ?
Here it is select this image , click on open , click on insert media , we have this image over here .
Now if you see this style is quite different , when you hover this , the image shifts towards right and we have the text everything over here but here this style is quite different .
OK ?
So let's change this .
OK ?
So 1st , 1st thing that we have to do , we have to change the effect .
So select and make it effect two .
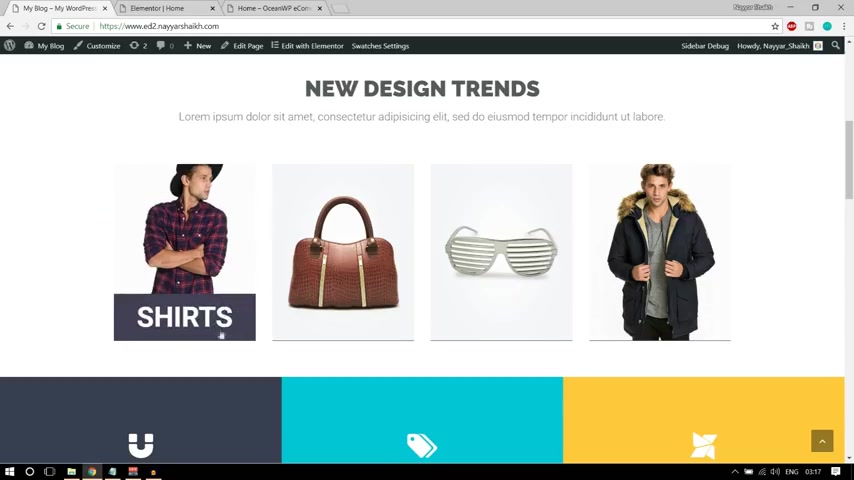
Now , as you can see very much similar , but still we have to do some more changes .
OK ?
Now when you have this , nothing happens to the image but we want the image to zoom in and we want this shirt to come and this color is quite different .
OK ?
So quite similar .
But let's do everything step by step .
Now , however , effect select zoom in so that whenever we go how this image it zooms in , OK .
Better , this looks better then height .
OK .
Fine .
We can you can change , you can have a custom height if you want , but I think default height is looking good .
So no need to change anything .
Now , content , I don't want to , I want to add only title but no subtitles .
So this is under subtitle , I'll delete everything from here and let's see where we have the title .
We have the title over here which says premium banner instead of premium banner .
I want it to say shirts .
Now , let's see .
Now , as you can see when I how about this , we have these shirts and we have this thing , OK ?
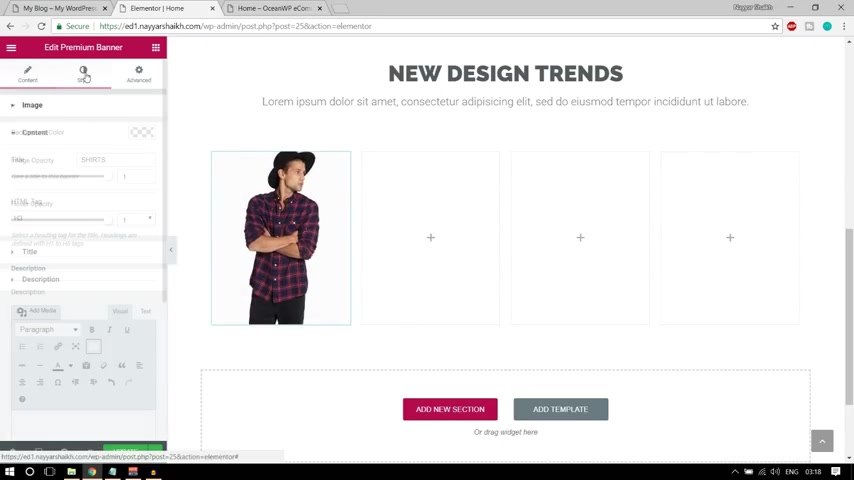
Now let's design it in a better way .
So go to style first , let's change the background color to this dark gray color .
OK ?
Not this background color , I guess .
OK .
It was image Dragra color , not this one .
OK ?
Go to title now select the title color and here as you can see the title color is white .
So select white , then we have title background color , select this and select the dark gray color .
OK ?
Looking better .
We just have to change the typography .
So go to typography and let's increase this size to maybe 50 pixels .
OK ?
Looking better .
Now , if you see over here , the gap at top and bottom is quite more .
And here we have a decent amount of gap and I think it is not that great .
It is some this kind of color .
Let me select this .
Yeah , this kind of color .
OK ?
So you can select any type of color .
It's all up to you .
OK ?
Let's select some darker version .

Yeah , this is looking better .
Now let's decrease the size at top and bottom .
So what I can do is I can again go to a typography and here you have something called line height .
Now let's make it 0.7 .
OK ?
Now this is looking perfect .
OK ?
Really good .
Now let's click on update and similarly , we can create all these four sections .
So what I'll do is I'll copy this four times 1234 and I'll delete these blank columns from here .
OK ?
Now , what I have to do is simply have to do two simple things .
Click on over here , change the image , the second image is this bag so change the image , put this bag image , OK , insert media and change the title just two things .
OK ?
Simple .
OK .
Similarly you can do for all these columns .
Now click on update .
Let's come over here .
Let's see the changes .
OK .
Everything is looking so well , so nice .
OK .
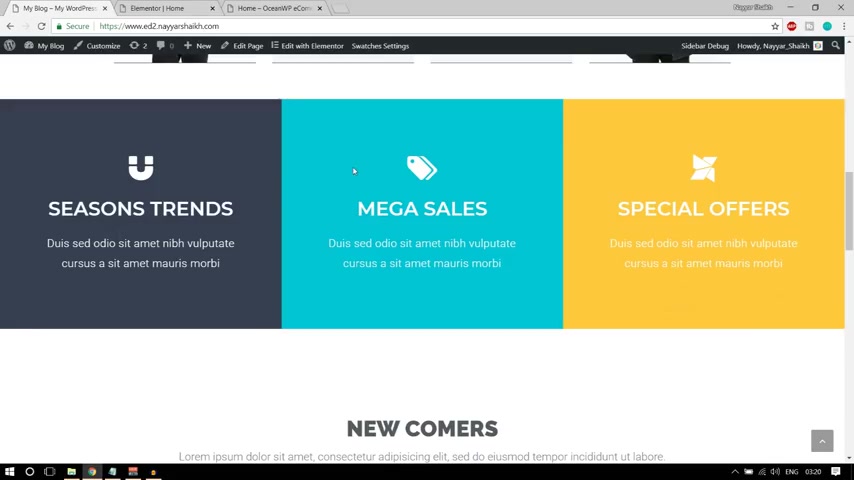
So after this we have the third section and this is also a very , very beautiful section .
I really like this one .
Let's see how we can do that , how we can create this section .
So come over here , OK .
So first come over here , let's click on this icon and let's add three different columns over here .
OK ?
So we have 12 , let me add one more .
OK ?
So 11 to 3 different columns fine .
Now what we have to do , we have to make this thing of a full width .
OK ?
Because we want the corners to be touching everywhere .
OK ?
Before that , if you want , you can do one thing .
Let's change the background color of all the columns .
OK ?
So first let's now let me also teach you a very simple and very useful way .
I would say whenever you want to know the background color of some website , what you can do , you can have this , you can right click over here and select inspect .
OK ?
Let's see what happens when you do .
So you can see the background color over here .
OK ?
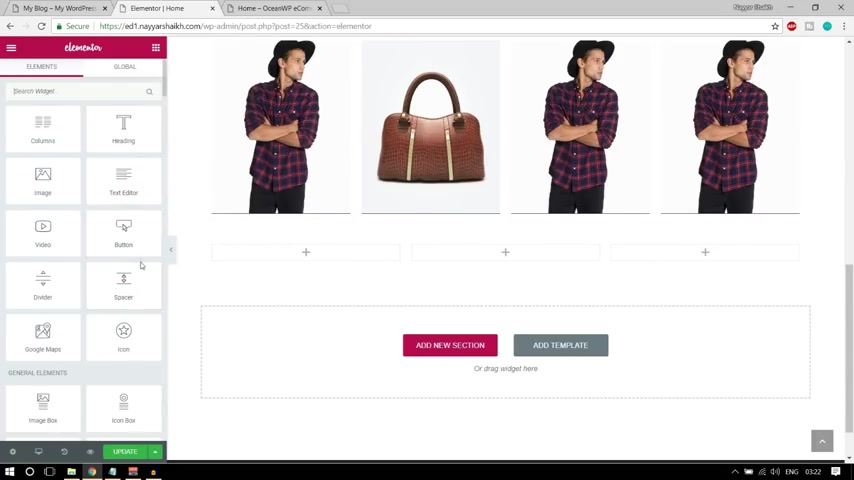
Now simply copy this background color because we will need this .
OK ?
So the first thing that we have to do , we have to add this I can thing in the OK , in this column .
So what you can do , we can search for something called I can box , I guess .
Uh Here it is I can box bring this under column one .
OK .
Here it is .
The first thing is that we have a different icon and the text and everything is different .
So I can is magnet .
So let's click on over here and choose the icon instead of this .
Let's search for magnet .
Here we have OK .
We have the magnet icon and here the title is Season Trends .
So copy this change the title from here .
The default title is this is the heading , change it to Season trends and this is the subtitle or the description , whatever you call it .
OK ?
Bring it over here .
Make sure everything is center aligned .
Now , let's design everything go to style .
OK ?
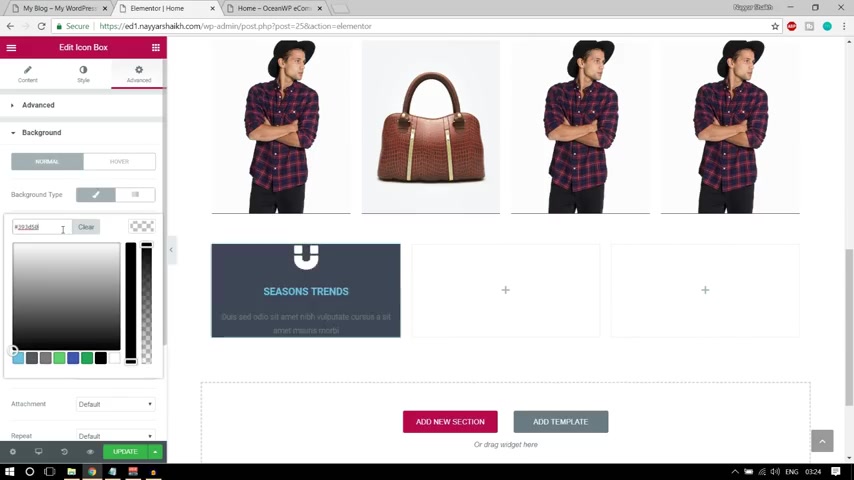
So first thing that we have to do first option is I can relate it so I can color is white , everything is white .
So let's make it everything white .
So let's change the I can color to white .
Now , obviously , when we do so everything disappears .
So we don't want that .
So we want something at the at the background background .
OK ?
So copy this color from here .
Select this thing , go to advance and go to background color , select this option color based in the color code .
OK ?
So we have this color at the background .
Now we can play with it .
OK ?
Now again , come to style and if you want to increase the size of the I can obviously you can do so you can increase it from here .
OK ?
It's all up to you .
OK ?
If you want to make it default , you can simply delete this number and it will come back to default .
I think this default size is looking good .
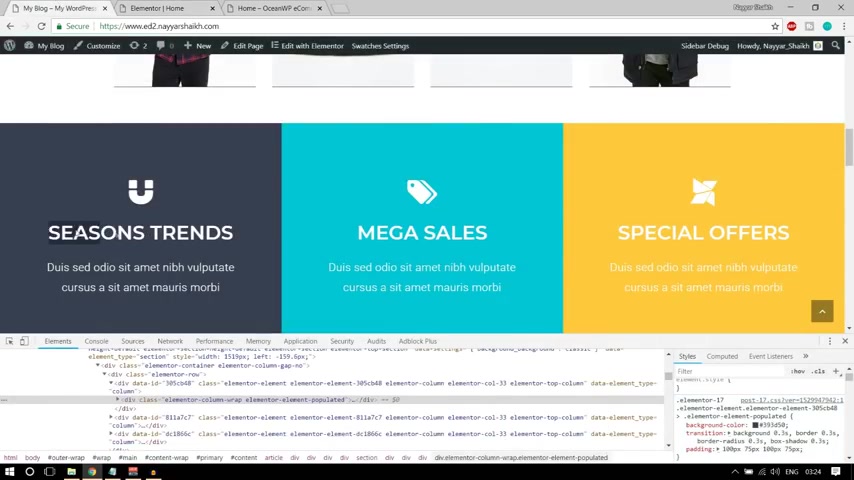
Now go to content and let's change the content of style , the font , style , the size , the color and everything .
So first thing is title .
So the title for title , I think I have selected a Monet font .
Let me show you .
OK .
First let's select the color .
Let's make it white beautiful , then select the typography and search for Monet Monts er ret select this font looking beautiful and you can select , I think 40 45 would be better .
You can select 40 pixels .
I've selected 40 you can select 45 as well .
I think both will be looking better .
OK ?
So this is our title .
After that we have subtitle or the description .
We have the description option here again , select this , make it white , OK ?
White color , select the typography .
And here let us select Roboto and height .
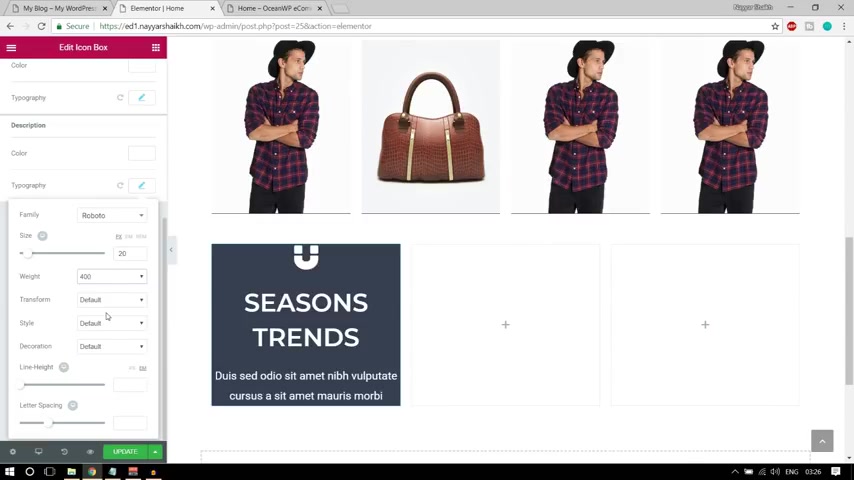
I think maybe 30 would look better .
30 let's decrease the weight to 400 or maybe 200 I think or maybe let me do one thing .
Let me decrease the size of the font to 2 20 the weight to 400 .
Yeah , this is looking better now and uh ok , the rest of everything is looking better .
Now , let's add if you see over here the everything is touching the corners .
Ok , you will see the the icon is touching the corners , everything is touching the corner .
So what I want is I want gap at all the sides .
So I'll go to advance select the padding at top .
I want 100 pixels padding at right hand side , I want 75 at bottom again , 100 pixels at left 75 .
OK ?
So 175 175 and now this is looking bad , but we'll fix this , don't worry .
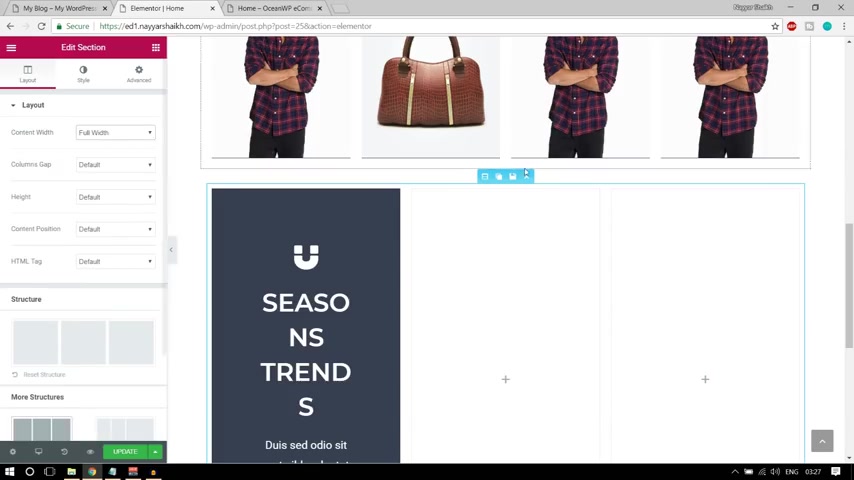
OK ?
So the first thing that we have to do , we have to make everything stretch so that you know , it stretches and it applies more space .
So I'll select this thing and I'll select full width from here .
OK ?
Then I'll select the main column which is the main section .
I'll stretch it like this .
And instead of box , I'll select full width .
OK ?
Let me OK .
Now , as you can see , this is how it is looking .
Also , if you see first , let's see how it looks .
OK ?
So this is looking better , but I still see some gap at left hand side and I'll think I will see gap between all the columns .
So we don't , we just don't want any gap so very easy .
What again we can do is we can again , come over here , click on this blue section and you have this column gap .
So let's make it no gap .
Now select the top blue section .
OK ?
And again , column back gap make it no gap .
Now let's bring it over here .
Now it is looking perfect .
OK ?
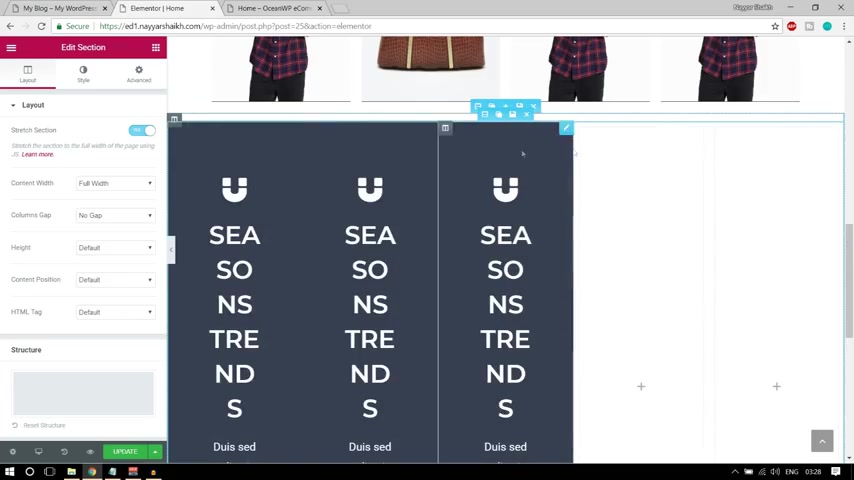
Now , once we are done with one column , it is very easy to do with other columns .
So we can simply copy this column three times and we can delete these empty columns .
Now we have to do only a few things .
We have to click on the second column , change the icon , which is this here , we have tag , I can so select the tag , select the tag I can we have we change the text which is mega sales .
So let's change the text to mega sales .
OK ?
Here it is .
Then the text is a description is fine .
Now let's change the color .
So let's see what color here we have .
We have this color , copy this color code from here , good style or maybe advance I guess the advance background color change this color .
OK ?
Looking perfect .
OK .
So again , let's bring it over here .
OK .
OK .
We need because yeah , this is because this is coming in two lines .
This is coming in one line .
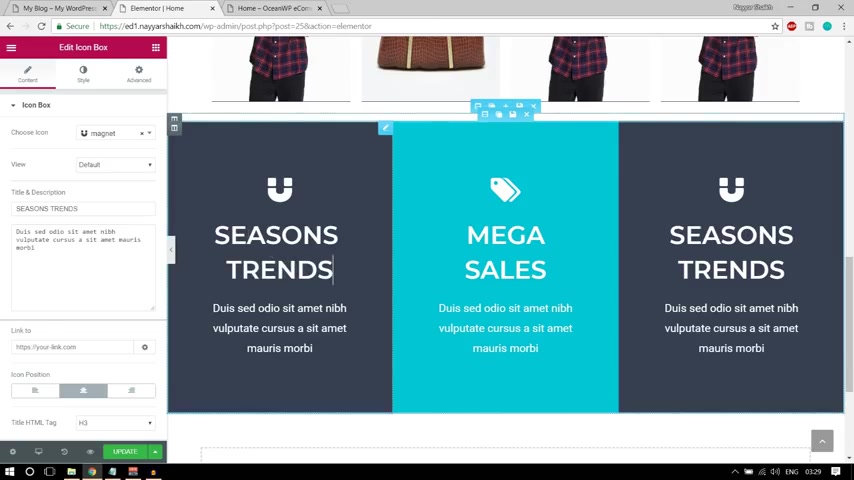
That's why we have some uh gap difference over here .
OK ?
But I think this will not apply over here .
If you want , you can uh come to this thing and you can delete this or you can change or instead of deleting this , you can simply go to style and change this size , decrease the size a little bit .
Instead of 45 let's make it 40 let's see .
OK .
Again , I think we have to decrease it a bit more .
So instead of 40 let's make it 35 again , let's bring it under .
OK ?
So 35 can be better if you want , you can have 35 .
OK ?
But I think 45 would be better .
It's just the thing that we because we are doing this in different .
Think that's why it is showing us like this .
OK ?
Now let us do one thing .
Let us similarly , you can change this thing also .
OK ?
First let me update this thing and let's see how it looks over here .
Let me come over here .
OK ?
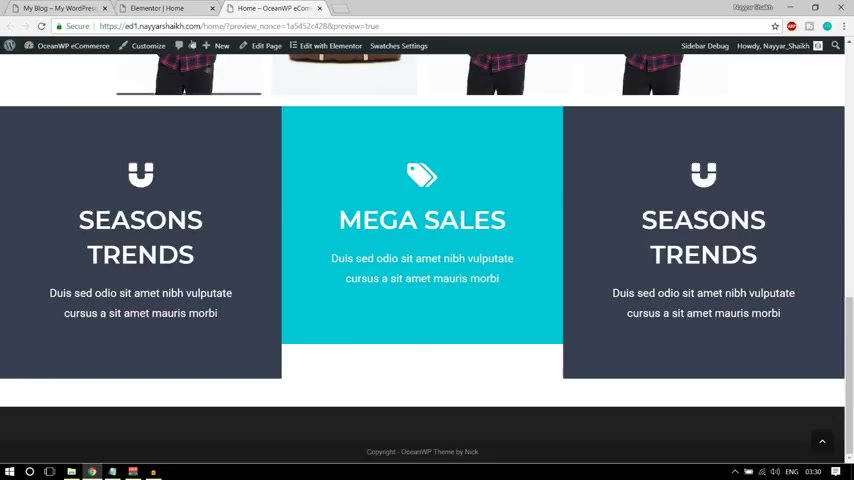
So this is how it is looking .
So make sure you have the same amount of lines so that it does not look bad .
OK ?
So if you want , you can add some more text over here super mega sale now because this will also be in two lines .
Let me show you , let us update it , come back over here as you can see because this thing is also in two lines .
OK ?
Everything is looking perfect .
So make sure if you have one line , make it one line .
If you have two lines , make everything two lines .
OK ?
That would be better .
Now you can select the 2nd , 3rd 1 .
Similarly , you can change everything accordingly .
OK ?
Now if you see , oh , here we need some gap at top .
OK ?
Between these two things , we need some gap and also OK , Below this thing , we don't need any gap , but at top between these things , we need some gap .
So what I'll do is there are many , in fact , there are many different ways of doing that .
So let me show you the simplest way we have an element called space .
So we can bring this element below these things .
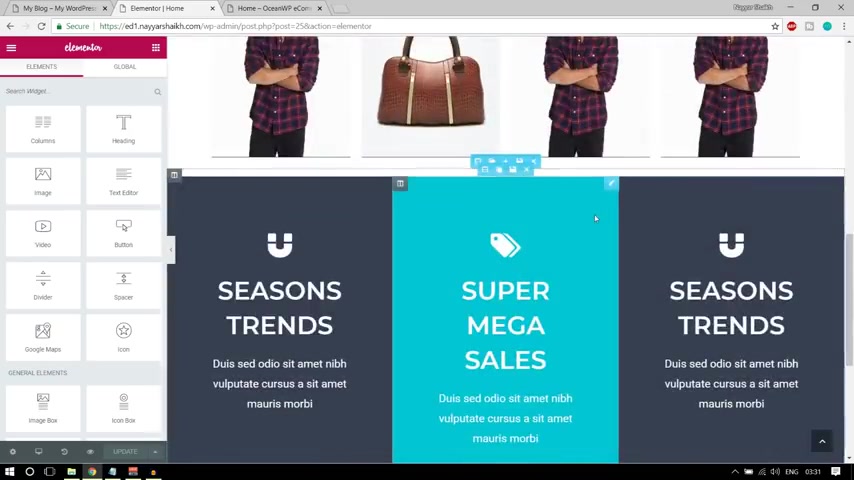
OK ?
Below this uh I think this is not the easiest way .
Let me do one thing .
Either we can add some gap at the bottom of this section or at the top of this section .
Both will do the work .
OK ?
So I'm adding at top of this section , I'm selecting this section , go to advance um select padding , top padding , maybe 100 .
OK ?
So we can see this gap over here .
Let's update this page , let us reload .
Let's see how it looks over here .
Let the page reload .
OK ?
It is loading , still loading .
OK ?
It is reloading .
Now let's scroll down .
Now , as you can see , we have a decent amount of gap over here and this is looking really amazing .
OK ?
Now , after this , we have a title subtitle .
So we have already created that .
So what we can do is instead of doing everything again and again , we'll simply click on add template , my template .
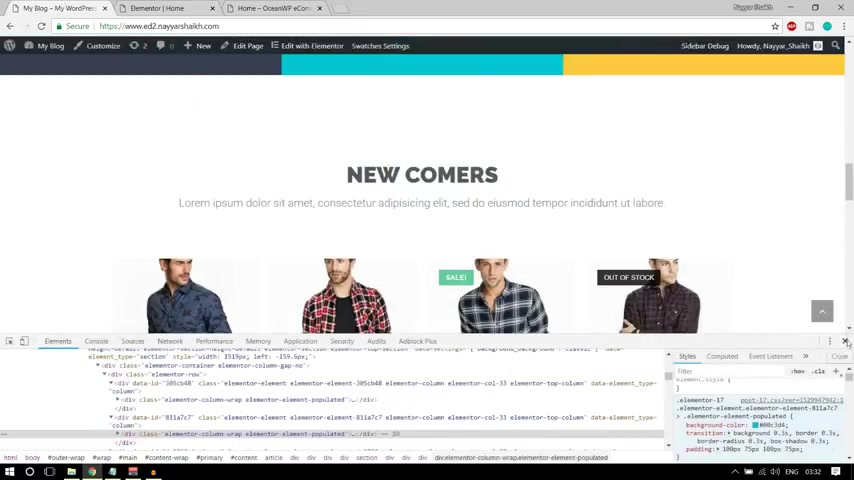
And here we have title which we have saved , click on insert , OK ?
We have the title subtitle .
We just have to change it .
OK .
Here it says newcomers .
So instead of this , let's type in newcomers , OK ?
And similarly , you can change this thing as well .
Now , we don't have to put all this gap and column padding every again and again .
OK ?
So it saves a lot of time .
And after that , we have the recent products showing up over here .
So let's see how we can add this thing .
So to add those products simply go back over here and let's search for under this section , OK ?
Under wordpress section .
If you see the bottom , you'll see V recent products .
Here it is V recent products , bring it below this thing .
OK ?
We have this thing because we have only one product .
It is showing only one product and here at the top it says new in , I want to delete that .
So if you want to delete that , go to title , just type in a space now , that will be gone .
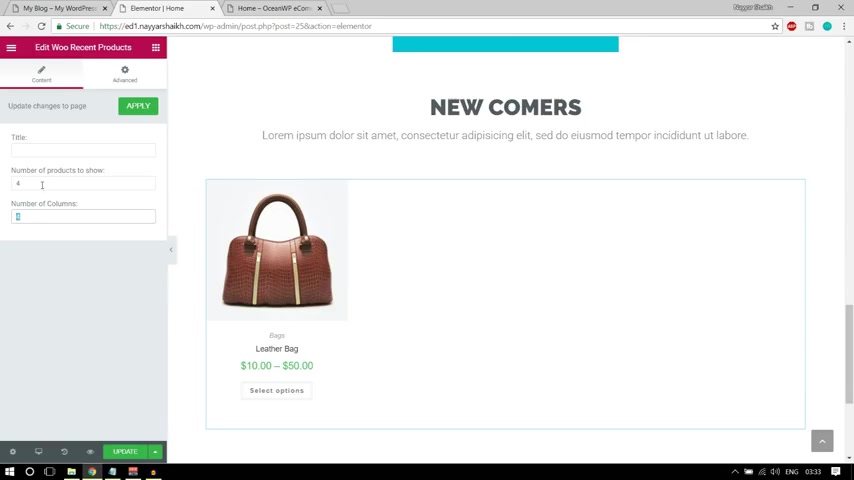
As I said , you , that is gone .
Now , if you want to show four products , you can see four .
If you want to show six products , you can type six or four whatever you want .
Ok .
So with this , we have this thing available over here .
Everything is looking awesome .
Now after that , we have this section , our brand section .
Ok .
So we can also add this section if you want .
First .
Let's click on update and let's see how it is looking over here .
Let's scroll down .
We have this product showing up over here .
Select options , all these options are given .
OK .
Then after that , let's add this section .
OK ?
Our brand section .
So let's come back over here .
Let's scroll down .
So to add that , click on this icon again and let's search for image carousel .
OK ?
Let's search for that .
I think it should be somewhere over here .
Here it is image carousel , bring it to here .
OK ?
So this is how it is looking again .
Not looking very good .
First , let's add all the images so that we can see .
We have so many different images right here .
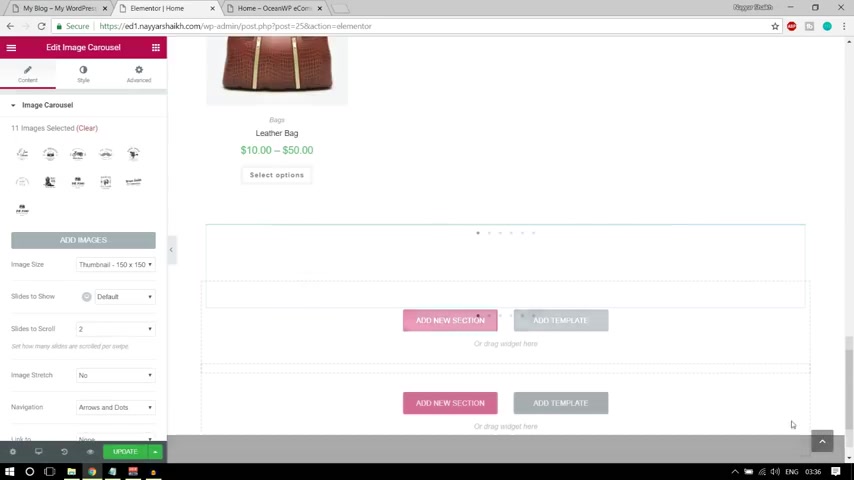
So let's click on add images , click on upload images and let's select all these images that we have .
So let me select all the images from here and one mode is left which is oi let's select everything , click on open .
So all the images are getting uploaded as you can see .
So make sure everything is selected .
Click on , create a new gallery .
OK ?
So we have this many images , click on insert gallery and as you can see , this has started showing now what we have to do , we have to select a few options over here slides to show how many slides to show .
So I'm selecting six over here .
And as you can see , we have six images showing .
Like here we are here .
Also we have six images then slides to scroll two which is fine image stretch no , which is fine .
We want to show arrows and navigations .
Yes , we want to show here we have arrows , we have the dots .
So we do want to show , show them additional options .
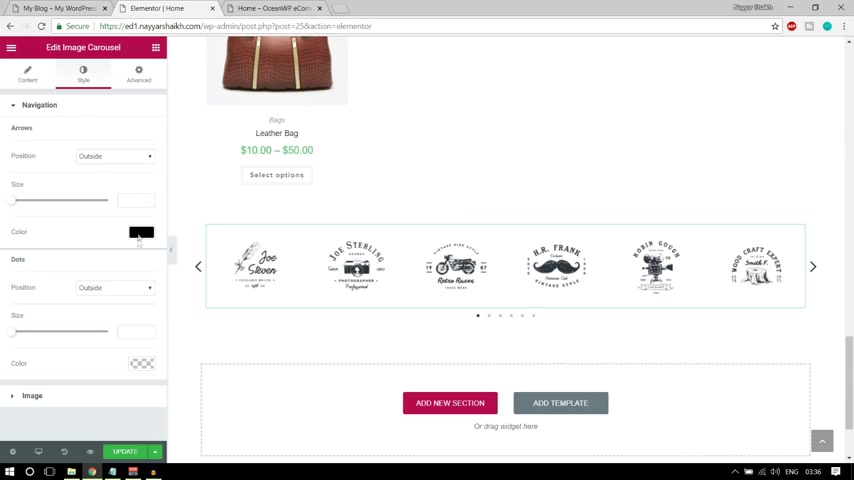
Uh You can see if you want to pause on how you can make it .
Yes or no or you can if you want or to play yes or no , it's , you can select all these things .
Now what style and uh let's color these things .
Arrow , let's change the arrow color to black .
OK .
Now , as you can see , you can see the arrow color .
So here and uh where , where do you want the arrows inside or outside ?
So I'm selecting outside and now as you can see it is showing outside this box now , dots and also dots color .
So black , which is fine .
You can also increase the size of dot and these arrows as you can see the size of dots and arrows are increasing .
OK .
This is looking better click on update .
But if you see over here , this one change , uh the background color of this one is quite different .
OK ?
And also we have some gap at top and bottom .
So let's try to change the background color of this row .
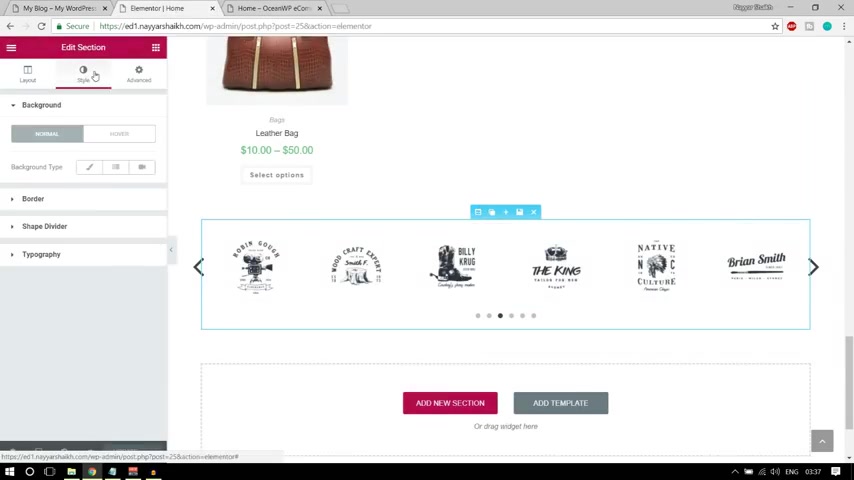
So come over here , select this row , go to style .
Now select these background colors , classic color and select this .
OK ?
This is quite dark , select some light gray color like this , OK ?
Like fine .
So it is E eight E eight E eight .
But again , we want everything .
I think this is more lighter .
So let's select more lighter .
OK ?
So this is F two F two F two at present .
OK ?
And we want to stretch this section .
So again , go to layout and stretch section .
Now let's add some gap at top and bottom .
So go to advance and let's add in top , maybe 100 and padding bottom .
Let's add 50 .
OK , looking better .
And also we have a beautiful and simple title over here at the top .
So again , come back over here .
Let's bring the heading at top over here .
Let's see our brands .
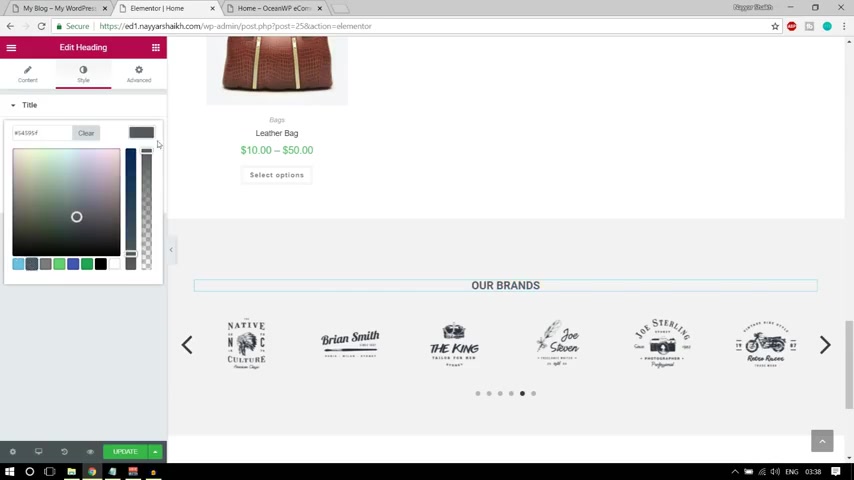
Let's make it center align good style .
Let's change the color to dark gray .
Come to typography .
Let's make it railway .
I think we have the uh title railway .
Make it railway , we 600 or maybe more 800 .
Yeah , fine .
Let's increase the size to thirties looking better .
Yeah , click on update .
So we have this section as well .
Now this is the last section now because we don't have any blocks or post created .
So we'll create now .
But before that , let's simply copy and paste this simple title that we have created .
OK ?
So we don't have to create the title again .
Simply click on add template , select this title , click on insert , let's copy and it's , it says new from blog .
So let's type in new from blog .
Fine .
OK .
Now , let's see how we can create different blocks .
It is really easy .
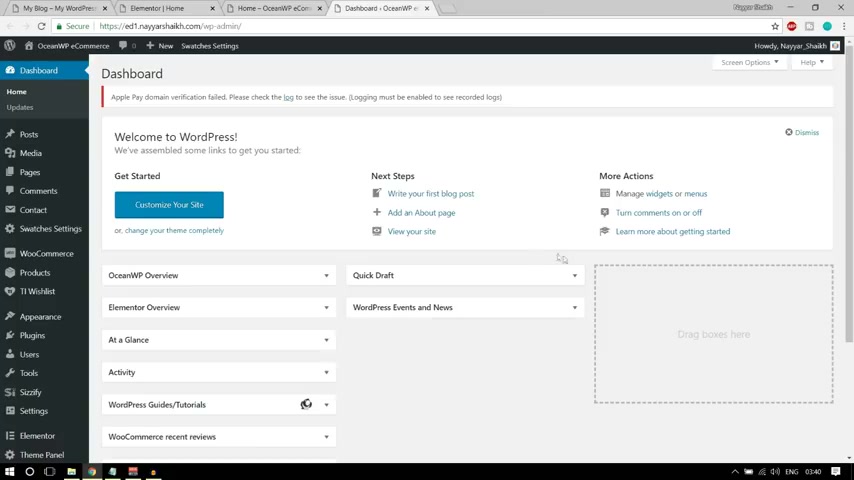
There's nothing to show over here .
But let me just show you .
OK ?
So first let's go to our dashboard .
We have already seen how to use that , but I'm just showing you .
OK ?
Now let me first open a blog how it looks .
So let's open this blog , organizing your workspace .
So we have a featured image , we have some text , simple text , whatever you want , you can put it over here .
This is the title .
OK ?
So if you want to add a blog , you simply have our blog post and click on adding you put in your title over here .
So your blog title will come over here .
OK ?
Your blog title will come over here and the content will come over here .
And again , we have already seen that you can change it , the color , the size link and all these things .
OK ?
And the category for this is different .
OK .
Suppose this blog is related to technology , you can type in technology .
Now , those categories that we created earlier , those those were product categories and these are different .
OK ?
These are post categories .
OK ?
And then at the bottom , you have to type , make a featured image , you can select any featured image .
So let's select this one , click on open set , visual image , OK ?
Click on publish .
And this is how easy it is to create a blog .
No Rocket Science .
Nothing .
OK .
So because we have created it now , we have to first refresh this and make sure you save everything , just update it .
And now we can refresh this .
Let's refresh this page .
Now let's scroll down and let's add this blog over here .
So uh scroll down and we have to add an element .
Let me show you under essential add-ons for element .
You'll see E A the first one E A post grid .
Bring it over here .
OK ?
Now you'll see all your recent post uh showing up over here .
So this is how it is done .
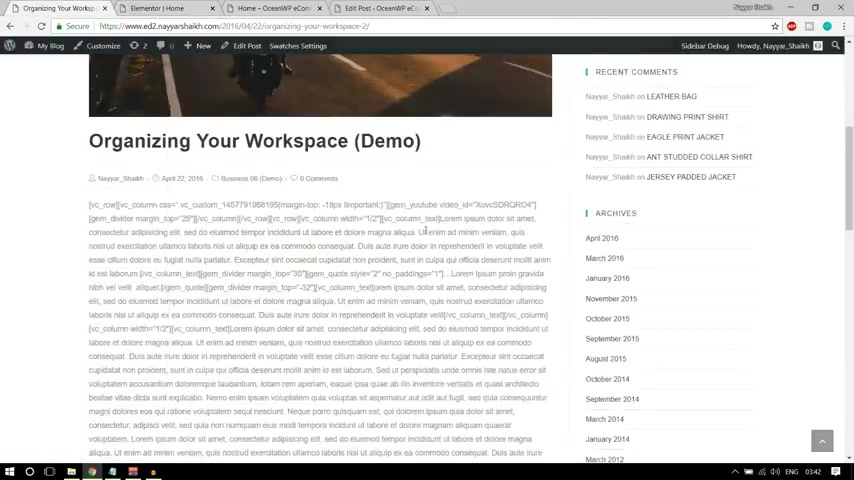
Click on update .
OK ?
Now let's click on this I button to preview the changes .
Let's scroll down .
OK ?
So we have this thing over here .
We can scroll using the mouse and we also have our blocks showing .
So this is how it is done .
OK , guys .
So we are done with this again .
Let's come back to this home page .
Let's scroll down and yeah , we are done .
The only thing that is left is foot and before you know , proceeding with the photo we have some more things to be done because if you see , oh , here , let me get rid of this .
Now , let's cancel this .
Let's go to our home page to our .
Now , if you see over here when you go to your website , this is the page that shows and we want this page to be showing .
Ok , this is the home page that we have created , but this home page is not set as the home page .
OK ?
So we'll have to set this page at the home page so that whenever someone comes to our website , they can see this page .
OK ?
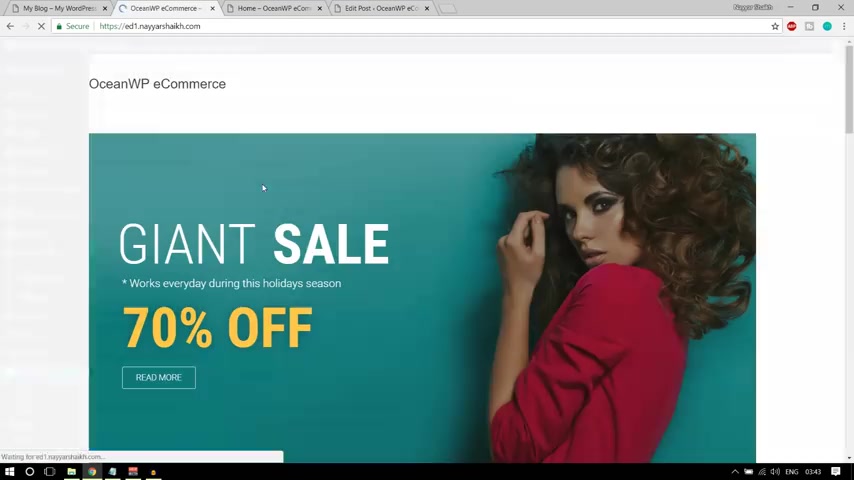
So we , we can do it easily .
It's very easy .
Go to your dashboard and under settings , power settings and click on reading and under reading .
Select this static page and on the home page , select home , click on save changes .
Now when you go to your website , you'll see that page .
OK ?
As you can see , we have this page now we have to get rid of this gap at the top .
So open this edit page in a new tab , OK ?
Scroll down , you'll see these margins or just disable this margin .
Click on update .
Come back over here .
Let's refresh it .
As you can see those gaps are now gone .
Now , we can create our header and we can style everything respectively .
Now , before that first , let's create a simple and beautiful photo .
We have four different sections and four different and important things are showing up over here .
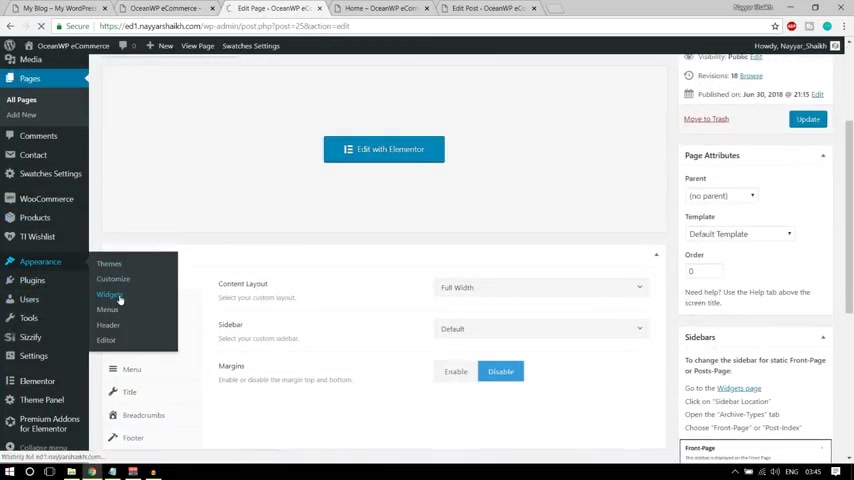
So let's add this very , very easy .
You simply have to drag and drop widgets and you don't have to do anything .
Ok .
So let's see how we can do that .
Ok .
So the first thing is this contact info .
So if you want to add anything in the foot , what you do is you go to your dashboard first and you have appearances and click on widgets .
Ok ?
Then you will come over here and what we have to do we have foot 1 ft or two filter , three footer four .
So under footer one , if you see under footer one , we have this contact info .
So there is a widget called contact info .
You'll see at the top .
Ok ?
Here it is contact info .
Simply select it , drag it and drop under footer one , ok ?
So drop under foot of one and change all the text you want .
For example , here it says title contact info here .
Also the title is contact info , which is fine .
Then after that , we have some text to here so we can change the text .
Let me go .
Here it is .
Yeah , let me bring it over here .
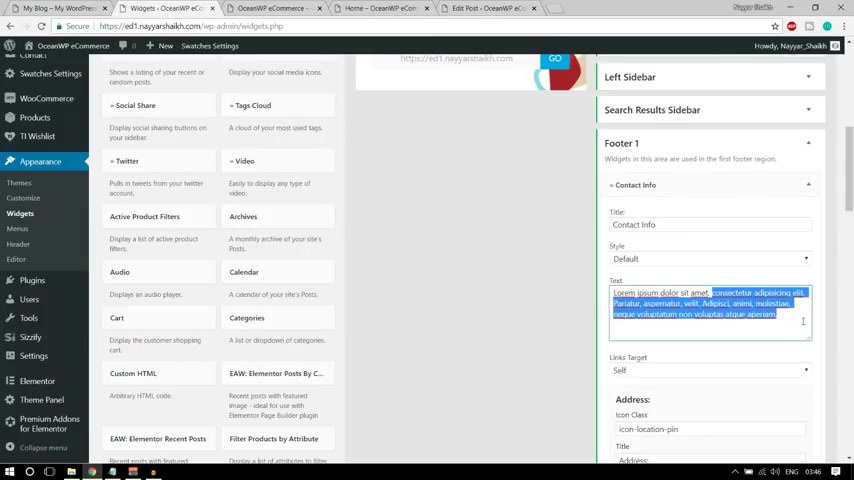
So we can change the text from here .
If you want .
Let me delete it , then you have to change everything .
So don't change the icon class , just change your address instead of this thing , just put in your own address instead of this phone number , put in your own phone number .
Ok .
Suppose if you don't want the phone number , simply delete everything from here .
OK .
Now , instead of this mobile number you put in your own mobile number .
If you don't want the fax , just delete everything from fax .
This is the email .
This is the website .
If you don't want the Skype , delete everything from Skype , Skype .
Click on save .
Let's uh minimize this .
Let's come over here .
Let's refresh it .
As you can see you have the contact .
We didn't do anything at all .
It was just simply copy and paste and we have this thing ready in front of us .
So this is that simple .

You simply use this widget which is contact info and change your contact info from your , you change your address , change your phone number , mobile number , email address and don't do anything else .
OK ?
Very , very easy .
Now , the second one is recent post again , don't have to do anything .
Just select the recent post .
One here it is recent post , select it , click on and select the photo to click on add widget .
Now , here you have recent post .
The title here says recent post , which is fine and we have three different posts showing so you can select three and click on save .
Now again , come over here , let's refresh it .
We have the title which says Recent Post and we have the post now obviously , because we have only one post , it is showing only one .
OK .
Then after that , we have a few links .
Now this is also very easy .
This is simply custom links .
OK ?
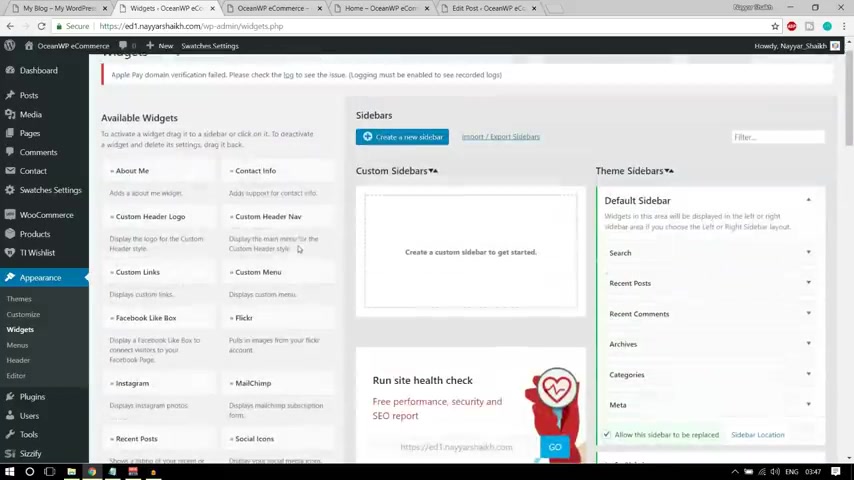
So again , same thing at the top , you'll see something called custom links here it is select this select photo , three click on add widget and whatever links you want .
For example , at the top , the first link title is stored .
And under that , we have four links , 1234 women men brands and so on .
So what I'll do is we'll change the title to ST and we'll change the link to fold because we have four link , then we'll put in the link you RL .
So I'm just typing in this hashtag and the text here is women .
So just type in women .
OK , I'm sorry .
OK .
Similarly URL two and text men , URL three , text brand A to Zur four and text .
Our latest fashion arrivals .
Click on save , come over here .
Let's refresh it .
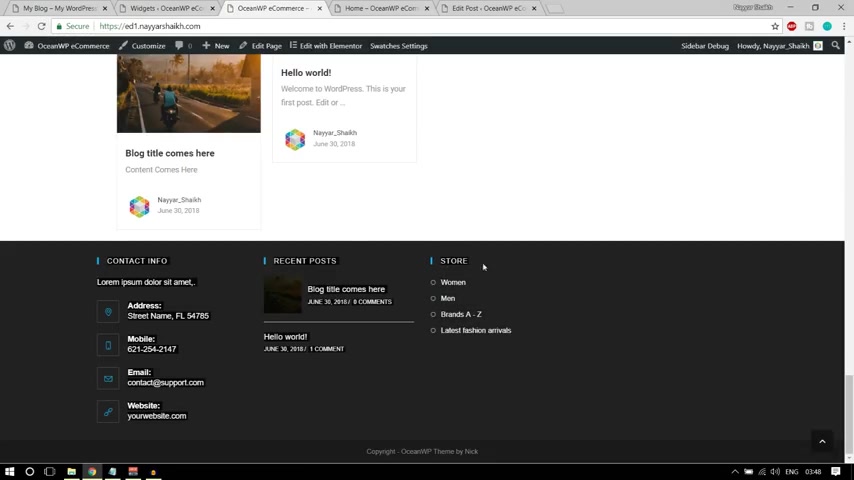
And as you can see , the top portion is showing we have store four links and after that , we have some more links .
OK ?
So the title is useful links and we have four more links .
So you can see do and repeat the same process .
Simply select this thing , custom links again , select the photo three , click on .
OK ?
Change the title to useful links .
OK ?
Let me type in useful links over here .
Fine .
Now here we have again , four columns .
So we have four things over here .
I think I just , yeah , this is , this was the one I'm sorry .
Yeah .
So again , change this to four , select the URL whatever you want and make all these things .
OK ?
So it says about the company , select the URL , make about and type in the title as text as about the company .
OK ?
Financing .
You can repeat the process .
Click on save .
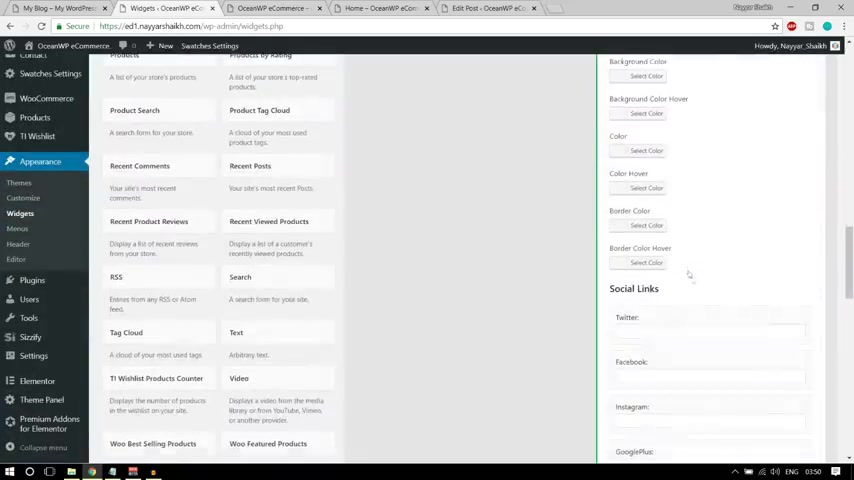
Let's come over here , let's refresh it .
Now , you can see everything is showing up away .
So this is that easy .
Now , the last thing is this follow us thing .
So again , we'll see something like this .
I think it is called .
Let me see .
I think it is social .
I can select social , I can select photo , click on add widget .
And if you want , you can just simply change the title and don't do anything else .
Just put in your Twitter , URL , whatever your Twitter , URL is your Facebook , URL , whatever it is .
So I'm putting this hashtag everywhere .
OK ?
So I don't have time to put all my URL over here .
So I'm just typing this hashtag OK ?
Do whatever you want .
OK ?
So type everything .
Click on save .
Come over here , let's refresh it and you can see all your social links showing up over here .
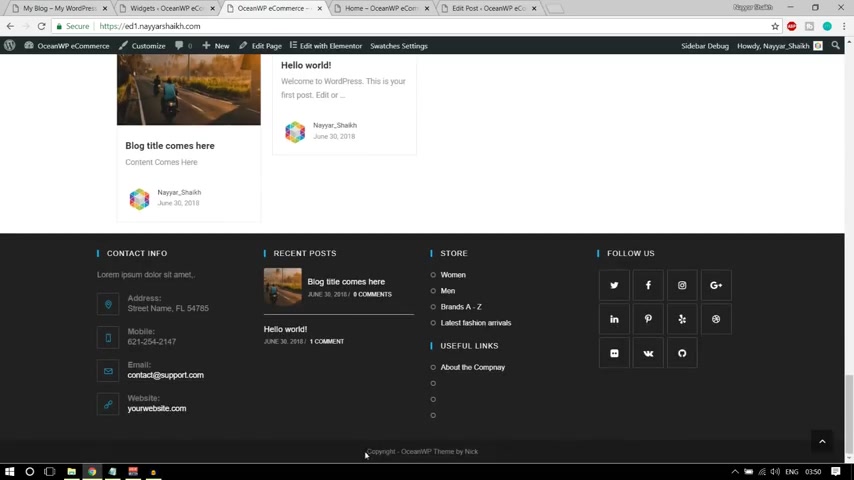
So this is how you do your photo and this bottom footer is left which says copyright , whatever it is .
Ocean WP you , you have to change this ocean WP theme bic and you can put in your own name over here .
So it is also very easy .
What you can do , you can click on , customize at the top .
OK ?
Now , from here you'll see an option called footer bottom .
Click on this and here you have the copyright text and everything .
So let's change everything .
Let's me drag it to here .
Now instead of ocean WP I want blog dude .
So I'll type in B block two and instead of theme by Nick , I'll type in theme by or website by Naka .
I can change this theme to website .
So I'll type website by a click on publish .
You can see all the changes showing up over here .
OK ?
So we can just x this out so that we can see the changes .
Let's drag it over here at the bottom .
Copyright 2018 block to website by .
So we have it over here .
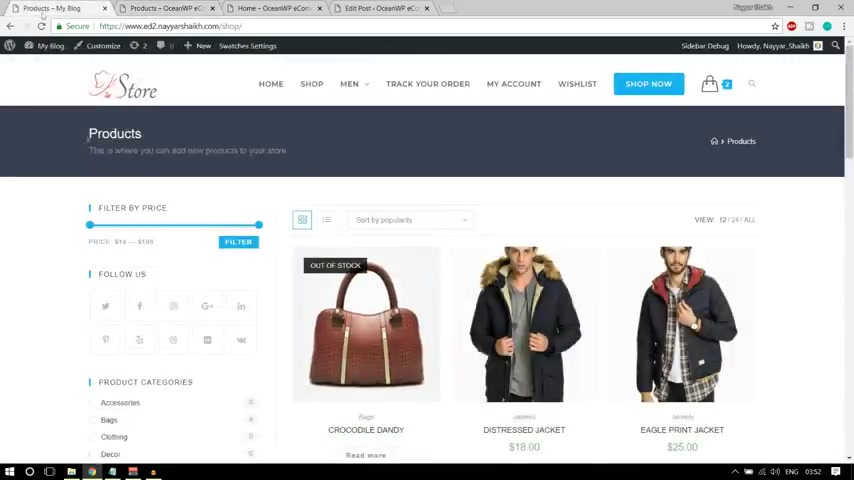
OK ?
Now , if you see there are a few things that are left .
Now , the first thing is that a shop page is automatically created so you can type in your website , name slash shop .
Let's see what happens .
You can see shop page is automatically created , you have one page .
But if you see this shop page , let me show you if you see this shop page , there are so many things different .
Uh We have one thing same uh which is let me get rid of this widget page first , which is this page .
Is showing that we have this page .
We have these products over here .
But the left hand side , we have different options .
We have filter by price , we have followers , we have categories and so on .
We have top rated products .
So let's put all these widgets in our shop page .
OK ?
So let's see how we can do that again .
How over here .
OK .
So you can have over here , you have the widgets open this link in a new tab .
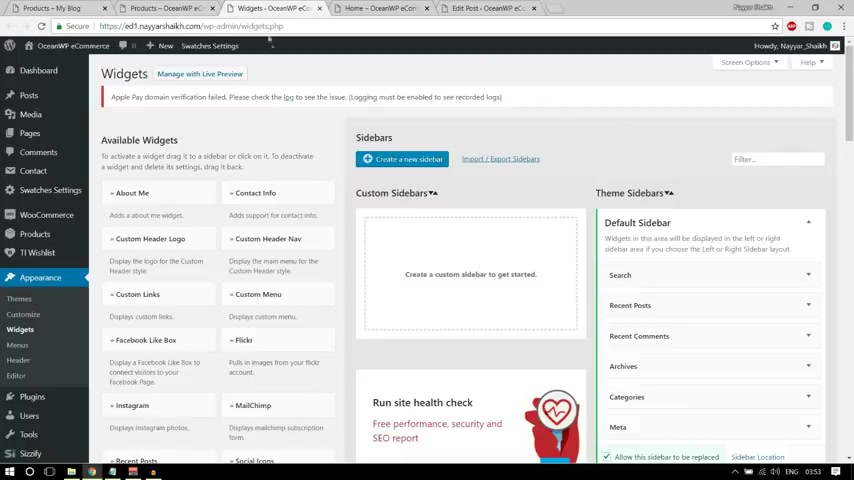
So we have this , use the same widgets , OK ?
For this thing as well .
So first option is filter by price .
So come over here under your widgets and you have now you don't have to bring underfoot or 1 ft or two .
You have to bring everything under woocommerce sidebar .
OK ?
So first let's search for filter product by price .
Here it is filter product by price select this and from here select V commerce sidebar , click on add visit .
OK ?
Don't have to do anything if you want , you can change the title .
Now , let's come over here , let's refresh it .
Now , as you can see , we have the filter by price .
After that , we have the followers icon and this is the same that we have used earlier .
So you can go at the top and we can select this one which is social .
I can select this , make sure book commerce side where is selected , click on add widget .
And again , let me add this OK ?
Very good .
Google saves some data .
So I think this is for me .
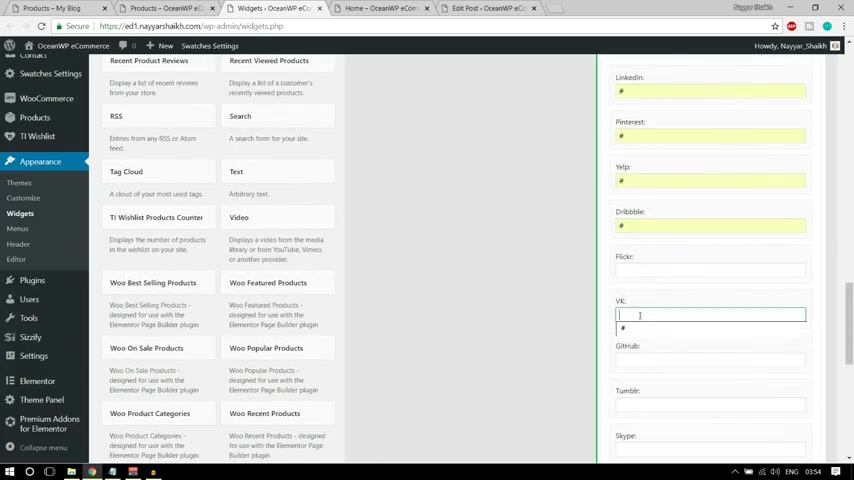
Very good so that I don't have to waste my time again .
OK ?
So you know what uh this happens , OK ?
This is how it happens .
You simply put in your links , click on save and let's minimize this .
Let's come over here , let's refresh it .
Now , we also have our social links .
Then after that , we have product categories .
Let's see how we can do that .
Come to widgets .
Now , let's scroll down and I think we'll have to here .
It is product categories .
Bring this under W comma sidebar .
And do you want to show the hierarchy ?
No , but we don't do want to show the product count because if you see here , it says zero product for product and so on .
So we want to show the product count .
Let's click on save .
Let's come over here .
Let's refresh it .
Now , as you can see , we can see the bags , one product and categorize zero product .
OK ?
Then after that , we have top rated products again .
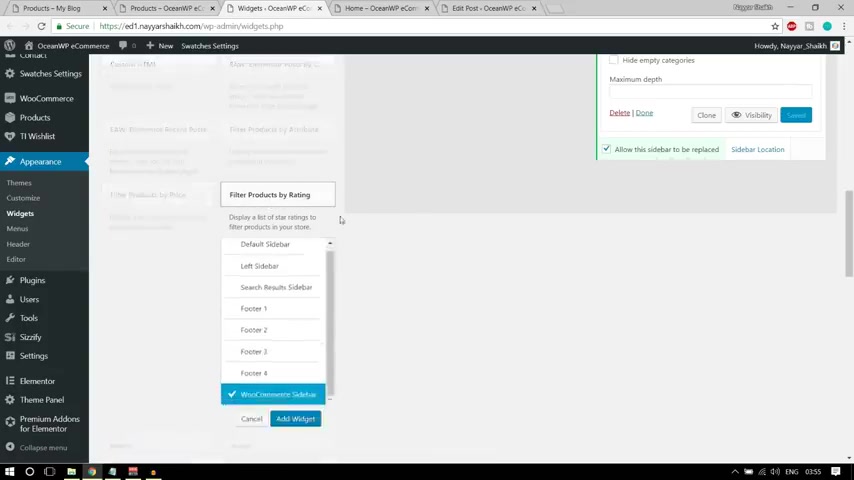
Come over here and let's search for filter product by rating , select this thing , add widget and don't do anything .
Just add a widget , refresh it .
Everything will be done .
OK ?
Because we , we don't have any rating .
Let's give it a rating .
OK ?
I think that was not the plug in , by the way , let OK , not the widget .
Let me do one thing .
Let you .
Ok .
Good product .
Click on submit .
Ok .
It is not .
Ok .
So that was not the right widget .
Actually let us go back to the shop page .
Ok , because it is not showing , ok .
It is just showing average reading .
I think there was some different plug .
Let me first delete it , filter by reading and let's minimize everything .
First .
I think it was product by , I think it was products by rating .
So let's search .
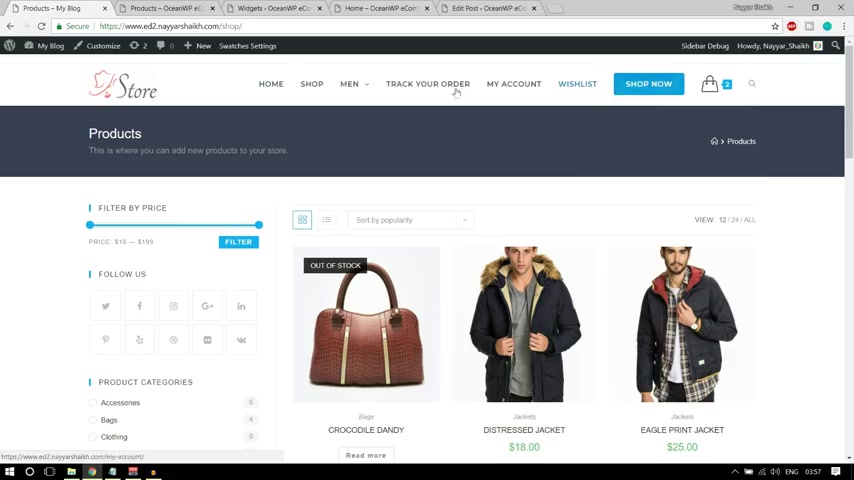
Yeah , here it is products for reading , select this one , click on add widget number of products to show and let's click on refresh .
Yeah , this is the one products by rating .
OK ?
So we have all the side bars uh similarly to the shop page in our demo website .
Now let's create this menu .
OK ?
Let's see how we can create this menu .
OK ?
We have this beautiful menu over here and we also have this uh mega menu .
So let's see how we can do and let's see how we can change this logo and everything .
OK ?
So again , very easy .
Come back to your dashboard , have our appearances and under appearances .
You'll see menus , click on menus now to create a new menu .
First , we'll have to name , give it a new name .
So I'm giving , giving it a name of main menu .
Now click on create menu .
OK ?
So whenever you are creating a main menu , make sure you select this main from here and click on save .
OK ?

So this is the first step that we have to do right now .
We , we have to select everything that we want to show under the main menu .
So I want to show all these things under my main menu .
OK ?
So I want to show everything now , click on save changes .
Let's come over here , let's refresh it .
Now , as you can see everything is shown over here .
Now , suppose I want to make this wish list into a button so very easy .
I can simply expand this wish list and uh OK , if you don't see this option , OK .
Here we have a CS S class option .
Just type in button BT N .
OK .
BT N if you don't see that this CS S class is option over here .
Go at the top under screen options and make sure CS S classes is ticked mark .
OK , then whatever you want to make button , go open this type in BT N , click on save changes .
Come back over here .
Let's refresh it now , as you can see which list has turned into a button .
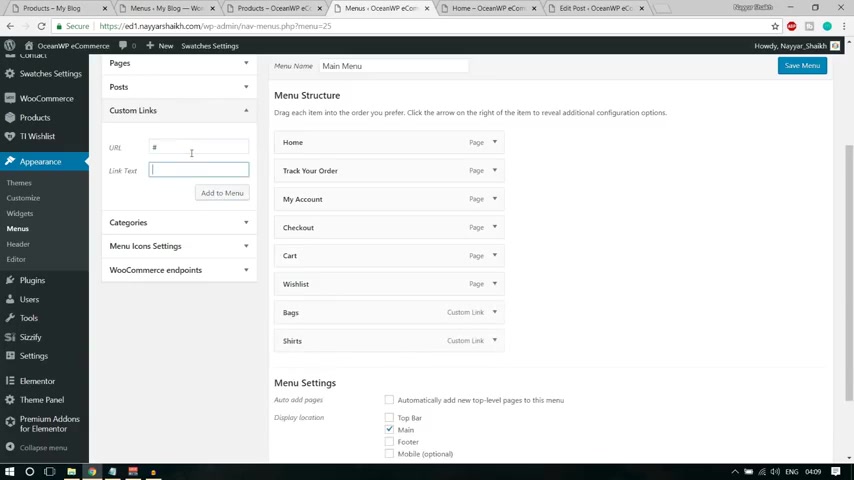
Now , let me show you how you can create a mega menu .
Now .
Now , suppose I want to turn this my account into a mega menu .
So suppose uh what I'll do is I'll add a custom link and I'll add URL S hashtag and let's add three columns .
OK ?
So I'm adding column one , OK ?
Or maybe in column one , let's add bags in column two , let's add shirts and in column three , let me add an image .
Ok .
So I have three things over here .
Now , what I'll do is I'll bring everything under my account or whatever I want to make as a mega menu and I'll select my account and I'll select this thing enable mega menu and number of columns I want .
So I want three columns over here .
Ok .
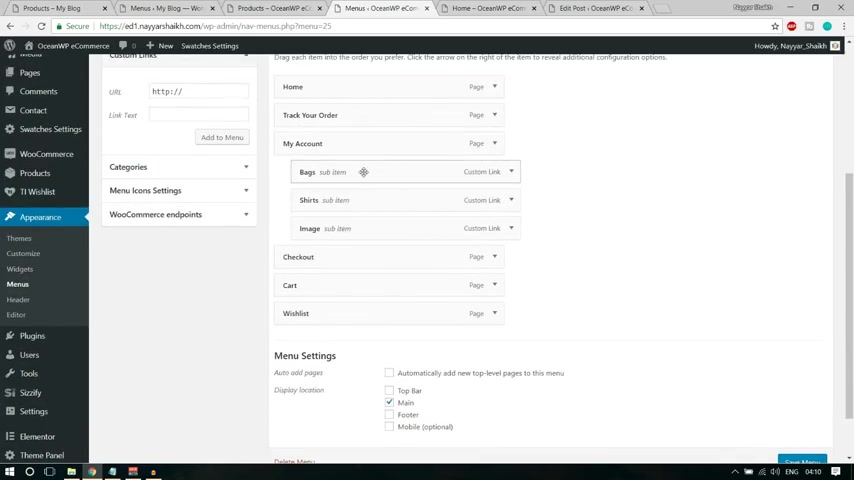
So I have selected three columns now in uh in bag , one suppose in under bag , suppose I want few options like leather bag .
OK ?
Oh , ok .
So I had a leather bag .
I have pu bag .
OK ?
And so on .
Now , obviously , I'm putting this URL as hashtag you have to put in the URL of the category leatherback category and so on .
So if you want , you can see your categories thing .
For example , we have leatherback things so you can copy this , copy , link , your link address from here and paste it over .
You obviously don't put hashtag like I'm doing , I'm creating a demo website .
You are creating a original real website .
OK ?
So let's add some more .
So more bags .
OK ?
Etcetera .
Fine .
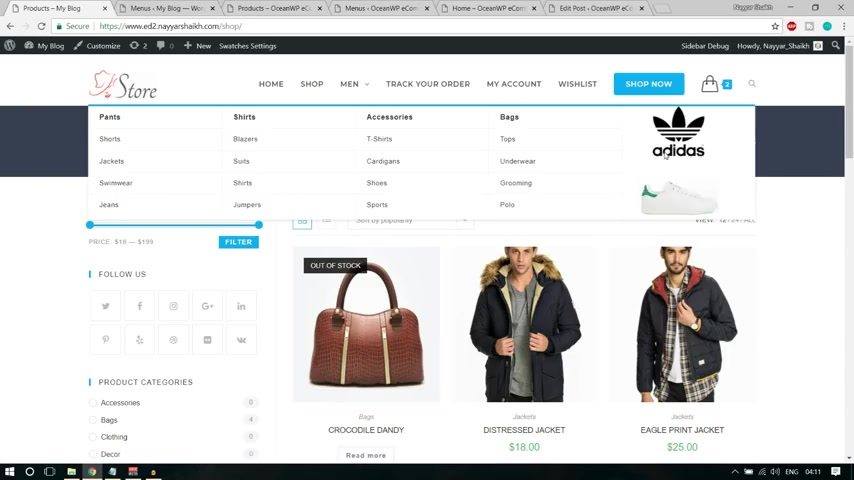
Let's bring everything under bags .
OK ?
All right .
Now let me refresh our save menu .
Let's see what happens .
Now , let's come over here , let's refresh it .
Now , if you see now as you can see , this is how it happens .
OK ?
We have everything under these bags .
We have all the menus that this is how mega menu is created .
Now , if you see in the demo website , we also have an image in the mega menu .
In fact , you can add an image video whatever you want in the mega menu .
Now doing that is also very easy .
First , we'll have to create a new widget area for that .
Now , that is also a very easy thing .
OK ?
Under appearances you will see widgets open that in a new tab .
OK ?
Now let's create a new widget area .
So here is the option create new widget sidebar or new sidebar .
Let's name it menu image , you can name it anything you want .
OK ?
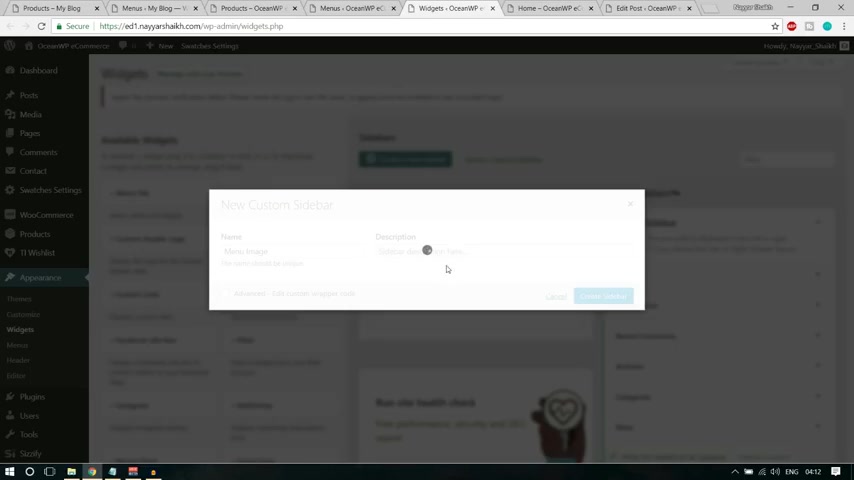
So I'm naming it menu image , click on create sidebar , it will take some time and if it takes a lot of time and still you don't , it does not load , you can simply refresh this page .
OK ?
All right .
So we have this menu with sidebar over here menu image .
Now I want to add an image over here in this under this sidebar .
So what I'll do , I'll search for image widget .
Here it is select this image widget and make sure menu image is selected .
Click on add widget , let's add the image and let me upload the file .
Here it is select this click on open advocate safe .
Now come back to the menu section , click on refresh .
OK ?
Now go under the image section because here we have to add the image go under the image section , select , select a widget area and select menu image , OK ?
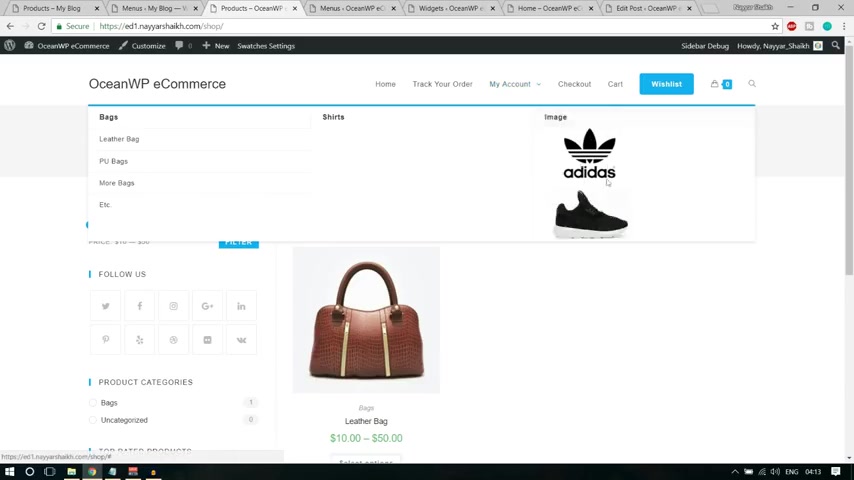
The widget area that we have created .
Click on save menu come over here .
Let's refresh it .
Now , let's see as you can see under image , we have this thing .
Now if you want to hide this title because we have the image , we don't need the title image .
There is another CS S code for that open this image thing and in this CS S thing just type in hide heading , OK ?
Hide hyphen heading .
I think that is what it is .
Let's see .
Save menu come over here , let's refresh it .
However , it now as you can see the heading is gone .
So this is how our menu uh is created .
Now , let's see how we can put this thing .
Uh I can how to add an icon .
So click on customize .
Now from here , you'll see me options .
You have this header , click on header , then logo , then select the logo .
If you want , you can use this logo which you have downloaded here .
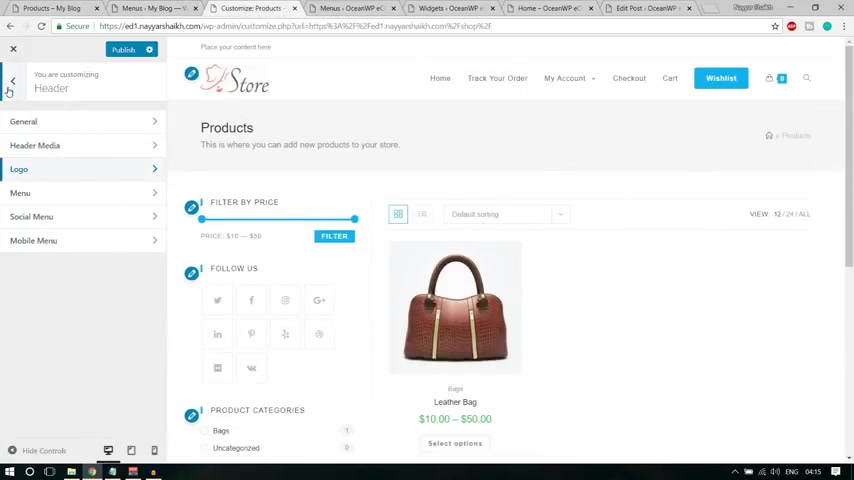
It is logo one , select this , click on open .
Let's select this .
You can just keep cropping if you want .
Now this thing will change into a lobo , OK ?
As you can see now let's change if you see .
Oh here the menu is quite beautiful .
Everything is upper case , OK ?
The font is different , quite big .
So if you want to change this , what you can do you can come back .
Oh , here again , come back and go to typography and select menu , main menu .
Select this thing .
Let's change the font to Mont set .
OK .
Select this thing .
Now , as you can see , font has changed now you can change the font style font size instead of 13 .
Let's make it 15 .
OK .
You can see quite bigger uh bigger than before .
You can make it 20 if you want .
OK ?
And after that uh font style or let's make everything upper case .
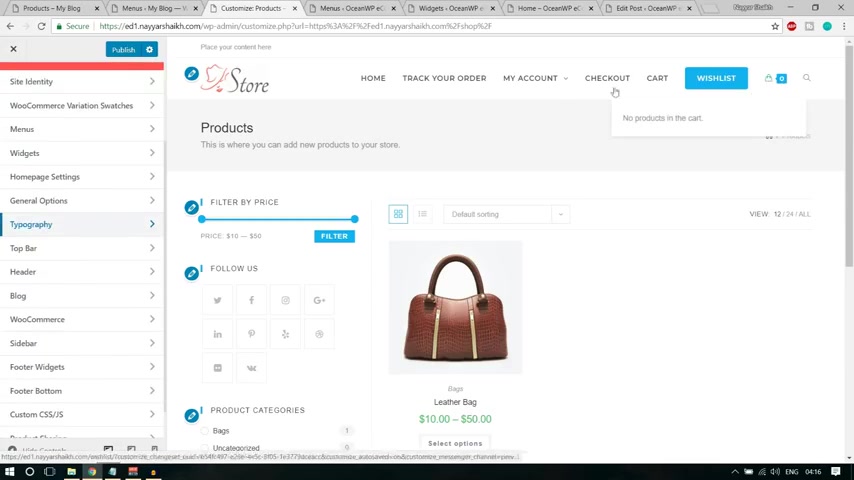
So let's select upper case and as you can see everything is upper case and let's make it a bolder .
So let's select semi bold .
OK ?
So this is how it is happening .
So this is how it is done .
You can select a different color and so on .
Then again , come back , let's increase the size of this car I and this is looking quite small .
So again , uh let me search for this thing .
I think it will be under header and the logo , header media .
Let's see header media not over here .
Let's see general options .
OK ?
I don't see that image uh that option right now .
I'm not finding it .
I don't know why , but I have changed that if you see over here uh the size of the card I can .
So it is possible , I'm just not able to find it that option over here , just do some here and there and you'll see that OK ?
It's really easy .
Now , let's move forward .
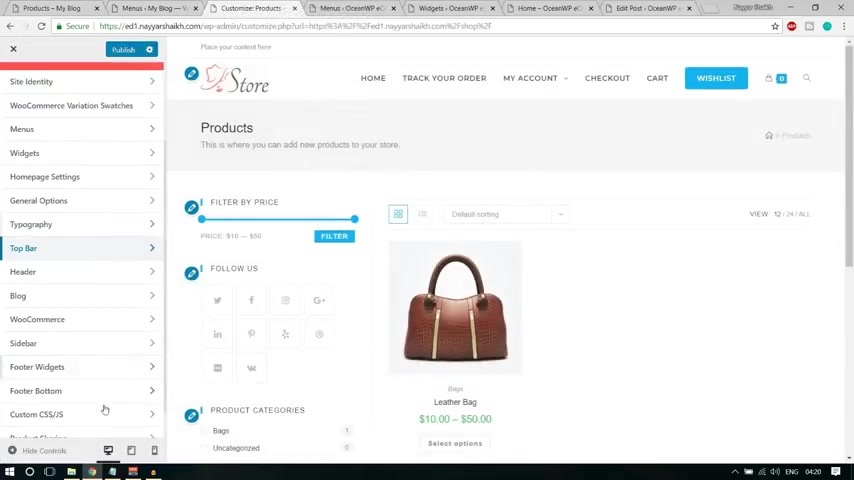
Let me explain you this .
If you want to , you can change the color and style of this bread crumb .
As you can see here , it is plain white and everything is like this .
You can change the color to this and you can change the text color and so on .
So let me show you very quickly how we can do that come over here .
So you have to go to general options first .
Here it is my general options .
Now go to page title .
Now from here , you can select , select everything if you want to change the background color .
If you , you can change it from here , as you can see , you can change any background color .
You can select it's all up to you .
If you want something darker , then obviously you'll have to change the color of the text to some lighter color .
So text color , select it , make it white .
OK ?
You can see everything is white .
Now we have a link over here so you can change the linker as well .
Let's see .
OK .
Position text color .
So let's change the text color to white again .
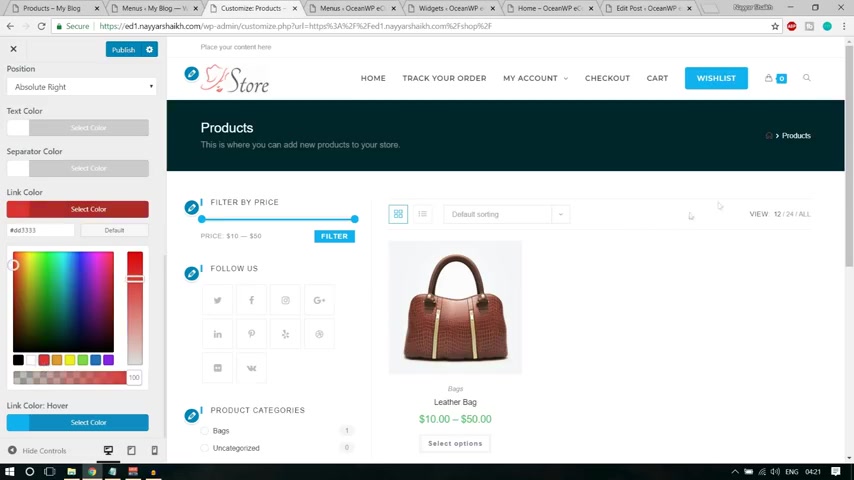
Then separator color .
You can also make it white .
OK ?
Here is the separator .
You can see then link color , let's make it red or blue just to show you that you can change it as you can see blue color , link color .
If you want to make it red , you can make it red .
It's all up to you , then link our color when you have this link , it terms what ?
So it's all up to you .
You can set that color as well .
When you're done with all these things , you can click on publish .
OK ?
Now let's see everything , one by one , whether everything is complete or not , there are many , few more settings .
Obviously , you can go through this page and all these general settings , obviously , those are really simple .
You can easily do so .
So I'm not covering them .
You can go through do some research or do some here and there and you'll find some new things , obviously .
OK ?
All the important things I have successfully covered it .
Let's cancel this .
Let's cut this thing .
Let's see where everything is fine or not .
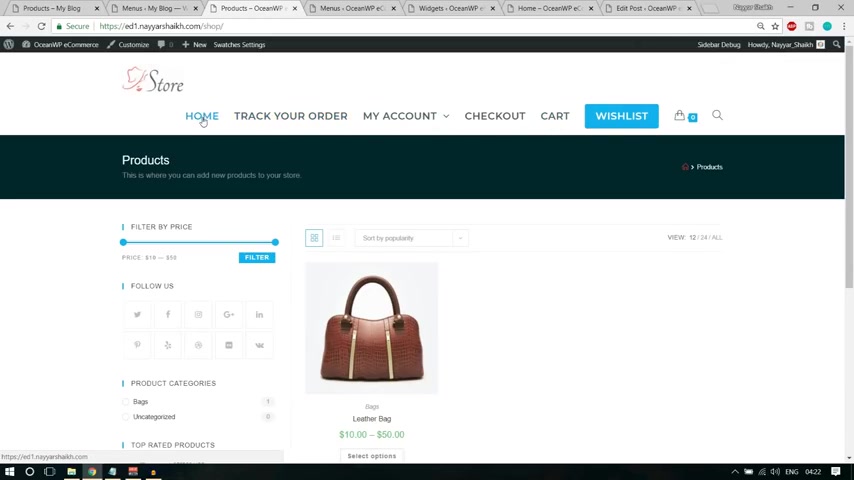
So first , let's see whether the homepage is available or not .
OK ?
So I think the size of the icon has increased .
So I think you should decrease it a bit .
OK ?
This is looking better .
I think I have increased it .
OK ?
So first let's go to home page .
So make sure you decrease it .
It is uh coming on to next line just because of the size of the size of this font .
OK ?
So make sure you decrease it .
So here everything is fine .
OK ?
All the menu till the bottom and everything is fine .
Then let's see the shop page .
OK ?
We should have added a shop page .
To the menu so that don't , no one has to go to shopping like this .
Ok , so we have the shop page as well .
Uh track your order page .
OK .
So here is the problem .
We don't want this thing at the left side bar .
So go to edit page .
Ok .
Go at the bottom , make it full width , click on update and I think this will be for all the pages .
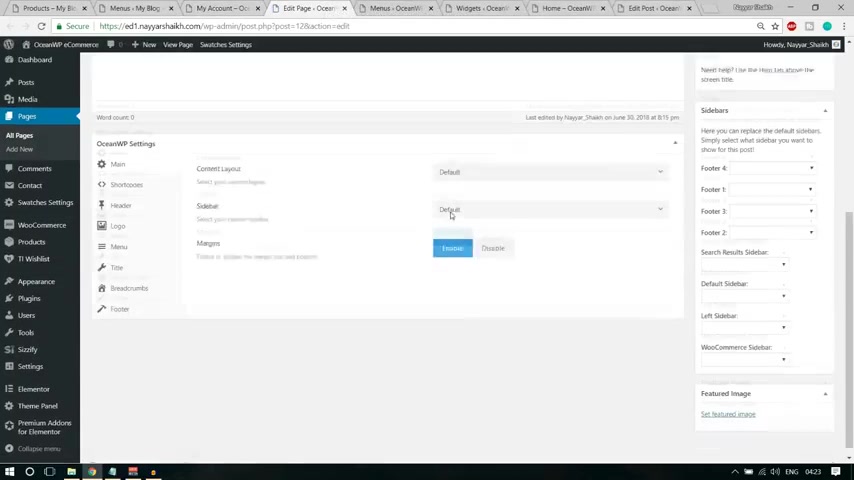
Let's refresh .
Ok .
That is gone .
Go to my account and I think this is also , yeah , here it is also we have this thing .
So again , do the same thing .
Edit this page in a new tab , make it 100 full width , click on update , refresh it done .
Go to checkout car and all the pages repeat the same process .
Ok ?
Check out , go to edit page but the bottom make it full width update .
Let's refresh it fine .
Ok .
Card page .
Ok .
This was the card page , wish list page .
Do the same thing .
Ok .
Make it full with update .
Come over here .
Let's refresh it fine .
Now let me do one thing .
Let me go to home page .
Let's see our demo payment .
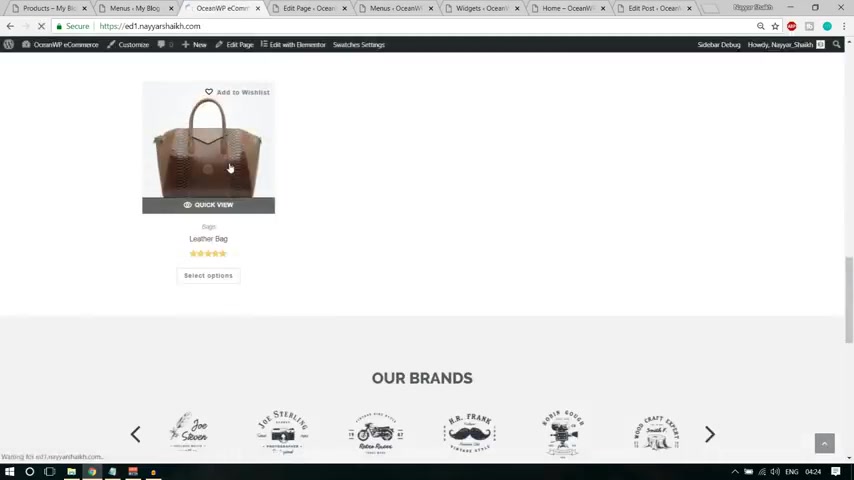
Let me purchase a new product .
Let's select this one .
Ok , so I want the leather one .
Ok .
Add to cart .
Ok .
So when I have this , I can ok , let it , let it load first .
When I have this , I can see this .
Let's click on , check out .
Let's fill in some dummy details over here .
Ok .
Now as you can see Leatherback , $50 sub total shipping cost .
You can see GSTCGST , all these things are applied over here .
You can pay through paypal , you can pay through credit card .
Let me pay through credit card .
Ok .
I don't remember the card number .
By the way , I think it was .
Ok .
I was , this is a demo card payment , by the way , don't use this .
Ok ?
So 424242 .
I'm putting 22 .
Please order .
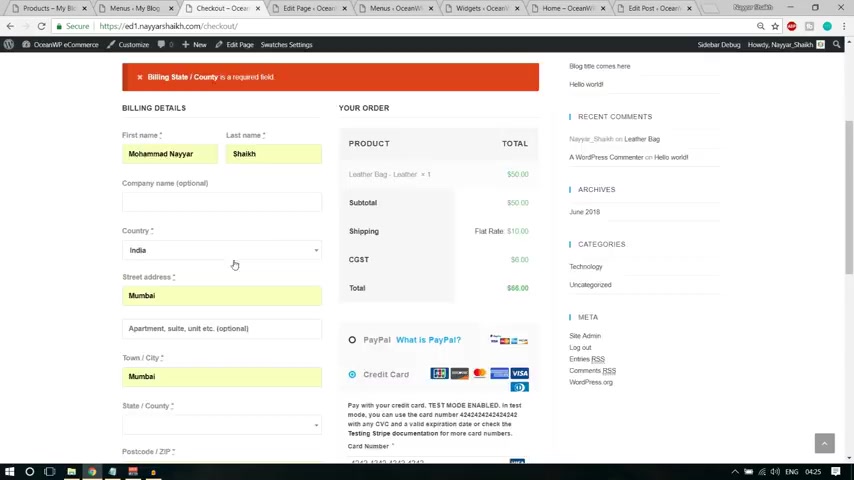
Ok .
Countries is required .
I I have selected the country .
Ok ?
I think state is missing .
Yeah , here it is state is missing .
So let's search for state .
This was a Google Chrome by the way , they save all these data .
That's why it was happening like this .
OK ?
So let me again put in the card detail over here .
OK ?
Some expiry date .
OK ?
Please order , let's see what happens .
OK ?
So your order is successfully placed as you can see you get all your order details over here .
OK ?
So this is also working very fine .
Everything is awesome .
OK ?
So this is how it happens .
And again uh checkout page is also having this sidebar .
So let us do that .
I think we changed it , I guess .
Let's see .
No , we didn't .
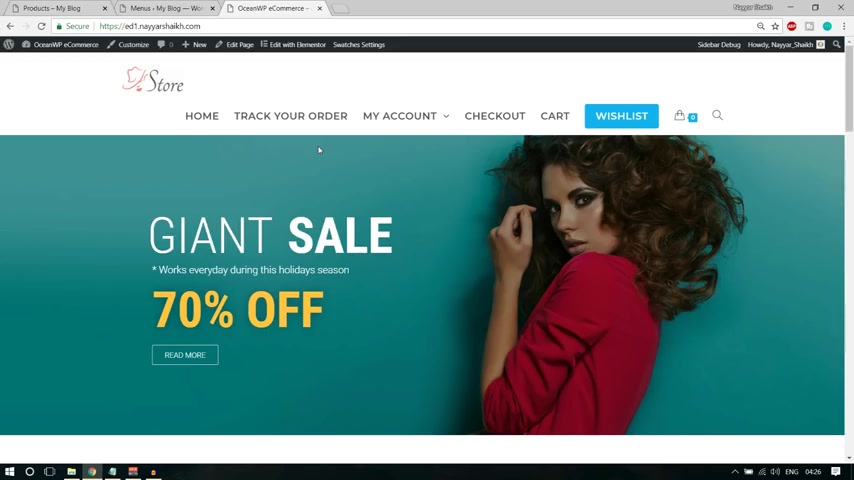
So make sure you make it full with as well .
OK ?
Let's refresh it obviously .
Yeah , now it is looking better .
OK ?
So with this , we have completed this tutor .
I hope you guys have enjoyed it .
Uh uh You know , if you like this , if you enjoyed it , if you learn something new , make sure you subscribe to my channel .
Also give a thumbs up to this video .
If you have any doubt , any comments , any queries , any suggestions for me , any request for me , if you want me to create any special kind of video on special topics or so on , then you can leave , then you can leave your request .
You can leave your comment in the comment section below .
By the way , thanks a lot for watching guys .
See you soon .
Are you looking for a way to reach a wider audience and get more views on your videos?
Our innovative video to text transcribing service can help you do just that.
We provide accurate transcriptions of your videos along with visual content that will help you attract new viewers and keep them engaged. Plus, our data analytics and ad campaign tools can help you monetize your content and maximize your revenue.
Let's partner up and take your video content to the next level!
Contact us today to learn more.