https://www.youtube.com/watch?v=_q3KDhyCpjE
Secret to Perfect Cake Pop Dough _ FREE CAKE POP CLASS
Hi guys .
If you're having cake pop problems today , I'm showing you all the secrets you need to know , especially how to achieve the most smooth round ball and other shapes .
It's literally all about the dough .
So we will be covering the perfect recipe for that without being too greasy to fall off the stick and there's no need for frosting as well as rolling technique , the basic dos and don't and other fun tricks and hacks to preventing a flat bottom , how to drizzle a spectacular swirl all the way around to dipping and decorating and much more information .
Plus I wanted to give a big thank you to all my subscribers for your continued support you guys .
And my biggest inspiration to make videos .

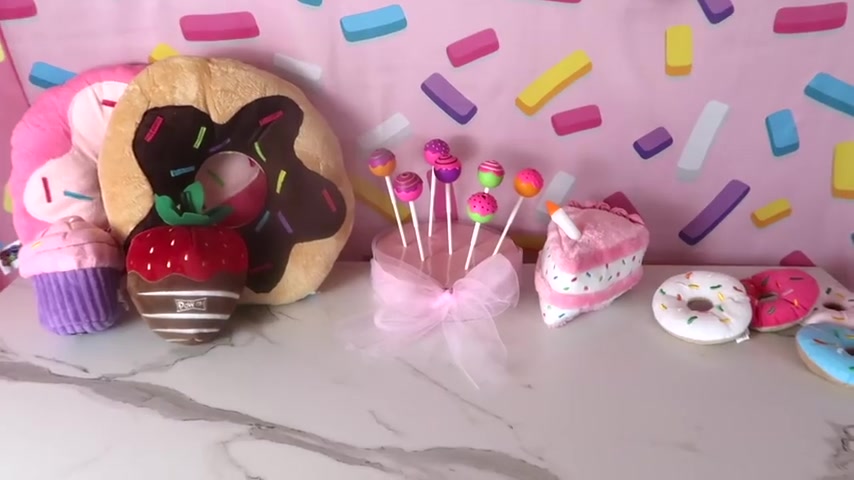
The winner of this cake pop giveaway will receive this three tier cake pop stand , three mustard dust from back in gold , white and champagne pink .
And this super cute Sprinkle brush set from fancy sprinkles to enter .
You need to be subscribed to my channel here on youtube and be following me on my Instagram to confirm your entry and leave a comment below that includes your Instagram name .
I'll be announcing the winner on Instagram next week , Sunday , March 20th .
And you'll have this fun and creative kit to decorate your own cake pops along with all the skills from this video as your guide .
So be sure to keep on watching the number one question for anyone that wants to perfect their cake pops is what is a great go to cake pop dough recipe to help you achieve that smooth , correct free round shape as the perfect canvas for dipping .
All you are going to need are a box of cake mix , eggs , milk butter and water .
And I recommend to use Pillsbury .
I'm not sponsored by the Doughboy , but the results with this product have always been the most moist .
You can make any flavor with this base recipe just by switching out the flavor cake mix that you want and keep everything else .
The same .
For example , here for strawberry , I'm adding one box of the mix to my mixing bowl along with two eggs , four tablespoons of melted butter .
This is one of the golden secrets right here .
I'll tell you why in a moment and last is half a cup of milk and three quarters of a cup of water .
Then give that a mix mix mix until it combines and back to why butter is better .
Butter is an absolute must to achieving the most firm smooth texture to your dough without leakage or separation , which happens with oil .
And I also have another important tip for you .
After you bake the cake that will change the whole game for you .
You want to pour your batter into an eight by 12 inch pan that has been greased and lined with parchment paper .
Don't forget to do that and we don't want to over bake or brown the cake on the back of the box .
The instructions will tell you to bake at 3 50 for a longer amount of time , instead , I drop the temperature to 3 25 and bake for 20 to 25 minutes or until a toothpick comes out clean .
Notice how there is no browning on this cake .
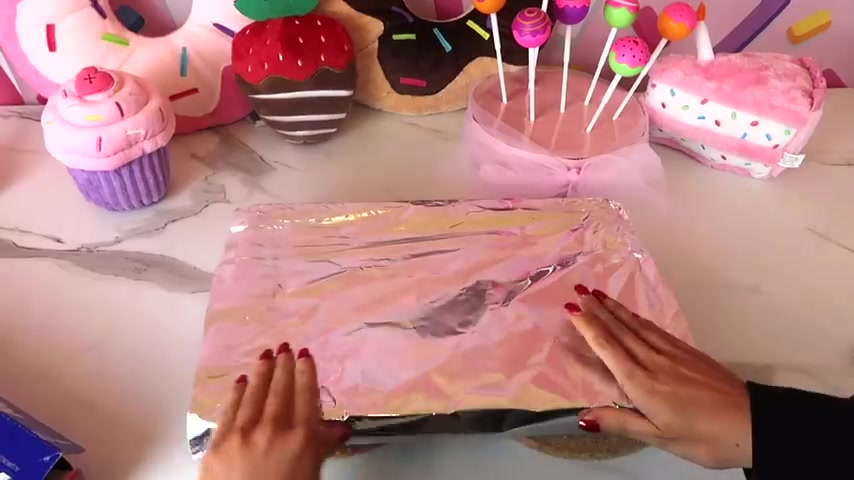
Now , after removing from the oven , the next step that I'm showing you is called sweating the cake to do that immediately covered with aluminum foil while your cake is still hot and inside the pan to lock in all the moisture for about 30 minutes .
And after it is cool enough to safely remove from the pan , I'm taking large Ziploc bags and plastic wrap to contain you a part two of the sweating process .
As you can see , there is condensation from covering the cake while it was hot from the oven .
That's exactly what you want to see .
Then I'm placing the plastic wrap over the top and when you flip it over onto a cookie sheet , it should slide right out of the pan , which is why I can't stress enough to grease and line your pan for easy release to completely seal your cake .
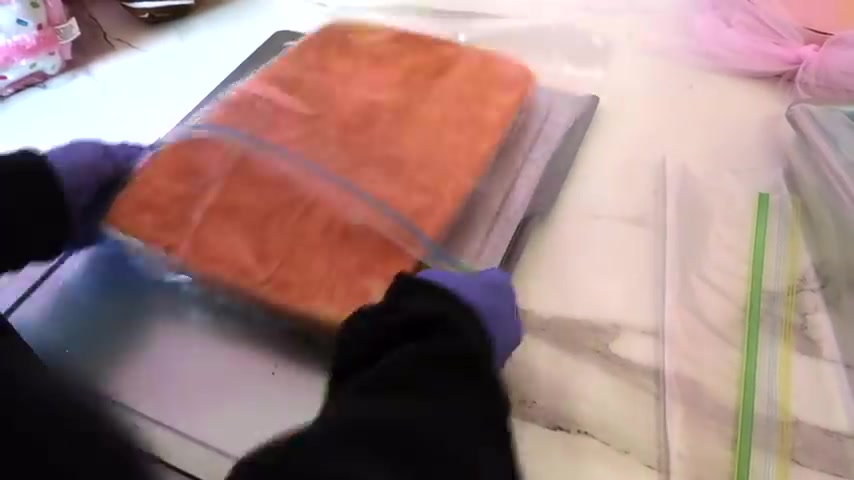
Cover the top and edges with another sheet of cling wrap and lock it up in two large Ziploc bags .
I use two since the largest ones I have aren't big enough for this piece of cake to shimmy both ends inside the bags and allow the cake to contain .
Continue to sweat overnight .
This straps in every bit of moisture .
You definitely don't want to skip this part .
All the sweating is worth it and makes such a huge difference in your dough .
I did the same steps for my strawberry and vanilla flavored cake .
On the next day , you can remove all the wrap and slice the cake so that it is able to fit inside your mixer .
I cut mine into large cubes before this video .
My old method was to do this in a food processor .
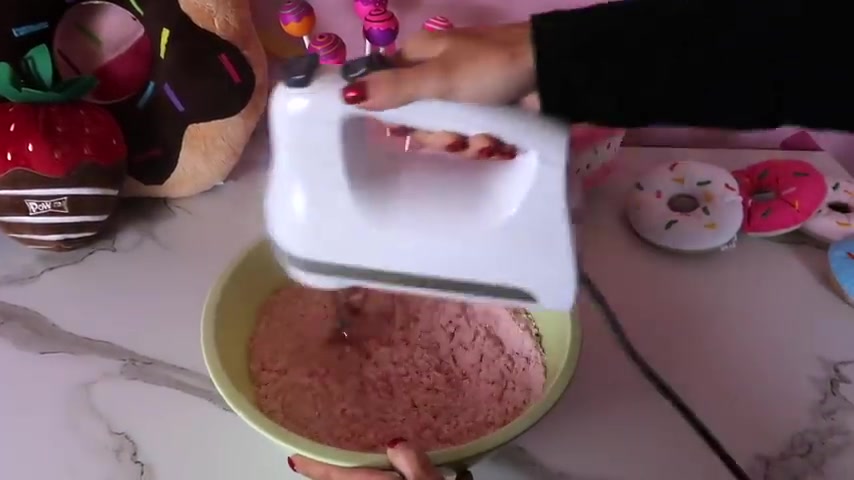
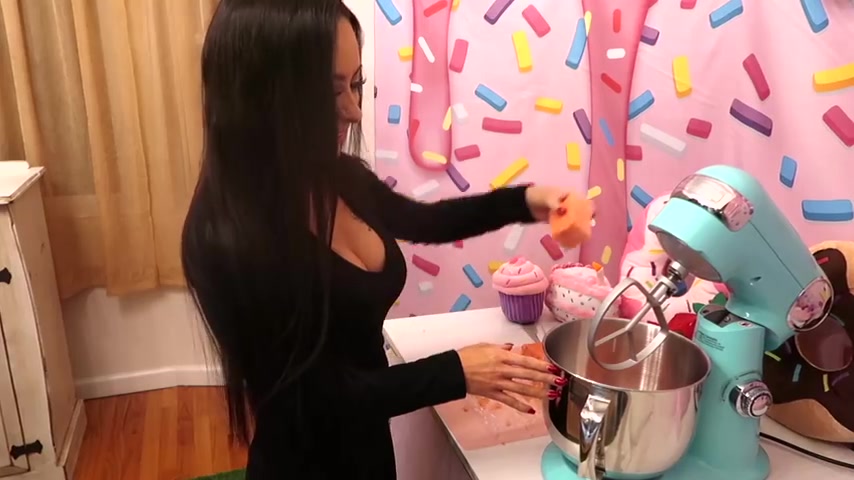
Now I throw all cake in my skin mixer .
Instead it comes together so much better and it is similar to needing a dough .
When handling your cake , it will feel a bit sticky , which is completely normal .
That stickiness is just from all the sweating .
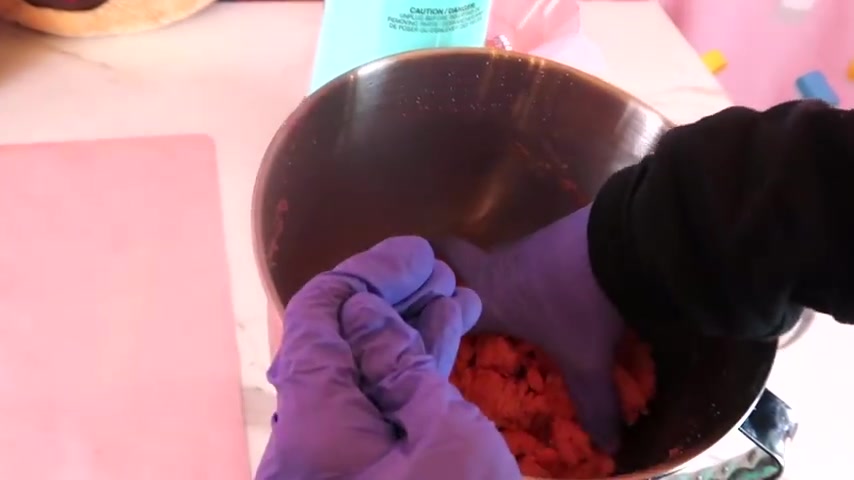
First , start mixing on medium speed with your paddle attachment as the crumbs break down , they may stick to the sides of your mixing bowl .
So I stop the mixer in between and scrap down the sides with a rubber spatula to ensure everything gets worked into that dough and you can increase to speed a bit .
The goal is to keep mixing until all those small crumbs form into larger pieces that eventually pull away from the sides of the bowl .
The key is to get out of that stage where you see all those crumbs , otherwise it will remain a cracky dough which we don't want .
You are ready for the next step .
Once it is smooth and firm like this and press together without having to add any frosting .
The next essential skill you need to get down is the rolling technique .
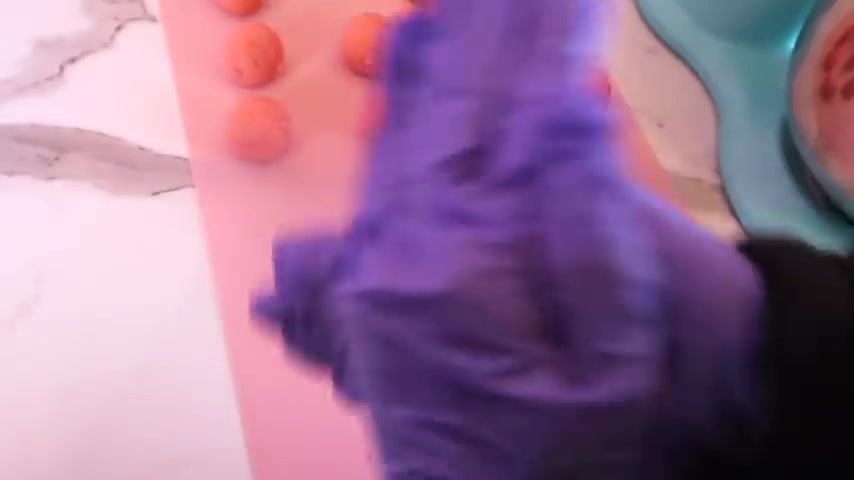
So let's get ready to roll , grab a section of dough and place on your surface .
I like to work on a silicon mat and take out my scoop .
So all my cake pops are the same size .
Mine is actually a meatball scoop from Amazon .
It's a lot easier than using an ice cream scoop .
I'm scooping out the dough and breaking off the scraps that squeeze out of the top and bottom and peel the ball right out of the scoop , the streamline , the process scoop several of these instead of scooping then rolling one by one and it prevents you from being too much of a perfectionist , getting stuck on rolling your first one .
However , your dough can dry out if left out uncovered for too long .
So I take the remaining dough and store it inside a Ziploc bag until ready to use as for the rolling technique .
This way works the best for me .
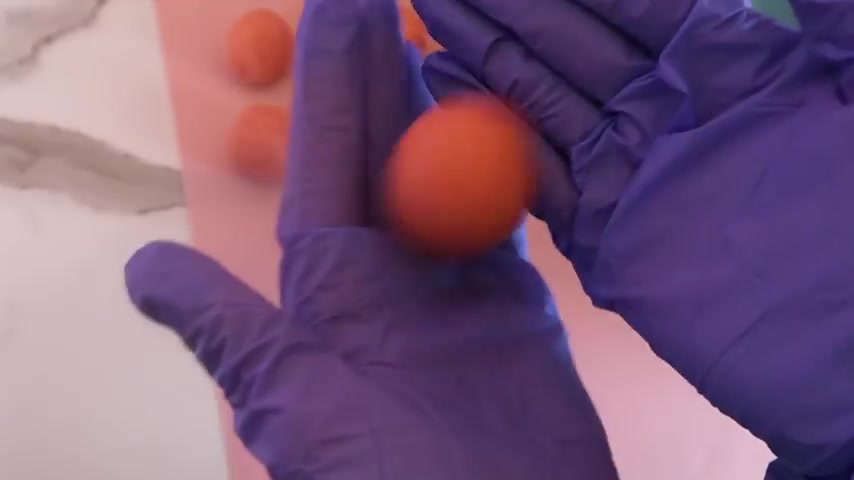
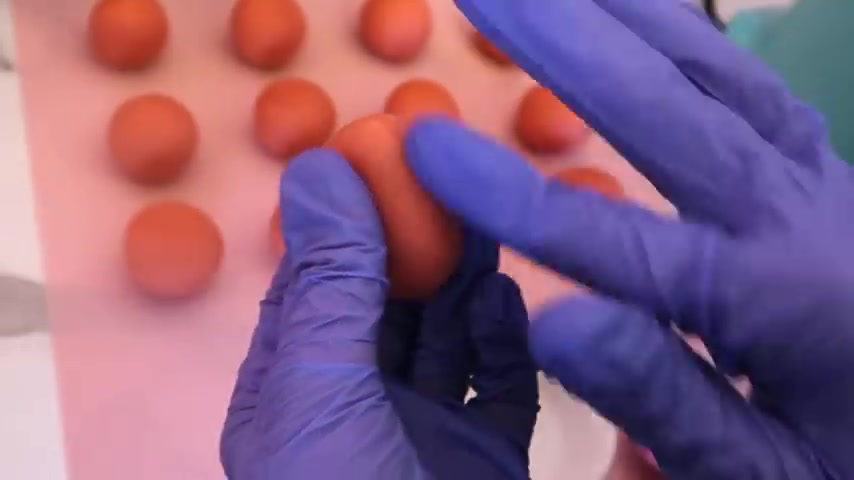
So I'm going to walk you through it , start by smooshing and flattening the ball of dough to soften it up .
If you start rolling without doing this , there will be lots of cracks , then begin to apply more pressure to form it into a compact patty just like a crabby patty last .
Continue by gradually easing up on the pressure as you cup it in your hands and form into a smooth round ball .
I know this is something a lot of you guys struggle with .
I strongly believe you will be more confident in your cake pops with these tips and much practice .
They will be looking amazing and that's how we roll one more recap before I show you the heart shape first smoosh it up next form into your compact crabby patty with pressure .
Last , ease up your pressure as you cut in your hands and roll into the round ball .
When it comes to making more advanced shape , cake pops , a smooth firm dough is needed to hold the shape as well .
I purchased all my molds from my little cake pop like this heart mold here .
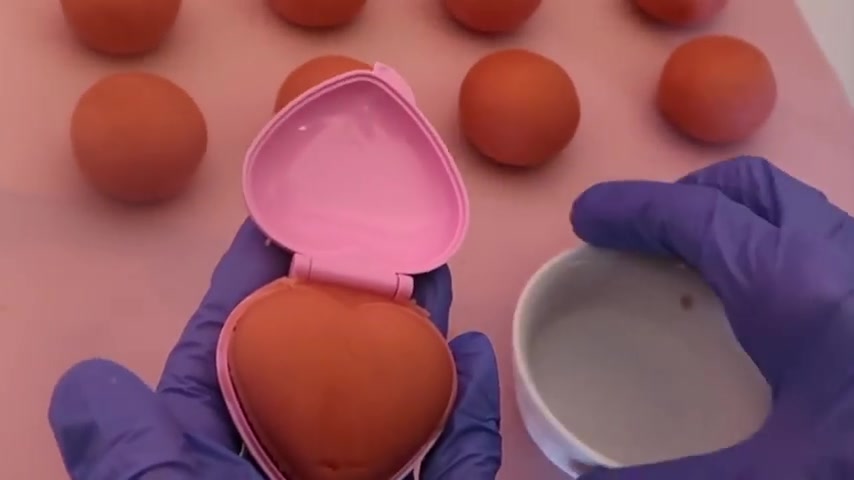
Now , I will be sure to link all the products used in this video in the description box below to mold the heart .
I scooped and rolled two balls because when you squeeze the mold shut , there is pressure .
So it's much better to have extra dough rather than not enough .
In order to prevent cracks , I rolled that with the same smash patty and cupping method that I showed you before .
And when molding , I lightly press down to flatten and fit inside , then squeeze down as much as you can to get all the excess dough out finish by removing the scraps away from the edges since there was a lot of pressure for molding .
No worries at all .
If you spot a crack and it happens to fix that , I apply a small amount of water over the area with my fingers .
It really helps bring the dough back together as if it never happens carefully .
Peel the hard out and along the edges , the mold leaves a seam .
So I go over that with some water again to smooth it out .
I've seen many others like to do this part with a lollipop stick .
It's all up to what works best for you for my vanilla flavored cake pops .
I roll them the same exact way I forgot to mention before I made them with yellow cake mix .
I prefer that one since it is more flavorful than the white cake mix .
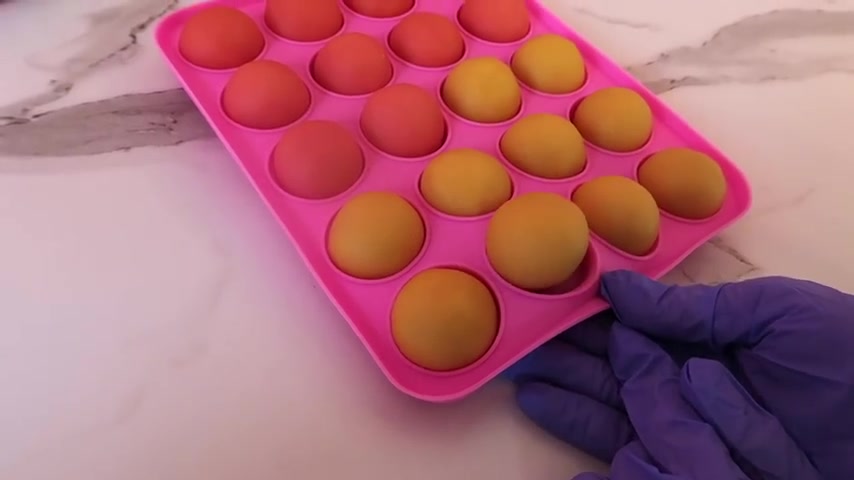
Another common question is how to prevent that flat bottom on your pretty cake pop .
This cake pop mold from Amazon is not the most ideal .
There is a better one , especially designed for this from my little cake pop .
I really wanted to try it out but it didn't come in time for this video .
So I used the Amazon one it was better than nothing at all but the bottom on some of my cake pops stuck to the silicone .
The silicone trays are flimsy .
So I stored them inside of this cookie storage rack from Michael's Craft store .
However , if you purchase the tray from my little cake pop , it is more sturdy .
So you won't need to do that .
Feel free to cover them in a Tupperware container that is big enough to fit the tray without crushing the cake balls .
Although I don't recommend this mold .
I gently push from the bottom to pop the cake ball out .
It is almost time to dip and decorate .
You may be wondering what chocolate melts do I use .
And the proper melting method for cake pops .
I really like the deli melting wafers .
They are also available at many local supermarkets and Walmart and you can use less thinning agents than me since these melts are a consistency on .
All I'm adding is one tablespoon of easy thins .
They are also known as paramount crystals .
And for the first round in the microwave , I start off with 30 seconds .
You can use whichever brand of melt you prefer .
But the key is to keep your mouth at a low enough temperature while being thin enough to dip , especially with cake pops .
After the 1st 30 seconds , I microwave in 12th intervals until completely melted to prevent overheating and stirring in between .
I put my Paramount crystals in with the melt , both of them melted so they melt seamlessly together .
But if you still see clumps zap in the microwave for another five seconds .
But for Gelli and Merkin specifically , you should not go above 90 degrees .
It should be a smooth fluid consistency .
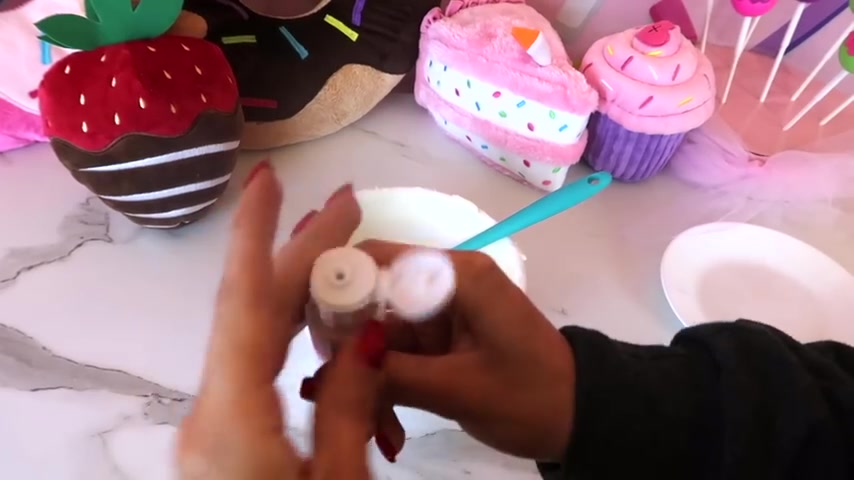
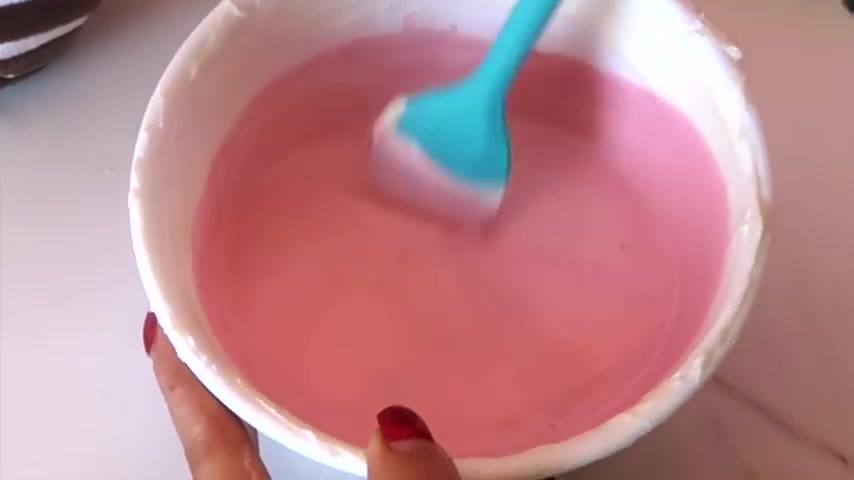
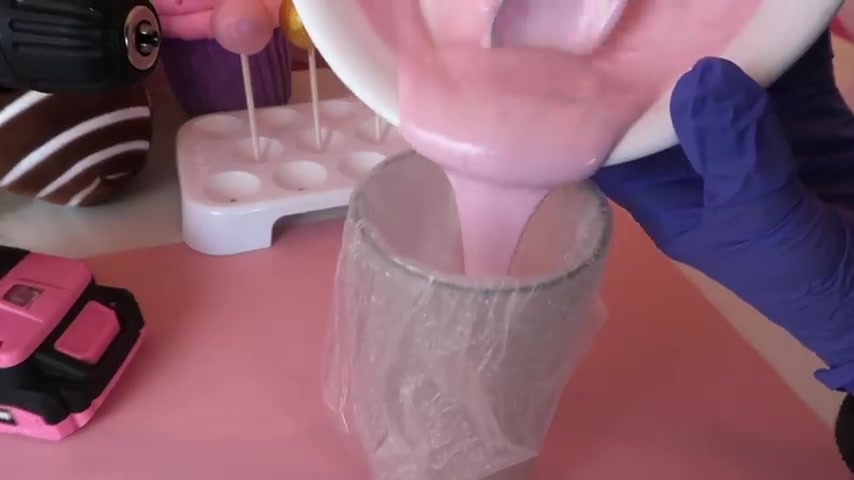
Then add in your oil based candy coloring .
The color mill bottles can be rough to open .
A little trick is to spin off the cap and push the top into the seal .
It will make a small opening there gradually mix in a few drops until you reach your desired shade .
This is color mill in the shade pink .
It is the perfect pastel pink .
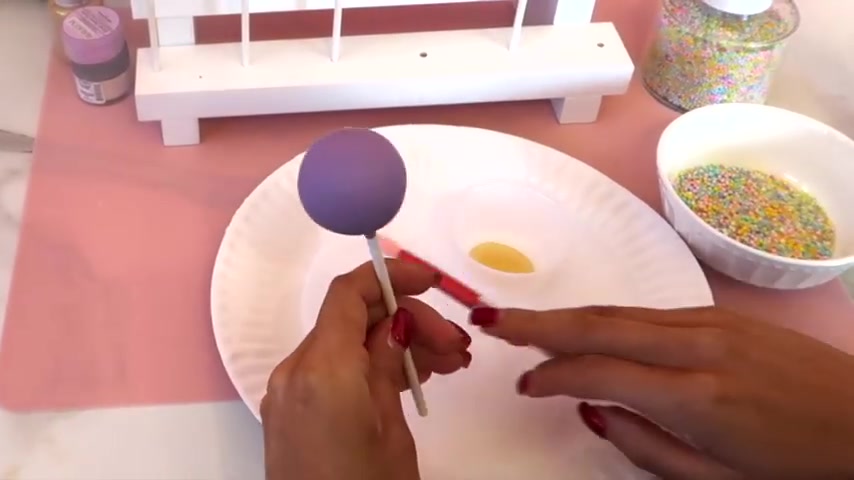
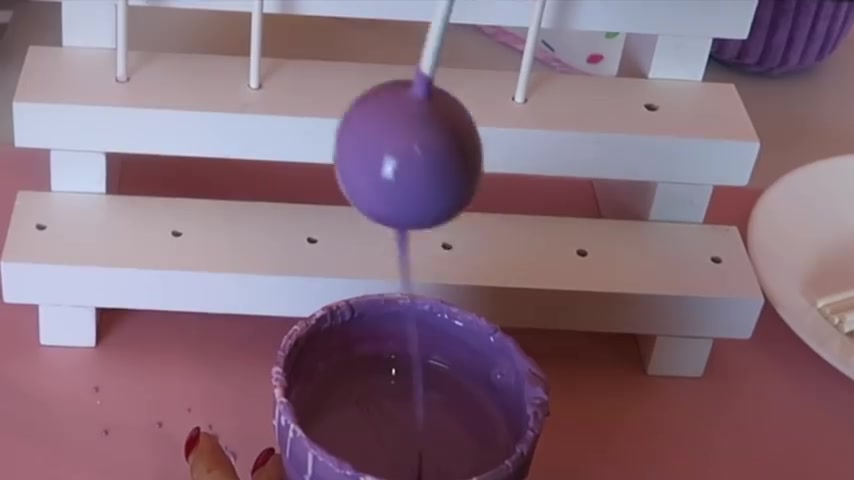
I also mix the other pastel shades with color purple and chef master yellow since I didn't have the color mal on hand before we insert our sticks .
I want to show you exactly what not to do on our dummy cake pops first , don't dip your lollipop stick into too much chocolate a little goes a long way and you will end up with a lunch plug when you insert the stick into the cake .
This is also why it's important to thin your chocolate out enough .
So you are able to shake it off without being too clumpy .
You may think you don't have enough on there , but this dough is super firm .
A little chocolate is all you need to anchor the stick .
Another dough is do not chill these in the fridge or dip your cake pops when they are cold and merkin or melts should never be above 90 degrees .
Also , this cake pop I poorly rolled , which is another dough .
Once you dip and shake off the excess chocolate , don't ankle .
Your cake pop too much and troll off the side or will leave a bump on the no matter how much you try to settle it out .
The idea is when you dip a cold cake pop into hot chocolate , the temperature difference causes expansion .
It won't happen right away .
But after a few minutes , you will see the cracks form on the surface .
I wanted to add a side note that the only candy melts that can be dipped above 90 degrees or crips or me .
For example , Wilton or Sweet Tooth Fairy should be at 95 since they are more heat resistant .
But follow the same rules of never dipping .
Your cake pops when they are cold .
These tips are the dos of what you should do .
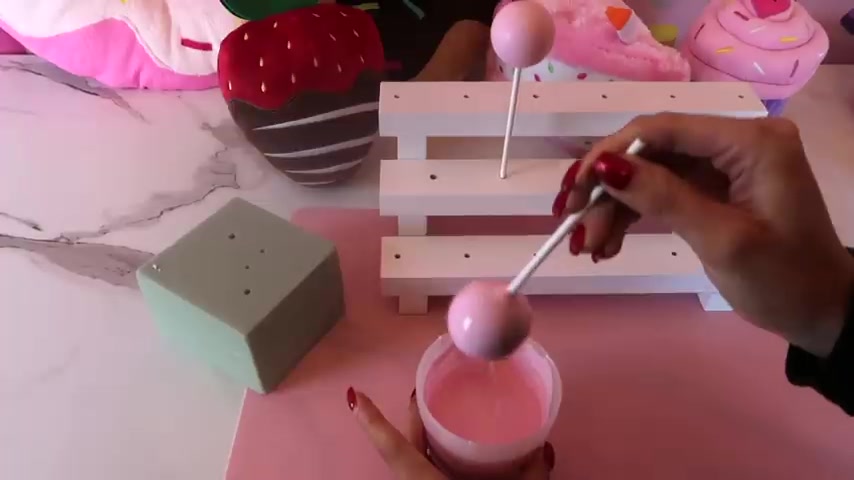
Dip your lollipop stick into a small amount of chocolate and carefully stick as far as you can go without going through the other side and look at the difference .
After doing this , you want your cake pops to set around 15 minutes on the counter at room temperature before dipping for the heart .
I carefully twist the lollipop stick instead of pushing straight in to prevent adding too much pressure to this delicate shape .
Although the stough is super durable is always a good idea to be careful .
Now that it's been 15 minutes .
My chocolate is ready to dip at 90 degrees .
Quickly dip in and out and shake straight down , then wiggle and shake quickly as you come up to prevent that bump from forming on the back .
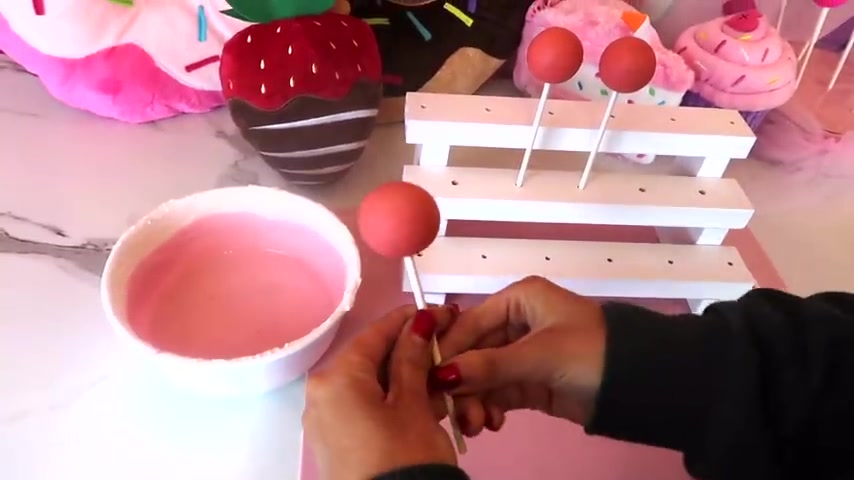
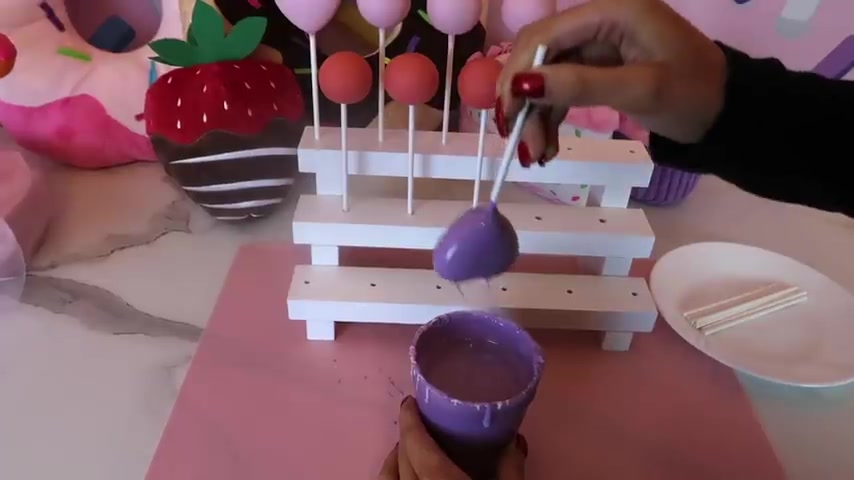
I dipped my strawberry cake pops in pink and purple chocolate dipping .
The heart is similar .
Just make sure not to keep it in the chocolate for too long or it will be a blob instead of a defined heart shape and shake with the same method so that the top isn't left with any bumps and guys if you are enjoying this video so far .
Thank you for stopping by my channel .
Make sure you join the party and subscribe to see more of my treat tutorials every time I upload and hit that bell to get all notifications .
I've finished by tipping my vanilla cake pops in white and yellow chocolate .
I always match the color that is going on the stick with the color .
I am dipping the pop into last but not least decorating is everything with making your cake pops pop , but it doesn't need to be that involved .
Some simple and cute designs are adding luster dust , sprinkles and drizzles .
These fluffy brushes are the Sprinkle brush set from Fancy Sprinkles which the giveaway winner is getting a set of their own .
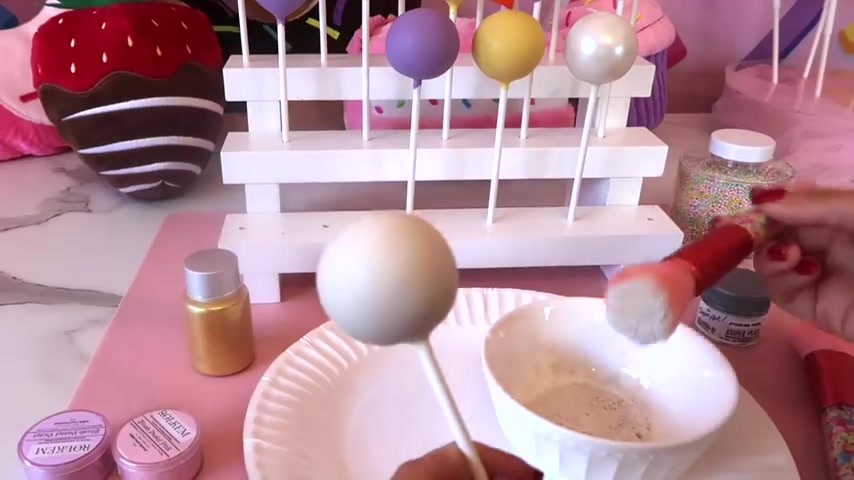
And one of my favorite luster here is the super pearl dust from Sugar Art .
It creates the most perfect , an elegant pearly look .
I always luster the lightest color first .
That way it doesn't mix with the other colors on my brush and please excuse all that luster dust on my hands .
Another one of my favorite brands of edible luster dust is called Roco .
It's sold on Etsy .
This shade is the blush pastel pink .
After packing on my brush , I tap off the excess and rub it in .
I recommend that to apply too many layers .
The more you brush over it , the luster starts to come off .
I clean my brush in between with a dry paper towel and for my gold cake pop , it was applied dry .
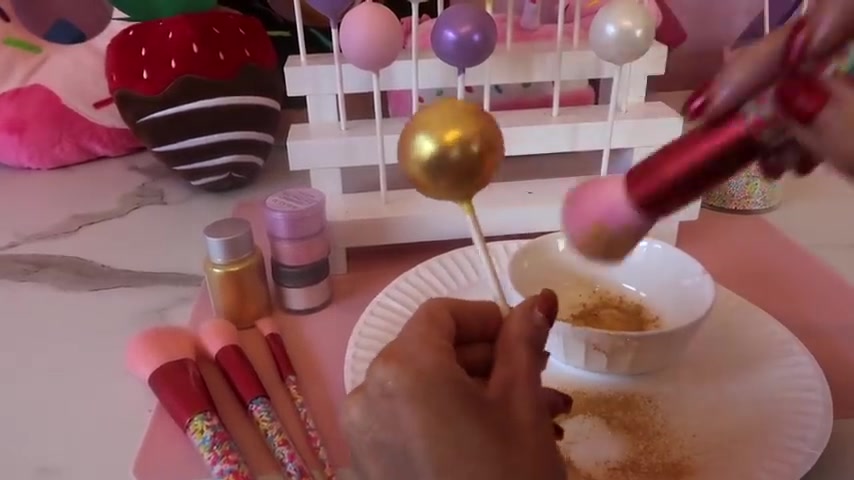
There was no need to mix with to make an edible paint .
It should be very intense on its own .
As long as the quality of your luster dust is on point and the purple color with the Roco pastel violets , the luster dust are also great .
If there is another brand you want to try next .
I have a hack .
If you want to get your drizzles to swirl all around the entire cake pop .
Give this trick a try .
It's another game changer that takes your drizzle from this to this .
For thin clean lines .
I use a textured piping bag .
These are my favorites since they are lightweight anti burst and seamless .
So you don't get those squiggly lines .
Snip a very small opening , the smaller the opening the thinner the lines and these bag ties came with my piping bags .
They're amazing for maintaining your pressure .
Your chocolate should have no thinning agents and be up to 1 20 degrees for the ideal drizzling Conal .
See , because you don't want it to dry and clog the tip of your piping bag if you feel it's too runny .
Wait a few minutes before drizzling and I'm not joking about this .
Get yourself a drill .
If you don't have one and practice , practice , practice , this isn't one of those gimmicks that doesn't work .
Just requires some practice for you to get comfortable with your speed and pressure .
And of course , I will link my pink drill description box .
What you are going to do is start from the bottom left corner and let your chocolate start blowing out of the bag and catch on to the top as it rotates , then slowly move almost on a diagonal from the bottom left to the top , right , while maintaining a light , steady pressure .
The most important thing is slow , even movements with the steady pressure and the slower you go , the closer your lines will be , your drill should always be rotating in the direction towards you .
It's almost like a gliding motion , don't overthink it .
Keep in mind I'm right handed though .
So if you are left in , you will need to make some adjustments .
And now you know the drill , there is nothing like a cake pop topped with colorful sprinkles .
My go to method is to brush my edible adhesive on the top part of the cake pop .
After the chocolate has completely set , it gives you more time to Sprinkle them on .
Instead of when the chocolate is still wet a little bit is all you need on a smaller brush so that you can scatter them nicely .
Since the edible adhesive is sticky , you may be wondering if it's best to apply luster dust before or after the adhesive , it works much better to luster first than the adhesive after I tested both and the luster appears clumpy .
I hope you guys enjoyed today's cake pop class and you learn something new .
Give this video a thumbs up if you did many tree makers get discouraged when it comes to selling cake pops , but I hope that this video will change your mind so you can be inspired to master your own awesome cake pops and don't forget to enter the giveaway .
It's Christina here .
Thank you so much for watching and I'll see you in the next video .
Are you looking for a way to reach a wider audience and get more views on your videos?
Our innovative video to text transcribing service can help you do just that.
We provide accurate transcriptions of your videos along with visual content that will help you attract new viewers and keep them engaged. Plus, our data analytics and ad campaign tools can help you monetize your content and maximize your revenue.
Let's partner up and take your video content to the next level!
Contact us today to learn more.