https://www.youtube.com/watch?v=U6dw28UtSHw
2023-07-12 12:58:07
How to Make Bread with Step by Step Instructions - Easy Homemade Bread Recipe - No Machine Required
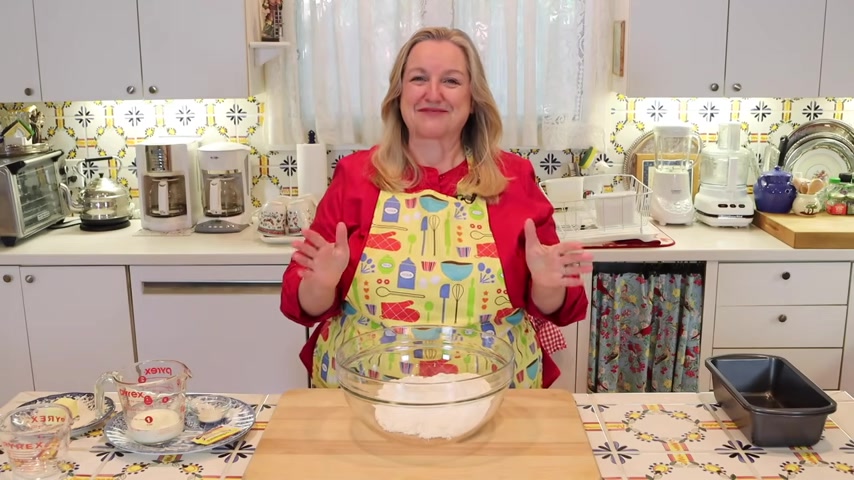
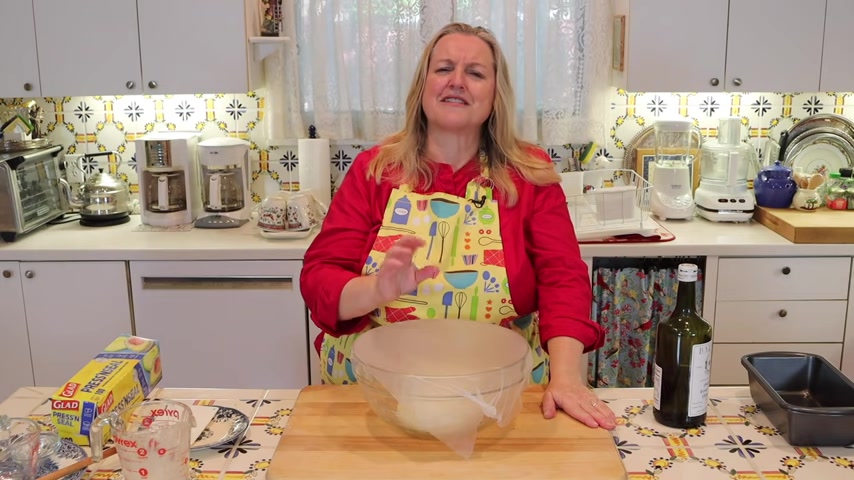
Today , I want to share with you how to make bread with step by step instructions .
And this is very easy .
You don't need a stand mixer , just your hands .
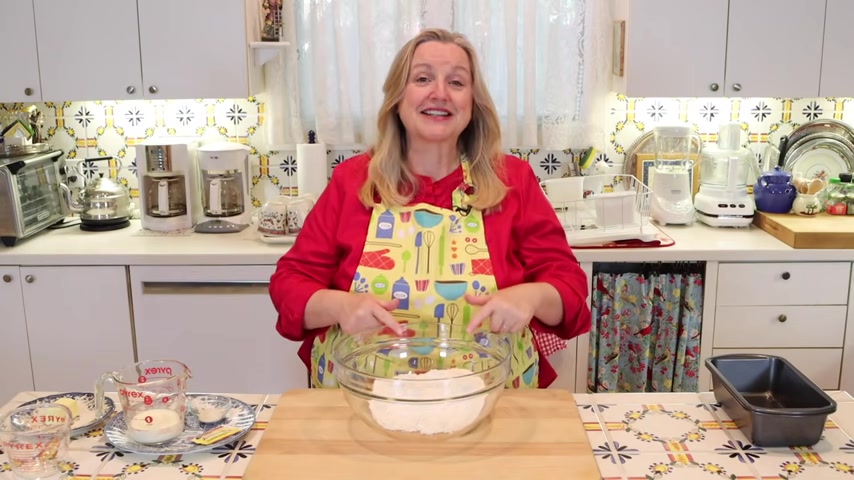
Hi , sweet friends .
I'm Mary and welcome to Mary's Nest where I teach traditional cooking skills for making nutrient dense foods like bone broth , ferment , sour dough .
And more so if you enjoy learning about those things , consider subscribing to my channel and don't forget to click on the little notification bell below that will let you know every time I upload a new video .
Well , even though we've made a of no need breads together , many of you have written to me either in comments or via email asking me to show you how to make a basic bread with yeast that you need by hand and that gets a beautiful domed rise to it .
And that's what we're gonna do today .
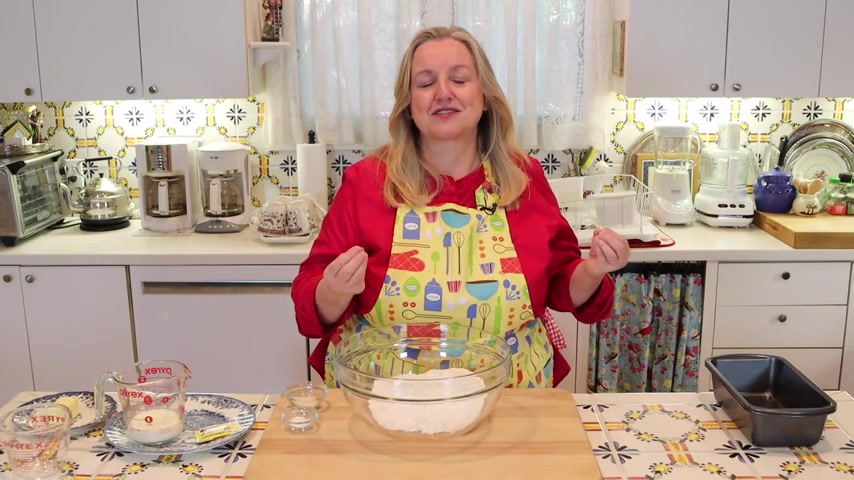
Well , let's go over the ingredients .
They're very basic and I'm sure you have most of these in your pantry .
The first thing that you're gonna need is some flour .
It can be all purpose flour or it can be bread , flour either will work and you're gonna want three cups .
Now , for those of you who are making the transition from a processed foods kitchen to a traditional foods kitchen and you've started incorporating whole grains into your baking .
You can use some whole grain flour in this recipe .
You can do half all purpose flour or half bread flour and then half whole grain flour .
You can use traditional the modern day whole wheat .
You could use the ancient grains like iron corner spelt any will work .
But if you want to go with 100% whole grain , the bread will be a little denser .
So I recommend that if you do want to incorporate whole grains that you start with half all purpose or half bread , flour and half your whole grain flour .
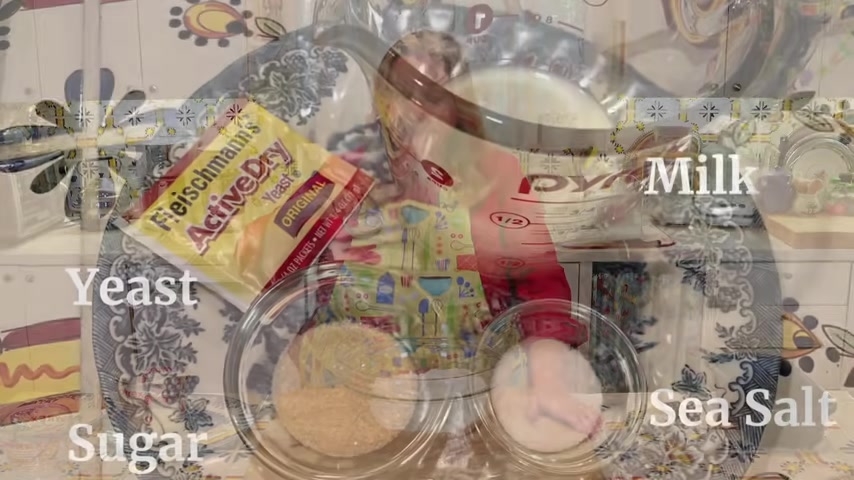
Next , you're gonna need one tablespoon of sugar .
This is just a plain white sugar .
Uh It is organic and it's unbleached , but you can use whatever you have on hand .
And again , if you're in the process of making that transition from a processed foods kitchen to a traditional foods kitchen and you have the whole uh the whole cane , uh the dried cane juice , the whole sugar , you know , normally called .
So you can definitely use that too .
And then you're gonna want a teaspoon of salt , a rounded teaspoon .
So you're gonna be a little generous with the salt .
Next , you're gonna need your liquid and you're gonna need a total of a one and a quarter cups of liquid today , I'm gonna use a half a cup of milk and then I'm gonna have three quarters , cup of warm water in here for a total , as I said , of a cup and a quarter .
Now , if you want to do all milk , you can , if you want to do all water , you can , if you want to use a diff , I'm using whole milk .
If you want to use a different type of milk , uh low fat or fat free , you can do that .
You can use alternative milks , anything will work .
It's just that you're going to need a cup and a quarter .
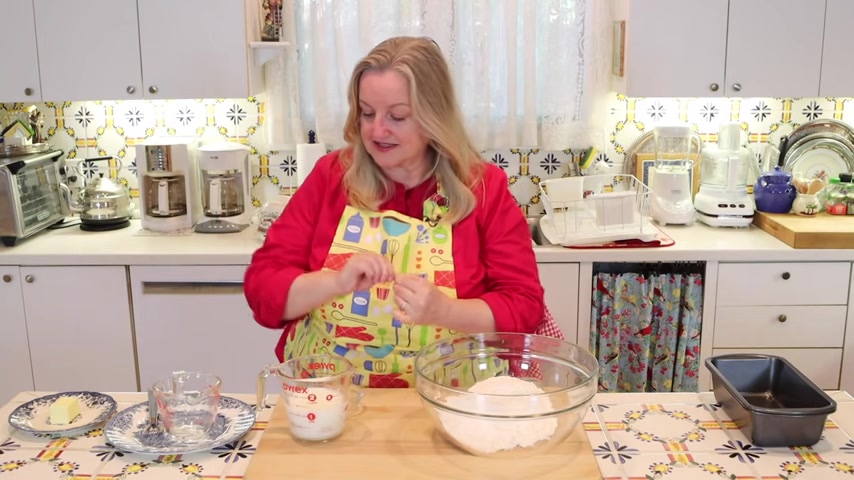
And then next , you're gonna need three tablespoons of butter and you want to have that butter soften that room temperature .
And finally , you're gonna need some yeast and I've just got here a package of active dry yeast .
Now , in a previous video , I went over a lot of explanation about the different types of yeast that there are and I'll be sure to link to that video if you want and I'll put the time stamp where I go into that discussion if you'd like to learn more about yeast .
But as I said today , I'm gonna use active dry yeast .
Now , if you don't have active dry yeast and you have something called instant yeast , you can use that as well .
Uh The only real there , there's some differences to it , but the basic difference is that instant yeast will allow your dough to rise a little faster than the active dry , but either can work in this recipe .
And don't worry , you don't have to write any of this down .
I'll have a link in the description below .
Just open up the description that's underneath this video and there'll be a link there that'll take you over to my website , which is the same name here as my channel , Mary's Nest and you'll have the , the detailed recipe and instructions there that you can read online or print out .
Now , make sure that your milk is at room temperature .
And then if you're using milk and if you're just using water , uh you want to have nice warm water , you want it to be about 100 and 10 F .
Now , if you don't have a thermometer , don't worry if you put a clean finger in here and it feels like warm bath water .
That's the perfect temperature .
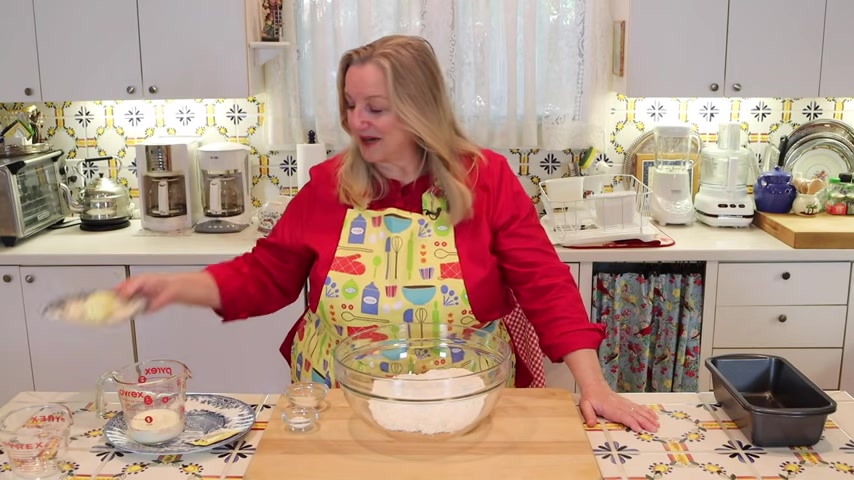
And then just go ahead and add that right in with your milk .
Next , we'll go ahead and Sprinkle our sugar right in and then we'll go ahead and open our package of yeast and Sprinkle that on top .
Now , if you're not using packaged yeast like this and you have a little jar of yeast or uh a little , um you know , sometimes they're sold in little blocks of yeast , then you're going to want two and one quarter teaspoons of yeast .
So whether you're using the instant yeast or the active dry yeast , you're gonna want two and one quarter teaspoons .
And so we'll just go ahead and Sprinkle that right into our liquid .
Then I'm just gonna take a little whisk and I'm just gonna give this a little stir around to incorporate the yeast , the sugar and the liquid all together .
Next , we're gonna set this aside and just let it froth up a bit .
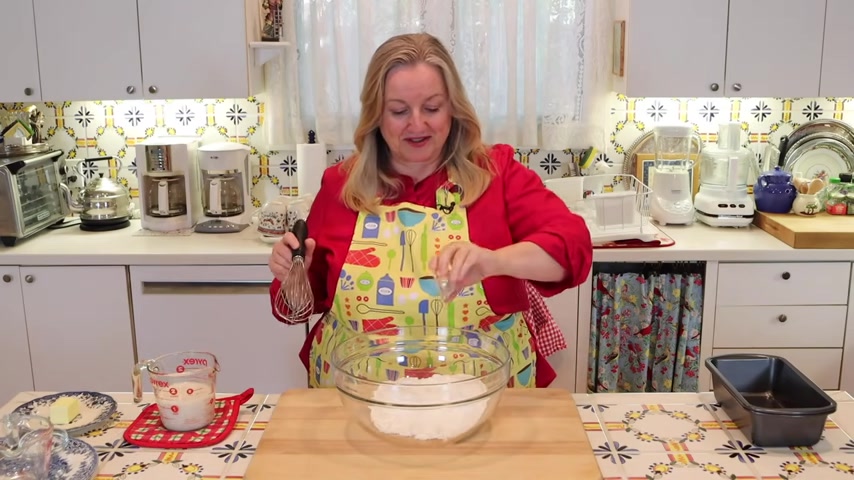
It's gonna take about five minutes next , I'm gonna take my salt and just Sprinkle this over my flour and I'm just going to whisk this to incorporate it well , throughout the flour .
So after about five minutes , you'll get a real frothy top on top of your liquid to which you've added your yeast .
And then you just want to take your flour in which you've mixed the salt really well , just make a little well in the middle , nothing fancy .
And then go ahead and pour in your yeast or your , your yeast mixture .
The next thing all you want to do is just mix all of this together .
You can use a wooden spoon .
If you've got a danish dough whisk like this , you can use that .
It looks funny but it works great .
Uh Or if you're a fan of uh artisan bread with Steve like I am , you'll know that he uses just the handle of his wooden spoon and he says that it's very similar to using a danish dough whisk .
So there's something to that too .
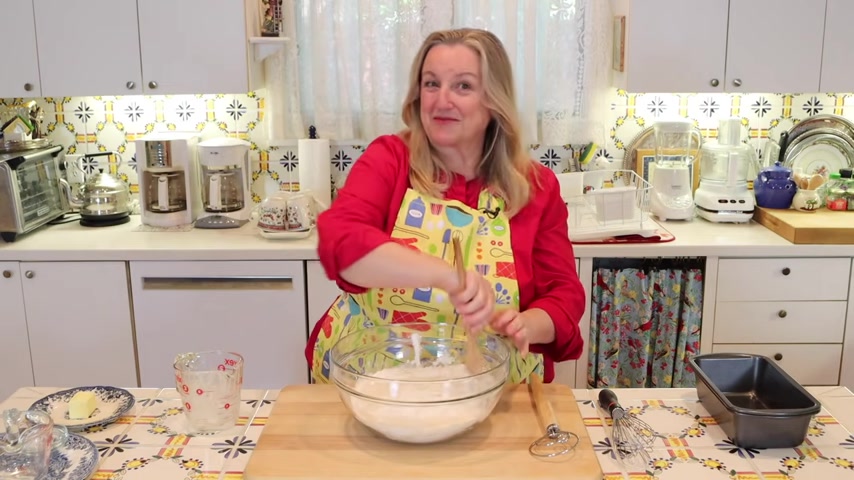
So I'm just , but I'm just gonna go ahead and start incorporating all of this flour with my liquid .
And then we'll move on to the next step .
Once you've done your best , mixing everything together with your wooden spoon or your dough whisk whatever you're using .
And it's come together as much as it's gonna come together with using those tools .
The next thing that you want to do is go into the bowl with your clean hands and start to bring all of your dough together so that it forms a bowl .
And now I'll start doing that and I'll show you I'll overlay a video so that you can see exactly what I'm doing as I go around the bowl and try to bring in all those little pieces of uh flour and , and uh water or liquid that I've not been able to get 100% incorporated just using the spoon .
And basically what you're doing is just more or less using the dough bowl uh to go all around your bowl and clean your bowl .
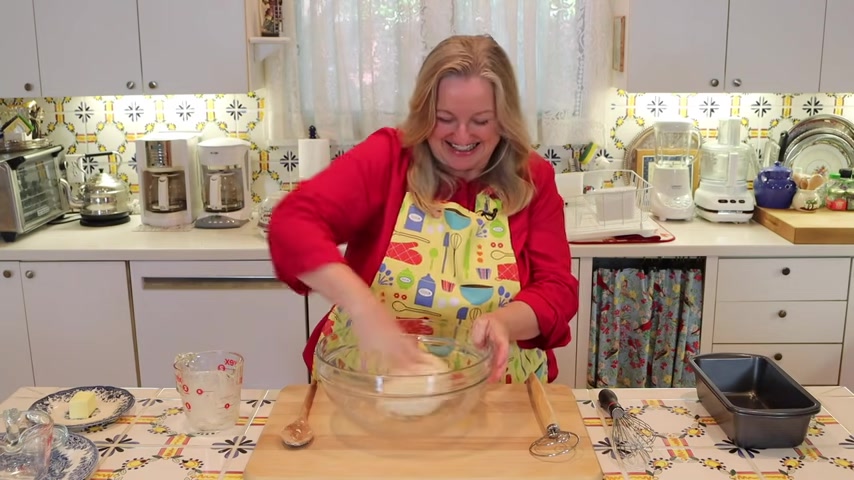
And then once we get pretty much everything off the sides and the bottom and we've got it all incorporated into our dough bowl .
We'll transfer it onto the board and we'll get ready to need it .
Now , if your dough feels exceptionally dry , you can wet your hands and use wet hands as you're needing your dough , but resist the urge to add too much water .
But other than what you put on your hands , because as you need your dough , it is going to become softer , it's going to become better .
It's gonna come together .
So just give it a little time .
And the same is true as if you think that the dough is very wet .
You can flour your hands and use whatever the flour is on your hands to work your dough , but try not to add too much flour .
Now , granted weather conditions , conditions in your kitchen , so on and so forth can affect uh the consistency of your dough .
So if you do feel that it is a little dry or it is a little wet , just make those minor adjustments .
And as you need your dough , if you start to see it coming together and coming together nicely , you know that you don't need to add any more liquid or any more flour .
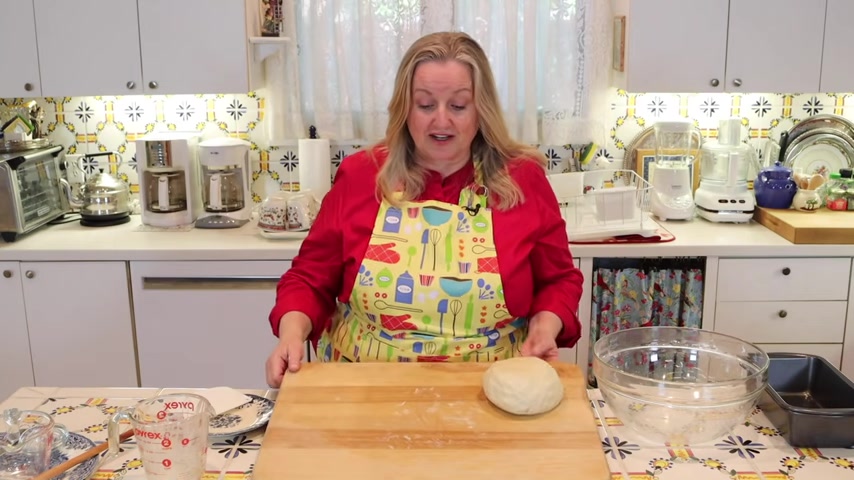
Now , if you find that your dough sticks to your board because we're not gonna flour the board at this stage , we really want to try to see if all of the ingredients we used were sufficient uh to create the nice dough that we want .
So if your dough sticks to your board a little bit , just use a bench scrape .
This is just a very inexpensive plastic bench grape to scrape your dough off your board and add it back in to your dough ball .
And if you don't have a bench grape don't worry , you can use a spatula .
It works very well .
Now , basically to need our dough , all we're gonna do is take the palm of our hand and push it down into the dough and then we're gonna fold over part and then just turn it like a quarter of the way .
Press it down again , fold it again , turn it a little , press it down again .
It's really , I've even got a little sticking to me and sticking to my uh board here .
So you'll see , I'll just scrape that right up and put that on .
But as you see , it's not an exact science .
So don't worry about it , just keep pushing and folding and turning .
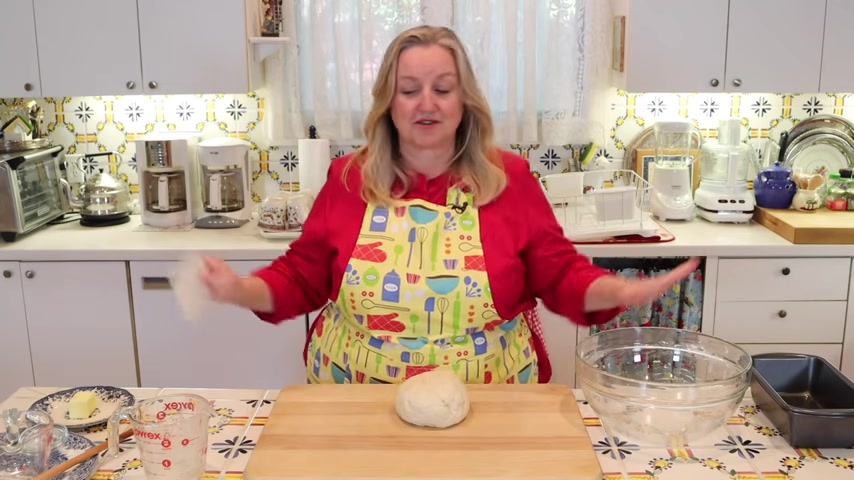
And after a few minutes , you're gonna start seeing this coming together nicely .
Now , if you're doing this by hand , we're gonna have to need this about 8 to 10 minutes .
If you're using a stand mixer , although definitely not required , it's probably only gonna take about 2 to 3 minutes .
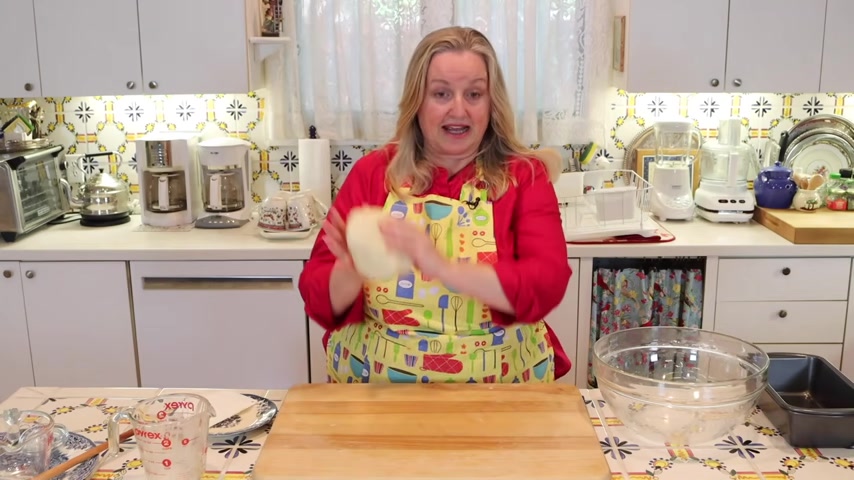
So after hand kneading this for about 7 to 8 minutes , somewhere in there , you want to start incorporating your butter and I've got three tablespoons of butter and it's softened and I'm just gonna try to start incorporating about a tablespoon at a time and all I'm gonna do is just put a piece on top like that .
Best I can fold it over and start to work it in .
Now , you may be wondering why are we incorporating the butter .
Now , why can't we just add a little melted butter to our liquid with our yeast and pour that in and go from there .
And that's an excellent question .
The reason is as you're needing the dough for the bulk of the time , 7 to 8 minutes , as you're , you know , maybe working up to that between eight and 10 minutes sweet spot when we'll know that the dough is perfectly needed .
If you put the butter in at the beginning , it can be very sticky .
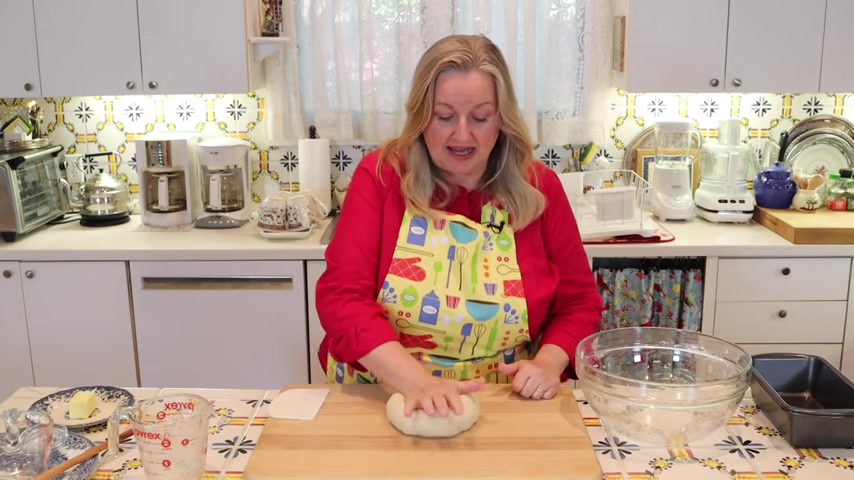
And that's what I wanted to show you here as I was kneading in the butter .
You'll see and I'll take a picture and overlay it that uh more dough is sticking to the board .
And what happens , especially if you're a new baker having to need dough for eight minutes and it's constantly sticking .
You get the temptation to add extra flour and that can sometimes throw off the recipe .
Whereas if you uh need the butter in towards the end , yes , it's a little bit of a sticky wicket of a mess , but you're not needing it as long .
And then you can just take your bench , scrape or your spatula and just get all those little bits .
It's like butter and a little dough in there and scrape it off your board .
Consolidate it back into your dough bowl .
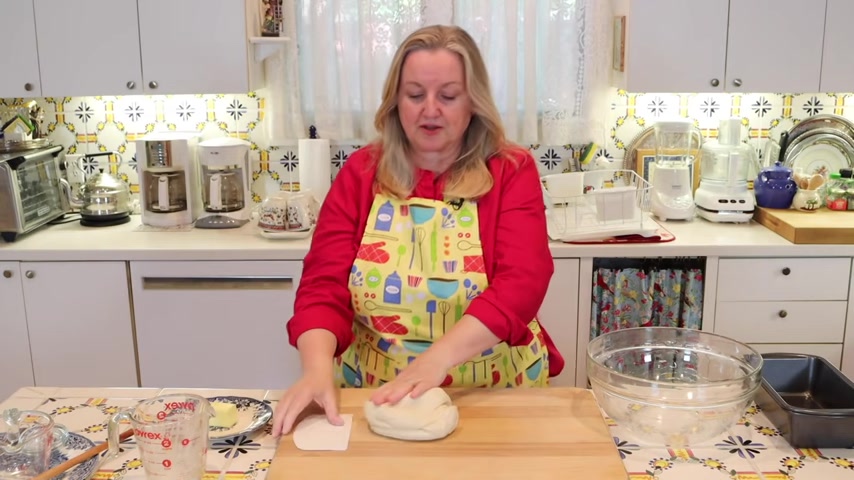
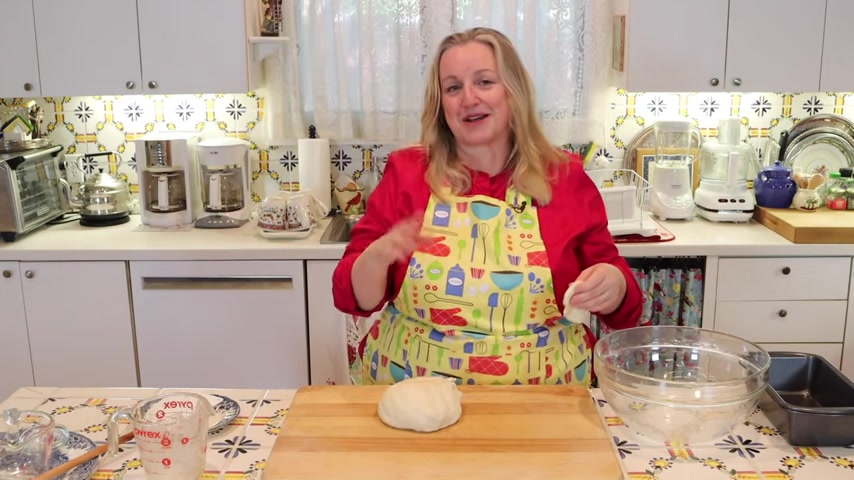
And because you've been needing it for a minute or two , working in that butter , it's a lot easier to work with now and it's not sticking well after you've needed this for somewhere between 8 to 10 minutes .
And you've got all your Butter Incorporated and it's no longer sticking to your board .
Now , what you can do to see if it is needed sufficiently , you can do something called the window pain test and you just take off maybe about a golf size ball of the dough and roll it around in your hand .
And then you just want to start pressing it out as thin as you can and then you're gonna start stretching it .
And what you wanna do is you want to stretch it gently .
You don't wanna pull it real hard , but just gently till you get to the point where it's somewhat translucent .
And if you hold it up to the light , you can see some light coming through it .
But as you're pulling it apart and it doesn't rip as you're trying to get a translucent translucent .
That means that you've needed it enough .
I also want to let you in on a little secret , a little under , eating a little overeating .
It doesn't make a big difference in the bread , maybe 10% .
And everybody's just going to be happy that you baked homemade bread , it's going to come out fine .
So if you've needed it somewhere between 8 , 10 minutes , you've needed it enough .
Once you feel it's sufficiently needed , you want to take your bowl , you can use the same bowl that you mix your dough in and you , I just want to put in a little bit of olive oil .
You don't need too much .
Maybe somewhere between a teaspoon and a tablespoon .
Then we're gonna put our dough ball in here .
We're gonna just swizzle it around and turn it upside down .
Make sure that we get it all well greased next .
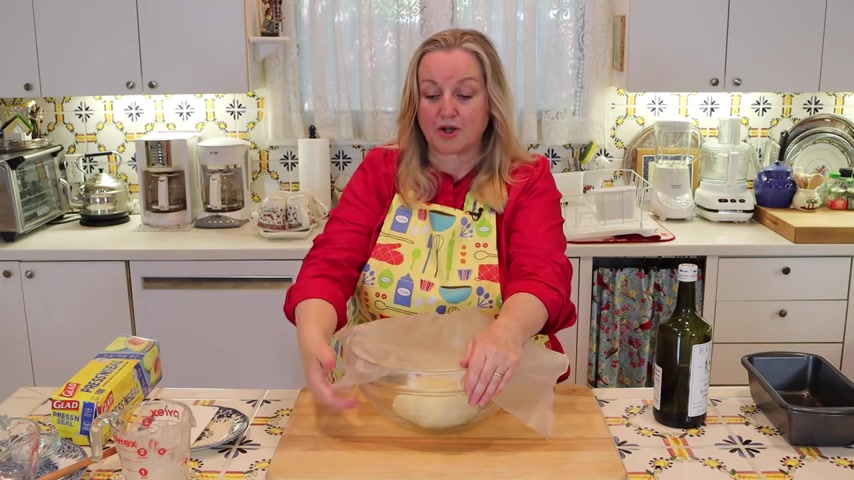
You want to take some cling wrap or a dish towel , whatever you have .
And I'm just gonna use this kling rack to cover my bowl .
If you use a dish towel , you'll wanna dust it with a little flour .
Or alternatively , if you have a damp dish towel , you can use that too .
You just want to make sure that the dish towel won't stick to your dough .
Now , we want to put this in a warm place to rise and we want it to in size and it's gonna take about an hour to an hour and a half .
Now for a warm place that might be on top of your refrigerator or maybe in your oven , but with the oven turned off , but the electric light on or the pilot light on just some warm cozy place that is free of drafts and you'll know that it's risen to the right amount when you put your finger into the dough .
It's called the finger poke test .
And you just go right up to about the nail bed .
You don't have to really stick it in deep , just stick it in .
And if it springs right back , you know that you have to recover it and let it rise another five or 10 minutes and check it again .
If you put your finger in and it stays in or it starts to fill in very , very slowly , then you know that your bread has risen enough .
But again , like with the window pain test , don't worry too much about the finger poke test .
Chances are if you let this rise for an hour , an hour , an hour , an hour and a half , and it looks like it's doubled in size to you .
That's perfect .
If you check it at an hour and you're not sure , just let it go an hour and 15 minutes an hour and a half , whatever the case may be , it's going to be fine .
Well , I let this dough rise for about an hour and a half and it looks very good .
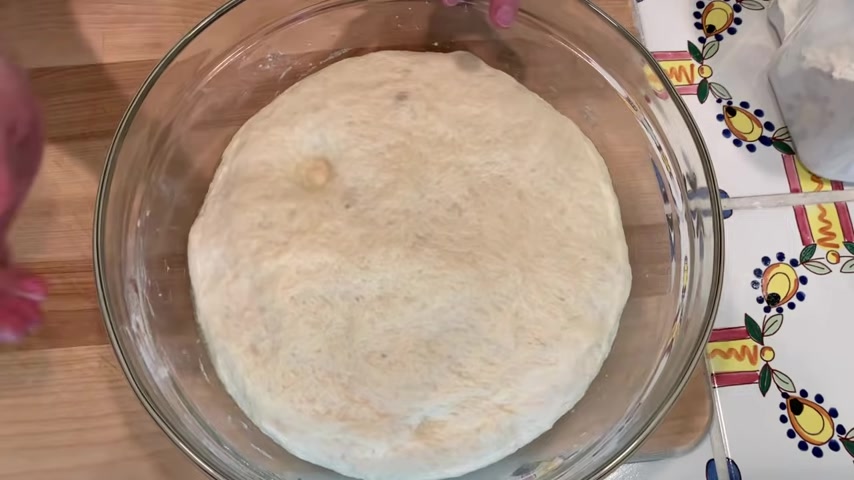
Now , what I'll show you what I'm talking about with the finger poke test , we're gonna put our finger into the dough just up to the nail bed and if it stays indented , it's risen enough .
So our indentation stayed in , we know our dough has risen enough .
Now , we want to make sure that we have a loaf pan .
This is about a nine by 59 inches by five inches approximately and it's well buttered .
So just take care of that and let that be , uh , put that aside .
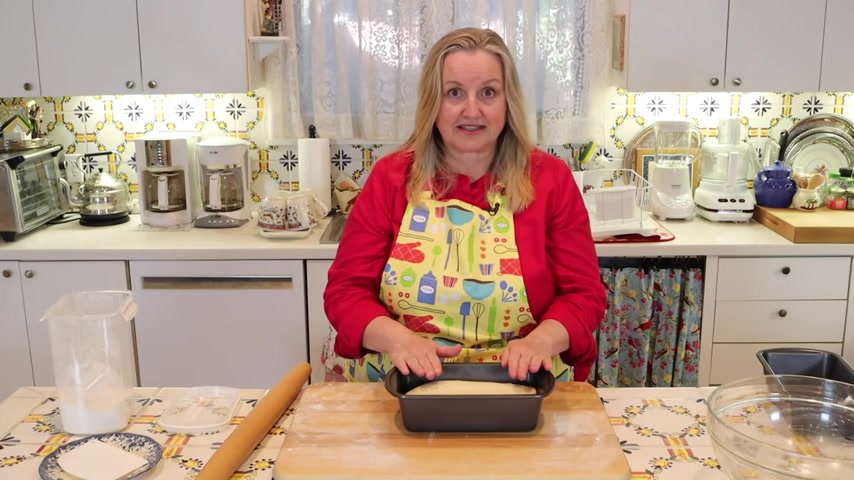
Next , what we're gonna do is take a little flour and now is the time where we're gonna flour our board just lightly and then we're gonna roll out our dough and I'll show you how to roll it up and to get it into the bread pan or the loaf pan .
So we'll just go ahead and punch this down just like that and scoop it out as we go .
And with thanks to that olive oil , it's not gonna stick to your bowl .
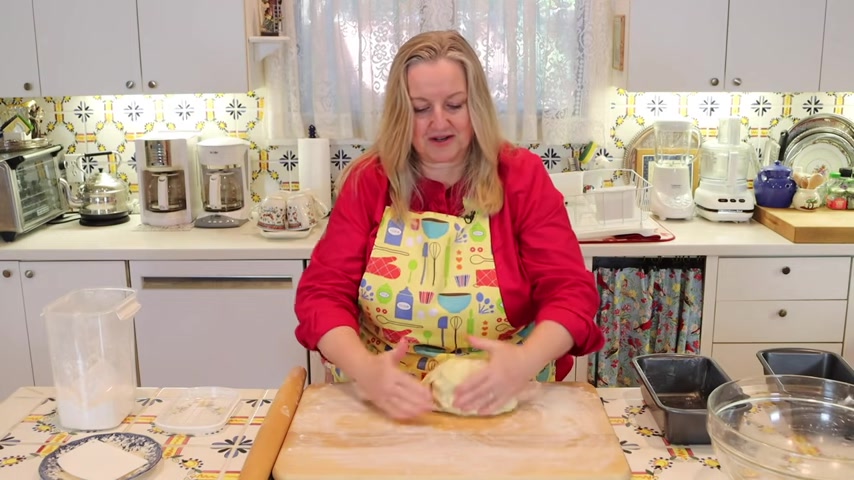
And now what we wanna do is just get work this around a little bit , just get a little flour underneath , so nothing sticks and then we're gonna roll this out .
So I'm just going to get a little more flour .
I'm gonna flower my rolling pin here and we're just going to start rolling this out into a rectangle and we want it to be about the length a loaf pan or bread pan , whatever you wanna call it .
And if , as you're rolling it out , it tends to kind of spring back on .
You don't worry , let it rest a few minutes and try again , it should roll out fine .
And then once you get it rolled out to where it's about the length of your pan , it doesn't have to be exact .
Don't worry , you're just gonna start rolling it just like a little jelly roll and you just wanna do it gently but tightly .
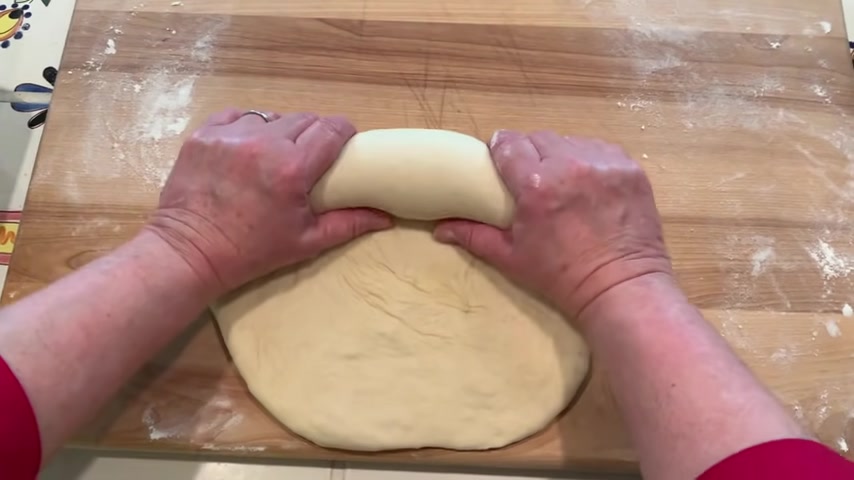
So just roll your dough up the way I'll show you I'll overlay a little video and you want to be a little firm as you , uh , tuck in your roll and tuck a little roll and tuck a little so that it stays together nicely .
And then with your hand just be a little firm in terms of , I should say firm , but let it know .
It sounds kind of funny , but you don't want to put too much pressure on it , but you do want to make sure that as you roll and , and you tuck it in a little that it does stay secure and then you just wanna make sure that you've got the seam on the bottom and then just tuck in your sides and pinch them together a little and then just go ahead and pop this right down into your pan .
Now , what you want to do is let this bread rise for about 45 minutes and it'll be nicely domed .
And what you want to do is cover this with uh , maybe a damp dish towel or a well floured dish towel .
You don't want anything to stick to the top of the dough and you don't need to put any butter or oil at this time .
So you don't want to be using like a plastic wrap , rubbed , rubbed with oil or anything like that .
You want just a damp dish towel or a flour dish towel .
However , those of you who are familiar with uh artisan bread with Steve will recognize this .
You can just take another loaf pan and put it right on top like this and then put this whole thing in a warm cozy place to let it rise .
You may have seen also too , if you watch Joshua Weissman , he does a lot of baking as well .
And I think this is such a very clever trick because you just put it on top .
Now , we're not gonna bake it like sometimes they do with some of their no needs and whatnot .
The poor man's Dutch oven as Steve calls it .
But we're just gonna use this to rise our bread .
So now all we need to do is find a warm place like we did before and let this rise for about 45 minutes .
Now , while that bread is rising , go ahead and preheat your oven to 450 F so that we can get it nice and hot .
Now , we're not going to bake the bread at 450 F , we're gonna bake it at 300 degrees Fahrenheit .
So once we put the bread in , we're gonna turn the oven down , but it's nice to be able to put our bread into that nice real hot oven and give it that little boost .
What did they say ?
Oven spring to , to help it get a nice rise to it .
Now , I also want to talk to you about the rack in the oven and where to place it before you even preheat the oven .
I have a very small oven .
So I put the rack on the lower third rung of my oven .
If you have a very large oven , you might be able to put the rack in the right in the middle run .
The reason I put wine in the on the lower third is because with it being a small oven , if I put my rack on the middle , a rung , the bread is very close almost to the top of the oven and it can over brown .
So you may want to look at what size oven you have and think about how close the bread will be to the top heating element .
If it looks like it might be within three or four inches of the top heating element , you may want to put your rack in the lower third of your oven and break bake your bread down on a little , a little lower .
But if for any reason during the baking process , you find your bread over browning , but it's not done , then you can always tint it with a little aluminum foil and allow it to continue to bake and keep the top from over browning .
But often if you bake in the lower third of your oven , that's not a problem .
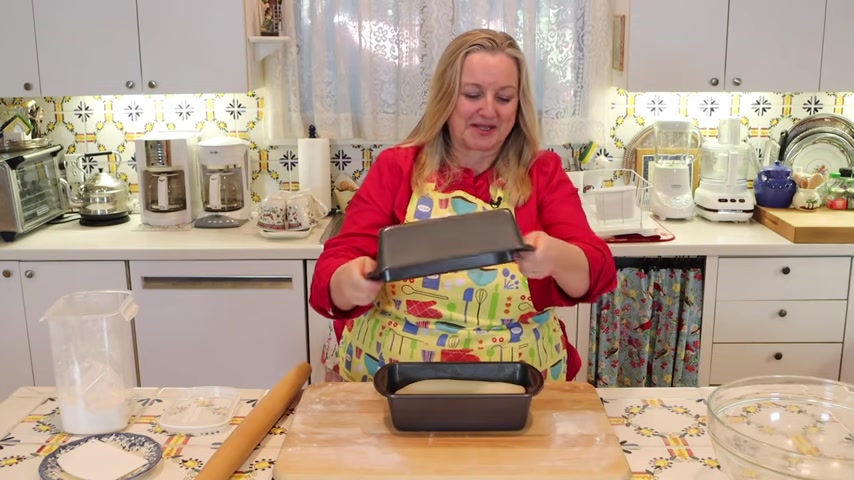
Well , I let this rise for about 45 minutes and I think it's looking terrific .
So I'm gonna get ready to go ahead and put this into my oven .
It's been preheated at 450 F with the shelf , uh , the rack on the lower third of the oven .
And now I'm gonna put this in the oven and I'm going to the heat to 300 150 F .
And I'm gonna let this bake about 35 or 40 minutes .
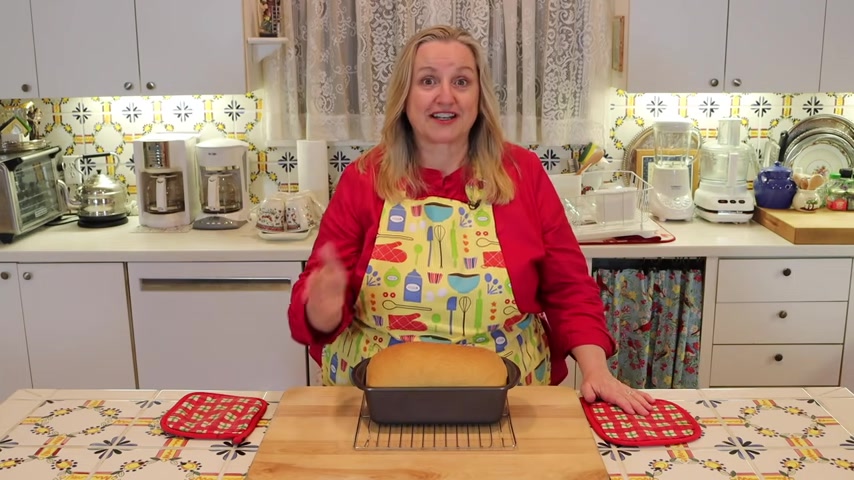
Well , look at this glorious bread .
I just took it out of the oven .
It was in about 40 minutes .
Now , I'm just gonna let the pan cool a tiny , little bit and then I'm gonna tip it over and put it on the cooling rack to cool completely .
Now , I just wanna show you the top crust has a , has , has a nice crust to it .
Hear that .
Now , if for any reason you want this to be very soft and not have that little bit of crunch to it , you can right now while it's hot , take some butter and just rub the butter on top of the crust and that'll soften it tremendously .
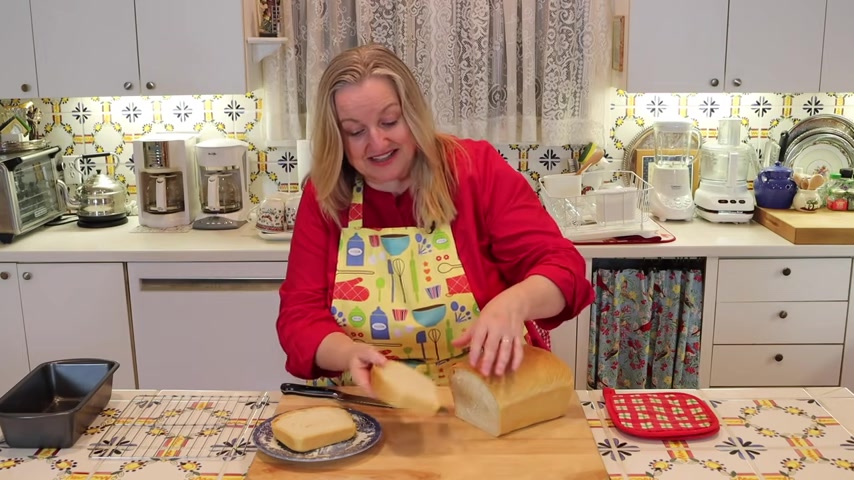
Well , this is a little easier to handle .
So I'm gonna take this out .
I think it should come right out because we really , oh , yeah .
Look at that beautiful , we really buttered that pan and then look at this glorious loaf of bread .
Well , I let this cool a little bit but it's still quite warm .
But who can resist warm , homemade bread .
So we're just gonna have to go ahead and slice into this .
Oh , this just , oh , it has such a nice feel to it .
I think you're gonna love this bread .
Listen to that .
Oh , glorious .
Gotta slice some Texas toast size slices .
Oh , look at this beautiful bread .
Oh , I think you're gonna just be so pleased .
I'll take some overhead shots so that you could or , or close up shots so that you can really see how this came out inside .
Oh , it's just beautiful .
I'm gonna slice another slice and we'll get a little bit more of a look .
Oops a little deeper into this bread and I'll take some more close up shots .
Oh Look at this .
Oh , it's , it's still quite warm but look at how beautiful this slice of bread came .
This is just so light and tender .
I think you're gonna really love this .
Well , let's give it a taste .
I'm gonna get some of this crust .
Mm hm .
Oh , delicious .
Well , I hope you'll give this bread a try .
It's really delicious .
And if you'd like more bread recipes including a no need recipe for super soft sandwich bread .

Be sure to click on this video over here and I'll see you over there in my Texas Hill country kitchen love and God bless .
Partnership
Are you looking for a way to reach a wider audience and get more views on your videos?
Our innovative video to text transcribing service can help you do just that.
We provide accurate transcriptions of your videos along with visual content that will help you attract new viewers and keep them engaged. Plus, our data analytics and ad campaign tools can help you monetize your content and maximize your revenue.
Let's partner up and take your video content to the next level!
Contact us today to learn more.