https://www.youtube.com/watch?v=jA95tUK2RZU
CIABATTA (Crispy Crust✔️ Silky Open Crumb✔️ Biga ✔️)

Hey , what's up ?
CBA ?
Had a really hot moment in the nineties .
There .
Pretty much every cafe had some sort of roasted turkey and sun dried tomato CBA sandwich on the menu .
And most of them weren't very good .
But that's not to say that CBA isn't a great bread .
In fact , it's kind of like the Italian version of the classic French baguette .
It's got really great brittle crust and super tender Satan crumb and has also the same utility of a Great French baguette .
So today I'm gonna show you how to make a classic Italian style at home to get started .
We're gonna mix a little pre ferment called a big for that into a high sided container .
I'm gonna measure 100 and 35 g of warm water , roughly a quarter teaspoon of instant yeast and 225 g of all purpose flour is essentially just the Italian version of the classic French pre ferment that I use on the channel here all the time .
The foolish just with about 30% less water , but both have the same goal .
They bring more yeasty fermented flavor to the dough and also allow us to have a more extensible and thus easier to shape dough with bigger holes .
Once that's all stirred up and there aren't any dry clumps of flour .
The lid goes on and I'm gonna let this thing ferment for 6 to 24 hours the next day .
As you can see , this , bega is very full of life and it smells amazing .
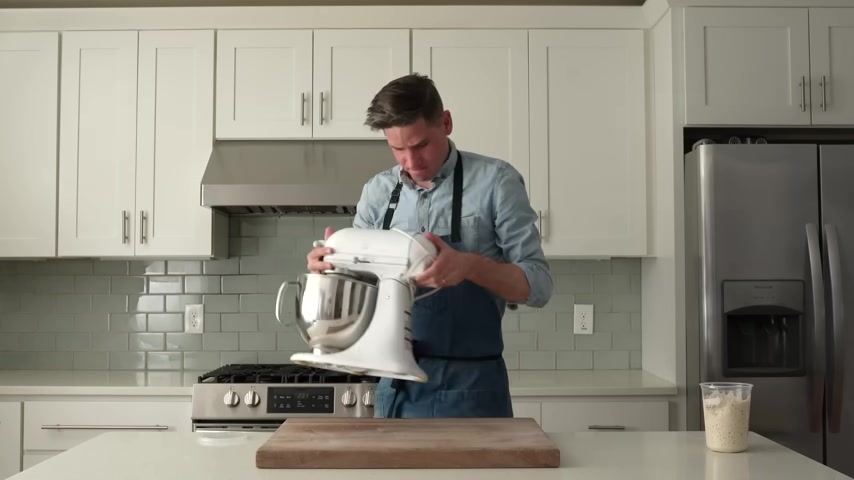
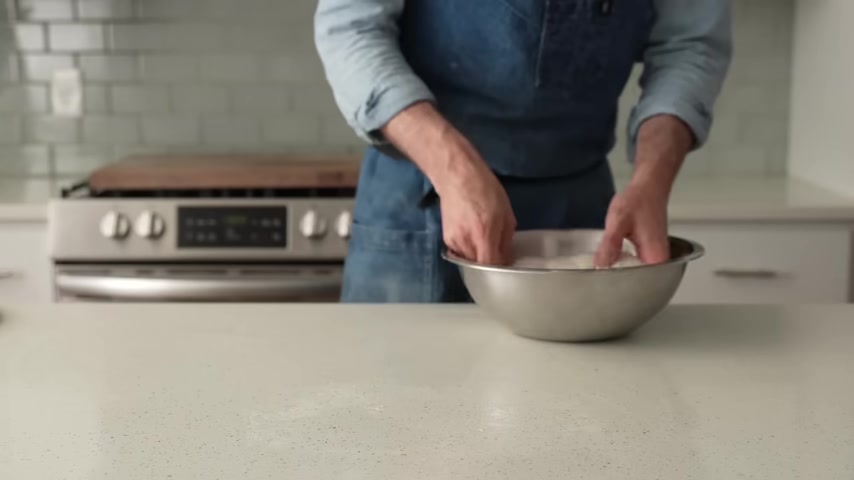
Now , to mix this dough , I'm gonna grab my stand mixer and into the bowl of that .
I'm gonna measure 100 and 80 g of warm water and 250 g of strong all purpose flour .
The hook goes on and now the speed goes too low .
This first mixing step is called auto .
That means the flour and water get mixed up but no salt or leavening of any kind go in yet hydrating the flour without all that stuff gives us even more extensibility or elasticity .
And that means it easier to shape bread with larger holes and that's very desirable .
Once this is combined , the mixer goes off and I'm gonna cover this with a tea towel and let it stand here on the counter for 30 minutes after that , 30 minutes .
Now we do what's called the final mix into the bowl goes 40 g of warm water , 5 g of instant yeast , 10 g of salt and all of that .
Bega Now I'm gonna mix this on low speed for three minutes any faster than that .
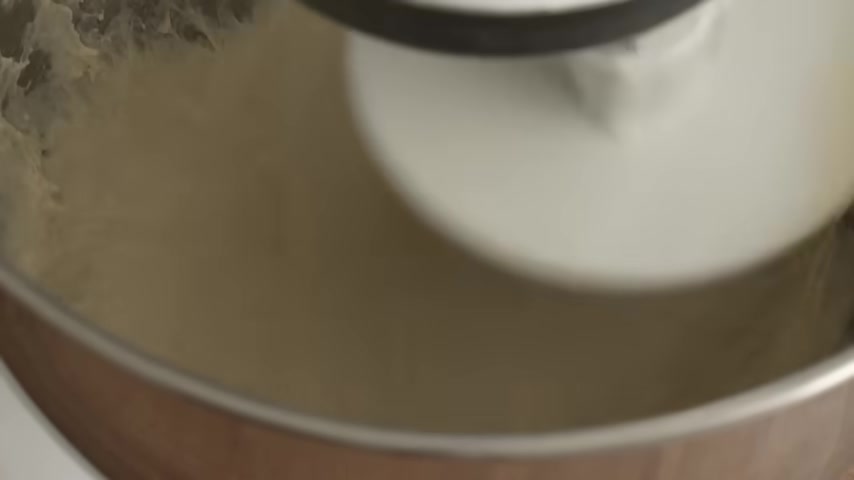
And that additional water we just added will probably make the bega slosh around the bowl and things will get sloppy .
Once everything's starting to come together , we're gonna turn the mixer up to high speed and mix this for five more minutes .
And if you're wondering , hey , bra , you know , oh , I don't have a stand mixer .
Right .
Of course , I do .
And yes , you can make this without one .
All you need is a medium bowl in goes the flour and water stir that up to combine .
Then we're gonna auto these for 30 minutes from there .
We add in the water salt yeast and all of that .
I'm gonna mix this with a soaking wet hand .
This keeps the dough from sticking to me and you'll notice this dough is very , very wet and that's on purpose .
This is one way to get large open holes that are signature to a great CBA .
And there we go , it looks shaggy , it looks very wet but over all it's well combined CBA dough .
Let's get back to the stand mixer .
We will get back to this hand mixed version later .
The only reason I prefer the stand mixer over the hand mixing is that in my experience , we get a more dynamic , slightly more open crumb bread overall that is much easier to shape .
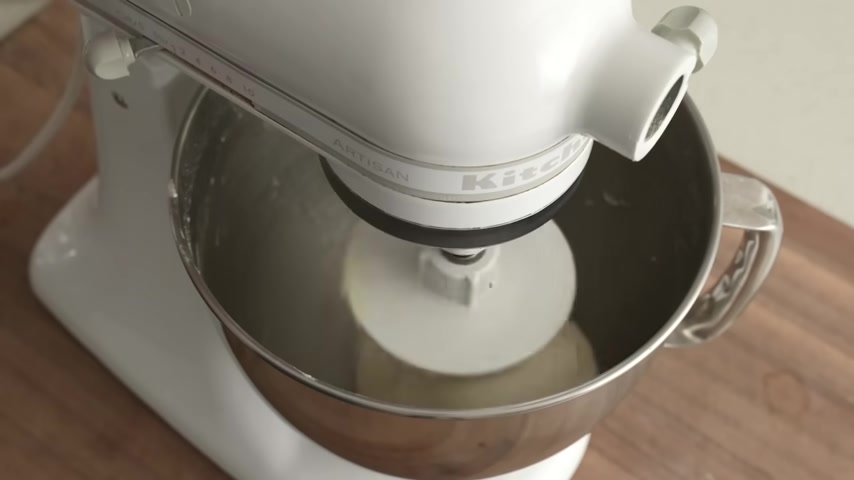
After five minutes of mixing this dough on high speed , you'll see this dough come together into a nice shiny mass that is now slapping around and clearing the bowl .
The true test though comes when we give it a firm tug like this , as you can see , it doesn't shear off or tear .
And that tells me that the glue is developed enough and ready to go .
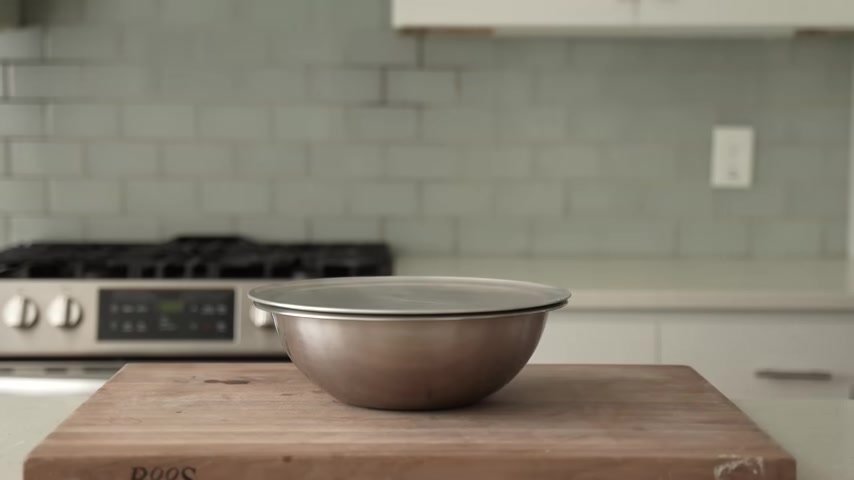
Now , I'm gonna transfer this over to a medium bowl that I've rubbed with a little bit of olive oil .
And as you can see right away all of that high hydration and auto has given us an incredibly elastic dough or as bakers call it extensible dough .
It is a beauty but it is quite sticky and that's to be expected .
That's ok .
The lid goes on .
I'm gonna ferment this on the counter for 30 minutes , 30 minutes later , the dough hasn't risen much and it looks really wet and quite slack sitting there in the bowl .
So that means it's time for a strength building fold for that .
I've got a very wet hand and I'm gonna use it to pull out the dough stretch it out as far as it will let me go and then I'm gonna fold it back over .
I'll turn the bowl 90 degrees , pull it out , fold it back over and repeat this two more times , turning the bowl 90 degrees each time .
Once I've got four folds into the dough , I'm gonna grab a corner and pull that to roll the bottom over to the top to get things nice and tightly stretched from there .
I'm gonna do 4 to 5 of these 10 to 2 on the steering wheel style moves to get a nice tight seam built underneath .
And there we go .
It's still a little sticky looking for sure .
But now we have some much needed strength layered in the lid goes on .
I'm gonna check back in 30 minutes after that 30 minutes .
Now , we can see some nice gas development .
The dough is active and it looks very good .
Now , instead of another stretch and fold , I'm gonna show you another cool technique that I've learned recently and it's called lamination to do that .
I'm gonna clear off my counter and then spray the surface really well with water .
Next , I'm gonna use my dough card to scoop the dough out of the bowl onto that wet surface .
And now using wet hands , I'm gonna pull and ST this dough out into a large flat rectangle that's roughly 12 to 14 inches by 18 to 20 inches .
Give or take .
I'm doing this lamination instead of a second stretching fold for two reasons .
One is that we're going to be layering the gluten in a way that gives us a dough that rises much higher .
And number two , it's gonna give us a much easier to shape dough in the end .
Once things are stretched out , I'm gonna give this what I would call a letter style fold .
One side's gonna get pulled out and then fold it into the middle .
The second side is gonna get carefully pulled out as well and then fold it back all the way over the first side from there .
I'm gonna grab this from the bottom and then roll it over itself 3 to 4 times again .
Keep everything wet .
This dough will definitely want to stick to you .
And once it's rolled into a nice fatty ball like this , I'm gonna scoop it up and lay it back into the bowl .
Now , I'm gonna cover this dough and let it from it here on the counter .
For another 60 minutes .
After that hour , this dough has risen by about 30% from our last fold .
And it looks gassy and buoyant and really alive to shape these .
I'm gonna flour all of my surfaces liberally .
The dough will stick to anything less than total coverage of flour .
I'm gonna flour the dough itself as well and then using my dough cart , I'm gonna go around and make sure the dough is very well released from the sides of the bowl .
A lot of the open crumb in these CTAs is gonna be made or lost in this step .
We need the dough to be very easily released from the bowl when we flip it over .
And if we did our job , when we do that , it should fall right out onto our floured cutting board .
And that looks great .
Next , I'm gonna literally flour the top side of the dough that we just flipped out and then I'm gonna pat it with a flat of my hand gently to help spread things out just a bit with well flowered hands .
I'm gonna gently coerce this thing into a square slab .
No more movement than this is needed .
If you see a huge bubble like this , pop it .
That's literally it .
We've got a big slab of dough over here .
I've got a large piece of parchment paper that I'm gonna liberally dust with flour from edge to edge .
Then using my dough scraper .
I'm gonna gently slide this around the edges of the slab to make sure that it's not glued itself to my cutting board from here .
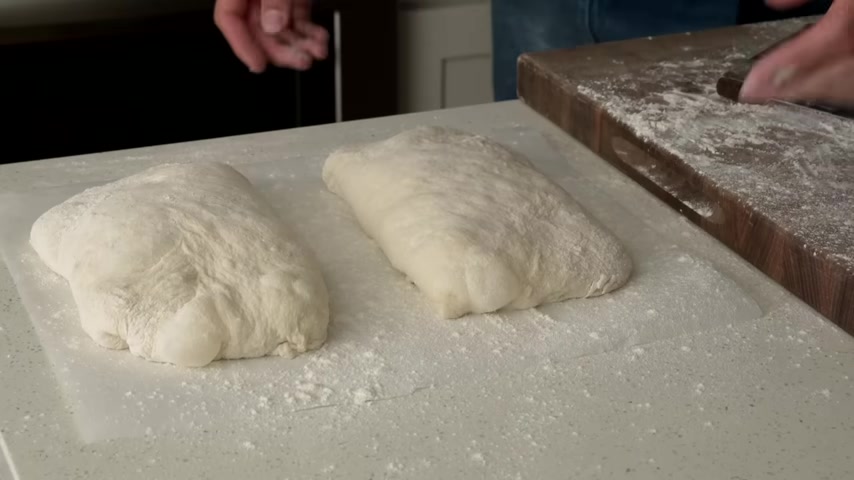
All that's left to do is to cut this slab into two equal size rectangles .
And there we go , these are looking like now in one fell swoop , I'm gonna lift these up with my fingertips and move them over to the parchment paper .
The best I can try to keep your fingers under the loaf .
Instead of squeezing them , the gas will leave if you put too much pressure on them .
Once these are moved over to the parchment paper , I'm gonna cut these in half to make them easier to move around .
And then I'm gonna move them back over to my cutting board .
It turns out that these quartz countertops that have suck a ton of heat out of dough and it majorly slows down production .
So as much as I can to keep dough on the wood and off of the countertop .
Now I'm gonna cover this with a tea towel and proof these on the counter here for 30 minutes .
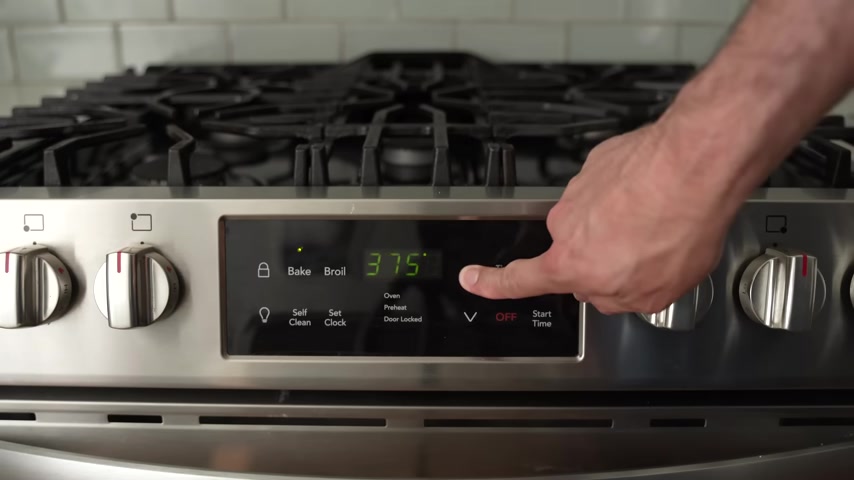
While these proof I'm gonna preheat my oven to 500 F or 2 60 C and to set up the inside of the oven , I've got a cast iron pan going down on the floor .
A rat goes onto the lower third and then my pizza steel or baking stone goes on top of that .
Finally , I've got a large foil turkey roasting pan .
This helps trap a lot of steam around the ciabatta while it bakes .
And that means pro level crust .
So I'm using it .
But if you guys don't have one or can't get one , it's probably not essential .
Speaking of steam at about 30 minutes into this proof , I'm gonna bring some water up to a boil over at the stove .
This is really gonna help boost the steam even more .
And you're gonna see why in a second back to the bread , these shaba has been proofing for about 40 minutes and they're right in that sweet spot where when you poke them , they take it and then gently bounce back .
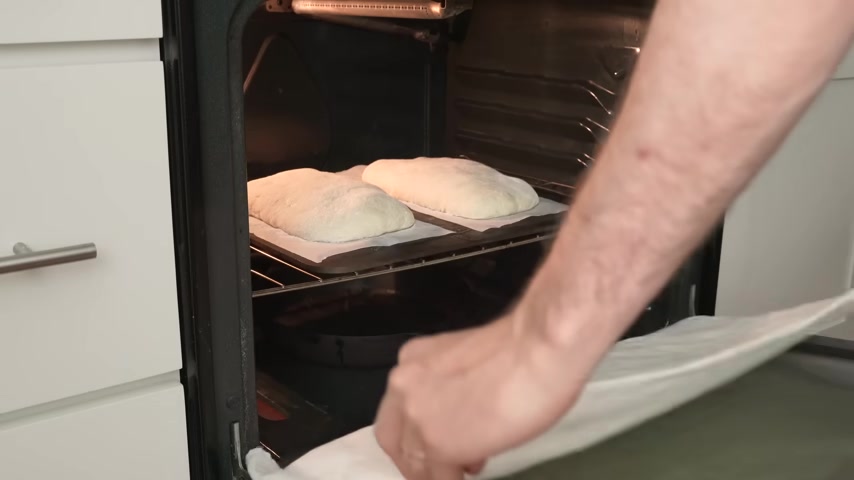
Now to load these in the oven , I'm gonna grab my pizza peel , slide the Chippies onto that parchment and all and then into the oven they go thanks to the parchment , they should slide off super easily .
Now , I'm gonna throw a towel onto the glass door of my oven .
Then that boiling water from the stove top goes into that preheated cast iron pan , tons of steam .
As you can see to trap that steam .
I'm gonna put the turkey pan over the loaves , close up the door and turn the heat down to 4 80 F or 2 48 C and bake for 12 minutes .
12 minutes later , I'm gonna come back , remove the foil pan and clearly it did its job .
The shaba has sprung a lot more than I was expecting and I am very excited about it pretty good .
From here .
We're gonna bake this for an additional 13 to 15 minutes or 25 minutes total depending on how hot your oven actually gets .
And I say it often , but I will reiterate .
We want dark crust .
We've gone through a lot of trouble to get to this point and it would be a damn shame not to cross the finish line with dark reddish brown robust crust .
After 15 minutes , these things are ready to come out of the oven and onto a wire rack to cool down and take a look .
I know I say it all the time and it's kind of cliche , but this is beautiful bread .
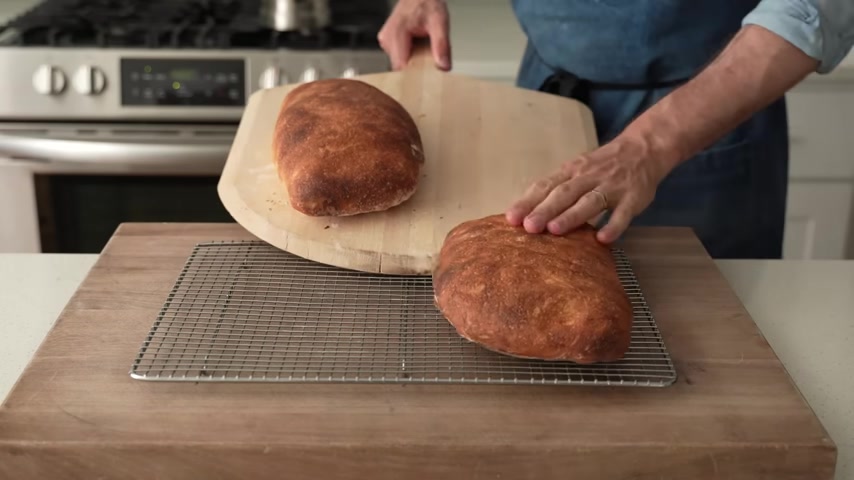
The loaves rose so much and so wildly in the oven that they tore and crack themselves in a supernatural , an attractive way and I'm just super stoked .
This is perfect CBA , in my opinion , but before we cut into this .
Let's take a look at the hand mixed version of this CBA .
In my opinion , these still look very good .
They're less dynamic for sure .
They're a little bit less pro but damn , this is still beautiful bread and take a look at the crumb .
I cut into this about an hour later and it stands up .
That is good looking CBA crumb cutting back to the stand mixer version .
The crust here is perfect .
It's thin and brittle and the crumb is super wide open and Satan and the amazing I think fruity aroma of that overnight .
Bega gives me vivid reminders of my time as a baker around 10 a.m. the CBA comes out of the oven and it's really the first time since 5 a.m. that you as a baker have had even a second to stop and catch your breath .
So you tear up a fresh chippy out of the oven , drench it in olive oil and top that with a bunch of flaky salt and then you just demolish it standing there in silence , enjoying every last bite of it before you get to the sourdough .

It's a perfect bite .
Let's eat this meat .
Are you looking for a way to reach a wider audience and get more views on your videos?
Our innovative video to text transcribing service can help you do just that.
We provide accurate transcriptions of your videos along with visual content that will help you attract new viewers and keep them engaged. Plus, our data analytics and ad campaign tools can help you monetize your content and maximize your revenue.
Let's partner up and take your video content to the next level!
Contact us today to learn more.