https://www.youtube.com/watch?v=9WkiHoHb5FI
how to use watercolors for portraits _ tutorial
Hi , everyone .
Welcome back to another tutorial video .
This time , I will be talking about a step by step process of how I paint the face with water colors .
A few things to note before we get started , this video will only be focusing on how I paint the face .
So it does not include the hair .
This video will show my style of painting which can be considered messy by a lot of people since I avoid blending the paint and I like to preserve the texture and layers that I naturally get with water colors .
However , if that is a style that you want to learn , you can continue watching this video , I will not be going through what watercolor materials , tools or brands are the best ones to use and I will not be going through all of the techniques that you can do with water colors because there are a lot I will only show the that can be applicable to how I paint the face with .
That said if you want to see um an in depth video on how I paint the hair or how to do a different style using water color or different art materials or watercolor brands that I like or an in depth video on techniques .
Then let me know in the comments down below and that might just be the next video that I make .
I will also leave some awesome resources in the description box where you can watch and learn a variety of techniques , tips and tricks to help you get a better understanding of how to use water colors to paint , basically anything you want and in any style that you want .
And speaking of awesome resources , this video is sponsored by Skillshare and I want to thank Skillshare for sponsoring yet another video .
If you don't know what Skillshare is , Skillshare is an online learning community where you can learn a variety of creative skills ranging from drawing , painting , animation , photography , freelancing , and so many more .
And the best part is that the classes are taught by professionals who have established themselves in their respective fields .
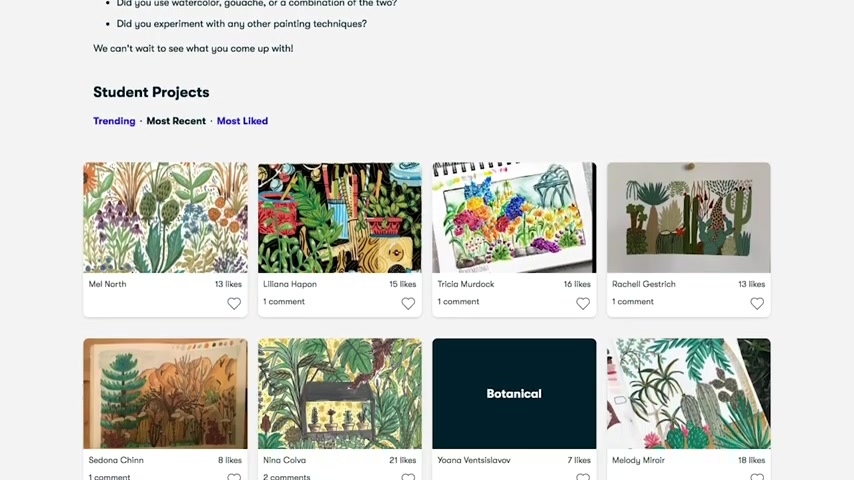
Many of the classes also have assignments and projects that you can participate in , get feedback from your peers and also get feedback from your teachers .
So if you are interested in checking out skillshare and signing up for their classes , the first 1000 people to sign up using the link in the description box will get a free trial of skillshare premium that gives you unlimited access to all of their classes available .

And after the free trial , skillshare premium costs less than $10 per month if you pay annually , which is still a really good deal considering the amount of skills and knowledge that you can gain from skillshare .
So once again , the 1st 1000 people to sign up using the link in the description box will get a free trial of skillshare premium .
I highly recommend you guys take advantage of this offer and check out the links in the description box where you can learn the basics and advanced techniques on how to use water colors for your drawings .
Now , let's start with knowing a little bit about water colors .
So what are watercolors ?
Watercolors are paints made of pigments suspended in a water based solution .
Hence the name water colors .
This also means that they are used with water and they react and dissolve when water is added , allowing you to create beautiful textures and effects with this medium , which is why I love using water colors .
So because the pigments are diluted in water , that means that water colors have this translucent look to them , which is really great for layering and it also helps create a soft , dream-like aesthetic , especially if you're into that .
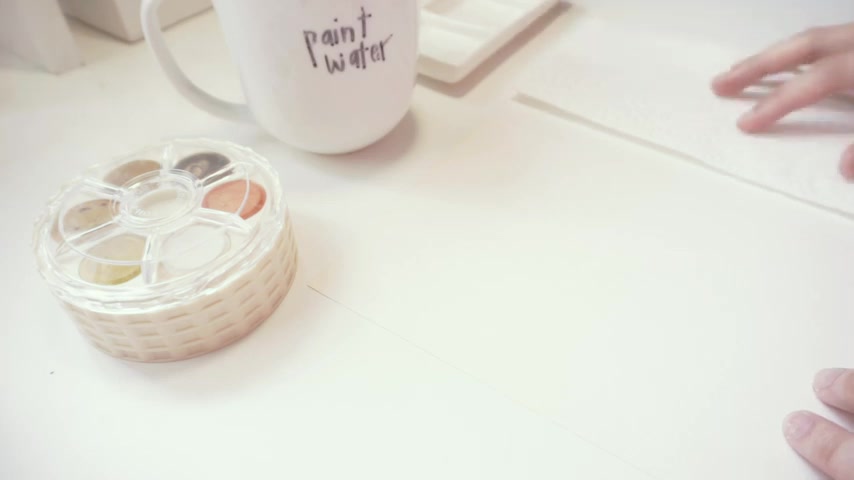
However , you can also create vibrant and bold colors with water colors , but that depends on how you control the medium pan , water colors or tube .
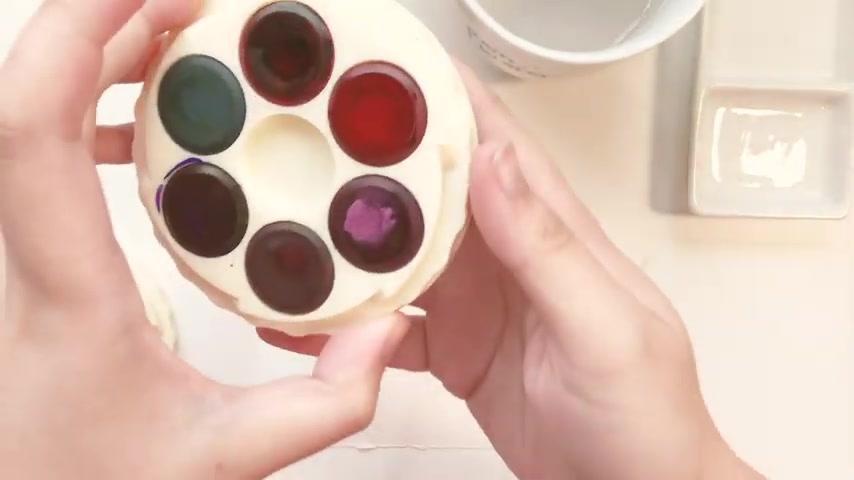
Watercolors , watercolors come in a variety of ways , but the most common forms are in tubes or in pans .
The best way to know what to buy is do your research , read reviews from people watch videos of people using different brands of watercolors .
I can make a separate video on this but really it comes down to personal preference .
I actually prefer pans .
So in this video , that is what I'm going to use .
What is the water to pigment ratio ?
Because water colors are used with water .
The water to pigment ratio is important in creating the desired effect you want .
So a simple rule I like to remember is that the more water I use , the more translucent and softer the colors are going to be .
However , the less water I use the less translucent and more vibrant the colors are going to be mastering how much water to use basically comes down to actually using the medium and practicing with it and getting a feel of how much water is just the right amount of water for your personal preference .
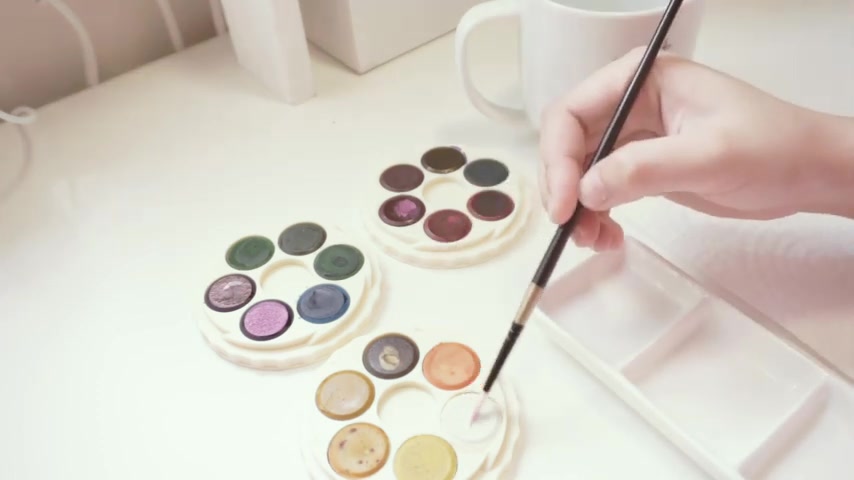
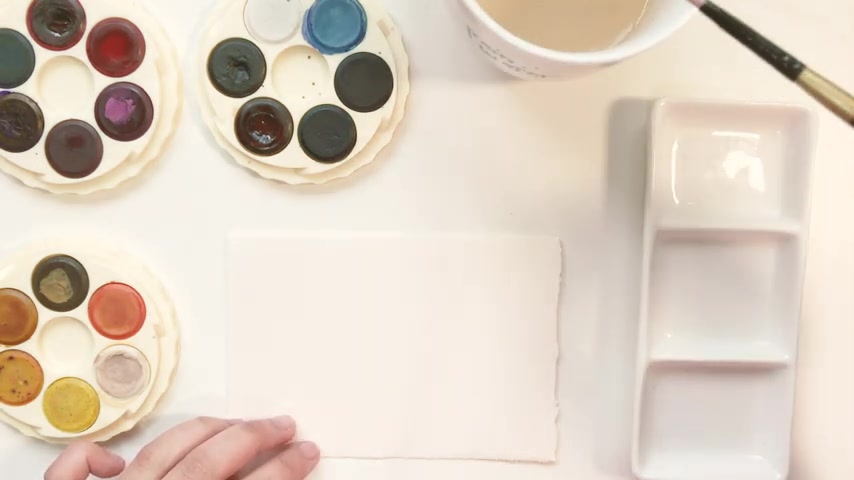
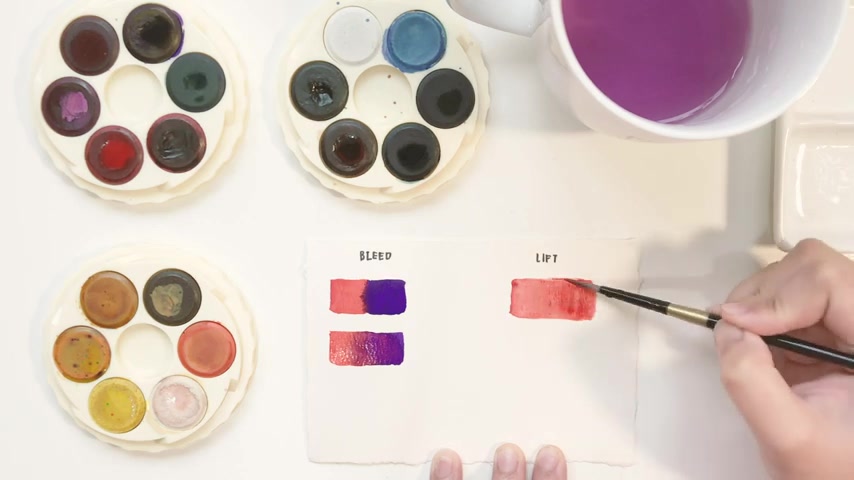
I do recommend doing practice tests like this before getting started on a painting .
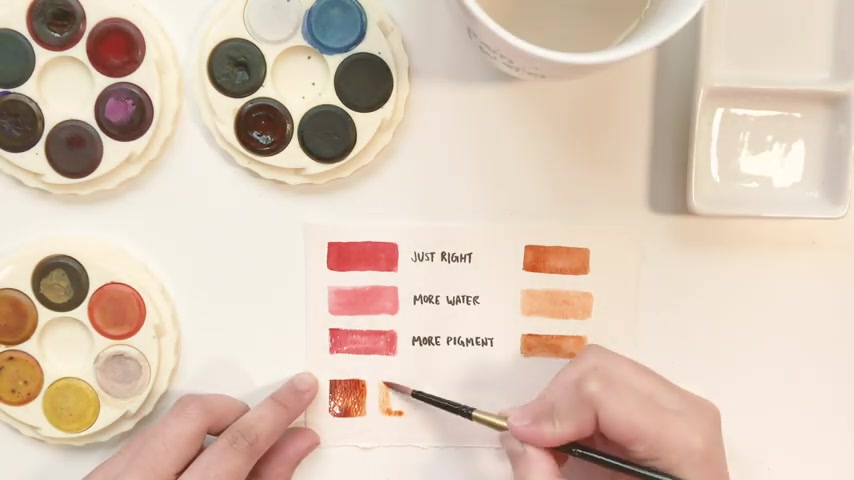
That way you can get to know the water colors you have and you can get comfortable with the medium as well .
How do you mix colors ?
I can create another separate video on this as it touches more on color theory .
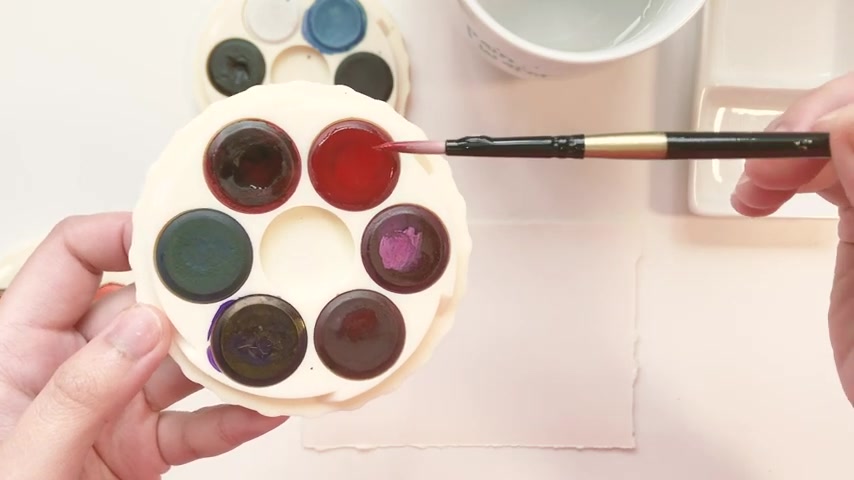
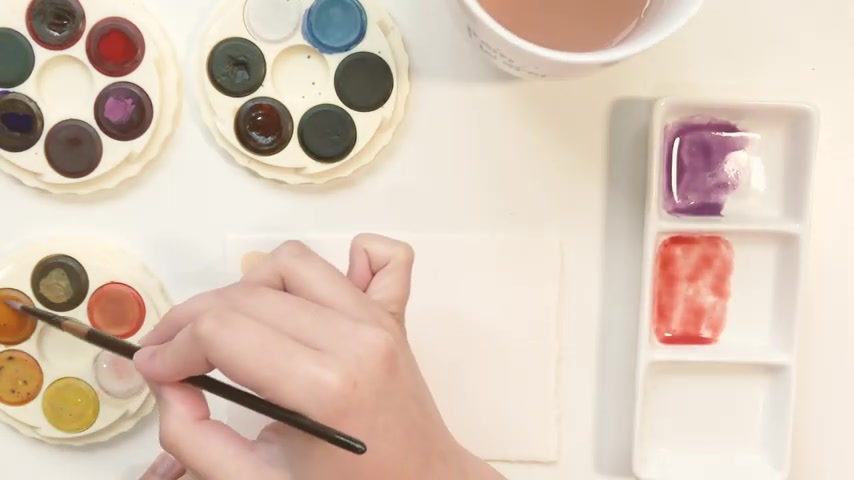
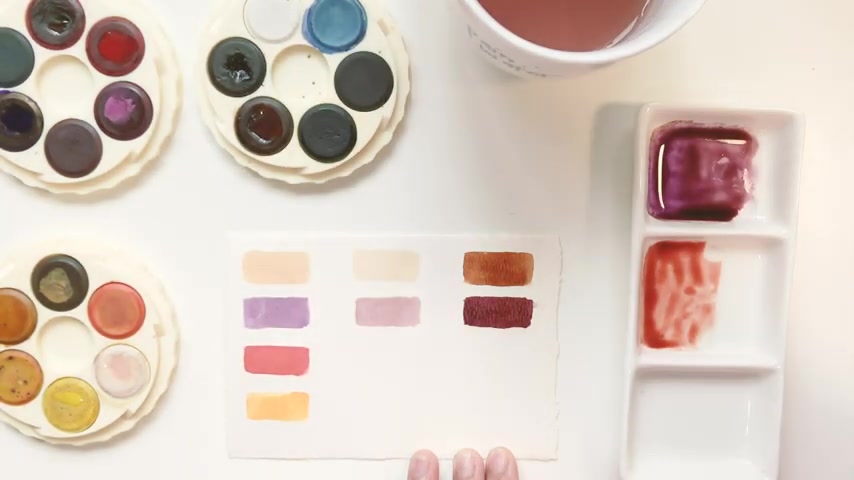
However , in this video , I will show how I mix colors that I use for skin starting with beige to create this color , I mix burnt sienna and white , burnt sienna has this yellowy or orange tint to it which I really like for skin to create purple , which is the shadow color I use , I mix the beige color with a bright warm purple and I like my portraits to have a warm tone to them .
So the colors I use especially for this color palette are always on the warmer side to create red .
I use this color for blush .
So I mix the beige that I created once again with a warm red color and to create yellow because I like to add yellow to the skin .
I use a small amount of the red mixture that I just created and I add a yellow ochre but this yellow ochre is actually really bright .
So it creates this slightly orange yellow .
So notice how I used white in all of the mixtures .
This pretty much gives the colors a bit of a dull look which sometimes that's what I'm going for .
It also makes the colors look a little bit milky which I really like .
Sometimes the colors aren't as saturated and they're softer too .
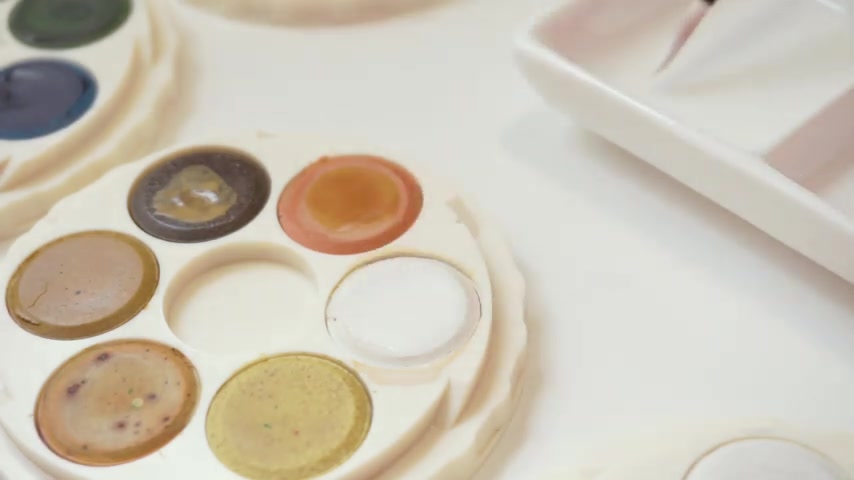
However , when I want to create vibrant colors , I basically just emit the white from any of the mixtures to make darker colors .
I simply add more pigment to the mixture .
So for example , to create a brown and a really nice warm brown color , I mix burnt sienna and burnt umber together .
So this might be too dark .

However , I can change it to a lighter skin color by adding more water and still keeping that vibrancy confident for a dark purple .
I like to use that same brown mixture and basically just add purple to it , creating this really rich color that I love to use as a shadow color for darker skin .
And sometimes I use it for light skin as well .
If I want some heavy contrast in there and if it still looks a little bit brown , then obviously I just add more purple .
It's as simple as that to create a dark red .
Um I use once again the same brown mixture and I add lots of warm red and finally , for the yellow , this one is slightly different since I use a watered down mixture of the dark red and then I add a yellow to it .
It creates a similar shade to the previous yellow .
However , this one is not as dull , but also this one is a little bit darker too .
So these are the colors that I like to use for the skin .
It has taken me a lot of practice and experimenting to arrive at these colors which I really like and these became my go-to colors , especially when I'm not in the mood to mix things up .
However , as a baby beginner , I highly recommend that you play around with what colors you get when you mix things together because that can help develop your own style and your own color palette .
Once again , if you want a separate tutorial on how to mix colors and color theory .
Let me know and that might just be the next video I make .
Now let's talk about my favorite techniques to use with watercolors , especially when I am painting faces .
So these are the ones that I have tried and tested and they work really well for me when it comes to painting portraits .
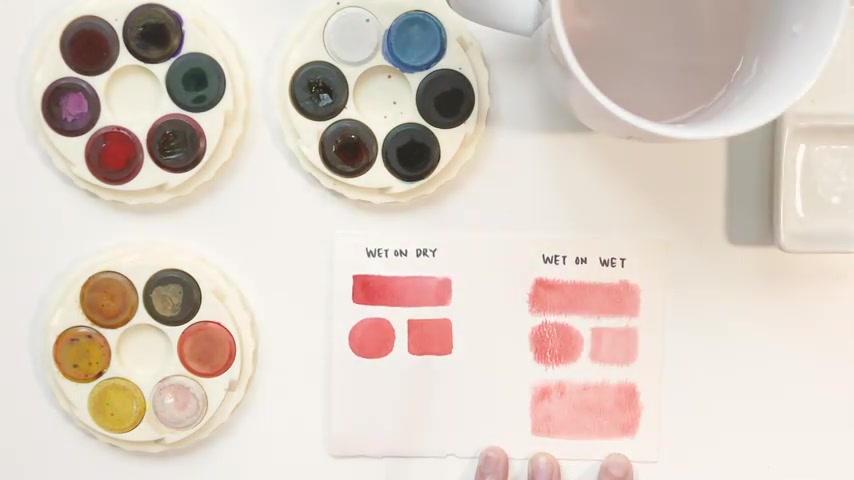
Number one wet on dry .
This is one of the most commonly used techniques and I highly recommend that you start with this as a beginner .
It is super easy .
All you have to do is apply wet paint onto a dry surface .
By using this technique , you can create precise shapes since the paint doesn't bleed outside the area that you paint it on .
It also dries with nice crisp edges which look really cool .

In my opinion , it's perfect for beginners as well because this technique gives you a lot of control with the paint .
Number two , wet on wet .
This technique is another commonly used technique and you will intentionally and unintentionally encounter this technique when using water colors , it's once again , super easy .
All you have to do is apply water onto a dry surface .
And whilst it's still wet , you add paint on top of it , you'll notice that the paint bleeds and you're not really able able to get clean crisp edges with this technique .
However , this technique is really useful in creating flat washes because you get an even spread of pigment onto the paper .
And it's really helpful in blending colors seamlessly together .
The paint can be harder to control .
However , that's also the beauty of water colors .
They are unpredictable and the way they react with water naturally can create these beautiful textures in your drawing , especially when it dries .
So I highly recommend that you play around with the two techniques that I just mentioned .
Number three bleed .
This technique combines the use of wet on dry and wet on wet .
It's when you paint a surface using a wet on dry technique .
And whilst the paint is still wet , you grab a different color and paint the area next to it .
When the paint touches the other wet paint , it creates a bleeding effect similar to what you get with a wet on wet technique if you want to create a beautiful blend of colors .
However , you can use this technique and basically just run your brush back and forth until you're happy with the result and you get a really nice blend of those two colors .
Another thing to note is that the amount of bleed depends on how much water you use .
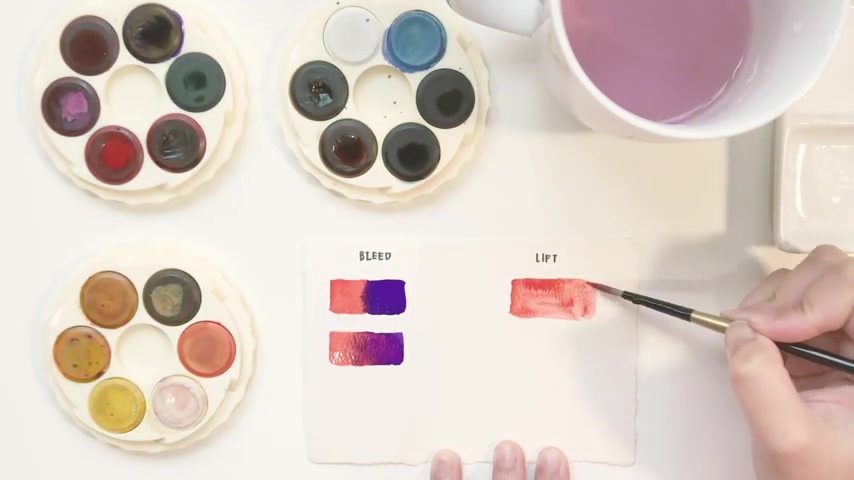
So if you want to create a nicer blend of colors and you want more control , make sure that you don't actually use too much water number four lift .
So this technique is commonly used to fix mistakes and I use this a lot .
For example , you've added the wrong color or there was too much water or too much pigment .
So in order to fix this , all you have to do is dip your brush in clean water paint over that surface and then dab the wet area with a paper towel .
And you might want to repeat this a few times depending on how much pigment you want to remove .
You also want to be careful when doing this since you don't want too much water on the paper and you don't want to rub the wet area or else it'll damage the paper .
So try not to rush um and also try to prevent this from happening , which is actually possible if you ever feel like you have too much water or too much pigment on your brush .
All you have to do is dab your brush onto a paper towel to remove excess water and access pigment .
And those are the four techniques I like to use when painting portraits and watercolors .
And now that you have a basic understanding of water colors , let's actually start painting the face .
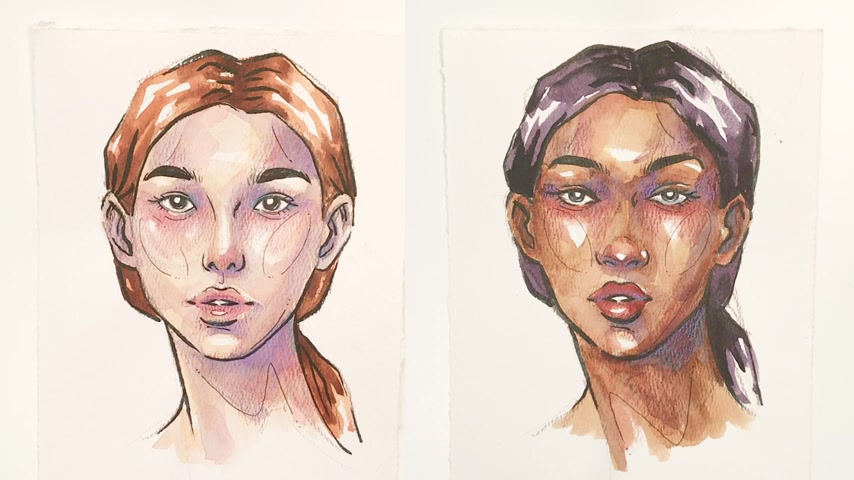
So I have two demonstrations right here in this one video .
Feel free to watch this again .
Um There is a time stamp so you can come back to this specific spot .
So you're able to watch both demonstrations clearly , I will be painting a light skin color and a dark skin color .
Since I don't use any special techniques to color dark skin , I basically just use the darker colors that I have shown in this video .
So that's why you're getting both of them in this one video .
So I start with the sketch of a female face .
If you want to learn how to draw faces , I have a video tutorial that you can watch .
It will be linked in the card section of this video .
I also have a video on how to shade faces so you can watch that too and come back to this one , especially if you aren't sure how to shade faces just yet .
Because in this video , I won't be going through how to shade .
I'll basically just assume that you know how to shade already because the first thing that I do is know where my light source is coming from so that I know where my light areas are and where my dark areas are on the face .
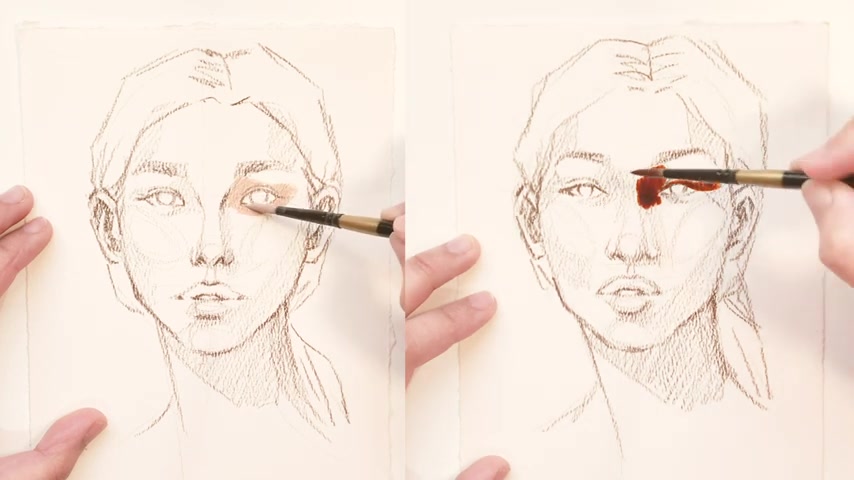
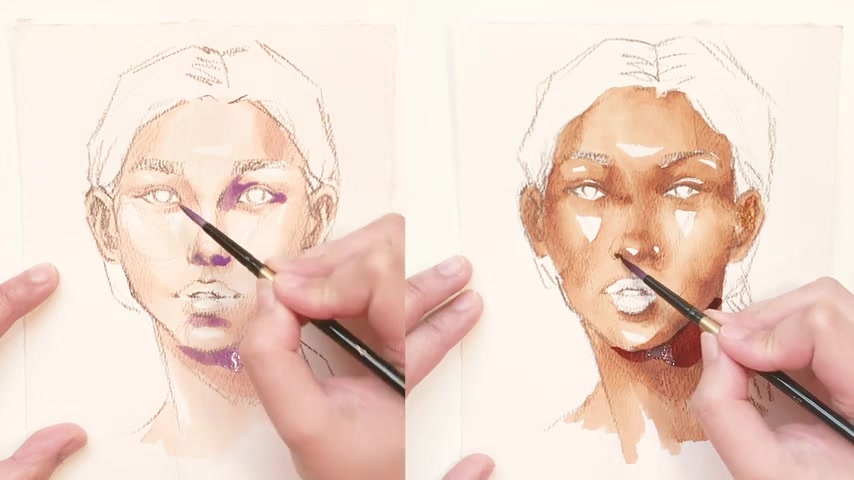
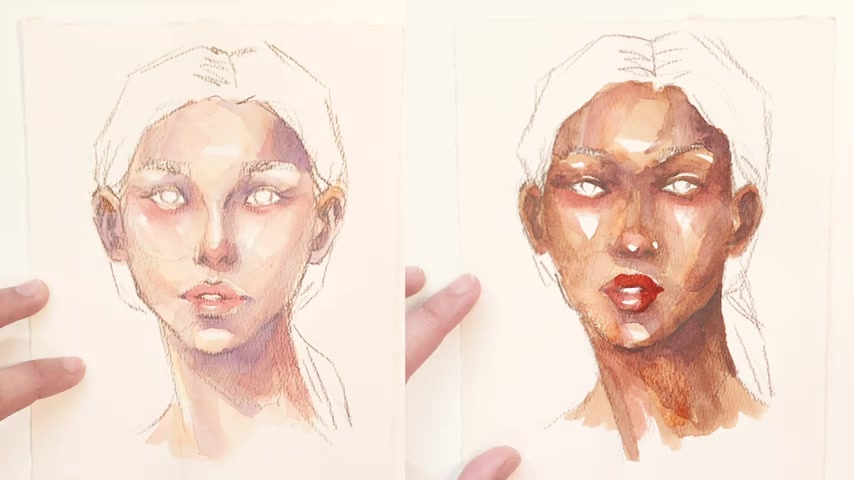
And that's pretty important because I use the wet on dry technique to paint in the dark areas of the face first .
So that could be around the inner part of the eyes , the right side of the face under the chin , the nose bridge cheekbones , basically any area which doesn't get a lot of light .
And in order to get a vibrant color for these dark areas , you can use the technique that I showed you when mixing colors .
But basically , in summary , I just make sure to pick up a lot of pigment on my wet brush and to use less water .
The next step is make sure that these areas are still wet .
I dip the exact same brush in water to increase the water to pigment ratio on my brush .
This results in a softer , more translucent paint .
And I basically use that with the wet and dry technique to add this paint areas next to the dark areas .
Then I make sure that I let it touch the wet areas so that the paint bleeds .
It can either create this instant gradient or this amazing interesting texture because of the bleed and because it's so unpredictable and it always has a different outcome .
However , if you want to create a smooth gradient , you can use the technique that I showed you before where you run your brush back and forth the area to blend those two colors seamlessly .
And you can also just manipulate the paint even more by adding more paint or pigment or adding more water to that area .
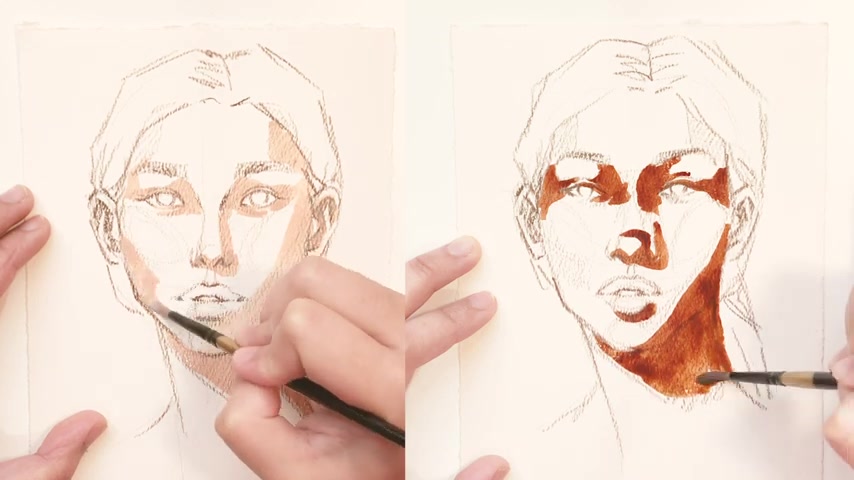
So I do this pretty much all over the face .
I add this translucent paint to the light areas and I'm making sure that I deliberately don't paint on areas that are the highlighted areas such as the nose , the cheeks , the chin , under the eyebrows , and basically anywhere else that I choose to leave white .
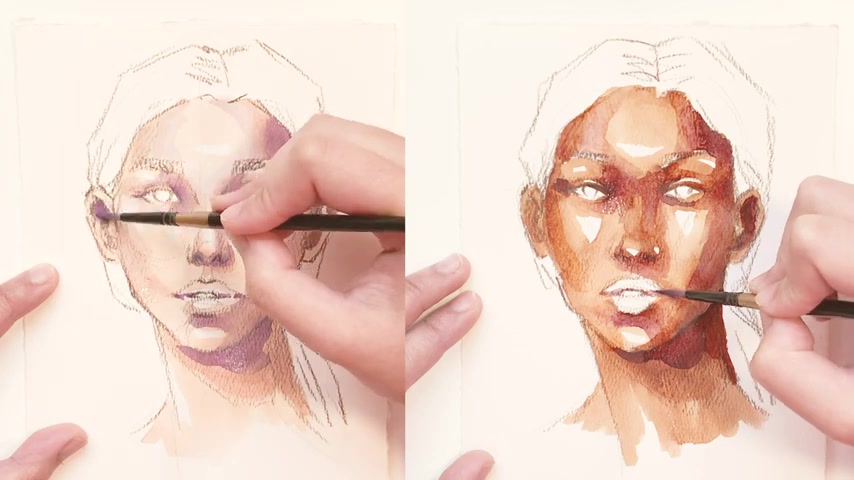
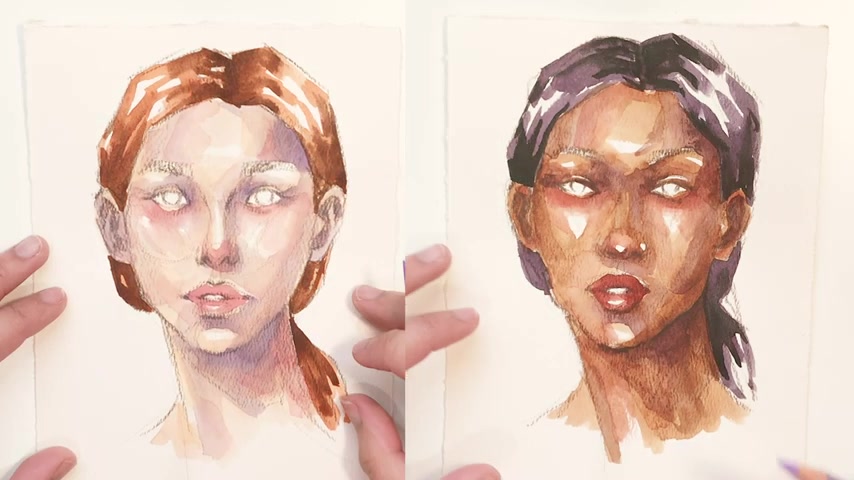
The next step is to add a purple layer to the dark areas for some added depth .
And I like to wait until the previous layer is a little bit dry so it's not super wet , but it's kind of just a little bit damp .
I like to use purple for the sole reason that I just love this color for shadows .
You can absolutely use a darker shade of brown or literally the same exact color .
If you don't want too much contrast , it's completely up to you .
But for me personally , I love using purple for skin and because this can be a strong color , I add this sparingly to the areas that are really dark or sometimes I add it as a shadow color .
I also use less pigment compared to water on my brush .
And the fact that the previous layer is damp means the color won't bleed too much to the layer underneath .

However , if I want to blend that purple and the layer underneath together , all I have to do is add a bit more water that reactivates the um layer underneath , especially if it's not super dry yet .
And that spreads the purple pigments out and then it creates this nice blend .
The next step is to repeat the same method with this layer as I did with the previous layer .
So I dip my brush in water so that the purple is a lot more translucent .
And then I add this to the light areas .
And because there's more water , especially on the lighter areas , you can barely see the color purple , but it's just enough to add that layer look to it , which I really like for skin .
By this time , the paint is also quite dry , especially the layer underneath .
So it actually creates these nice edges to the layers , creating that texture , which I really love to preserve , which is why I don't really blend water colors too much .
I do blend colors as you've seen me do it but only in areas where , where I feel like it's necessary .
Once again , I let that next layer dry a little bit .
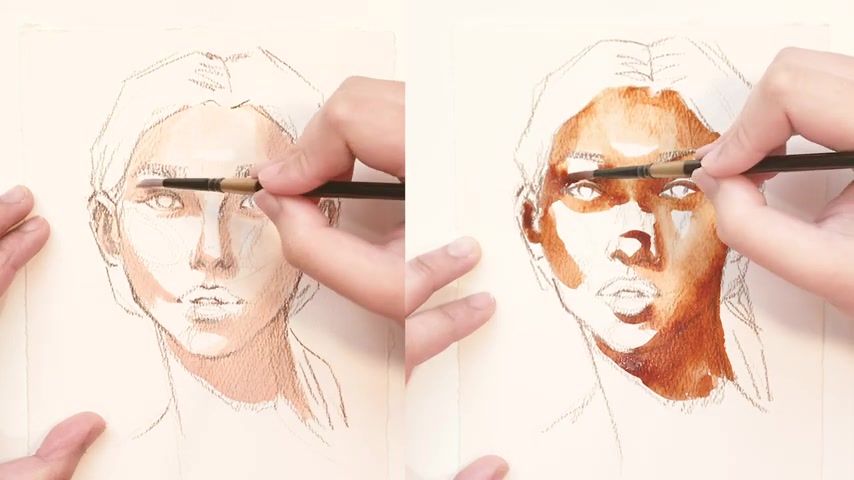
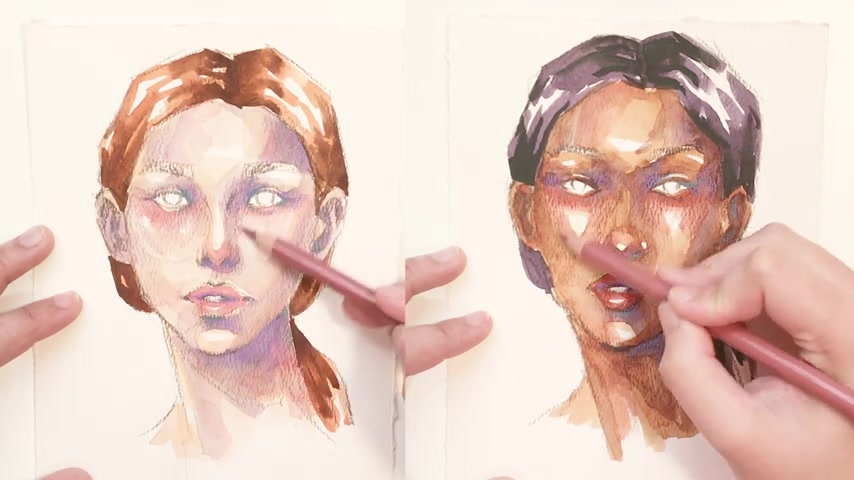
So it's not super wet , it is still a little bit damp and that's when I add the third layer , which is the red layer .
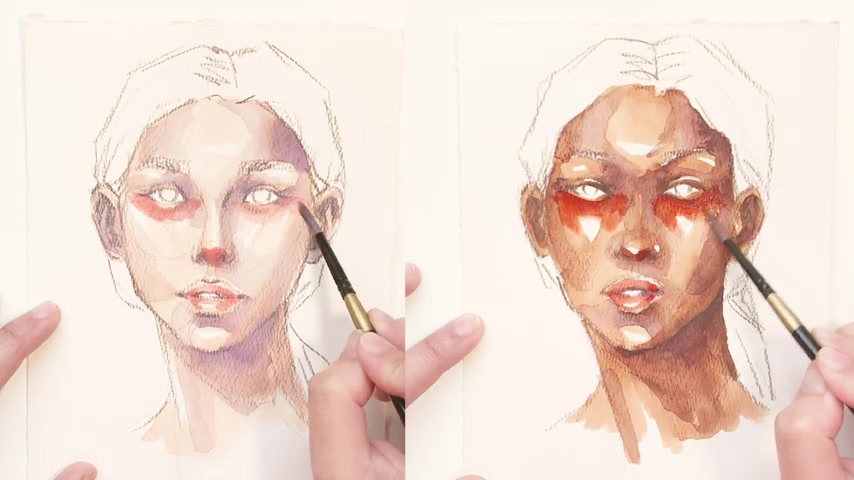
So I add this to the cheeks , the nose , the lips and other parts of the face as well to give it some warmer color so that it's not super dull .
Um I use the same method where I start with a highly pigmented brush and then I blend it out by dipping the brush in water and then using that to blend and spread the red pigment out .
So it looks like a natural blush .
And a great tip when working with watercolors is to also have a paper towel on hand .
So you can dab the brush onto the paper towel to get rid of excess water or excess pigment , especially when you're adding layers like this where you don't want it to be too overpowering and you only want a subtle hint on the skin .
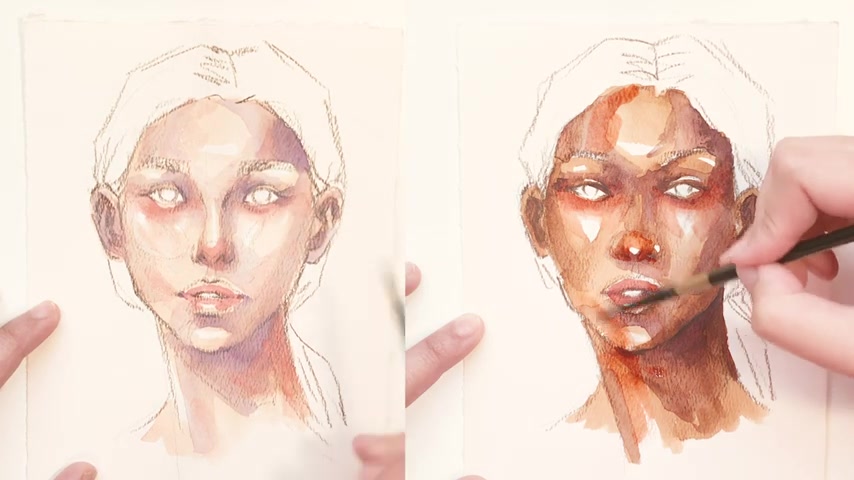
It and the next step is adding a yellow layer to the light areas of the face .
And I don't even wait for the red layer to dry .
So during this part , some of the layers underneath would be already dry .
That doesn't really affect this layer because I think it looks best when using a wet on dry technique .
That way you get those crisp edges onto the brush strokes that you create , which once again I really like .
So I make sure to use um more water than pigments when it comes to the yellow layer because I don't want this to be super overpowering .
It can be difficult sometimes .
So I always like to keep a paper towel in hand so that if I add way too much pigment , sometimes I just take my paper towel and dab that pigment away .
So it just creates this subtle warm yellow light on the face .
And the last step is to do any final touches or fix any mistakes by using a paper towel or water to lift unnecessary marks on the paper like I've showed you before .
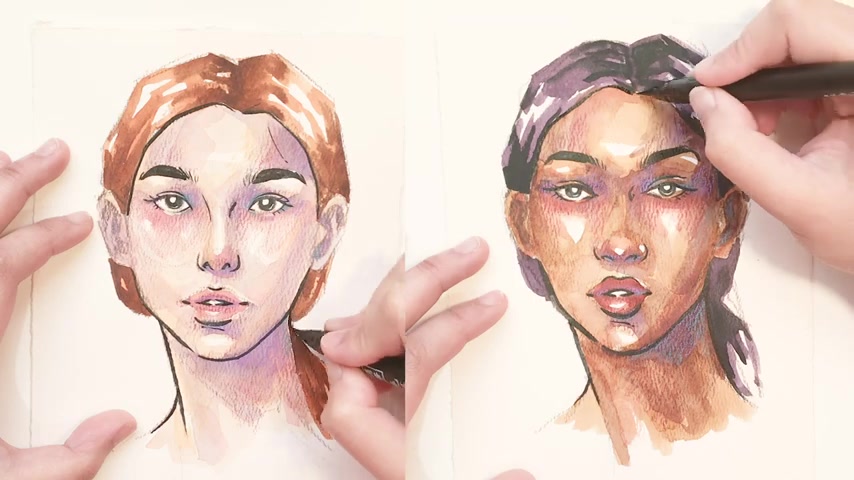
Um I let that dry and then I move on to adding ink for the line art or pencil for texture .
As a bonus .
I will let you guys know a little bit about how I use colored pencils to enhance the way I color skin because water colors and pencil go hand in hand for me as you know , I love using purple , red and yellow for the skin .
I use those same exact colors when it comes to pencils .
However , I do add blue into the mix as well .
I like to add purple and red or magenta and blue to dark areas so that they kind of pop and it doesn't really matter if they're the exact same shade as the colors that I used with the paint .
I have only these four colors that I use pretty much for every skin color and it just , I just like how it looks .
It kind of looks like pop art a little bit but not really .
So that's what I do .
I sometimes add yellow to the light areas to give it a warm tone .
And then I go back with the red to um , color in the cheeks , the nose and the lips just to emphasize those areas .
So she looks like she's glowing or that she's blushing and it overall creates this nice warm tone and that's how I paint the face using water color .
I don't always paint skin in this step by step manner .
It can appear a little bit rigid and sometimes it can be repetitive , especially if you're doing it all the time .
So sometimes I do change it up , but majority of my drawings use this exact method .
Maybe not to the t maybe there are some changes in between .
Like sometimes I might paint the lighter areas first instead of the darker areas However , however , for the most part , this method has been modified to my liking and to create a result that I really like when it comes to water colors and to skin .
So that is something that I have developed and I've been using it relatively consistently for my watercolor drawings .
So that is why you're getting this video .
And I hope that this helps .
Like I said , there are a variety of classes on skill share and they have videos that can help you out with more basics and more advanced techniques with water colors if that's something that you want .
However , if you want to see me do an in depth video on that , um Let me know in the comments down below .
But for now , I highly suggest that you check out the list of resources in the description box , including some classes on skillshare because it will take time for me to create another tutorial video .
But I hope that you liked this video .
If you did please give it a thumbs up , don't forget to subscribe , push that notification button to know when I upload next and don't forget to share and leave some feedback down below as well .
So thank you so much for watching .
I know this was a long video .
Thank you for bearing with me and I hope to see you in my next video .
Are you looking for a way to reach a wider audience and get more views on your videos?
Our innovative video to text transcribing service can help you do just that.
We provide accurate transcriptions of your videos along with visual content that will help you attract new viewers and keep them engaged. Plus, our data analytics and ad campaign tools can help you monetize your content and maximize your revenue.
Let's partner up and take your video content to the next level!
Contact us today to learn more.