https://www.youtube.com/watch?v=fahm_1q9-WQ
How To Make A WordPress Website _ Beginners Tutorial 2022
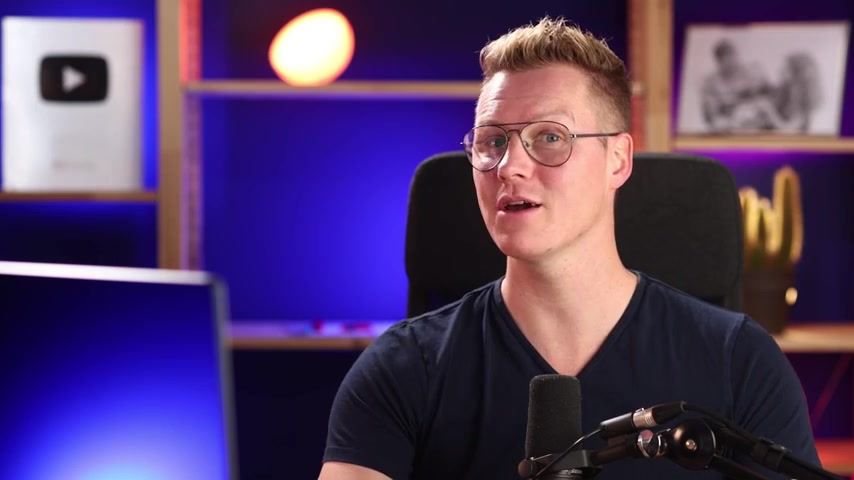
Hello people .
My name is Fruity .
And in this video , I will show you step by step how you can create a professional website using a free theme , a free page builder , a free stock images .
Even when you have never created a website before , this tutorial is for you .
Let me show you what we will cover in this tutorial .
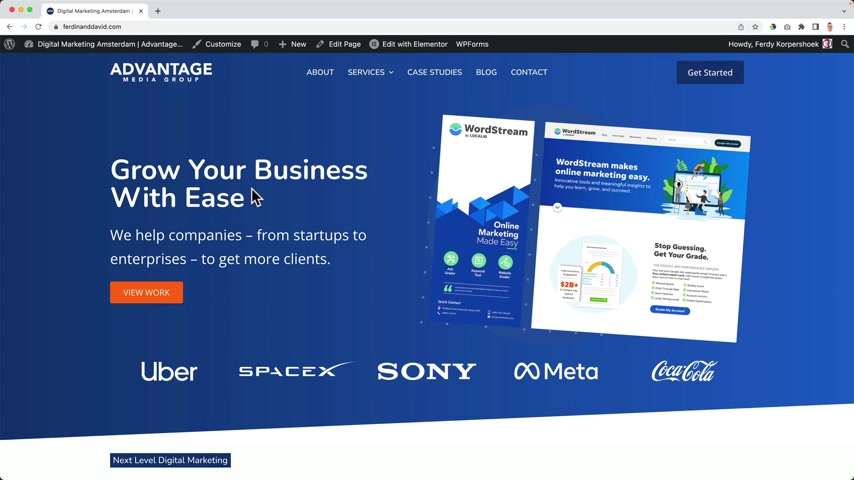
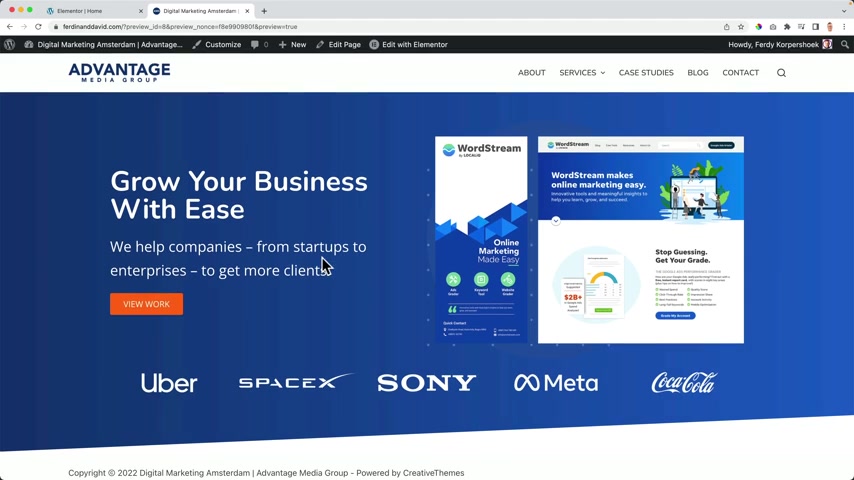
So this is the website that we're gonna create .
We have a white logo with white text in the code to action .
And when I scroll down , we change the header colors and we see another logo really nice , nice menu and a nice sub menu .
And if I want to , I can adjust this header so I can go to the customizer , go to the header .
I can add some AM L I can add social icons over here .
Then I can say that the top row should have a background that is dark blue and then I go to HTML because I want to change the link color .
I'm orange , light blue or white .
I , when I scroll down it sticks with us .
And if I don't want that , I can go back to the headers and decide that only this area should stick with us .
Now , we have this header over here and if I scroll down only this area sticks with us , we will create this page using the element or page builder .
And I will show you how to create this step by step .
I will also give you all the templates so you can download them .
But I will show you step by step how you can create this from scratch , a good looking contact form or using free tools .
Here's our footer , you can showcase our latest case studies .
Talk about our company , show some quick links in our recent post .
And if I click here , I go up again and we're not just gonna create something over here .
We're gonna talk a lot about how we can give a great first impression to your viewers .
Don't say welcome on this website .
Be really clear .
This is what we will do for you , talk more about it and then have a call to action over here or over here .
So we're not just gonna create a website , we're gonna create a website that converts that gives us new clients .
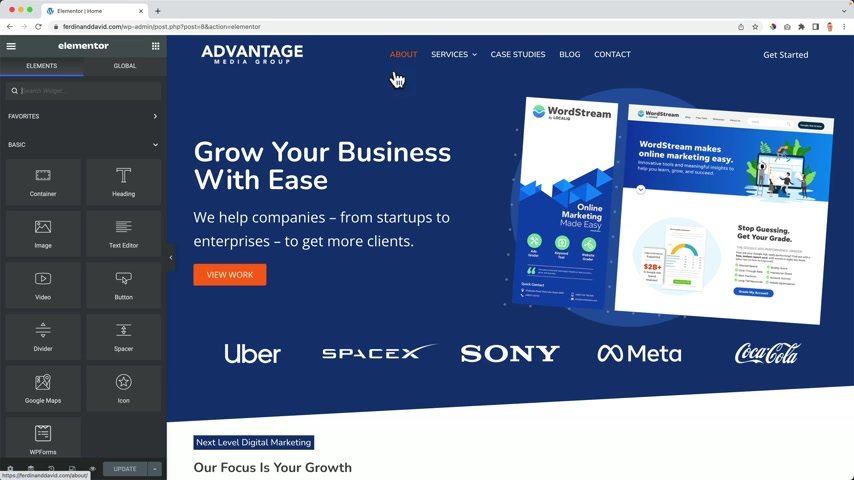
And let me show you the power of element or if I edit this page with Element , we can do so many things I can click on this image , we can go to advanced it closes , I go to motion effects .
I say , you know what I want you to fade in from the right like that , but a little bit slower .
And after a half second , if I think , hey , there is not much space over here , I can go to this area , go to advanced and create some space over here .
Pixel .
Perfect .
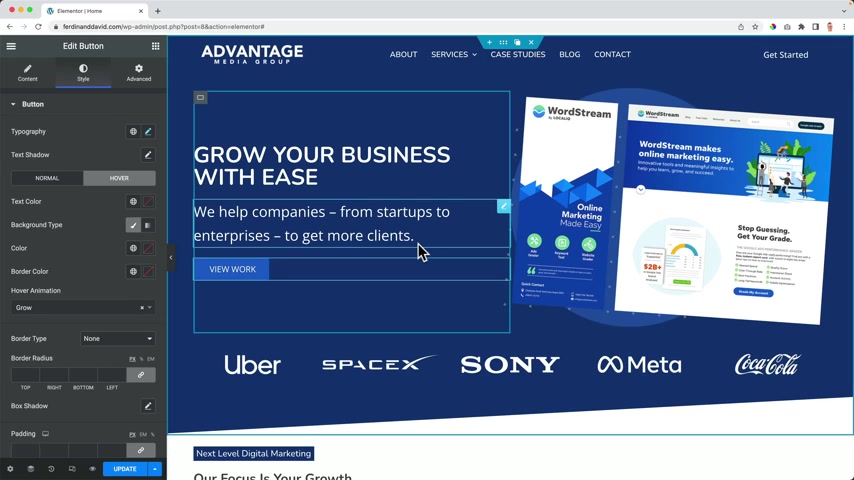
I think this text is too big .
I can click on it .
Go to the Cell James a ty biography before the and if I want to , I can make it upper case , I don't like this color .
So I go to and I change it to a blue one when I hover over it , it shrinks .
But I rather let it grow .
Maybe you're like , what are you doing ?
Where are you going ?
You're going all over the place in this tutorial .
I will show you step by step how we can learn how to create pages like this and how to apply all these things that I'm showing you right now .
But that's not all what we will also do is really important .
We will optimize our website for all devices .
So if I click over here , I can see how it will look on the tablet .
And if I don't like it , I can change it .
So maybe I want to have a little bit more space from the sites I go to advanced , I change this to 70 .
Now , we have more space from the site .
And if I don't like it , command ZZ control Z and it goes back to the original state and I can update it .
So we will make sure everything looks great for every device .
We go to the about page .
I will show you how to create this from scratch and I will also show you how we can import pages like this .
So you can save yourself a lot of time import a few pages and adjust the information .
You can showcase your services and have sub items .
Those are all pages .
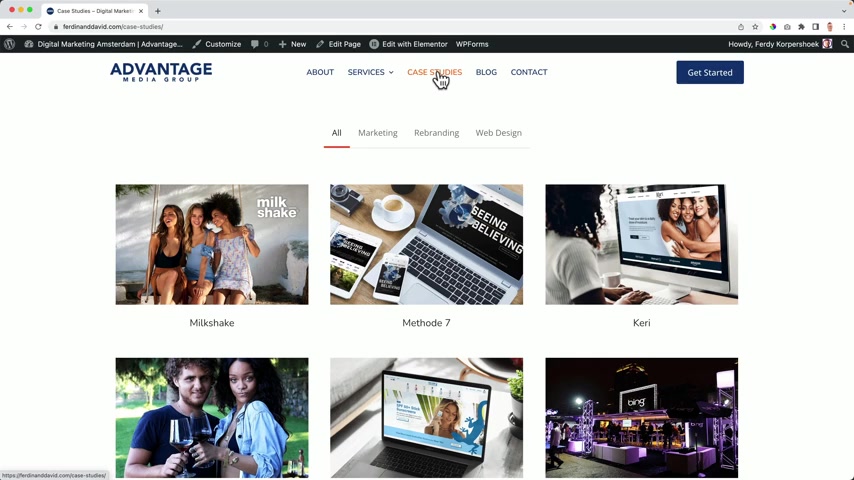
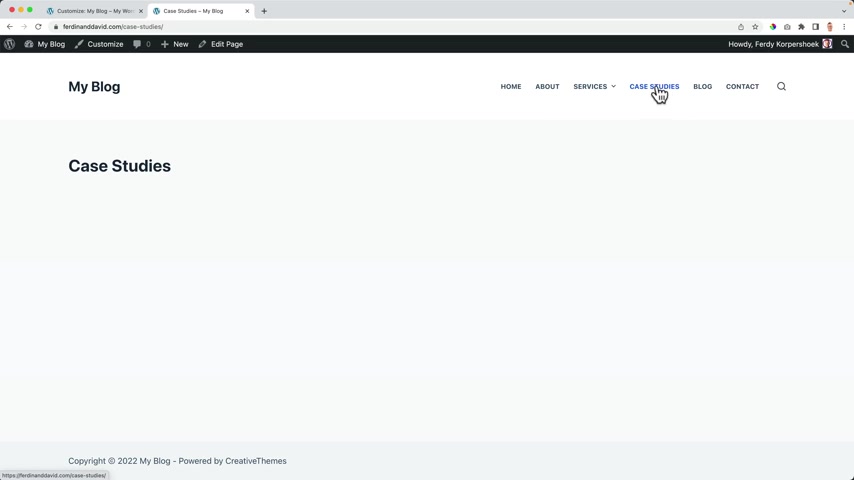
If I go to the case studies , we can showcase what we have done for clients in the past .
So visitors can get excited about what you can do for them and you can create categories .
So this was marketing , rebranding and web design .
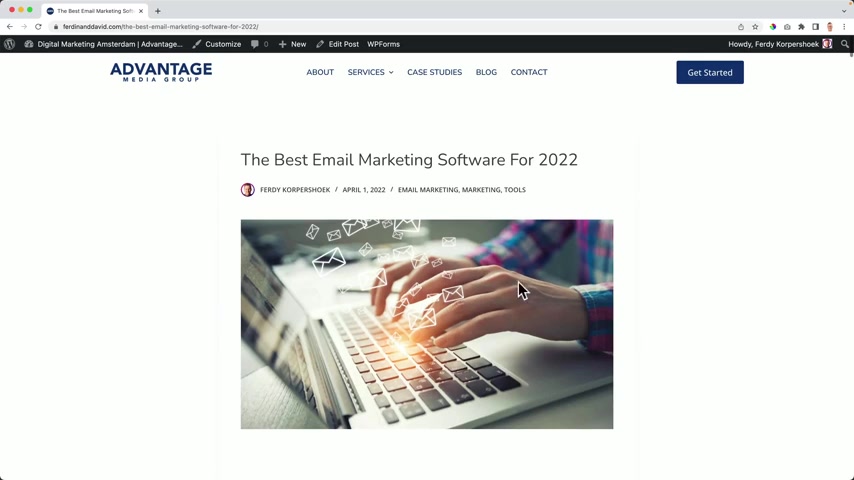
When you click on it , we created a template that will showcase all our portfolio items or case studies like this , text , a few images and then we see related projects click over here again and we're gonna create a block page with blog posts and block posts are a great way to get organic visitors to your website .
So they search on Google for something and go to your website because of your content .
And then they also can get excited and maybe you want to make use of your services .
I click on my blog post and I will show you how to format it like this .
I will show you how to create a blog post , how to create a converting blog post .
And thanks to the blocky theme .
It all looks really nice .
And below the blog post , people can share this .
People can read about the author , go to the social media accounts of this author and go to the related post and leave a reply .
If they want to , I'll show you how to import a contact page , then you can change the information , saving yourself a lot of time and talking about saving time .
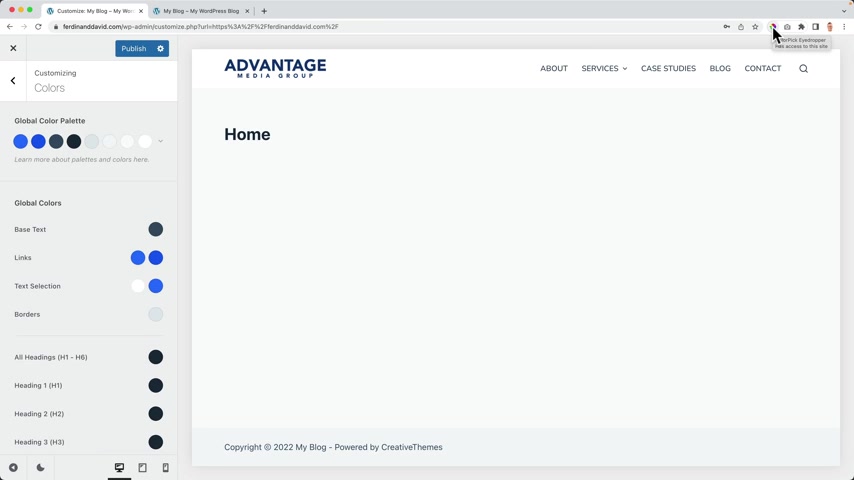
If we go to the home page , look at this , we will set everything up in a way that can save so much time when we want to change the colors in the website .
So if I go to the customizer and I go to colors , I have my global color palette and if I want to change one color to make it darker , so let's let's make it this color .
What I will see everywhere in the website still changes .
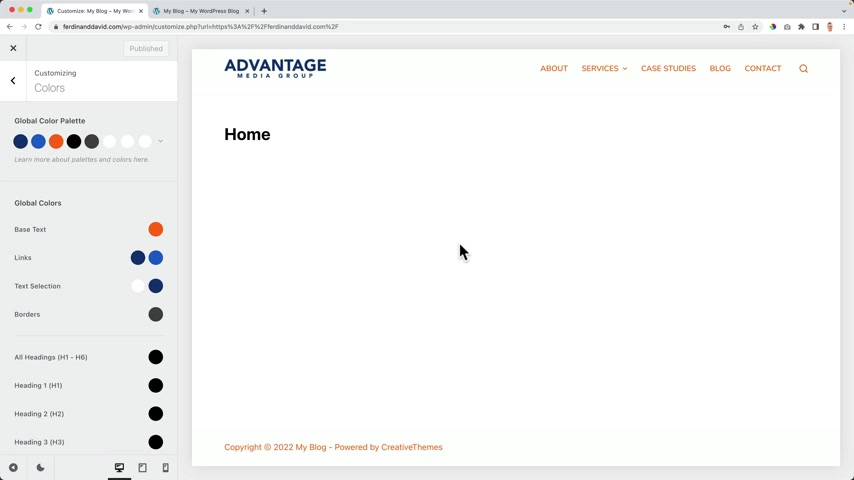
Then I have this orange button .
So I go to the orange one can change it to something else green .
And now everywhere I use that orange button or the orange color , it is green .
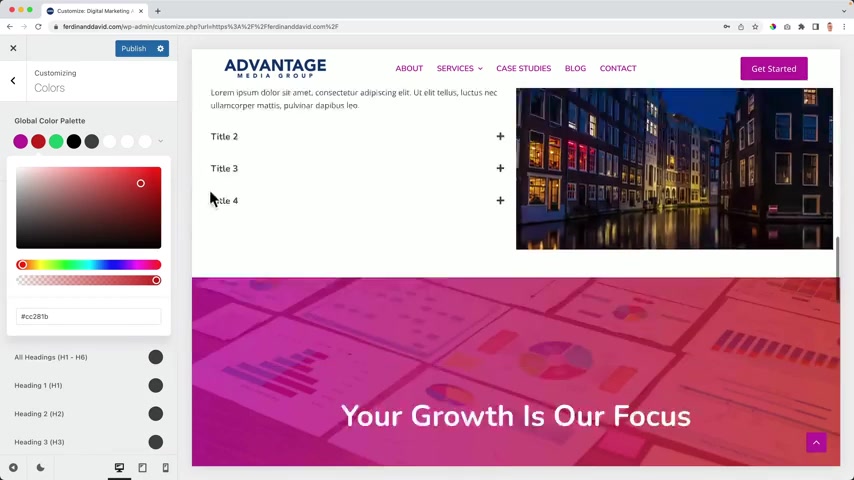
I can change the second color and in a few clicks , we can change a complete look and feel of our website and we can choose between different color palettes .
This one , for instance , it can be handy when the clients of yours says , you know , I like it , but I want to change the colors .
You just can do it in a few clicks .
When you follow this tutorial , you will not only learn how to create an amazing website , but you will also be able to start a web design agency and start making websites for others , make money with it .
Another thing you can do , you can write blog posts , place advertisements on it and then you can also start a make money .
So when you learn how to make websites , a whole new world opens with opportunities for you to do things for a living .
And I will talk about it in the tutorial .
A few more practical things for you .
When I go too fast for you , you can go to the settings of the youtube video and change the playback speed to a slower one or you can click on the left arrow on your keywords and go back five seconds in the video .
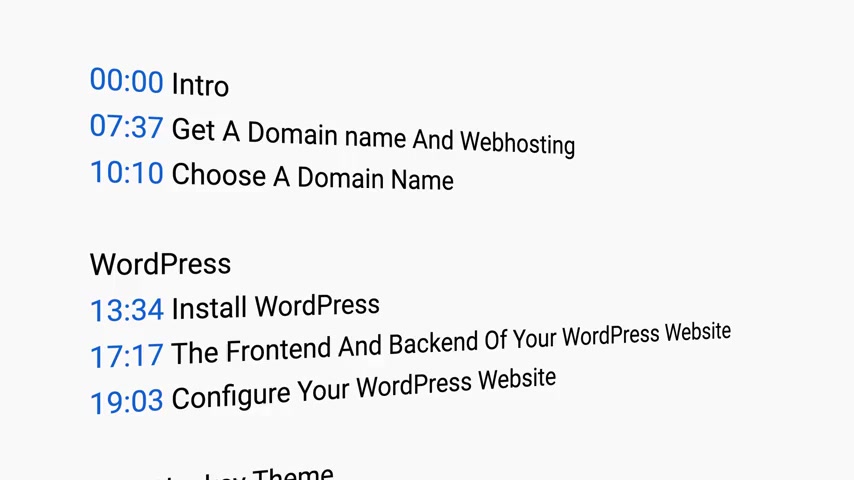
In the description of the video , I have time stamps .
So if you want to go to a certain part of the video , you can click on one of the time stamps and you go directly to that part of the video .
I hope this introduction made you excited already .
If you are , please like this video , feel free to subscribe for more upcoming workers related tutorials .
And now let me show you the four steps we're gonna take in order to create an amazing website .
So there are four things we need to do .
If you don't have it yet , I will show you how you can get your own domain name or web hosting and I can give you 70% discount .
After that , we will install wordpress , then we get the blocky theme and the element or page builder .
Then we will create our amazing website .
If you already have a domain name , a web hosting and you have already installed wordpress , I will show you on the screen right now where you need to go in order to continue with this tutorial .
Now it's really time to get started .
If you already have a domain name , a web hosting , you can skip this part if you don't have it .
Let's go to web hosting 11 dot com hit enter .

You will be redirected to name Hero .
In my opinion , the best web hosting provider when it comes to quality and affordable prices .
And when I take a look at web hosting , of course , I take a look at speed .
I take a look at the support and I take a look at ease of use and name Hero came out on top and I have an exclusive discount for you of 70% if you go for the first plan .
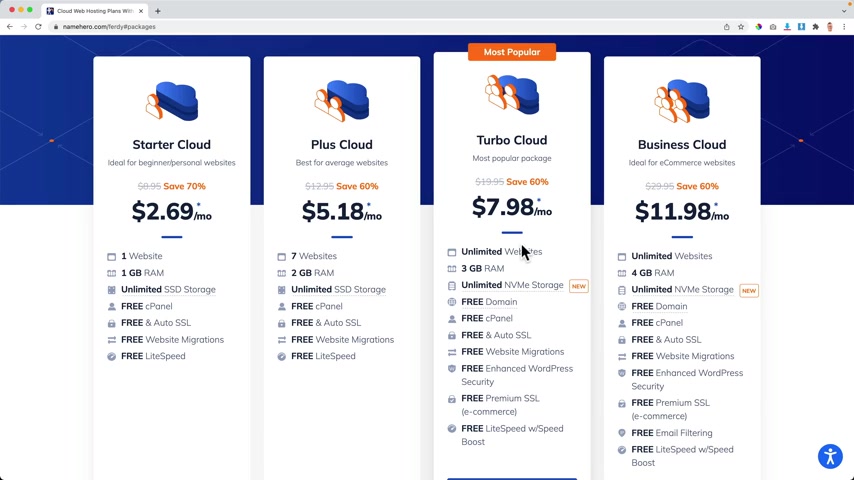
So let's take a look at the plans by clicking here or if you feel like it , you can scroll down and here you see the four plans if you just want to start and you're sure you want to go with one website .
This is a great package for you .
It's called a starter cloud .
You pay $2.69 per month and you can have one website .
You have one gigabyte of ram , which is more than enough unlimited SSD storage .
You have the C panel which helps you to install wordpress and free and automated SSL .
And this one I really like , it saves you some time because automatically your website will be secure with other web posting providers .
You need to do them manually .
Here it is automatic .
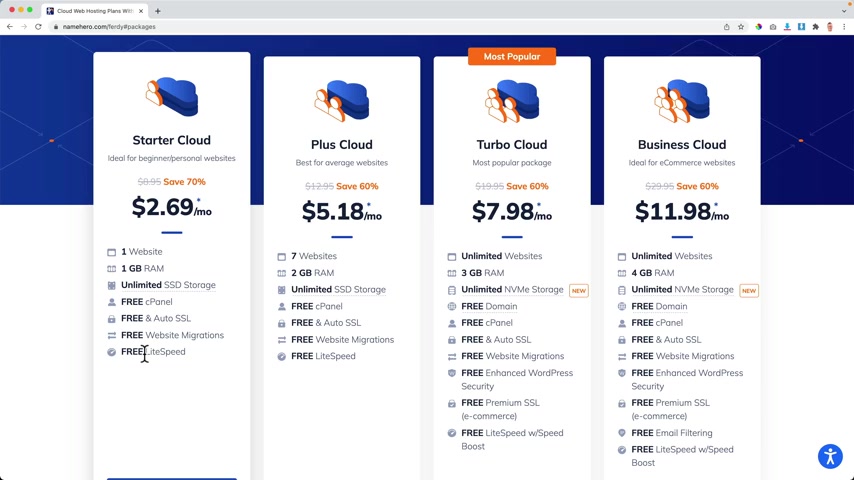
If you already have a website , you can migrate it for free to name Hero and you have free live speeds , which makes your website even faster .
I can tell you the website at name Hero are fast .
That's for me , the most important thing , fast .
Websites .
I don't want to have slow websites .
So if you get a startup cloud , you have one website and it can be as short .
It is blazing fast .
If you think in the first year or the first three years , you want to create multiple websites , then I would go with the plus cloud , you get 60% of discount .
You can have up to seven websites and two gigabytes of ram , which is more than enough to have seven websites .
Again , unlimited SSD storage , all the other benefits which you also see over here .
If you want to start a web design agency , I would go with the Turbo cloud .
You can have unlimited websites .
That means that you only have to buy the domain but you can host it under your Turbo cloud package less than $8 per month .
But this is not with SSD storage , but with NVME storage , which is a new technology that makes your website even faster .
This is already super fast , but this makes it even faster and that can be handy .
So if you're planning to create a lot of websites , then this is the plan for you .
And if you want to go all in the best of the best , then you can go for the business cloud .
So if you're starting out , I would suggest you start with the starter cloud or with the plus cloud , you can always upgrade later .
So if you're sure you want to go with one website , this package is great for you .
If you know you want to create multiple website in the first year or in the first three years , then I would go for the plus cloud .
But again , you can always upgrade later .
So I will start with the plus cloud .
I scroll down and I click on order now .
Now we need to get a domain name .
You can have a dot com domain name or a different extension .
You can also search for it .
Do they have a , a Dutch extension for instance ?
Yes , they have that .
And if you buy a dot com domain , your website will be live immediately .
That's what I really like about name .
Er , you don't have to wait , your website is live immediately .
We don't have to take a break .
So you need to search for a domain name that is available yet .
Of course .
So you need to come up with a , with a brand name or with your own name .
For instance , my brand name is Ferdi Corps .
That's my name .
So I can also choose Ferdinand David dot com .
See if it's still available .
I click on search and if it's not , you'll see that over here , but it is available .
So I will go for Ferdinand David and I click on continue .
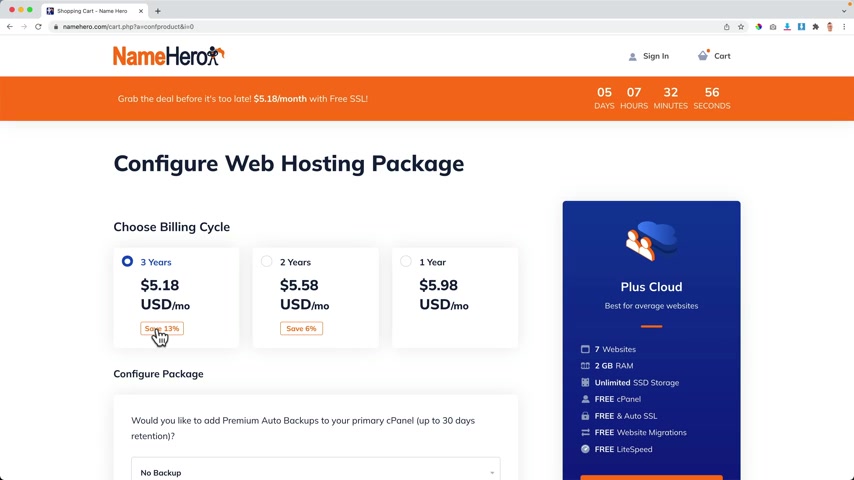
So over here , we can choose our billing cycle .
Do you want to go for one year ?
Then you pay $5.98 per month for two years , $5.58 or $5.18 .
So depending on the billing cycle , you get more discounts .
Maybe you want to check things out .
I suggest you go with one year and then after the first year , you can also extend your billing cycle for another three years .
And then again , you get a discount .
So I would start with one year and then you don't need all this stuff .
This can all be done using wordpress plugins .
So I click over here and continue .
And then it's really important to take ID protection so you can check that over here .
Why ?
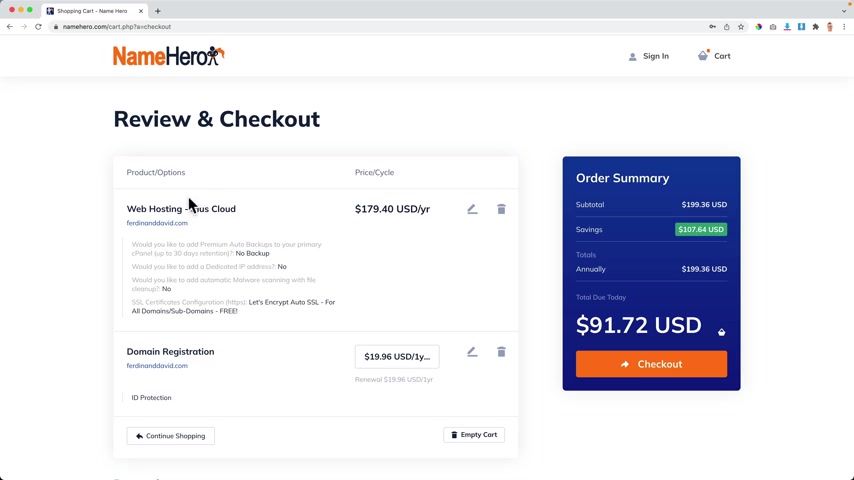
Otherwise your data , your phone number , your email address will all be visible to everybody in the world and people will spam you their automatic bots , they will send you emails about let me create a logo or do sco for you .
You don't want that .
So for just $6 per year , you can get ID protection and nobody can see your personal details .
Then I click on continue and that's it .
So we have the web hosting plus cloud which normally costs $179 per year .
But you get a lot of discounts and we pay less than $100 and then we can have up to seven websites in this package , which is amazing .
This over here is a glitch .
This is not uh $20 .
So select that and see the price stays the same and I receive the right price .
So I don't know what it is .
Maybe it's a mandatory .
You found out that the , I don't know .
But um I want to have the domain .
I want to have this web posting package and we can get started right away .
So you see we got a lot of discounts .
So I'm a new user .
So I will fill in my details over here .
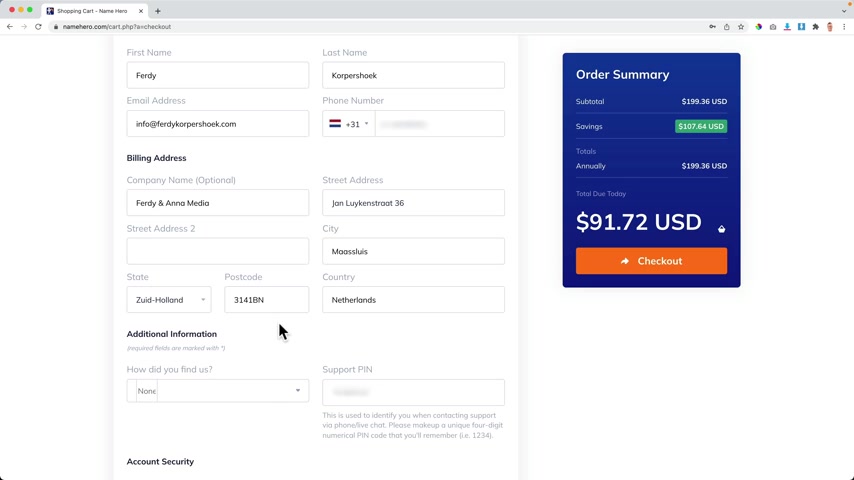
First name , last name , my email address , my phone number , my company name the street address , my city where I live , I live in South Holland in the Netherlands .
How did you find us ?
Well , probably through youtube because you're watching this tutorial and you can have a support pin and that can be asked from you if you go to the support .
But if you have phone or live chat and then choose four numbers , I have those over here and then I want to create a buzzword and I confirm that password .
I want to pay with credit card stripe .
So I fill in my details over here .
One superhero specials .
Well , I definitely would turn it on because with Black Friday , for instance , you get an amazing discount .
So I would turn it on and they do not spam you .
They send only emails when it really benefits you .
They need to agree to the terms and then we need to go to the checkout by clicking here .
And when you got this through my link , you don't pay more , you get a discount and I get credit for it .
So it's a win , win situation .
So I click over here on , check out .
This sometimes can take a moment and I'll check a few things and there we are , the order is placed .
Congratulations with your domain name in your web hosting package .
Now you can create a website and it will be visible to the whole world .
So what we will do now , we're gonna install wordpress now we can continue to the client area .
So I click over here and there we are .
So what we can do over here , we can maintain our domains , our websites , our support tickets are billing .
So if you have any question , you can click over here on support , you can open a ticket or go to your tickets and they usually reply really fast .
So that's really nice here .
You can see an overview of all your domains , your cloud , we going right there .
So what I will do , I will click on my cloud over here because we're going to install wordpress .
And then I click over here on the web hosting plus cloud .
Awesome .
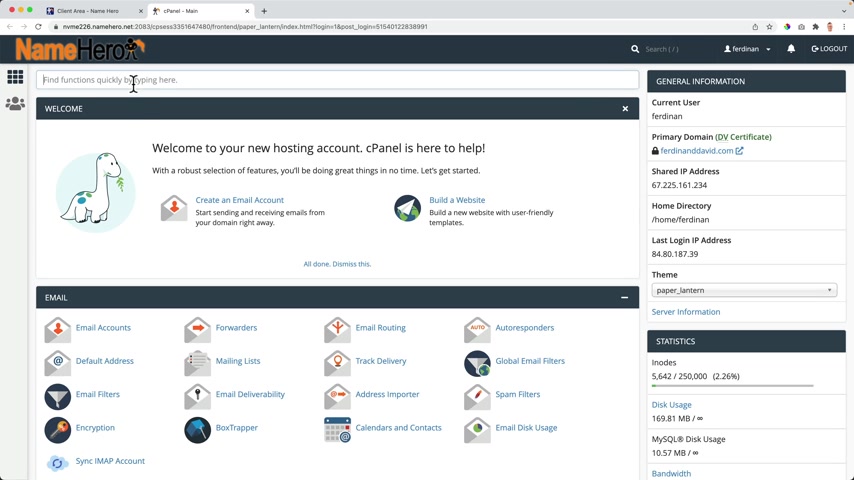
I log into the C panel and before we install workers , I want to configure a few things .
I search for select and then I click on select PHP version .
I click on it and then I can choose a PHP version and I want to choose 7.4 .
I click on set as current .
OK ?
And then I go to the options .
I scroll down a bit and I want to change the execution time , let's say 150 .
And then over here the memory limit 1 28 the post max size , let's say 64 and the upload max fell size .
This is really low .
Two megabytes , change it to 512 megabytes .
OK ?
I click over here .
So I go back to the overview with applications and now I want to search for wordpress and then I click on wordpress manager by soft Dela .
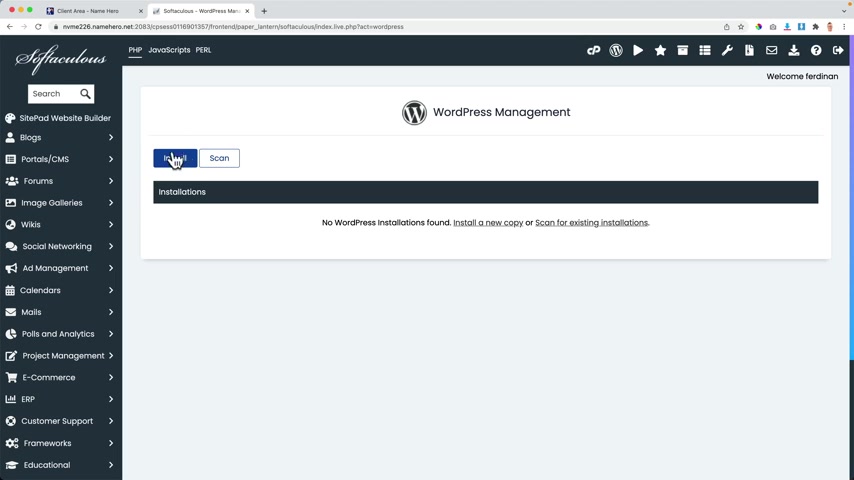
And now we can install a worker website on our domain .
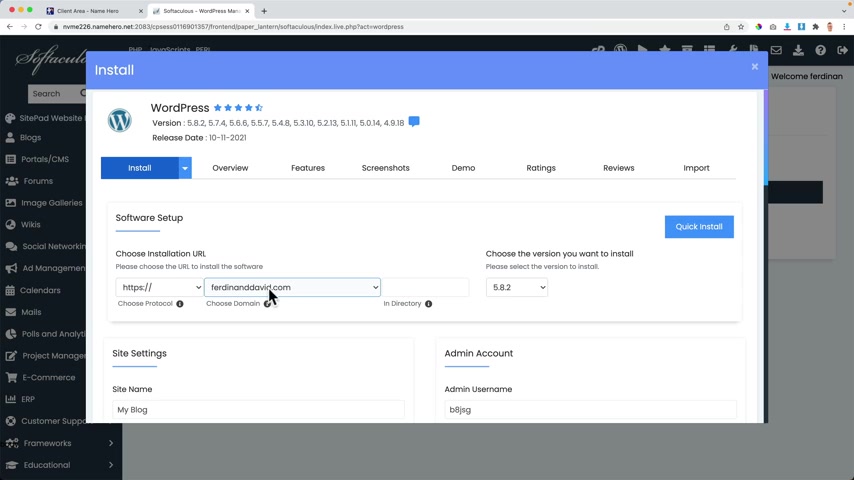
So I click on the blue button , install in here , we can choose our domain .
Awesome .
And then over here , I can choose a TPS .
And maybe it will say , let's see , it will say nothing .
It can say , hey , you don't have HPS still choose HPS because it will be there really soon that will be automatically be created .
And with HPS , as you see over here , your website becomes secure , that's really important for the search results , really important for your website .
So with they take care of it , then you can choose your domain name .
If you have multiple domain names , you can choose one over here .
And by the way , if you want to learn more about everything that names offer , you can go to youtube and search for name Hero tutorial .
And I think I will be the number one .
Yes .
10 months ago , I will create a new one because I recorded four K .
But over here a 1.5 hours of everything you need to know for uh name Hero web hosting .
And then over here we can install wordpress on your domain and forward and then new or WP or test .
And if you make this empty , which I suggest you do , then workers will be installed on the director on , on , in my case , Ferdinand david dot com , they always use the latest version .
And then over here we can choose the name of our website .
We'll do this later right now .
I want to create a user name Corp and I want to hide my buzzword and create one and I need to create it , admin email third at 30 corp dot com .
And then I scroll down all the way I don't need all that stuff and I click on install .
And now ladies and gentlemen , wordpress is installed on our brand new domain name with web hosting .
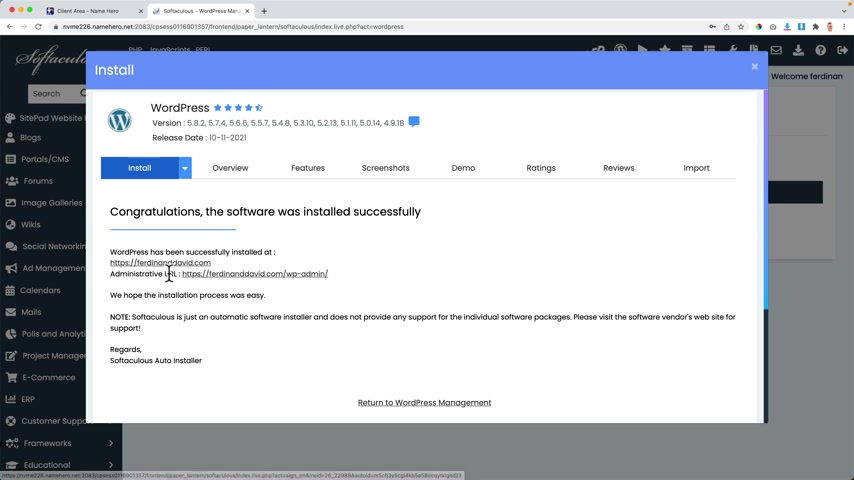
So there it is , we can go to the back end and to the front end of our website .
If I click over here , I go to the back end .
That is where we can configure our complete website .
It may look overwhelming .
I will explain to you how everything works .
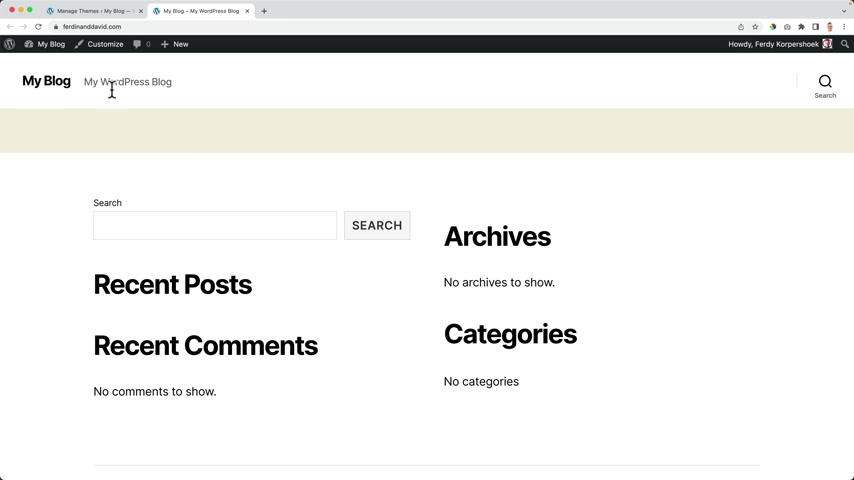
Then I go back and I click over here and now I go to the front end of the website .
So what I can do , I can close these two steps .
This is what people will see when they go to your website .
It's called the front end .
And then this over here is the back end .
This is what you only can see when you're locked in and no matter where you are in the back end or in the front end when you are logged in .
You see this bar over here , this stub bar , this bar is only visible when you're locked in .
So your visitors will not see this .
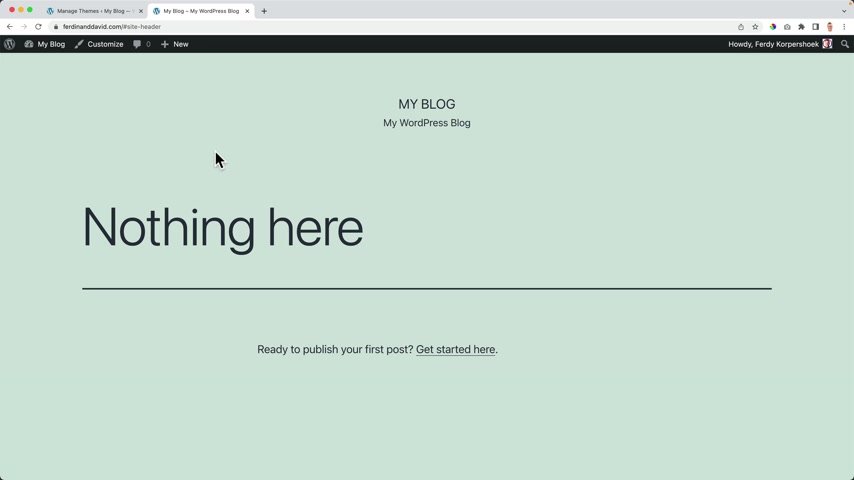
But if I would go to this website , let's say in an incognito window looking over here , when people go to Ferdinand , David at this moment , they will see this website .
So we are live immediately and that's what I really like .
When you take a look at your website , I think we can all agree .
It doesn't look that appealing yet .
We're gonna make it look really appealing , really professional .
But first , I want to do a few things in our website .
I want to work in a clean wordpress environment .
So we need to remove a few things we don't need and we need to configure a few settings .
So let's get to that .
So let me talk you through the front end and the back end , starting with the back end .
This is the place where we adjust our website .
We can change the theme , we can create blog posts , we can add pages , we can monitor all the comments , we can add plugins , create new users , go through the settings of the website and step by step , I will show you how everything works .
And then when we change things over here at the back end , you will see the changes here at the front end .
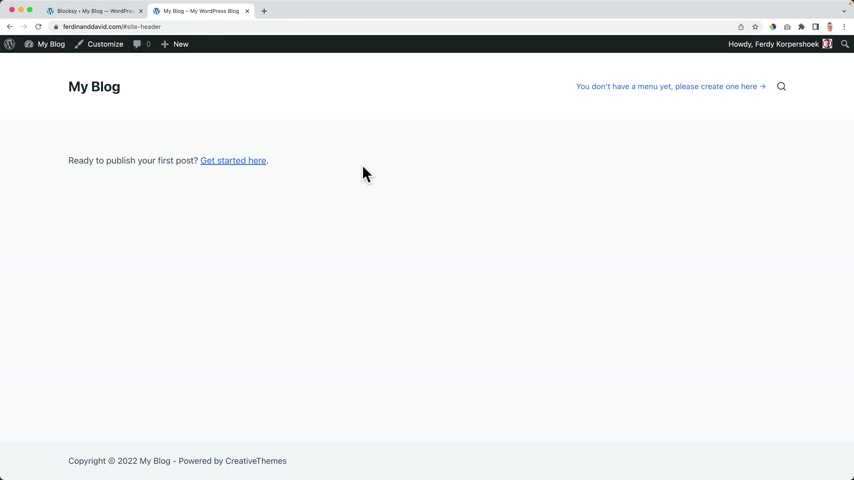
So first things first , I always like to make my website a little bit cleaner because this is a little bit overwhelming .
So the first thing I do , I dismiss this message and all this stuff over here .
I want to make it look cleaner .
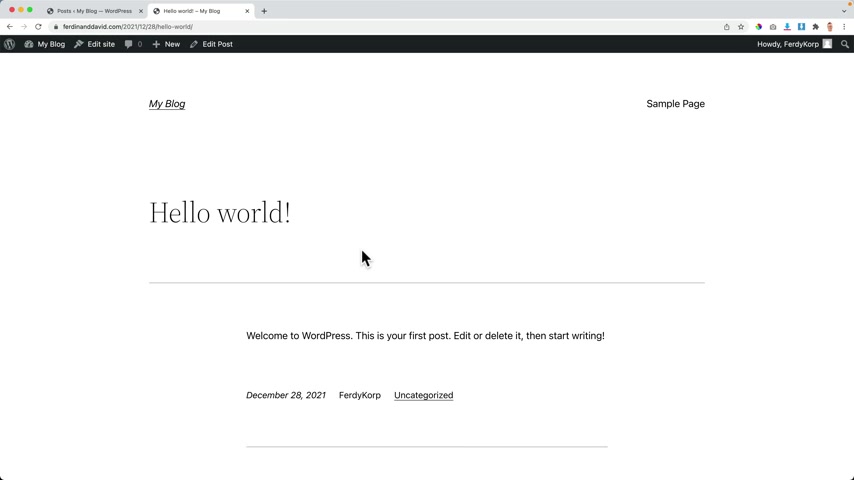
So first I go to my blog post over here and I want to remove it right now .
On my website , I see one blog post , which is this one .
If I click on it , you go to the blog post and there's a comment and it looks really ugly .
In my opinion , we're gonna make it look so much better .
But first I want to get rid of this blog post .
I don't need it .
So over here at the posts , I select all the block posts , there's only one build actions , move through the trash and I click on apply .
Then I go through the trash and I emptied the trash .
The same goes with bees .
There are a few pages .
I don't need those .
I select them all by clicking here .
I can also select them individually build actions , move to the trash .
Apply .
Then I go to the trash over here and again , I can remove them permanently one by one or enter the trash .
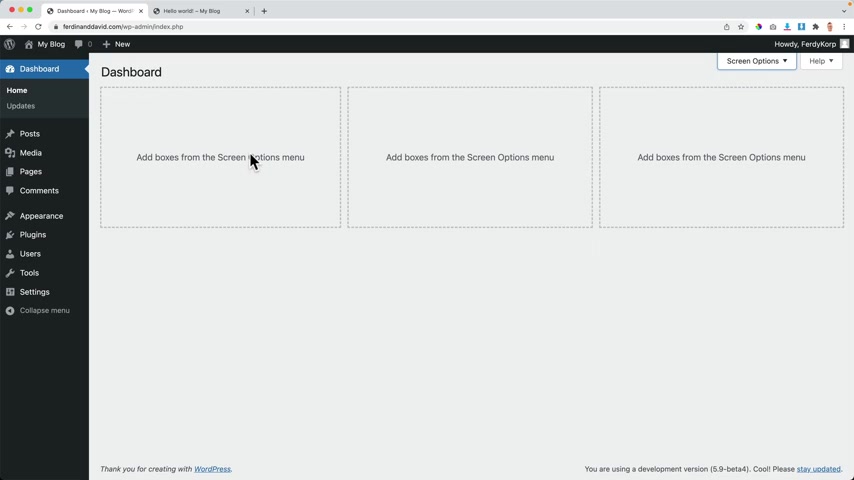
I go to the dashboards .
I see all those steps over here um to collapse them or even better get rid of them .
So I go to the screen options and I uncheck them all .
So I don't see unnecessary stuff over here later .
We're gonna add a few things over here , but right now it's not necessary .
Then I go to the plugins .
OK ?
Two plugins .
They are not um active so I can click on delete .
If you want to delete a plug in , you need to deactivate it first .
So if I would activate it , I cannot delete it right now .
I first need to deactivate it and then I can delete them .
OK .
Then I want to go to settings Perma links right now .
When we have a blog post over here , you see this my domain name and then the date I don't want that .
That's ugly .
I just don't want that .
I want to have my domain and then the title of the blog post , which is in this case .
Hello World .
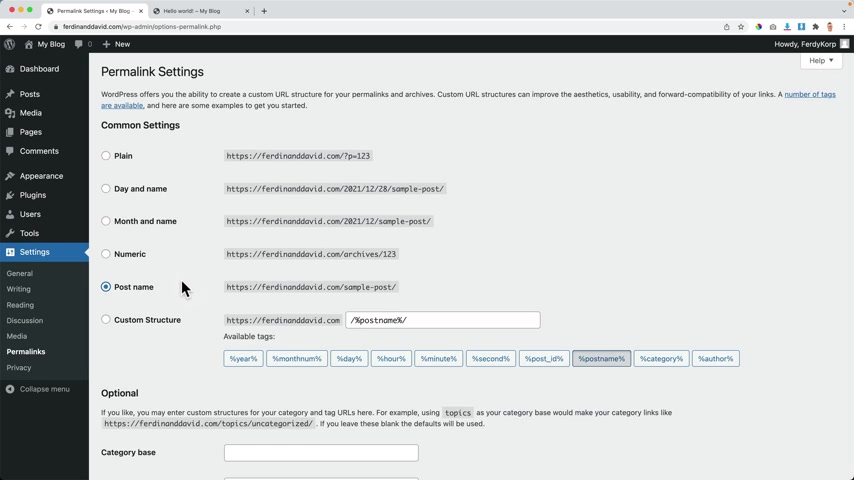
How can I do that here at settings Burma links .
I select post name .
That's the best option in order to be found in Google and other search engines .
So I save the changes .
I do it twice just because I feel like so sometimes it's good to follow your feelings and now if I would refresh this uh and this block house doesn't exist anymore , but it would look like this and it looks much better if I go to my website , the Corp dot com .
And I go to tutorials how to make a workers' website .
It will say free corruption dot com , how to make a workers' website for free .
So that's what I like to use and not this or this or this that I don't want that .
OK .
So far so good .
Now , I want to go over here to my profile and then we can change the look , a few of our back end .
I always use the default one .
I'm just used to it So um I keep it with that .
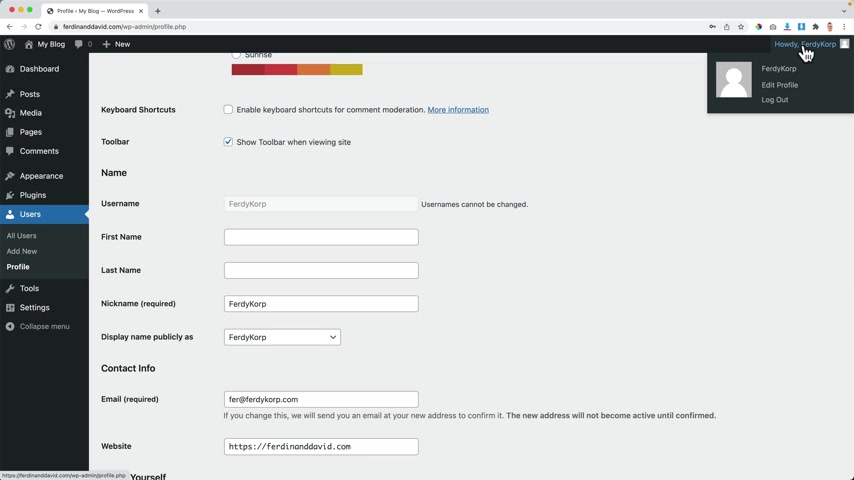
What I can do right now , you see how Ferdi Corp and then when I write a blog post , it will say the author is Ferdi Corp .
I don't want to show my user name , I want to show my real name .
So my first name is Ferdi .
My last name is Corpus Hook .
And then over here at display named Felicity , I can choose the combination Ferdi K and what you will see over here .
Howie Fed K .
If you want to have an image over here , you can scroll down , it can create a profile picture on grav .
So if I open this in a new tab , you can sign in .
And if you sign in with the same email address you use over here it contact info , then you can upload an image in this account .
And then when you use the same email address over here as over here in your gravity account , there will appear an image over here .
A lot of over here is in one sentence .
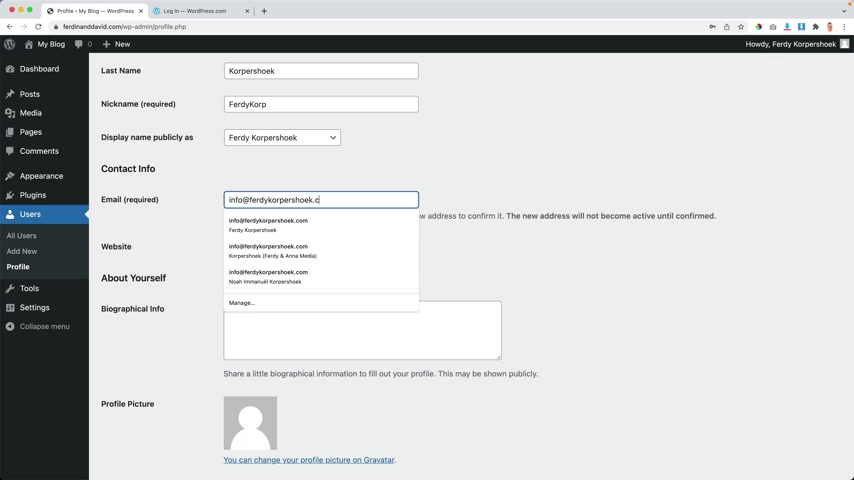
So I normally use this email address from my websites and this email address is also active here at Gravatt .
And when I have that .
So when I save this and I confirm it , my profile picture that I have on grave will appear .
I scroll down all the way I can create a new password if I want to , I click on update profile and now I need to confirm my email and I have done that .
And now you see this image over here , which is from .
So when I place a blog post and people can see my my profile picture , this one will appear .
And if they see my profile picture , I can also say something about myself over here .
So here .
So uh I love to teach people about word press , affiliate marketing and commerce .
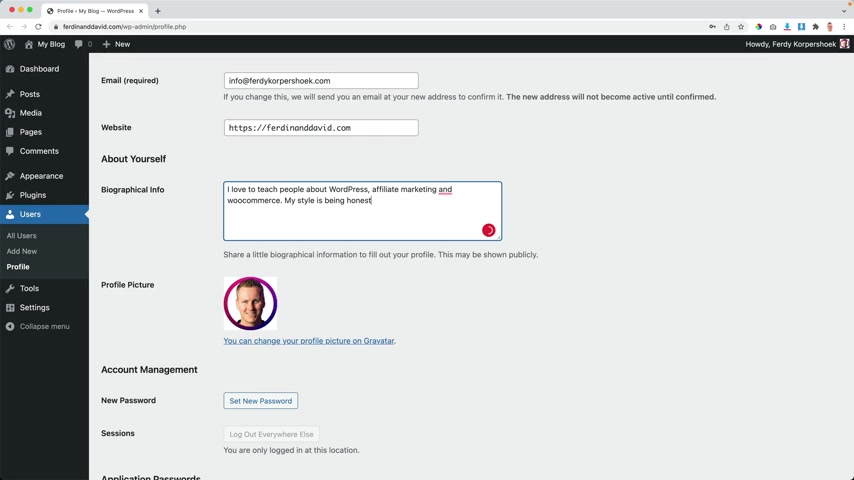
My style is being honest , straight to the point and optimistic .
I don't know , I'm not the best text writer , but then we have something over here and then I use grammar to fix all my errors because there are a lot .
I'm from the Netherlands .
My first language is Dutch .
So grandma Lee is helping me .
Thank you , Grandma Le .
You're welcome .
Uh Did he talk back ?
No .
OK .
Whatever .
So this is how it looks right now .
Really ugly .
But as I said , we're going to make it look so much better .
So one more thing go to the site settings in general and here we can give our website a site title really important for the search results and a tag line .
We're gonna talk about this later , really important that you have H BS over here that your website is secure .
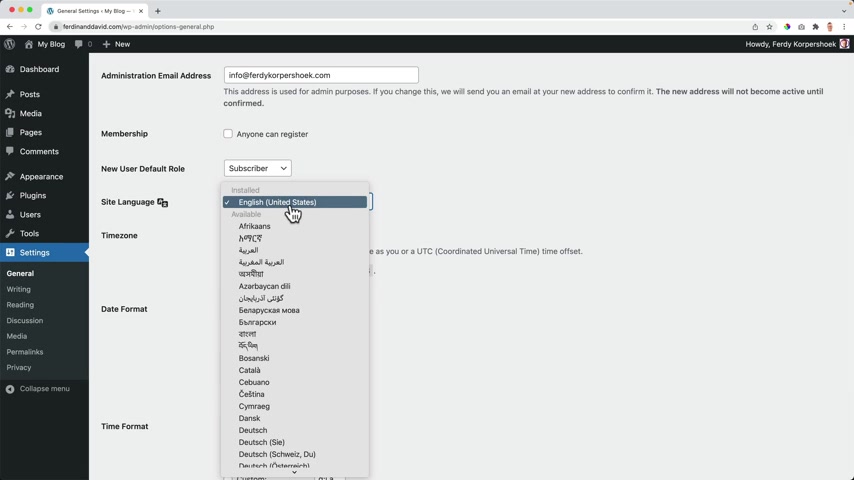
Also over here , your administration , email address and what we can do over here , we can change the language of our website to a different language if you want to and we can change the time zone .
So if I'm from the Netherlands and I want to schedule a few blog posts , it's important that my time zone is correct .
So I can use one of those and Google , which one is , which one or I can screw up .
And over here , I can select the place where I live or close by .
So I can choose Amsterdam and then I can change the date format .
Uh depending on where you live , it's , it's different .
You can choose one , you can create your own and you'll see how it will look over here .
I like this one and then the time format , I use this 1 a.m. and PM using capitals over here .
And also here you can have your custom time format .
My week starts on Monday and I save the changes .
So if we take a look at our website , it looks ugly .
Ok , ladies and gentlemen , we're gonna install a theme .
There are thousands of Verus themes and they , they decide look a few of your website and there are themes that gives you extra functionalities .
Well , I've been around quite a long time in world .
I really like it here and I think I know what the best theme is .
There are a few , but I want to choose the best of the best .
And at this moment , in my opinion , that's the blocky theme .
It will make your layout look so much better and it can help you to create beautiful headers , footers and it has those extra functionalities which are really nice .
So , are you ready to download the blocky theme ?
I hope you are because we're going to do that right now .
Wordpress theme decides the look and feel of your page and it gives you certain functionality .
So right now , my website looks like this and when I would go to the back end to appearance themes , I see a few other themes and they look different .
So what will happen ?
I have this title over here and I have no content yet .
But if I would have it , the content would remain the same , but the style would change .
So if I would choose this theme by clicking on active over here and I refreshed the page , I still have the title and the subtitle and now it all looks different .
The photo looks different .
There's a new functionality over here .
Go to the top .
I have a search I can over here .
I did not have that with the other theme .
So themes beside the style of your website and every theme has their own functionalities .
So if I would go for 2021 now you refresh the page again .
The title is here , the subtitle , the Footer , but there's no go to the top button over here .
There's no search icon over here .
So as I said , every theme has their own functionalities and that's why we're going for the best theme .
The best free theme there is right now .
In order to get it , we go to 30 Corp dot com forward slash block C hit enter , you will be redirected to creative themes and then we can download this theme by clicking here free download .
You can click on downloads .
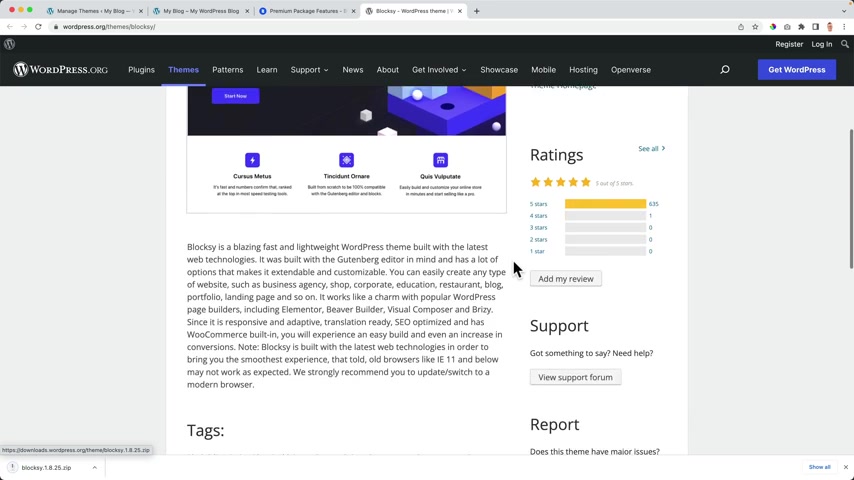
It is a popular theme .
It has a lot of installations .
A lot of , wow , five star reviews .
14 star .
How dare he or she ?
Wow .
And it's been downloaded every day a few 1000 times .
And I know why , because it's one of the best themes out there .
In my opinion , it's the best theme right now .
But I hope the competition will drive all the the makers to make better free themes .
So we are the winner .
So I have the theme over here as a zip fell .
So I go to the back end to themes .
I can click on add new upload theme and I can drag it over here and click on install now or I go to appearance themes at new and I search in the database .
So over here I can search for block C and there it is .
And I click on install .
I don't need this one anymore and then I click on active activate .
So if I refresh this page , it loses difference .
But with this theme also comes a plug in .
So I click over here on install blocky companion that will give it a lot of extra functionalities .
Which we of course want .
OK ?
You can decide if they uh can see things you do on your website so they can make their tool better .
I do that .
You don't have to do that but you can .
And then I was talking about extra functionalities .
We have starter sites over here .
That's a functionality that lets you import a complete website with a few clicks .
It's a great functionality within the free blocky theme and there are extensions , free extensions and pro extensions .
So for instance , cookie consent .
So if I activate this and somebody goes through your website for the first time , they see this area and they need to accept it .
And normally you should download a plug in for that .
Now , it is included in this theme .
So I love this theme .
So I will show you step by step how you can use this theme .
And the first thing I want to do , I want to create a menu with the home page , the about page and all the pages you want to create .
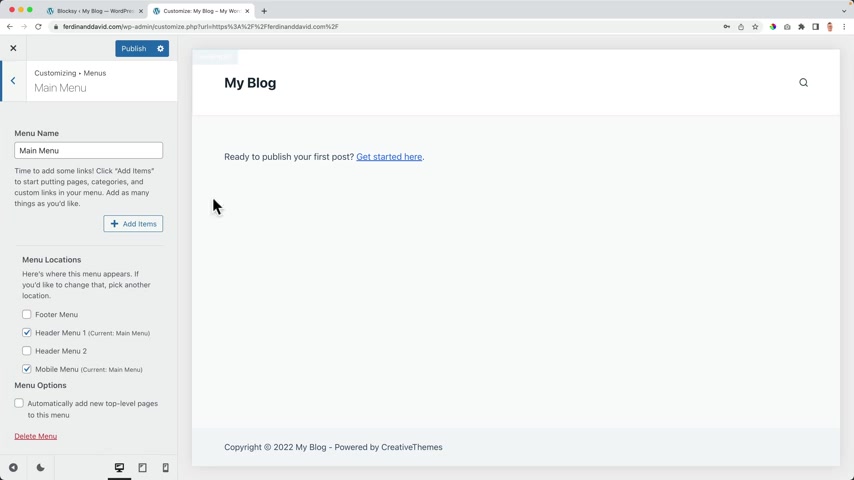
So in order to do that , we go over here in the front end to the customizer , then I scroll down all the way I see menus .
I click on it and now I can create a new menu .
We don't have a menu yet .
So I click over here .
You can give this a name .
It's just for reference purpose only .
You're the only one that will see this so you can call this one , Uncle Jim or GM .
As long as you know which menu it is .
Well , I , I'll call this the main menu and then I need to assign the menu to a certain place in the website .
I can assign it to the footer over here or to the header one or even to the header two that , that can be header here above and for the mobile menu .
So I right now I choose header one and the mobile menu .
I click on next and now I need to add items .
So right now I can add items that will appear over here .
So I click on this plus and I can add a new page .
And the first page of course I want to add is the home page .
So I can just call this one home and I click on add and when we do so be over here , come on minus .
Where are you ?
It's a little bit shy there , it is home .
And also if I would publish it , then I will see it .
But I want to add more items .
So I click on add items .
So what kind of pages do you want to have on your website ?
Well , it depends on what kind of website you are creating .
What I always suggest is that you have an about page about me , about us about .
I call this one about and I click on add , what I suggest you do depending on the , the company you have search for websites of competitors .
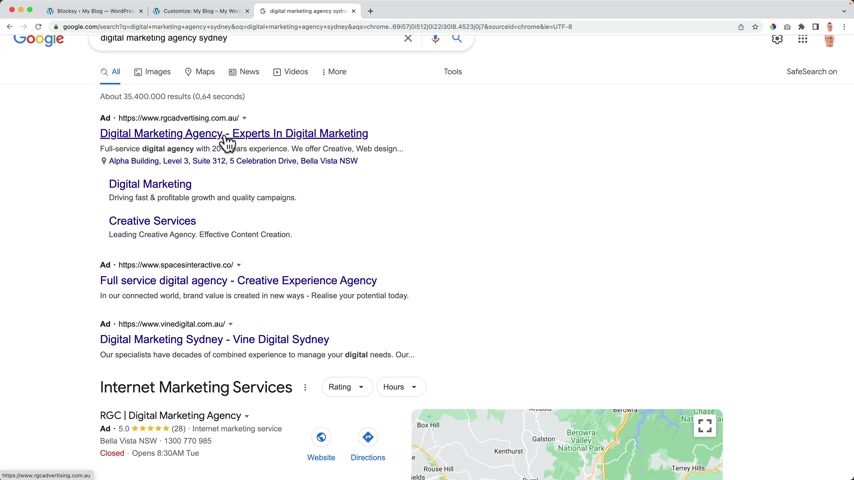
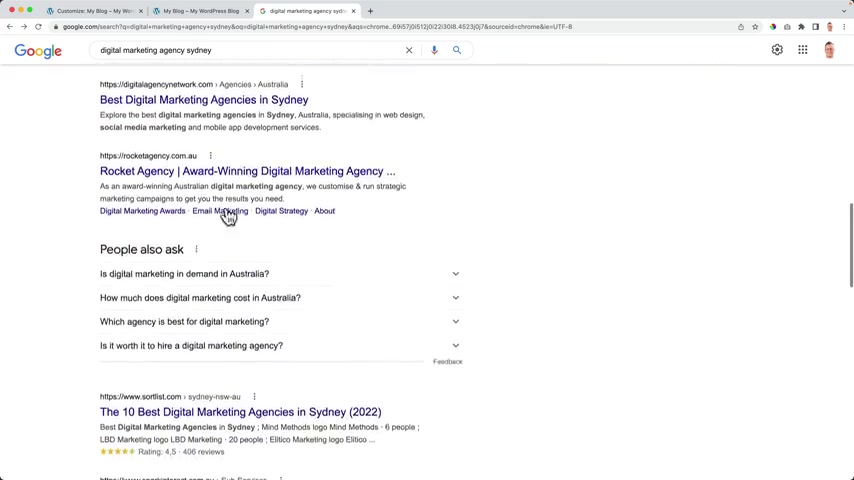
So if I would have an uh marketing , digital marketing agency , I search for digital marketing agency and then let's say Sydney , and please don't copy things that you can get inspired by other websites .
So those people pay money for it .
And when you pay money for your website , you know , you have an optimized website , you want to spend less than you make .
So when those people are advertising , they probably make money with that .
So they probably have a really good website .
So I open this in a new tab .
This is how it looks .
So they have a text over here , go to action really nice .
So they say about then they have creative , they have a lot of sub menus .
What design seo digital marketing , programmatic advertising work and blog .
So what I can learn from this is OK , show your services .
What design sco digital marketing .
OK .
So what I will do , I will add a new item .
Gold is one services .
OK .
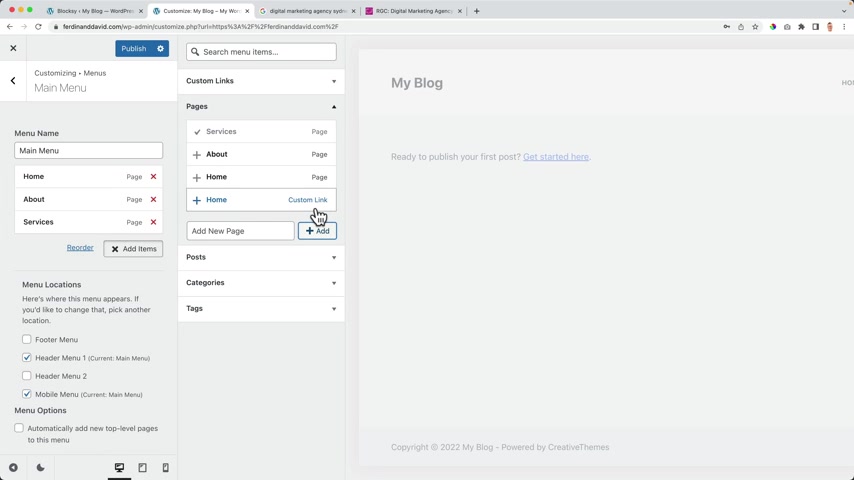
I edit and then I want to have the pages of my services .
So what do I offer ?
Well , I do offer rebranding marketing , web design and maybe you have other services , you can add them over here or what happens .
They are added to the menu and I want to add them into a sub menu .
How can I do that over here ?
I have services I want rebranding to be here below .
So I direct this to the right , this one also , this one also .
And now it's a sub item .
So I click and publish and it closes .
Now we see it looks like this and we can tell this later .
But uh I think this looks nice home about services .
So what else ?
What else can we learn ?
What else can we do ?
Well , of course , we want to showcase what we have to offer .
If you offer a certain service , we want to show people what you've got .
So I go to the back end story to the website and then to the customizer again , scroll down all the way or you can click over here .
Oh , no , no , just kidding .
No , I'm not kidding .
Yes , I'm kidding .
But now we're going to the , I want to go to the menu itself .
So sorry , I was misleading you .
You know , always when I mislead people , no , I don't people that much much .
I don't know .
I go to the main menu .
Yes , there we are .
So I click on add items and I can say portfolio or cases and also , yeah , I can take a look at what others do I go back or close this .
Let me go to one of the search results that is really high because that should also be a really great website .
And that's the same one .
Yeah , it's the same one .
They are doing a great job .
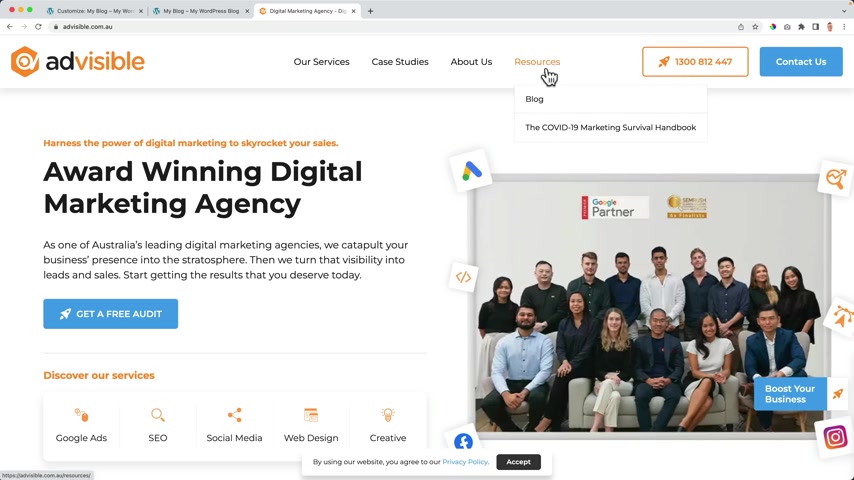
So I go to the second organic results case studies .
OK .
Case studies er about us resources block our services .
OK .
What I like to do is add a blog post because when you add blog post to your website , you can be found truly organic results .
So when people search on a certain subject , they can go to your website , find your block and then if they like the block , they can see , hey , these guys know what they're talking about .
Maybe I can outsource my product to them so it can help you to earn extra money to get more clients and all that stuff .
And I call to action , we can take a look at that later .
So um the block page at and of course , when people are super excited about you , they want to get in touch with you .
So we will have a contact page .
So that's how we can work .
Just search for a competitor , see what they are doing .
Uh preferably the one of the best search results because those website are doing a great job .
Google thinks those websites are amazing .
So probably the visitors also think that way and then you can learn from them about services , case studies block .
We , we are doing a great job .
We are having almost the same things about services , case studies block and then also contact us and we can also make a beautiful button like this and maybe something like this .
So say that I was talking about not copying , but you can get inspiration from other websites .
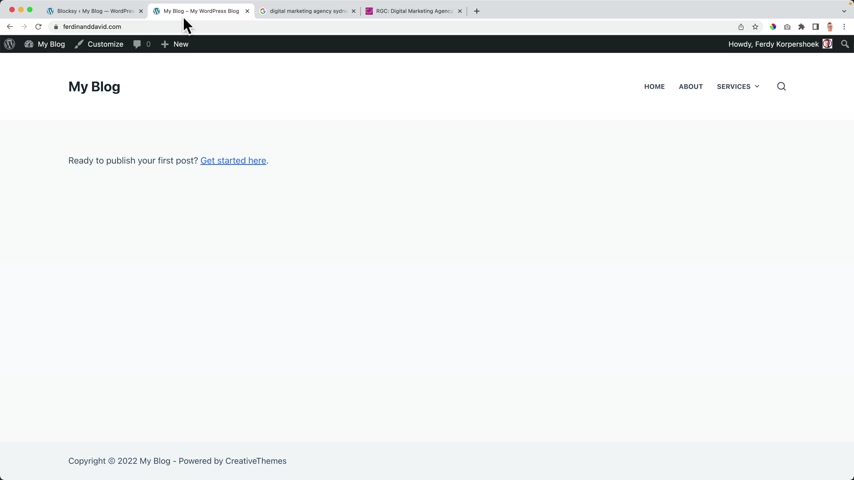
If I refresh the page , nothing happens because I need to publish it first and then it will be saved .
And now if I refresh the page , this is how it looks .
If I go to one of those websites , what I do not see is the home page button .
Also with different websites , you don't see it .
So we should also not show it over here .
People click on this link , then they go to the home page .
So people go to case studies and looks beautifully like this .
When we want to go to the home page , we don't click here , we click here .
So in order to fix that , I go over here to the back end and at home , I click on the arrow down and I remove it , then I published it .
I click on the X , I want to change one thing .
So we go to the customizer again , it says ready to publish your first post .
So right now our home page is showing the most recent posts .
So if I scroll down , I can change that by going into the homepage settings and change our homepage displays to static page .
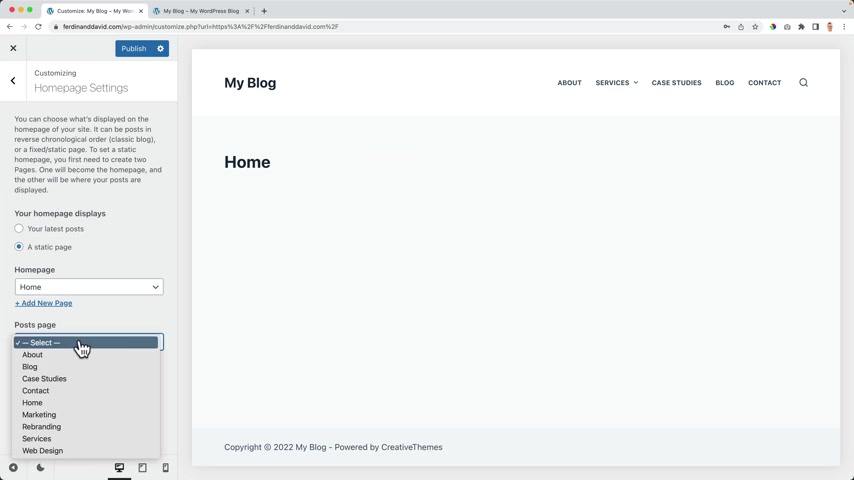
And then we can select that static page , which is the home page and the postage is of course the block page publish , close it .
So now we see the home page over here So I want to do a few things about the header .
So it looks nice and then we're gonna focus on creating a beautiful website using the element or page builder .
How can we do that ?
We go back to the customizer .
And if you want to follow along with the same images I use in the tutorial , you can go to F corp dot com forward slash images , hit , enter and there it goes thinking open them and there you have them , you can drag them to the desktop .
I had them over here .
And then you can go to how to make your website 2022 .
And I have a few logos over here in color and in white .
I see if I can .
So a few images you can use .
So you can follow along in this tutorial and what you also can do , you can use your own logo , your own images with your own websites .
I go to the customizer , I hover over here and I click on those three dots .
Then I go directly to the logo area .
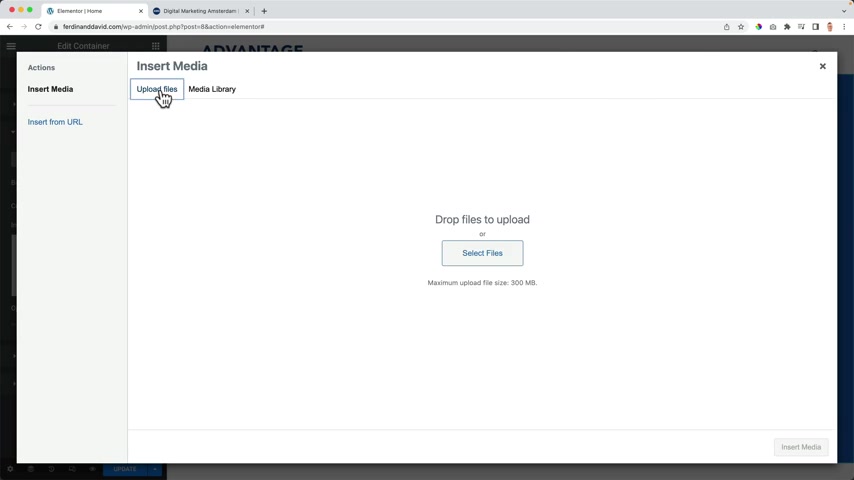
I select a logo and here at upload files , I click on select files .
I go to the desktop to images tutorial , how to make a website 2022 .
And then over here I select or I search for the logo Advantage logo in color .
I open it .
Then I always optimize all my images because they can be found through your images through Google , I remove the dashes , copy the title base it at all , text and paste it in the description .
That's the way to go crumbles .
Then I click on select and there the logo is , but below there is this text and I don't want it .
So over here , I have a few settings .
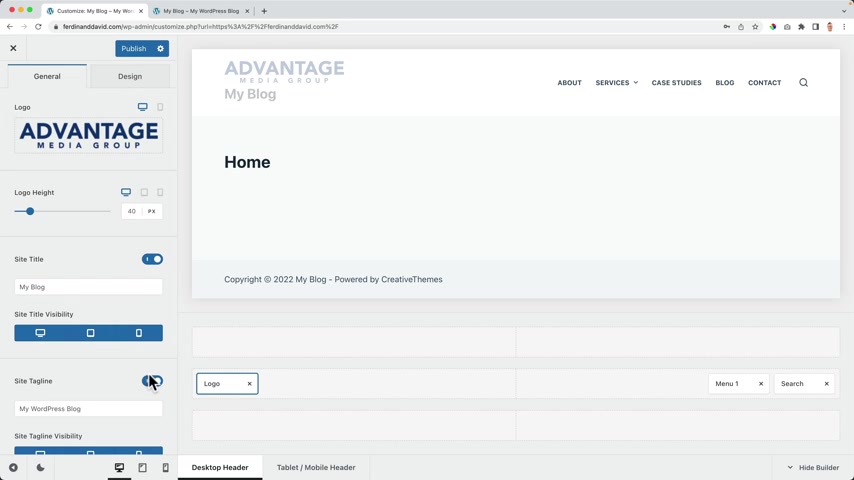
So I want to uncheck the site title and then over here I can change the logo height , can make it bigger .
I can make it smaller and I think 40 is perfect .
So I don't want to show this or the tagline .
No , just want to have a logo .
And for me , that's perfect .
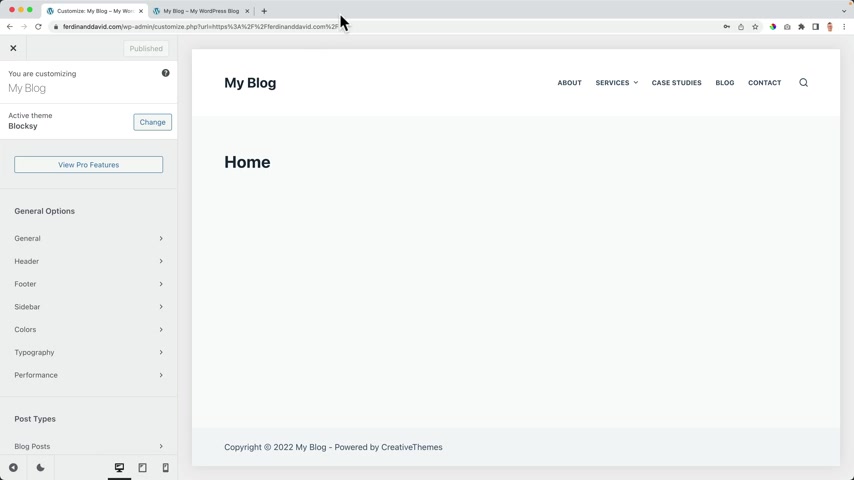
I don't have to go to design because I'm happy with how it looks and then I can go back and go back and here we can customize our theme .
And one of the options is the Heather .
So I go to the heather .
I want to re I want to make this a little bit less high .
How can I do that ?
I can click over here .
I can also hover over here and click over here on main row .
Then I can change the minimum height of this header .
Well , I think it's really high .
The examples we just saw of other websites were also not that high , you can increase it , but I'd rather use a lot of space to show my home page .
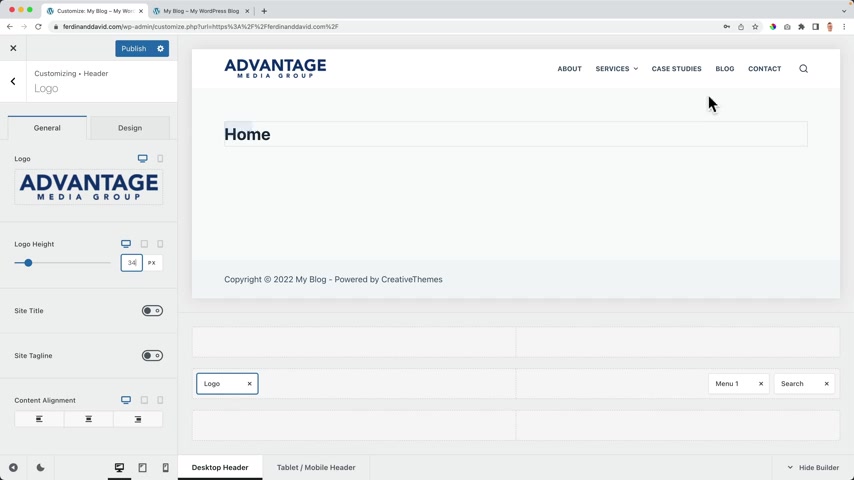
So I bring it back to 70 and then I think um then the logos are maybe a little bit big .
So I click over here and I bring this back to 34 .
OK ?
Then I can click over here and they can select the menu .
I use the main menu and I can select how it is shown .
So right now when I hover over this becomes blue , but I can also change it to type two .
And we have also on the line here below or the third one or the fourth one or I like to keep things clean .
If you take a look at apple , it's clean .
When you hover over it , it changes a little bit .
It's just clean , not much other things .
So I want to keep it clean like apple , I can also change the space over here .
To me its like that .
I think it's perfect .
And if I don't want to change it or bring it back , I just click here and it will be go and it will go back .
I can also stretch it .
There's so much you can do look at this , look at this and we're gonna talk later about the , the heather and the menu .
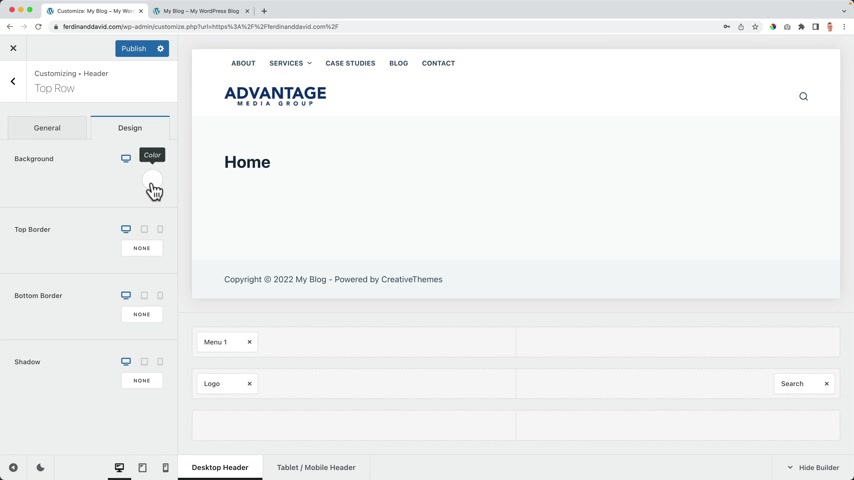
But if I want to , I can drag this menu over here to the center and to take it to the next level , I can also drag it over here to another area .
And in this area , I can click over here and go to design it with a different background color .
And then I go to the menu , I can change the colors to white .
So there's so much you can do .
Let me bring it back .
Let me bring this also back to the right .
There's so much you can do .
We'll talk about it later right now .
I just want to make it look , OK ?
So I go to this menu , then I go to design .
So here we can change a few settings and then at design , we can change the colors and other stuff .
So I click over here on default family and I want to change this to new , I just like that font .
I can make it a little bit less um balls like that .
And then over here , I can do other things .
I can make it bigger .
I can change the line it well , for now , it doesn't matter because we only have one line .
I can change the letter spacing , bring it back .
I can bring it back to normal uh cases or upper cases on the line .
It's and then change the colors .
Well , let me talk about colors .
Let me publish it , refresh it .
It looks so much better already .
Let's take a look at the colors because we can use certain colors in our website .
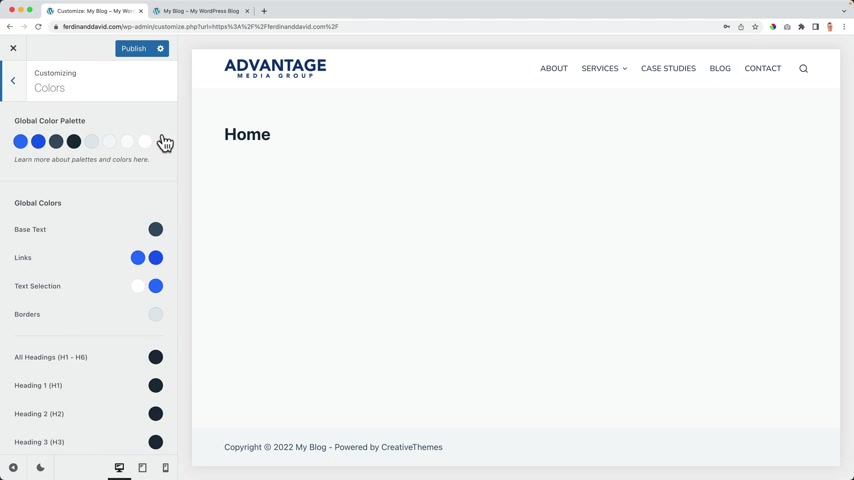
If I go back and I go back to the colors I can make use of global color palettes .
And when I use those colors and I change those colors everywhere in the website .
The whole style will change by just clicking once clicking again .
So now if I hover it becomes red , so we can use this global color palette to save you a lot of time .
So what I want to do , I use this tool over here .
It's called the color pick eye dropper .
You can download it as an extension in chrome and I can grab this color .
So I copy it .
I choose the first color I base it and if it doesn't work hashtag before and then it works , I copy this again .
I paste it and then I want to make it a little bit lighter .
Then the third color I want to use an orange color to to Yeah , to , to for my branding , I use orange .
You see it over here and the fourth one for me is black .
Then I want to have a gray color .
That's the text of my uh the the color of my text not completely black , also not that light too light .
So that's OK .
Color six .
I want to be white perfectly and the seventh one and the 81 , I also want to be white because I don't use those colors .
So I want to make use of these , these colors and please never use too much colors in the website .
I like to use three , the blue one , the light blue one and the orange one don't use yellow and green and then on a different area on the website .
Blue and red .
Maintain your ste OK .
So now the base text , I wanted to be the dark one .
The links links can be dark blue or light blue .
And when I hover over it , they can become orange .
When I select the text .
Sorry , sorry , sorry , let me go back two colors .
When I select the text , the background becomes dark blue , I can also make that orange .
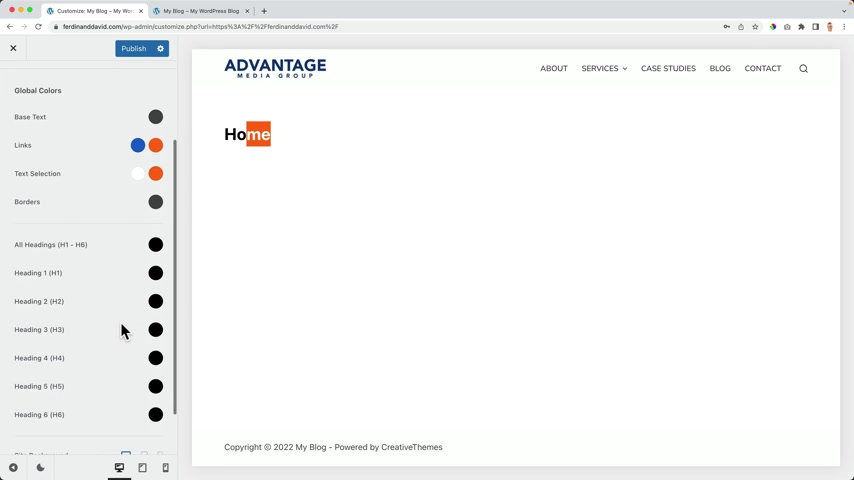
So when I select something , uh it's up to you what you want to do with that borders and give them a color , then all headings .
Well , I like them to have this color .
Now , uh this one side backgrounds .
If you change this , it will look like that .
Well , I prefer white .
So publish .
So you see , it looks like this and when I would change it to the green ones , this will all change if I would change it to this one .
So I like pellet one and for now that's enough .
We're gonna take a look at the Heather and the footer later .
I close this .
This is what we have so far about services for now .
It's perfect .
Ok .
This looks great .
A few more things I want to do before we get started with Element or I go to the customizer because I want to change the title of the website .
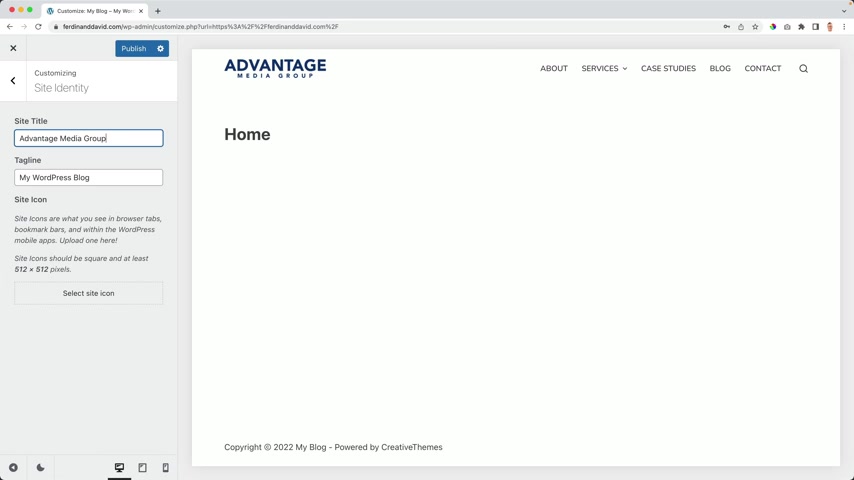
Where can we do that ?
If we scroll down , we can go to site identity and then we see the site title and the site title is really important .
And if you have a site title , please don't go to your business name , Advantage Media Group .
Because when people want to search for a certain service and they don't know me , they will never search for this .
If somebody wants to have a website , they search for web design , probably their city Rotterdam .
So if I would skip the ads over here , the title , this is the title you can create over here and it will be displayed over here .
Like this web design .
Wrote to them , we wrote to them website website web design .
Rotterdam .
Web design , Rotterdam , web design .
Roter them web design wrote to them web design , web direction , wrote to them web design , wrote to them again again again .
So make sure that the title you want to be found on the keyword you want to be found on in the beginning of your site title .
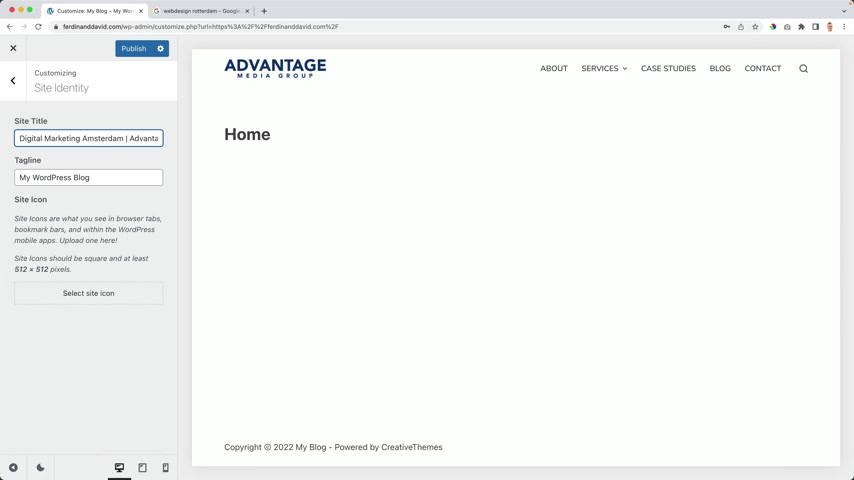
So I would call this one Digital Marketing Rotterdam or in my case , Amsterdam .
So people know , hey , when I see the page , I'm searching for a digital marketer in Amsterdam .
That's my title .
I will be found on the title and then they can get in touch with me and they know immediately I'm from Rotterdam and then people will see this name and they know , hey , it's the advantage media group .
So they see the name of the company , but first digital Marketing Amsterdam .
So what on what term do you want to be found ?
What are people searching for when you want your business to appear ?
And that's what you need to type over here as far as to the left as possible .
Digital , digital marketing , Amsterdam , and then Advantage Media group .
And there's a tag line , you can have more information about your company .
And I say we help companies small and big to get more business and to serve more people .
OK ?
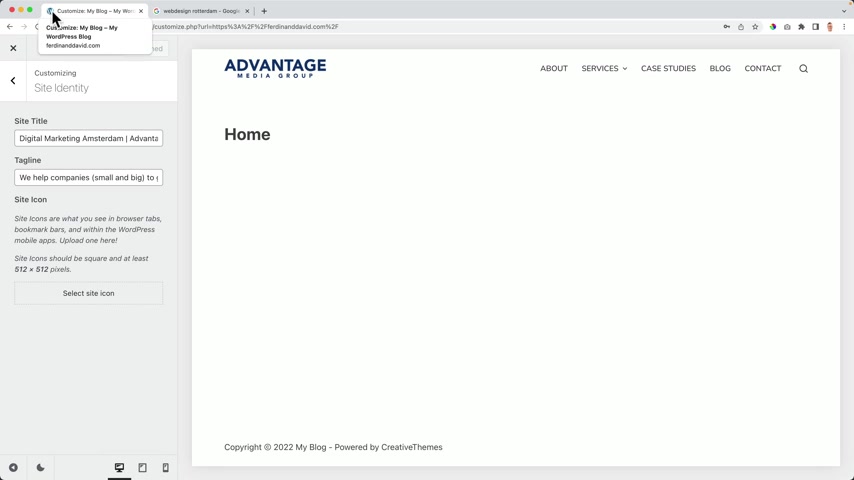
I publish it and then it will be displayed over here .
So no more my blog .
But this will mark the answer .
And then then , and then I see this wordpress I can or I can .
And if I would go to apple dot com , I see the app icon over here .
So I want to select my side icon .
So I click here , upload files , select files and then I go to my favorite .
Again , it needs to be square and I will make it at least 512 pixels by 512 pixels .
I open it .
I select it .
I do not crop it .
So I click on skip cropping and now it starts to look really nice in my opinion .
I close this .
So we have our logo , we have our menu which is enough for this moment .
We're gonna focus on the home page to build it .
We have the site title and we have this beautiful I can am G advantage Media Group .
I want to say to you that I appreciate you , that you're still hanging around over here .
I hope you're excited .
I like making websites and I've been going through a lot of errors in my life with making websites and these days it seems to be quite easy to make a website .
I hope you think the same thing .
I hope to help you as good as possible .
And now we're gonna create our first page , the home page and we're gonna use for that .
A free page building might be in the best free page building in the world .
It is an amazing page builder .
I can't wait to show you everything , but first we're gonna download it .
So let me show you how to download the element or page builder .
So in order to get Element or we go to 30 Corp dot com forward slash element or hit enter and elementary is optimizing their page continuously because they want to uh grow their business .
So they change a lot of things every time .
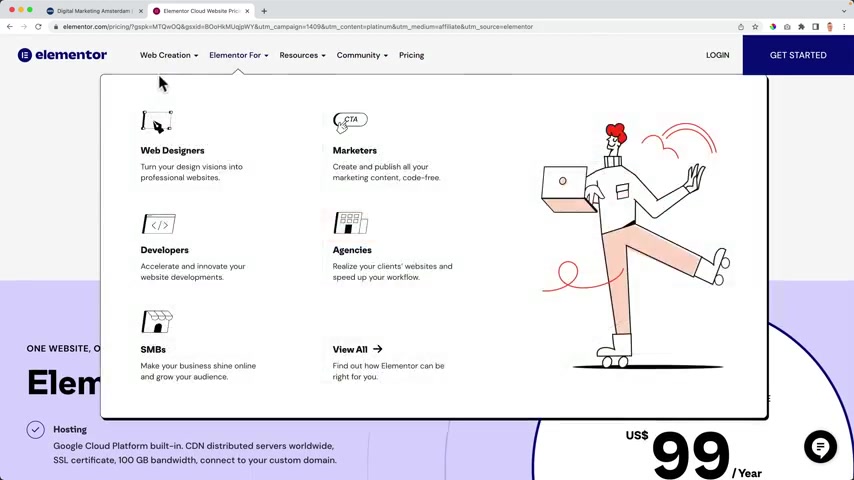
So if I want to find the free version of Element or the plug in , this is the pro version , get started for free and get started and then I need to log in .
I don't want that .
So you can also go back and then go to the website , your own website , go to the back end , go to plugins at new and search for a mentor .
And there it is more than 5 million installations but there are somehow there's a gap over here .
It does not go above and beyond 5 million .
But meanwhile , there are 10 million installations already of elementary .
It's crazy .
It's an amazing page builder .
I click on install now and then I click on activate now .
I need to do a lot of things .
I don't want that .

So I click on skip , skip , skip , skip and skip now as well .
Create a page for us .
Actually , I don't want that .
So I click over here and go to the dashboard .
I close this , then I go to this .
I can , then I go to all the pages and I remove this draft from element or trash , go to the trash and empty the trash .
And now we go to the home page by clicking here and now we can edit the page .
Now over here , it says we can edit this with element or so we can do that .
Click here .
We're finally creating our homepage using element .
But before we do that , I want to show you a little bit around .
Let me show you a little bit about what everything is , how you can do things .
So you get a little bit of familiar familiar , you get your feet a little bit wet and then we're gonna get started .
So what I will show you right now you don't have to save that .
I'll just show you how to work at elementary and through this tutorial you'll get more familiar with it .
And um I'm excited .
I hope you are too .
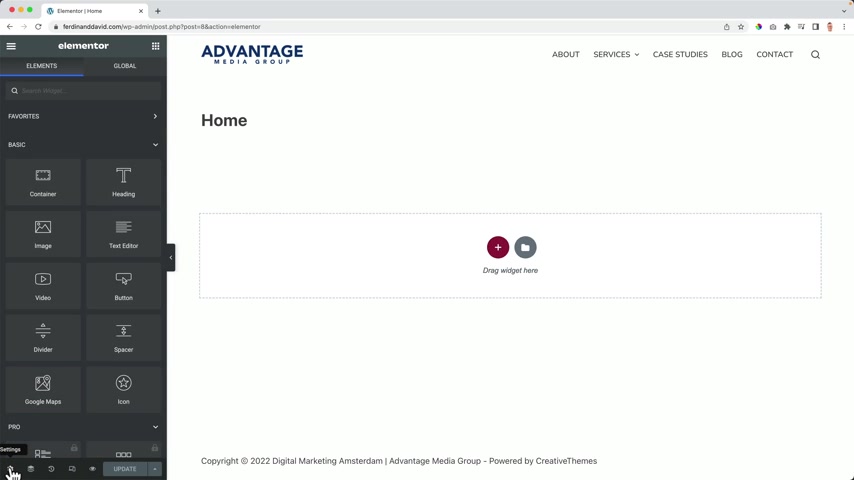
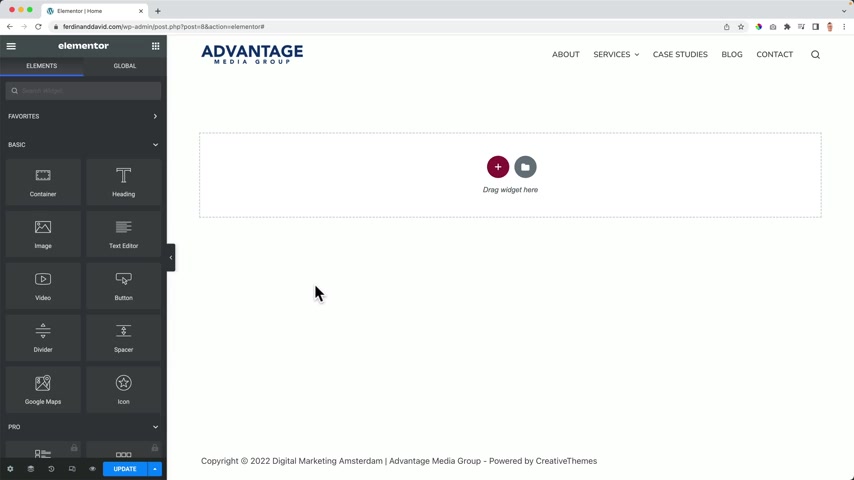
So let's start playing around with element or , and this is how it looks here at the left , we have a lot of elements .
That's why it's called element or .
So all these elements over here , I can drag them over here and then I can create an image , select an image , I can adjust it , make it bigger , smaller , I can do a lot of things .
But before I do that , I want to go over a few basic configurations .
So here at the left top corner , I go to the user preferences and I want to make the user interface dark .
I want to add editing handles right now .
I see three icons .
If I want to duplicate this , I cannot do that .
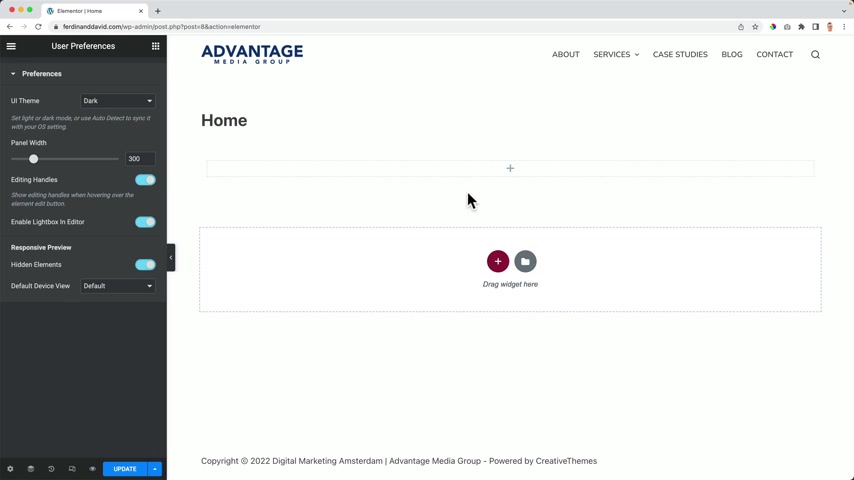
But if I add editing handles I can , so it gives you a little bit more options .
Now I can remove that .
If I turn this off , I cannot see the extra options .
I need to do the right mouse .
Click .
So go over here , use a preference , turn this on and now it's easier to do that .
I close this .
What else if you see a section over here ?
That that can be possible , but I don't want that .
That means that you need to update .
If you want to know how to do that .
Click here on update , then click here and click on exit to the dashboard .
And click on this .
I can , then we go to elemental settings , experiments , scroll down , turn on the flex box container by selecting active , save it .
And now again , we go to the home page ed with element or , and now we see a container over here when you see that you're good to go .
OK .
The first thing I want to do , I want to get rid of this area over here .
So I go to the settings here left below settings .
And then I want to change the page layout to a element or full with update .
Now , the title is gone .
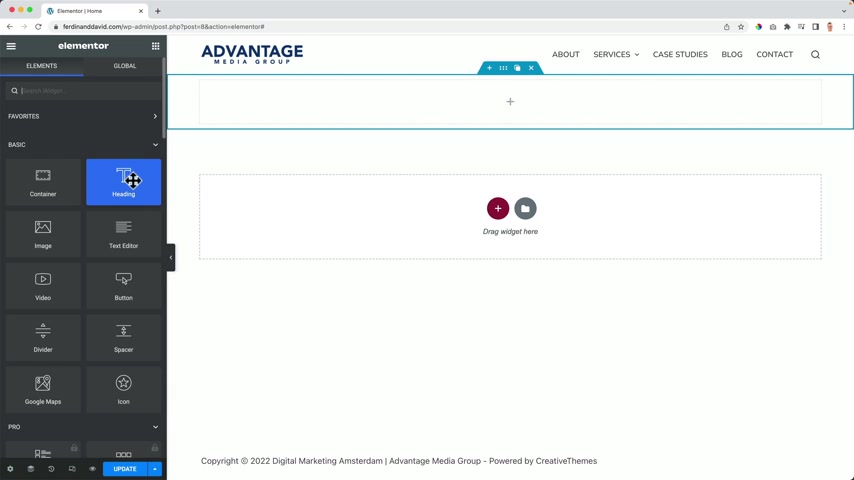
Now , let me show you what is possible with elementary over here at the left .
When I click on this icon , I see all those elements and I can drag them over here and it's uh uh what you see is what you get page builder .
So when I drag something over here , I see the result immediately and then I can adjust over here .
Here , I can adjust the content here .
I can adjust the style of the content and here I have advanced options which appear at every element and also every section and column .
Let me explain it to you .
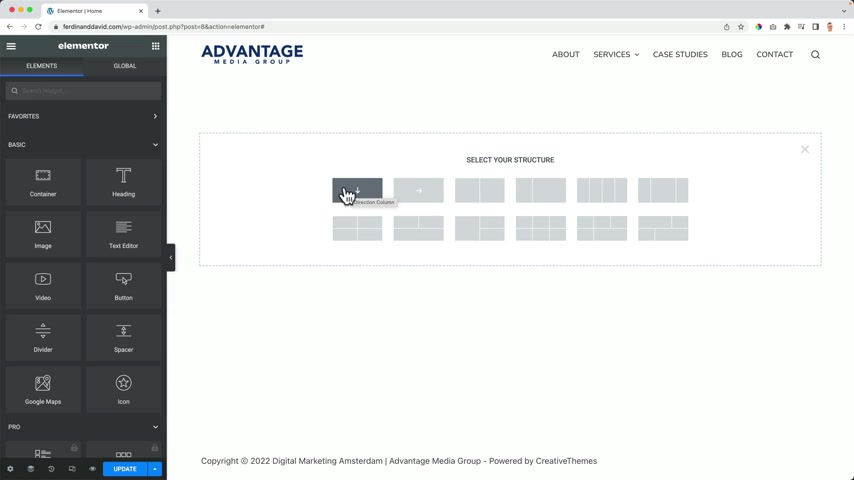
Let me close this , I go back to all the elements and I want to start with the plus and now I can have a container , I can have a container that's pointing downwards .
So when I add new elements , it will be below each other .
I can also create a container with elements next to each other .
And I can also have containers with multiple columns that can be nice when you have one to some text over here at the left and the image at the right , maybe you want to offer a few services over here .
Four or three .
So I click over here and then I remove this one , this one and this one and I can offer my three servers over here .
So I can have an image with a button and a text and also over here and also over here .
So let's start really simple .
Let me show you the basics .
We're not gonna save this .
Uh I just want to show you what is possible what element or so I choose for a container with an arrow down .
That means over here when I go to the elements , if I drag this header over here , now I can go back to all the elements and I can add a button over here and it will be below or above .
And that's because we had that arrow .
So let me show you really quick if I have this arrow to the left and I add a heading and after that , I had a button , it will be next to each other .
So that's the difference .
Uh I actually always use the arrow down or I use one of those containers .
I don't use this one but through this story , you will learn everything you need to know in order to create amazing websites using element or so what I have over here , let me show you I have this container and in that container , I have two elements , the heading element and the button element .
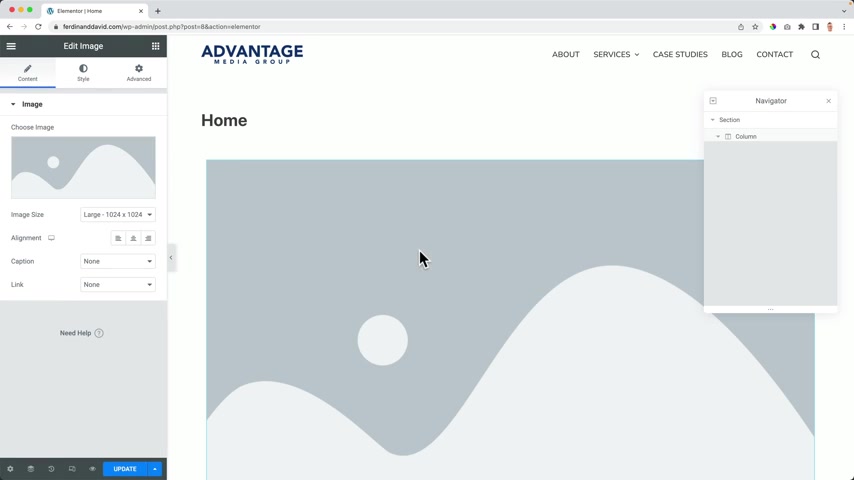
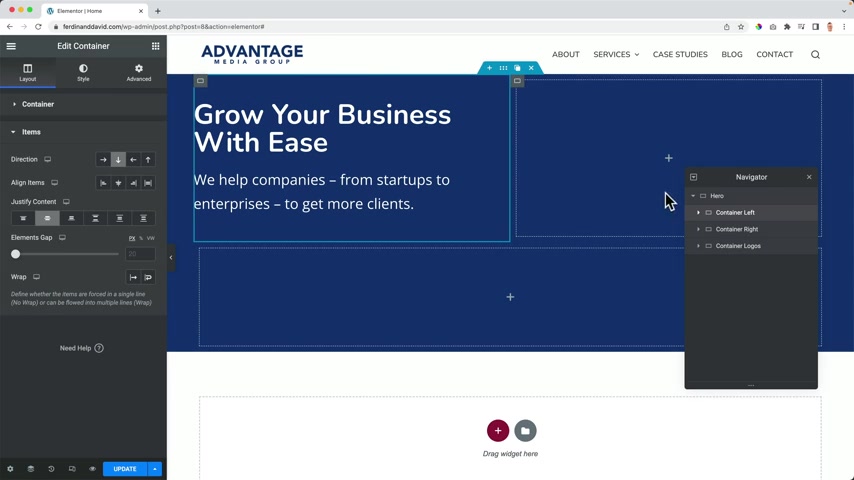
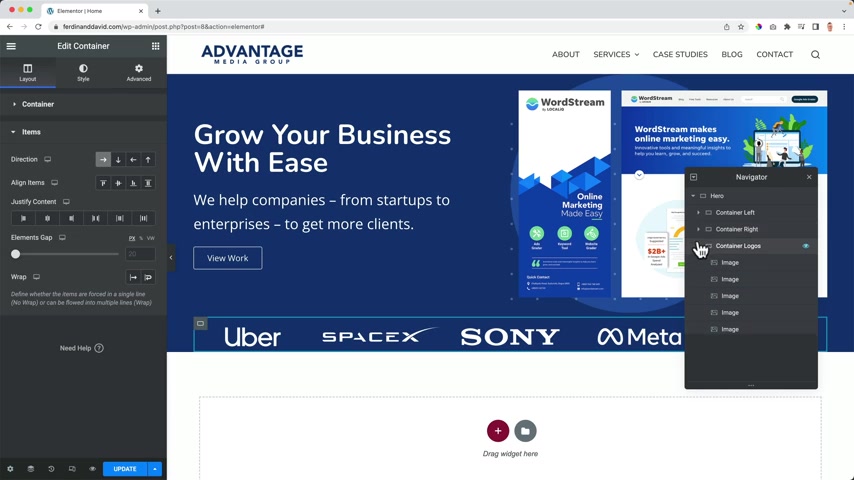
And if I would go over here to the Navigator icon , I can see that over here , I have the container and in that I have the header in the button .
So you can use the Navigator to select something and then you can edit it over here .
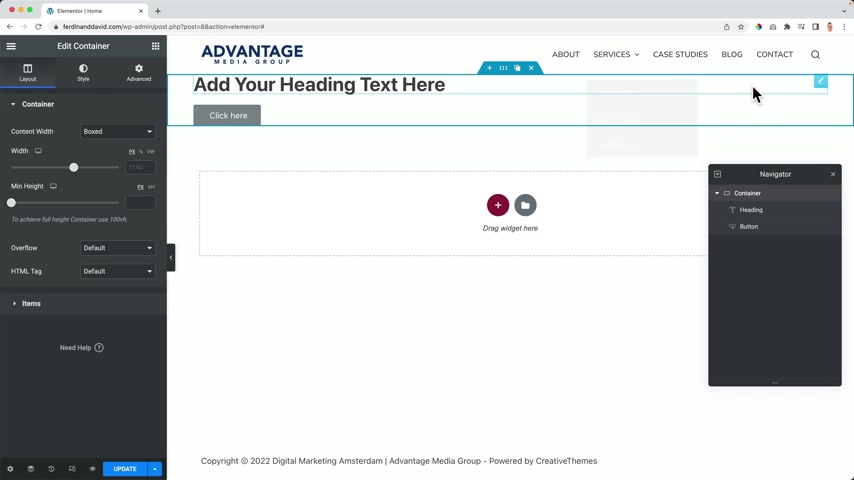
I can also bring this to the right .
So your website becomes a bit smaller and then you have this overview over here .
Really nice .
When you have a big computer screen and you want to create a website , it's really nice to have here at the right .
I will use it like that and sometimes I will remove it and then I can bring it back over here .
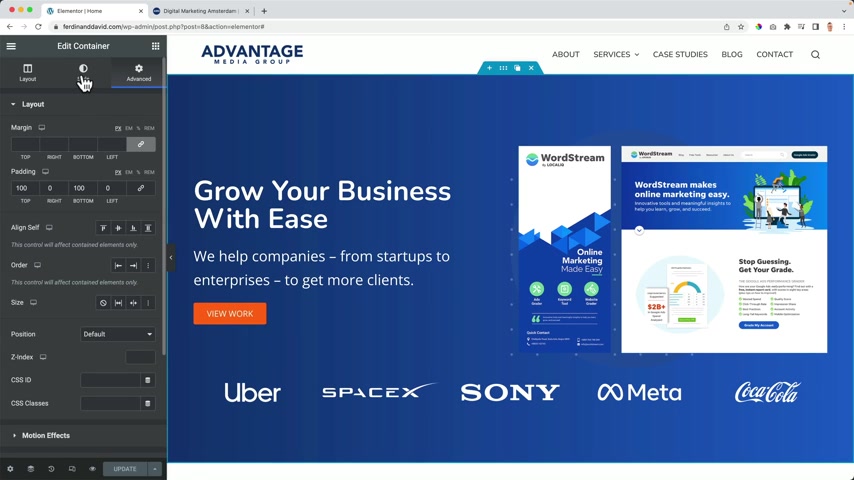
So when I click on the container , I have the layout , the style and advanced .
So here at layout , I can have a few settings .
I can change the width of this container .
I can change the height .
So if I want to make this really big , let's say 500 I can do that over here .
And then here at the items I can bring this uh to the right next to each other like that , which we just had .
But I prefer the other one or just nothing .
So it will be below each other .
I can bring align the items here to the center .
I can align them over here vertically to the center .
So really easy like that .
And when I add something out , so let's say um an Eigen everything will stay in the center and it's really nice .
So let me remove the button .
I go to the container .
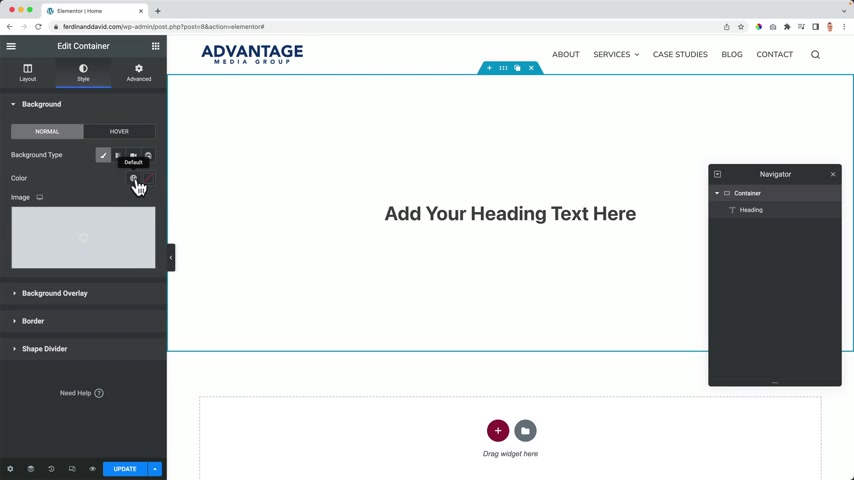
So here I have the settings I can change , but I can also change the style , the background , a few colors .
So if I would go to the style , I can change the background type to a classic color .
So I can choose color like that .
I can also use a gradient sort of .
First color is this one and the second color is the lighter one and then I can adjust the background so I can change the location .
So maybe I want to have a , a really straight line like that , then I can change the angle .
I can change the type .
And then that way I can uh do a few nice things .
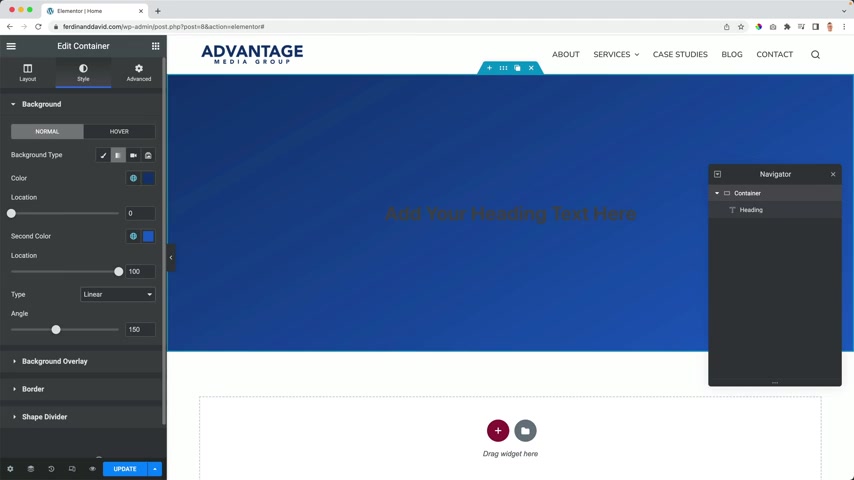
What I prefer is to make this A zero is 100 and then change the angle to 90 .
So it's from the left to the right .
But now the text is a little bit weird .
I cannot see it that well .
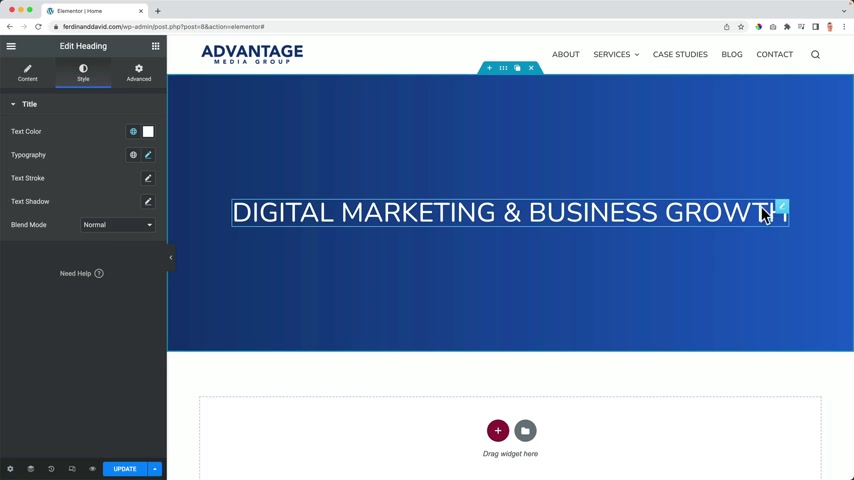
Well , then I need to go through this heading area .
You're gonna see digital marketing and business growth .
Then I go to the and at the text color , I can make that white over here , I can change the typography so I can make this unit , I can make it bigger , smaller , I can make it thin or really thick .
And it's also easy when I changed over here , I see it immediately .
And if I want to see how it looks on a whole page , I can click over here and then I can see the results .
What else can I do ?
I can make it upper cases .
So here at the transform upper case and then if I want to have another text be loaded , I can hover over here , duplicate it , triple click over here .
And then I change the text advantage media group .
I can go through the still make it bigger line it a little bit .
And then if I want it to be on top , I can drag it over there .
Sometimes if , if you see it's not working , you can always go to the Navigator , change it like that .
And I can call this container double click hero .
I can call this one digital media and the one below advantage .
So just like that and then I have advanced .
So if I click over here advanced , I can play around with margin .
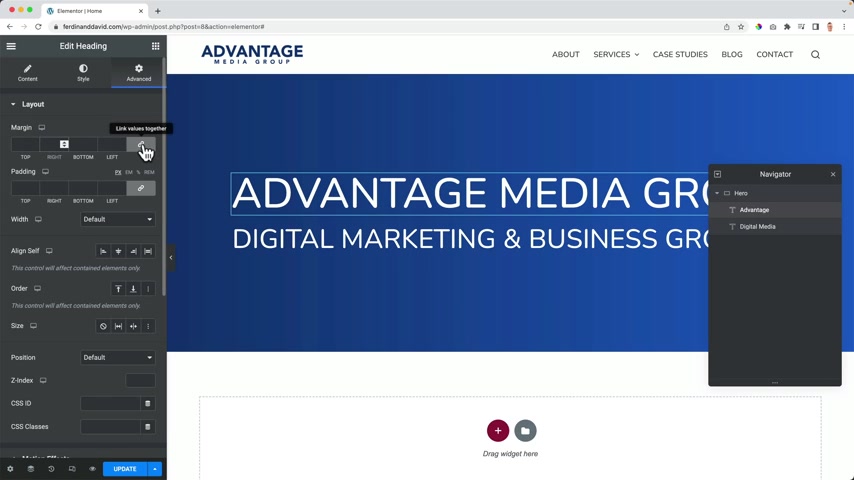
So I create , create some space inside or some padding , some space like that's , that's outside .
Or if I make everything zero , I can uncheck this and then at the bottom , I can make it a minus margin so I can bring things closer to each other .
Then I go to all the elements and I want to add a button over here , go to the style , change the background color to orange .
And if I hover over it , I want to make it blue , maybe the light blue like that .
And that's how you work with element of just dragging and dropping and then through the content , through the style and advanced , we can adjust areas in our website .
So this is just an overview of what you can do .
And now it's time to create an amazing home page using the element of page builder .
So I want to get rid of this .
Now , we're gonna start from scratch .
OK ?
We've been playing around uh by now , you probably know the basics and through this tutorial , you will learn more .
But right now we're gonna start for you making our homepage using the element or page builder .
Good luck .
So I want to start with a hero .
That's the first thing people will see when they enter my or your website .
So it's really important that it's really clear what people can expect when they enter a website .
They need to see immediately what you can do for them if it's a real hero .
Like , hey , welcome on this website .
People can get confused and they think , OK , I don't know what this kind of website is .
So .
Bye bye .
So we're gonna start building and then meanwhile , learn a few things .
So I want to start with a text over here , a title , a subtitle and a call to action .
And then at the right , I want to have an image so I click on the plus over here and I want to have two areas left and right .
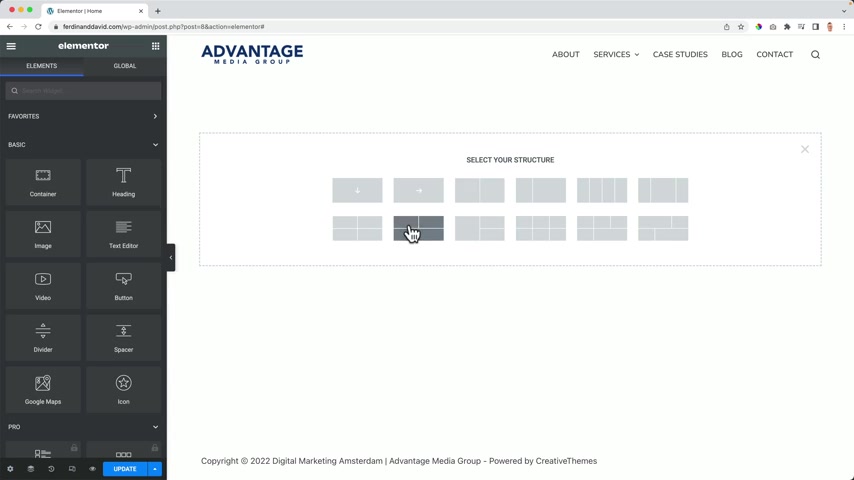
So I can choose this one .
But what I want to have below , I want to have an area where I show a few logos of companies I work with or for so I can choose this one , but I would rather choose this one .
OK ?
And then I want to start the first thing I want to do at the container , I want to change the height so I can make it a little bit higher , let's say 500 pixels .
And that's what I also love about element or you can change things pixel perfect .
You can say I want to have exactly 500 pixels in height .
Then I go to the and I can use a background but I want to use ingredients with the first color , dark blue and the second color light blue .
Then I want to change the angle to 90 degrees .
So the dark color is at the left and the light color is at the right .
Great .
Then I click here .
So I go to all the elements and I want to start with a heading like that before I change the head .
I go to the text color , click on this world .
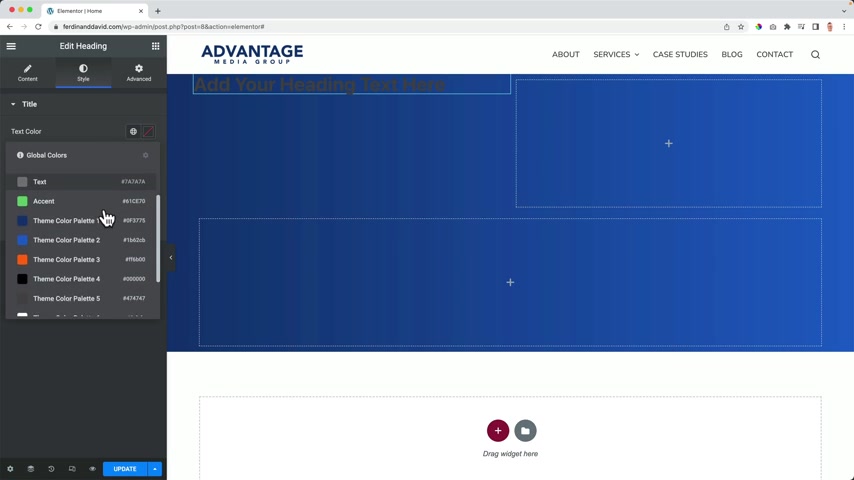
So you can use a global color and I want to use all the colors of the themes .
I I never use those colors .
I always use the colors , theme color palette , one , et cetera .
So I choose the white color , sorry palette , uh color seven .
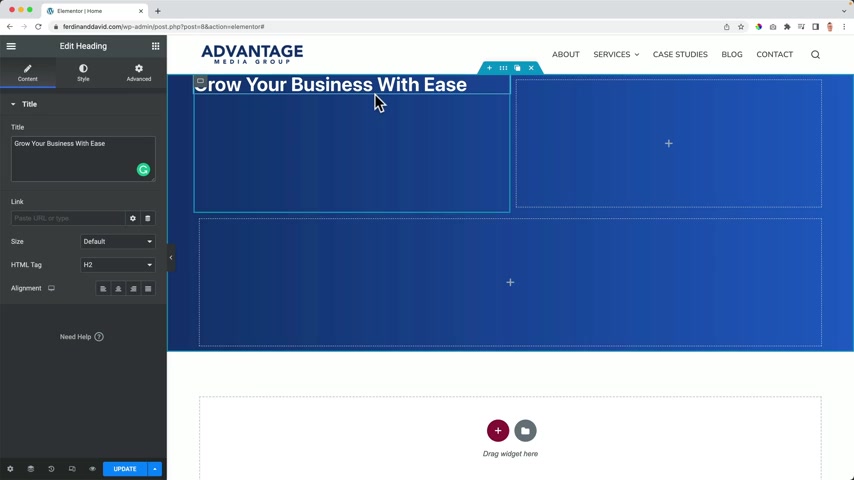
And then I go back now I can see the text and I can change it .
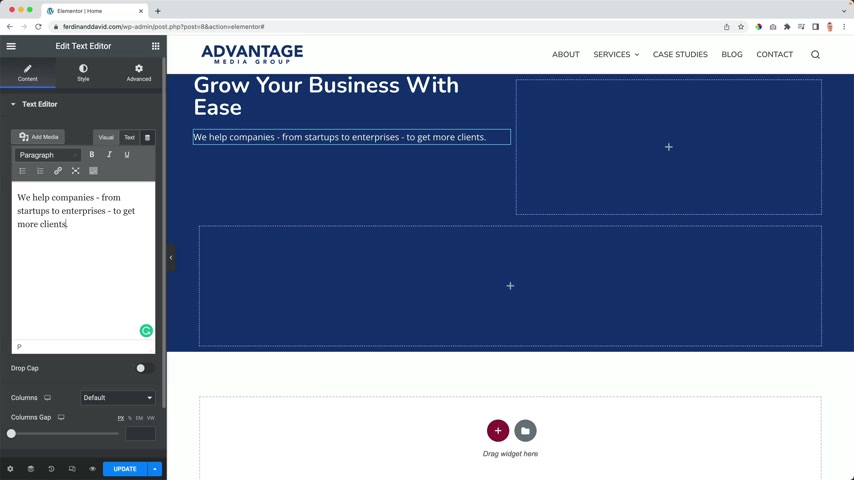
So I say grow your business with ease .
As I said before , I want to have a clear description of what I want to do for my clients .
I want my clients to grow their business with ease , not with easy with ease .
If I go to apple dot com , what I do , I go to the famous websites in the world and then I take a look at what they do .
How have they done their marketing ?
Do you see welcome on our website ?
Feel free to take a look around if you have any question , hit me up with a contact form submission .
No , they're really clear iphone 13 with a beautiful image super pro learn more or buy .
So you give the the the viewer the visitor an option or they are convinced at once like , oh , I want to buy this click here or they are not yet convinced and then they can click on learn more .
So give people options , have go to actions on your website and if you use images use high quality images .
So I say grow your business with ease and then I want to elaborate on it .
But before I do that , I want to take a look at the funds in my website because I want every header to have the fund called unit .
If you want to find funds , you can go to funds dot google dot com .
You can type a text , grow your business and then you see something you like .
Maybe you can also uh take a look at the categories .
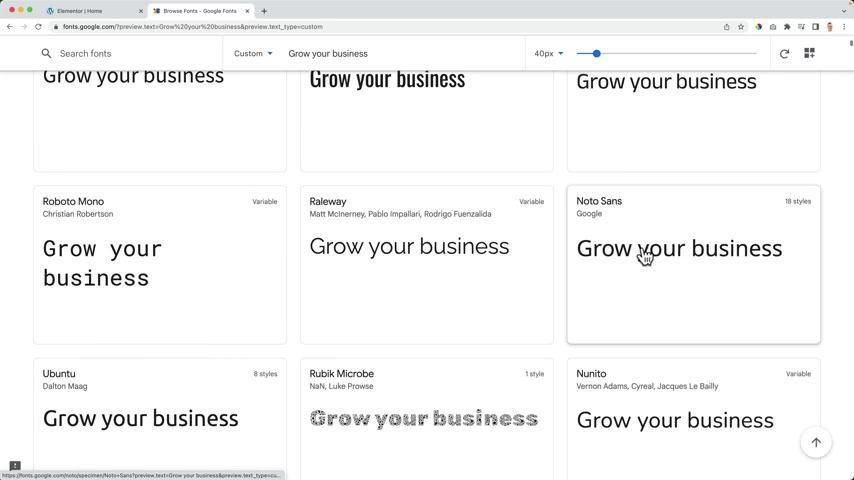
Then if you see something you like is also really a nice one , really clean , Oswald and Ubuntu .
If you see something you like , you can use it in your website .
I personally like unit .
So I click on those three lines .
Then I go to the site settings , global funds .
That's what I click on .
And then at primary , my primary f for the for everything is open .
So then my secondary is also open .
Sounds the text of my website , also open suns and the accent color of our color .
Uh and also is one OK ?
So far .
So good I updated .

Then I want to go back one step and then I want to go to topography and then the body text typography again , open sounds .
But over here link color is the same uh typography .
So I leave it empty .
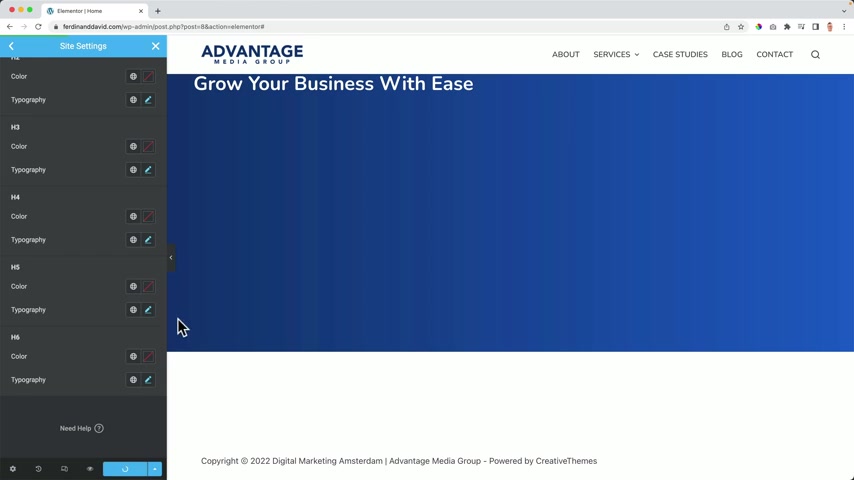
But every H so header , one , header , two Heather three , et cetera , which we use to create headers in our website .
I want them all to be NITO .
So I copy this .
Now , I select it .
Second one .
You need to do this only once .
And did you see that it changed ?
Because there's a head two and I just changed heading two .
So if I would change this one change over here , so it will save me a lot of time in the long run if I already predefined all the heading funds .
If I predefined all the heading funds , shall I continue over here ?
And the latest one , I normally only use H one and H two H one can be used only once in your website .
So grow your business with ease is a heading and I like it to be a heading one because I can have only one heading one and this is my most important title of the website .
So I choose heading one and all the other ones need to be H two .
So for Google heading , one is really important .
Adding two is less important , but that's why it is important .
But I can also do , I can have a text editor and I can say grow your business with ease and then I can go to the cell , make it white , make it bigger and then it can look exactly the same as this one , but then it's not a heading .
So it's important to use headings .
Now , I want to go for a text editor .
I drag it here below .
Sorry , I drag it here below .
I go to the cell change the text color too white .
And then at content I want to start typing , get more clients .
OK ?
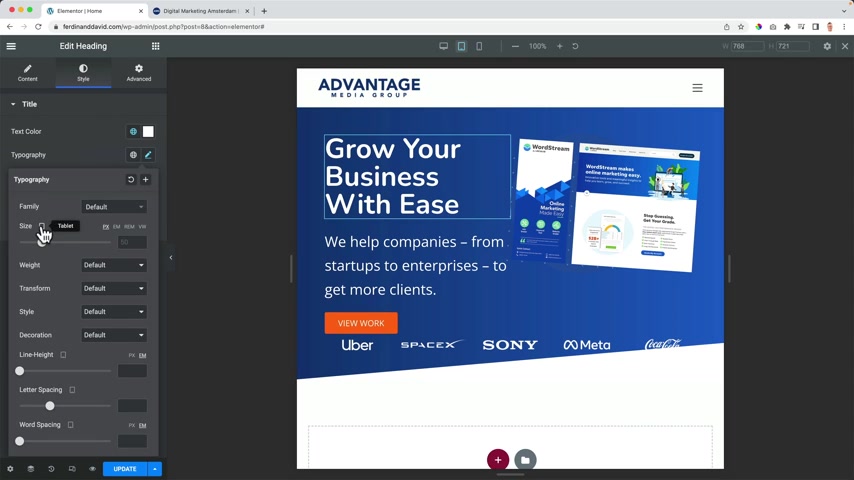
Then I go to the I want to make this text a bit bigger .
It's already open sense because we really find that OK ?
And over here I want this to be bigger .
So I go to ST Typography 50 .
Perfect .
Over here , I want everything to be in the center .
So I click over here on this container within the container .
If I want to see how it looks , double click , this is the hero , this is container left and it collapses that one is container , right ?
And I call this one container logos .
So I select container left and I want to say at the items here below that they should be vertically in the center .
OK ?
So far so good , I go back to all the items , all the elements and I bring a button to the page builder and I call this one view work .
So that's my call to action .
I want to show people what I'm capable of .
I want to show some case studies .
So I click on I I select a view work and I can search over here for case studies .
And since I have the page already , I select it and automatically the link will be created .
So when people click here , they go to the case studies page .
So what I want to do , I want to go to the scale of this button and then I want to give the background a color and that color is transparent .
So there's no background .
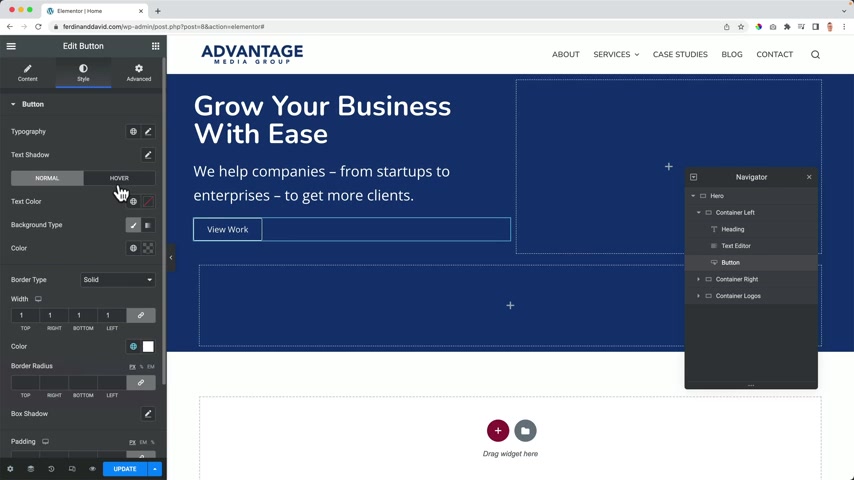
Then I want to create a border solid , think it's one pixel , the co color is of course white .
And then when I hover over it , I can do two things I can make it increase or shrink like that's and I can give the background so the background color can be a light blue one like that .
But since it's a transparent , I'm I'm OK with having nothing here , grow your business .
But least we help companies from startups to enterprise to get more clients , do our work .
Great .
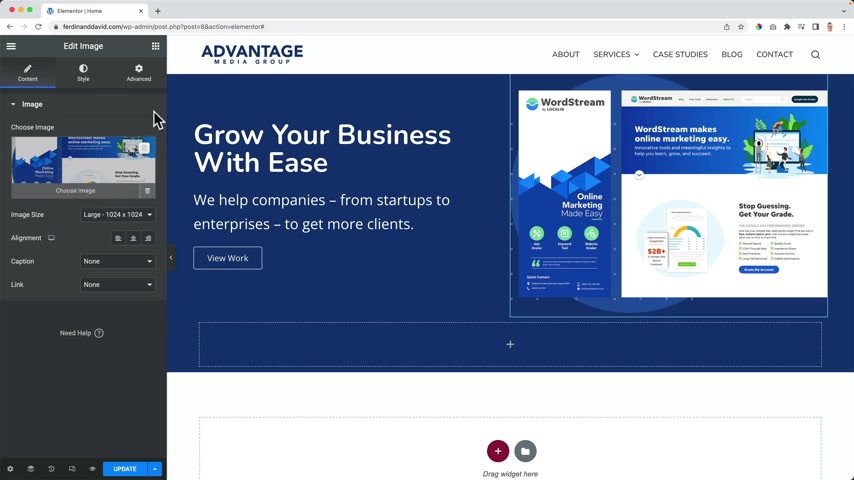
Then I go to all the elements and I drag it here to the right an image I click over here and then I select this image at a case study .
I can also call this the company name of the website over here in the banner .
But for me , this is OK , great .
So far so good .
Then I have this third area over here .
And what I want to do , I want to add an image .
So I drag it over here .
I choose the image and I upload a few files .
I select the files and I go to logos and every color logo has color uh after the name .
So I search for everything that has not color effort .
So Coca Cola hold control or command later , Sony space and Uber .
So five wide logos and I start with the first one and that's really big .
What I can do , I can duplicate this a few times .
Then I click on U where the second one and I click on space X the third one , Sony fourth one , meta , the fifth one , Coca Cola .
So now I want those aligned next to each other instead of below each other .
In order to do that , I go to the Navigator , I go to the container logos and then at items right now it is arrow down .
I want to change it to row and now they're all next to each other .
Really nice .
I can go to the big hero which contains three containers and what I can say at layout , I want it to be bigger so I can increase it .
But what happens now the more height I give it the more space there will be between those elements .
So I don't want it , I say nothing , I make it empty and now I can go to a complete container .
The hero advanced .
And then I say at betting at the top , I want to have 70 pixels and at the bottom , I want to have 70 pixels .
So everything stays connected here in the center and I want to make it 100 .

Again , I can make this pixel perfect .
So everything stays in the center grow your business with ease .
We help companies from starters enterprise to get more clients and they can view our work .
Well , I want to add one more color .
So I go to this button and I have a , a color in my branding which is orange with those three colors .
I can make a really nice website and when I hover over it , I don't need , I don't need the , the solid anymore .
So over here it's now off the button .
I don't need any border anymore .
And I do want to have upper case text .
So over here transformed into upper case update .
So when I click on the I , what happens , I see a preview of what I've created .
And the great thing about that I is when I change something .
So let me change this color to a blue one .
If I update it , it will be changed automatically .
It's now blue .
If I bring it back to orange and I update it , I don't have to refresh the page , it will automatically be refreshed and it will save you so much time .
And if you have two screens , I highly advise to have this area on your first screen , the back end and the element of page builder and the right and on the right screen , I would have the result .
So as soon as you click on update at the other screen , you'll see the update and then that way you can work faster by the way , there will be more moments where I will talk about productivity and making websites faster .
Because in the end of the day , we want to create great websites in the shortest amount of time that will help you how you can do that .
So I think this looks nice .
Uh There's more we can do , we can click over here on the container and at the background , I can collapse that and I can have a background overlay .
That means that I can mix an image with this gradient .
So here at normal background overlay , I can click on the classic one , I can select an image .
So I go to upload files , select files .
If I go back to this one , I can go for Max Marketing Agency Amsterdam .
If I select it and I optimize it copy paste based and I insert the media , I look at this , it's now overlapping with the gradients .
So it's 15% if I would increase it , I see 100% of the image if I decrease it .
So and that way I can play around with this and I can also use blend notes .
I can multiply those colors overly and you could play around with that .
And normally I would do this in Photoshop but right now you can do this with an elementary .
You don't need Photoshop for this .
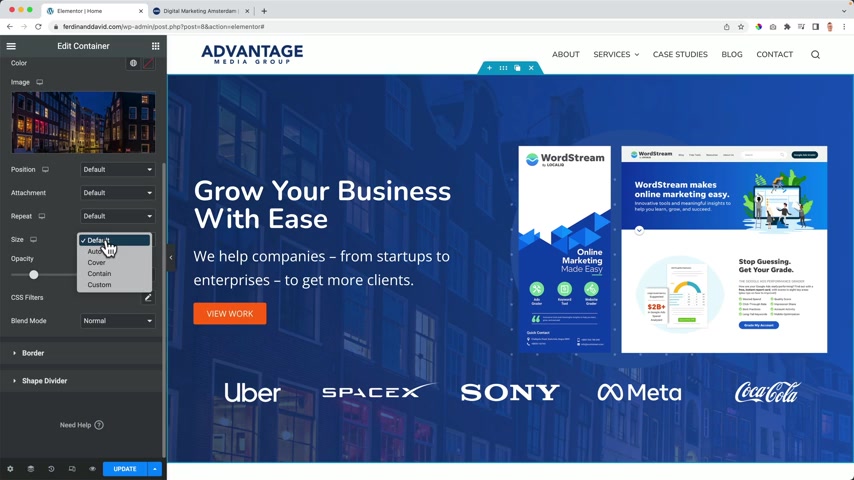
I use the normal one opacity like that I can change the size to cover .
So we will see as much uh of the picture as possible .
And then one important one if I scroll now , everything is static .
But um but I can change the attachment to fixed .
This is what I like .
If I scroll the background stays like that , what I don't want is that um the image will take too much distraction .
So it becomes a little bit too crowded .
If you want , don't want that , you can always decreases a little bit more or just get totally rid of it .
Um I want to get rid of it .
I just want to show it's possible what else is possible over here ?
We can have a video in the background .
Well , it's really , it becomes really crowded when you have that .
But if you just want to show a video in the background , don't have a lot of content over here , then it is possible .
How do you do that ?
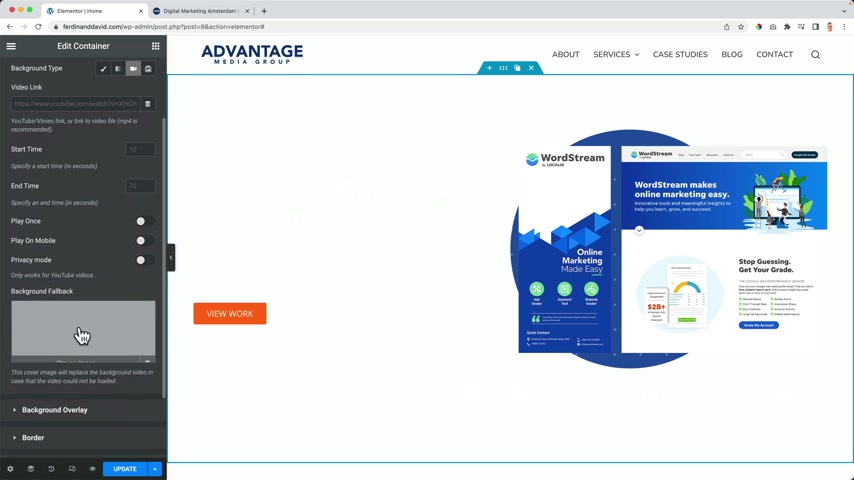
You click over here , you import the video link , you can adjust the start time , the end time play once play on a mobile , have a fallback image if it somehow doesn't work .
So that's what you can do and you can have a slide show with multiple slides .
So it will change now and then I want to keep it simple .
And for me , this looks fine , I can also make these links so I can make it a custom ul right now .
I have a hashtag but I could refer to my case study called Uber .
And then I can show case what I've created for Uber .
And then this can be a link and then when people click on that link , they can go to the case of Uber .
OK ?
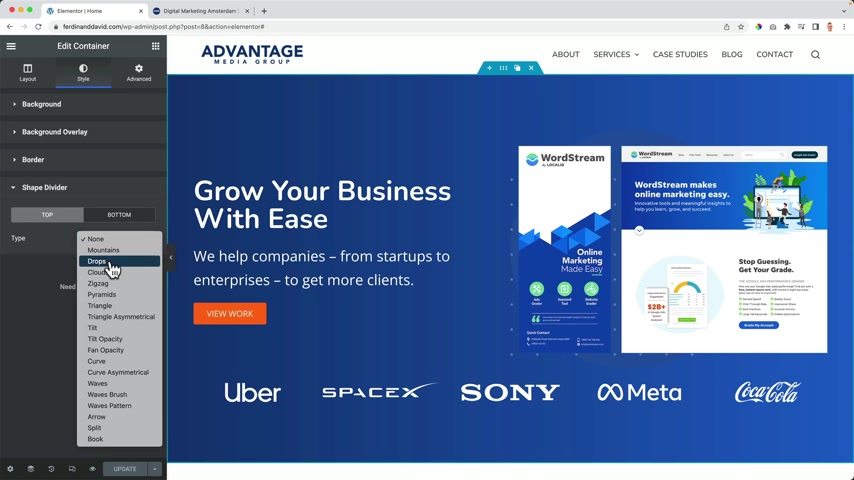
One more thing I go to the hero and then I collapse this and then I see the shape divider that means that I can have nice shapes on the top of the bottom of the container .
So right now it looks like that's a little bit creepy .
I can increase it or decrease it .
We have quite a few different ones .
I can have pyramids , girls waste .
You can change your height , et cetera .
And that way you can give your website a nice style .
You can also do this at the bottom .
I want to keep it simple .
I want to have a tilt , I can flip it .
I can change the height .
I think 70 is perfect .
And then at the top , I can see I won't have none .
So grow your business with these .
Great .
OK .
I click over here .
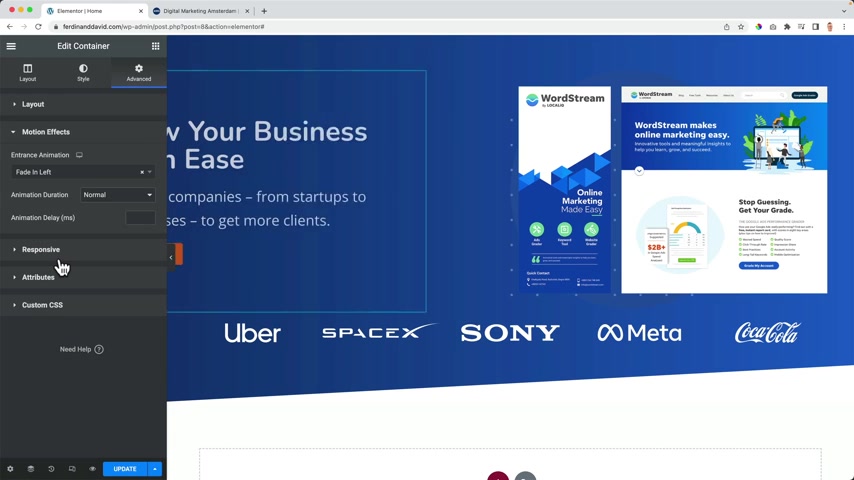
I go to advance and I want to slide this in .
So I collapse the layout area and I go to motion effects and I say the entrance animation is fading from the left and what it does , it fades everything that's within this container , from the left to the right .
I want to do the same over here .
Advanced collapse motion effects fade in from the right .
And then over here this container , let me check the right one container logos , advanced collapses , go to the motion effects and fading up like that .
But we can also give everything and delay .
So this one can appear slowly after half a second .
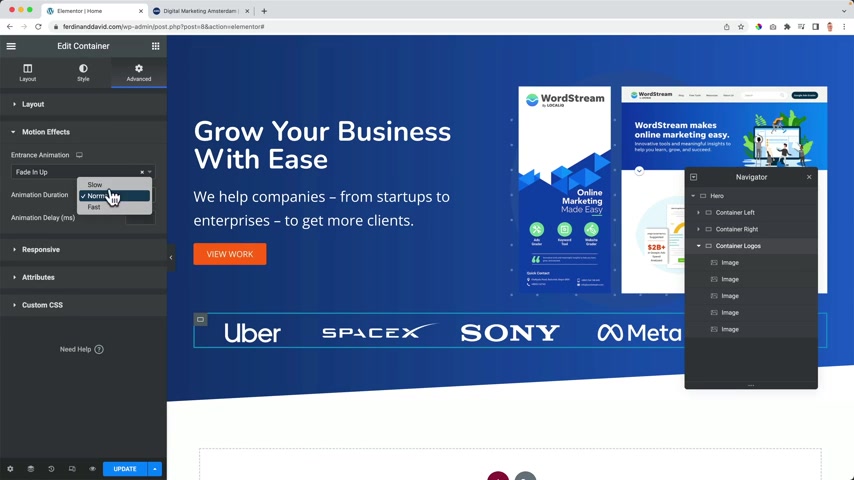
The second one can appear slowly for one second and then the third one can appear slowly if they're 1.5 seconds .
Now , if I update it , I can see the results like that .
When you do this in your whole website , I think it will be distracting and it can make your website slower .
So you should not do it too much .
But now and then I think it's , it's a nice way to do that .
I think there's too much space over here .
So really simple and go to the hero advanced and bring this one too 50 better .
OK ?
Grow your business with , with we help companies to start , we help companies to get more clients , view our work and image .
Great .
I showed you how to work with uh insurance animations .
What I also can do , I can click over here on this element .
I can go to advanced and then I can go to transform normal .
That means that without you hovering or doing anything , you can change this so I can make it look like this .
So now without me doing anything , it will be tilted a little bit like that or what I also can do when I hover over it , I can also do things .
So when I hover over it , it deals even further , there's so much more offset skill skew .
So let's try something .
So that's what you can do .
Well , I'll never overdo this .
This is too much .
So , but what I can do , I can do this .
So now if I update it , it slides in when I hover it deals even further what we've created so far in the element or it looks really nice in my opinion .
Um But how does it look on a different device ?
It looks great on a desktop screen .
How does it look on a smartphone or on a tablet ?
Well , we're going to optimize it for all devices right now .
Great but really important .
How does this look on a tablet and on a smartphone in order to find out I can click over here and go to the tablet mode ?
What I see is that everything is really close to the edge .
It's exactly against the edge .
So in that case , I should go to the container settings and then the betting I should increase it with 60 pixels at every side .
And now now it looks like this and then there are a few things I don't like .
So let's make it 50 .
What I can do , I can click over here , go to the typography and then over here for the tablet , I can make it smaller .
Let's make it two lines .
Then I go over here to ST typography 18 .
OK .
If your work looks fine to me over here , I go to the style of this image and in pixels , I want to say make it a bit smaller .
And then over here I click layout items , bring it to the center only on the tablet .
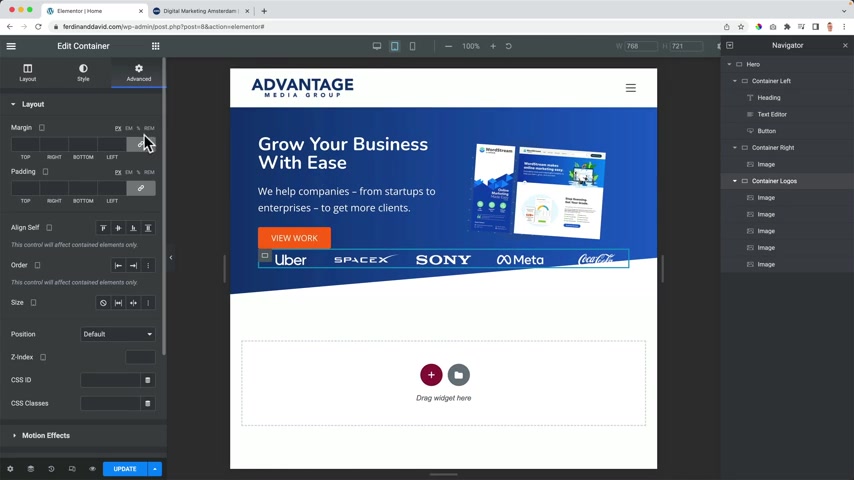
Then I go to the contain your logos and then I uncheck this and I want to increase the margin a little bit .
So I have more space between the view work and all the logos .
And at the bottom , I want to do the same because right now uh Coca Cola is beneath this wide area or in front of .
So until I think pixel perfect that I like it .
So now it looks great and there's a little bit of space over here .
So I'm happy with that .
How does it look on a smartphone ?
Grow your business with ease with ease ?
OK , I click here , advanced uncheck and at the top , I want to increase some space and then we have those images over here .
And what I can see , I click here , advanced responsive , I can say hide this on a mobile .
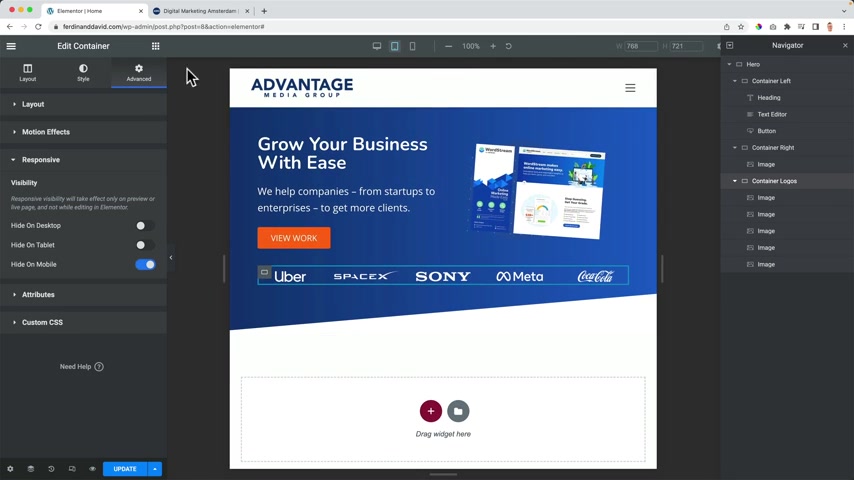
So on the mobile , I will only see this , grow your business with each sorry this button , this text this image , but this will be hidden and you see those lines over here .
So when I go back to a tablet , you don't see those lines because it will be visible .
But as soon as I go to a smartphone view , I see this will not appear that's the power of element or you can make it all look so great on any device .
So this is how it looks , I can make it smaller .
This is how it looks on the tablets and this is how it looks on a smartphone .
And I think there's not much space over here .
So over here , let me see .
I click and then the bottom , I can also say 30 pixels update .
I said look , make it small again .
And now I see there's enough space over here .
I think this all looks amazing .
OK ?

Are you ready for the next area over here ?
What I want to do ?
I want to showcase some portfolio items .
I don't have them yet , but I will show you how to display a few images , make it all look really nice .
And I want to show you a little bit more about elemental .
We're gonna dive a little bit deeper .
So I want to get rid of this thing over here by clicking this again like this over here .
Click on the plus .
I want to start with this area over here and then with a heather or a heading .
So I changed the text to next level digital marketing and then I go to advanced close this , I go to the background and I want to add a background really simple , just this dark color .
Then I go to the style of the heading , change the text color to a white one .
Great .
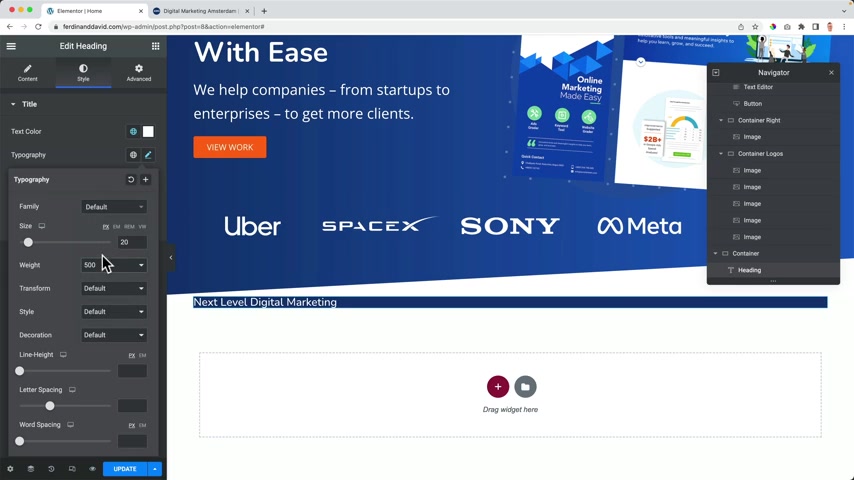
Then I go to typography , I make it a little bit smaller and say 500 make it smaller .
And then I go to advanced and I increase the bedding .
So I create some space around the area .
Not too much .
OK ?
But I want to get rid of this stroke over here .
I only want to to be until this point .
So I can go to layout , change the width to custom .
Then again , pixel perfect .
I can increase it or decrease it until I think it's exactly how I want this to be and that's how it is .
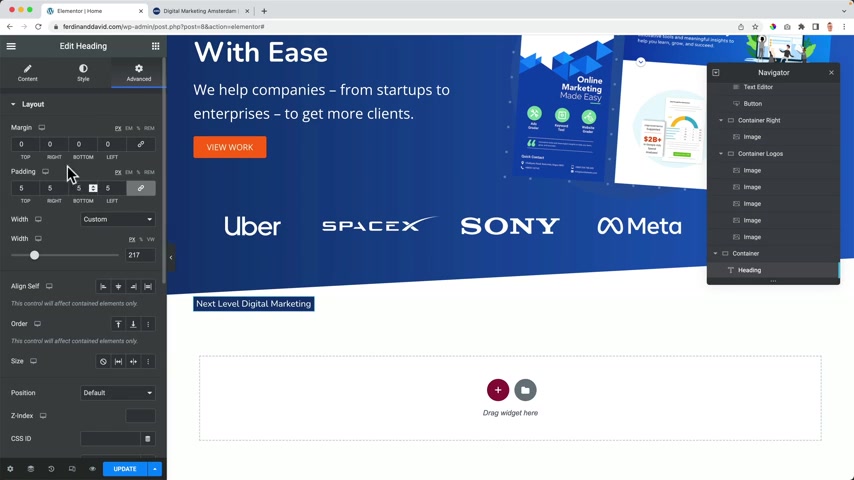
Then I uncheck this and at the top , I want to increase some spacing or at some spacing 20 and that's how I like it .
I go back to all the elements like direct a heading below .
First , I changed the content .
Our focus is your growth and that can be a little bit smaller .
So I go to the typography .
Yes .
Then I can have a text area so I can grab the text editor , place it here below and now I can go to the dummy text generator .
I click over here and I want to have multiple paragraphs .
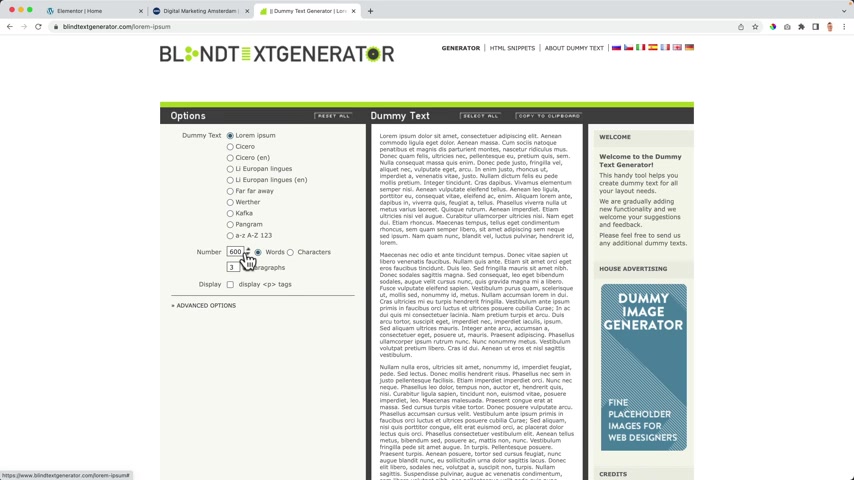
If I want to , I can have less words , more words , you know , one paragraph is OK .
And let's go for 100 words .
Or a little bit less .
I paste it all I can do here below .
I can add columns so I can make it two columns or three and I can change the gap in between and then I go to the , make it a bit smaller .
Be careful with too much text .
People tend not to read it anymore .
So , um it's ok , you know , a little bit more if you use this lower synthe , you can never be um sued for copying someone else's text .
Because if you want to see how things , some things looks and you go to a news website and you copy the whole text and place it over here , you're violating some copyright stuff .
We don't want that .
Ok ?
What we can do now it's a little bit next level .
But at the other hand , it's actually basic .
It's the way how we work with element .
We have one container .
I can call this one case studies to keep the the overview I can make close all these case studies heading , heading in this .
So what I want to do I want to drag a container in a container .
Isn't that cool ?
So let me drag it over here below .
There it is .
And then I can drag it below in that container .
I want to have three other containers .
So I drag them over here and then duplicate it and duplicate it .
Then I go to the container settings to the items I want them to be next to each other as a row .
So 123 , exactly what I want .
Now I search for um image , I choose an image and you can uh I don't have this um in my folder .
So you need to use your own images .
What you can do , you can just go to the internet , search for a portfolio , digital agency or whatever .
Um And then use those images or you go to Pixar Bay come , they can find images for free .
But since you are uh creating a portfolio , you can also use images you have from the case studies you already have created .
So I select those images .
Let me see .
Let me see .
Portfolio .
I opened this one .
I searched for another one is one and then the third one , this one .
OK .
I uploaded the first one .
Great .
I want to change the image size to 768 because then it still looks great .
But we have a less happy website because if I would say 2010 , it will load unnecessary space because right now it looks great .
Look , if you make it 300 by three on it , you'll start to see that the quality becomes worse .
So take a look at the lowest uh resolution and when it still looks great , then it's perfect because you don't want to uh link your website heavier than necessary .
OK ?
I go to the elements .
You like a heading .
Below .
I call this one , the name of the company carry Lotion and later in a tutorial or , and in a different tutorial , I will show you how to create a portfolio like this .
So you don't have to do this manually .
Right now .
I believe when I show you this , you will also learn a little bit bit more about element .
That's my goal in the tutorial , not only to help you to create an amazing website , but also to help you to work with Element .
So meanwhile , I'm a typography , I make the text a little bit smaller , then I duplicate this area .
And here I want to place my categories for instance , um silting identity , it and web design .
And I go to the topography and make it um upper case , make it a bit smaller .
And over here carry lotion .
I want to make that dark blue and the categories I want to make them light or blue .
I go to advanced uncheck this in a margin .
I bring it closer to each other and at the left betting , let's say five .
Also here at Car Lot advanced left five .
Ok .
But it still looks a little bit boring in my opinion .
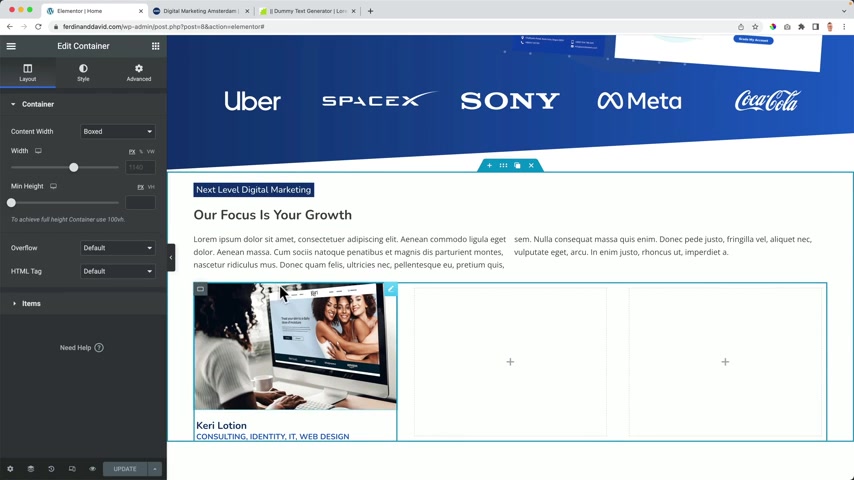
So how can I fix that ?
I can make it look better by going to the container , make sure it is only this container and not a complete container .
In order to find it out , we go to the Navigator and it is the first container , then I go to the style of that container to border and I don't want to use a border but I want to use a box shadow .
If I turn it on by default , you have something over here .
You can adjust it , blur it more , spread it even further on the inside of the or the container .
Well , and you can bring it all back .
Bring it all back to you don't stop .
Never give up .
Mm mm mm mm mhm .
Bring it all back to you , you know .
Um I got a phone call a few days ago from an ex member of S club seven asking me if I could do this to remember them .
Let's see how they are doing .
I think they created two video clips .

S Club seven .
I think it was in the year 2000 .
Really happy music .
So that was all for free .
Um If I go to the container to the advanced area , I want to increase the space , the bottom .
Why is nothing happening ?
Sorry .
So I , I have to be honest , I'm making websites now for 23 years and still sometimes I have to figure out what is betting and what is margin .
I'm sorry .
I feel like I'm letting you down .
Uh I go to the border again .
Yes .
Randall Beck .
Ok .
No , I'll do it manually .
000 , zero and then two or three blur it a little bit , then we can also increase or decrease the shadow .
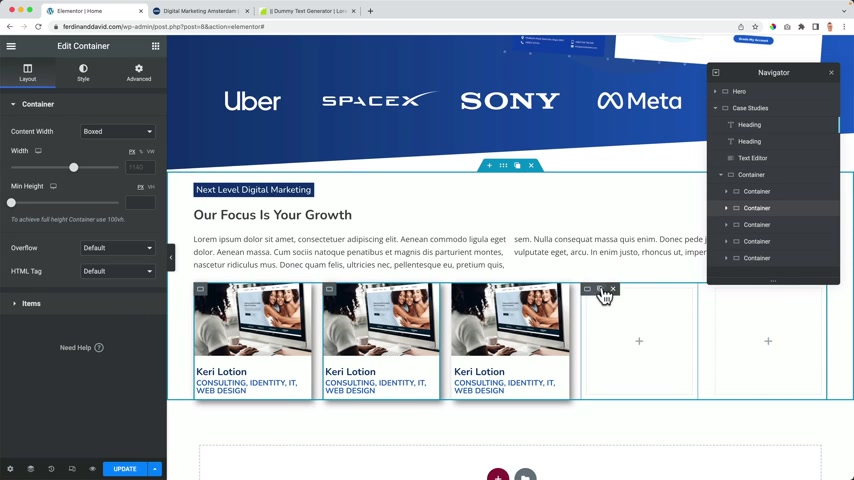
So let's make this five you can play around and make a pixel perfect .
Then I can duplicate this area and duplicate it .
And I remove those two over here , I changed the image to the second one over here to the third one .
And then I can change the title seeing , believing it can be a difference , get a grease and then the third one , blue lizard , it was all about identity and also web design .
So what does my eye see over here ?
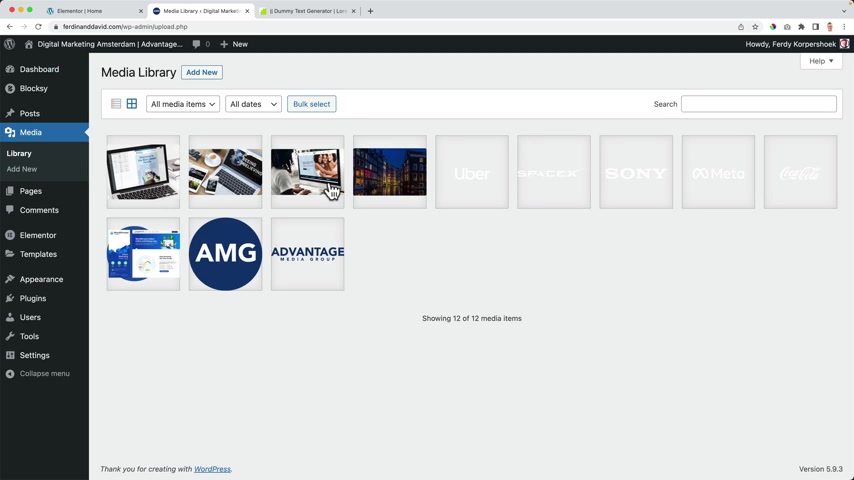
It's not aligning perfectly because this image has a different aspect ratio .
How can I fix that ?
Oh , let me go to the back end by element or overview , go to media .
And let's take a look at this image .
I see that the dimensions are 60,000 by 1000 edit image .
So if I would say 16 by 10 and I choose crop , I have the exact aspect ratio .
So 16 by 10 , then I go to a different image and let me see which one is having problem .
The blue lizard one .
So over here I can edit the image and I can say 16 by 10 .
Then I go to crop if I change the size , look at this .
So I select this area and I click on crop , I save it .
I close it .
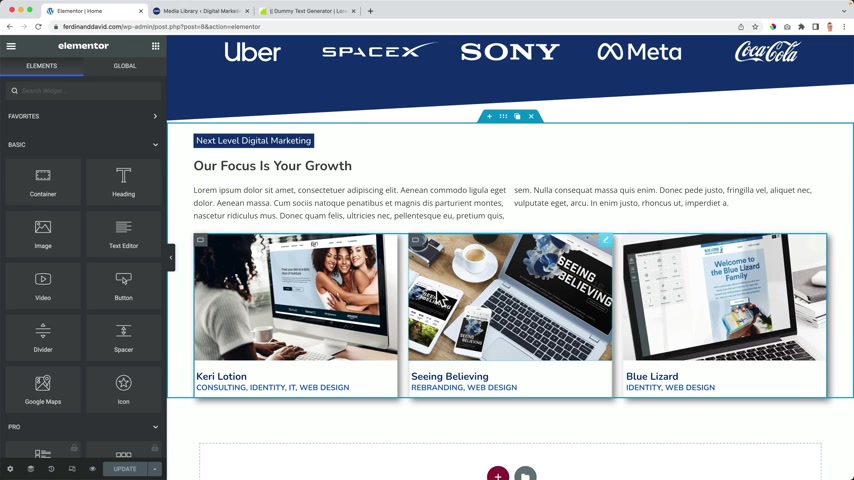
And now if I would go to the dashboards and if I will go back to the elemental editor page builder now , they should be aligned .
Yes .
And that's what I like .
I like alignments .
So uh our next area , next level of digital marketing , our focus is your growth , a text and then this area and maybe I want to have more space over here .
In this that case , I can go to container , I can rename this case or three case sari .
And then when I'm over here , I can go through the items , I can increase the gap pixel .
Perfect .
So let's say 30 or 40 update .
That's the way the cookie crumbles .
One more thing .
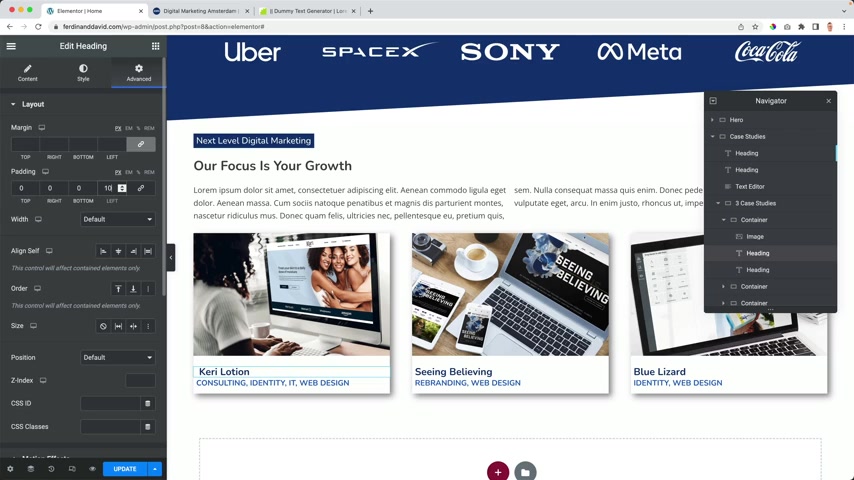
I don't like it that there is not much space over there .
So let me see , see what you can do advanced at the left , make it then and I say copy and based the style and based the cell and then over here on to half then and at the bottom five .
So over here , I must click copy , based the style and update , click on the eye .
Great .
I want to do one more thing on to duplicate this area and drag this one .
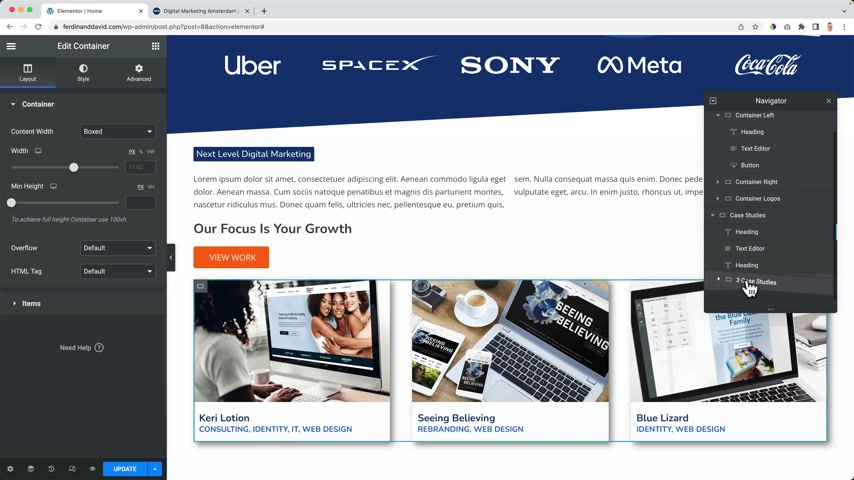
Uh Let me see over here and then and drag it here below as far as I can like this above it , three cases above it .
OK ?
And then it's heading above the text and now I have this button and I can bring it to the center and I can say all ga studies and it's fast March in the top .
Let's create some space .
Let's give this button a bit of space .
So what we've done before , we've taken a look at how it looks on a different device .
And again , over here it say 50th betting .
And then I go to this container .
Let me see if I have the right 13 K that is , then I can say make this 20 .
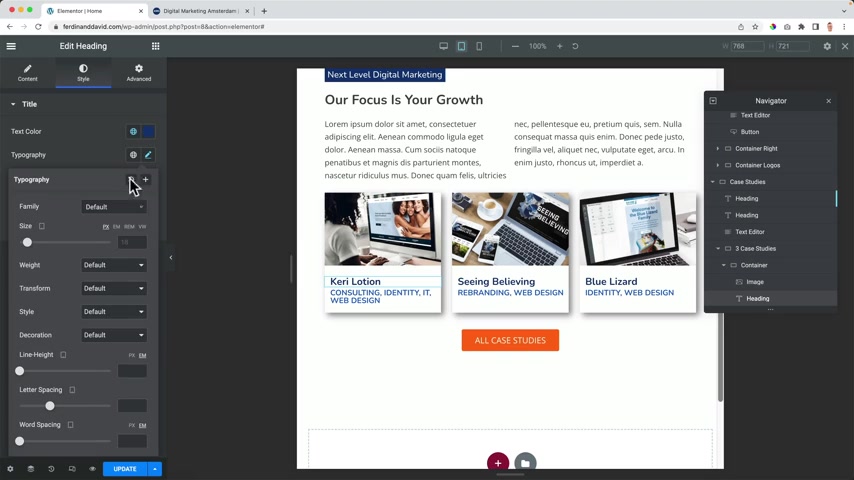
And then over here the typography for the smartphone for the tablet , let's say 16 copy .
They and then over here typography make it a bit smaller 12 copy bassist .
I like it .
It looks great smartphone for the smartphone .
I can say over here your smartphone it should be only one column .
Awesome .
OK ?
I really like what we have so far .
What I don't like is that here is the start of our content .
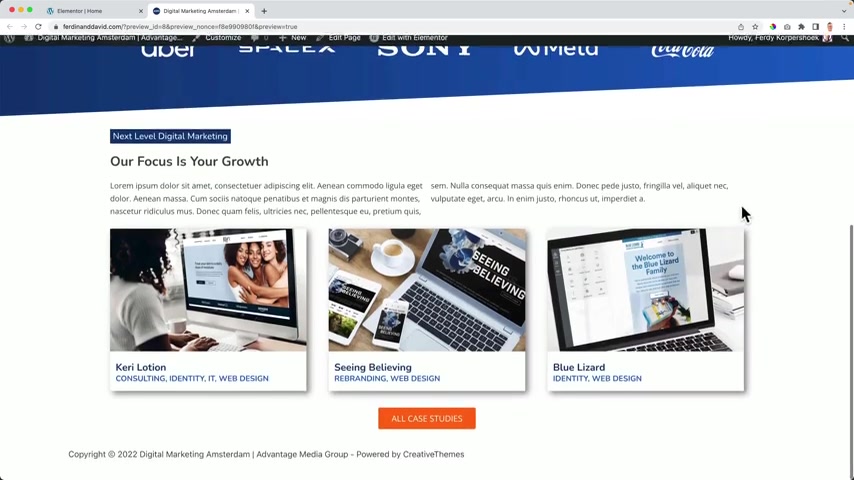
Here's the end of our content all really well lined up except for with the header .
So if I want to line this up with this area , I can go to the , let me go to the uh element of base builder which is over here and go back then I click on those three lines and I go to the site settings and I go to the layouts and I see that the width of our content is 1140 pixels .
And I want it to be the case also over here .
So I close this , I've copied it 11 40 .
I go to the website to be customizer .
If I go to command or control minus , I click on that .
You see the difference if I want to align that I go to general layout and then the width , the , the maximum side width , I changed it to 11 40 .
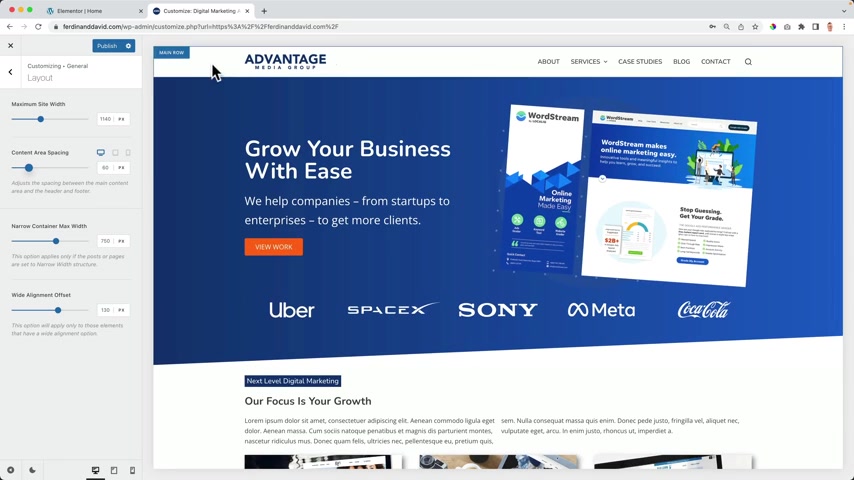
So now it's aligning perfectly .
It brings a smile on my face and I publish it and I close it and now it looks even better .
Very nice .
I don't want to have the animations because right now if I open it , it's just empty .
And here you see something , it , it's I just wanted to show you that it was possible .
So I go to advance over here motion effects .
I say nothing over here .
Motion effects , nothing and then um contain your logos , advanced motion effects , none or X default refresh .
Yes .
No more animations .
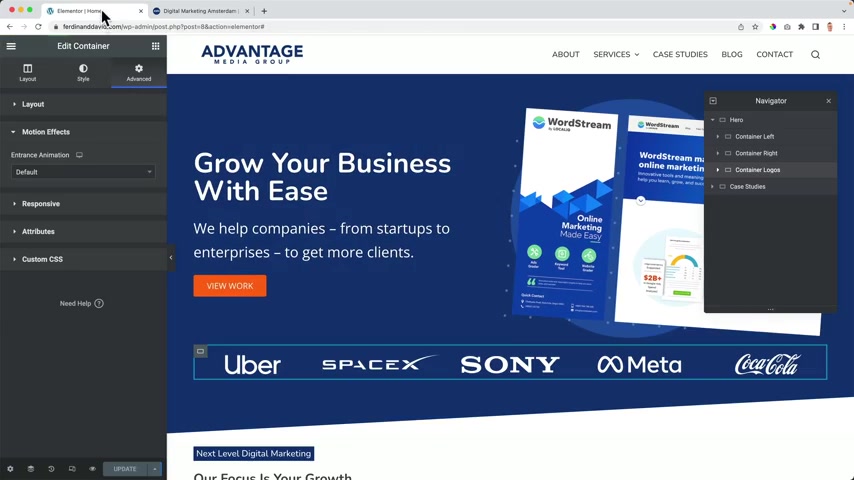
Let's go to the next area which looks a little bit like this area .
So I want to show you how you can duplicate an area and change the look a few of it and that shows you the power of elemental .
So I duplicate this area by clicking here .
There it is .
Then I go to the container settings still .
And again , it was for his gradients .
I choose these ingredients over here .
I changed the text to Mindset Elephant .
I go to the advanced area background , I make it lighter background and then it's the layout and decrease this .
And so I think that it's perfectly .
Yes .
Then I go to our focuses on growth .

I change that the the color to white , change the text growth by by changing the way you think .
And I click over here , change the style you can fill in your own text .
No , I don't need this area .
So I click over here and I go to three case studies , right ?
Mouse click , delete .
Bye , bye .
And this one and bring it to the left .
I can see read more .
I make the backgrounds light blue and the link hashtag I can create a page about this and then I can refer to that page .
OK .
This is great .
But what I want to have , I want to have an area with two columns and this is one column .
So let me show you how you can copy and paste things .
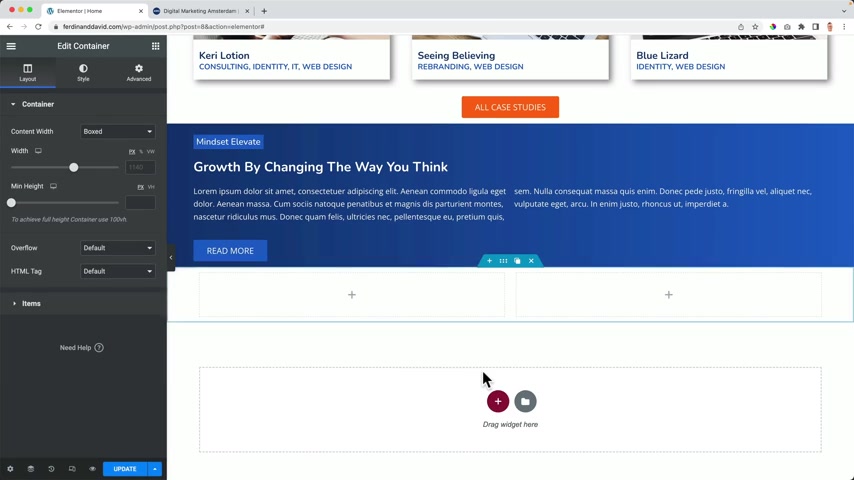
First , let me save it by clicking on update .
So I want to open a new container with two columns .
Let me show you how I do this .
I click on the container settings still .
This is what I would do if I would not make a story about it with the speed .
And then I just drag this over here and this one over here and this one over here and this button over here .
Then I click here .
Go to the content changes to one column .
I removed this .
Uh And now I want to click over here .
Search for an image , drag it over here , click on the image upload .
Files , select files and I search for images , tutorial how to make a website .
This one graphic design , remove the dash has copy , paste it past it .
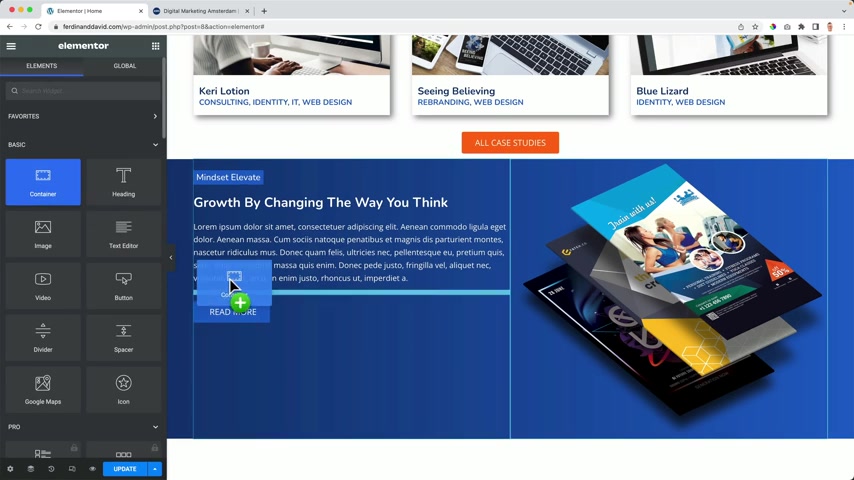
Insert the media , go to all the elements and I want to drag a container over here and in that container , I want to have another container .
So I go back to all the elements .
I search for an I can box .
OK .
Let me slow down again .
Like that's I want to change this .
I can do a heart .
So I search over here for a heart .
It's one .
Then I go for a title , laugh or our clients .
I think this text is perfect .
Should not change anything about it .
I can link it to somewhere but I can also change the position .
I want to bring the icon to the left like that .
And I go to the James color to orange or it's a heart , make it red .
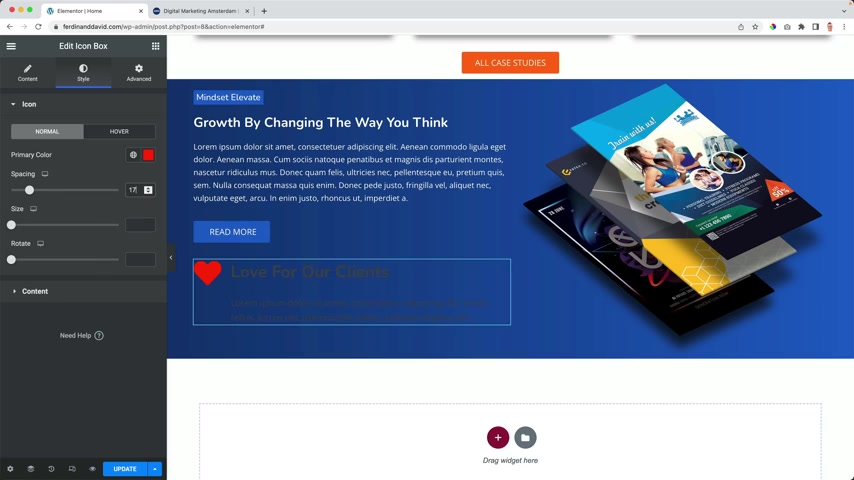
Can change the spacing .
I can decrease or increase the size of the heart .
I think this is fine .
I can rotate it and then I go to the content and I want to change the the title to white and the text description also to white .
I want to remove the space over here .
So at the icon , it OK .
So at content spacing , let's say zero and I'm happy .
So what I can do , I can duplicate this and now it's below each other .
So I scroll down , I go to the , let me see , I can box container , then the overlapping containers .
So the whole container and then I change the items from left to right .
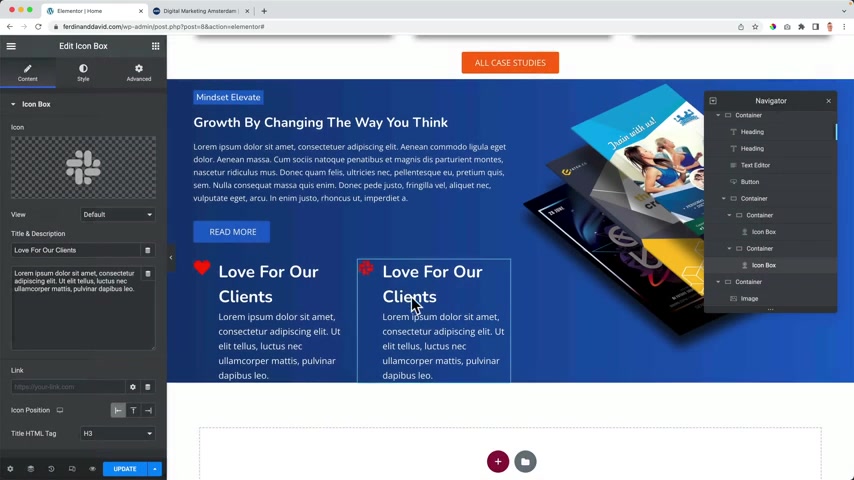
I click over here .
I changed your heart too slack .
I see supports for our clients how to make this text smaller .
So I go to the contents .
Topography .
This is the title and the text 12 .
I copy this copy , right , mouse click paste the style and I want this to arrive in advance from the right .
So I go to the motion effects from the right after a half second .
Yes , then I go to the whole container .
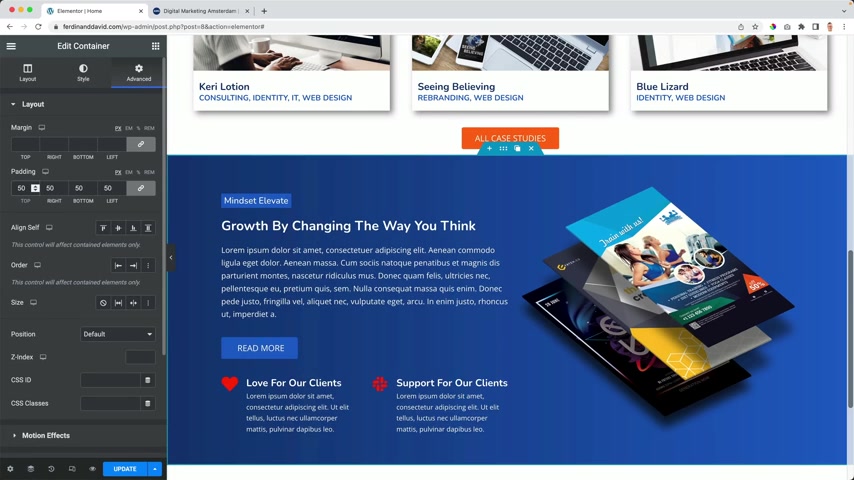
I increase the petting with 50 on check at the right and the left I say zero .
So that's how we can copy and paste an area and change the look a few quite rapidly .
But again , how does it look on a different device ?
And also here we're gonna dive a little bit deeper .
I will show you what else , what else you can do ?
OK .
As we know by now 50 everywhere , what I don't like is this area .
So let me take a look at that in a minute .
You know what ?
So right now I want to make the section a little bit smaller .
OK .
What I want to do ?
I want to duplicate this whole area like that over here .
I want to get rid of this , of this , of this , of this over here .
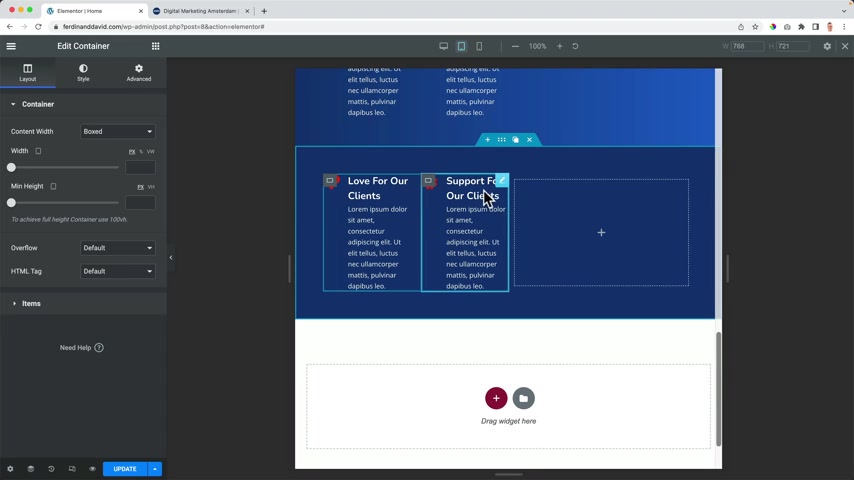
I want to get rid of this area .
I want to drag this over here to the left .
This one too .
I want to get rid of this container stuff .
When I've done that , I want to drag this to the left again .
Yes .
Then I go to the overlapping container over here .
Go to the items changes too .
20 like that .
So this is what I want to show on the tablet and on a smartphone .
So over here I go to advanced this whole container and then at responsiveness , I want to say hide this on a tablet , but show it sorry , hide this on a desktop , but show it on a tablet and show it on a mobile .
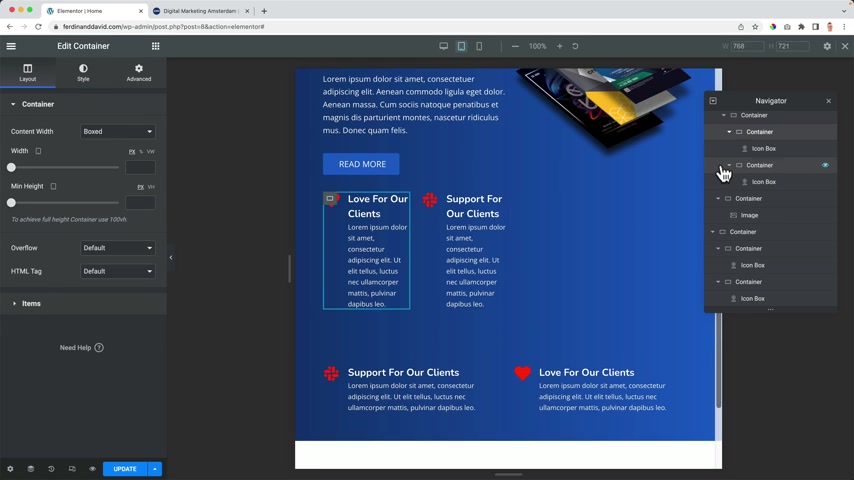
And then to those two , I want to say , you know this whole container , I want to say exactly the opposite , hide his own tablet , hide his own smartphone .
So what happens when I go to the normal screen ?
This area is what will be shown on a normal screen .
And this is not what will be shown on a normal screen .
But when I go to a tablets , those two will be hidden and this will be shown .
And then I go to the mobile , this will not be shown , this will be shown and this will also be shown .
So let's see how that looks in real life .
I scroll down , this is how it looks .
I love it .
I make it smaller is how it looks on .
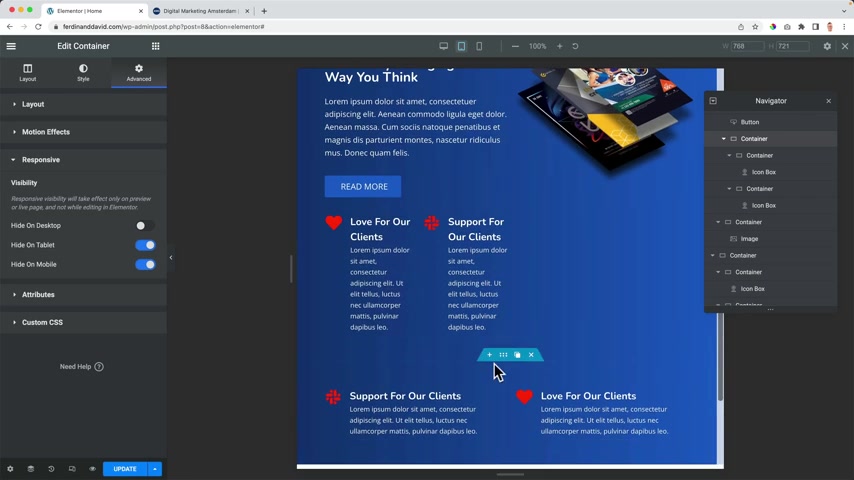
OK ?
I see that .
I think there's too much space over here .
So all the tablets I click here , advanced at the top , I say nothing .
Wait , wait , wait , uncheck this top , nothing .
And then over here at the bottom , nothing .
So I updated and make it smaller .
So it's a little bit too close maybe , but that's how it works .
And then I go to a smartphone .
Perfect .
Maybe a little bit more speed over here .
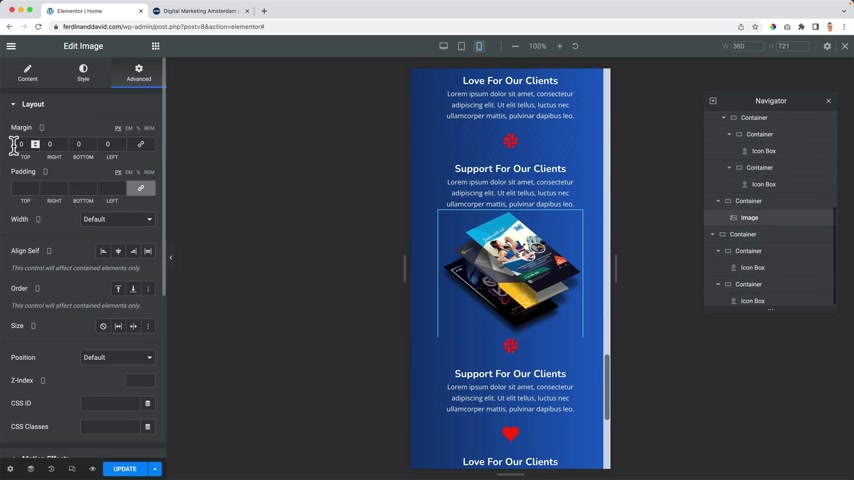
So smartphone , image advanced March and top 30 update looking good .
I think this is really close to the edge .
I don't really don't like it .
It's one of the first rules on the website I make there should be space around updates .
All right guys happy .
I hope you are .
If you like what you've seen so far , then please like this video to help me out a lot .
You're already helping me out because the longer you watch , the better I will be found on the internet .
And that's my goal .
I want to be found a lot .
Not that I'm lost .
You know , I just want to be found .
So uh feel free to subscribe for more upcoming tutorials .
Ok .
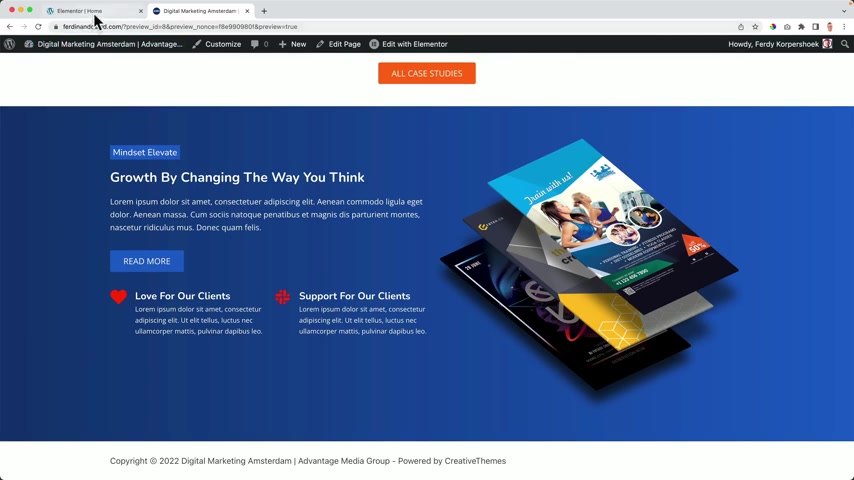
Let's continue with the home page .
Are you ready for the next container ?
Well , I am , I hope you are too .
I scroll down .
I can create a new one or since the thing I want to create looks like something we already have .
I can scroll up to this area .
I duplicate it .
So now I have two of those areas .
I click here .
I hold it , I drag it down and I place it here be low double click or triple click .
Why ?
Advantage ?
Question mark and I go to advanced and bring this down .
Like that's double click over here .
I call it , I say a client first approach to service and support .
I don't need this text .
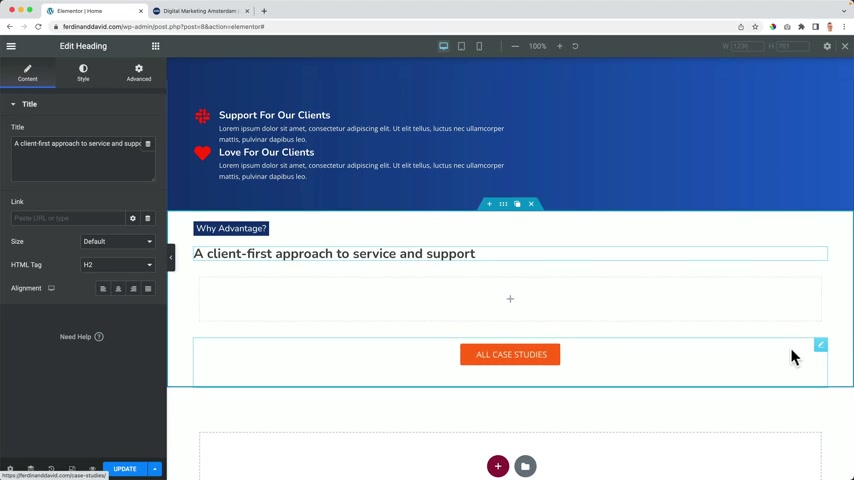
So I have over here , close it , close this one , this one and this one , I removed the button .
Then in this container , I want to add two new containers .
So I drag this one over here and I duplicated and I want to have them side by side .
Then I go to all the elements .
I close this and I search for accordion .
There it is .
I drag it over here .
I want to answer a few questions or tell something about my company .
So uh I click over here and I call this one , title one over here .
Title two .
I can duplicate it a few times .
So I have three lif four .
OK .
So far so good .
I click on an area and it opens and I can see the content and of course you can fill in the content yourself .
I can change the I can over here , do something else .
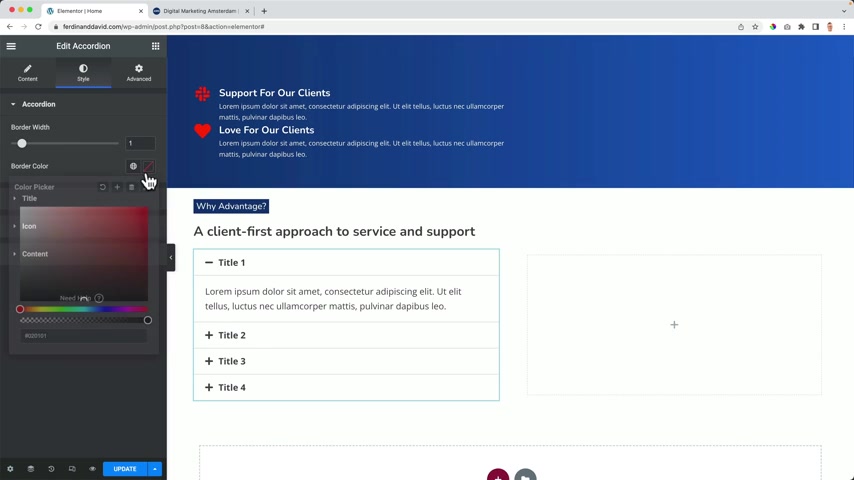
But I like the plus and when you open it , it becomes a minus .
It's also what I like .
So I don't change it but Hey , you can do that .
Then I go to the , let me open one so I can see what's going on .
I can change the border with .
So you see what the border is , you can change the color , let's see one and I can make it really light .
Then we have the title this area .
What I always do , I like to just choose a color to see which area is affected .
So now I know , OK , when I change the background , it will be affected .
Bring it back with the color , I can do the same .
OK , the active color .
So maybe I want to have the active color orange .
For me , that's a little bit too much .
So what I prefer , let me go to the icon , the active color .
I want the active color of the icon to be orange .
So when I click on the plus only the plus or in this case , the minus will be orange .
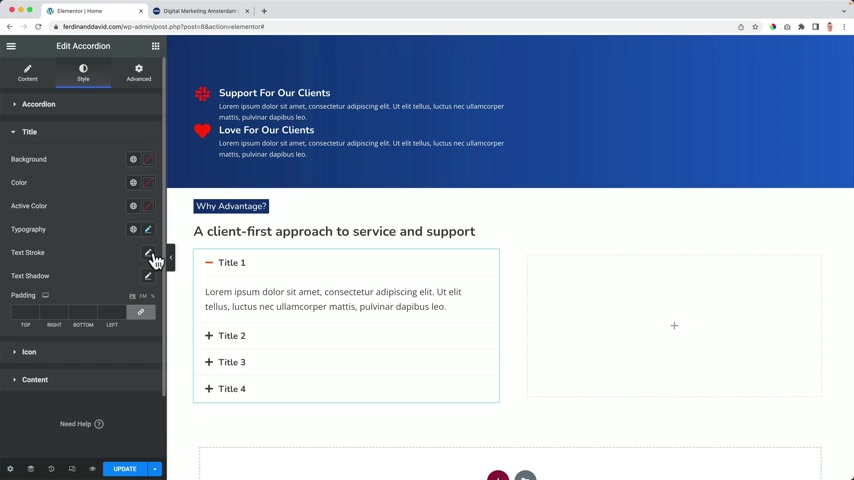
Let me go back over here to the title Topography .
I can change that .
You need to stroke .
Why would you want to change the stroke of the text ?
I don't know .
I don't want that the text shadow , you can have a shadow and the bedding 20 .
Then I go to the icon .
What I like to do .
I like to bring the icon to the right .
I can change the color of the icon .
But um I'm OK with the current color I could change the spacing .
But uh that's only when you have uh this option available .
Then spacing is relevant .
When you put this to the end , it's not .
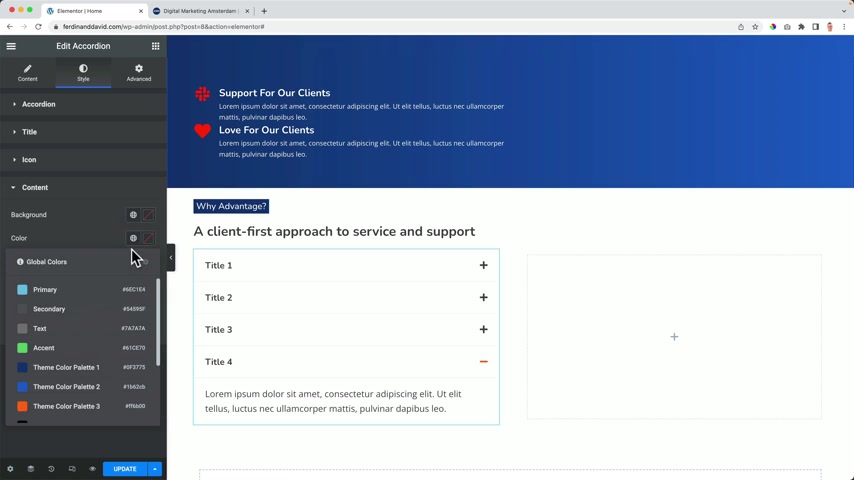
Then I go to the content background , OK ?
The content background , the color of the contents , the typography , the texture , and what I like to do is change the patting .
Then I'll check this and I can increase the top and bottom .
But I don't need to do this .
It's already perfectly fine .
I want to know I want to not zero .
OK , let me turn this on then yes .
And then it will be by default or normal one .
So I like this title , one , title , two , title three and four .
And I can have my text maybe make the text a little bit smaller .
And the title also .
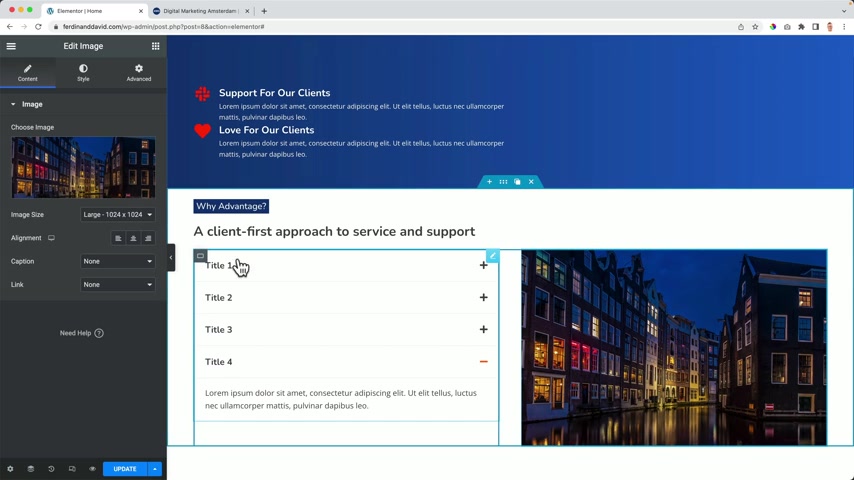
Then at the right , I want to show something about the , the , the the city where I operate Amsterdam .
So I use this image and then there's a space over here and I want to get rid of the space .
So I need to go to the container settings .
It's called three case studies .
I call this one fa Q and then I go to the items and I bring this 1 to 0 .
So they stick to each other .
That's what friends do .
That's what OK .
Accordions do with images from Amsterdam , they stick together .
So how does it look on a different device by default ?
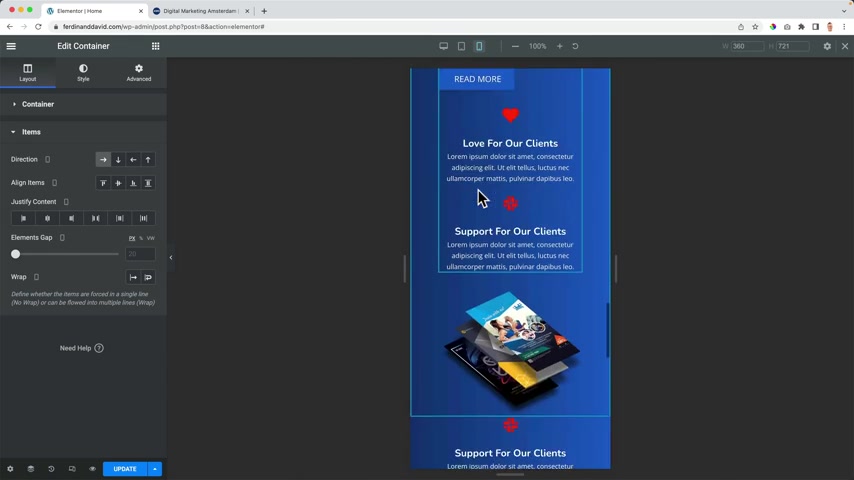
It looks nice and by default , not by default , but I just need to bring this back to zero and then for the smartphone , I can click over here , go to advance and get rid of that image by going to responsive and say hi this on a mobile updates and a little bit more space to advanced top 50 button 50 .
Perfect .
So what is the next step ?
Well , since people should become excited about your services , they should have an option to reach out to you and you can make it easy for them by creating a form , contact form .
So that's what we're gonna do .
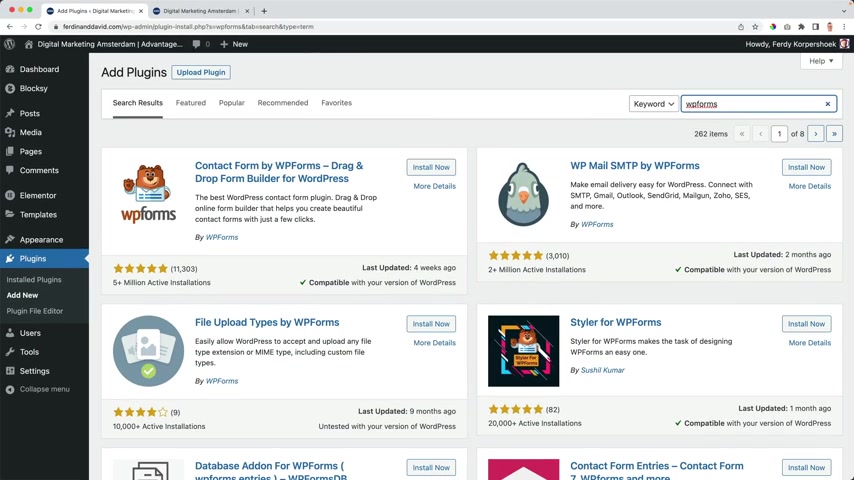
I go to Element or and then I say call command or control E and then I can search for the dashboards , then click over there .
And then at once I go to the dashboard , then I go to plugins at new and I want to search for WP forms and I will create a complete tutorial about it .
So I will not take too much time uh over here .
But um we're gonna make a great form .
So I click on install now .
There's a lot of installations and the free version is amazing .
I activate it , then I can watch this video , but I will show you what you can do .
So we're gonna create our first form by clicking here or go to WB forms at new .
And then I want to select a simple contact form , the second one .
So I use this template .
OK ?
Great .
Then I can click over here .
I can change this name .
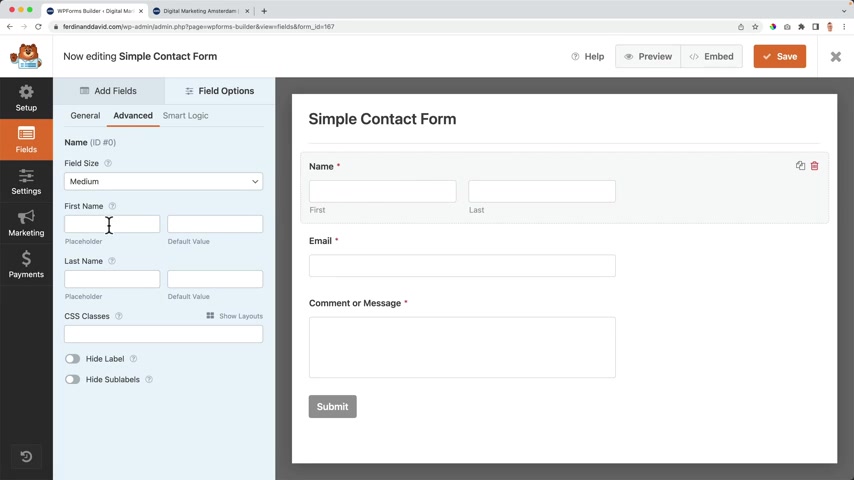
First , last I go to advanced , I want to have a placeholder , placeholder text will appear within this area .
So I say first , no , first name , last , no , no , no , no , last name .
So as you see , it appears over here and then I want to get rid of this text and this text like that .
Then I go to email .
I do the same thing .
I copy this .
I go to advance I place it and then I check those two and then with the third one copy , advanced paste , the place all the text and hide the label .
I save this farm .
Then I close it .
Now , I want to use it with an element or but in order to do that , in order to sell it , I need to have a plug in .
And this is amazing .
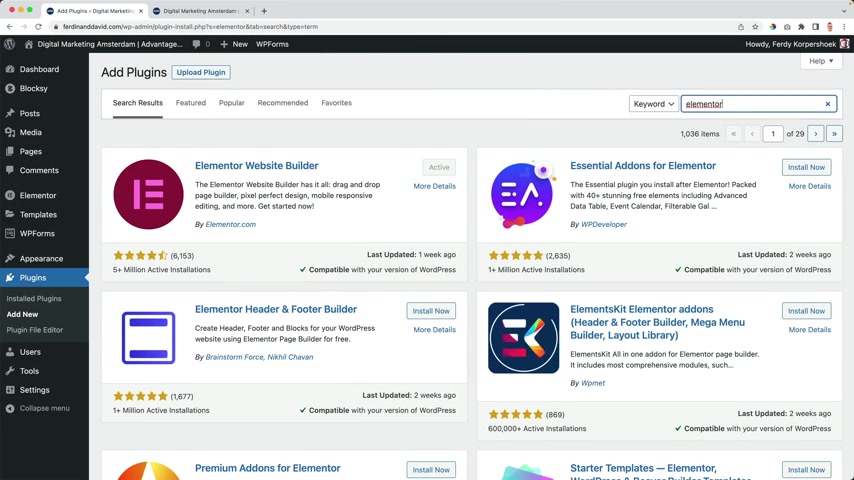
This is amazing about element or if you go to plugins , add new , you search for element or there are a lot of free editions .
So you can have extra elements within a free element of base builder by installing essential add ons for instance .
So we're gonna use this one more than a million installations .
Oh , what's the catch ?
Why do those people create this for free ?
Well , they all have a pro version and they hope you get so excited about the free version that you'll buy the pro version .
Uh In this tutorial , we will make use of the free version .
So I click on install now and I activate it .
Great .
Uh You can go for advanced or custom or basic .
Uh I go for basic , I click up next and then over here , I can turn on the elements I want to use for now .
I click on next .
I'm ok with that .
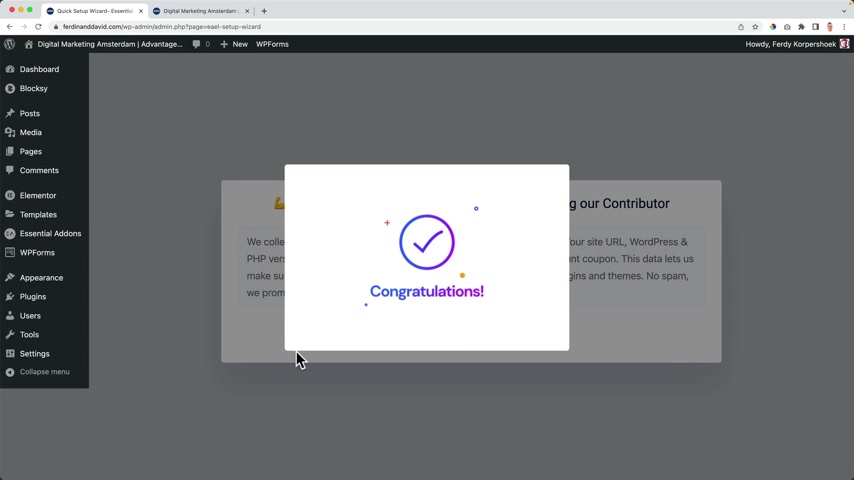
Next , next , next .
No , thanks .
Congratulations .
And then I go to the elements over here , the second step .
So essential D and elements and here I can enable them all or disable them all .
And in order to keep our website um fast , I can disable everything except for the things I want to use .
So you see not everything is active and not everything is in the free version .
But I'm searching for the form STRS and over here WP forms .
I turned it on so we can see it in our element or page builder .
I say the settings .
Then I will go to the website edit with element or I scroll down .
I click on the plus .
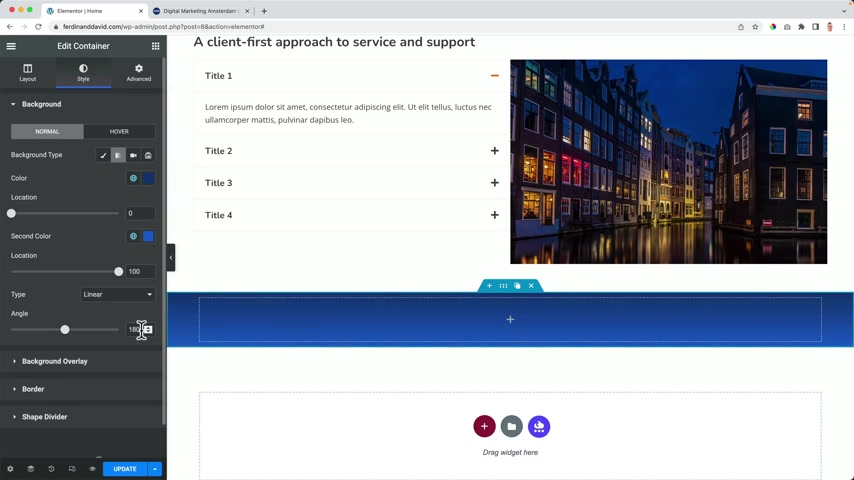
I want to have one area arrow down and the gradient dark blue li blue with an angle of 90% and advanced .
I want to have a top margin of 50 the bottom margin of 50 .
Then I go to all the elements and I search for WP forms and you need to see the E A because that means it's from central allows I drag it over here .
Now , I need to select the form we have and there it is a simple context form , first name , last name .
So here's the title .
If I want to , I can get rid of it and it will be gone .
Let me keep it .
I want to turn off the description , the labels and the placeholders and then it looks like this .

So I will turn back the placeholders and then I go to the styling , the Form Mac with let's say 500 and I want to bring it to the center and again , I want to try this color to see what it is .
OK .
There's the color .
Uh Now I know um which area will be uh used .
So uh there's more margin betting you can play around with these settings , but I'm happy as it is .
Then I go to the title and description .
I bring it to the center , this title over here , the car is right and I can change the text custom title , reach out to us , go to the style title .
Make sure it is .
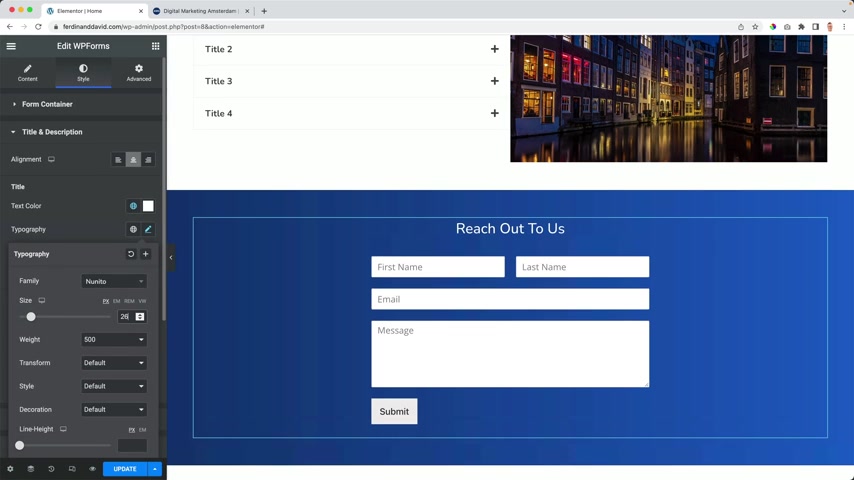
Think it's a bit smaller , maybe a bit thinner .
OK ?
And then it can be a bit bigger .
Yes .
Then I want to sell the labels .
No , no , not the labels that the input text area .
So the background scholar , I can make it orange so I can see which area it is applied , applied and then I want to make it black and transparent .
Yes .
Like that .
The text color of course is white and I want to have a border type that is solid and I uncheck this and the only area I want to be at the button and then the color should be white .
We're gonna have a border radius as you see .
Uh I don't need it .
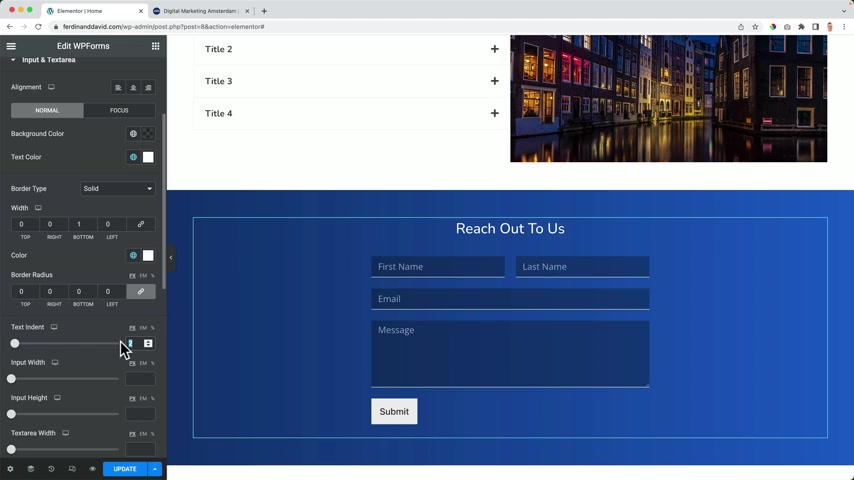
So I say zero and we can change detection dent input with .
So there's a lot you can do and I'm actually happy with it .
So um I want to go to the placeholder text color white .
Then I want to go to the submit button and I want the background to be orange .
When I hover over it , I want it to be I blew sorry .
Something is not going right .
The text color should be white .
Yes .
And when I hover over it , the background color should be blue .
Yeah , that's what I want .
So I think that look , this looks beautiful .
Submit .
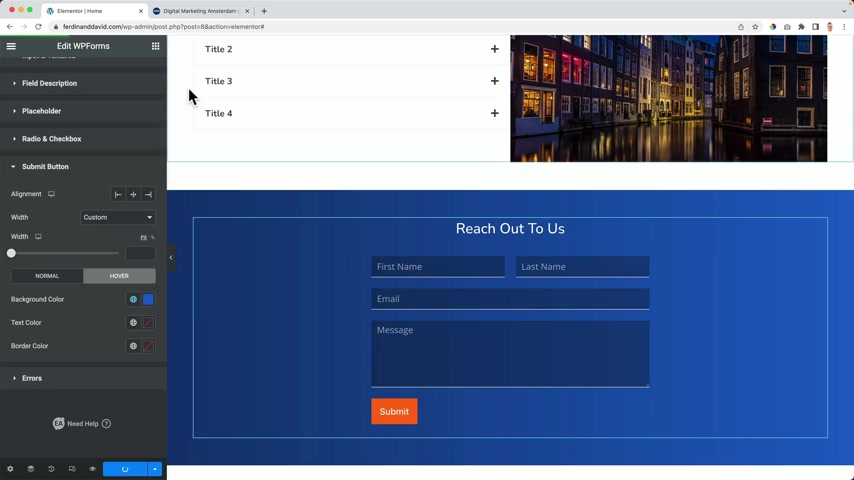
If you want to change the text over here , submit , let's say command E go to the dashboards , Cola's this .
I say no thanks .
And I go through the screen options and I remove the WP forms area and then I can go to WP forms , select the forum , go to this button over here and I can change the text , submit to send or something else .
And then if I save it , it will change .
So I go to the home page .
This is the page we have created .
I scroll down , see if everything's OK .
Reach out to us .
First name , last name Cork .
That's my last name in Dutch , in English .
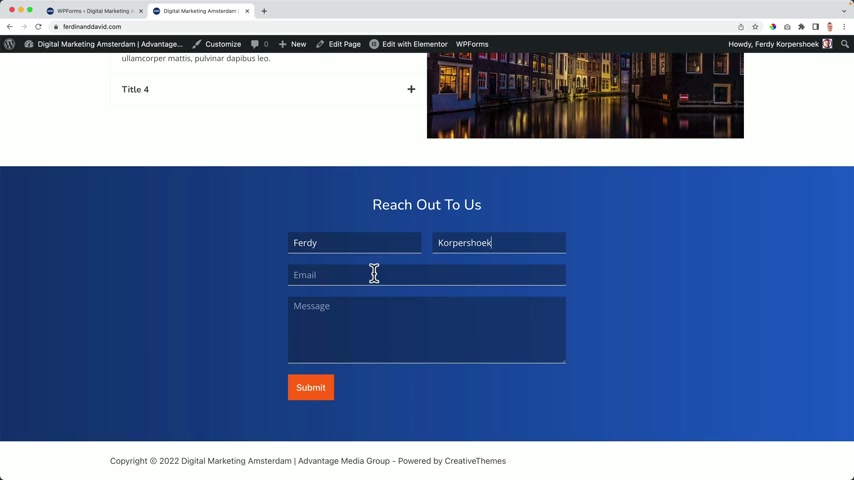
I don't know , Kuku just Kuk .
I wish I would uh started with a different channel name , Trevor Simpson , something like that .
But when I did it , I thought I've really felt like doing that calling myself , Trevor .
Trevor Sampson .
But I was afraid that I would get a identity crisis not knowing who I am anymore because my real name is Ferdi .
So I'm happy I just call myself Ferdie and uh that's who I am .
Ferdi F Freddy Ferdi , Freddie .
Ok , I'm really happy with this .
And um , yeah , let's go to the home page again , close this before we continue .
We need to check everything looks great on every device .
Yes and on the mobile .
So far so good .
But here it doesn't look that well .
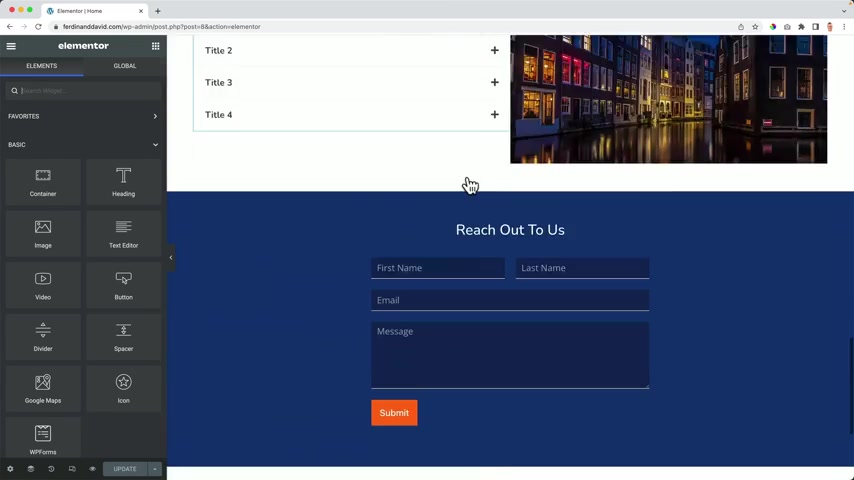
So , ok .
And over here we're gonna take a look at to this area later in a few minutes .
But first I edit the website with mentor , I scroll down and go to the container and by now I hope , you know what you should do .
We go over here to the mobile view and if this area is at the edge , what should you do ?
What would you do ?
I go to advanced , should you choose margin or betting margin creates a space out outside of this area .
So if I would increase the margin there will be in uh um white area around it .
So margin is for the space outside of this area and betting is for the space inside of this area .
So if I make this 50 then everything will be brought 50 pixels at the inside .
And that's what we want updates .
Let's take a look and everything can be adjusted pixel .
Perfect .
I'm happy we have created the home page using element and I think it is time to take a look at what we can do with the blocky theme .
We have the free blocky theme .
We have a free page builder called Element .
And I think we've got already learned a lot on how to create pages using Element .
But now I want to get everything out of the block the and it's a lot that you can get out of it .
So let's get to that right now .
So what I want to do now , I want to take a look at the header right now .
We have a simple logo , a menu in the search area and when we scroll down , nothing happens .
So let's take our header to the next level by clicking on the customizer .
I hold command .
So I open it in a new tab .
I bring this to the left .
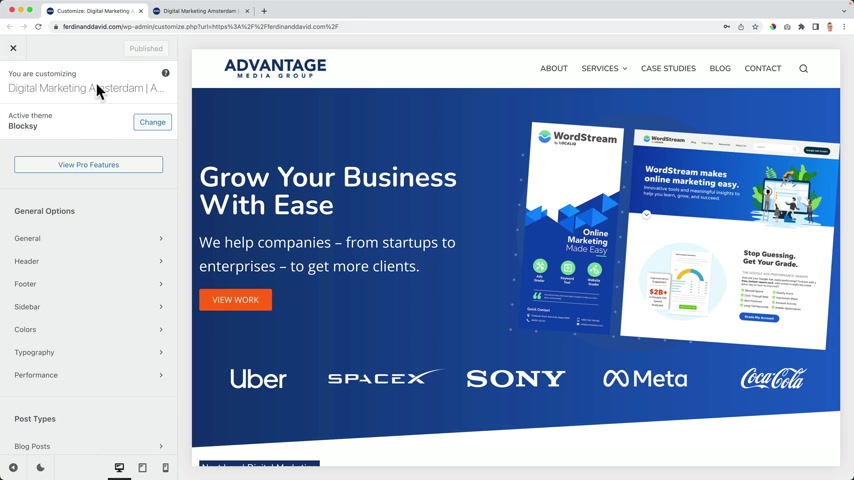
So here I can see , see the result of what I'm creating over here .
So before we do that , let me show you what we can do with the colors .
If I go to the colors here , we have to spell it .
And if I would change it to this one , look at that whole change like that , I'll bring him back .
But that's uh really nice .
And if you want to go to the heather , we can go to the heather over here , then we see those nine areas .
I talked about them before .
So here I have elements .
If I drag this over here , I can drag it to the left , to the center , to the right and our main menu or our main head and heather and then the lower heather .
So there are nine places .
So if I would bring this over here , it will be there .
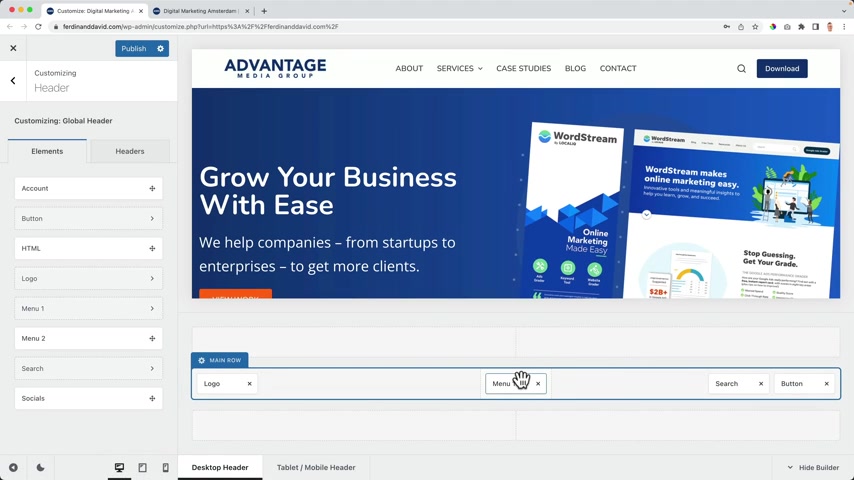
I can bring the menu to the center , can remove the search area , especially when you have a small website in the beginning , you probably don't need the search area .
So I click on the button and make it bigger .
Change that link your l can change the text , of course , get started or reach out whatever you want to do .
And then we can open it in a new tab or set the link to .
No follow .
I can go to design Awesome .
But I can also bring the button over here and then we have a new layer .
So let's not do that .
What I want to do .
I want to go back and I want to add my social media accounts at the top and you have some HML text over there .
If I click on it , I can adjust the content and the style .
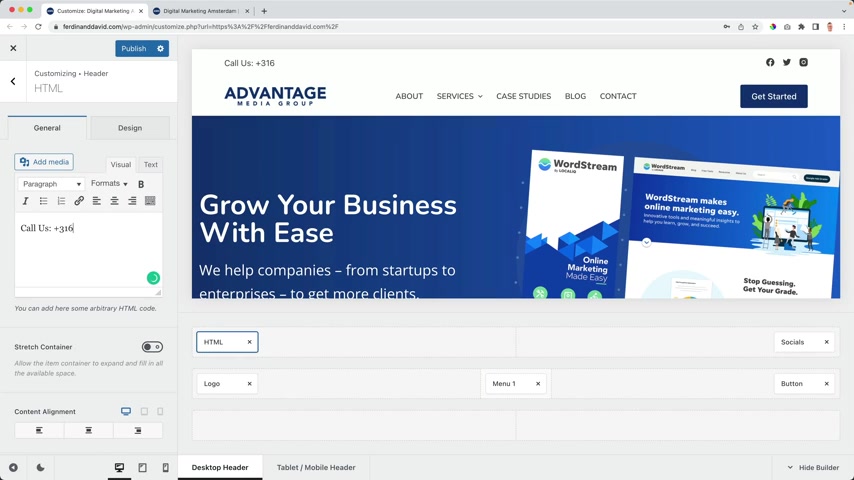
So here the content I can say call us , call us plus 3 +1612345678 .
I can make this a link come on hashtag and then I can stretch the container , then I can go to design and for now it's ok .
But what I also can do over here that brow can go to design , change the background to dark color and go to html design change the first color to white .
The link is blue .
If I hover over it , it becomes orange , you can do whatever you want to do with that .
You can also make it orange .
When people hover over it , it becomes blue so easy .
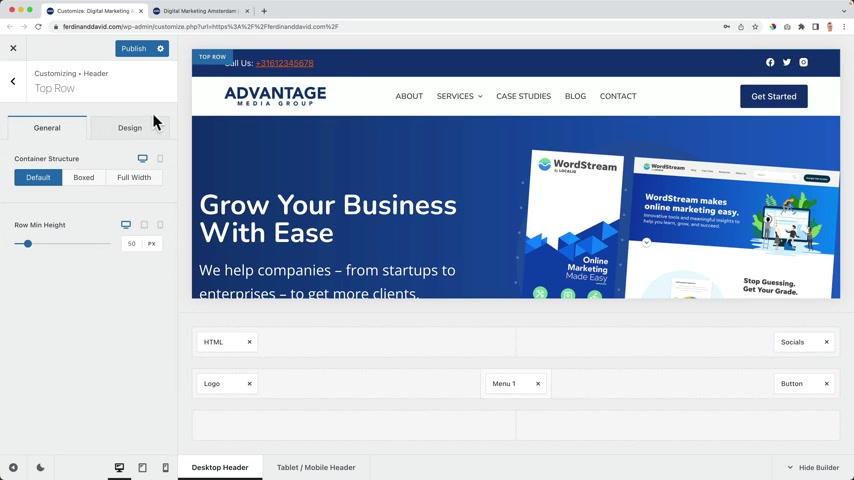
And then with this one , I can select it over here or I can click on the three dots next to it , go to design , change the Eigen to white .
And then when I hover over the orange , I think , yeah , the the the header is a little bit high .
I want to decrease , I click on the top row , change the height .
Great .
Then there's another area and that's the area below .
Also there you can add more stuff .
So you can be really creative with this .
I have tutor or I will have to to on uh the bib theme and I will dive deeper into this .
But for me , this is perfect .
So I get rid of the search area and then I can go to Heather .
So let me go back .
Publish it .
Refresh is our Heather .
OK ?
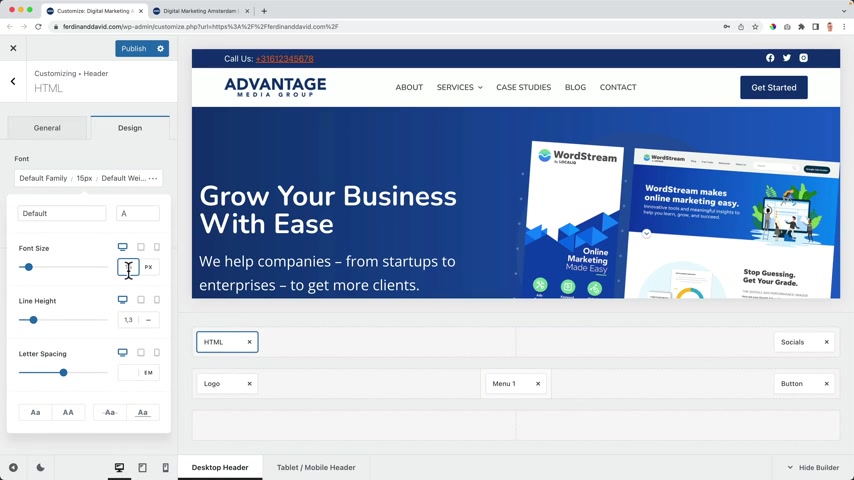
Before I continue , go to Heather html text design like it's a bit smaller and then at the top row to make it a bit smaller and then I can go to the socials , I can change , I can size publish refresh .
So I go back and then I go to the heather to headers and there I can click on the global heather and I can make the global heather sticky .
So now if I scroll down this area will stick with us .
So if I click on publish like refresh this , this stays sticky .
So this area is only at the top , it's all sticky with us .
What else we can do ?

I can say that the top and the main row should both be sticky .
So now everything scrolls with us .
Only the color changes .
I can change the color uh when I scroll .
So um let me show you how I go back to the top row design .
And at the sticky state , I also want to have a dark color .
This option appeared at the moment I decided here at the heather , this selection should be made .
So I refresh it again .
Now everything will stick with us and the colors will stay the same .
There are more options if you have all rows and also the third row , you can all let them stick with you or only the main and bottom row or only the top row .
That can also be the case , the sky is the limit .
As I said before , I only want to do the main row .
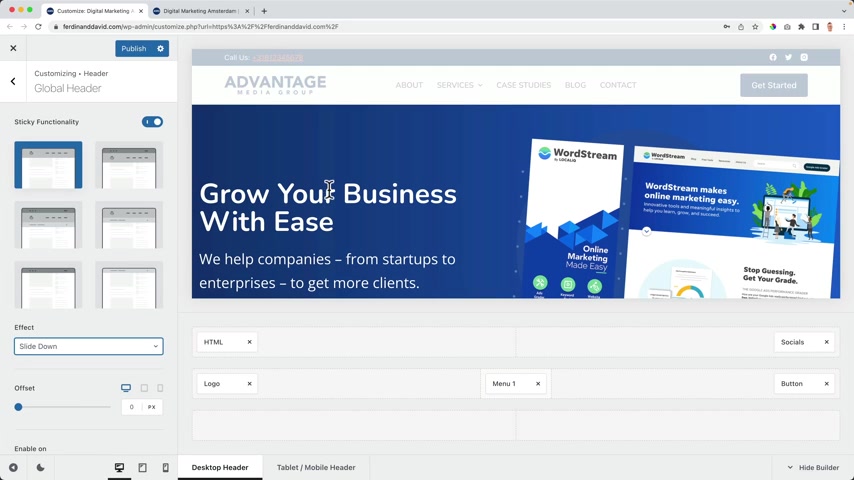
Click on publish .
I'm happy with that .
And there are effects , I can be slide down that or feed , I mean offset .
So after let me see after 111 pixels , then it will appear .
So not yet , not yet , not yet .
No .
And then there will also be an offset over here , which is awesome .
Well , I think if you make this um 20 it can look nice .
So I scroll down there .
It appears it's interesting , interesting .
So that's what you can do .
I bring it back to default , no offset and I enable it um all devices .
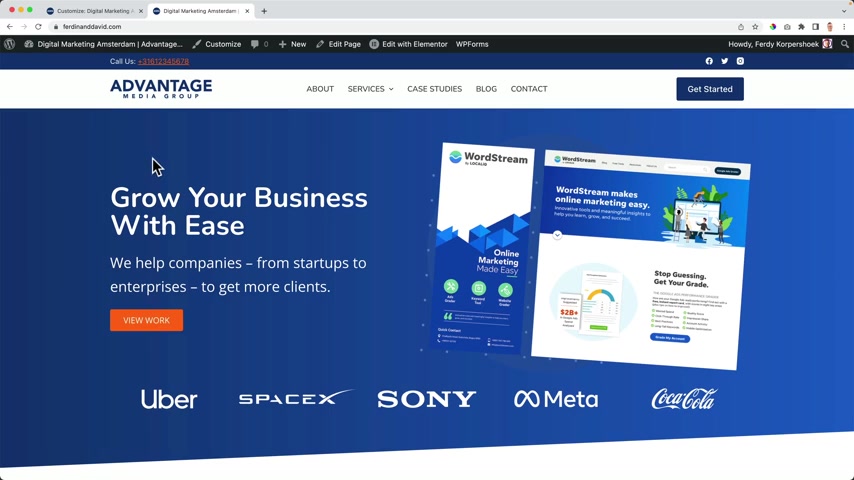
So that's the first thing you can do .
What else can we do ?
Look at this ?
We can make our header transparent .
So I click on transparent now something changes .
Just see , I want to add some conditions first , I close everything .
I only want to have this option on the home page .
So I add a display condition and it says that I only want to show this on the front bench over here , see the conditions .
So if I click on publish and I refresh this right now , it looks like this .
But when I go to the about page it will have the normal heather .
If I go to the home page , it will have the other header .
Yes .
OK .
I enabled everywhere and not uh not on the smartphone .
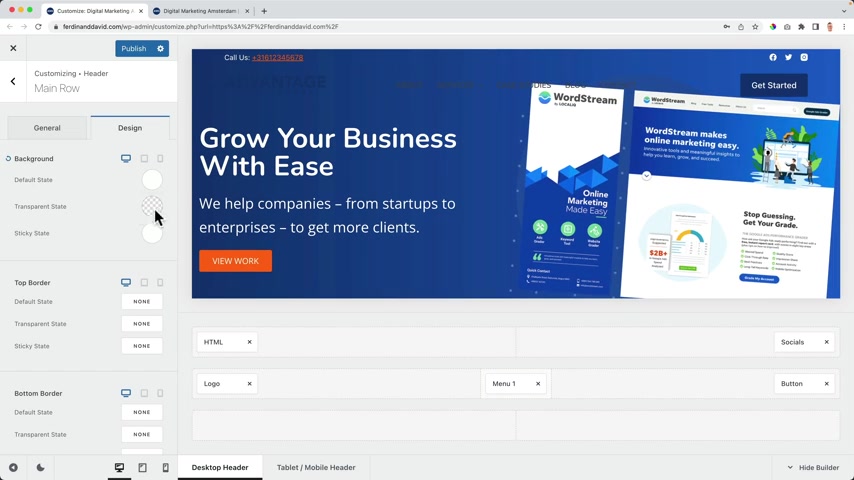
OK .
Publish what I need to do .
Now , I need to go to this heather the main role and then I go to design and it says that on a transparent state , it has no background , which is exactly what I want .
What I can do , I can make it dark a little bit feasible .
Like that's what we can do .
We don't need to do that .
But we can let me show you for a second how to have a look .
And then I need to go to the logo and the logo also has a few new options on a transparent state .
So right now I want to have a different logo , of course .
So I select the light logo and in order to get it , I go to upload files , select files , you need to have a wide logo with uh exactly the same aspect ratio , the same amount of pixels and it looked like that .
And when I scroll it's still white .
So I need to go to the sticky state logo and then I change , change it to the darker one again .
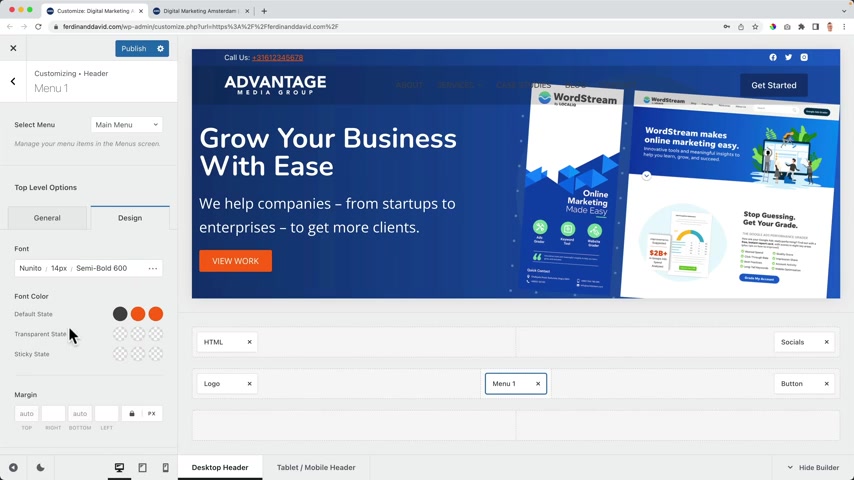
And then when I scroll down , it changes like that and that is amazing .
Then I go to the menu design and on a transparent state , the color should be white .
When I hover over it orange and on the sticky state , it should be dark when you hover over it orange .
Also over here , let's make it dark blue .
So on a sticky state , it looks like this .
I scroll down , it starts to look like this .
They should also become orange , I guess .
So I click on the button design .
Change the hoffer too orange .
OK ?
Since I've done that , I want to bring back the mero design to completely transparent , not , not a black area .
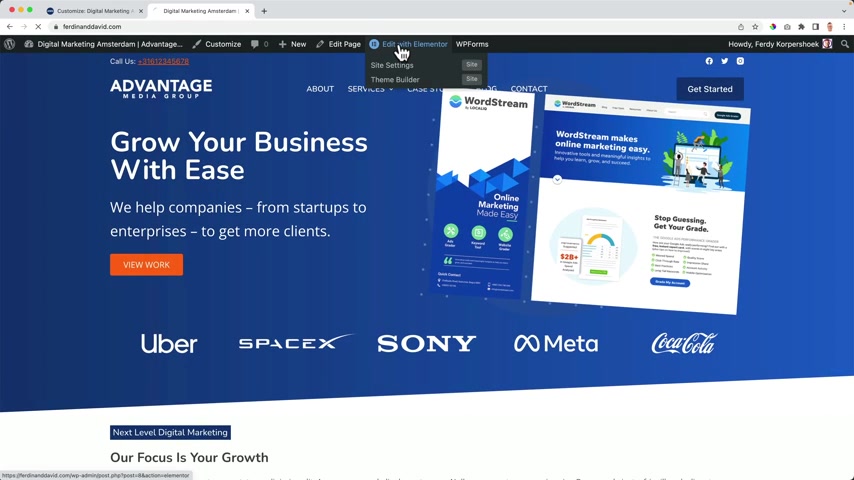
And actually I don't want to use the header , the the the top header .
So let me refresh this .
Yes , but now this is interfering with each other .
So I need to edit the page with element or then I go to the Navigator because because maybe I cannot select it anymore because there are many ways in front of it and I can select it over here .
I go to advanced and at the betting top , I can say 100 and that's uh that makes me happy .
So now there's space .
If I scroll down , it appears like that , I'm happy with this .
But as I said , I don't want to use this Heather .
So I go to the customizer at the top row .

I get rid of HML and socials publish close .
It allowed to lose like this exactly what I want and that you can do this with a free theme amazes me and that you can do all this with a free page builder also amazes me .
But again , how does it look on a different device ?
Ok .
Oh , it looks like that not in the branding of our website , not in the style .
Ok .
How can we change that ?
We go to the customizer and I go to the header and look at this .
When I go to the tablet view , I see the tablet slash mobile header .
So here I can change the header so I can have different items over here .
I can have the mobile menu but I also can have a button and then it will appear over here .
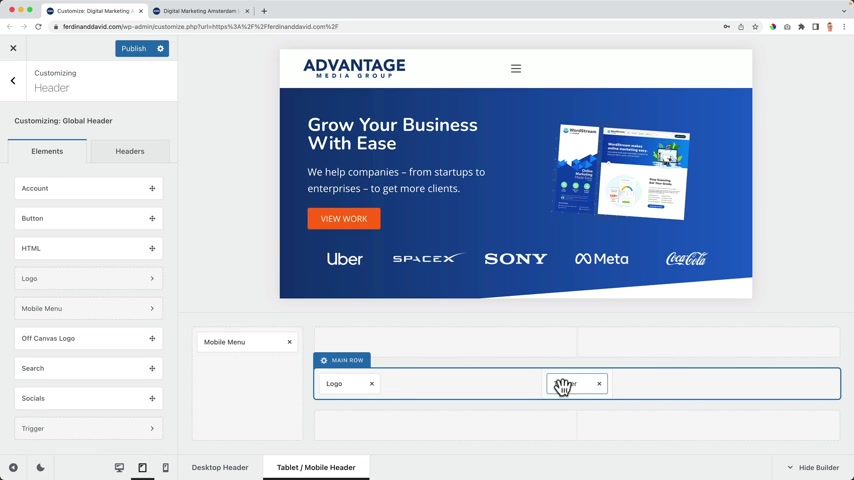
I can have socials like that kind of an HML text with , with anything I want to see .
And on a tablet , I can still have the logo over here and the trigger .
But I also can have other menus .
So I can also bring this to the center .
It's all up to us .
What do we want to do ?
If I click on the trigger , I can make it bigger , can change the outline , make it solid , change the color .
Of course , decide where I want to display the label if I want to have a label .
So I can say uh you should have uh menu on the tablet .
So there are a lot of nice options over here .
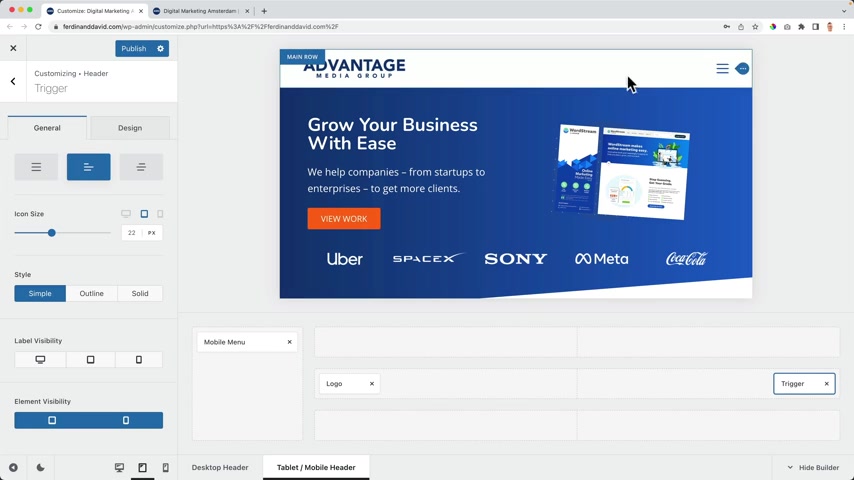
I can change the logo or the icon , then a design , I can change the color when I hover over .
It looks like that on any state , so sticky , transparent , et cetera .
So how does it look on the mobile like that ?
I think this is perfect .
So let's take a look at the menu and go to the of canvas area .
I go to design and right now the background is dark .
I want to make it blue in the style of our website .
Then I want to go to General , I can also show it as modal .
So it will be over the whole width .
I wants to be a side panel left or right .
I can change the width .
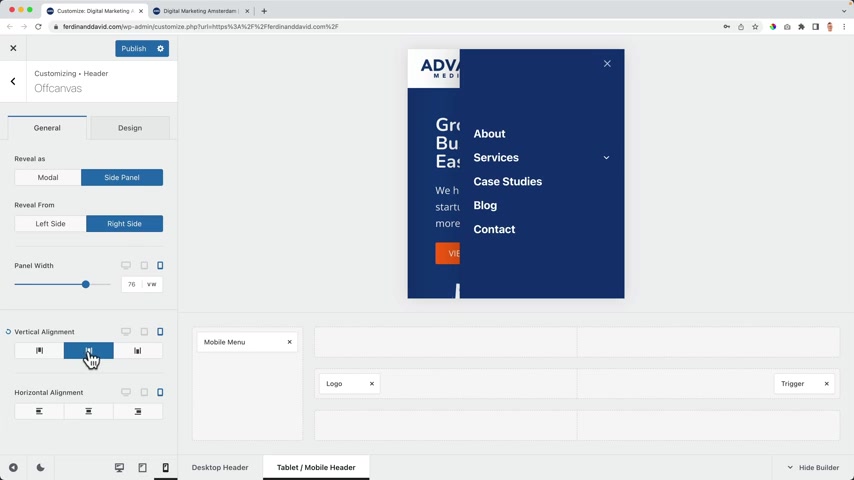
How about 76 the alignment should be in the center vertically at the bottom , at the top horizontally .
And then when I go to the um mobile menu , I can also go to design , by the way , I can change this arrow to a plus arrow down like that and then I can increase the spacing .
I can uh change the border design .
So um let's go over here and choose because that's the on for all my headers , uh less bold , it's really bold right now .
I can make it upper cases and then maybe you can move with less big , smaller .
OK ?
I published it .
I refreshed the page .
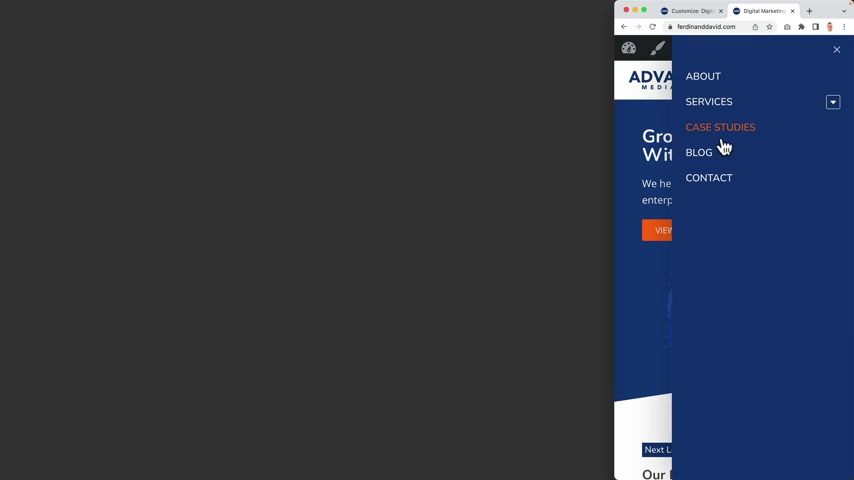
If I make it smaller , look like that , I'm actually happy with how things look the divider change of color and stuff .
So that's how you can optimize your header for all devices .
That is what we have done .
And I think it looks fantastic except for this area .
So let's take a look at that customize .
We go to the header and I go to the menu and I scroll down and I see the dropdown options .
So when I hover over it , the dropdown appears , I can also say click , then I need to click and then it will appear .
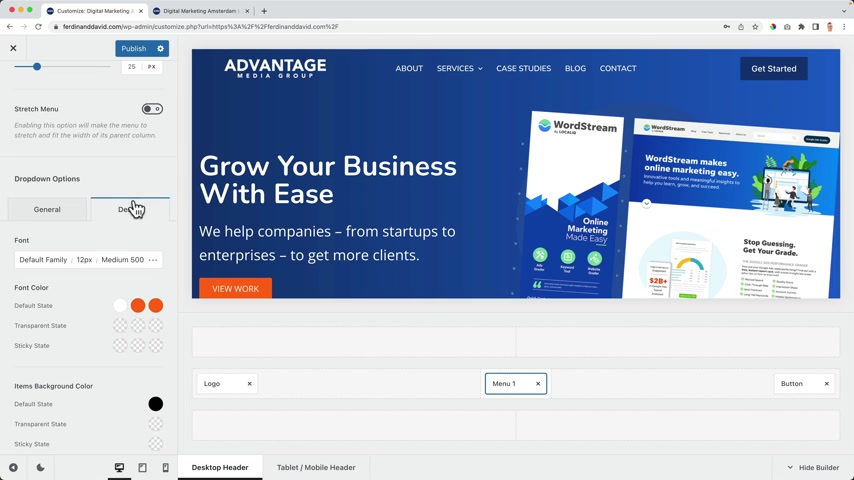
But I want to go to hover and let's go to design again to find out what the colors are .
Let's change this to green to orange .
So I really know which area is affected .
OK ?
Then I go to General and let me see if I hover over nothing happens to the background .
OK ?
The default state is white .
When I hover over it , let let's make it blue .
So it becomes blue and then the default state , let's make it a dark blue , dark blue and dark blue like that .
Then I want to make the font upper case , OK ?
When I hover over here , I want uh the background to change , I want this to be orange when I hover over it or a blue light blue and then this area white .
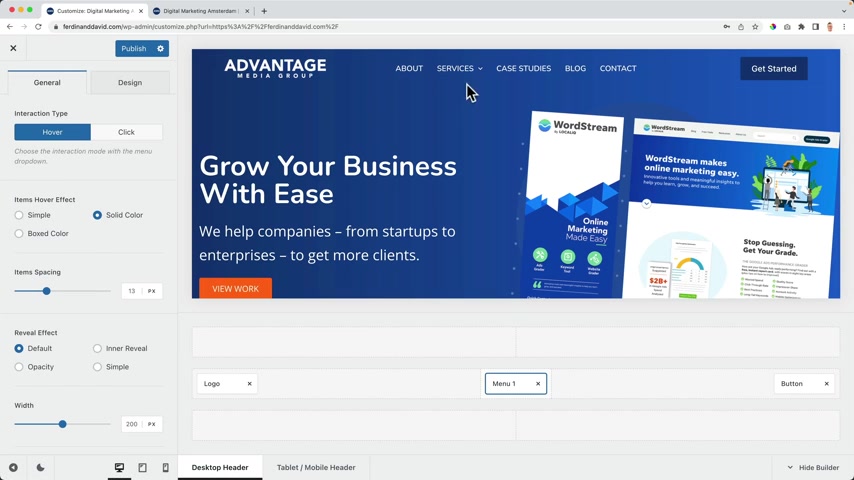
So let me go to general change this to solid color .
So when I hover over to see that the background color changes , now we can go to design Yes , now we can go make it orange .
Yes .
And then I want to make this white .
Yes .
Awesome .
And can use different colors of course .
So now everything looks great .
I think you can be really proud of yourself .
What you've created so far .
If I go to a different page , it looks like that .
It'll all looks fine .
Beautiful .
We have a great header .
We have a great home page .
We're gonna create a new page , but I want to show you a few ways on how to be more efficient in elemental because the more efficient you are , the more time you will save and time is money .
So we'll save money .
And with that money , you can do other things whatever you want to do .
And um it's , it's nice when you can make a website faster .
So let's go to the next page and show you I will show you how to work really progressive .
So let's go to the second page , the about page and let me show you how you can speed up your workflow .
So the first thing I want to edit this page and when I've done that , I want to edit it with mentor .
So the element of page available will start great .
And now , you know , the first thing we should do again here , left at the bottom settings and change the page layout to element or full with .
OK , I'm talking about speeding up your workflow .
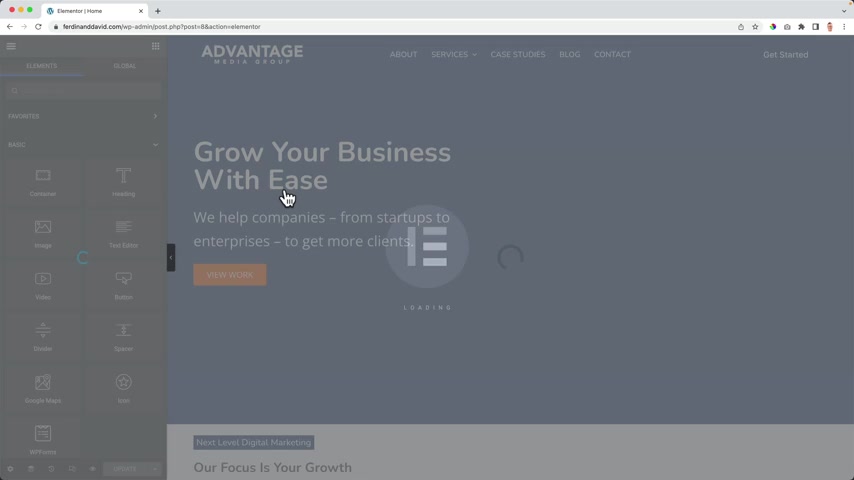
What I can do now , I can hit control E or command E , then I search for a home page and then I kick over here .
Wait let me update first home or home even better home .
And then I click here and then we go directly to the element or page .
We are within the home page .
And now if I go to the Navigator , I can copy this hero or right mouse click copy .
And I say command E and I go to the about page .
There I go right mouse click paste .
And that's the way the cookie crumbles .
So now I can change this text .
I can change the image .
I don't need this area .
So I go to the Navigator again .
Remove , then here I can change the text .
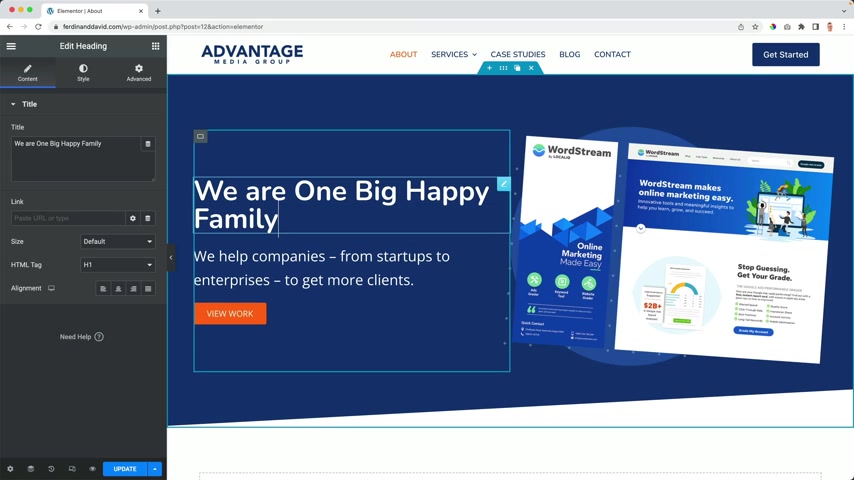
So let's say we are one big happy family and I can create a text over here .
Now , here I changed the text , apply for a job .
And if you would have uh jobs over here and then a seven after that uh like this .
Uh and it's really the case that you have seven places for people that can uh apply for a job , then it looks like you're a really big company .
And that can also give the , is there some trust like , hey , those guys know what they're doing .
So we are one big type of family .
We like what we're uh doing our passion and skill for and then people can apply for a job .
And then over here I can change the image .
And if I want to use , make use of free images , I can search for Pixar B that's come and I can use all these images to save him and don't show any credentials .
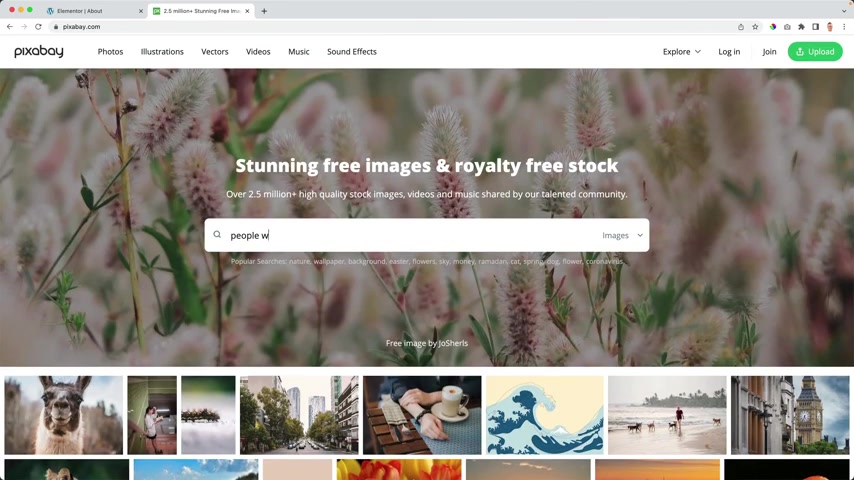
So I search for people work .
If I see something I like , I can use that image on my website .
Keep in mind those images are free and that's why the quality is a little bit worse than when you go to uh something like I do .
So if we would go to 30 Corp dot com forward slash I stock photo and enter photo , then we can find really high quality images .
So if I would search for people work , those images are way better .
So you can download the image .
And if you take a look , uh all I have this one already or I can get it for free since I'm new .
It's old Dutch over here .
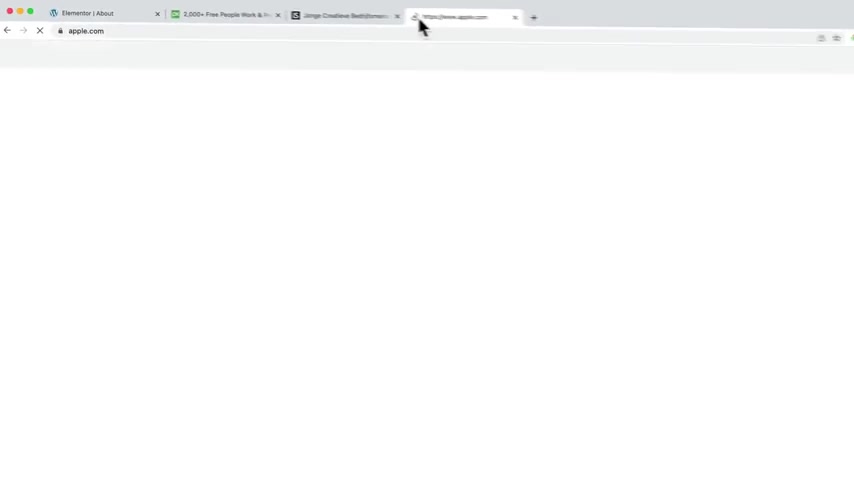
I don't know why .
So I can um sign in and then this one would cost one credit .
Uh one credit .
That's around $9 .
So maybe you think what $9 for a picture ?
Yes .
But keep in mind that that thousands of people can potentially visit your website .
And when the the quality of the website is great , it will be payback itself .
If you go to apple dot com , look at this image , high quality image , high quality image , image , image , image , image , image image .
If all those images were lousy and stupid and ugly , the website would look ugly and uh not professional .
So I call the images are really important .
So if I go to my photos , I download history , I like to use this image .
I can download it , always rename it .

Digital marketing Amsterdam .
Then I go to pick over here and then I go to finer I drag it over here , copy paste and then I click on insert media .
I can also make the image smaller right now .
It's 573 kilobytes .
If I would change it too .
12 81 I go back then it's only 200 kilobytes .
So um let's let her know .
And over here I can create some space at the right like that .
OK .
So that's how you can copy and paste things and then save yourself some time .
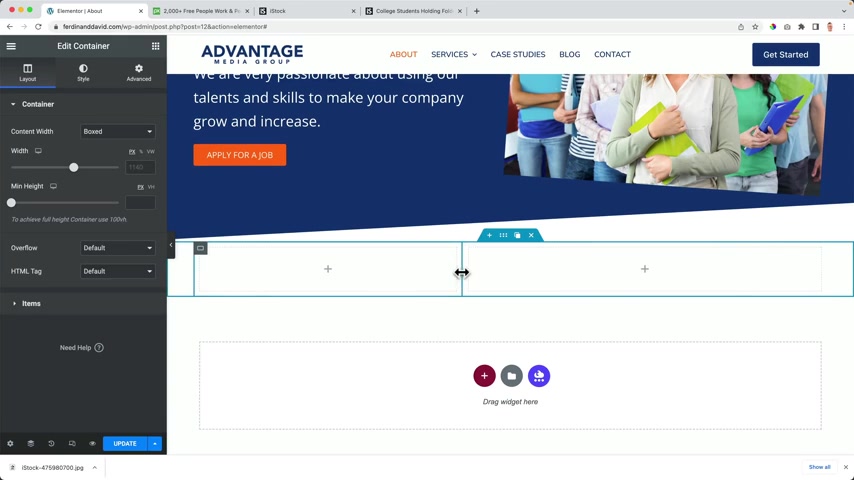
Let me show a few other things on how you can make um a nice website and use element or let me f two columns and I can drag it a little bit like that over here .
I want to have an image .
So I search for an image .
And then again , I go to , I do , I can grab this image .
Let me see , show you what else we can do .
00 sorry .
Um Download again , rename digital marketing Rotterdam because people are searching for Rotterdam .
And then eventually they can go to our company in Amsterdam or you have multiple places where you have your own company and then they can go to digital media .
Rotterdam to your company in Rotterdam .
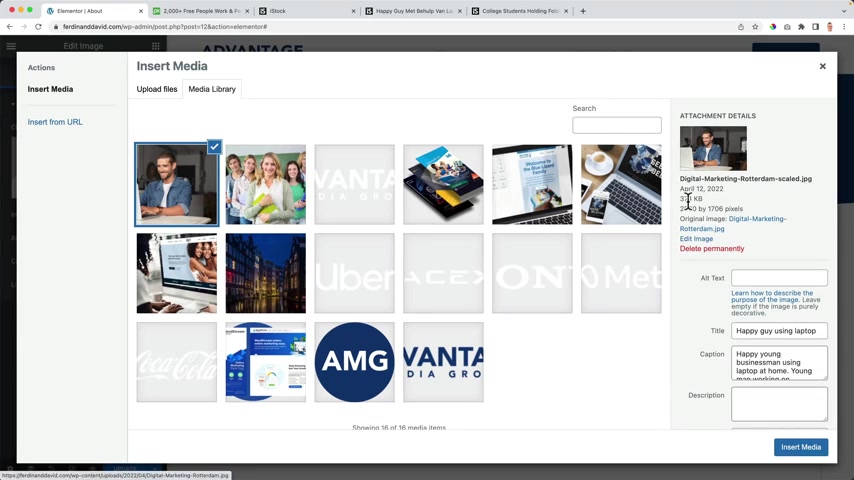
So click over here , upload files , select files , downloads most recent one .
It's 20 megabytes .
That's a lot .
But it will be made smaller automatically by wordpress .
So that's nice .
But we can make it even smaller .
So I click on edit the image is three on the 74 which is quite ok .
But now I want to crop it .
I want to make this an expect ratio of 34 by three .
Why is it not working like that ?
Maybe because I already have a crop over here .
So let me edit it again .
No crop four by three .
And now it's working .
And now if I click on crop , yes , I have a four by three aspect ratio .
So I cannot make it different aspect ratio .
Now , I can select certain area and then I can click on crop safe .
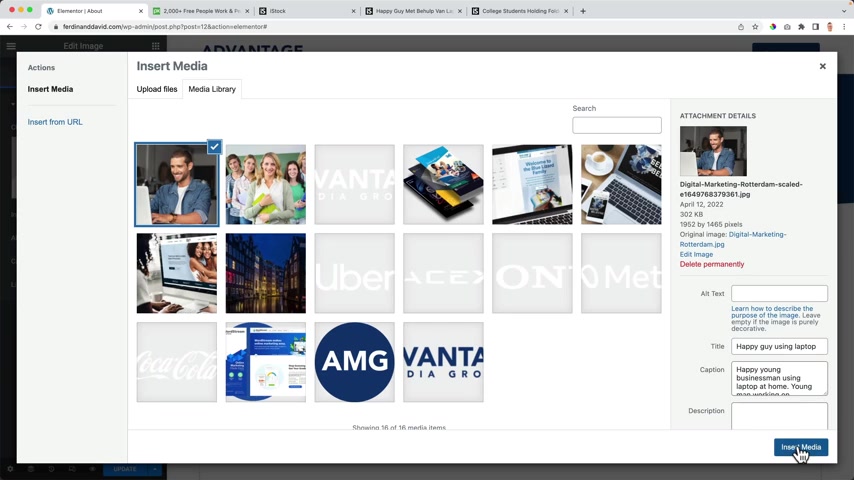
Now it's uh 302 kilobytes .
I insert the media and now I can do something nice .
First , I can make the image smaller .
And then if I'm here at the , I can go to a box shadow , I can give this a shadow but I can also make the shadow really harsh so I can make the OK ?
And you go to this button , I go to the to this color and I copy this color command C or control C .
Then I go over here to ST below .
I go to the box shadow at the color I face it .
Now I can say minus five .
Mine get rid of the blur and then it looks like that .
So if I would say minus 10 , minus 10 , you have a nice effect like that .
And then over here , I can have a heading , let me save it .
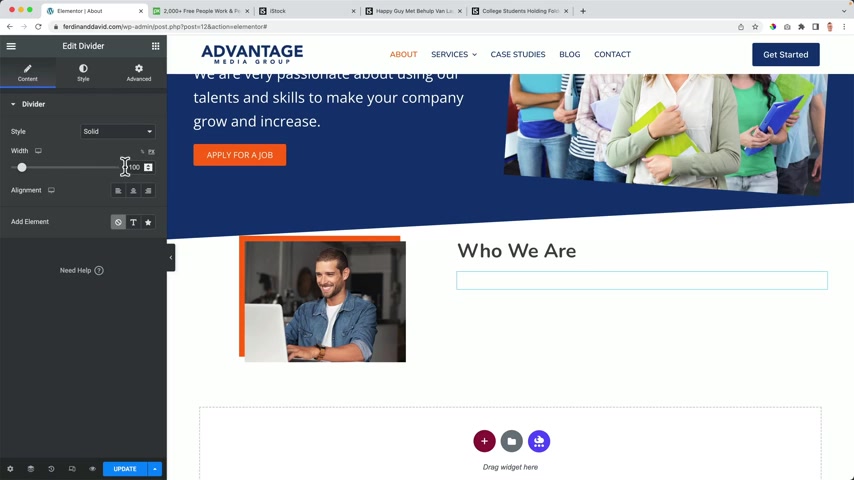
Andre was heading over here .
Who we are .
Then I can have a divider if I want to drag it here below , make it um 214 pixels solid .
I go to the cell , I can remove the gap to nothing .
Change the color to blue , change the thickness 23 .
Then I go to advanced and check the margin and at the top , I bring it a little bit closer then and then I can have a text and I can type this text something like that and then I can duplicate this , drag it over here .
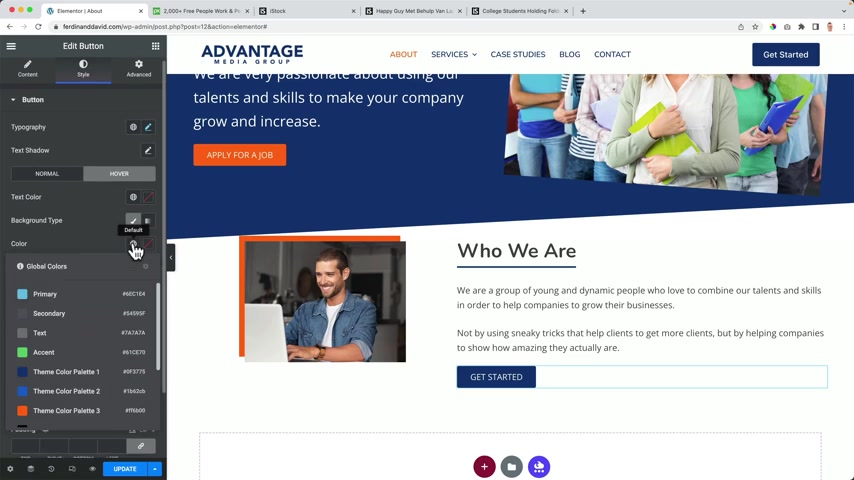
Change the text get started , continue to sell to dark blue .
When you hover over it , it can become orange .
OK ?
Then I click on the whole section .
I go to advance and at the top , I would like to say give me some space also at the bottom .
Then I want to have a new area like that .
I want to change the height to 500 pixels and I go to this area .
I want to go for a nice image .
This one .
Download it web design , Amsterdam .
There I go again .
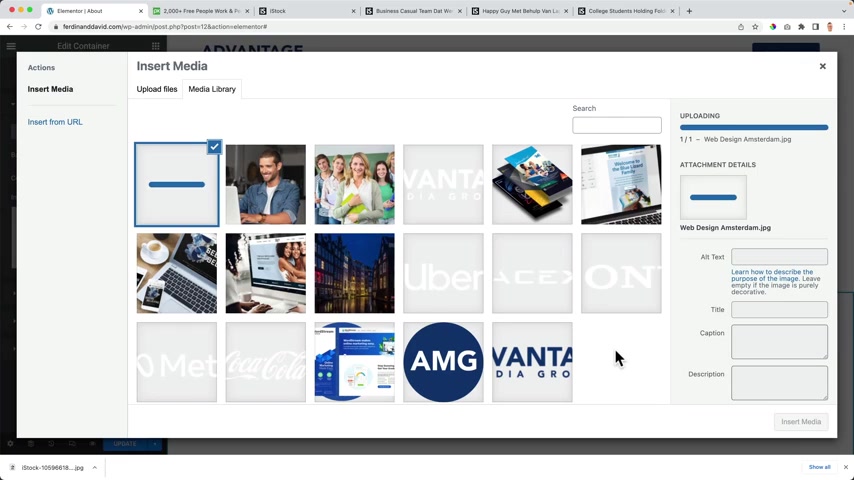
I go to the ST background type image , upload select Bells .
There it is open copy based and the image changed too 1920 skill beck and allows 430 kilobytes .
I insert it now to change the size to cover .
So as much as possible will be fitted in this picture .
I change the attachment to fixed like that and then I uh update it .
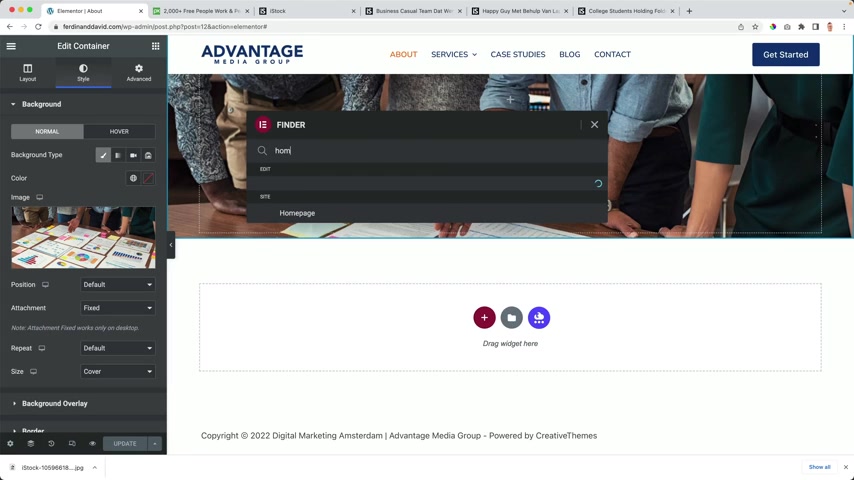
Then I say come on home and then I want to go to this area copy when e about over here , I want to face it , get rid of this this and this .
And then over here at the container advanced una this , I want to bring it closer to the image above .
So you get a nice effect .
This can be the portfolio of who we are .
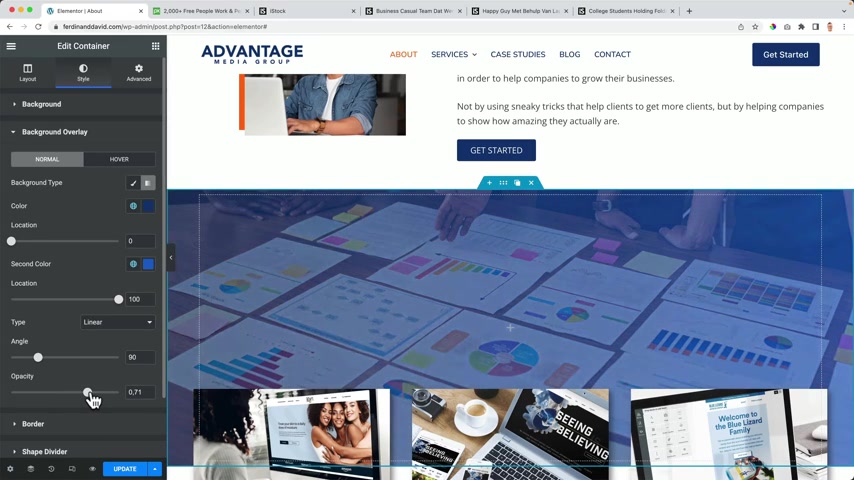
And then this area with this image , we can also go to ST background overlay and then we can choose a gradient , increase it .
And then if you want to , we can have a heading over here .
Our focus is your growth or your growth is our focus or goal .
And then I can go to this area layout , bring things to the center and the center , I change the text color to white and then advanced .
I can also bring this closer to the center of this area and this area like that .
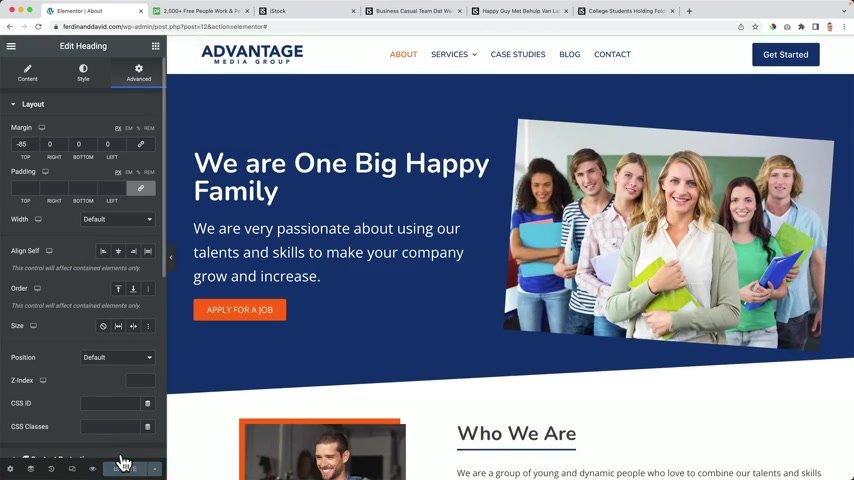
So that's how we can create a page .
I want a little bit faster .
I hope you don't mind .
It's like look how does it look ?
Oh Look over here .
Advanced unchecked 50 50 over here it , it's a left 40 and this looks great .
Ok .
Let's go to the Hero for mobile .
Increases a little bit more like that's over here .
40 .
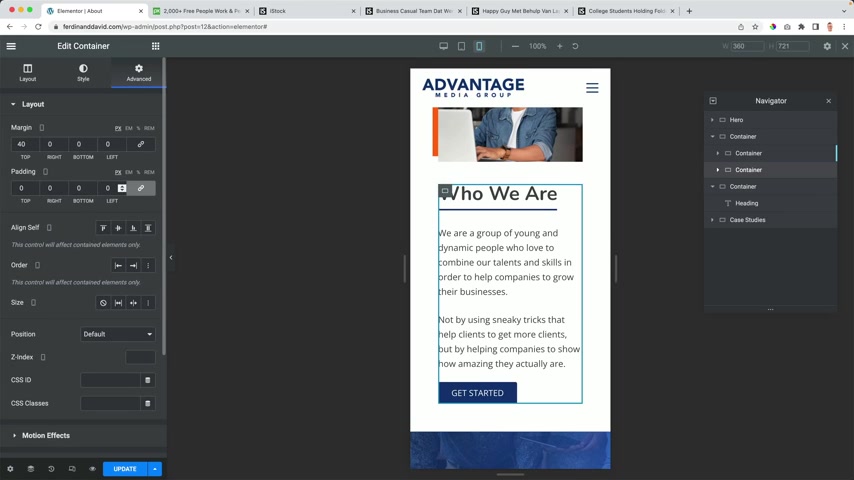
No , no , no , no , only it's up and then zero over there .
Click over here , bring to the center , see sorry content over there and this all looks fine .
So now it's optimized for all devices .
Let's take a look and close all this stuff and then it looked like this .
I think it's amazing .
So what can we do now ?
Since you know a little bit about element or there are tons of ways on how you can make money using a website or knowing how to make websites , you can do that for a living , but you can also sell designs .
So if you become really good in making websites , you can sell your designs .
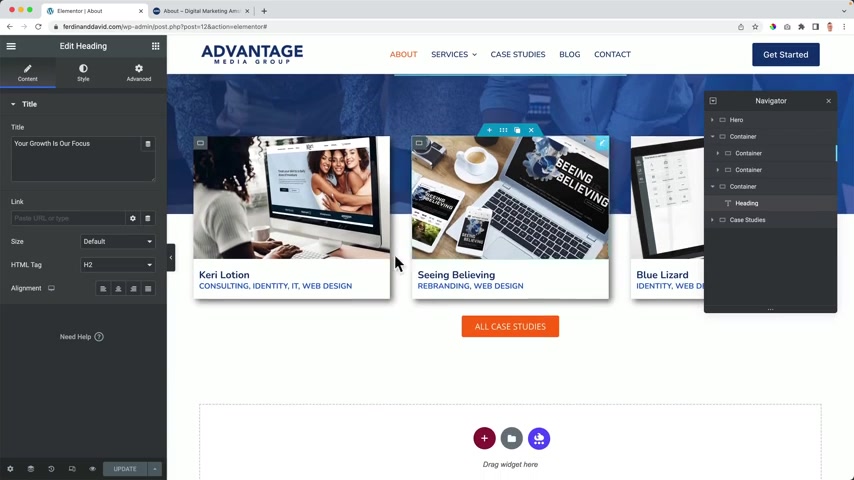
So if you want to sell this , you can go to Element or you know , it's optimized for all devices , make sure you don't have um any copyright images in it and then you can click over here and save it as a template .
So I can now call this one about our Advantage media about page nice there in between .
Save it .
And now I go to all my saved templates and I can click over here and I can export it there .
It is , I can rename this to advantage media about page only 15 kilobytes and I can import it somewhere else .
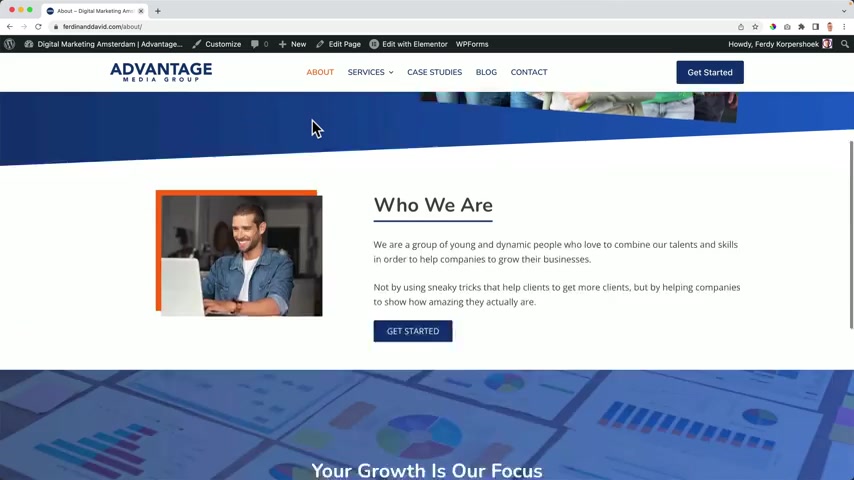
So let me remove it right now , delete and then I click on the I great .
This is the home page is our about page .
And if you go to the services page , I can edit the page added with element or , and if I want to import a template first , I can make this a four page update , then I can click on the folder in the center over here .
Click on this icon , select a JSON file .
We just created 15 kilobytes .
Open it .
I want to import without enabling and then I want to insert it .
I don't apply these settings .
So now I cannot import these images because they are copy protected .

And that's how you can sell your designs and people can insert it and then they can change the information really quick .
So I can click over here three times .
What can we do for you and change the text here .
It makes the deck a bit smaller advanced .
It's all right .
I make this 40 started .
We are what is our approach question mark and then I can change this text can change this image in the background and that's the way we we crumble .

So I update it and then that way you can speed up your workflow .
If you want to download all the pages I use in the tutorial , I give them to you for free .
You can go to 30 Corp dot com .
Then to templates , then you when you fill in your first name and your email address , click on , give me the package from Europe China need to consent with this .
I can subscribe and now I need to go to my email account .
Ok .
Then I click here on my email , get the template back back and then we can click on download the template pack .
There are ghost and you can also go to all templates and there you can find uh templates for Element or the free version pages like this or Element of pro and you can import pages like this .
My opinion , beautiful pages .
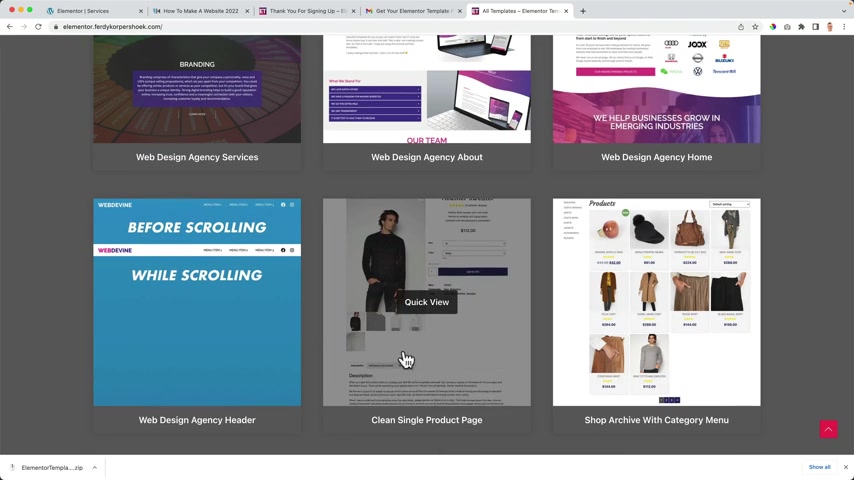
Even if you have a web shop , I can show you how to create uh import something like this or uh headers .
So you can click on headers and then when you scroll things change and you just have to change the colors and stuff .
So um that's what you can do .
I close this , I close this this and this , then I opened this and there they are the advantage website .
So let me click on the I and I go to the contact page .
I edit the page .
Then I go to edit with Element or the first thing I want to do .
I want to change the settings basically out to element of full width update .
Then I click on this folder .
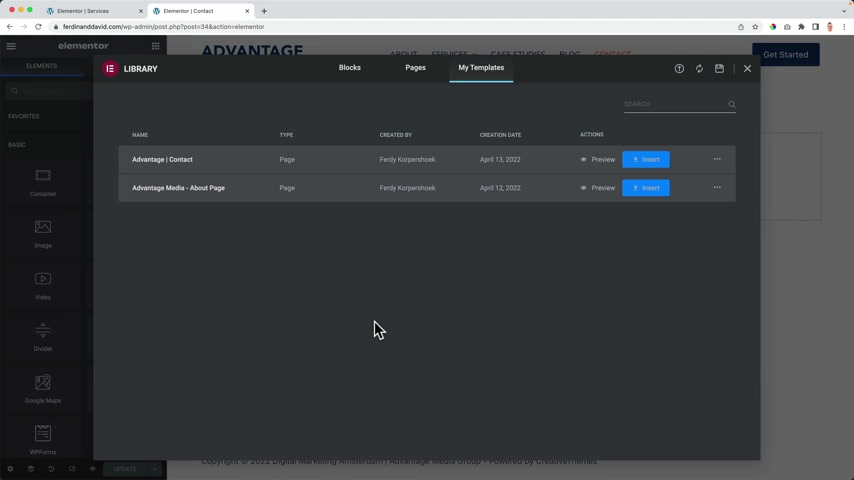
I can I click on this icon to upload a JSON file or a zip file and then I go to downloads this folder advantage and I go for the contact page three kilobytes , I say import without enabling the red one .
Keep in mind that you need to have WP forms which we use on the home page .
So I click on insert , don't apply the settings of the page .
There it is and I see there's no form .
So I click over here .
I need to select this form and now it works update .
So this for free .
But what I said before , you can learn how to create beautifully designed pages and sell them on your website .
And then I will also have tutorials on .
I already have them on how to sell digital products on your website using woocommerce .
And that's the way the cookie crumbles .
I really like making a website like this using the blocky theme and element or if I open this page is how it looks .
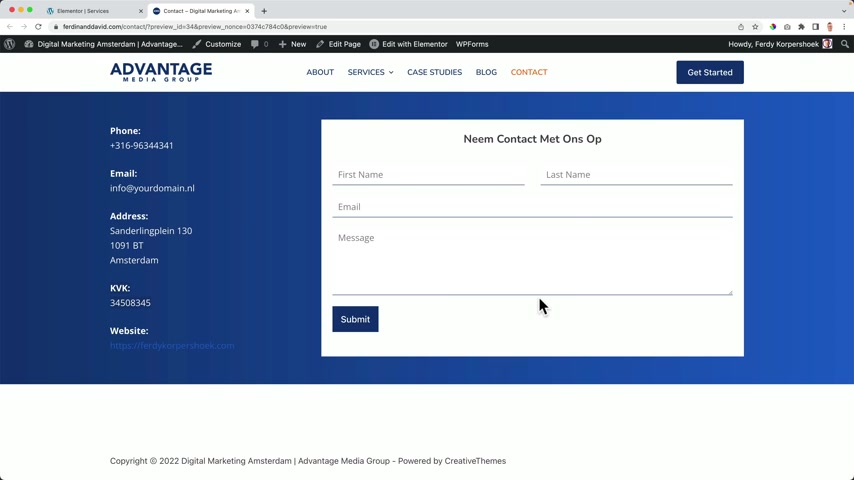
And of course , I can change the information over here and I can change the form .
So we have the uh home page and I also have a template for that .
So you can import this page completely about page services , page , contact page .
So let's take a look at the case studies .
Are the people in the house ?
Are you still having fun ?
I hope you are .
I hope you are excited .
I do my best to create the best tutorials possible .
And what I also can do , I can also make the longest tutorials possible .
Like 10 hours .
But I don't want to do that because that will scare people off if they see , learn how to make a website and it's 10 hours long .
So , what I do , I take a look at all the basic things people need to know .
I put it in this tutorial but not everybody wants to have case studies in their website .
It's just the way it is .
Some people don't want that .
So what I did , I created a separate tutorial for that .
Otherwise it will another 30 minutes will be added and maybe not everybody wants to make use of those 30 minutes .
So if you want to learn how to create a case study , uh case study portfolio area in your website , you can click on the link over here .
Yes , I've been working out .
Thank you .
What time is it or you can go to the link in the description .
Let's continue .
This is how it looks as the end result .
I can go to marketing rebranding web design .
If I click on one of those , I can see the content and then below , I see related projects .
Great .
Let me go to the block page there .
I am again because the same thing goes for the block page and the block post , creating a block post and optimize it for the search results and adding rank math and you can do so much things with it and it can be a tual that's two hours long .
So what I will do , I will create a tutorial .
So if you want to learn how to create uh a block post , you can click over here or go to the link in the description .
And then um when you follow that , you can go back to this tutorial and follow along again .
If you don't want to have a blog post , you can just keep watching because I will skip that part because not everybody wants to have that .
I don't want my tutorials to be too long .
Yes , I hope you um are not mad at me because when people are mad at me , I it's hard for me even when people are mad at me for a reason that I not agree with and I still feel like , oh no , somebody is not happy with me .
Actually , I should have not become a youtuber if I am vulnerable for that .

But um yeah , I feel like I'm sharing my heart with you and feels good to open up , you know , even though it's through youtube , ok , I can imagine that you sometimes think , ok , are you serious or are you weird ?
What's going on ?
Ok .
This , this is just why I'm , I like what I'm doing and sometimes just do something like that .
So , um we're gonna skip the block thing if you want to learn how to do it , follow the tutorial and let's continue .
Now , if you follow the tutorial and you refresh the page .
It will look like this beautiful overview with all the block posts .
And I'll show you in the tutorial step by step , how you can create those .
If I click over here , I go to one of the block post and this is how I made it look .
And I'll teach you how to create a block post like this with images links , how to format the text , how to write a converting blog post .
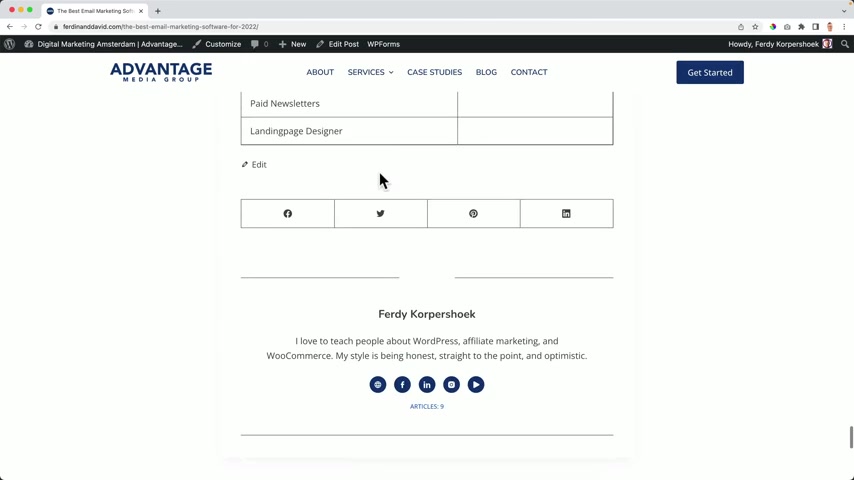
This blog post makes me money through advertisements and through people that click on the link about convert kits and then I make money and I help them great way to make money .
If it did marketing , I also have tutorials about that .
Then uh through this uh beautiful theme blocks so we can display information about ourselves .
We have a related post and people can leave a reply .
So since you have case studies and block posts , maybe it's a great idea to put them on your home page .
And in order to do that and go to the back end , we need to have another plug in for that .
I also downloaded that already in that other tutorial .
But if you have not followed that tutorial , let me show you , I go to plugins at new I search for life mesh .
It's a live mesh element or you need to install it and activate it .
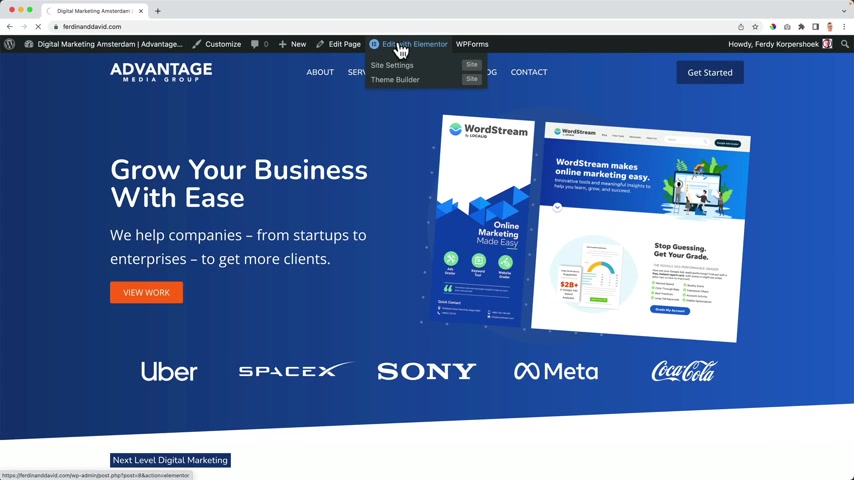
Then we go back to the home page added with element or , and as I said in the I , I already did it .
So uh I remove everything I have over here and then I search for grit and I need to have post grits and dr over here .
Ok .
Um Then I go to the Navigator .
I want to direct it below the text editor .
Oh man , I , I love how simple everything is .
They like click over here and I change posts .
I close that and I click on the plus I choose portfolio .
So I , I choose my portfolio items .
Then I go to settings and I remove this text and I uncheck the filterable question mark area and I go to content again , I make this a little bit wider .
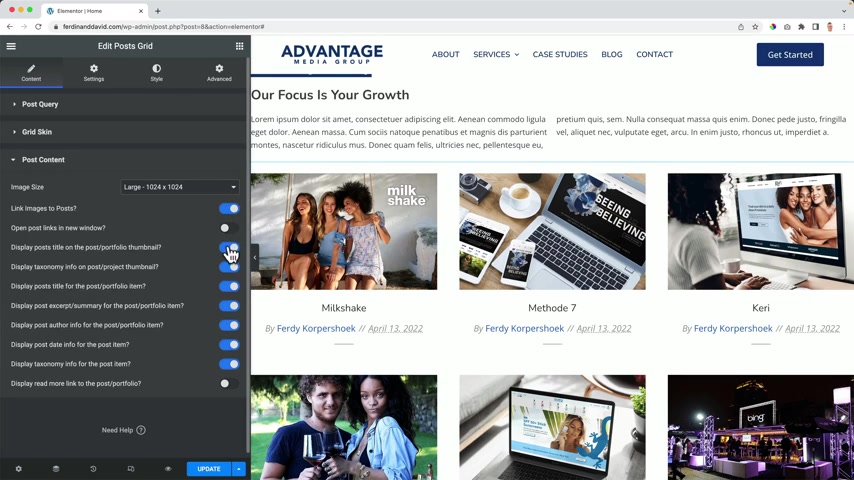
I collapse this and I go to the post content and I only want to check the first one and the fifth one , I go over it a little bit quick because I have a tutorial where I show you that .
So uh this area and then the title , this uh size size of the image can be smaller as long as you see that the quality is high because uh right now with 304 150 you see it becomes worse .
So I think also with 300 it still looks great .
And then your website will load faster because the images you load are smaller .
So if I would say shift month four on a mac , OK , it's 400 pixels wide .
This one is 300 So I choose no .
And then you have really high quality images .
Then I go to the post query and I choose to show just three both update .
So we've created this really fast .
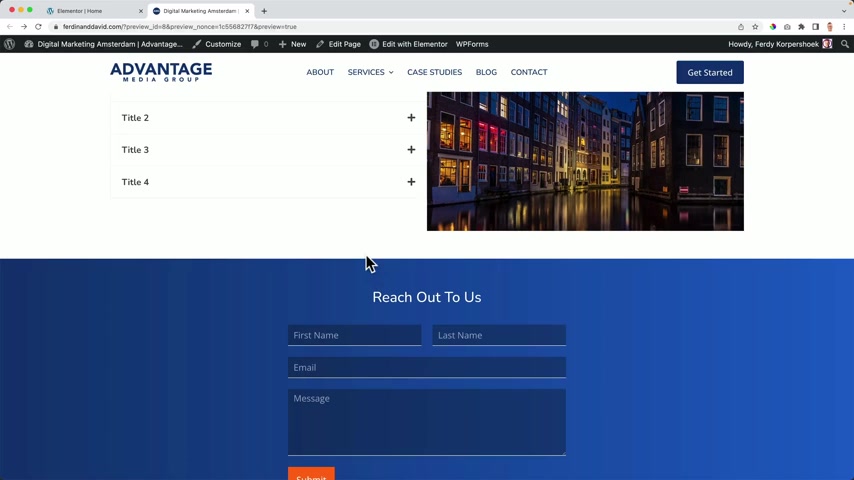
And if I click on them , I go to that case study and then scroll down .
I want to add my recent block post over here .
But you know , I want to have , I have dark areas and then light areas , dark areas and I want to have a light area for my block post .
So I need to have another dark area .
So I go to element or scroll down over here .
I click on the plus one area with the arrow dung .
I go to the , you know , by now how I will have my background 90 and then I go to the elements and I drag this heading over here and it can be a nice blog post .
I have a block .
Uh It can be a nice quote .
So um your growth is our focus .
I have already somewhere else in the website , but I'm totally fine with it .
OK .
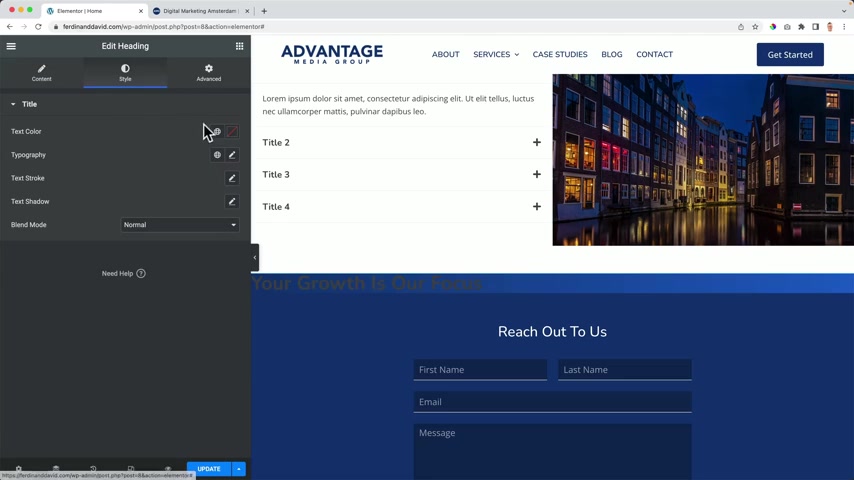
Then I go to the cell , make the text white .
I can make it a little bit bigger .
Then I go to this area container layout onto make it higher , let's say five hundreds and then add items .
I bring it to the center and to the center and I go to ST overlay and then I choose an image this one .
I make it cover and fixed and I decrease the opacity .
OK ?
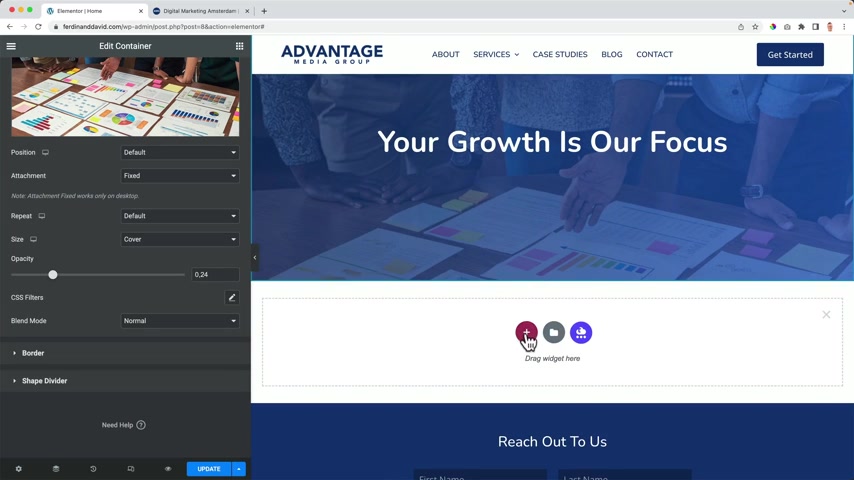
And then I also have a new area a but having still bring this back to this one .
Let's see as one , OK .
I'll bring it to the center and then I go for the grid again , I do the same thing .
I go to settings , remove this and uncheck this content , three items .
And then here at both contents , I only check the first one and the fifth one and change this to 768 .
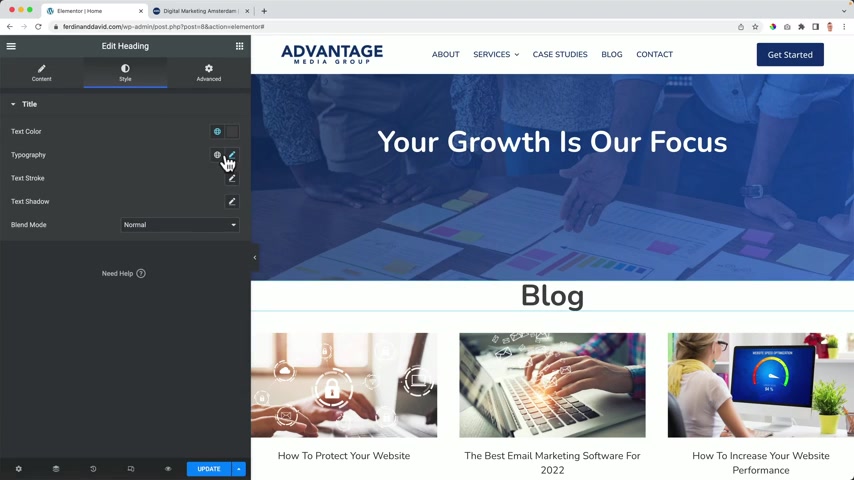
Then I click over here and I say block , make the decks a bit smaller , increase the margin at the top or I go to this this area .
Bye , increase the betting .
And I go to the um responsive mode .
This is fine .
This is not .
So here I say fif 50 everywhere .
Let me see .
Click over here .
OK .
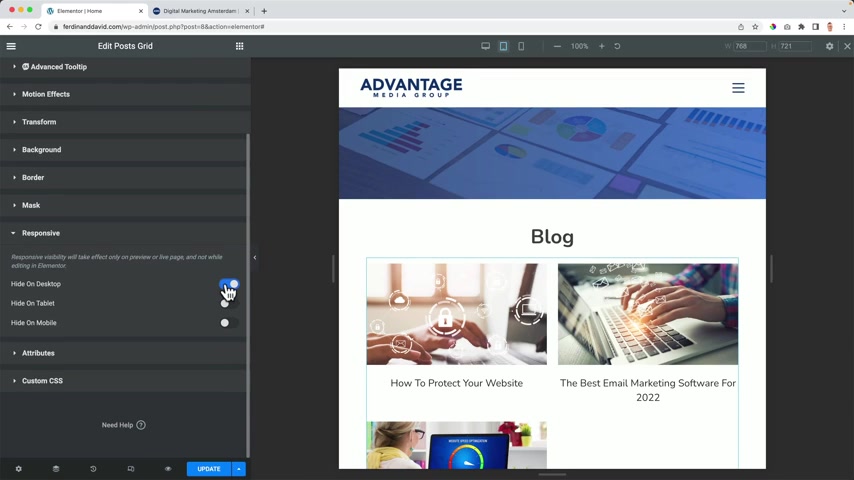
What I want to do II I don't want to show , I want to show three in a , in a row also over here .
So what I can do , I can duplicate this .
And over here I go to advanced and then responsive .
I see I did on the desktop re not hide it on a tablet .
And this one , I say you hide it on a desktop and content .
I say shall only two black post .
I do the same over here .
Duplicated .
This one is only four , the desktop .
This one is for the smartphone .
So hide it .
Let me see .
Yes .
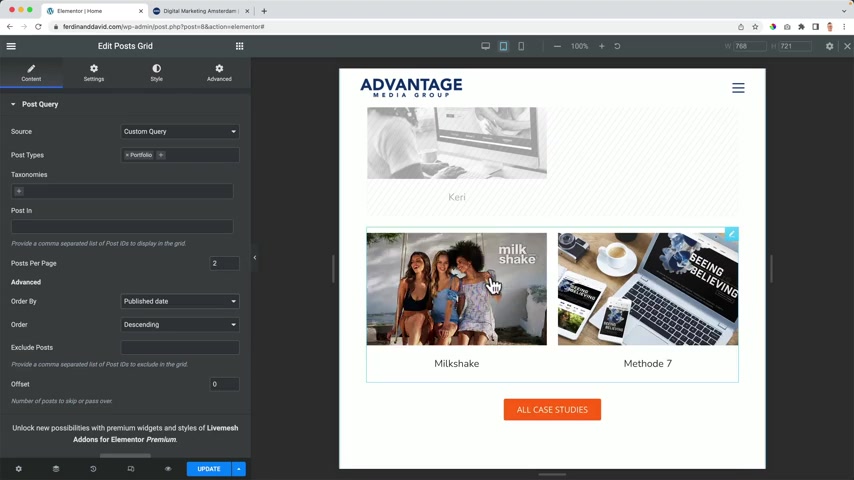
Now , here again I say too .
So what I say this area with three K studies is only for the desktop .
And this area with two is only for the smartphone and tablet .
So if I go to the smartphone , she stood below each other also here to be love each other update .
We see three , we see three here .
Was he too ?
See too .
I like it .
So that's how it works .
Let's go to the home page .
OK .
People , we're coming to an end of this tutorial and um what we're gonna create right now is the footer the finishing touch .
And of course , we're gonna take a look if everything is optimized for all devices .
And after that , I will give you some follow up tutorials because there are so much more to do in work as the world .
You can uh create a web shop .
You can sell a course , you can uh create a Facebook page , you can optimize your website for the search results .
So I have tutors about all those things for free on my youtube channel .
So feel free to subscribe .
And I always say that the best is yet to come .
I do my best to create better and better tutorials .
So feel free to do that .
Now , let's uh create our food .
In order to uh create a beautiful footer , we need to download or activate something .
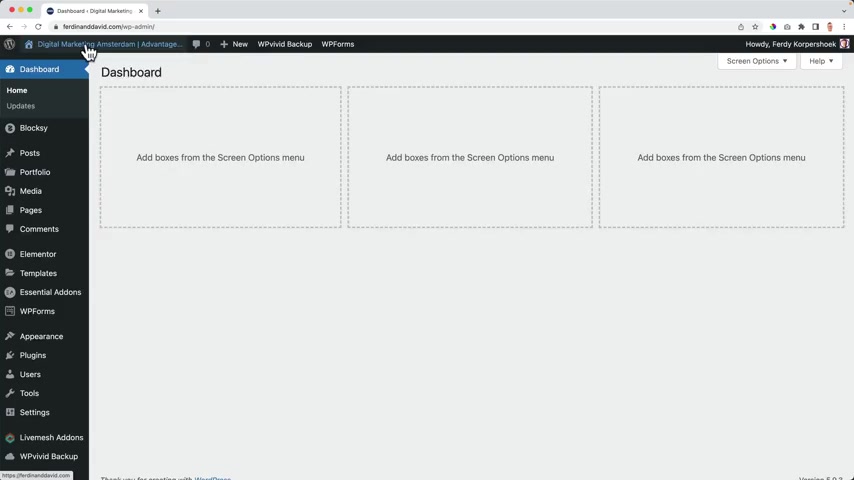
In order to do that , I go to the back end and then I go to sea to extensions and then here at the free extensions , I turn on trending posts and also a few nice widgets .
Then I go to the website , I click on customize and now we can create our food .
I scroll down all the way and this is what we have .
It looks a little bit weird but these are trending posts and this is hidden .
So let me uh configure this , I can click on edit or I just go up over here to extensions , training posts .
And then first I want to go to design , let's change that the back ground .
And then I want to change the font color .

When I hover over it , I want to make it orange , it can increase or decrease the space 20 is OK with me over here .
I make sure that uh it is .
And then I go to general again , I can say trending now I can change the text .
I can show the recent boasts or uh training post or portfolio items .
Let's do des portfolio items , um case studies , trending from all time .
So the the ones that are clicked on the most visited the most those will appear over here and it will not be visible on the phone .
Great Publish .
Then I want to edit this area .
So I click on edit .
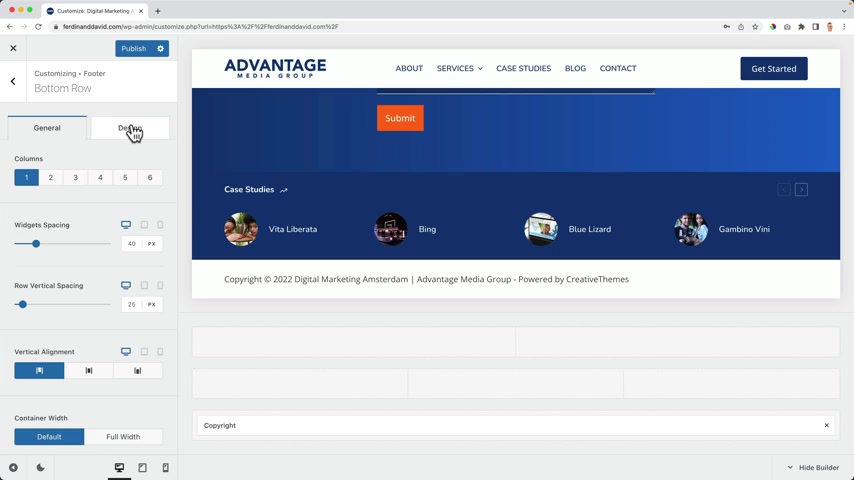
There we go .
So we have the bottom row settings and I want to change the design first .
I want to change the background color to the darker one .
So this dark one but then even darker like that , then I click on copyright in this area .
I go to design and I change the font color to white and then the link is also to white .
And when you hover over the link , it is orange and then over here I say open suns , it's already the case and I make it a little bit smaller .
Then a general I bring it to the center .
I can change the text I removed to copyright .
I like the year .
So when it's the new year , it will change .
No , I have a pipe over here , the site title pipe and I remove all this and then I can have a few links I can say website made by and over here I can make it the link HP ready Corpus Hook , come open it in a new tab .
OK .
What else can I do over here ?
I can say disclaimer and privacy policy .
I can create pages about that .
I say come on control .
OK .
And then I can say forward slash disclaimer that I need that .
I need to create that page privacy policy forward slash privacy dash policy .
And um if you want to learn how to work with that , you can Google or you can hire someone to do it for you or you can search for create disclaimer pages or website and there are tutorials for death .
Ok .
Well , then we have two more areas and I want to make use of this one .
I have to say before , this was a smoother uh experience right now .
It's been a little bit clunky .
I don't know why workers say that , but hey , I think it will become better in the future .
Let me walk you through it .
I go back and then I have a lot of areas .
So let me go back one more time I go to , then we have all these areas and then we have widget area 123 .

Before uh first , I want to show you that there are three areas right now .
And if I would click over here , I can change it to four 56 .
And when I do that , you see them change over here .
And in all those areas , I can drag these things , the food or menu , socials , widget area .
So I go to the middle row editing area and I want to have three columns evenly divided or divided like this .
A small one at the left at the right and the big one in the middle .
But I want to have this 12 small ones , 25% each and then one of 50% .
I can change the column spacing , widget spacing .
Um It's time to add some , some areas .
So the widget area one is over here , I release it .
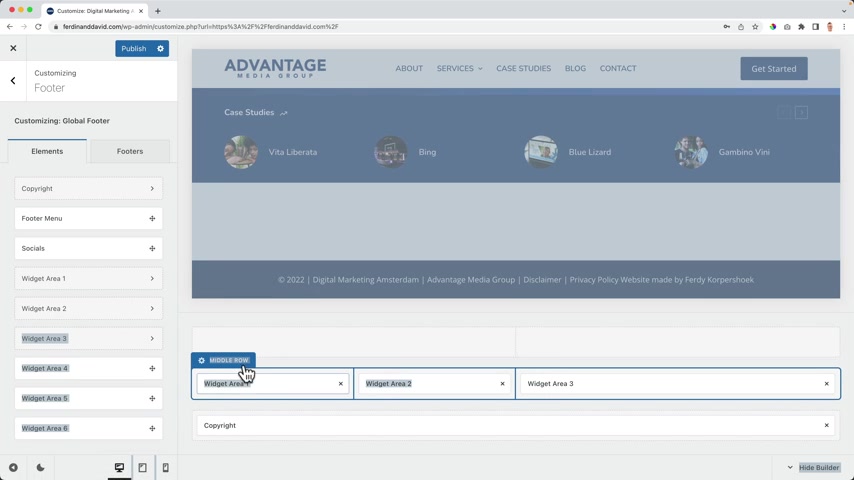
Widget area two over here and then widget area that he over here before we continue , I go to the middle row to design , I want to change the background to dark blue , but now we have dark blue and dark blue .
So what I can do design , I scroll down row divider , a beautiful line over here which I want to be white .
Ok .
Then I've switched area one and if I click on it , I should see something over here and this is what I mean with clunky .
Yeah , there it goes .
OK , I got this .
Then I click on the plus and then I see a mini Gutenberg editor .
If I click on browse all I installed cadence blocks , so now I can make use of all these blocks so I can have a page break calendar , our latest comments , latest posts .
So I just want to have a simple image .
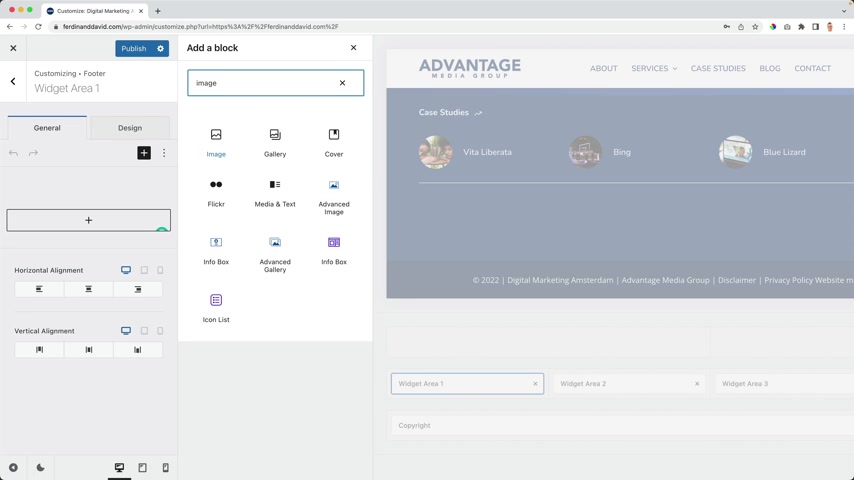
So I search for image and I click over here and now I can upload an image arc .
I can go to the media library .
I want to have my logo in white .
So I go to advantage that logo , I select it and there it goes .
And in this widget area , I can have multiple widgets .
So this over here is one widget .
So if I click on the plus , I can have a text widget or a paragraph widget .
Let me go to the dummy text generator .
You can play some texts about your company .
I paste it but I don't see it .
Why ?
Because a design , I need to say that the font color is white and a link color also white .
And when I hover over it , it becomes orange .
OK ?
Then I can go to widget area two .
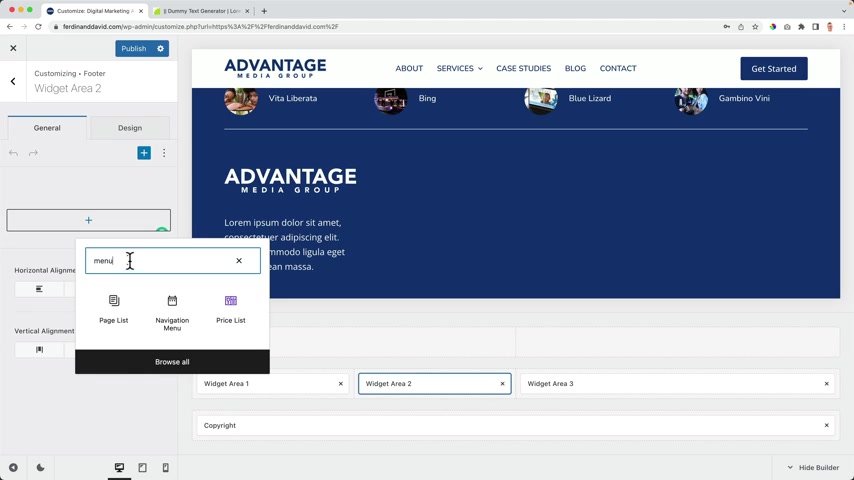
And this time I click on the plus and I want to go for a menu .
So I go for the navigation menu .
I need to select one that goes really dark .
So first I want to create a title quick links and then also your over design , I can make them white or I go to this whole area design and they say that all the title should be white and all the fonts uh colors should be white .
And when I hover over things , it can be no , no , no uh links can be white .
And when I hover over , they can be orange .
So that's how I can do that .
I click on , click on publish but I , I think the text is a little bit big so I can click over here is for the title , make it a bit bigger , make it upper case .
OK ?

And then for the fonts , I can make it a bit smaller like that .
I like it .
Then the third area we did area three , I want to have a special plug in for that .
So I click and publish .
I close this , I close this , then I go to the back end to plug in at new and I searched for recent boast with thump mail .
I'm searching for tic , it is a lot of installations installed now , activate it .
Now I go to the website through customizer .
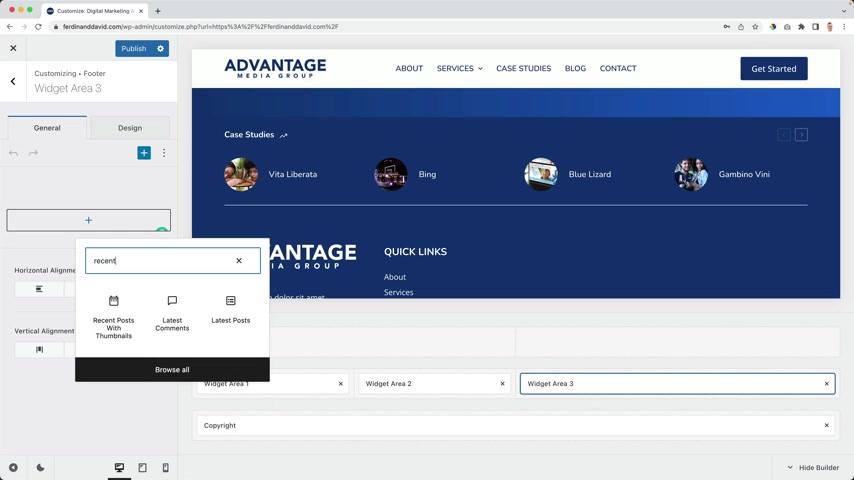
I scroll down .
Ok .
And then uh in the third area , these are the settings .
So let me go back .
I click over here .
Click on the plus and then I search for a recent post with thumbnails .
There it is because we downloaded that you see a lot of options and by default , it looks like that .
Well , it's quite nice .
So I can say block or reasons .
Boasts boasts .
How many do I want to show , let's say three .
Otherwise there will be a lot of space over here , which is not used .
So when I say three is better open a new window , no order descending just uh based on the newest block post and I do want to show the date .
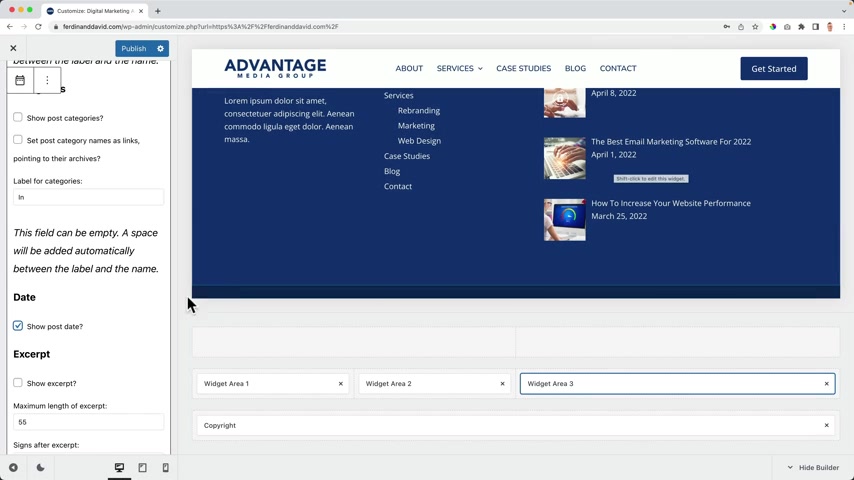
So over here is what we shown no excerpts and choose uh to show a certain category .
Do I want to show the um the thumbnail ?
Well , if I would say 300 by 300 I get a weird aspect ratio .
Try to say um Neil and that looks better .
I can change the size here manually .
I think it's a great like this .
Ok .
Right now , it's not evenly divided 25% 25% 50 .
So I want to divide it equally .
So I go to the middle row and bring it back to Italy .
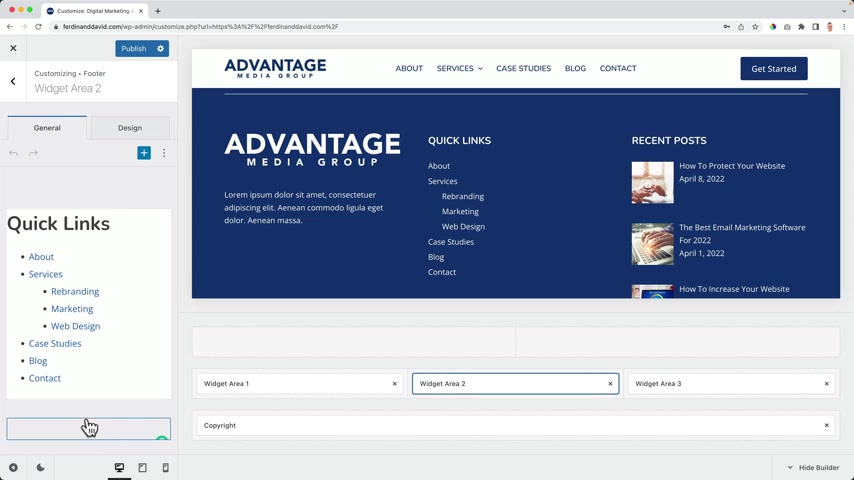
Maybe over here edit , I can bring it to the , I can bring it to the center also here .
Great .
That's how we have created our footer .
And now I want to go up and then I need to scroll up all by myself .
I don't want that so I can go back , I can go back some general options .
And then here we see , scroll to top , then there's the button And if I click over here can change the arrow and change the design .
So let's make the backgrounds blue .
I can color white when a hover over it can be orange .
And I want to change it to this arrow .
I can change it to a circle .
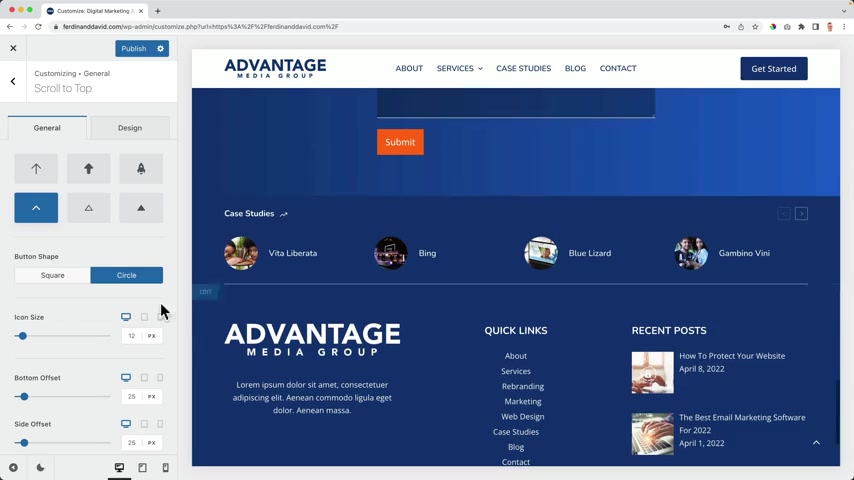
I can do a lot of things .
So that's how you can do that .
Publish .
Ladies and gentlemen , we have created an amazing website .
So ladies and gentlemen , congratulations with your websites .
Con .
Congratulations with following .
True .
I'm happy for you and I wish your company or whatever you do whatever you created the website for the best of luck .
And I hope you will reach a lot of people .
So what is the next thing you should do ?
What you can do ?
Well , I have a few tutorials .
As I said , I don't want to create a 1 10 hour long tutorial .
I rather have specific subjects because not everybody wants to follow every subject .
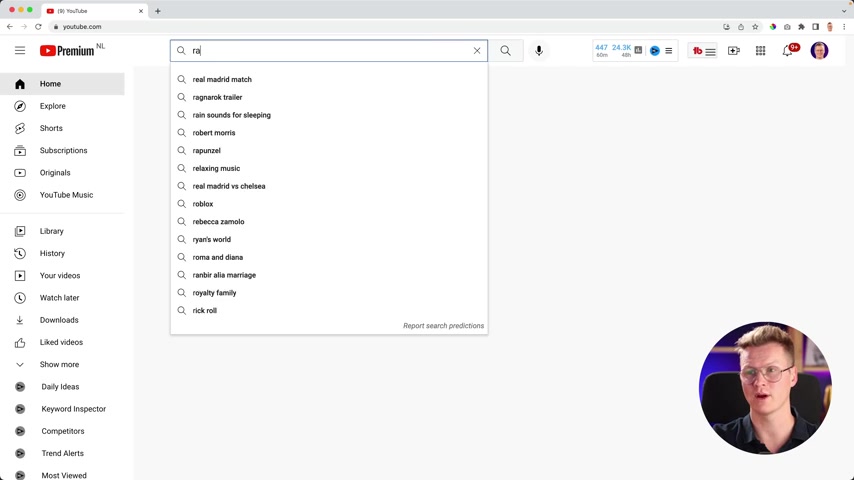
So let me show you a few tutorials .
I suggest you follow if you want to take it to the next level .
The first one is a rank math tutorial rank math is a tool that will help you to optimize your website for the search engine , search engine results .
So here's uh mine .
And if you don't see me on number one , you can say space 30 and I probably will be number one .
So that's why you can do .
This one is two years old .
This one is five months old .
What else ?
Maybe you want to sell things on your website .
Well , then there , there's the woocommerce tutorial .
And again , if I'm not , number one , you can say 30 after that , but I'm still number one .
Uh , this is a newer one .
So I choose one of those .
Uh I should choose this one .
Uh What else convert kit ?
Maybe you want to build an email list .
Uh , get subscribers .
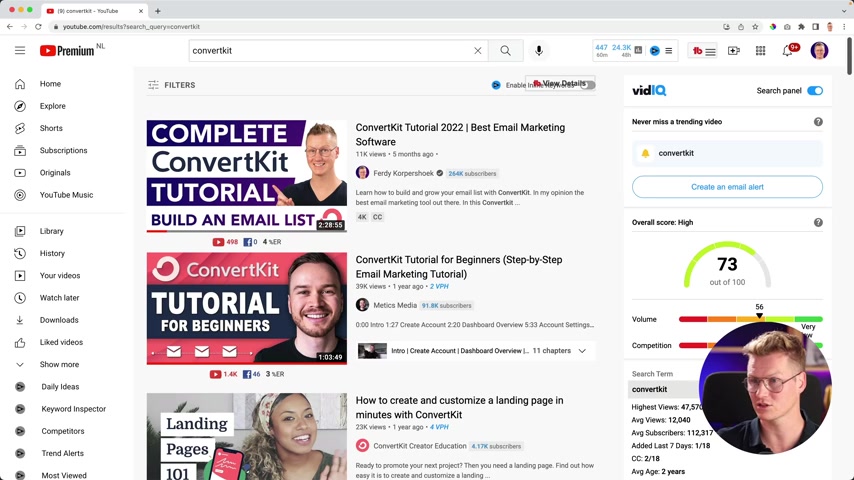
I made a lot of money building an email list , giving something away for free .
Uh , for instance , my um free templates and then I build an email list and then where there was , uh , something I could sell to them with some discounts .
I send an email to all my people .
Sometimes I make a lot of money in a short amount of time using my email list and using this convert kit tutorial 2.5 hours .
I show you step by step how we can get started .
I think , I don't know why it doesn't have that much f maybe because I , I'm a workers related general .
This is crazy what you can learn over here .
So I highly suggest you watch that one if you're interested in it .
And then of course , there is affiliate marketing , selling uh other people's products and when people buy it through your unique affiliate link , you get a commission an amazing way to help people and make money .
I have two tutorials about it .
This is uh affiliate marketing in general and this one is affiliate marketing uh for uh when you want to make a website .
So we already have a website .
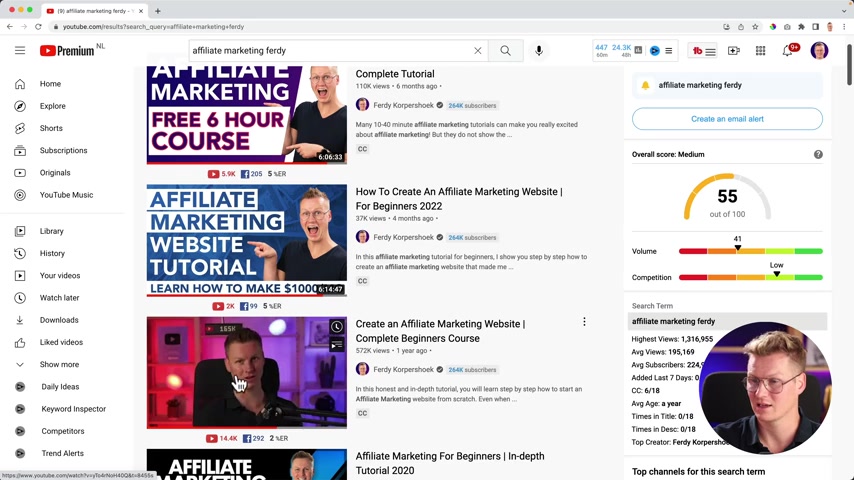
If you want to turn it into a affiliate marketing machine , you can watch this tutorial also here .
I don't get it but I don't get that much views .
But I , so maybe it will come this month , for instance , after a time all of a sudden I got a lot of feel .
So it looked like I was less happy over there .
That's true .
So those are a few follow up tutorials .
Thank you for watching this tutorial .
I hope you'll learn a ton of stuff and good luck with your website one more time .
Feel free to like this video and subscribe for more upcoming workers related tutorials .
And then I hope you have a great day and a great life .
Bye bye .
Are you looking for a way to reach a wider audience and get more views on your videos?
Our innovative video to text transcribing service can help you do just that.
We provide accurate transcriptions of your videos along with visual content that will help you attract new viewers and keep them engaged. Plus, our data analytics and ad campaign tools can help you monetize your content and maximize your revenue.
Let's partner up and take your video content to the next level!
Contact us today to learn more.