https://www.youtube.com/watch?v=6GUODvOVz10
2023-06-14 18:53:08
2 Most Common Issues DIYers Make With Metal Electrical Boxes
You won't make it too far in your diy electrical journey without running into metal electrical boxes .
I think these can sometimes be a little intimidating to D I wires .
When you go to the home improvement store , there's a bunch of different options .
Some look to be exactly the same with small differences .
And because of that , these components can be kind of avoided and inferior products can be used like a plastic junction box maybe up in your attic or in your basement .
These metal electric boxes are robust .
They're almost indestructible .
They're going to hold up to heat and if you have a fire much , much better , they're not going to melt , they're not going to crack if somebody steps on them .
So they do have a place and it is something that you're going to want to be familiar with for your projects around the house .
But there are two big mistakes that I see D wires make when working with these boxes .
And I do want to be clear , I am not immune to this .
One of these mistakes I made on a prior video and the viewers call me out pretty quickly on not doing things correctly and not doing things up to code .
So let's jump in and show you these two things that you need to avoid to make sure you're comfortable with this type of component and that you're doing safely and up to code .
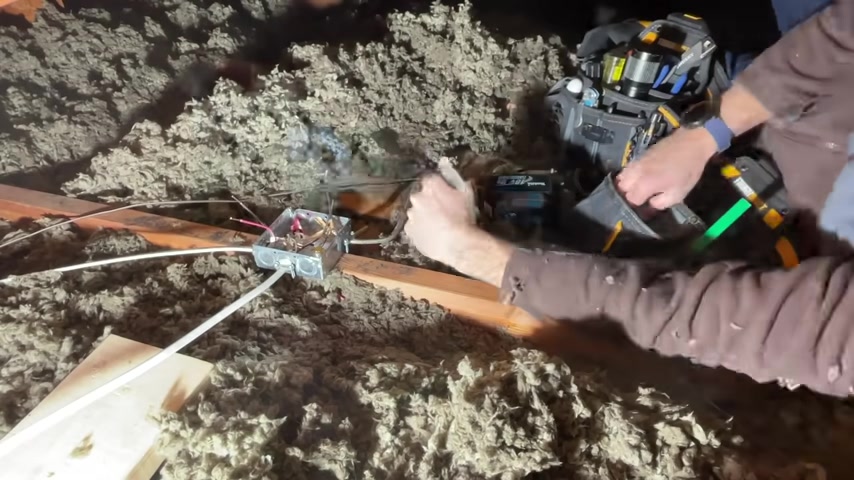
So I show you an example where I use these metal junction boxes .
This is on one of our projects where I was doing some update to a home and I was installing led recess lights in a living space for the first time and using some of the existing wires .
So what I was doing is I was taking the 14 2 wire coming in from the bottom and then I was passing the hot to the black conductor on the 14 3 and then passing back the switch along the red conductor and then passing that to the 14 2 that I just brought into that junction box .
This way , everything is contained easy to access if it needs servicing later on .
And just a classic example .
So this little mockup is fairly similar to what I just showed you and demonstrates the first of the two most common issues .
So we have three pieces of 12 , 2 rooms coming in .
Two of them are properly clamped down and then one is just passing through the four by four box with no method of securing , which is unfortunately more common than you'd like to see in a lot of homes .
So the two big things here is you do not have any strain relief , right .
I can push and pull the row max and that is going to push and pull the either wire connectors or if we had switches or outlets in here that would push and pull right on the screw terminals , that is obviously no good .
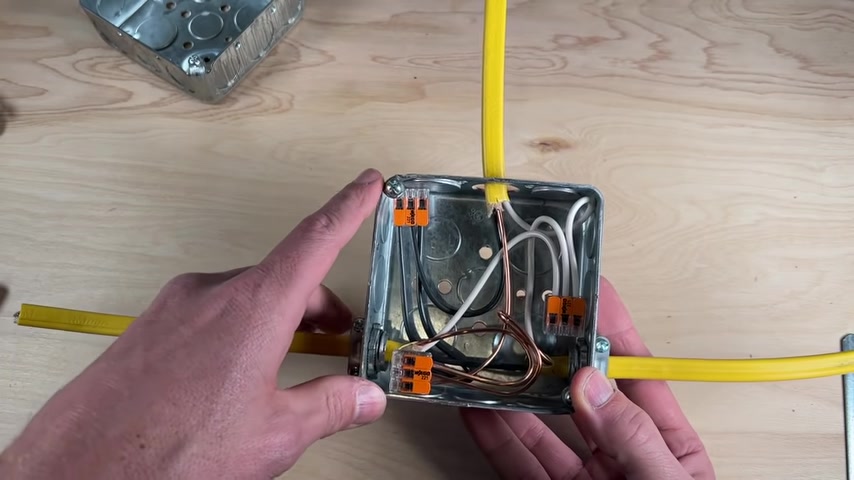
You want strain relief that's connected to your four by four electrical box and then two , you're going to have your non metallic sheathing possibly rubbing right on a sharp edge here which could easily cut through that sheathing and then possibly into your hot conductor , which would lead to a short or depending on your wiring in your home could lead to a bigger issue like this one .
So here it was an older home I picked up last year and this was in the basement .
It was a three way light switch for the lights in the basement .
You , if you look closely , you can see this was now and tube and kind of Frankenstein set up , you can see that hot conductor coming in and making contact with a handy box .
The kicker to that one is because it was an older house .
These were ungrounded boxes .
So when that hot conductor touched the metal electrical box , it actually sets that electrical box to be live and even the screws to the face plate .
So when I first went into that basement , went to flip on the switch , touched the screw , I got a little bit of a kick from that hot side .
That was electrifying anything touching that metal electrical box .
So , beware .
And that is exactly why when we're passing wires into a metal electrical box , we have the clamps in place to protect from something like that .
So it's not complex and there's really no reason why you shouldn't be installing clamps or some type of bushing in here to protect your role .
Max .
This is also why I like hybrid wire strippers because one , they can wire strip and they have the broader head .
So I don't have to get out my pair of clients to knock these out .
So you simply just go on the side that is away from the small piece of metal , still holding that in , just hit that once we'll do two of them , all you gotta do is bend those in .
Then you take that same pair of hybrids and just go ahead and break those off with just a few turns .
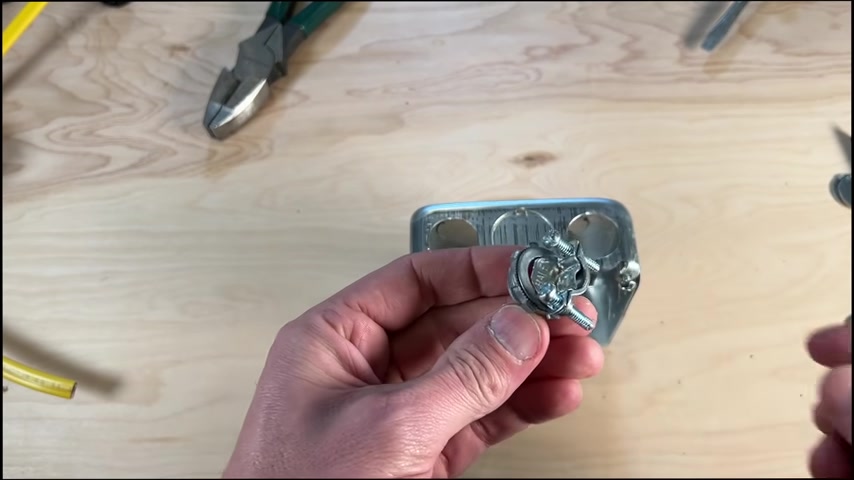
I do prefer these kind of classic clamps .
This is a three eights .
It's gonna fit your 14 gauge ro max your 12 gauge ro Max and fit about 95% of the applications as D I wires do .
Now with this nut , you can take , this is an old beat up , slotted flathead , you can take that and tighten the nut .
You'll see guys taking their lines , mens and tapping that in to tighten it .
If I have access to both sides like this .
What I actually do is I'll , I'll hand tighten to where I'm about 45 degrees off of where I want it .
And then usually that nut will cinch on and then I can just take my slotted and rotate that into place .
So now I have it where I want it .
I have access to the two screws .
I need to tighten to cinch down that clamp and that's all you need to do .
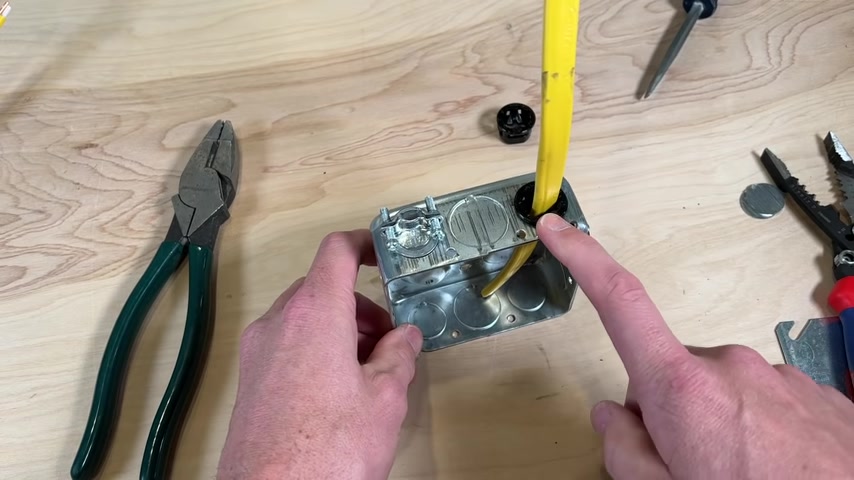
And then alternatively , you might have seen these small plastic , they're called connectors , but it's kind of a bushing and it does have strain relief as well on the inside .
So you actually just press that into place and it locks it in place and then this is a 12 3 row max , you slide that in and then you have strain relief pulling out .
Now , technically , you can just keep pushing in because of the way the tabs work .
So this is not my favorite , but it definitely is easier to use .
I can see why it'd be a little bit more ideal for D I wires opposed to your more classic metal clam .
This is what I use .
This is what I carry out the time on me .
But those are your two most common examples .
And I'll put links in the description to the two different types of clamps .
I keep calling them clamps , but they're actually connectors just for your reference in your own projects .
Also down in the description , I will have a link to our Amazon store and that's gonna be my recommendations for all the different tools you'll need across your diy projects or your house .
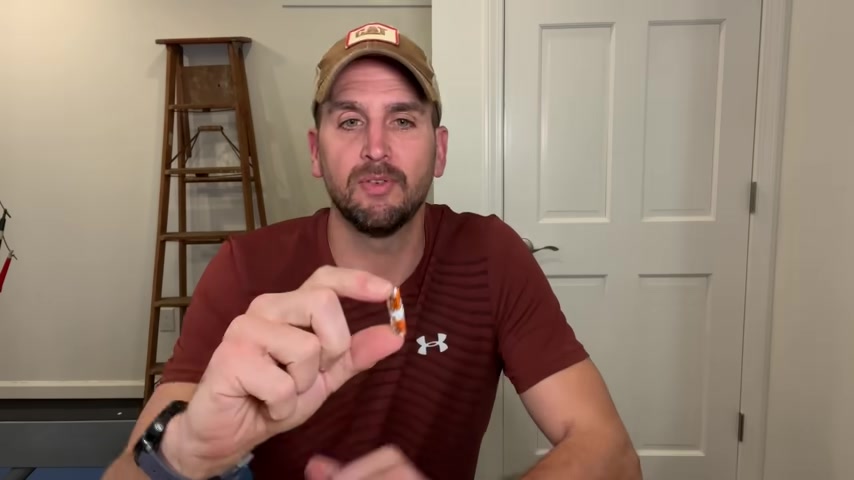
And that is adapting over time as I find new things like this little guy .
If you guys have watched any of my videos before , you know , I like the wa 221 lever nuts opposed to wire nets for D I wires .
And this is a new two two 1-24 oh one .
And it is an in line splice with little test port in the mist .
So kind of cool for a few different applications .
I'm sure it'll be a topic of discussion in the future .
But as I find new things like this , I will add that to the store as it becomes available .
So that's down there for your reference and include pretty much any tool I use across these videos .
Now , for the second most common thing that I see and this is a mistake that I have made such as if we jump back to the led recess lighting project .
And I'm finishing up this junction box .
This was where I left something out .
Now , if you have some experience , you can probably guess .
And that was I did not ground the electrical box itself .
Now , why we want to ground these things goes back to what we just talked about if you properly ground the metal electrical box and for whatever reason , the hot conductor , actual copper comes in contact with the metal , then that will short and because you have a ground that will trip your breaker .
If you do not ground , then just like the application we talked about before that housing can become energized from the hot side and then whoever touches that will create a ground path and they can get a small injury or possibly even death .
So we need to avoid that at all cost .
Let me show you how easy that is to install .
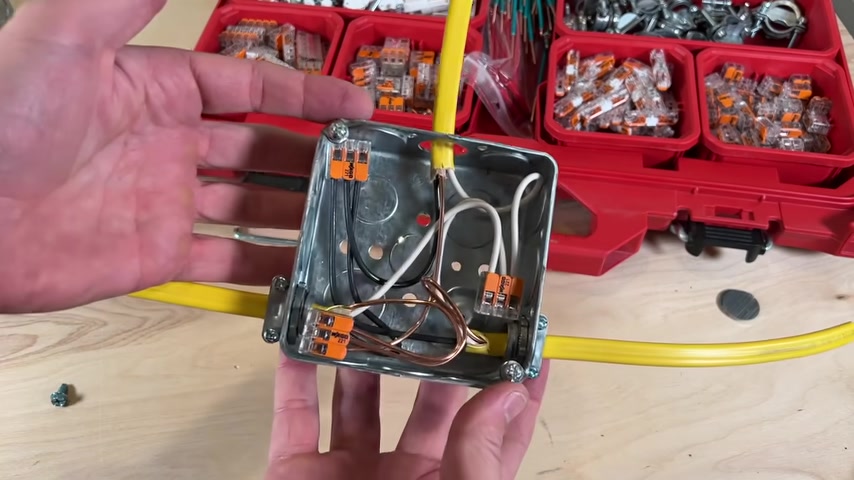
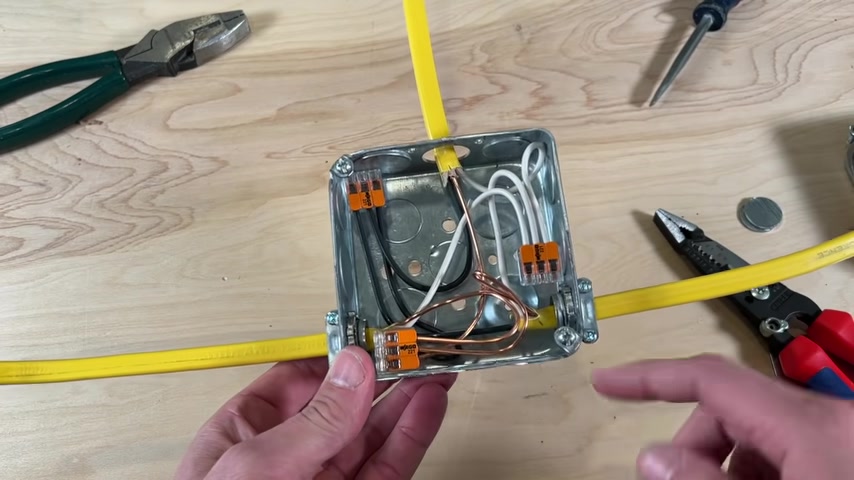
So taking a look at our example again , from this mock up , you can see I have my three bare copper ground wires coming into my wa 221 from each of the strands of Roma , but I did not ground that to the box .
Now , there is a specific BMP back here that has a threaded hole in it that matches up to these 6 32 grounding screws .
Now , you can either get these grounding screws and make up your own pig tail to tie into it or you can get these premade pigtails that have your 6 32 screw .
They have a shepherd's hook already in the clockwise direction and are ready to tie in to your other grounds .
So all you have to do is place that screw and threaded hole , tighten that down .
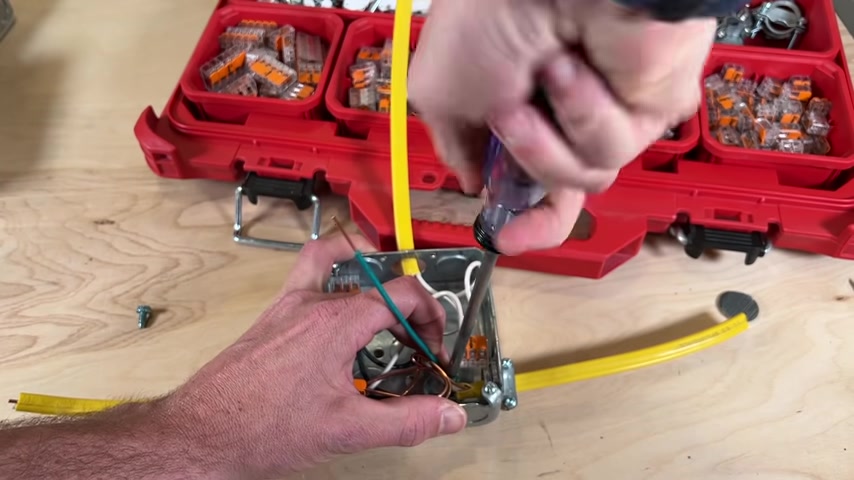
One thing I wish is the screws would fit a Robertson or E C X but they actually don't , they only fit a Phillips or a flathead screwdriver .
Ok .
So that's tightened up and now I'm gonna take the wa the beautiful part about the wa I'm just gonna take this three pen off and that is going to be reusable .
So I'll throw that back in my box and then I'm gonna swap it out to a five pen .
So that's all there is to it .
We now have that screw .
You can see coming through the back side which is flush to the enclosure and we are now bonded .
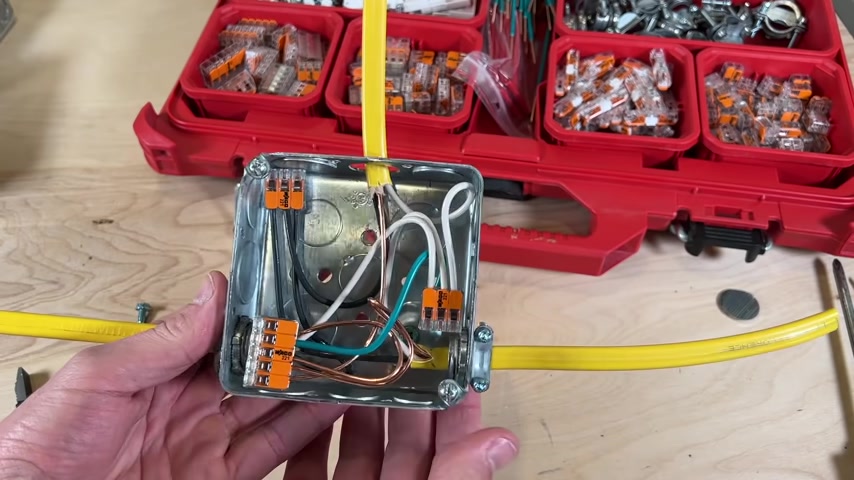
So now our electrical box is bounded to our grounds and we are good to go .
So hopefully that information will get you a little bit more comfortable with metal electrical boxes and also help you avoid those common mistakes that D I wires make .
Now , if you want to dive deeper into that project , we featured with the Led recess lights , which I think bang for the buck .
If you have a 19 fifties , sixties , seventies eighties home , those led wafer recess lights are one of the best upgrades you can do .
You can check out this video right here and it will walk you through the complete step by step process .
So thanks for joining me on this video and we'll catch you on the next one .
Take care .
Partnership
Are you looking for a way to reach a wider audience and get more views on your videos?
Our innovative video to text transcribing service can help you do just that.
We provide accurate transcriptions of your videos along with visual content that will help you attract new viewers and keep them engaged. Plus, our data analytics and ad campaign tools can help you monetize your content and maximize your revenue.
Let's partner up and take your video content to the next level!
Contact us today to learn more.