https://www.youtube.com/watch?v=oHdW4Fafn8M
2023-06-14 18:40:06
How To Use A Multimeter for Home Repairs and Troubleshooting
So today , I want to run you through a quick demo on how to use a multi meter .
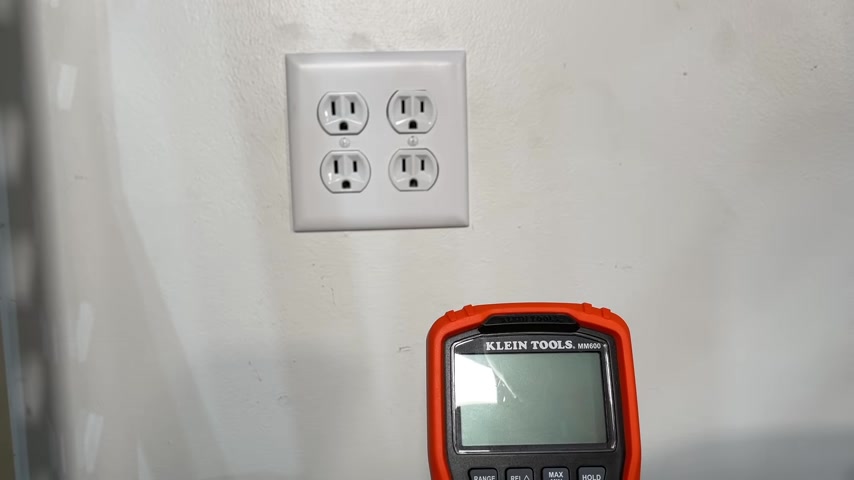
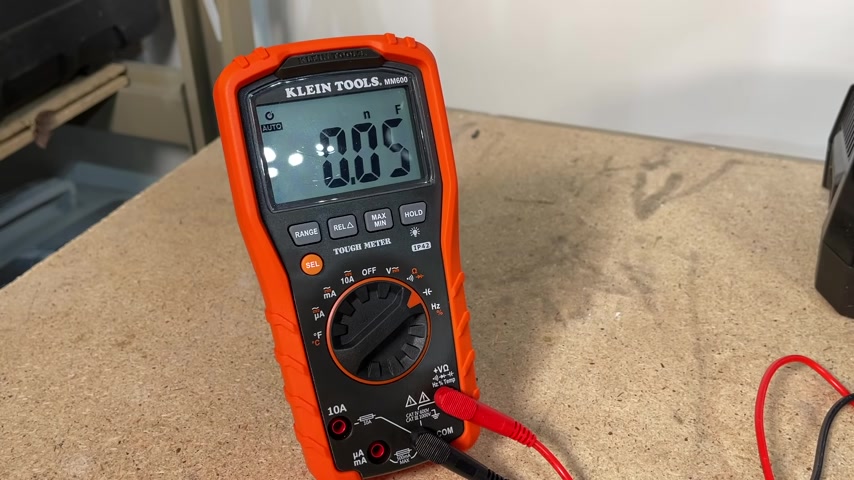
Now , the multi meter that we're going to focus on today is made by Klein Tools and it's an M M 600 .
It's kind of their mid tier multi meter .
I just upgraded to this one from an M M 400 .
What we'll focus on is measuring voltage resistance temperature and capacitance .
I want to you comfortable with the most common features that you're going to use on electrical and HVAC and possibly even automotive if you're troubleshooting some issues with your car or truck .
So let's jump in , we'll start off with voltage and we'll also talk about that big safety concern .
I want to make sure you're aware of .
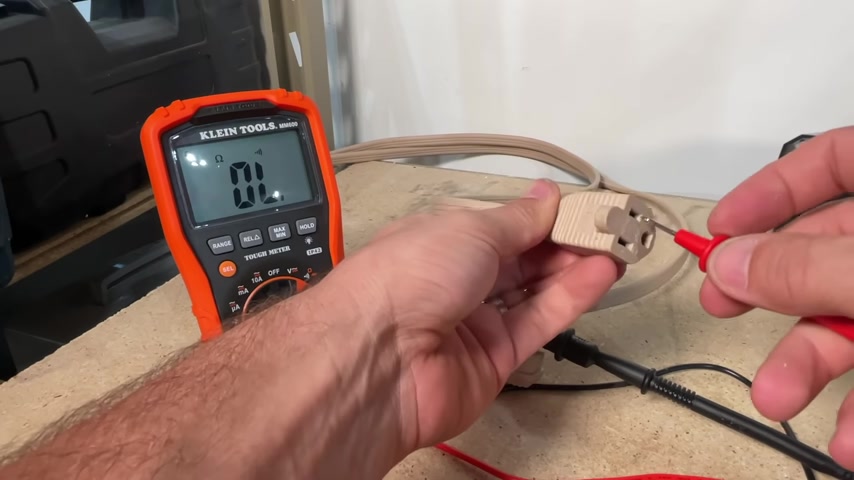
So starting off , if you just got your multi meter , there's a good chance that your probes come with these category 34 covers on them .
So I would pop those off because you're gonna need the category two probes for testing outlets .
There's a simple order of operation for connecting your probes to the outlet .
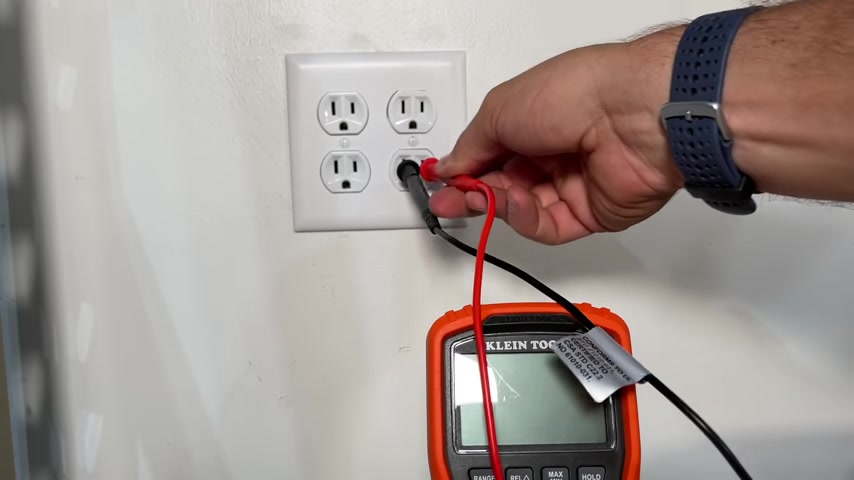
You always want to start off with your black probe going into the neutral or ground side , depending on what you're measuring here , I'll put it in the ground side , then you would introduce your red probe into the hot side .
You do not want to start off with the red probe or take out the black probe with the red still attached to the hot side .
If you do that , that can cause a safety issue .
And let me demonstrate that for you .
So now even with the probe just sitting out here , because I have my hot side connected up my noncontact voltage tester indicates that this pro right here is live .
So that is equivalent of sticking a knife in the hot side , sticking a wire in the hot side .
And now this is live and obviously can arc against anything that would ground .
It always start off with the neutral or ground side and then connect the hot .
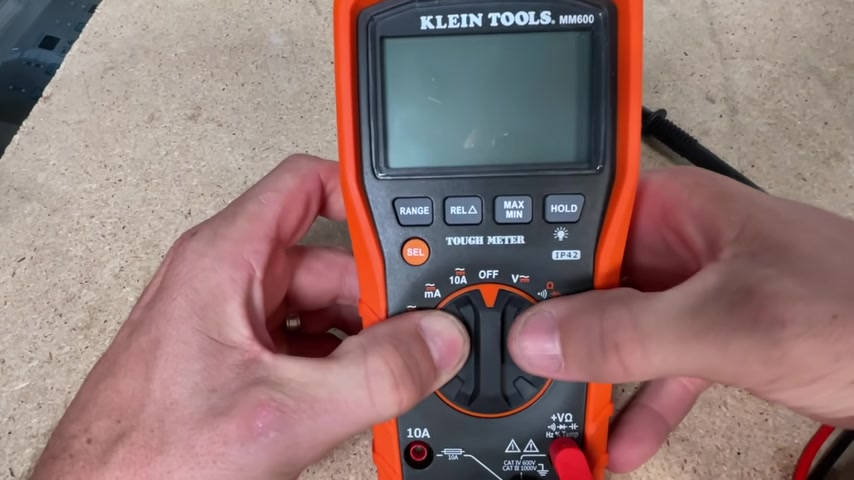
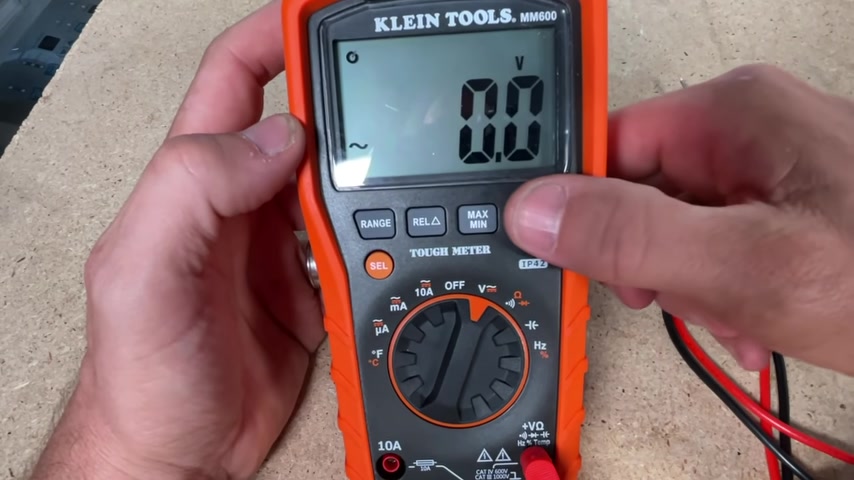
So for voltage , let's go over the basics , you turn the selection dial to V with the sine wave and also the straight and dash line .
Now the white sine wave you'll see here .
That means you're gonna measure AC voltage .
If you wanted to switch to DC , you just press selection and now we're over in DC , you can see auto is indicated here .
That means it is auto ranging , that is a new er feature for multi meters .
If you're used to having an old one , like here's an old cheap one , you had to turn the dial to where you wanted to test , this would be measuring AC voltage up to 1000 max 2 50 max 50 so on .
And then you'd have all these selections for your DC side as well .
So older meters like this super cheap one here had a ton more selections .
So back to the M M 600 if you wanted it to auto range , that's fine .
You can also , if I go back to AC voltage , you can set your own range .
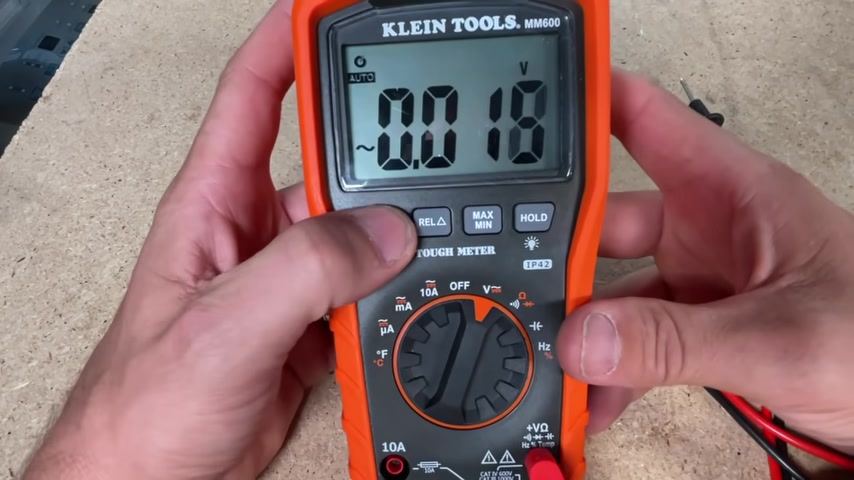
So now we're off auto , this is going to max out at a ac voltage of 9.999 .
This would be 99.99 and then this would be 999.9 .
Now , this is what I would use to measure uh an outlet on a 1 20 circuit .
This would be the correct range if I was setting it .
Now , if you need back lighting , you just hold this down , hold it down to turn it off .
And this also momentary press of the hold will hold a measurement .
So if you see a measurement , you want to hold it , you just press that and then that will hold that measurement and you can turn it off maximum and minimum , this will set where it will be measuring the maximum voltage during the test period and vice versa , minimum voltage during the test period or you just hold it down and that's gonna go back to auto .
Now , that switched it back to auto range as well .
So if you wanted to go back to your range , that you want it set , you would just set that to measure 999.9 , which is the correct range .
Now , if you try to measure 1 20 volts and you have it in this range , let me show you what you'll see .
So if you've manually selected your range , but it is not correct , you're gonna see an O L or outside the limits .
It's basically an air coming up .
Now , remember always take the hot side off first and now we're back .
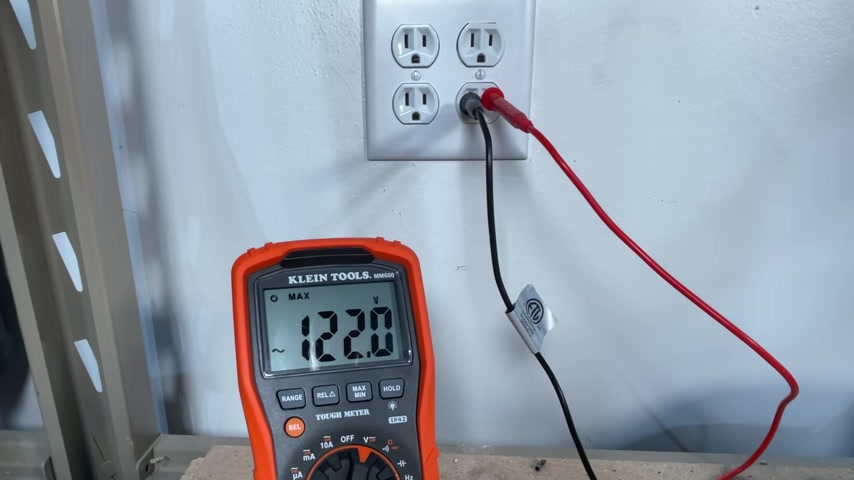
So if we wanted to set a range , even this range , right ?
Because this would be 99.9 would still give us AOL .
So now we'll read out our 1 21 .
So 100 and 20 again , if you wanted to just read out the max as you get slight fluctuations in the AC voltage , it is gonna only record the maximum voltage .
So you can see we just got a little blip come through .
This can be handy , not super handy for a normal D I wire , but depending on the application .
Now , if you're troubleshooting and you want to also measure between the ground , that's where black probe would just go to the ground and then red would go to the hot side and then you'll measure the difference across the ground too hot for me .
A common application for DC voltage , which you just set your selection down the V and then press select .
So you see the solid dash line .
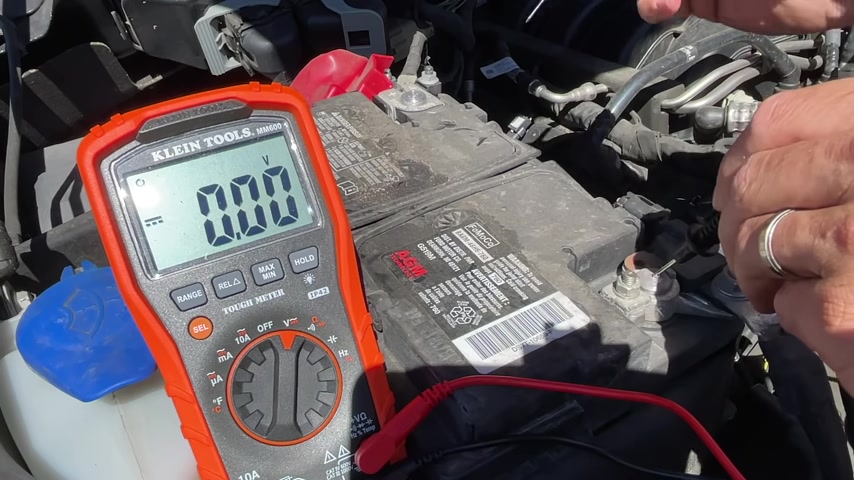
Now you're in DC voltage , same way you can change your range here .
This is a 12 volt system .
So I'll set it to a maximum 99.98 volts .
Then I'd put the black probe on the negative and the red probe on the positive and I'm reading 12.92 , which would indicate a strong battery .
But if I want to check my alternator , I'll start the engine and then do the same check and expect to get higher than that voltage indicating that the alternator is actually charging the battery and we do it with 14.12 volts .
Now , that's it for voltage .
So let's move on to resistance .
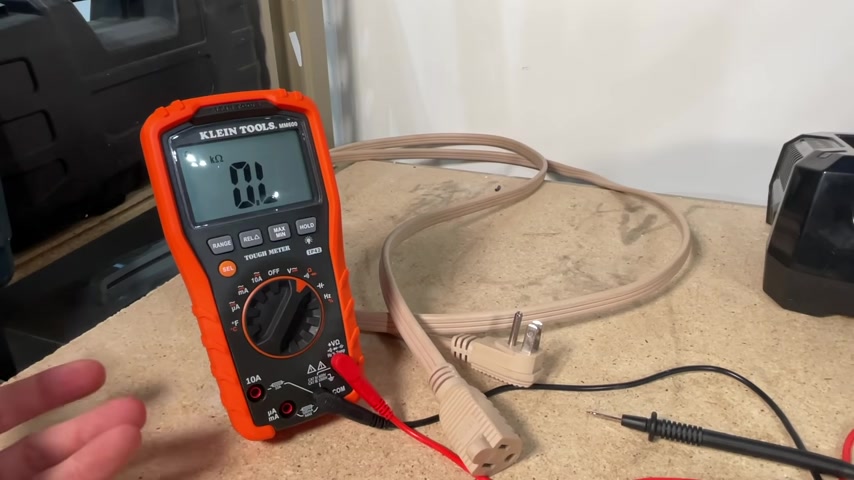
Now , the most common thing that I do in resistance is actually a continuity check and the setting is really the default setting .
It's the white setting here .
So the white settings across the dial or the primary and then the orange or the secondary , that's where you press that selection .
So if you wanted to measure just the actual resistance , you would press it once .
If you want to measure and test a diode , you'd press that twice .
But I'm looking for the audible alarm to help with the continuity check .
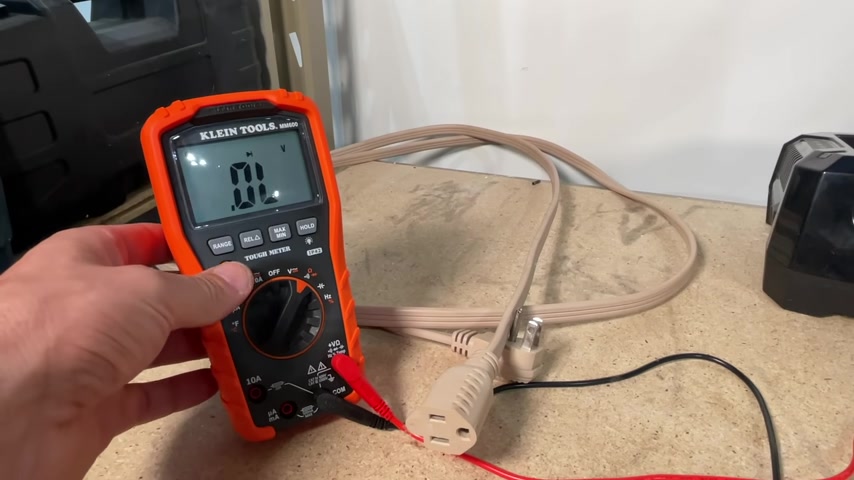
Now , the most common application that I use that for is maybe tracking down Rox wires or troubleshooting something like an extension cord .
So I put the alligator clip on one side , these do actually come in handy and then I will test my continuity to the other end of the extension cord .
All right , we have continuity .
Now , a common issue is you have an intermittent failure , maybe you have an internal wire that's starting to fray and at certain angles , it's not working other angles .
It is .
So what I use then is called a wiggle test .
So I'll demonstrate it and then I'll describe what I'm doing at the end .
So in this case , this extension cord passed the wiggle test .
So what was I doing ?
The audible alarm indicates we have continuity all the way through the extension cord .
Then one of the weakest points of an extension cord is where it goes through bending depending on its use case .
So that's why there's this reinforcement here is because that's one of the weakest points .
If there was an intermittent failure , if you started to have a weak connection , then when you do the wiggle test , you would start to hear intermittent on off of that audible alarm and that would indicate OK , we , we do start to have a failure here .
Sometimes it's working , sometimes it isn't and we need to replace this .
So continuity checks and using that wiggle test are the most common use cases that I use .
Now for automotive , you might need to use the resistance check works the same it , auto ranges from mega os to kilo os to s you can range it yourself if you want to .
And this is most common .
Maybe you're uh troubleshooting what's called a shunt resistor .
That's part of a system that has an issue and you're just making sure that it has the desired resistance and that , that is not the issue .
All right , let's move on to a cool little one that depending on the meter , you have the brand and model uh for temperature , which is pretty handy .
So temperature is super simple .
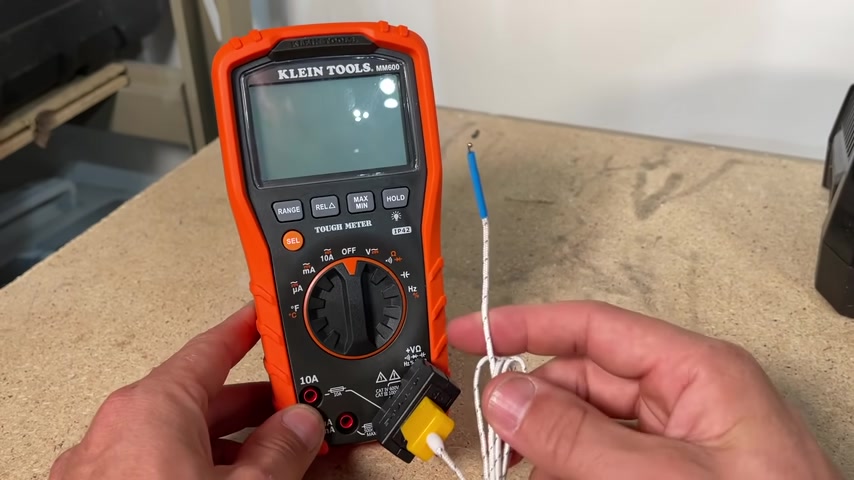
And so all we're gonna do is there's a little adapter that came with the kit and this is an adapter for K type thermocouple that'll plug in and then we'll match up our positive side here to the positive side on the top of the black housing .
And then what that actually gives us is a small what is called a thermocouple which measures temperature .
So we just turn it to temperature .
Then that's going to give this the reading of the room .
The most common thing I use this for is H VAC .
So maybe I just want to see how cold the air is coming out of the air vent .
Maybe there's an issue with the air conditioning or I'm trying to balance the system between the first floor and second floor .
So I'll take my measurement on the first floor .
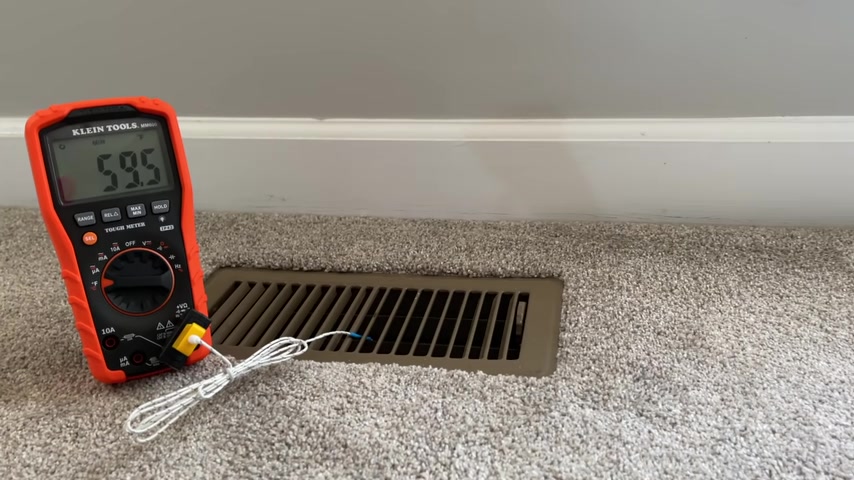
Maybe I'll do a max and I'll let it take a measurement for about 15 minutes , letting it get to steady state , take that measurement on my first floor , then I'll go up to my second floor , do the same thing for 15 minutes .
And then that will give me my different temperatures to help me when I'm trying to balance the system .
So that's really it on temperature , very handy feature and very easy to use on to the last one .
And that is gonna be capacitance similar to temperature capac is a pretty short one .
And that's because I really only use this to measure uh capacitors usually within my H V system .
Uh I had a failure not too long ago on the blower motor where my five micro I capacitor was not reading out within the tolerance range .
So I was able to identify that with my multi meter .
And then I knew exactly that I need to replace that component and that honestly saved me hundreds of dollars compared to bringing a technician out .
I was able to order it online , get it in less than two days and then install that and solve my problem .
So capacitors can come in handy for some of those critical capacitors usually found in your H VAC system , but also found across a few other systems that you might run into .
Hopefully , that helps you guys out .
We've reviewed voltage , both AC and DC resistance temperature and capacitance , which can come in super handy around the house or on your automotive projects now around the house .
Before getting a multi meter , I am assuming you have a non attack voltage tester like this one which is the N CV T three P which I really prefer from client tools or an outlet tester .
Like this one with a G F C I test button .
I would definitely say these two are on your list prior to a multi meter .
But if you already have these and you want to step it up with a little bit more troubleshooting capability , the M M 600 for client tools , I think works well .
But let me know what you guys use .
What multi meter do you have ?
And why is there a reason you bought that pretty simple ?
I actually stepped up to the M M 600 because it has the carrying pouch .
So those alligator clips , the K type thermal coups , all that I just end up losing if I don't have it in the pouch and I can kind of store it all together .
Now before you guys take off , don't forget to subscribe to the channel .
If you haven't already , we have multiple videos coming out per week to help you around the house with your repair and improvement projects and we'll catch you on the next video .
Take care .
Partnership
Are you looking for a way to reach a wider audience and get more views on your videos?
Our innovative video to text transcribing service can help you do just that.
We provide accurate transcriptions of your videos along with visual content that will help you attract new viewers and keep them engaged. Plus, our data analytics and ad campaign tools can help you monetize your content and maximize your revenue.
Let's partner up and take your video content to the next level!
Contact us today to learn more.