
https://www.youtube.com/watch?v=wjPM41jSXD8
2024-03-23 23:58:33
Deploy Large Language Model (LLM) Locally. Zephyr-7b-beta test
Hello , everyone .
So today , I would like to share with you a simple tutorial on how to run large language model on your computer .
Uh Before we start , uh please take a note that this tutorial is for Windows users who have a decent NV , DH GP for Linux .
Uh This would be a slightly different process .
And for a MD users , this would not work if you meet the these requirements , then uh let's dive into it .
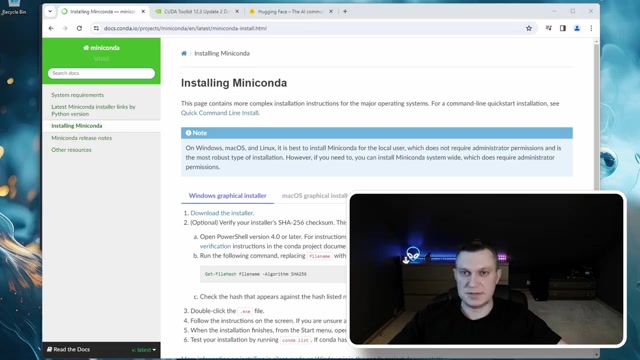
So step number one will be to install mini cond , download the installer and uh install this mini conda would allow us to create a virtual Python environments which are very advisable in this case .
Because if LL MS at least from my experience is that you need to try many different things and creating and using those virtual Python environments would save us enough time because we can easily create those environments and drop when they are not needed and start all over again .
Technically , it would be possible to do without those virtual environments and just do direct installations on your computer .
But uh this would uh be very complicated if you would uh need to uninstall all libraries and stop uh over again .
So I already installed mini bundle .
So I will not do the step here .
Now , the second step will be uh to add mini Konda directories to your path variables .
Again , this is not necessarily uh you can uh run all this in a mini Konda powershell .
But at least in my experience , it's easier to run everything in the windows command prompt to do that .
Uh click on uh on start start typing uh system variables , click on , edit the system environment variables , double click on path and uh add directories where mini conda is installed .
So in my case , it's uh let's say users uh and on mini conda free and also add the scripts , subdirectories , click OK .
OK .
OK .
And that should work now to test if that worked .
Um You open the command prompt and uh enter command conduct minus we and it should give you the version of installed conda .
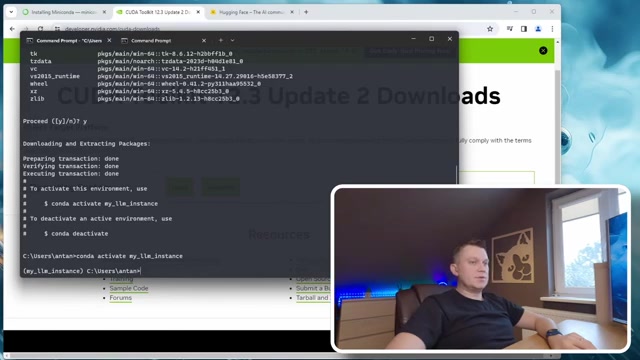
Now let's create a new Konda environment .
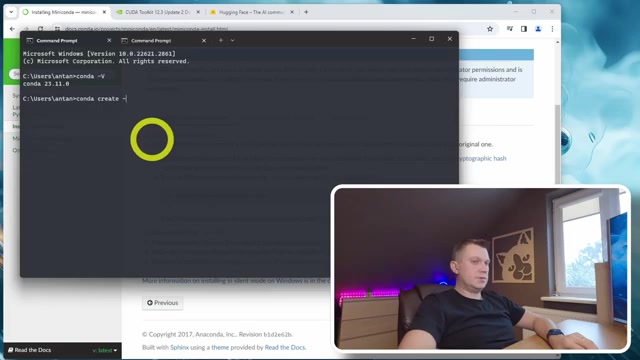
So the command will be calm down , create minus N you environment name .
In my case , it would be my LLM instance and then we need to define the Python version for you .
So this would be Python 3.11 enter , wait a second .
It will give you some prompts and uh to ask to do some things proof and new uh quantum environment is created .
Now let's activate our environment , just copy the goat , pasted and click enter .
So you will see here at the beginning , your environment name .
This would mean that we are now in this isolated condo environment .
Before me , we move forward , you need to make sure uh that you have uh NVIDIA Ka installed .
So uh just you can Google uh NVIDIA KA click on download and you should be able to download uh the latest B version .
However , in my case , uh the newest version did not work with the pytorch .
So I needed to use 12.1 and to find the older version of this , you can click on archive and then find 12.1 .
And then you can uh download uh coder versions for windows and install it .
I already did it .
So I will not repeat .
OK ?
So when the coder is installed , then uh you would need to , to create a new folder where you will be holding uh all the files which will be needed for um for the model .
So in my case , it's just see local LLM enter that path uh into the command prompt .
So the next step will be clone , text generation .
Uh that Y that will be the command .
I will also leave um the link where you can get all the commands .
And so we when you are in uh your directory , just copy paste um get command .
OK ?
So when we have cloned uh git repository , then we need to enter the directory and it will be next generation that my folder now let's start installing , required the library .
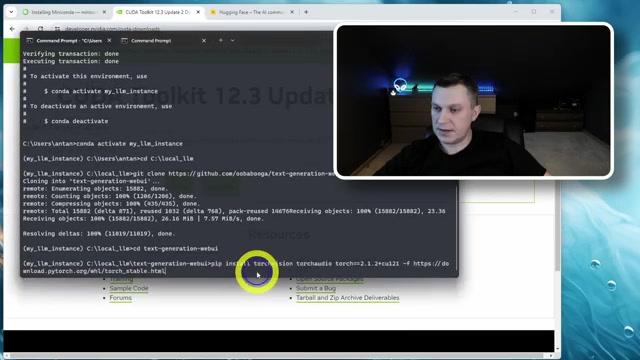
So first we need to install torch in , in my case , uh it will be the pip install torch , vision torch , Audia .
And then I needed to specify the specific torch version and the Q A uh NVIDIA Q A version which we are using .
Unfortunately , at the moment of recording the latest torch version does not support Q A 12.3 .
So that's why I'm using uh 12.1 .
And I'm specifying the version here .
Click enter some that sweet .
OK .
So torch is now installed .
And the second step will be to install the needed library is to run text generation B I just run the command pip install uh minus R requirements .
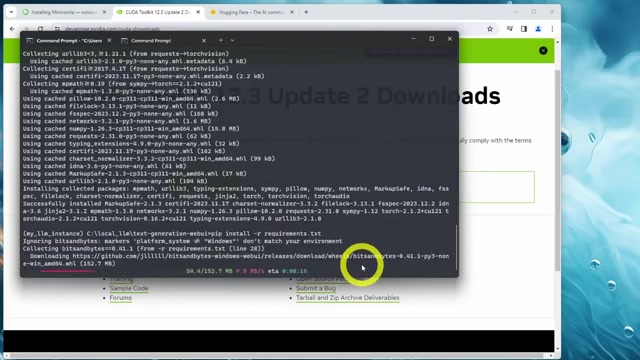
DXD click enter if you don't see any errors that then we can launch this generation .
But if you want to command a simple Python uh server dot by and then you will get link uh to launch uh we y just copy it into the web browser and you are in next generation .
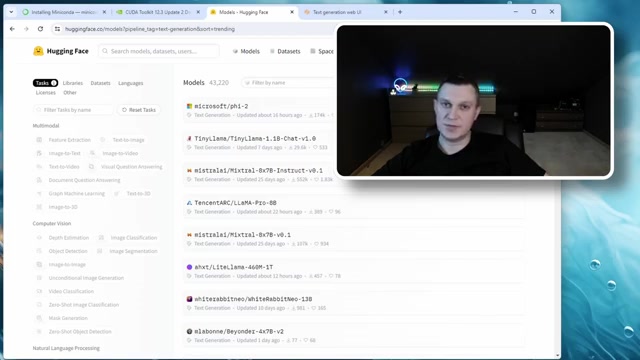
We by now , uh the most important step is to choose the model .
Uh So to find the right model , uh head to uh hacking face , click on models , uh text generation .
And uh here is the list of all the available Irish language models to , to test .
But as you see , uh the list is very , very long , I think the good starting point is to sort by either trending or most downloaded models .
What's important to know about the models is I think the , the first is um the model size .
Well , the model size is usually represented with B .
So it's like 1.1 B um which would this would mean the model has been straight on uh 1.1 billion uh parameters .
Uh Why , for example , eight B means that it um was trained on 8 billion parameters .
Uh And why it is important .
Uh It's important because uh it's , it represents the model uh size and uh your capabilities of running the model .
So for example , if you have uh just uh eight gigabytes or video memory on your GP U , then uh the maximum you can run is uh around like seven B .
Uh If you have uh the bigger GP , like , for example , I have uh 30 90 24 gigabytes of RA M I can run a 13 B and , and even 30 B uh models if you don't know where to start , uh I suggest you could start with uh Z seven B beta uh model .
And as well , the second uh model you can try out which I also tested myself is uh open Hermes 2.5 based on the L seven B model .
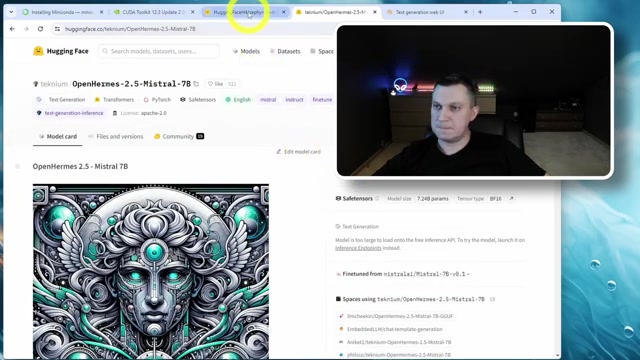
So these worked uh quite well um in , in my case .
So when you've chosen your uh model , then what you want to do is to copy the model name to the clipboard , you can do it by clicking uh this little icon , then jump back to next generation web O go to the model tab and then into the download model uh section , just paste that name and click .
Download all seven B models are approximately 13 gigabytes in size .
So uh depending on your network connection , this might take a while you can monitor um download status in uh the command prompt .
This will show you the download status and uh in case it will have any errors that this will show the errors to you .
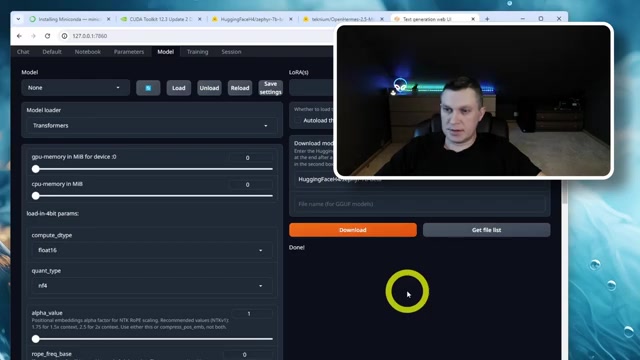
Ok .
Finally , so it seems that model was booed and it says done .
And now we can move to loading the model and testing it .
So to load the model first , uh click this refresh button and then in the model drop down , choose the downloaded models , then you can click the button load and when the model so that it should say successfully loaded .
If you see any errors here , you can either debug them or the easiest way , just try another model .
Uh because most likely the one is not compatible with your uh hardware or software when the model is loaded .
So we can go and test it .
So click uh on chat .
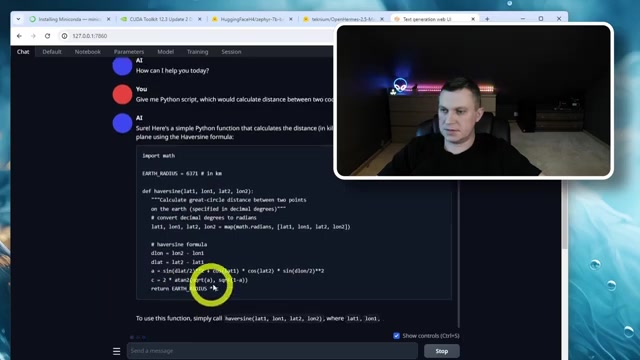
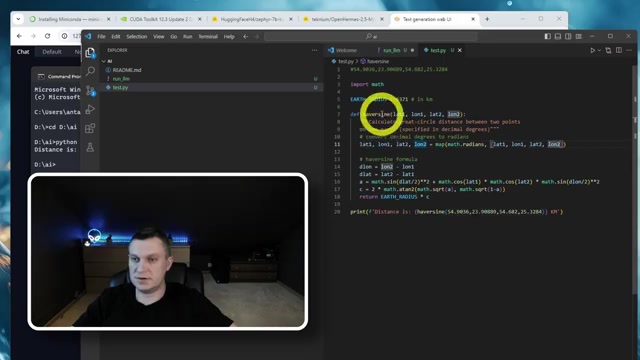
So I will ask you to give me that script two which would calculate distance between two coordinates .
Ok .
So far looks quite good .
I already see some problems .
Ok .
Let's test it .
We have prepared some coordinates for dust .
I wanted to see some simple instincts .
That's good .
The coordinates .
I know that the actual distance is approximately 95 kilometers .
And let's check if that will get us right .
And let's this just uh that uh oh yes , it's 94.27 kilometers .
So that's about right .
So , quite impressive stuff .
So the this this locally deployed model did quite a complicated uh task .
So we knew that we need to use harvest time format to calculate and actually did it correctly .
So this is like a GP T four level uh problem .
So that's it , that concludes our tutorial .
Let me know if you have any questions in the comments and stay tuned .
Uh I will be trying new models soon .
Original video
Partnership
Are you looking for a way to reach a wider audience and get more views on your videos?
Our innovative video to text transcribing service can help you do just that.
We provide accurate transcriptions of your videos along with visual content that will help you attract new viewers and keep them engaged. Plus, our data analytics and ad campaign tools can help you monetize your content and maximize your revenue.
Let's partner up and take your video content to the next level!
Contact us today to learn more.