
https://www.youtube.com/watch?v=KVYcZNvq8os&ab_channel=MactelecomNetworks
Unifi and pfsense configuration, New user interface
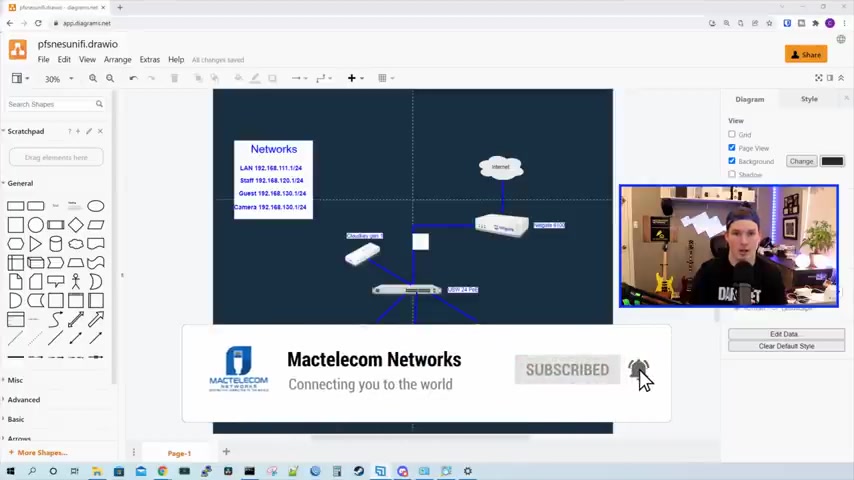
Everyone Cody from Mac Telecom networks .
In 2020 I made a video showing PF sense and unified networks together .
We did all the configuration , creating the V lands , also creating some wireless networks and some firewall rules .
Well , I think it's time for an update of video as the unified controller has been updated quite a bit .
If you're new here , please hit the subscribe button .
Make sure to hit the bell icon .
You'd like to hire me for network consulting .
Visit www dot mac Telecom networks.com .
You'd find it on Instagram at Mac Telecom networks and we have a Discord server which I'll put a link in the description below .
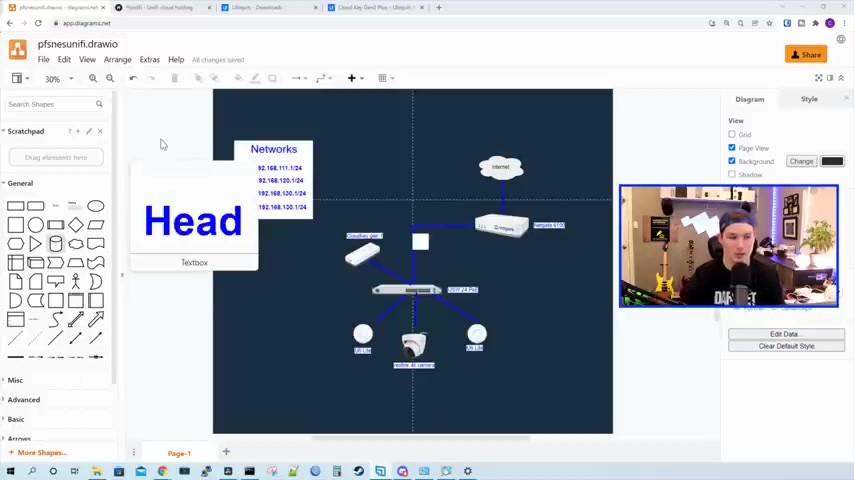
First , let's take a look at the topology of what we'll be using in this video .
At the top .
We have my internet connection which is plugging into the Wan port of my Netgate 6100 from the Netgate 6100 .
We're going to my US W 24 port pro switch .
And then from there we have two unify U six light access points and a real link , four K camera .
Also connected to my US W PRO 24 Poe switch is a unified cloud Keygen one and this will be hosting my unified network controller .
You don't need to have a cloud key to be able to host the controller .
And there's a couple of different ways you could do it , you download it locally onto your computer .
All you need to do is go to the ubiquitous downloads and then we could scroll down and we see our software .
So we have unified network application for Debian or UNIX .
And then we have Windows and we have Mac Os .
If you're looking for a cloud key , they have a couple different ones .
This is the cloud Keygen two plus , this would allow you to run Unify , protect , access and unify talk .
If you want to host it in the cloud , you could host it in hostile , which I use for my customers or you could build a VM yourself .
So the networks we're gonna create within the PF sense will be the LAN which is our normal network of 192168111.1 slash 24 .
That's what all of our Unify equipment is gonna get .
The next network will be staff of 1921681 20.1 in V Land 120 .
Then we'll have a guest network of 1921681 30.1 V Land 130 .
And finally , we'll have a camera network on 1921681 40 .
0.1 slash 24 in V land 140 .
Now that we know what networks we're gonna create .
The first thing we'll do is go over to our PF sense and create those V lands .
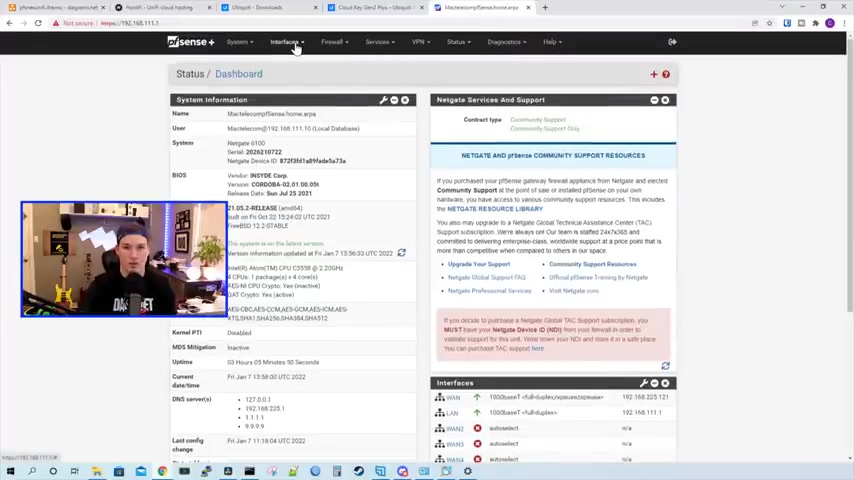
So we'll go over to the PF Sense next G 6100 .
And we could see that we have my wan interface and then we have my lan interface , which is already set up .
I already went through the wizard for this .
If you need to see the initial setup , I'll put a link down below .
So the LAN is in 192168111.1 .
The next network we're gonna create is our staff network .
So we're gonna go over to interfaces and then we'll go to assignments from assignments .
We'll go to V lands and then we're gonna add a V land .
This VL will be over my parent interface of IGC zero .
This is the one cable that's going from my Netgate 6100 to my US W pro switch VL ID .
We're gonna give it is 120 then we'll give it a description of staff and press save .
Now staff is created .
We create our guest network .

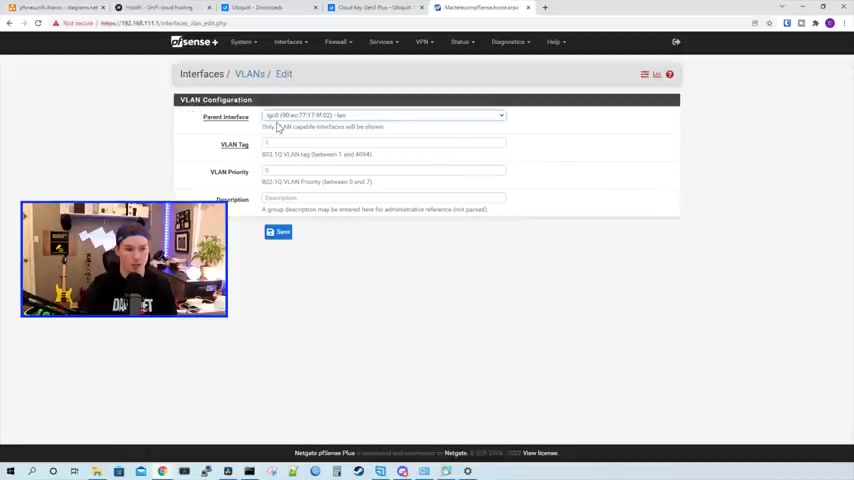
We're gonna add the new va it will still be going over that same parent interface .
So between the 6100 and the US W switch , it will be a trunk port .
This va tag will be 130 we'll call it guest and press save .
And the last Vlan we need to create is our camera network .
It's gonna be going over that same interface and it will get Vlan 140 we'll call it cameras and then press save .
Next thing we need to do , we need to assign these V lands in interface .
So we'll go over to interface assignments .
And at the bottom , we could see available network ports .
If we click on the drop down menu , we could see all of our new V lands .
So I'll start with V land 120 we'll press add , we could see it's added an interface of OP seven .
So I'll click on the OP seven .
We're going to enable the interface in the I PV four configuration type .
We're gonna set to static under static I PV four configuration .
We're gonna give it the IP of 1921681 20.1 .
And then we will do a slash 24 .
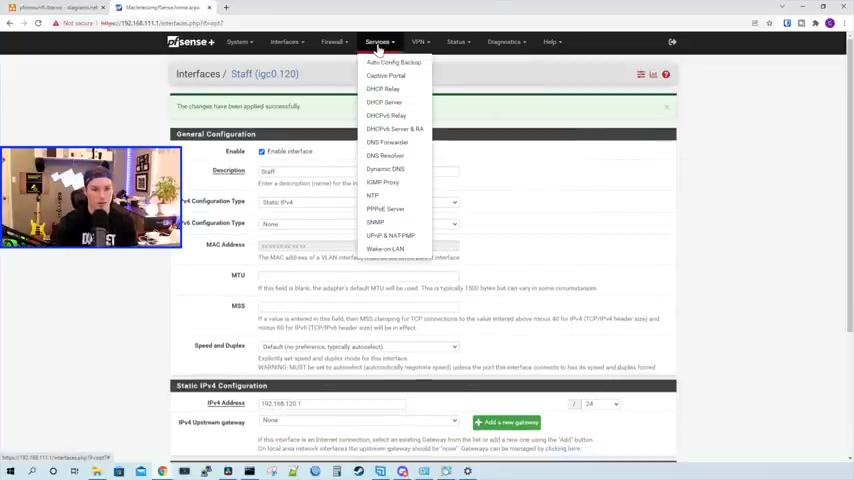
So scroll down to the bottom and press save and apply changes .
Now , we need to set up the DH CP server for this network .
So we'll go to services and then go to DH CP server under the DH CP server .
We could see our LAN and then we could see our staff .
We're gonna want to enable DH CP server on the staff interface scroll down and we could see our subnet information and we could give it a range of IP S that we want the DH CP server to hand out .
So we'll give it 192.168 0.1 20.10 to 1921681 20.200 .
You could also put in DNS information for this network if you'd like , I'm not gonna do that , but we'll scroll down and press save .
Now , we need to go back and do that for our other two V land .
So we'll go to interfaces and then assignments under assignments .
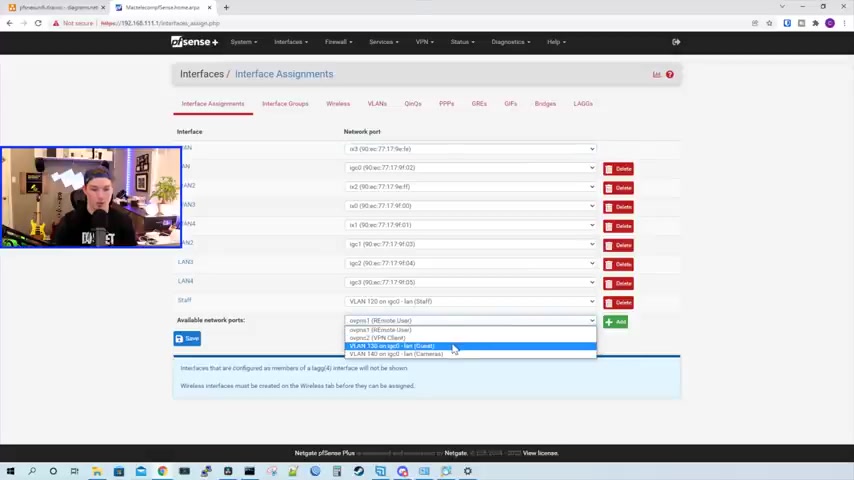
We're gonna hit the drop down and then we'll go to our guest network and press add , we click on opt eight will enable the interface and we'll call it guest under the I PV four configuration .
It will be a static IP and then we'll give it the static IP of 192.168 0.1 30.1 .
And we'll change that to slash 24 and press save and apply changes .
Now , I'm just gonna create the other interface while we're here , then we'll do the DH CP .
So I'll go back to assignments and then we're gonna add the interface of our cameras .
We click on OP nine , we'll enable the interface , call it cameras and then the I PV four configuration will be static .
The I PV four address will be 1921681 40.1 at slash 24 A save and then apply changes .
Now , we have all of our V LS created .
We need to enable the DH CP servers for our guest and our cameras .
So we'll go over to services and then we'll go to DH CP server .
We already have the LAN and the staff set .

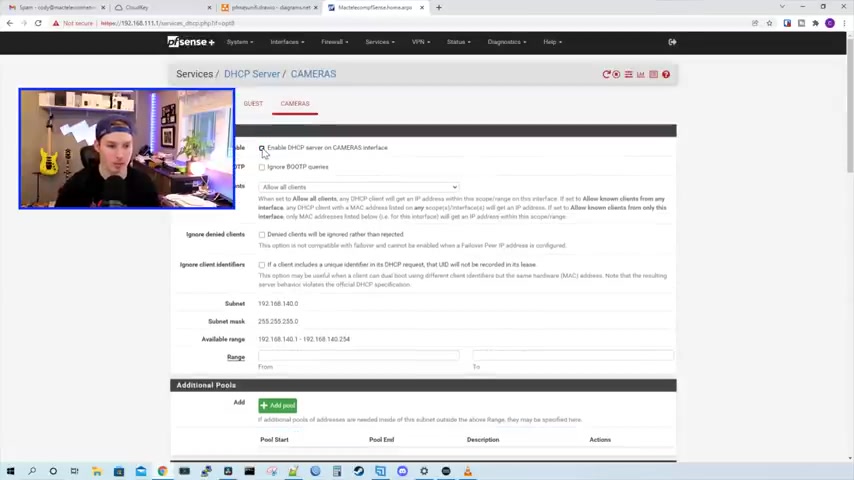
So we'll go to guest .
We'll enable the DH TP server .
We'll give it a range of 192.168 0.1 30.10 to 1921681 30.200 .
Scroll down and press save .
Now , we need to do the same thing for our camera network .
We'll enable the DH CP server .
Scroll down to the DH CP range and give it 1921681 40.10 to 1921681 40.200 .
Scroll down and press save .
Now with all our networks created within PF sense , we need to set up the V lands and our Unify network .
So I'll go over to my cloud key and then we'll get the Unify controller started .
So we're going to manage my Unify controller and this is a brand new controller .
So we'll need to do the initial setup .
I'll leave the controller name as unify network and agree to the end user license and press next .
I'll sign in with my single sign on account .
Now we're on step three .
We'll leave automatically optimized my network off and then we'll enable the auto backups and then we could see our three devices here .
We won't adopt it yet .
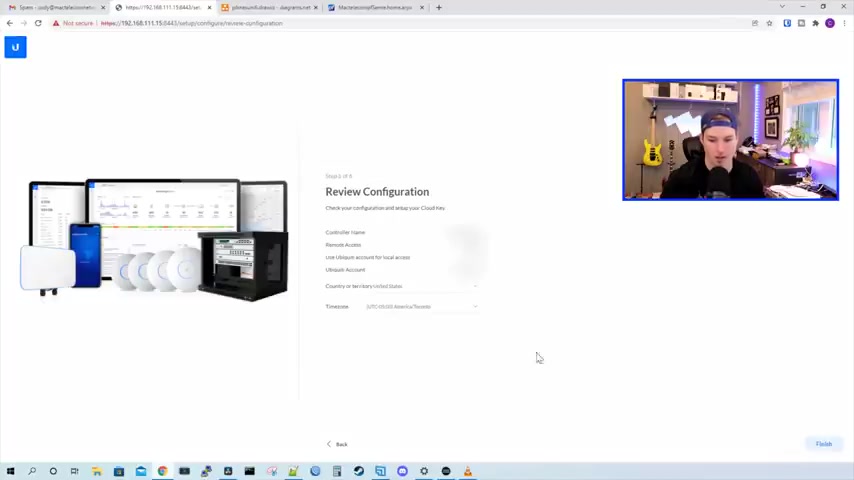
So I'll press next asking to create a Wi Fi network , but we'll do that in another screen .
So skip this and then we'll review and I'll press finish .
Now .
We're in our Unify controller .
I'm using Unify version 6.55 0.5 which is the newest firmware .
As of this video , we need to adopt our devices .
We could have done it in the initial setup , but I like doing it in this page .
So we'll go over to our devices .
We could see that the US W PRO 24 is pending adoption as well as the two U six lights .
First , I'll adopt the switch as it will do a power cycle and we don't want the U six lights , power cycling while they're in the adoption phase .
So I'll click on the US W 24 Pro and then we'll press adopt device .
Ok .
Our US W 24 Pro is now adopted into our controller .
We could adopt the two U six lights .
We'll click on the first one and then press adopt device and then click on the second one and press adopt device as well .
While the two access points are adopting , we could get creating our V land .
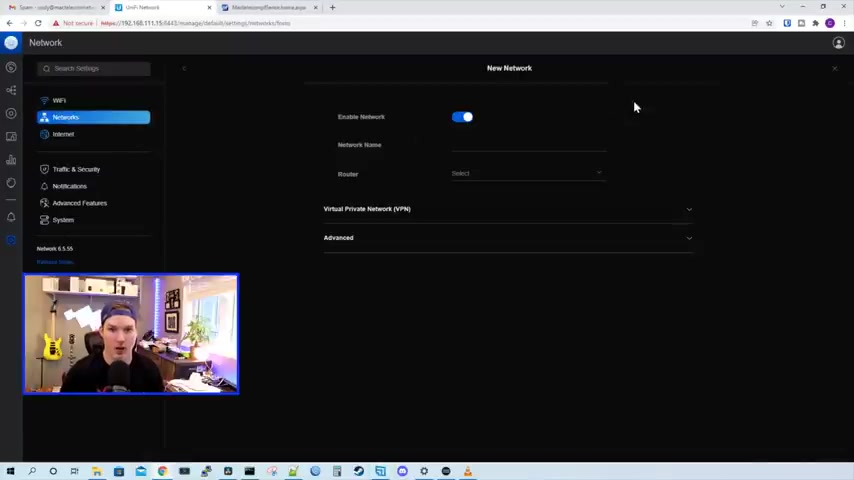
So we'll go over to settings and then we'll click on networks , we'll click , add a new network and the first network that we're gonna create is our staff network .
So we'll call it staff .
There's gonna be no router .
So we don't need to select that as we're using our PF sense for the firewall .
And we'll click on the advanced below here .
We need to put in a VA ID , which is 120 and this auto scale and DH CP server doesn't really matter because we're not using any unify router for that In the classic controller , we used to be able to specify if we want to have a corporate network or a VA only network in this new U I , you can't do that so we could leave everything as is and press add network under the subnet , we could see its ski in an IP of 1921682.0 but we can't get rid of that and it doesn't matter .
The unified network won't be handing us IP addresses .
When we tag a switch port to be in the staff network , we'll be getting an IP from 1921681 20 network and I'll show you that in a bit .

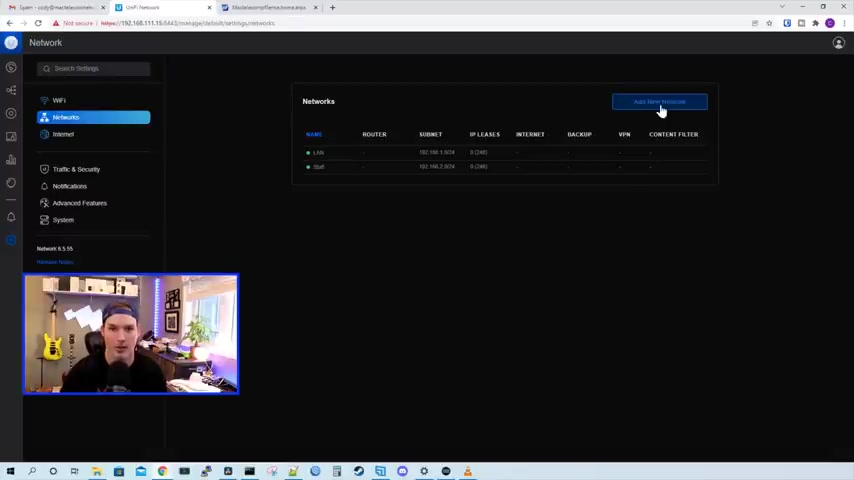
So now we'll create our other networks .
We need to create our guest network .
We'll call it guest and then we'll click on the advanced drop down and give it the VA ID of 130 press add network .
Now we'll add our camera network .
We give the name of a camera press on advanced and then give it the VA ID of 140 press add network .
Now to show you that I'm getting an IP from the correct Subnet .
I'll tag one of the switch ports .
So we'll click on our unified devices .
I'll click on my US W PRO 24 .
I'll go to settings and then we'll go to ports .
I'll scroll down in the port 22 .
I'm gonna set this to be on the staff network and press supply changes .
So I'm gonna plug this computer into port 22 .
We won't have internet access as we haven't set up any firewall rules in the PF sense , but I'll show you that we're getting the correct IP .
My computer is now plugged into port 22 and if I type in IP config , we could see that we're getting an IP of 1921681 20.10 .
So that's great .
We're getting an IP from the correct subnet .
Now , we have the V lands created .
We need to create our wireless network .
So I'll click on the settings wheel .
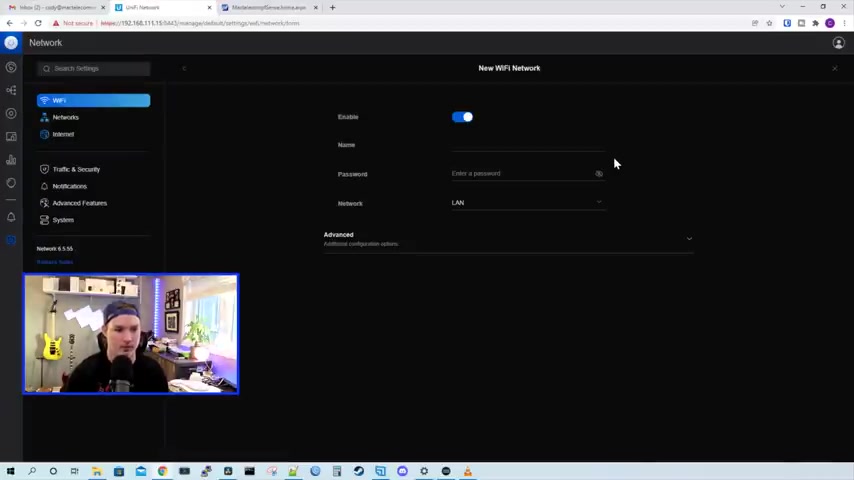
We'll go to Wi Fi and add a new Wi Fi network .
We're gonna have it enabled and we'll give it a name .
So this will be staff and then we'll give it a password .
I'll just put in test 1234 and then we need to select which Subnet we want this Wi Fi network to be on which we want it to be on staff .
So we'll click on the drop down menu and then press staff .
I'm gonna leave all the other settings at default and press add Wi Fi network .
Now , we could see the Wi Fi network of staff has been created .
We're gonna add a new Wi Fi network and I'm gonna call this guest .
We'll give it a password of test 1234 and then we'll select the guest network from the drop down menu and press add network or guest network .
I'm gonna want to limit the bandwidth which our guests could get .
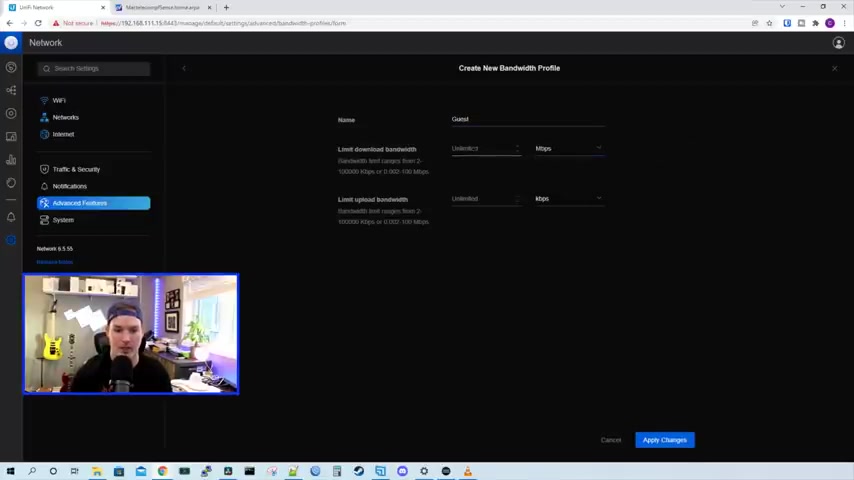
So we're gonna go to the advanced features , scroll down and then we're gonna select the bandwidth profile .
We're gonna add a bandwidth profile .
I'll give it the name of guest under the download bandwidth .
We're gonna change it to megabits per second and I'll give it 10 megabits down and then we'll give it five up .
We press supply changes .
Now , we need to go back to our Wi Fi network of guests .
So we'll click on Wi Fi click on guest .
We select the drop down menu for advanced and then if we scroll down , we could see bandwidth profile currently , it's on the default , but we could select our new guest bandwidth profile and press apply changes .
Now , the guest will be limited to 10 megabits per second down and five up and that's per client .
Now , I need to set the camera into the correct V land and how we do that .
We go over to our unified devices and then select the switch .
My camera is connected to switch port three .
So I'll click on settings .
We'll go to ports and then I'll go to the switch port three under the port profile .

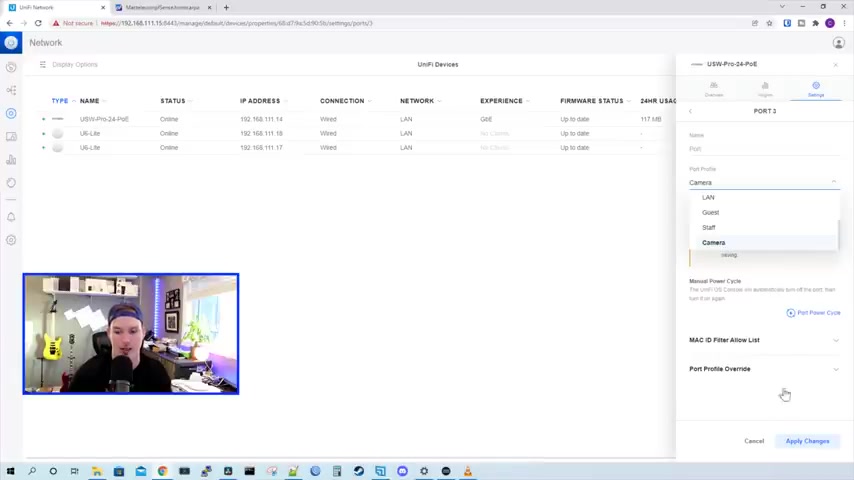
We'll hit the drop down menu , scroll down and then put it into the cameras and this is our V land .
So I'll press apply changes and to make that camera get an IP quicker out of the new Subnet , we could click on the port and then we could port power cycle and then press confirm and that's how you would set the V land for any network .
So if you had ports 10 to 20 for the staff network , you would wanna select them in the staff port profile .
Next , we need to do a few basic firewall rules to get these networks , internet access and then block them from inner V land routing .
So we'll go over to my PF Sense .
We'll click on firewall and then we'll go down to rules .
We could see that we have a bunch of different interfaces here .
We have my wan my Lan and then we have a bunch of different Wans and a bunch of different lands .
These are physical interfaces on my Netgate 6100 .
We're only using the one interface for our uplink between the unify switch and the PF sense .
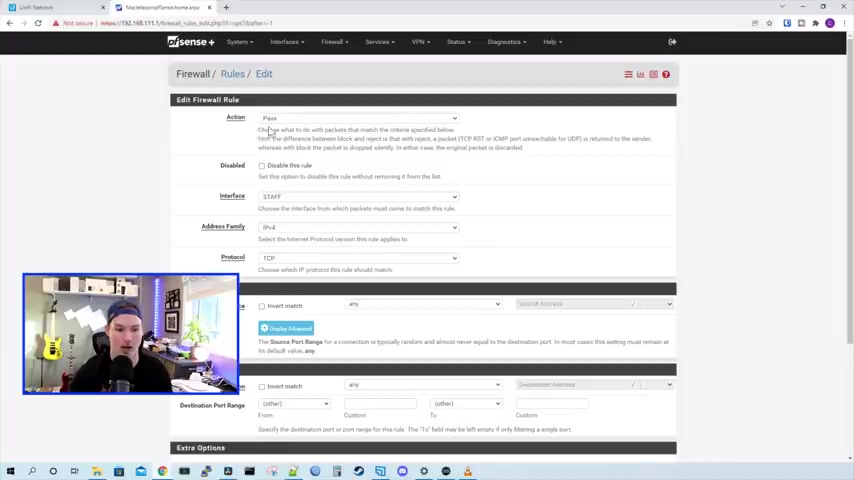
And that's our LAN and these are default rules that the PF sense create automatically .
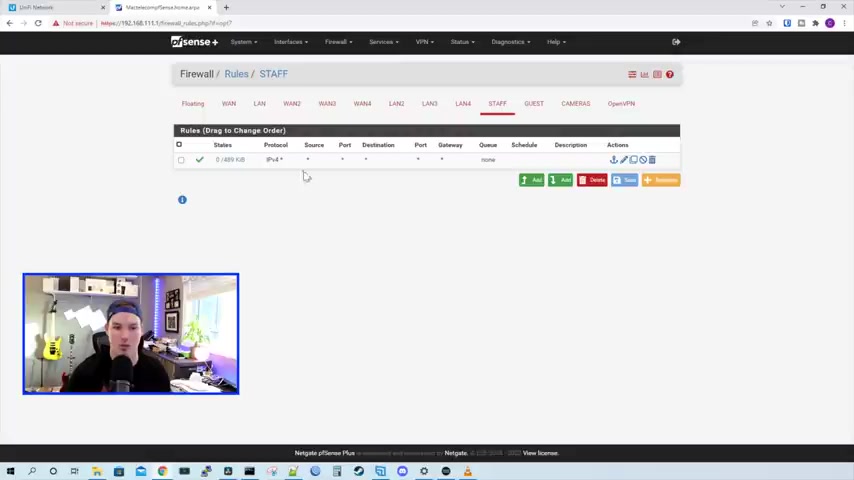
So now if we go over to our staff network , we could see that there's no rule .
So this network could really do nothing right now .
It can't reach out to the internet and it can't really talk to anything .
So I'm gonna click on the up arrow of the ad .
We're gonna select the action of pass the interface will be staff .
The address family is I PV four in the protocol .
We're gonna set that to any , the source and destination for .
Now , we have it set to any , any and we'll press save .
I'm gonna connect my computer to port 22 which is set to the staff V land and we should get internet access .
We're now plugged in and let's do a quick IP config and we could see we're getting that same address of 1 20.10 .
Now , I could try pinging the internet .
So I'll ping Google dot C A and you could see that we're getting responses back the problem with having this , any , any rule I could hit my administrative devices , so any of my unify gear .
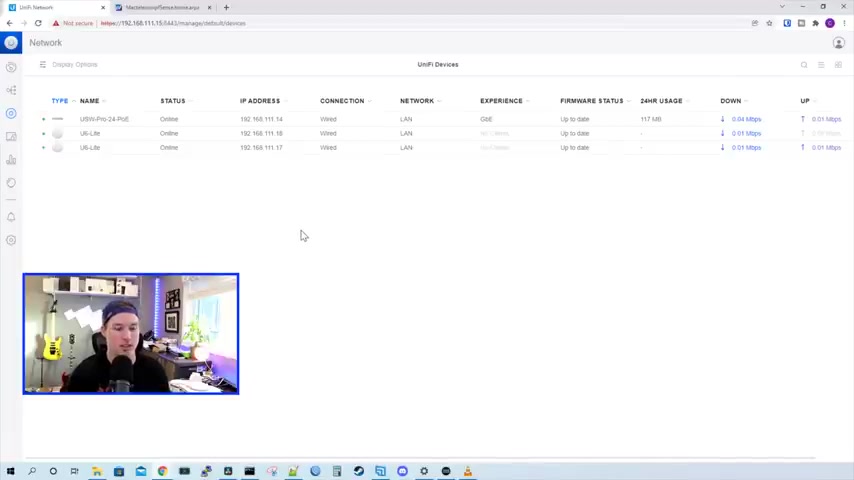
So if we look at my unified controller , we could see the US W PRO is on 192168111.14 .
So we'll ping 192.168 0.111 0.14 .
And I could easily hit any of my gear which we don't want .
So we need to put in a blocking rule to block that va routing .
So now if we go back to our PF sense , we could go to firewall and I'm gonna create an alias .
This alias is gonna be an IP I'll press add and then we'll give it a name , I'll name it RFC 1918 .
And this is all of our private I PV four addresses .
I'll give it the same description and instead of host , we're gonna go networks and we'll add the first network of 192.168 0.0 0.0 slash 16 .
We're gonna add a network of 172.16 0.0 0.0 .
And this will be slash 12 and will add one more network of 10.0 0.0 0.0 .

And that will be slash eight and then we'll press save and apply changes .
Now , we need to go back to our firewall rules .
So we click on firewall and then go rules .
We'll click on the staff network and we're gonna wanna add a new rule to block the inner va routing .
This rule has to be above the any , any .
So we'll click the ad with the up arrow and the action will be to block the protocol will be any , the source is gonna be the staff net and the destination is gonna be a single host or alias .
And then we need to put in the destination address of that RFC 1918 and press save and apply changes .
So with this rule in place , it's gonna block us from reaching the firewall in our DNS server .
So our DNS is on 192168111.1 .
So there's a few ways to do this .
I'm just gonna specify some DNS servers in the DH CP .
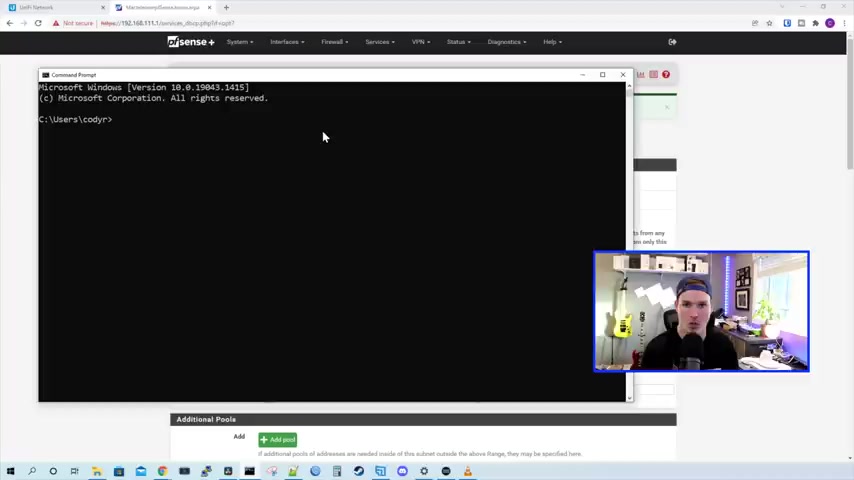
So we'll go to services and then DH CP server , I'll click on our staff network .
We'll scroll down and then under DNS server , we'll give it 1.1 0.1 0.1 and 8.8 0.8 0.8 scroll down and then press save .
Now , if I connect to the staff network , we'll be able to reach out to the internet , but we won't be able to hit any of my unified devices and we'll try that .
Now , we'll make sure we're on the staff network by going IP config , we could see we're still getting that 1 20.10 .
I'll try Pinging Google dot C A and we could see we're able to reach out to the internet .
Now , we'll try to ping the US W switch .
So ping 192.168 0.111 0.14 .
And you could see that the requests are gonna time out .
Now , if we need our staff network to be able to access another network's resource to synology , nas , we would have to put it in except rule for this video .
I'll just say that the staff network has to access the real link camera right now .
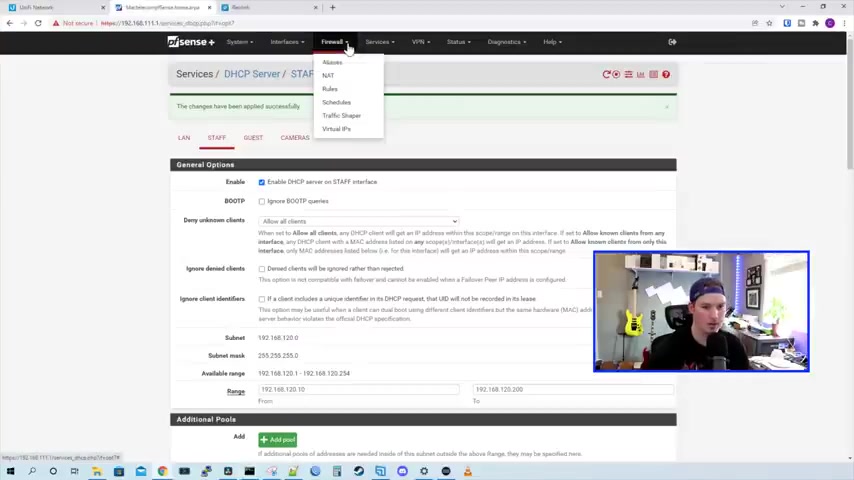
If we ping the real link camera , we won't be getting any responses and we can't get to it .
That's because we don't have that accept rule in place .
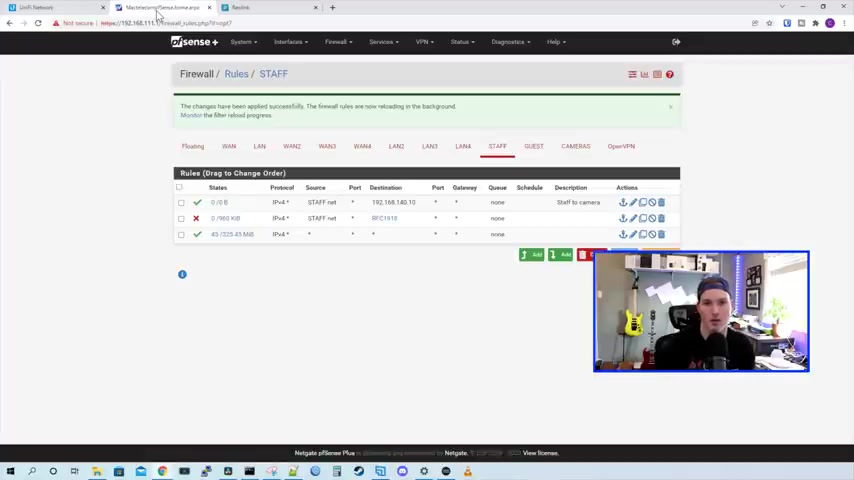
So let's go back to my PF sense and put that rule in .
We'll go back to firewall and then we'll go to rules and we'll click on the staff .
This rule needs to be above the block RFC 1918 .
So we'll hit the arrow up A and then we'll say pass the interface will be staff .
It will be I PV four protocol will be any , the source is gonna be our staff net and then the destination we're just gonna put in the IP address of the camera .
So we'll go single host or alias and the IP is 192.168 0.1 40.10 .
We'll scroll down , give it a description of staff to camera and then press save and apply changes .
Now , back on the staff network , we should be able to ping that real link camera , ping 192.168 0.1 40.10 .
And you could see that we can now access it .

So that's gonna be it for this video .
I showed you how to create some basic fireball rules , some vlan , some DH CP servers as well as get our unified network up and running with our unified network controller .
If you have any questions about this video , please leave it in the comments below .
If you like this video , hit the thumbs up button , you're new here .
Please subscribe and hit the bell icon .
All right , thanks .
Are you looking for a way to reach a wider audience and get more views on your videos?
Our innovative video to text transcribing service can help you do just that.
We provide accurate transcriptions of your videos along with visual content that will help you attract new viewers and keep them engaged. Plus, our data analytics and ad campaign tools can help you monetize your content and maximize your revenue.
Let's partner up and take your video content to the next level!
Contact us today to learn more.