https://www.youtube.com/watch?v=83BTI1HvZ-o
How to Install HardieBacker Cement Board on Walls

Dry wall and moisture don't mix hardy backer cement board .
On the other hand , is ideal for use in kitchens , bathrooms and other places susceptible to wetness where dry wall just won't cut it .
We recommend using hardy backer 500 cement board as it better transitions with drywall before we dig in .
Let's make sure we've got the right tools for the job .
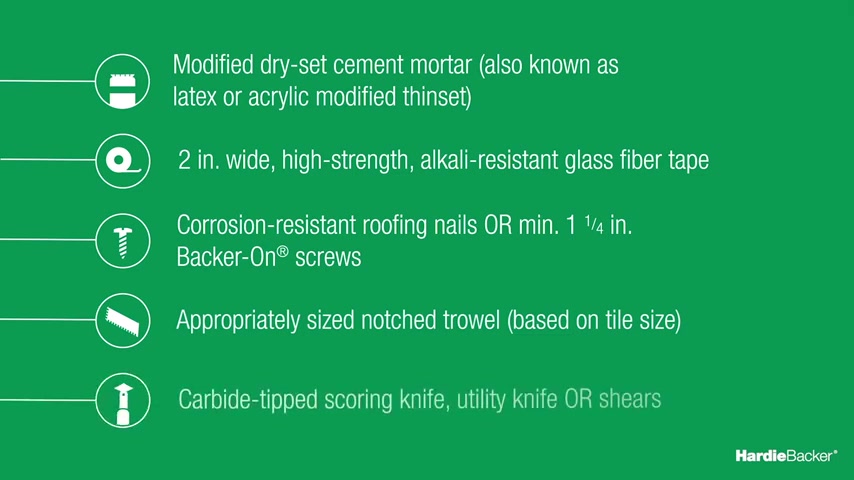
You'll need modified dry set cement board , also known as Latex or acrylic , modified thin set two inch wide , high strength alkali resistant glass fiber tape , corrosion resistant roofing nails or minimum one and a quarter inch backer on screws for tile to hardy backer cement board .
The appropriate travel size will depend on the size of tile being set .

The travel manufacturer typically provides this guidance online or on its travel labels for cutting a car by tip scoring knife is recommended but a regular utility knife will work as well .
Shears , whether manual electric or pneumatic are also an option to start check that your framing is sound and complies with local building codes .
You need two by four wood studs or 20 gauge metal studs .
They must be straight , properly aligned and spaced a maximum of 16 inches on center .
If you're planning on using your hardy backer cement board in tub and shower enclosures , first , ensure that the framing is adequately reinforced at the corners .
Once you're certain that your framework is ready for your cement boards , you can begin determining their layout .
Hardy backer cement boards may be installed vertically or horizontally in a staggered pattern .

Keep in mind the edges of the board parallel to framing must be supported by a structural framing member .
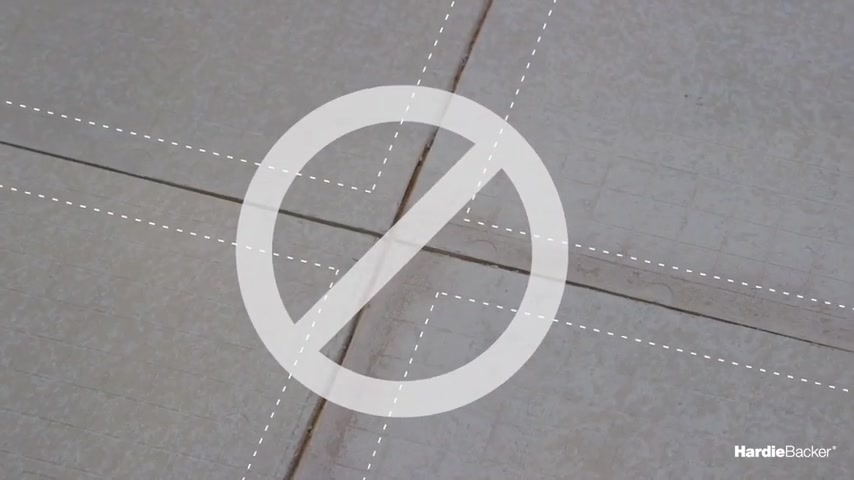
You also want to ensure that the quarters of your boards never meet at one point as this creates a weak spot .
Now that you've figured out how you'd like your boards laid out .
You're ready to cut them to desired size .
Check out our video on cutting for instructions .
Once your hardy backer cement boards are cut to size , you can go ahead and install them .
The use of a waterproof membrane , vapor barrier or vapor retarding membrane is optional unless the local building code requires it .
Start installing your boards a quarter of an inch above the floor tub or shower pan and co accordingly fasten cement board with specified nails or screws .
A maximum of eight inches on center at all supports .

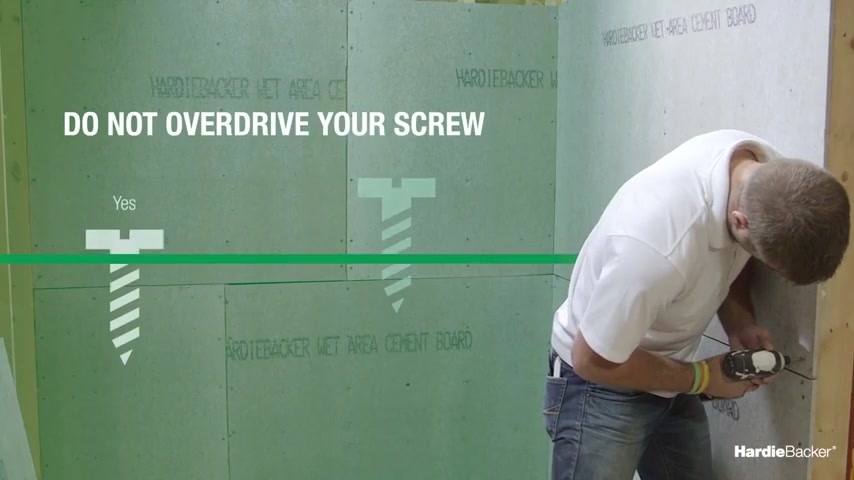
Keep fasteners 3/8 inch from board edges and two inches in from sheet corners , set fastener heads flush with the surface without overdriving .
When you finished , fill all joints with mortar and embed with two inch wide , high strength alkali resistant glass fiber tape and level .
Now you're ready to add stone or tile to your walls .
First , take a damp sponge and wipe the surface of hardy backer cement board clean .
Next , spread your mortar with an appropriately sized notch trew .
For best results , be sure to comb the ridges in one direction .
Only then twist or press and beat in the tiles allow a minimum of 24 hours curing , set time before grouting and then you're done easy to use and backed by exceptional performance .
Hardy Backer cement board is the choice for your next tile installation project .
Find out why it's the most preferred brand of backer board today .

Visit hardy backer dot com for more info .
Are you looking for a way to reach a wider audience and get more views on your videos?
Our innovative video to text transcribing service can help you do just that.
We provide accurate transcriptions of your videos along with visual content that will help you attract new viewers and keep them engaged. Plus, our data analytics and ad campaign tools can help you monetize your content and maximize your revenue.
Let's partner up and take your video content to the next level!
Contact us today to learn more.