https://www.youtube.com/watch?v=3OOpyKwrgVc
2023-06-14 18:22:08
DIY Floating Shelves
Today , I'm gonna be showing you how I built these 10 ft quote unquote floating shelves for my laundry room makeover what you are going to need or what I use to construct .
These shelves are a speed square , a stud finder , two drill bits , one for my wood screws and one to pre drill the holes .
Some wood glue , you can get a gorilla glue .
I'm using tight bond measuring tape , some plastic wood or wood putty wood screws , the appropriate length of nail for your nail gun and your power drill for 1 10 ft shelf .
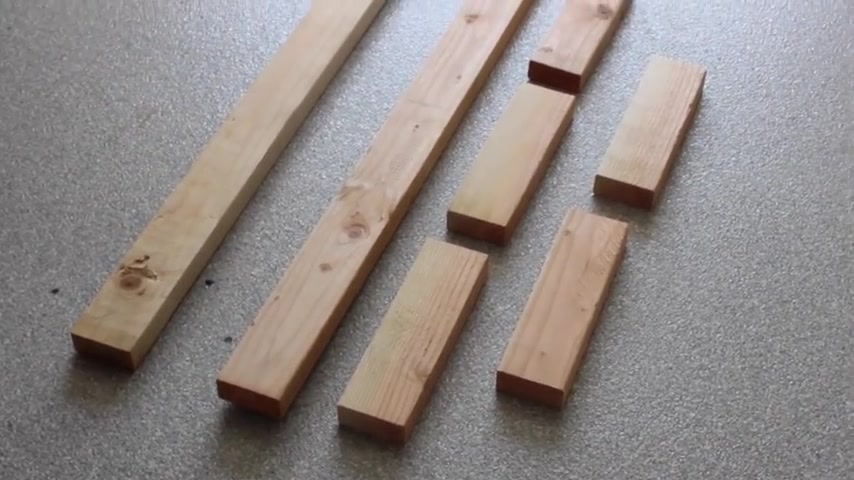
I have 22 by four by tens and then I cut down a two by four into five pieces that measure it out to be 11 and three quarters of an inch making the shelves 15 inches deep .
I'm basically going to be building half of the shelf outside the room and then finishing the other half after we install this frame of the shelf .
So I first start out by laying my 10 ft piece on my table and making a mark at 30 60 and 90 inches to Prell my holes for the smaller pieces which are acting as a support for my shelf .
I marked those measurements with my speed square to make sure that when I go into pre drill the holes for the screws that they're straight on top of each other .
I didn't need to measure the ends , obviously , but you want to add one of the smaller pieces to each .
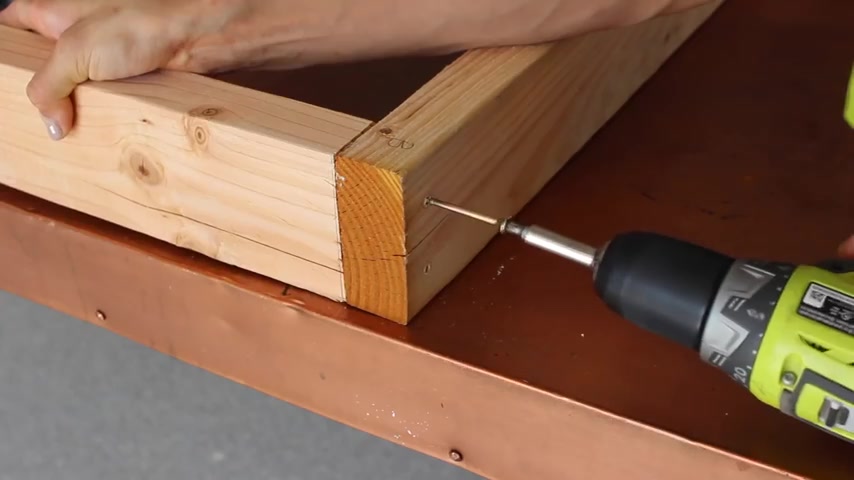
So drill two holes along those markings , including the ends for your screws that are going to secure the studs within it , add some wood glue to the end of the shorter pieces .
Line those up with those pre drilled holes and screw in all the way down across that beam .
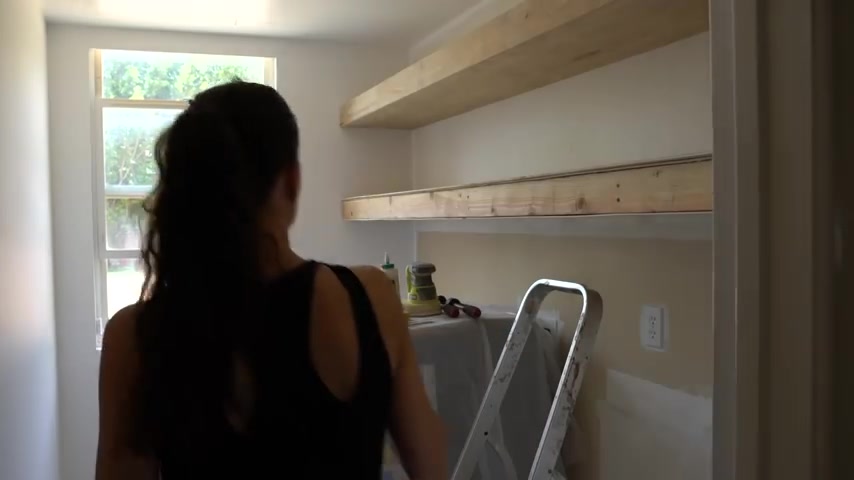
This is what I have so far before we install this into the laundry room and finish the project .
I'm gonna pre drill some holes for my screws that are going to go into my studs .
And I actually measured out the length of my studs on my wall and transfer that onto a piece of paper .
And now I'm gonna measure that out onto the studs .
So I don't gotta do it when I'm in the laundry room because it's a small space .
You can do the same thing or you can actually just bring this piece into the laundry room mark where the studs are .
Once you find them and pre chill , then it's really up to you .
What you are about to see , I train five days a week for with my personal trainers .
So be cautious and get some help if you can't handle it on your own .
But I am a one woman show , so I had to make it work just how to put that out there .
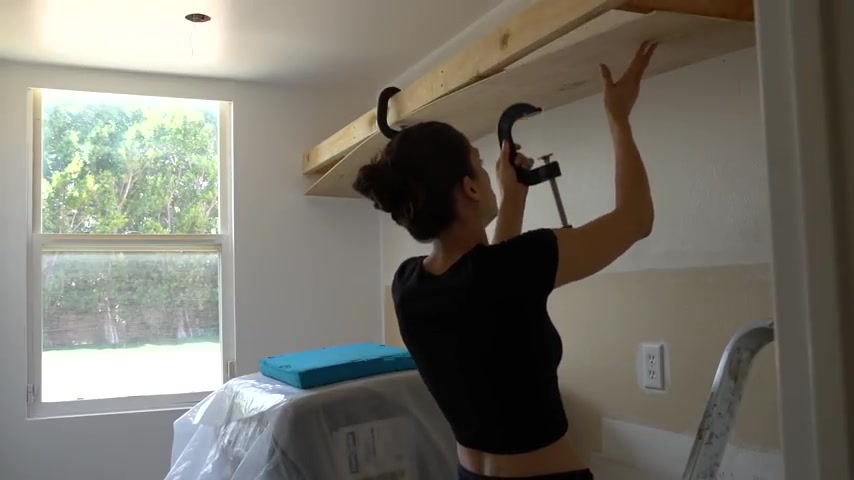
But the pre drilled holes for your studs , you should be able just to hold this on up where you want it on your wall , screw through those holes directly into the studs .
And if you just even get one screw there and you are by yourself , you are able to kind of maneuver around this thing solo .
This took me not even a day to execute .
And I'm actually really surprised because I didn't need help .
I just went through , made sure that this thing was level finished up , screwing everything into the studs and making sure it was extra secure after that is secured .
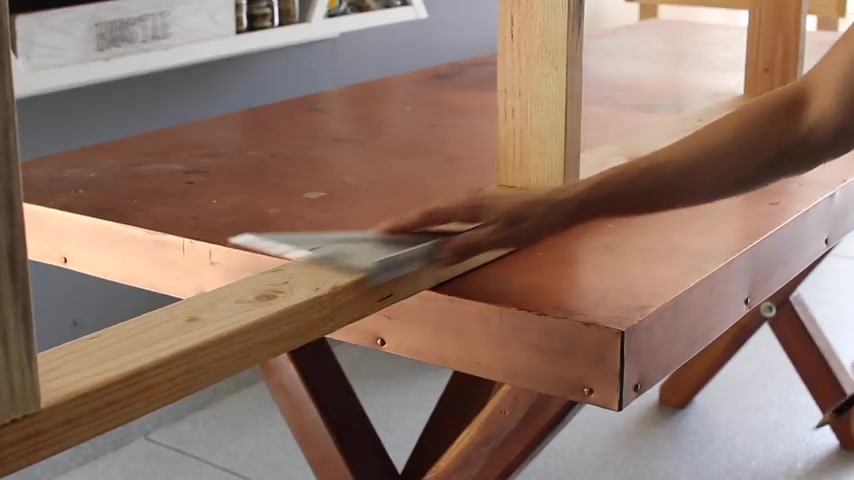
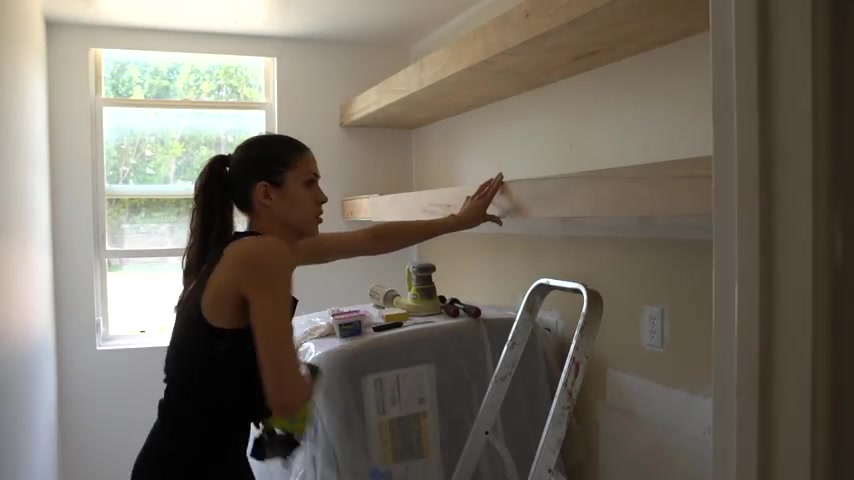
I'm taking my second two by four by 10 and lining them up with the smaller ends of the studs using my clamps to make sure that those pieces are nice and smooth and even and then screwing them into one another , feel free to use whatever material you want .
But I found some super thin plywood cut it down to the size of my shelf on the top and the bottom , which was 10 ft long and 15 inches wide , clamped them up , glued them to the two by fours which you can't see here .
I actually went back in because I forgot to film it and felt like such an idiot .
And then took my nail gun and just tacked it into place .
You want to make sure obviously that you are connecting the two by fours to the thinner plywood .
So just follow the outside of the frame , look to where your screws are to align it with the two by fours that are supporting because you don't want it to sag in the middle and then repeat that same process with the top of the shelf while I'm editing this , it looks really gorgeous .
But to be honest , there are a lot of little bruises as I like to call them for my learning process with these shelves because these are the first ones I've ever built from scratch .
If you want to see the bruises up close and personal of these shelves , head over to my Instagram , check out my latest Instagram team the episode and I give you an up close and personal look at the wood filler magic .
I tried to work .
I went ahead and repeated that process one more time for a second shelf in my laundry room .
And something that these shelves will do to your space is make it look so large in charge and just open it up an incredible amount to seal the deal on these guys .
I cut down a piece of the thinner plywood to cover the two pieces of plywood plus the two by four to kind of make this look like a chunky floating piece of wood like a big long slab , give it the illusion .
I added some wood blue and then I just nail gunned it in like we did before .
With the other pieces , these thin pieces are not heavy whatsoever .
So you'll be able to kind of reach across the length of the beam and secure it while you tack in one of the ends and kind of work your way down towards the other .
You definitely don't have to .
But I went in and kind of filled those nail gun marks with wood putty .
I know people like to use wood glue here , but I am gonna use some putty so I can stain over it once the wood putty dried .
I just went in with a 2 20 grit and sand it on over it and I'm actually not going to be staining these guys or finishing them quite yet because I have so much more work to do in the room , but I need to get these up because I have a special accent wall .
I'm going to install on it , but I couldn't do that until I build these shelves .
Thank you so much for tuning in today .

I hope that you enjoy this one woman show of executing 2 10 ft shelves and I hope it inspires you to try to build something as well .
All right .
That is it for me today .
You guys , I will catch you Sunday with another Diy .
Partnership
Are you looking for a way to reach a wider audience and get more views on your videos?
Our innovative video to text transcribing service can help you do just that.
We provide accurate transcriptions of your videos along with visual content that will help you attract new viewers and keep them engaged. Plus, our data analytics and ad campaign tools can help you monetize your content and maximize your revenue.
Let's partner up and take your video content to the next level!
Contact us today to learn more.