https://www.youtube.com/watch?v=NuR76h7j6pQ
2023-06-14 18:21:38
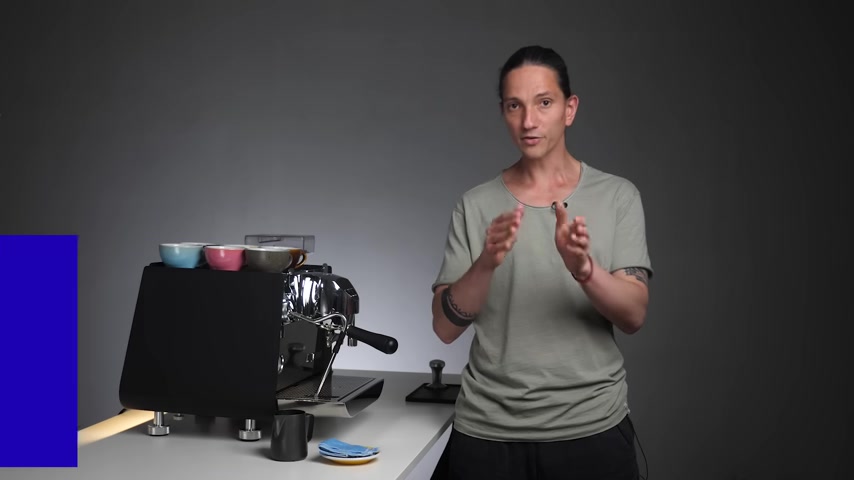
How To Steam Milk For Latte Art (Barista Training For Beginners)
Latin art patterns looks beautiful in cappuccinos and and it's exciting to be able to pour them into espresso .
But the most important step of all before pouring any pattern is to get a perfect shiny microphone .
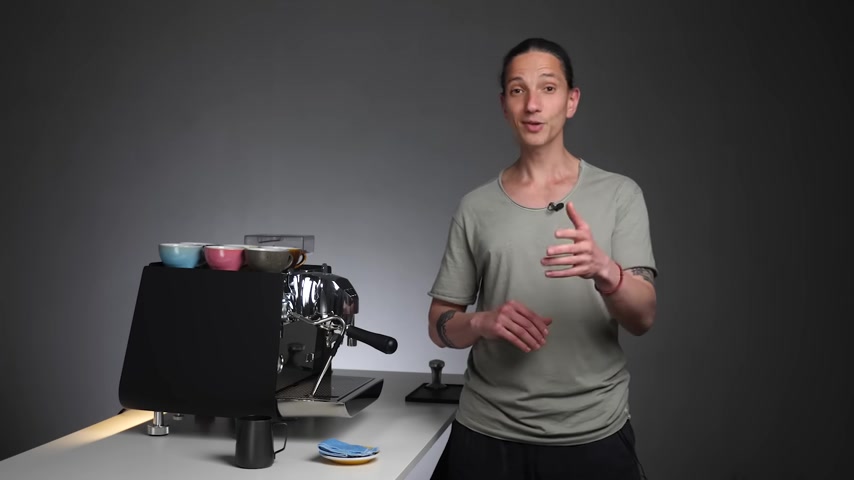
So in this video , Alan who has 10 years of experience as a professional barista will show you how to see milk that is suitable for .
This video is sponsored by an independent print magazine about coffee culture and people that surround it .
What is the goal of steaming milk ?
Think of milk for latte art as of a guitar and think of latte art patterns as of songs you want to play .
If the guitar is out of tune , it just won't sound good even if your hand hits the right fat boards .
If the milk is not textured perfectly , you won't be able to pour a nice latte art .
Even if you know the technique , there are basically two things that you're doing while steaming first .
By introducing hot steam into the milk , you create air bubbles and the milk rises in the jug and it looks frothy .
Second .
You want to create a vortex in that milk jug which breaks those big air bubbles into very tiny pieces that makes microphone .
The result should be silky , shiny and glowing in the jug that is the milk you want to end up with .
If you want to pour latte art , we'll show you how to do that in a few essential steps .
We're not going to dive into milk science .
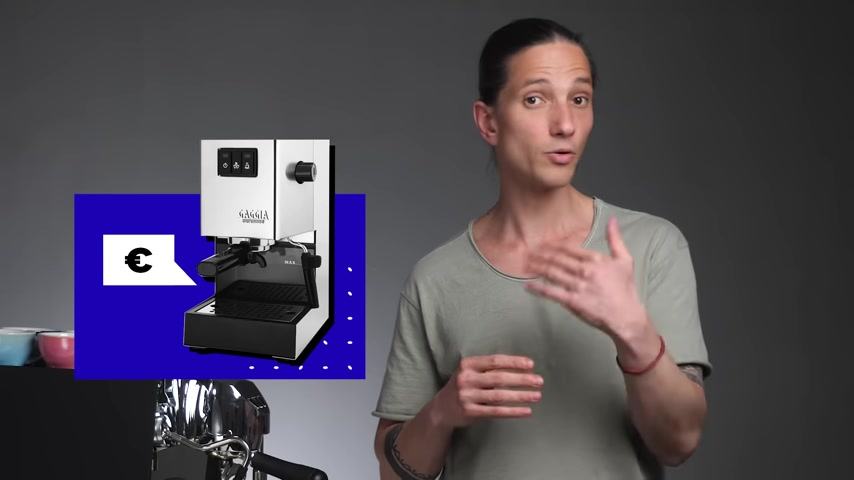
Just a technique , whether you're working on a professional machine or on a cheaper home espresso machine .
The video should help you to get a good result .
Three things to look at before you start steaming .
Number one , choose the right milk suitable for coffee .
Buy fresh milk , it tastes better both alone and with the coffee and it's sweeter when it steams to the right temperature .
I would recommend buying whole milk with at least 3.5% fat content .

These milks have more texture , they improve the mouth feel of the coffee and you actually have something that is suitable for latte .
Art number two , make sure the milk is cold enough .
Working with cold milk from the fridge gives you more time to introduce air into the milk when you're steaming and it gives you more time to destroy those air bubbles before you hit the desired temperature .
Room temperature .
Milk is steam but you have less time for texturing the milk and less room for a mistake .
Number three , use the right size and type of the jug pour the cold milk about half a centimeter under the spout , that amount of liquid behaves the best during steaming and it helps you to create a quick vortex which is essential .
Also jus with a round spout are perfect for big la out patterns such as hearts and tulips , narrow spouts .
On the other hand , are great for thin lines , long lines , waves and free pores .
So let's get into steaming .
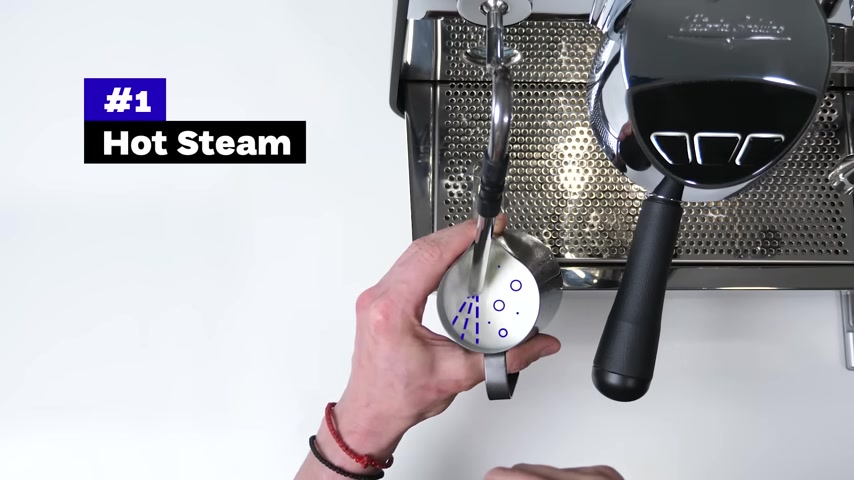
Number one Burch the steam wand like this before you start , take a moist fold , this towel grab the steam wand with it and put it on max for a second or two .
Merging the rest of water from the end of the steam wand is crucial .
Otherwise , we would incorporate the rest of the water from the steam wand into the milk and that would negatively affect the texture of the milk .
Number two jug and steam wad position , take the steam wand and put it towards yourself , but just slightly , you want the steam wad to be almost in an upright position .
Next , take the jug , your thumb goes through the handle and the palm of your hand goes around the jug .
Pinky finger goes under the jug .
That is where you're gonna notice the rising temperature .
First .
Put the tip of the steam wand where the spout is and just slide it down along the spout that steam wand spout fixation will give you grip stability , slide into the middle and put the tip of the steam wand into the milk .
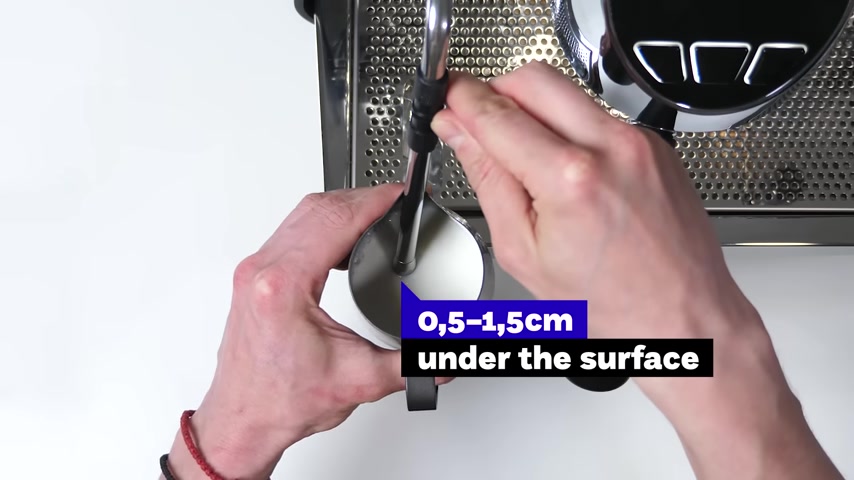
You still want to see the upper line of the tip .
So you should be about half a centimeter under the surface .
We also need to create a vortex inside the jug so we can destroy those big air bubbles immediately into smaller and smaller pieces .
To do that .
We need to tilt the jug on the side .
It doesn't matter which side you choose , just build the jug .
So you end up halfway between the center and the wall of the jug .
If you put the steam wand too close to the wall , the vortex will be too slow and won't destroy those air bubbles .
If you stay in the center , the milk will just randomly bubble there and you're not going to create the vortex .
Now you are almost ready to steam the milk .
But let's take a pause and give a shout out to the sponsor of this video standard .
It's an independent print magazine about coffee culture and people that surround it as subscribers .
We just received a new issue 23 with a sample of tasty Ethiopian coffee roasted by say in Brooklyn .
What were the highlights of this issue ?
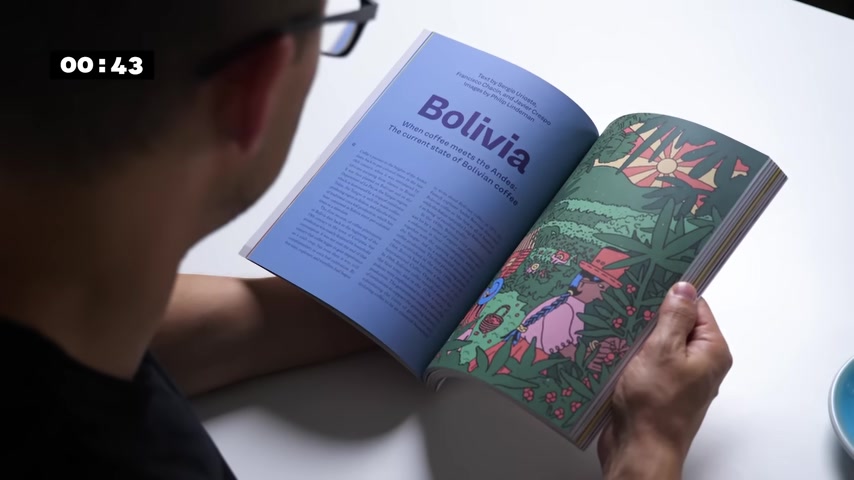
Besides a beautiful cover photo ?
I enjoy a deep dive into coffee production in Bolivia , an interview with the fermentation specialist , Lucia Solis about her work in Colombia and key differences between the wine and coffee industry .
Then I enjoy reading about who invented the espresso machine learning that it really wasn't only one person , an extension of this topic was a visual essay , mapping .
Coffee patterns from 18 68 eight up to 2005 .
The last story I want to highlight is meeting the post of the World Barista Championships and many other events , Cindy Ludvigson .
So if you haven't subscribed yet , you should go to standard mac dot com slash E C T and get a yearly subscription that covers four issues of Standard free World by chipping and coffee samples from some of the best in the world .
Now , let's get back to steaming the milk with a number three , steaming .
Now , when you're set and ready with a jug , it's going to be very quick .
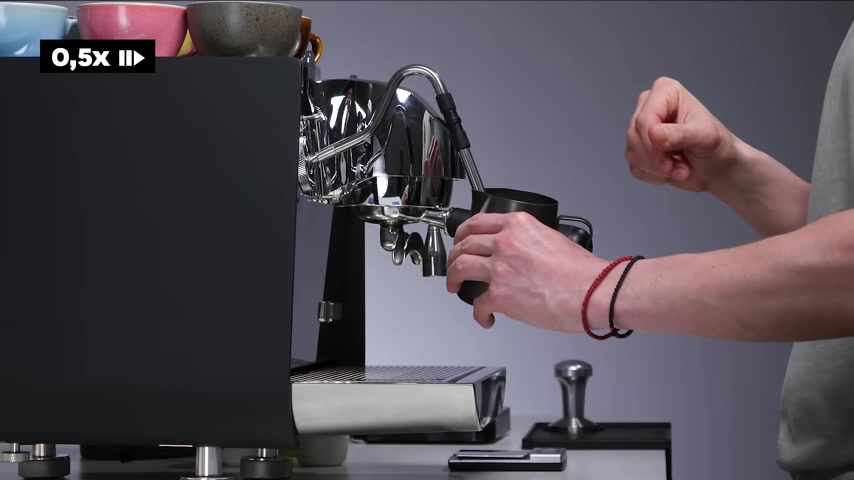
So I'm gonna demonstrate it before actually doing it .
Put the mon on maximum .
What you want to hear is the same sound as ripping paper .
The milk rises a centimeter or two , go just a tiny bit up with the jug .
So you stop putting too much air into the milk and now you're gonna tilt the jug again towards yourself that creates a quick vortex and you can recognize this one by the sound as well as soon as you hear , it hits a noticeably higher note and it's starting to burn first on your pinky finger and then on your palm , turn it off and wait until the steam goes completely silent .
The temperature is right when you get that hot sensation all over your hand and you end up at approximately 60 degrees .
Centigrade , take the milkshake out , put it on the counter and burst the steam on with a tunnel around it and clean it , especially the tip .
Yeah .
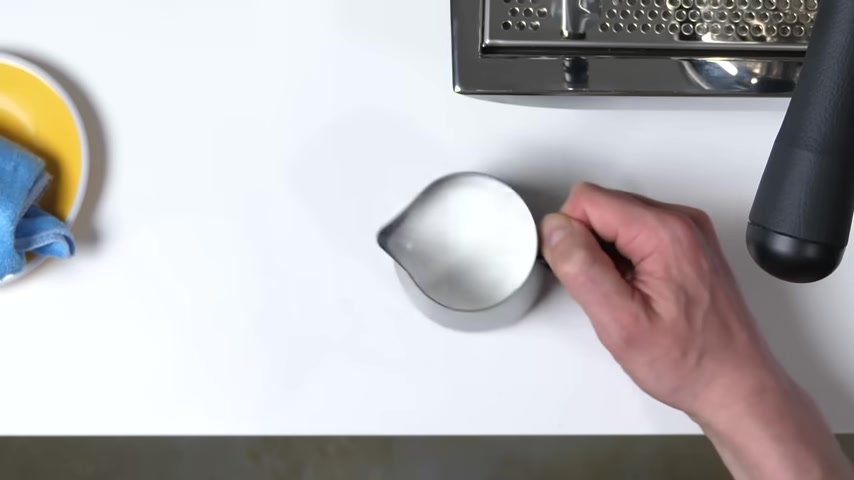
Number four .
Working with the milk after you steam the milk don't let it sit on the counter when it just sits , the microphone starts to break apart .
So as soon as you finish steaming , take the jug and swill until the milk is super shiny .
The milk should look like it's washing the edges of the pitcher like the sea waves swashed the beach , there should be no visible bubbles and the milk is glowing .
Now , when you have that perfect microphone , you're literally ready to pour .
If it's hard for you to make the milk move when swelling with a biter , it still contains large air bubbles and you put too much air into it .
If the milk behaves more like a liquid , you put too little air into it and it's just going to be hard to pour latte art with it .
There is a golden rule for steaming milk for latte art and that is less is always more in terms of texture and what you can do with it better having less texture than more texture .
It's important to say that steaming takes as long as powerful .
The steam one is on this and most of the commercial espresso machines , the steam one is powerful enough .
If you're working with a cheaper home espresso machine , chances are that the steam one doesn't have enough power to get you to the desired results quickly .
So you're just gonna have to be patient .
Let's do it again .
Cold milk pour just under the lower edge of the spout .
Grab the jug thumb into the handle .
Pinky finger underneath steam wand on max ripping paper sound , count to four .
Go just a tiny bit up with the jug and tilt it slightly towards yourself .
Notice the vortex got quicker as soon as it's starting to burn , turn the steam wand off and wait clean the steam on immediately and purge swirl of the milk in the jug ready to pour .
Now that you know how to steam milk for latte art , we'll just go briefly over five most common mistakes I've seen over the years when people are learning how to steam milk mistake number one , low temperature as your hands are not used to holding a hot pitch , you tend to turn off the steam one too soon and chances are the result doesn't have enough of a circ to work with .
Mistake .
Number two , leaving the milk jack on the counter for too long .
You don't want the siltec to be broken apart .
A golden rule for faster barrister workflow always pull the shots first .
Then steam the milk mistake number three not putting the steam wand on maximum .
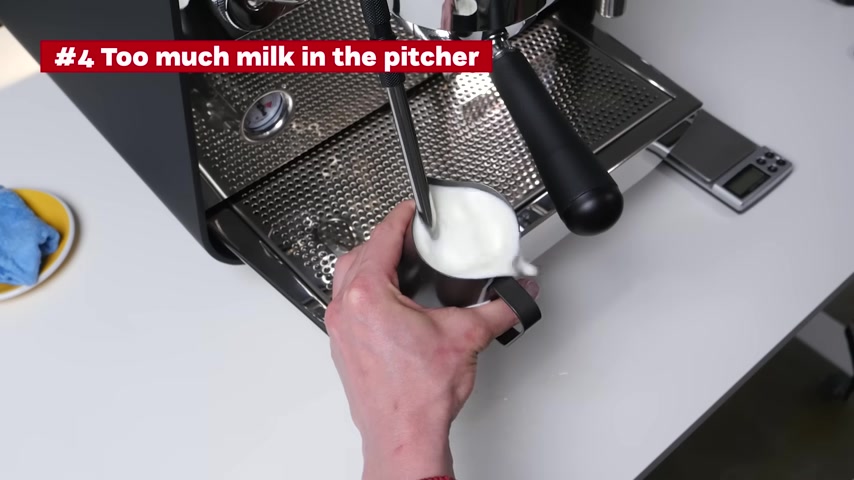
You need to create a fast spinning vortex by tilting the picture so the milk can move fast mistake number four , putting too much milk into the picture that just ends up with a mess as the milk rises quickly with spinning and it just overflows the picture and it ends up to be everywhere on the table .
Mistake number five , not putting the steam wad back in a safe position .
You're risking , burning yourself or others who might just walk around the coffee machine .
Ok .
So what was the most useful information or trick that you learned from this video ?
Let us know in the comments below .
And in the next video , Alan will teach you how to put basic latter patterns like heart rosetta or tulip .
So , subscribe to our channel and turn a notification on and perhaps even tell your friends who want to learn something about coffee .
Thank you for watching and see you soon .
Bye bye .
Partnership
Are you looking for a way to reach a wider audience and get more views on your videos?
Our innovative video to text transcribing service can help you do just that.
We provide accurate transcriptions of your videos along with visual content that will help you attract new viewers and keep them engaged. Plus, our data analytics and ad campaign tools can help you monetize your content and maximize your revenue.
Let's partner up and take your video content to the next level!
Contact us today to learn more.