https://www.youtube.com/watch?v=EJjPgIxvDw0
2023-06-14 18:20:33
How To Draft Corset Blouse With Yoke_ how to make a corset.
Hi , everyone .
My name is A A if you are new to my channel , you are highly welcome .
Consider subscribing and don't forget to turn on the notification bell for you to be notified each time I upload new video .
If you are my host subscribers , I really appreciate you for coming back to my channel .
Thank you so much .
God bless you in this tutorial today .
I would like to draft Corette top with you for you guys .
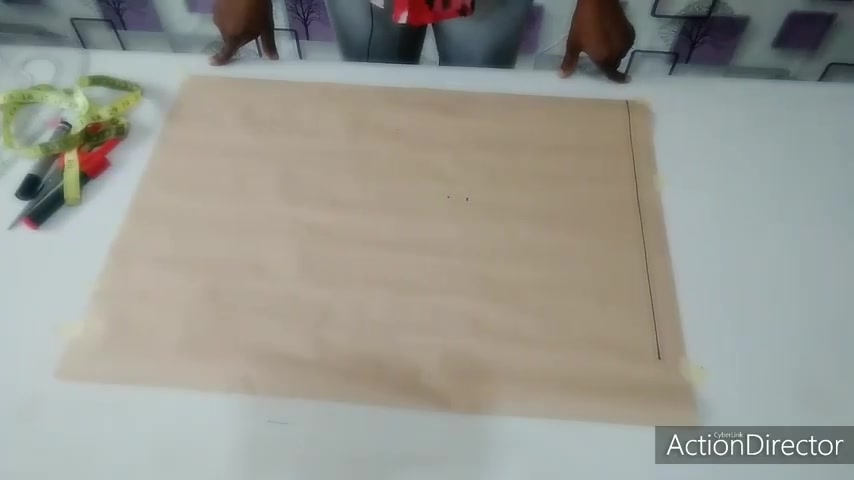
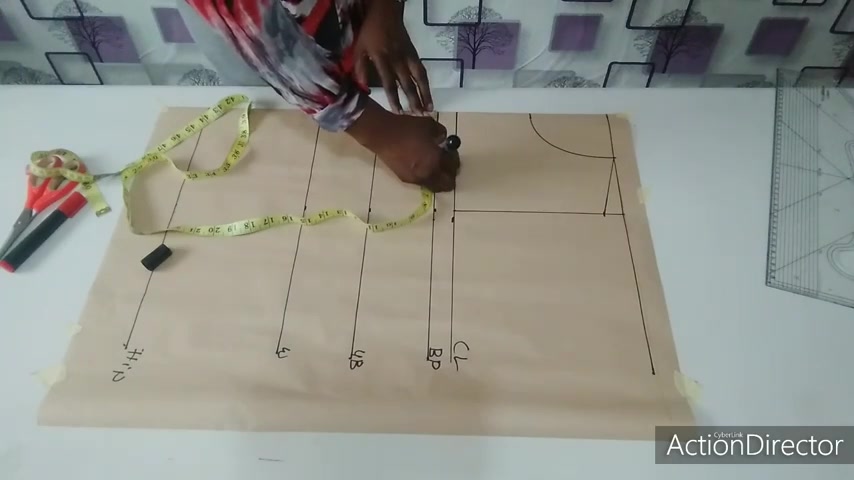
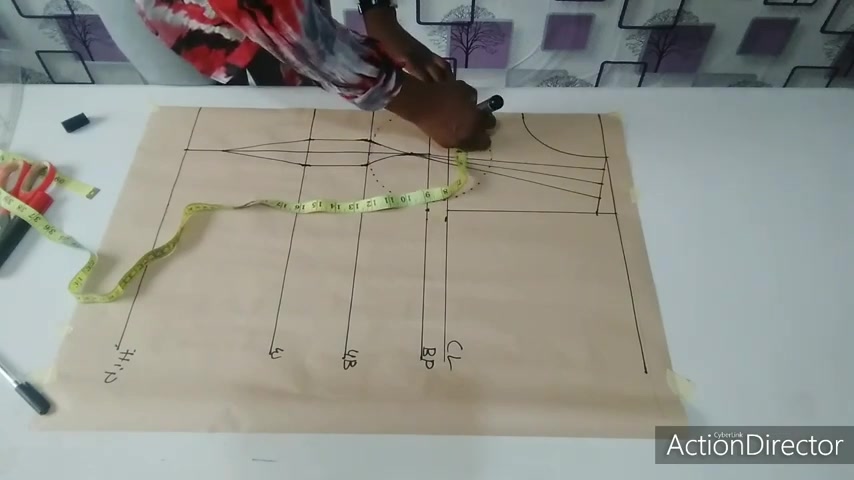
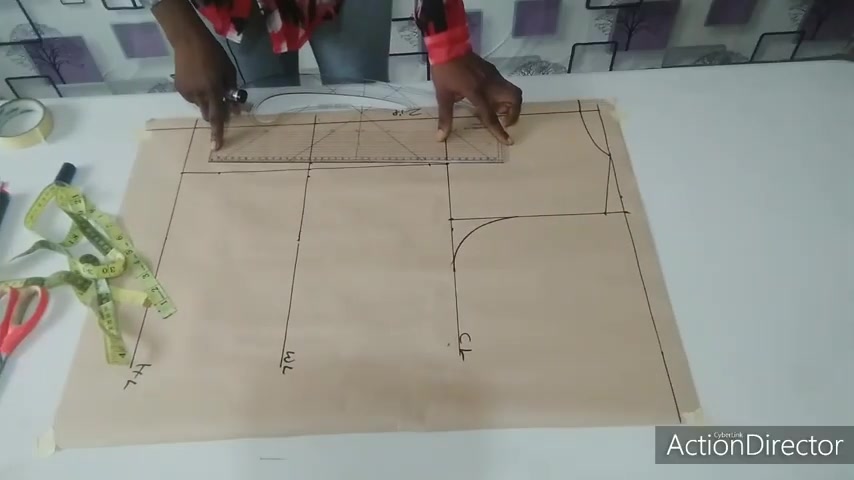
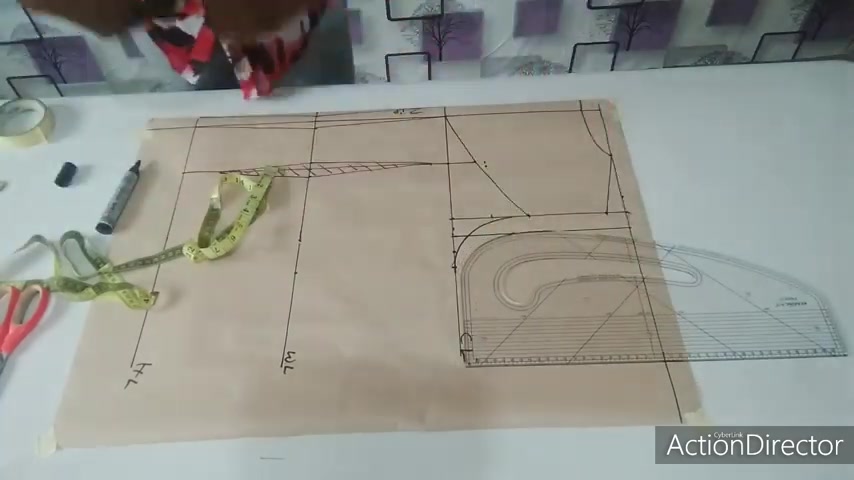
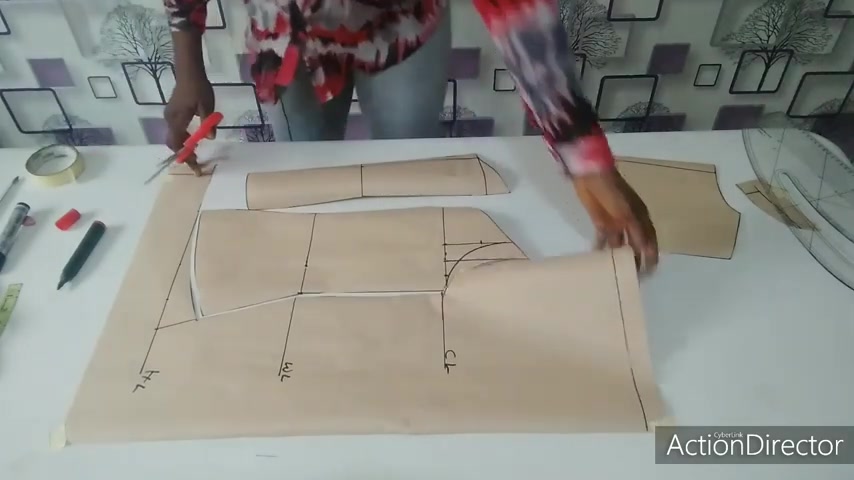
So this is the pattern paper I'm making use for my pattern drafting .
This is my starting point which I'm going to place my back home and my neck line .
So from there now , from the shoulder , I'm going to measure out my chest line to get that is half of my rand ham hole .
My round ammo is 18 inches divided by two .
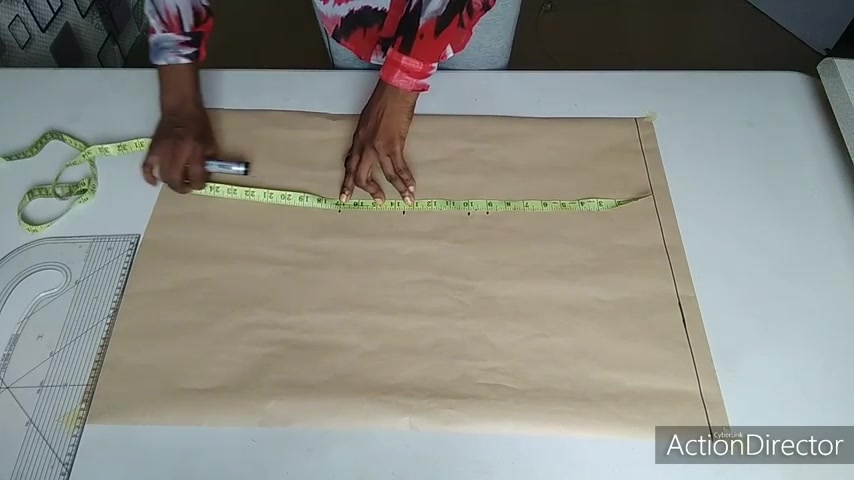
Give me nine inches which is a from my shoulder to my boss point is 10 inches which is here from my shoulder to my under boss is 13.5 , which is here from my shoulder to my waist is 17 inches which is here and from my shoulder to my to the full length of my top , which is the , which is my plan is 24 inches , which is here .
So I'm not adding any same allowance to this .
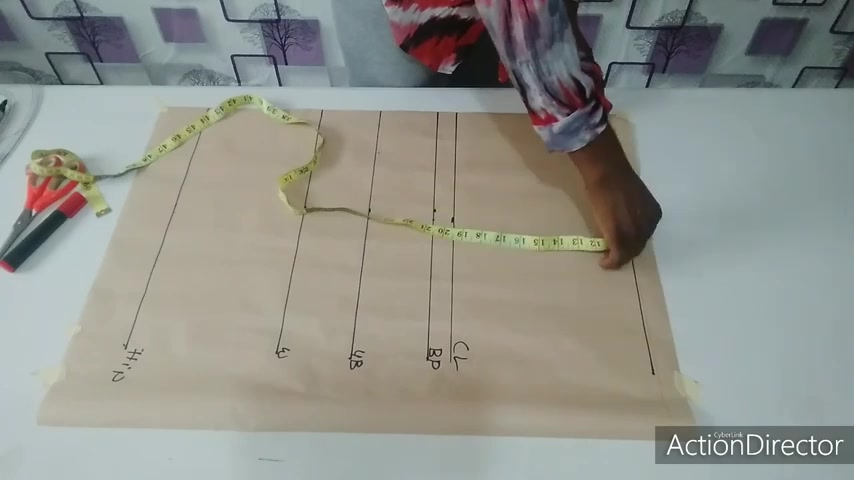
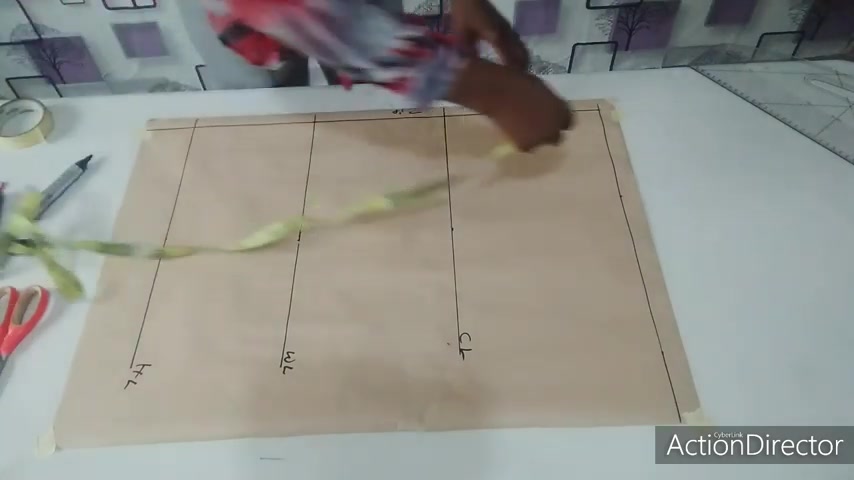
If I want to transfer it to my fabric , I'm going to add all the necessary allowances to , I'm going to extend all these points now to form a straight line before we proceed .
So I'm done extending the lines .
As you can see , this is my chest line , my boss point line , my underboss line , my waist line and my hip line and this is my shoulder line .
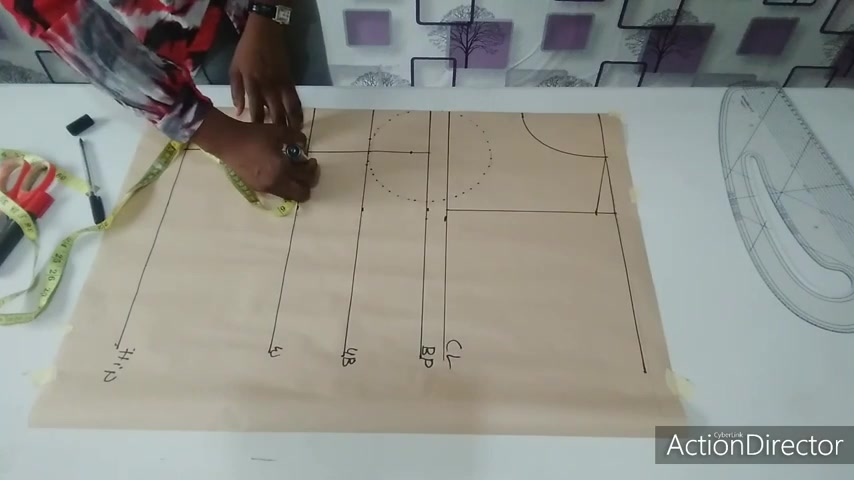
So on my shoulder line , I'm going to input half of my shoulder measurement .
My shoulder measurement is 15 inches divided by two will give me 7.5 .
It is here .
And on the chest lines , I'm going to input it for me to draw out my .
So I'm going to connect it straight now .
Yeah .
So my neck weight on my shoulder line is going to be 3.5 to draw out my shoulder slope .
I'm going to come down from this point by one Hinch and I'm going to connect it straight to my neck with point just like this .
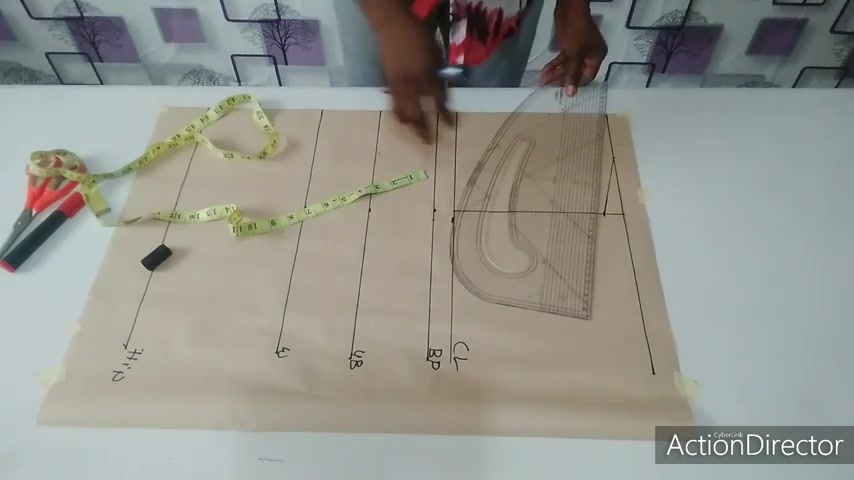
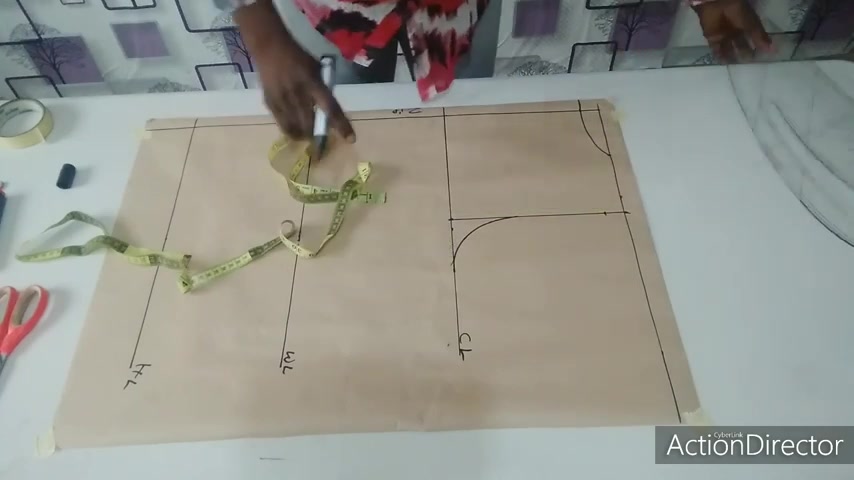
This is my shoulder's loop now and my neck they to be four inches or 4.5 , depends on how low you want it .
But let me use 4.5 and I'm going to take my , the cove side of my butter master like this and connect it to form a round ship .
So here is my neck line now .
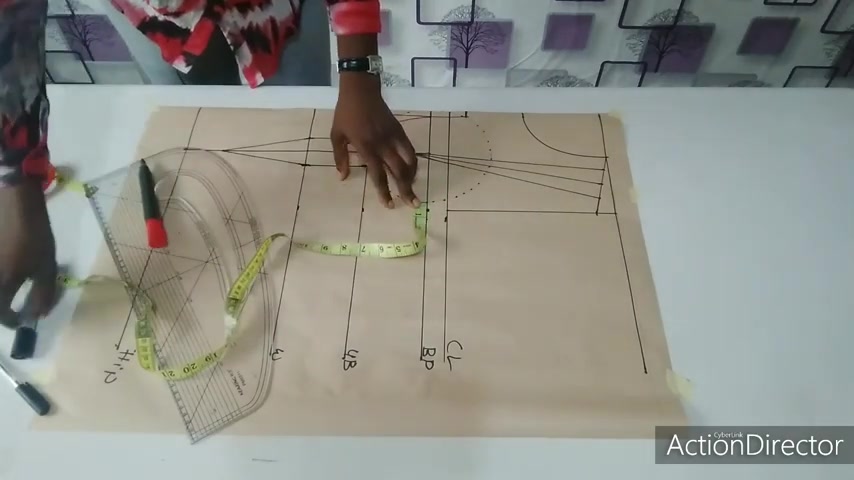
So to get my corset , now I'm going to measure my nipple to nipple measurement divided by two from my center frontier .
So my nipple to nipple measurement is seven hint divided by two is 3.5 .
So I'm going to measure it out from the center till I reached the bottom of my top 3.5 .
I'm not adding any allowance to this pattern drafting .
So when I want to transfer it to my fabric , I'm going to add all necessary allowances to it .
So I'm going to connect it from my boss point .
Now till I reach the bottom of my top and to get that , I'm going to find inches in between my boss point and my under boss .
What I have here now is 3.5 .
So from this point , now I'm going to measure 3.5 inches round for me to create my cop .
Now , I'm done with that 3.5 inches all around from my boss point .
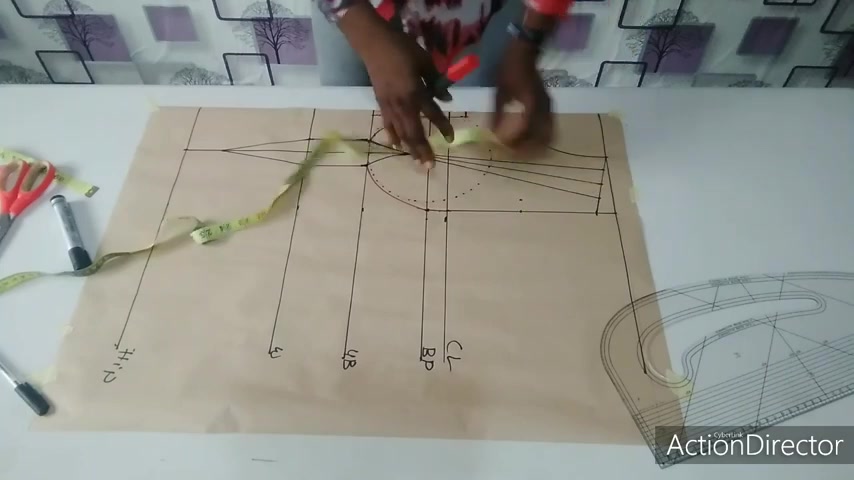
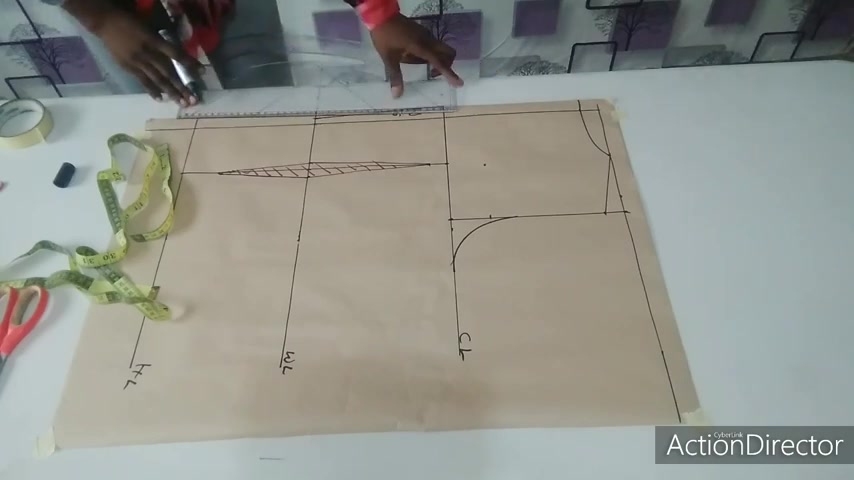
Now I'm going to create my dad on my under boss line .
I'm going to come in by one Hinch on both sides and on my waist line .
I'm going to do the same thing one inch on both sides .
So from my hip line , I'm going to come up by two inches .
So and I'm going to connect all the points now to create my dad .
So from my to my west streets like this on both sides and from there to this point .
So that's just it .
And from my boss point , now I'm going to come down by one Hinch to create my cop .
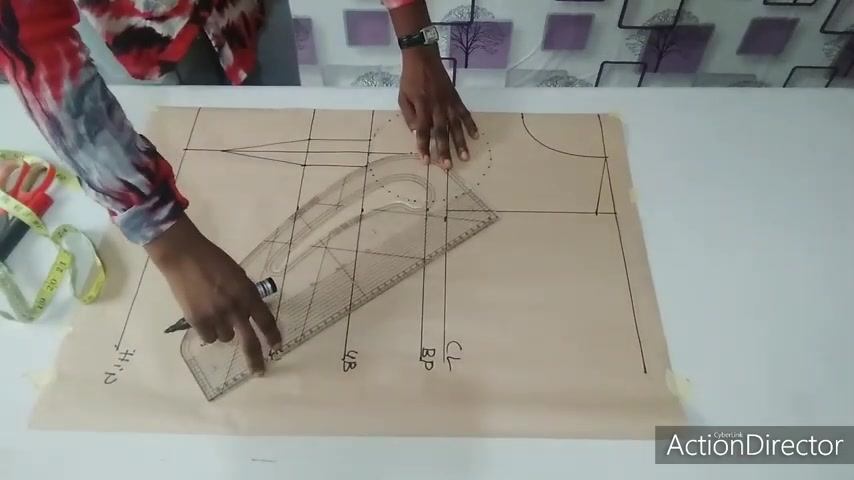
So I'm going to collect it , use the curve side of my ruler to connect it like this .
I'm going to do the same thing on the other side like this .
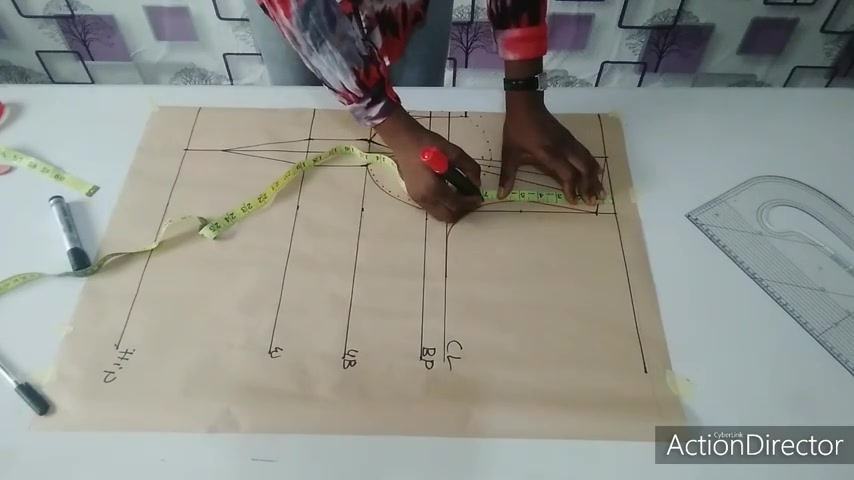
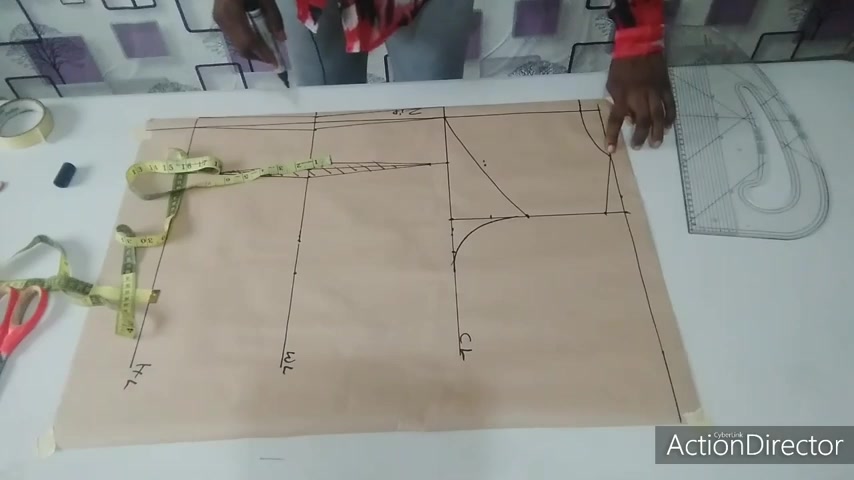
Mm Now , to finish creating my cup , I'm going to come on my shoulder line here and I'm going to measure what I have here on my shoulder loop .
What I have here is four inches , find the middle of it , which is two inches .
So I'm going to connect all the way down to my boss point .
Now , just like this .
Now on this line , now , I'm going to measure one inch on both sides .
So I'm going to connect it just like this .
Yes and like this .
Now , after creating my dad , I'm going to blend all the sharp edges just like this .
Make sure you blend all the sharp edges to avoid unnecessary stress while sewing .
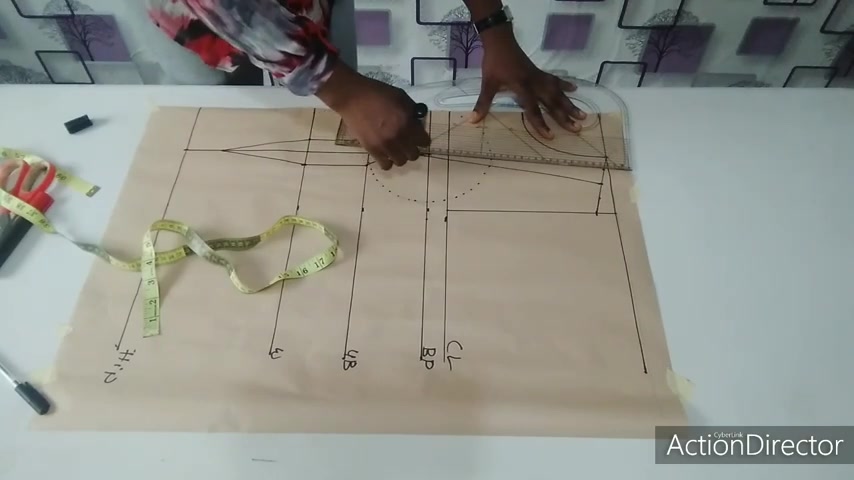
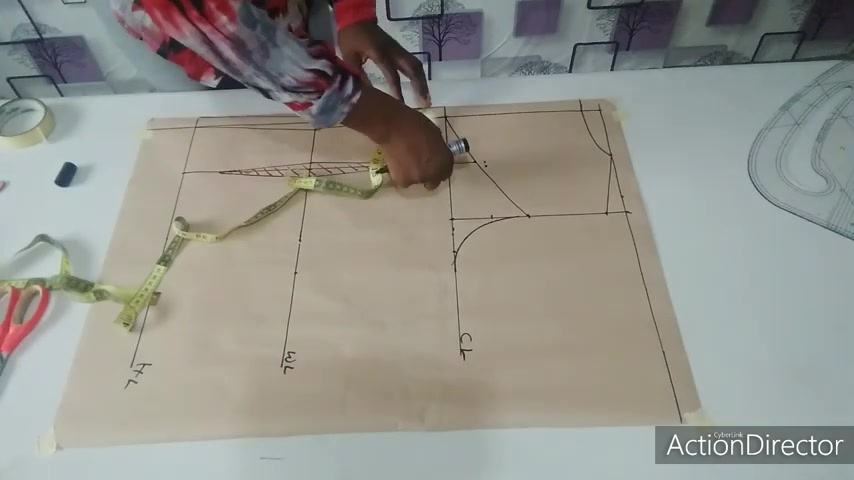
After blending all the sharp edges of my dad , I'm going to complete my cup shape now .
So on my boss point here , I'm going to come up by two inches .
If you like , you can come up by 1.5 , depends on how low you want your top to be .
So I'm coming up by two inches from my boss point and from the center front here .
I'm going to come in by half inch .
That will be the center of my closet .
So that's just it there .
And I'm going to measure that half inch till I reach my boss point all the way down from here .
So I'm going to connect it straight here just like this .
Start drawing a straight line from this point to my boss point .
I'm going to shape out my cup on this side and I'm using the red pen for it to be obvious .
So I'll just place the curve side of my pattern master like this and connect it just like this .
So I just connect it with the curve side of my ruler with my red pen for it to be obvious .
That's just it .
So and on the on this side , I'm going to come out by half inch .
So I'm going to connect with my ruler like this .
OK ?
From here to here , I hope you can see it and to complete it on this side , just connect to my ham hole line just like that .
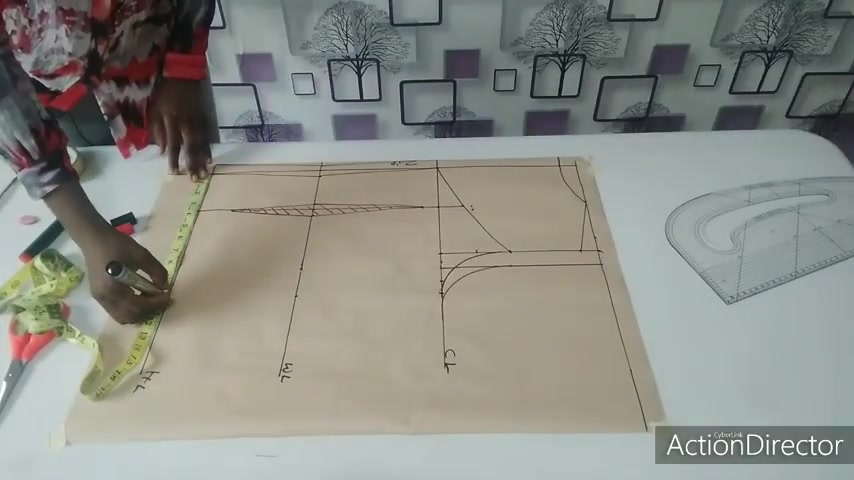
Now to create my ham hook off for the front , I'm going to measure what I have here and here .
So what remains here is eight inches .
I'm going to have find the middle of it , which is four inches .
So on that point , I'm going to measure 0.75 , which is quarter of an inch , I mean three quarter of and hinge inward to create my arm .
And I'm going to connect slightly from this point down to this point .
And I'm going to finish it off with the curve side of my ruler at the down path here to create my arm for the front just like this .
So for it to be obvious , that's why I'm using my red pen .
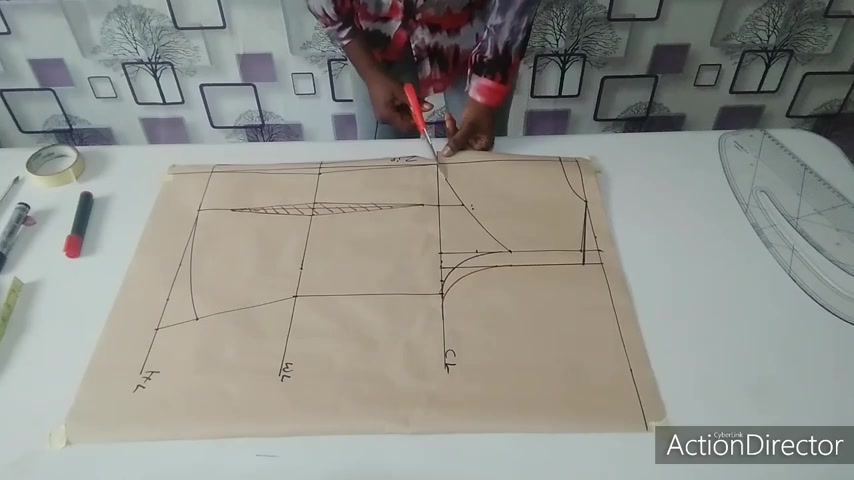
So to complete my upper part here , now , I'm going to measure the length of my yolk before completing the upper part of my cup here .
So I'm measuring seven in for the length of my yolk .
If you like , you can make it eight inches .
If you like , you can make it six inches , it depends on how you want it .
So this is the length of my yolk .
Now I'm going to connect it just like this .
Remember I measured two inches upward .
So from there , I'm going to shape my cop just like this .
You can use your free hand or you use your cola and I'm going to blend it to my , I'm who like this just make sure you blend it just like this .
That is how it's going to be .
So after shaping the upper part of my cop here , now , you know , this is my yolk .
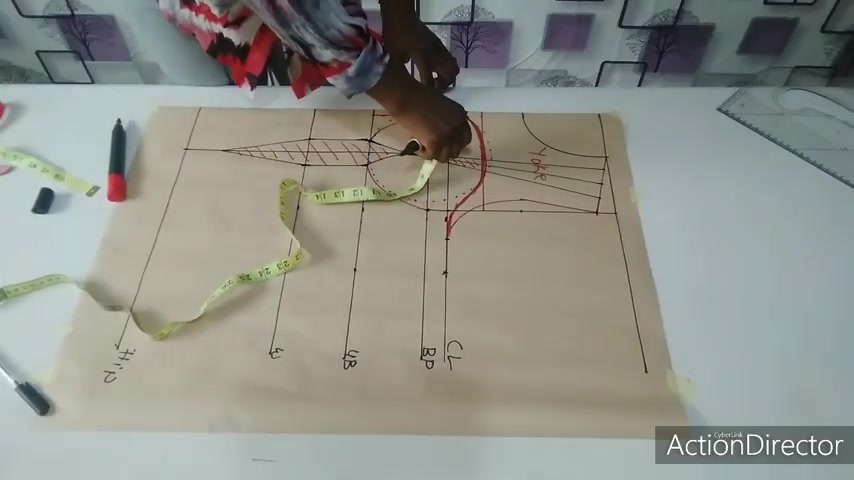
Now let me write it on it .
So I'm cutting this place off this place too .
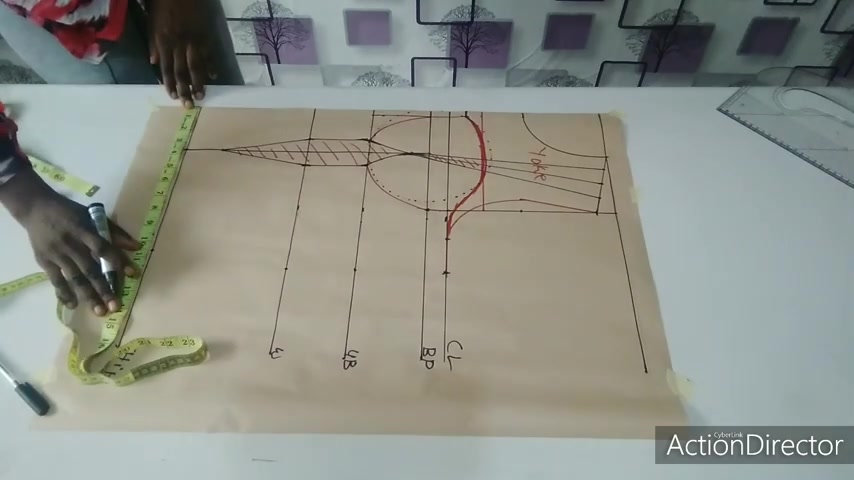
I'm cutting it off now , inputs all my vertical measurements .
Now on my test line , I'm going to input a quarter of my boss .
My boss is 38 inches divided by four .
Give me 9.5 , which is here .
I'm going to measure what I'm going to cut off here .
So what I have here now is one inch , I'm going to use one inch to join back .
That will give me two inches plus that 9.5 inches .
That is 11.5 inches , which is here .
So on my waist line , I'm going to input quarter of my waist , my waist is 34 inches divided by four .
Give me 8.5 plus two inches .
I'm cutting off here and that is 10.5 .
And I'm going to use one hint to join the back .
That is 11 0.5 .
So I'm going to measure it out on my hip line .
I'm going to input quarter of my hip .
My hip is 42 inches divided by four .
Give me nine point I mean 10.5 inches , which is here .
So three inches that I'm going to replace , you know , I I'm going to cut off two inches from here and I'm using one hint to stitch it back .
So I'm going to add that three inches that I added on this line to my EIP line as well .
So plus 10.53 inches plus 10.5 is going to give me 13.5 , which is here .
So now I'm going to connect all the points now , just like this and like this .
So I want to let my , the bottom of my top to look a little bit sexy .
So I'm going to come up from the bottom by two inches and I'm going to reconnect it , use the coff side of my ruler to reconnect it just like this .
So that's just it .
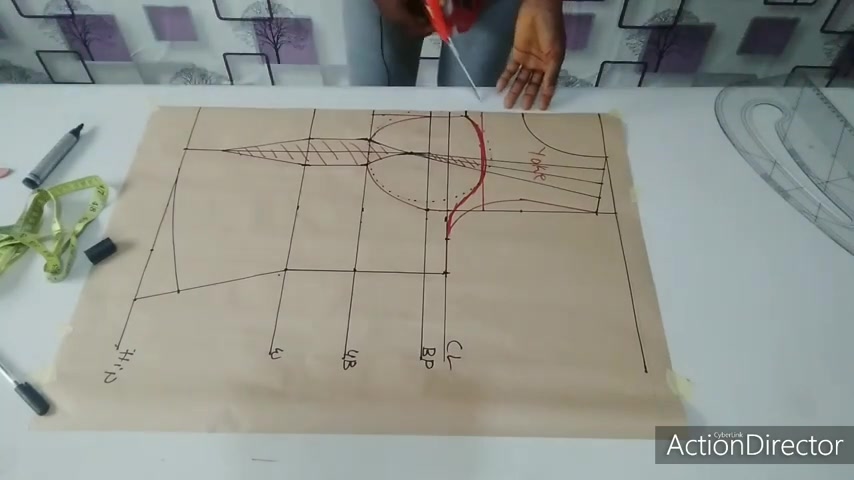
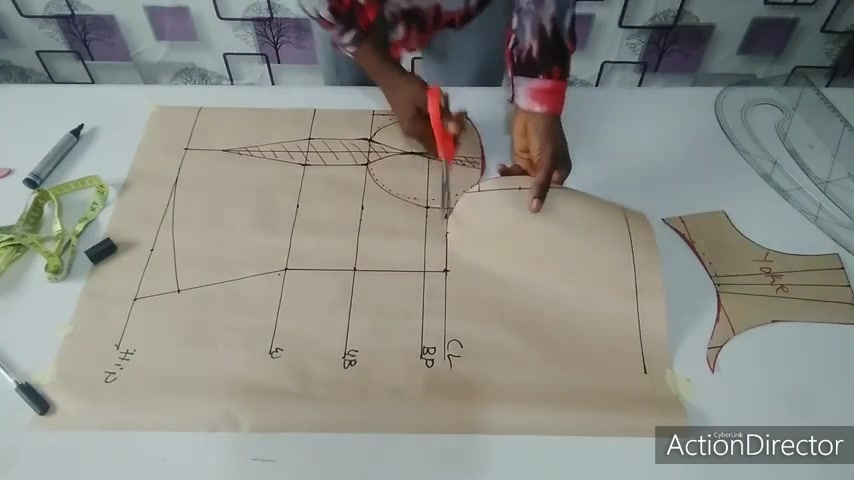
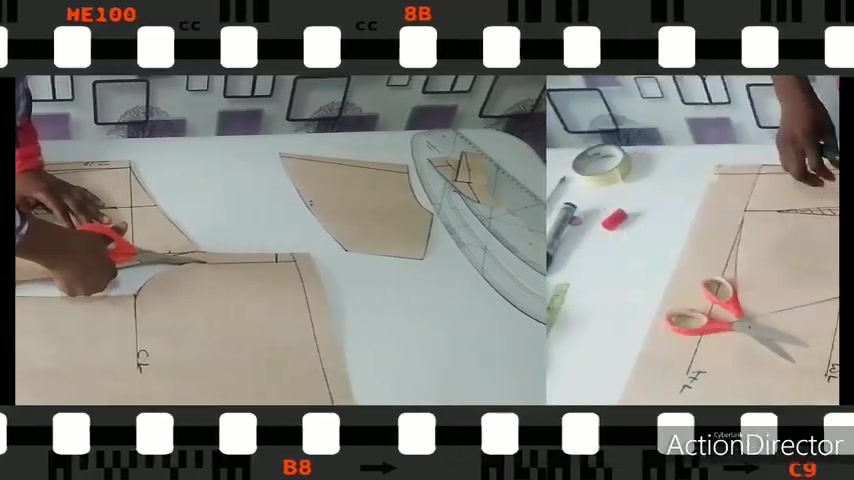
I'm going to cut it out now .
So I'm starting by cutting out my yolk .
Yeah , from here going to cut out my yolk .
Be careful while court is in place .
Yeah .
Ok .
So this is my yolk .
Now I'm caught in it .
I have hope for the front , the neckline .
Mhm So now this is my yolk as you can see .
So I now complete the coin .
Now , remember I did not have any same allowances to it while transferring to my fabric .
I'm going to have all the necessary allowances .
So let's continue courting .
Ok .
Yeah .
Make sure you blend all the sharp edges , please to avoid unnecessary stress while swing .
So I'm cutting the dots .
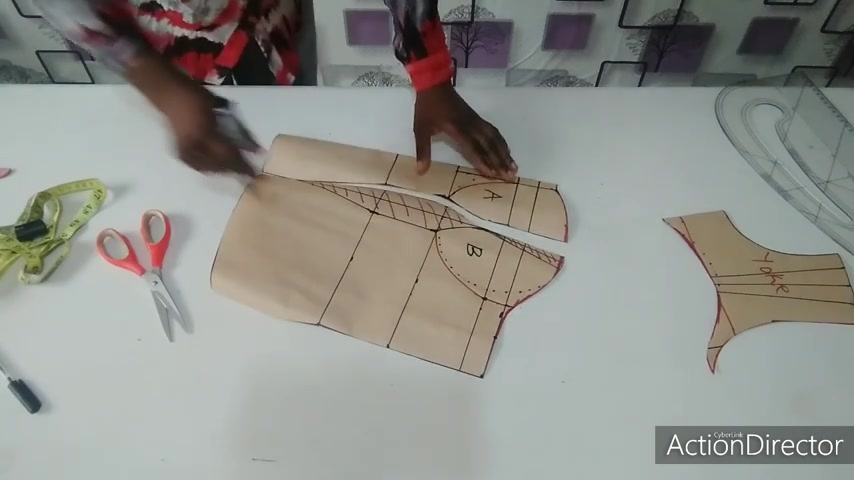
Make sure you label your , you please let me label it as a and be two front and side .
Now , this is my center front .
I'm cutting it off .
F So this is my cup for the center front and this is my , he got a bad first .
Yeah .
How much ?
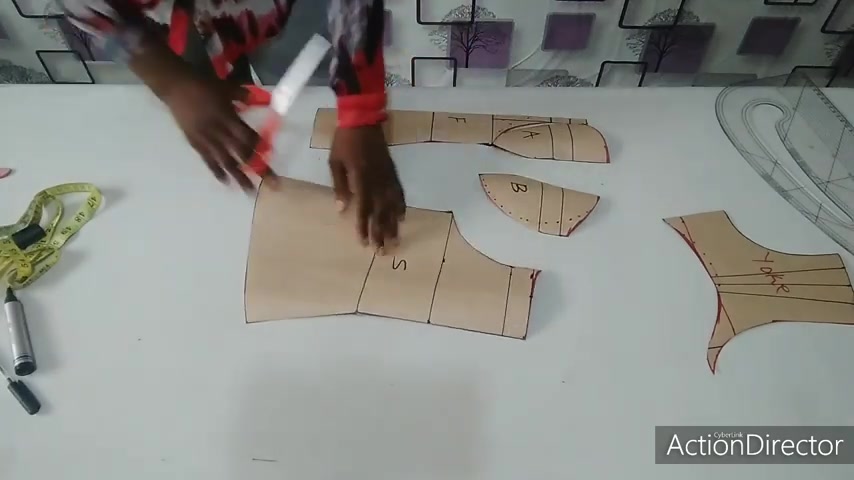
So this is the core for the side and this is my side .
I'm cutting two pieces of this two pieces of this cutting this on food and two pieces of this too .
So I'm cutting my two on food as you can see here is it she just be like this .
So you can see .
So and this is my yolk .
Hope you can see it very well to be like this .
And this is my work for the , for it .
So that's just it .
Let's move on to the back part .
Now , this is another part and paper for my back part , I've already draw all the line that I'm going to need on this part , which I've already explained on my front part .
So this is my shoulder line , my chest line , my waistline and my hip line , let me libel it for me not to make any silly mistake .
My chest line , my waistline and my line and this is my zipper allowance of one .
Hi .
So on my shoulder line , I'm going to input half of my shoulder there .
My shoulder measurement is 15 inches divided by two , give me seven 0.5 , which is here from this line .
So I'm going to input the setting on my chest line 7.5 and I'm going to connect it straight to create my ham hole for the back part just like this .
Finish it off with the curve side of my ruler like this .
This is my back and curve .
Now , my neck weight is 3.5 inches each is here and my next depth for the back will be one inch .
So I'm going to connect it with the curve side of my ruler just like this .
So , and to create my shoulder slope , I'm going to come down by one inch from my shoulder line .
So I'm going to connect it slightly like this .
So that's just it for the back neck line and the shoulder sloop .
So I'm going to measure out my nipple to nipple measurement , which is three point five inches to my chest line on my waistline and on the full length of my top , which is the line , I'm going to connect it straight before creating my dad just like this .
And I'm going to come on my waistline measure half inch on both sides to create by that .
And from the bottom of my top , I'm going to come up by two inches from my chest line .
I'm going to come down by one inch .
I connect my data now , from this point of one inch downward from my chest line , going to connect it to meet my waist line on both sides like this .
And I'm going to connect it down to the two inches .
I measured upward from my line just like this slightly .
It for the bag that I'm cutting out this now going to cut out this , cutting it out and to avoid any sea bug on my backpack , I'm going to come on my waist line .
Now from the center back here , I'm going to come in by half inch .
I'm going to reconnect my back for my chest line .
Going to reconnect it just like this .
Sorry , it's like this just to avoid any , any food in the back parts .
So connect it to the line too to meet the line .
So that's just it .
So my zipper allowance for the back will now start from this point .
Measure one Hinch in what ?
So going to reconnect it , you measure one Hinch , one Hinch till you meet here .
So just reconnect it to meet the chest line like this .
This is my new zipper allowance for the back part .
So before placing all my vertical measurements , I'm going to shape out my yolk , you can make it straight like this .
You can make it , make it curve like this .
You can make V shape depends on how you want it and how low you want it .
So I'll make mine to be V shape on my arm hole line here .
I'm going to find the middle of it , which is here now and I'm going to collect it straight down to meet here .
I'll let it go a little bit .
That's , that's the shape I want .
If you like , you can make yours straight , just place it like this and straighten it all like this and straighten it just measure your length , measure the length of your yu from the shoulder here if you want it straight like this .
But this is the shape I want for my , for my chest line , I'm going to put quarter of my boss from this point .
So quarter of my boss is 9.5 inches .
You know , I'm cutting this place off .
Now , let me extend this nipple to nipple line to reach my , to reach where my yolk wheels start from .
Yeah .
So this is just it , that's it for that .
And placing my , the boss , I mean , the quarter of my boss is 9.5 .
I'm placing it here now .
So , you know , I'm cutting this place , I'm splitting it into two .
I'm going to use one inch to join it back .
So I would have to replace that one inch that will make it 10.5 which is here and on my shoulder line too .
Since it affect a little bit of this place , I have to extend my arm hole curve by one Hinch too .
So for me to create another arm hole for my back part , so I'll just connected street to create another arm who called for my back part .
I'm going to finish it off .
Let me use my red pen for you to see it and understand very well .
This is my new handful .
Cough for the back part .
No need for me to touch my y because I'm not cutting anything off from it .
So this is my new hand of for this part .
Now , I just got this place for my yuk now .
So for me not to short of fabric after cutting it off , that's why I added one Hinch that I'm going to use to join this place back to create my new cough .
Now on my waist line , I'm going to put a quarter of my waist .
My waist is 34 inches divided by four , give me 8.5 inches , which is here .
So I'm cutting out one inch from here and I'm going to use one hint to pla to stitch it back .
That will be two inches .
So I'm adding two inches to that 8.5 inches .
That will give me 10 0.5 inches , which is here .
Now , hip line , I'm going to put quarter of my hip which is 10 point five inches .
I'm adding two inches that I had it on my waist line to eat .
I'll make it 12.5 inches .
Remember I did not have any seam allowance to my pattern .
So while cutting my fabric , I'm going to add all necessary seam allowance to eat .
So I'm connecting the points now from the , from the chest line to the waist , waist to my hip line just like this .
So to make it a little bit sexier at the bottom here , I'm going to come up by two inches like I did on the front , I'm going to connect it with the cuff side of my ruler just like this .
Ok .
So that's just it .
I now cut it out .
I'm cutting my first .
So I'm maintaining this line for my view because I'm not causing any same house from there .
I'm not putting any that out from there .
So my neck line and my shoulder slats .
Yes .
So no complete cutting of my top of my pattern .
Sorry , make sure you blend all the sharp edges , please to avoid unnecessary stress while it's causing .
So I'm cutting this , cutting it off here .
I have to connect to the new hand hole just like this .
And I'm going to finish the cotton now just for me not to be short of fabric .
Why swim ?

I'm going to put that out the to it and my soup B to avoid the B and cotton .
This this house .
Hope you can understand what I'm doing very well .
So that's just it for the bar in this here is my dark parts .
Now as you can see is it and this is the view point you can see .
So guys , this is what we've been drafting all this while this is the front part with the cop .
And this is the back part .
If you find my tutorial approved , please give me a thumbs up , subscribe to my channel to support my channel .
If you have any questions continue to cut in and sewing , you can join me on my Facebook group details to swing created by a I'm on Twitter and Instagram at , please show some love by liking my page on Facebook at singing tutorial till I see you in my next video guys .
Stay blessed .
Stay safe .
Bye bye .
Partnership
Are you looking for a way to reach a wider audience and get more views on your videos?
Our innovative video to text transcribing service can help you do just that.
We provide accurate transcriptions of your videos along with visual content that will help you attract new viewers and keep them engaged. Plus, our data analytics and ad campaign tools can help you monetize your content and maximize your revenue.
Let's partner up and take your video content to the next level!
Contact us today to learn more.