https://www.youtube.com/watch?v=Wdh8nOW9To8
2023-06-14 18:19:51
DIY Platform Bed Made from ONLY 2x4's!! _ Modern Builds
Hey everybody .
My name is Mike Montgomery .
And today I'd like to show you how I built this Diy bed completely out of two by fours on modern builds .
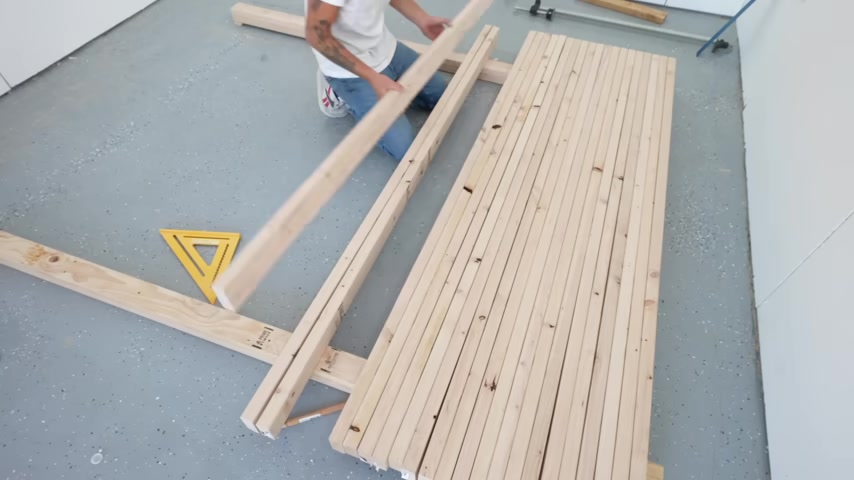
I started this project by breaking down a whole lot of two by fours .
I went to my local Home Depot and I got as many straight clean two by fours as I could find .
And here I'm breaking down 30 of them to 88 inches long .
22 of them are going to be used for our platform and we're going to save the other eight .
For later .
I made sure to use a high tooth count , circular saw blade and a 12 inch speed square to get good cuts .
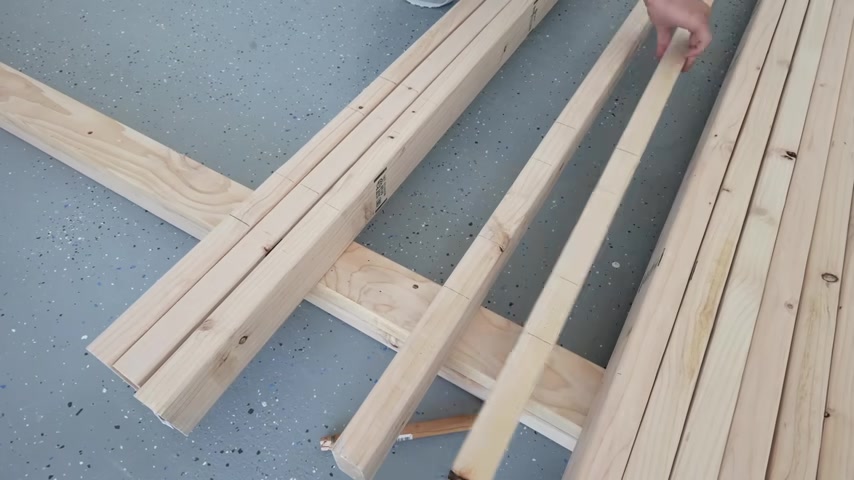
The majority of these boards are going to be covered by the mattress .
So I made sure and used the good ones towards the edge where they'll be visible .
I also made sure that all of the board's good ends were facing the foot of the bed .
Then I turned one of the two by fours into a template so that I could make marks where each of my spacer blocks are going to go on every single two by four .
Then I used an eighth inch bit to pre drill where I'll be screwing all of my boards to the spacers .
This was a little tedious , but I knew that it would help everything as Symbol Square later on for this bed , we're also going to need a whole lot of these 3.5 inch by 3.5 inch spacers to cut them .
I set up a stop lock on my might .
So that way I could utilize all of the short scrap pieces of wood that I had laying around , especially since two by fours are so expensive right now , in my area , two by fours are right around seven bucks .
But I'm curious , where are you guys based ?
And how much are you paying ?
Leave a comment down below .
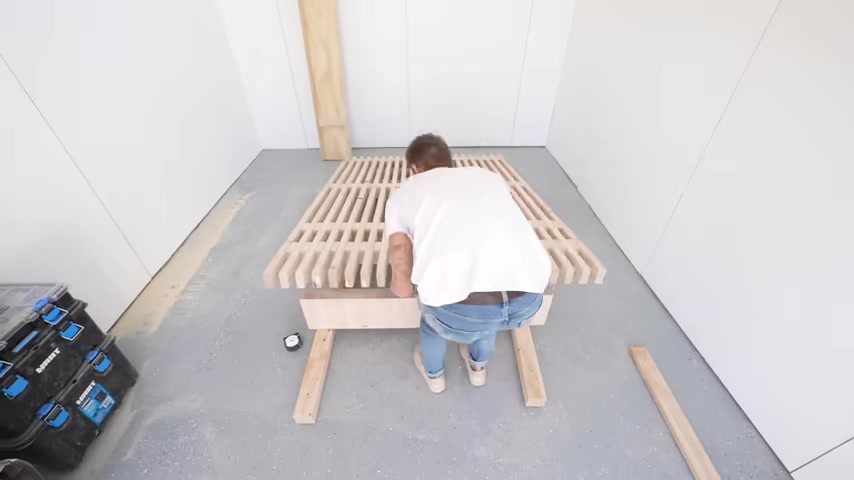
Now it's time to assemble this base .
I made sure to use wood glue on every spacer and every board where they met that way the screws could hold everything in place and the glue could harden and hold everything together .
Long term .
Notice how I put two screws in each spacer .
And then whenever I put on the next slat , I put two screws in facing the opposite orientation .
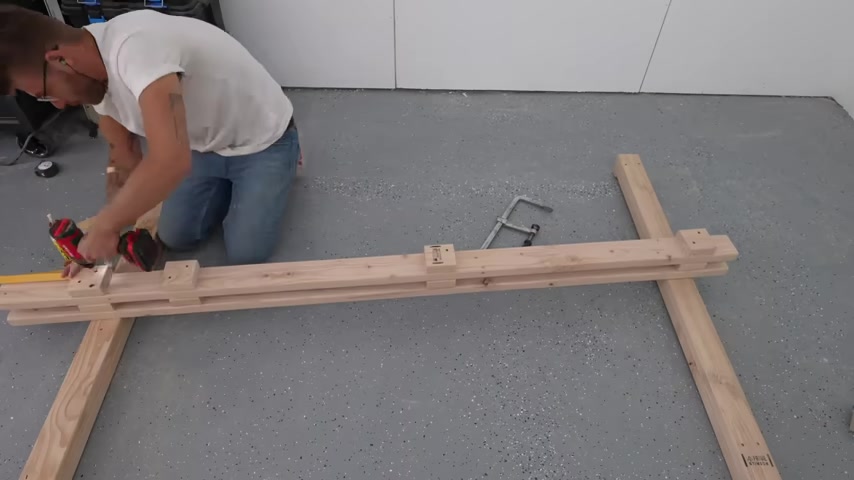
That way they sort of made an X .
So I didn't have any screws running into the ones behind it .
I do want to be up front , even though this process is simple .
It did take a long time .
I spent an entire day just assembling this space .
But I think it was worth it on the foot side of the bed .
The slice extend nine inches past that last spacer .
While on the headboard side , there's only a 3.5 inch gap , the width of a two by four .
While I worked , I kept a 48 inch drywall square with me .
That way , I can make sure that the ends of all of my slats met square along with all of my spacers , I gave myself about an eighth inch of margin , knowing nothing needed to be perfect .
And you can see that I switched over to finish head screws on this last slat that's really sturdy .
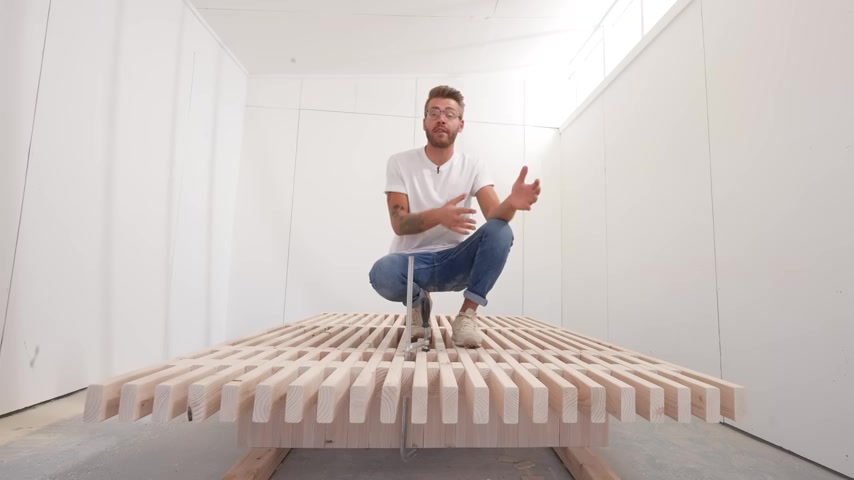
And with that , our platform is complete and now we need to make some legs for it .
By now , I had used up the majority of my good two by four scraps .
So I started cutting down some more boards into 10 inch long pieces .
I'm going to be making nine inch tall legs , but I will be trimming them to length later on .
Overall , I'm going to need 70 pieces .
Damn , I'll be gluing and screwing these pieces together just like before .
And I made this really quick jig to make sure everything went together square .
I just needed a couple of positive stops on one end of this glue up as well as one edge .
That way , I've got a couple of straight reference edges that I could then trim everything square to , I did my best to mix up the grain of these boards .
That way , I didn't have two pieces from the same two by four next to each other .
Although I'm sure that happened a couple of times .
And if you're curious , I'm going to have links to all of the materials and supplies in the description of this video , along with links to free plans .
If you want to build something similar , I let those glue ups cure for about an hour .
And then I ran over to my buddy place so that I could borrow his thickness planner and save a lot of time on belt sanding .
Then I used a circular saw to trim my pieces to their final height nine inches .
Like I mentioned , I took the time to sand these leg assemblies before I glued and screwed it to the platform .
I also took the time to sand the two by fours before I made the platform , but I didn't put that footage in .
This was really easy to line up and I made sure to use these really long lag screws that way it was a super strong connection and now is a great time to get any warp or bend that you might have in your platform .
So make sure and clamp it , stand on it , whatever you've got to do to get that flat .
And with that , the base of our bed is complete .
But right now I'd like to give a big thanks to the sponsor of today's episode .

Bright Sellers .
Discover Wine .
You love and get it delivered right to your door with Bright Sellers .
Bright Sellers is a monthly wine subscription service that uses their unique seven question non wine snobby quiz to pay you with wines based on your taste .
I really enjoy the wine wisdom cards that come with each bottle .
It gives you a little bit of information about the wine its origin and tasting notes .
That way you can sound extra fancy .
I'm gonna be sampling the world line red .
Blend out of this month's box .
Cheers .
Mm Pinky's out .
Look at those legs .
It's good .
And right now bright sellers is offering you all an incredible deal .
You can get 50% off your first six bottle box plus a bonus bottle which makes it a seven bottle box by following the link down in my description and taking that quiz .
Thanks again to bright sellers for continuing to support modern bills content .
Now back to the build .
Cheers .
All right .
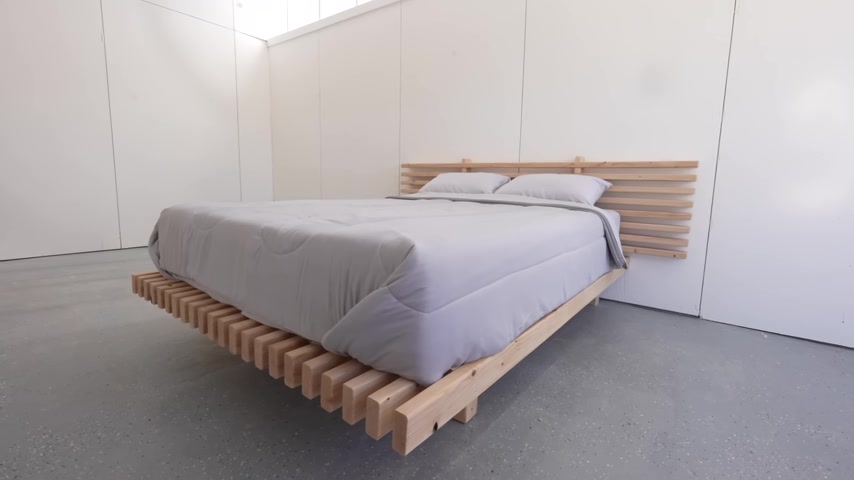
So this platform looks fantastic .
The spacing , the slats , everything is straight and even just the way I was hoping .
Now I'm gonna move on to making the headboard and you can do this in the same way of using the spacer blocks and stacking them up .
But I want to do a little bit of woodworking .
So today I'm going to show you all how to make half lap joints using just a speed square and circular saw .
It's a great utility joint and it looks nice too .
Let's get started .
First , I grabbed one of those 82 by fours that we saved from earlier .
And I made a mark where the fifth spacer in is from each edge .
Then I grabbed all eight of our 88 inch long two by fours , clamped them together and set my circular to half the depth of those two by fours by doing multiple passes with the circular saw .
I'm cutting a groove into each of these boards called the half lap .
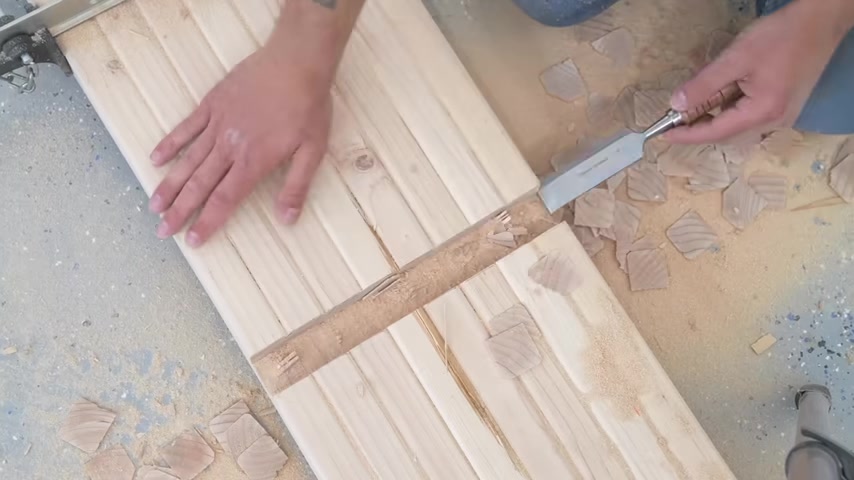
I'll be able to come back with a chisel and clean everything up first , I'll use it to break off all of those pieces of wood , then clean up the whole joint .
So it fits a two by four with a little bit of wiggle room .
I don't want this to be too snug .
Otherwise , it might be tough to get everything to line up , especially considering two by fours have a little bit of tension in them .
After cutting the first joint was a success .
I rinsed and repeated the same steps on the second and that worked just as well .
The two vertical supports for this headboard are gonna need a lot more half laps cut into them .
In fact , it'll need 81 for each of the slats .
I cut the second of joints on these vertical supports a little bit less deep than I did on the horizontal slats .
That way the horizontal slats would be a little proud of the vertical supports and give it a super pro look if that's a little confusing now , just wait until the reveal and you'll see what I'm talking about .
I couldn't have asked for this headboard assembly to go any smoother .
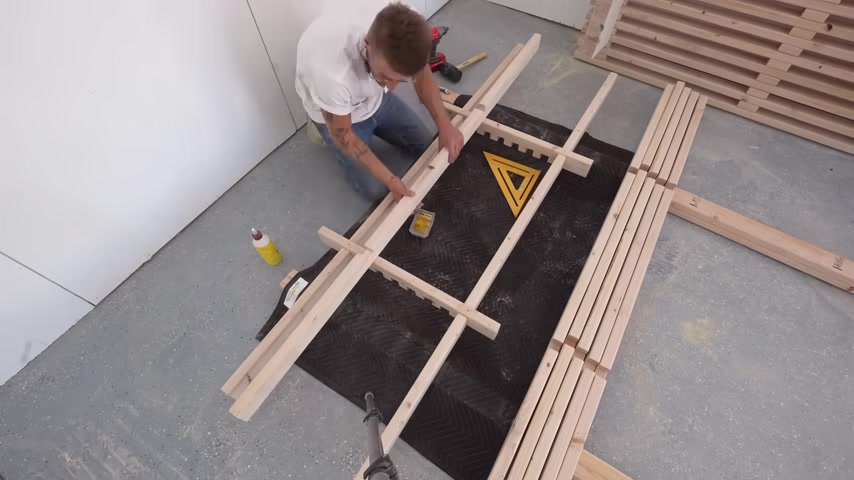
I just put a dab of glue in each of my joints and a trim head screw on the back where each piece met .
And even though making all of these joints did take a while , the assembly process was way quicker than the platform because all of my pieces went together on their own square .
And I used these two by fours to make sure the first slat was an inch and a half above our platform .
Oh Let's go that fit perfect .
Just like on the leg assemblies .
I cut the vertical supports for the headboard a little long so that I could trim them later .
They stick past that last slat an inch and a half .
I sanded everything up to 100 and 50 grid .
And then I made sure to apply a coat of water based polyurethane to protect all of my visible boards .
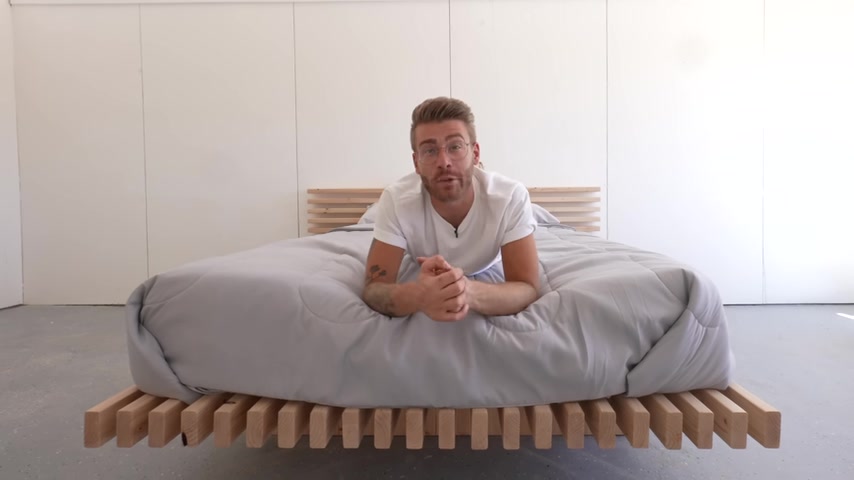
And with that , this project is done .
I am a big fan of this project right now .
I'm working on this design study trying to come up with cool ideas all around two by four furniture .
And I love all of the negative space between these slats and considering you can build this whole project with just a circular saw and a drill .
I am super excited if any of y'all out there decide to build this project for yourself .
Make sure and tag me at modern builds on Instagram .
I'd love to see .
So , thanks a lot for watching everybody .
As I mentioned , plans are linked down in the description and it should be easy to adjust this to whatever size mattress you have .
If you enjoyed this project , I'm gonna be doing a lot more beginner diy and two by four projects in the near future .
So stay tuned and we'll see you next time on modern builds .
Bye .
Partnership
Are you looking for a way to reach a wider audience and get more views on your videos?
Our innovative video to text transcribing service can help you do just that.
We provide accurate transcriptions of your videos along with visual content that will help you attract new viewers and keep them engaged. Plus, our data analytics and ad campaign tools can help you monetize your content and maximize your revenue.
Let's partner up and take your video content to the next level!
Contact us today to learn more.