https://www.youtube.com/watch?v=PctTnOvpdeg
2023-06-14 18:19:21
How To Replace Deck Boards
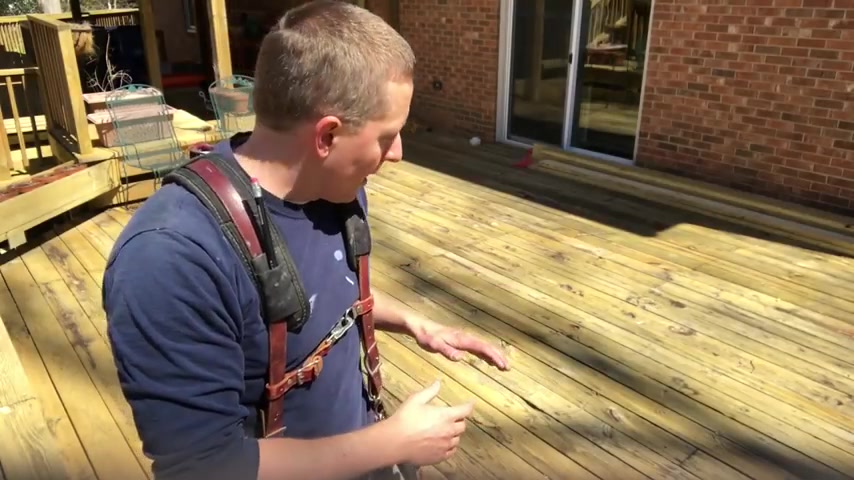
Hi there .
This is Ethan with the honest carpenter dot com .
Uh , in this video , I'm gonna show you how to replace individual pieces of deck board on your porch .
Uh , typically I would recommend that if some or a lot of the boards start going bad , you just go ahead and re top the whole deck , but that can cost thousands of dollars and not everybody is in a position to do that at any given point in time .
So sometimes it's not a bad idea to go ahead and pick out the worst deck boards that you have on your porch and replace them individually and you can save a lot of money that way and you can deal with the worst problems , boards that might cause splinters or boards that are just fractured and they're growing weak and you don't want them to become a structural problem .
The first step of the process is marking the boards that you think actually need to be replaced .
There's so much surface area on a deck that it can become pretty confusing when you make up your mind to replace the board and then come back later and can't seem to find that board .
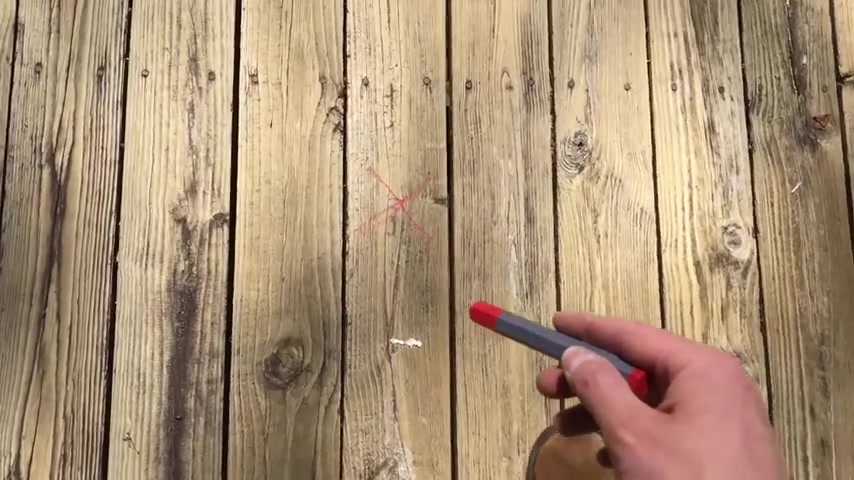
So I'd like to use a lumber crayon and just go around one board at a time and inspect them .
And when I see one that I don't like , I just put an X on it , it's real easy .
These crayons aren't permanent but they will last a long time .
Uh So if you change your mind about replacing something , uh , it's not really gonna matter .
You're not using spray paint or something that's gonna uh mar the deck forever .
But if you sit on it for a month and don't get to it right away , it's ok .
You're probably still going to be able to come back and remember that you wanted to replace that particular board .
Once you've pulled all your measurements and calculated all your lumber totals , you can go ahead and go out and buy your lumber and make sure you're accounting for each individual piece .
One thing you want to know is that you just want to be sure you understand how thick your deck boards actually are .
Um , decks are almost always topped with five quarter board , which is uh one inch thick and it's generally 5.5 inches wide though .
They call it six inches wide every now and then , like in this deck that I'm on the decks will actually be topped with framing lumber , which is two by six and call it two by six , but it's actually an inch and a half thick and 5.5 wide .
So it's thicker than our 15 quarter material .
Uh You're not gonna see two by material used on deck tops very often , but it can catch you off guard if you're not careful .
So make sure you go ahead and look at the edge of your deck to see how thick your deck boards actually are and purchase lumber .
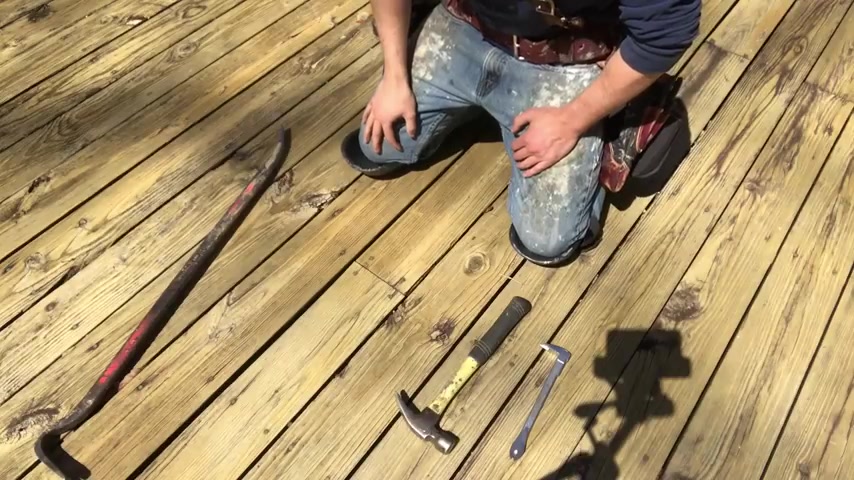
That is the appropriate thickness after you've marked your boards and picked up your new lumber , you can start removing the old pieces .
You could do this with the crow bar .
But when you're doing individual pieces , it's not the best idea because you can wind up damaging the pieces around it that you want to keep .
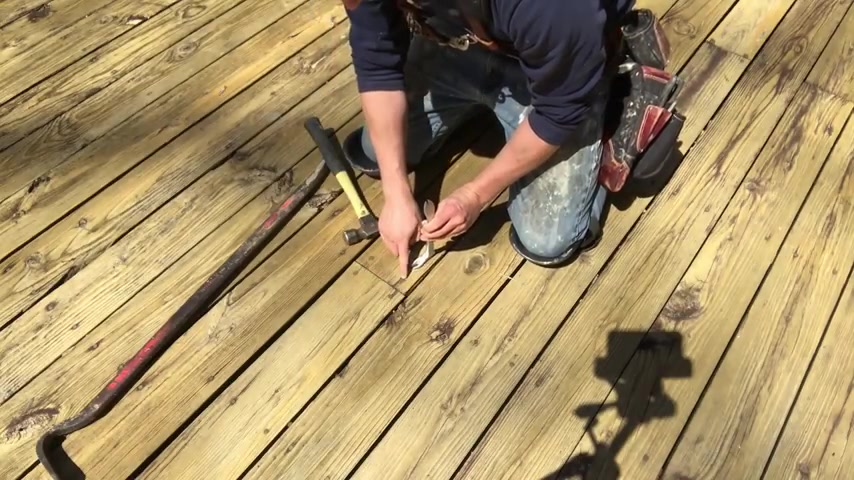
So instead , I like to do a more controlled approach where I take out one fastener at a time and to do that , I use a nail puller or what we often call a cat's paw and it's got a 90 degree end and a couple of prongs out at the point .
And you want to put those prongs right in front of the nail head and drive it down into the lumber and it will kind of latch itself underneath the nail head .
You get a few good taps and then you want to pull backwards .
If it fights , you tap it again , keep your fingers out of the way and tap the longer leg of the nail puller with the inner neck of your hammer and it will give a little extra leverage .
And as you can tell , I have the nail head exposed now , so you can go ahead and grab it with a claw , your hammer and back it out .
If they're really fighting you , now , you could use a crow bar or a pry bar .
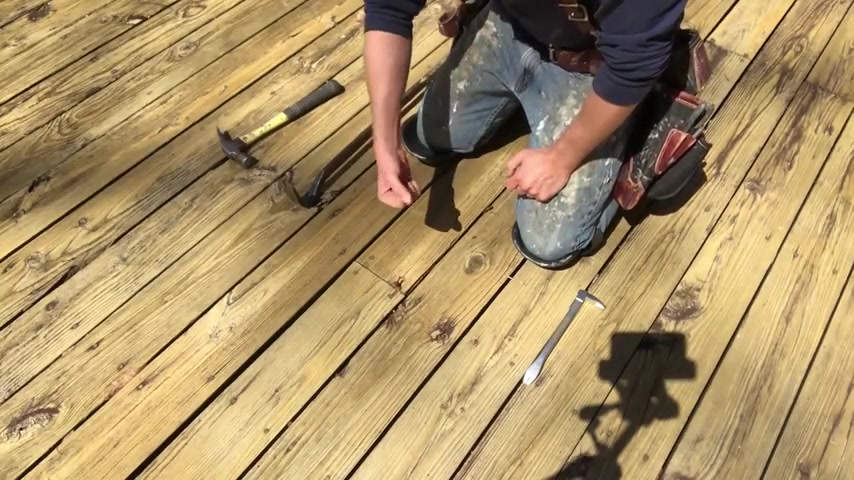
This is the demolition bar , but it'll give you a lot more leverage to get underneath the nail head and pulled out and then just make sure you're saving the nails you pull out .
So you don't leave them lying around and somebody will step on them and you do each individual nail along the length of the board .
And when you get almost down to the end of the board , generally , then you can gently pry the board out , lift it all the way out and the board itself will branch out the last couple of nails .
If you do have exposed nails left , when you , uh , pry up a board , just go ahead and bend them down .
You don't want anybody stepping on them .
It's very easy to lay a board down and you or someone else doesn't see that it has nail sticking out of it and you step on , it goes right through your foot .
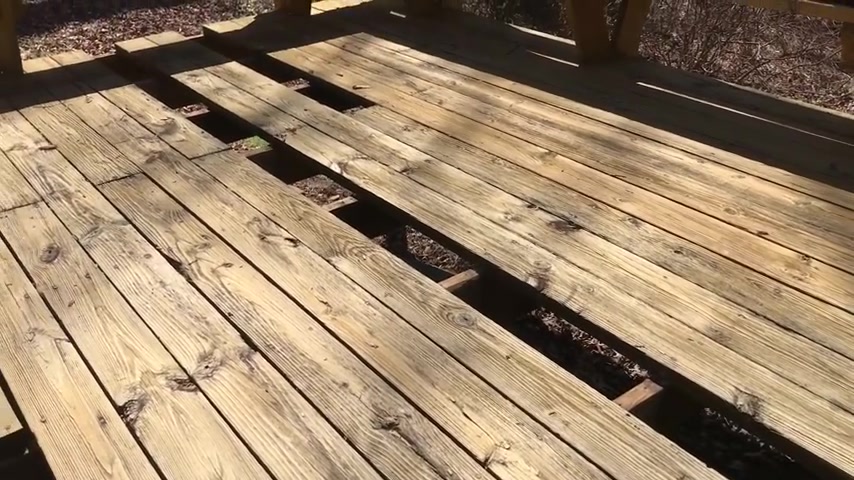
So , Ben , any nails that , uh , come out whole in your board , I've got my old deck boards taken out .
Now , the longer ones I cut in half so that they're easier to haul away and what I did next was just went and looked at all of the individual joists that I exposed to make sure that they were in good shape .
I really didn't see much rod on them .
So that was ok .
Uh I went ahead and swept them off as well because leaves and dirt and whatnot will fall in over time and it can make it kind of hard to get your next board set down .
So go ahead , sweep off tops of them , check their condition .
If they look good , you're ready to replace .
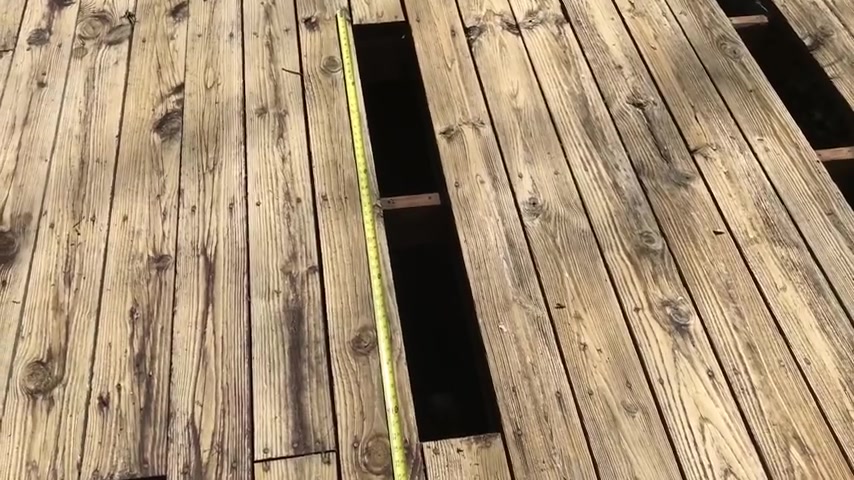
Once you're sure that your joists are in good shape , you can begin making individual measurements for each piece and all you have to do , stretch your tape out and , but it up against the end of the deck board at the far side and then site down it right along the edge of the near deck board .
And in this case , pull in a measurement of about 48 a half inches .
You can cut 1/16 of an inch off of that .
Uh , just give you a little wiggle and make it easier to situate the deck board down in there .
These aren't trim boards , they don't have to fit extremely tight .
So cutting off a 16 or even a full eighth isn't going to hurt .
So I will go around and do this for each individual opening and I'll begin cutting my individual boards .
I will probably start with the longest boards first that way I can select the best straightest lumber out of the pieces that I got .
And I won't be trying to fight to get a bow piece into a really long opening like this .
So I'll start with this 16 ft .
I'm gonna show you how to cut a replacement piece here .
I'm using a seven and a quarter inch circular saw .
We got a pretty new blade in it and I set the blade depth of the cut about a half inch further than the thickness of the board , which is an inch and a half .
And the first thing I want to do , what you always want to do is deck boards and framing lumber .
Often come with a ragged end .
It's uneven and we want to start with the square end to make sure that we're butting our seams up together as tightly as possible .
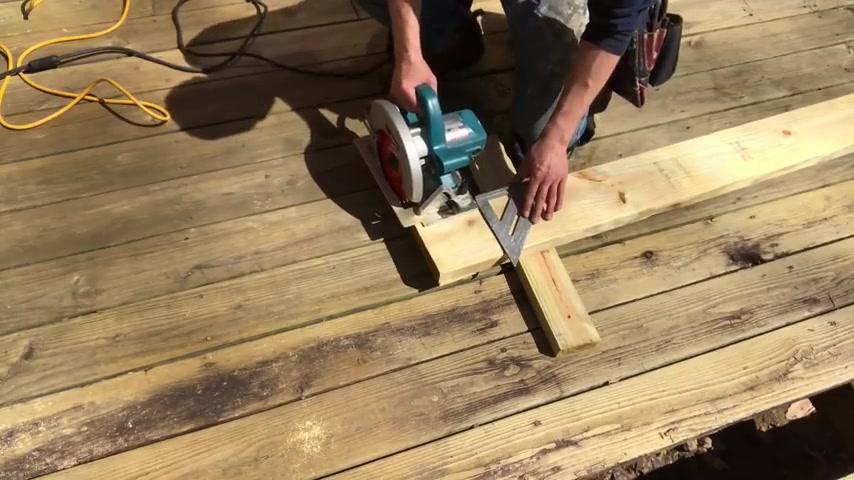
So I like to take my speed square , set it on the board and I set my saw on the board as well and I bring this edge of the sole play the saw to the edge of the speed square .
And I push until it's pushing the blade out to just inside the outer edge of the board .
And you can kind of test by thumping the blade into it and you just fire up the saw and pass it through , make sure the blade guard falls down before you set the saw down on the deck .
You don't ever want to set the saw down without making sure that the guard is in place .
And I'm gonna pull my 16 footer down .
We're starting with a piece that is , we're gonna cut it 48 5 eights .
I'm gonna send out my tape , hook it onto the edge of the board .
Find 48 5 eights .
Make a little crow's foot A V .
Let my tape fall in .
Bring your speed square right up to the point of that V and draw a line through it .
Now , we're going to do the same thing we did set .
We're gonna be cutting from this side and you , ideally you want to take half of the line that you drew .
I know that's kind of impossible , but you don't want your blade eating up the whole line or your piece is going to wind up being a bit short .
I'm gonna set my saw on and I'm gonna wind the tooth up just with the line I want to cut on .
Then I'm going to bring my speed square to it .
I'm going to test it a couple times and I'll be gently pushing the speed square over each time as I do it until it's lined up the way I want it .
And then I'm going to fire up the saw , touch the wood with it .
And if the notch is where I want it , I'll go ahead and make the cut all the way through .
Send your piece out and you notice that the whole time I did this , I had a sacrificial block underneath .
This is a prop block .
It keeps the piece up off the deck .
I don't want to cut through the deck .
I really want an inch and a half or a couple inches of space underneath .
So whenever I'm doing a cut that's not up on a table , I want to put a piece of two by four underneath and make sure that my blade isn't going to hit anything around it .
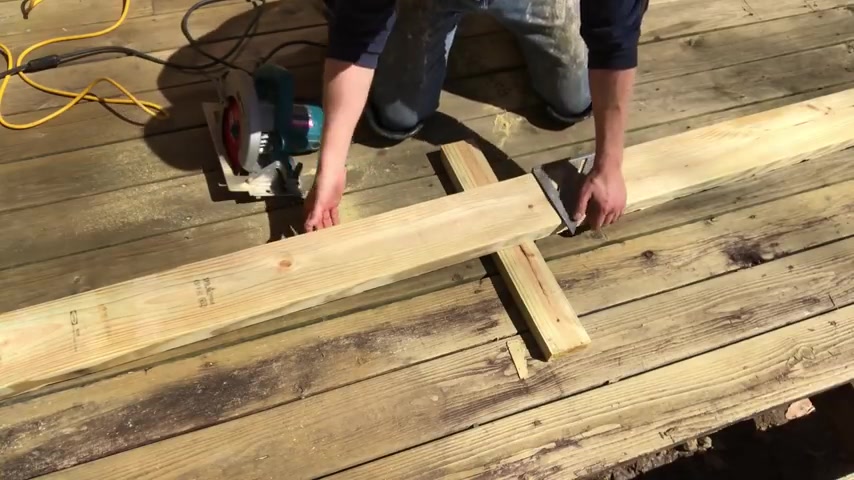
But I got my first piece there and I do put that in place .
There's a replacement piece pushed down into the gap where it goes .
Uh I'm gonna show you how to attach it .
This is a butt seam .
It's where our board is going to butt up against the one next to it .
These two boards are sharing a joist and they each only have about three quarters or an inch at best of space .
So , ideally what you want to do when you're putting your couple screws in here is that you want to toenail , the screws drive at a bit of an angle to make sure that the screw isn't falling out of the edge of the joist that we're going into .
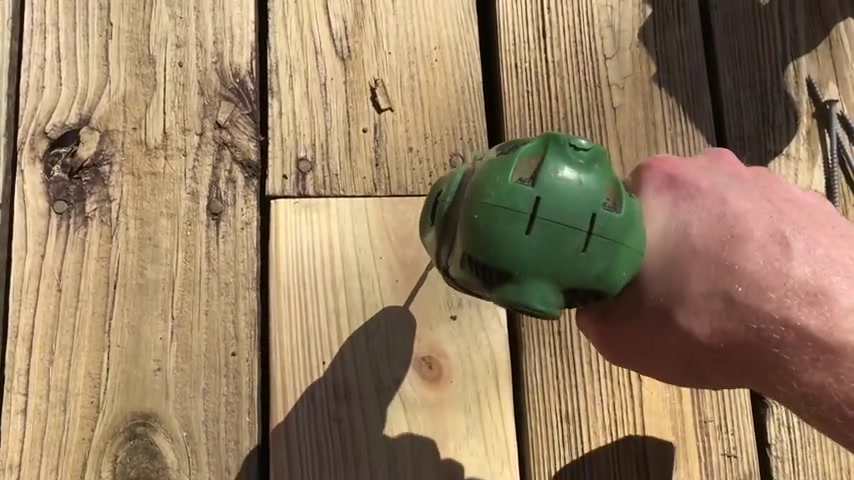
So I have a 9 64 spit drill bit and I'm gonna pre drill for this .
So we don't split the end of the boards , you know , get the drill bit started and then I'm gonna angle it about maybe 30 degrees .
Do another one and you're drilling holes about an inch from the edge of the board .
And what that does is it gives space for the screws to pass through .
So they're not fighting me the whole time .
They're not forcing their way in there and they're not gonna split the wood in the board .
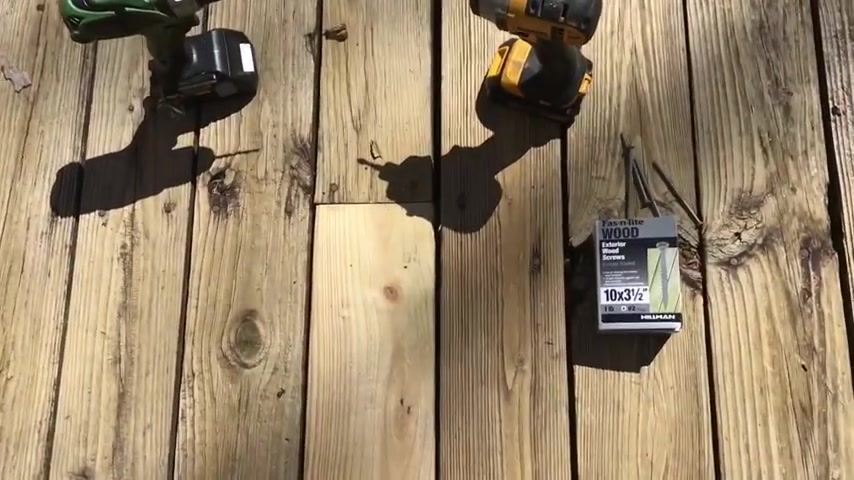
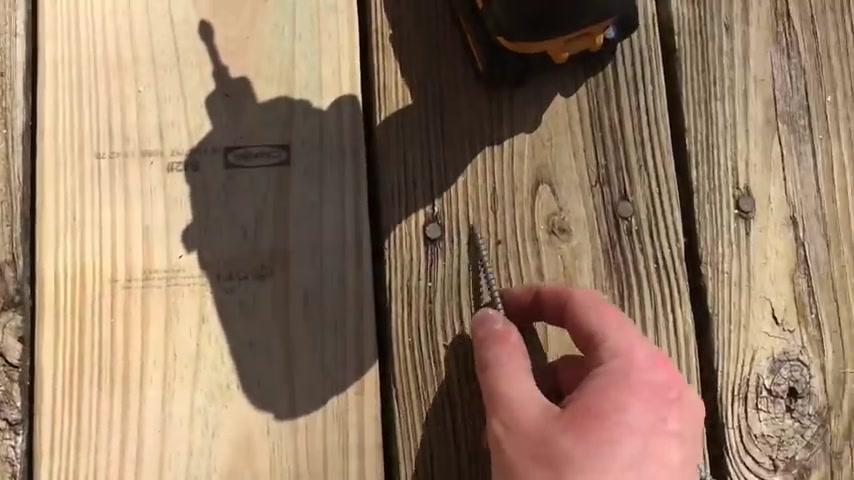
I use my impact driver .
These are 3.5 inch exterior screws and I drill and I counter sink .
I put it , I pass it just beneath the surface just a little bit and do that for the other one .
That's the pieces there .
And now for our next set , you come down and you find the other fasteners running along the joist underneath and they're , they're going to let you know where to put your screws in this board .
And again , I'm gonna pre drill , but I'm gonna do it vertically this time .
Not that much .
And I'm gonna set the fasteners in and then from the edge like we did last time and I'm gonna repeat the process , set your screws in .
You can even tap them a little bit with a hammer to get them set and then drive them .
There's the wrap up for our deck board replacements .
As you can see , I just went around the deck and repeated all the steps that I just talked about in the last few segments there and ended up notching in about 10 boards .
Uh but it all came out good and I'm happy with it .
Uh Every board has two screws per joist .
So everything's really strong .
And uh yeah , that's the job done for more information on replacing old deck boards .
Check out my blog , the Honest Carpenter dot com .

And if you enjoyed the video , please like and subscribe below .
Partnership
Are you looking for a way to reach a wider audience and get more views on your videos?
Our innovative video to text transcribing service can help you do just that.
We provide accurate transcriptions of your videos along with visual content that will help you attract new viewers and keep them engaged. Plus, our data analytics and ad campaign tools can help you monetize your content and maximize your revenue.
Let's partner up and take your video content to the next level!
Contact us today to learn more.