https://www.youtube.com/watch?v=gWcMP_aAHHA
2023-06-14 18:18:18
How To Fix A Large Crack In A Concrete Sidewalk _ Surprising Results!
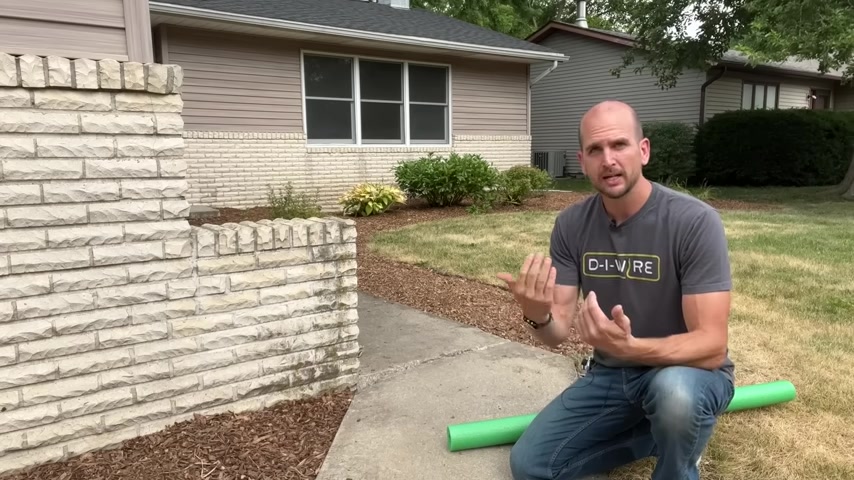
So what do you do ?
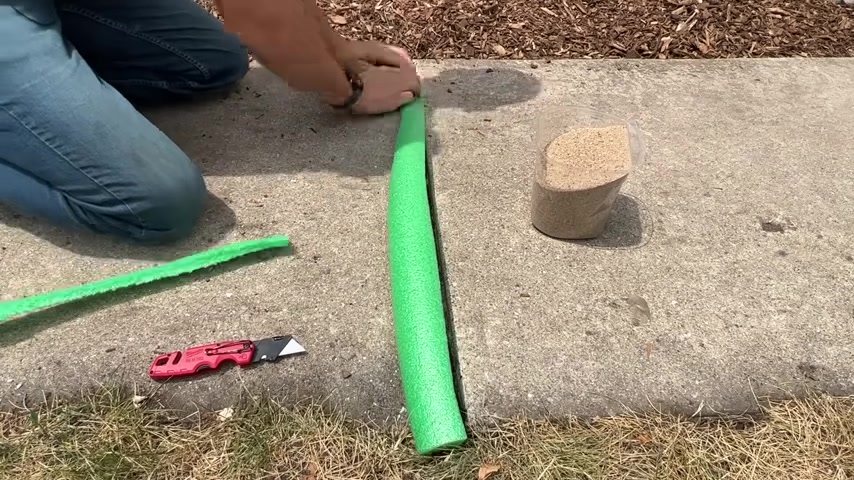
If you have large gaps that are over one inch and maybe irregular in shape like I have here on an entrance sidewalk , it's actually an easy fix and believe it or not , the key is a pool noodle .
So let's jump in , I'll show you how to fill these gaps and then seal them .
So you don't get weeds and grass coming up through those gaps and also you don't get water flowing into the gaps because if you're like me in the Midwest with the freeze thaw cycles that can start to heave your sidewalk .
So then you start to have lips which can be dangerous , especially when it's on an entrance sidewalk .
Like this one , I'll start off by doing a little pre work by using this nylon cup brush wheel on my drill .
What I'm doing is I'm just cleaning off the concrete edge itself because that's where the seal will bond to just getting dirt and debris off on both of the cracks that I will be working on .
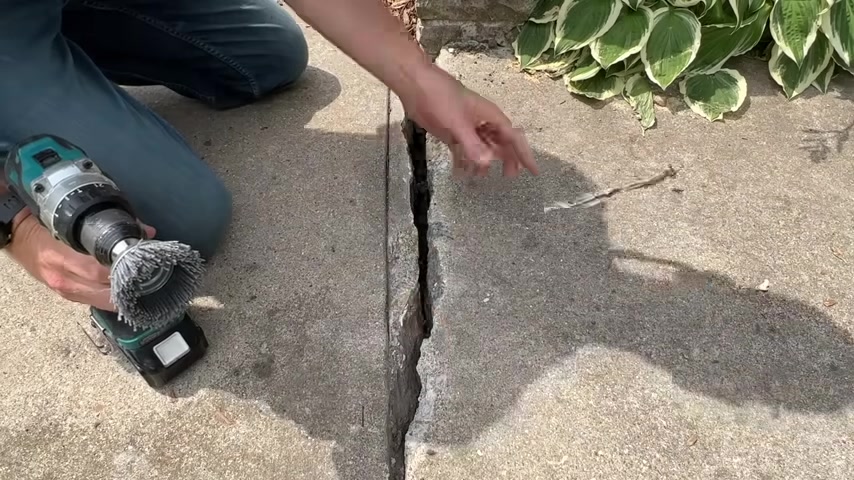
Now , also , if there's some exterior cock like there is here , which is not the right product to use , you're going to remove that during this pre work as well .
So here is my better looking of the two gaps I need to fill .
And now with all the dirt and debris knocked off , it's really a three step process .
I'm going to fill any of the larger voids .
Just with some standard play sand , you can get at any home improvement store .
If you had a consistent gap , half inch , 5/8 of an inch , three quarters of an inch , all those can be filled with the standard Backer Rod .
So just some background around that you'll find at your home improvement stores one inch .
I don't find readily available in my area .
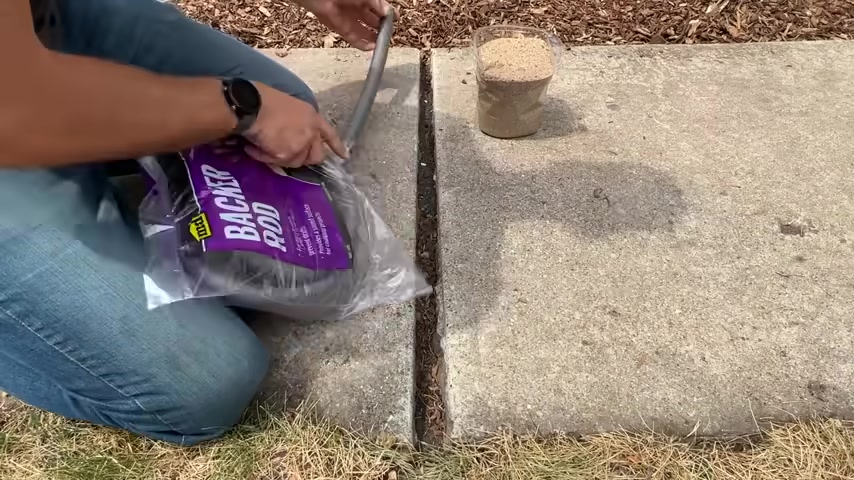
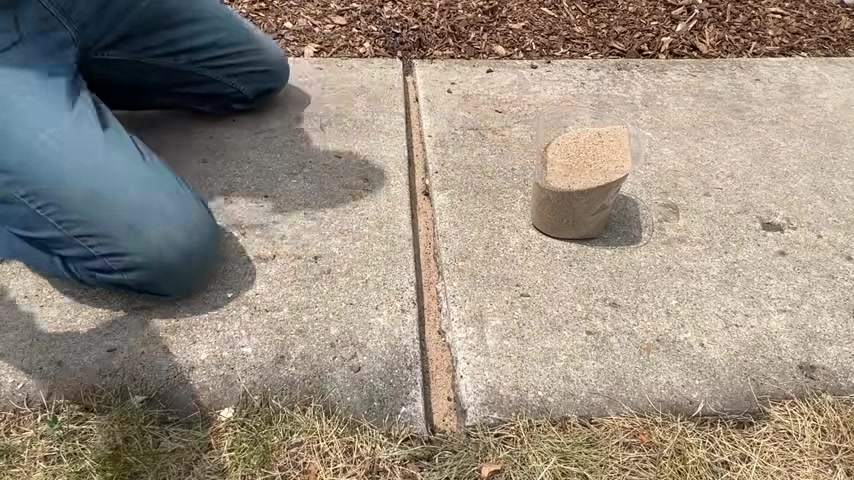
So I need to get it off of Amazon and you'll see that link in the description that would work , ok , at the start of my gap here , and I could push that down and it would reach resistance .
I press it down and then I do the last step , step three , which is the sealant on top .
But once I got over here , it would not .
So I'd either need to double up this back rod which I don't love doing or find out a new plan because one inch is about as big as it gets .
And this is just a polyethylene foam , which is exactly what a pool noodle is .
So I'll be able to cut this custom size to this gap and it will work great as a custom fit backer rod and then the last step is the ceiling .
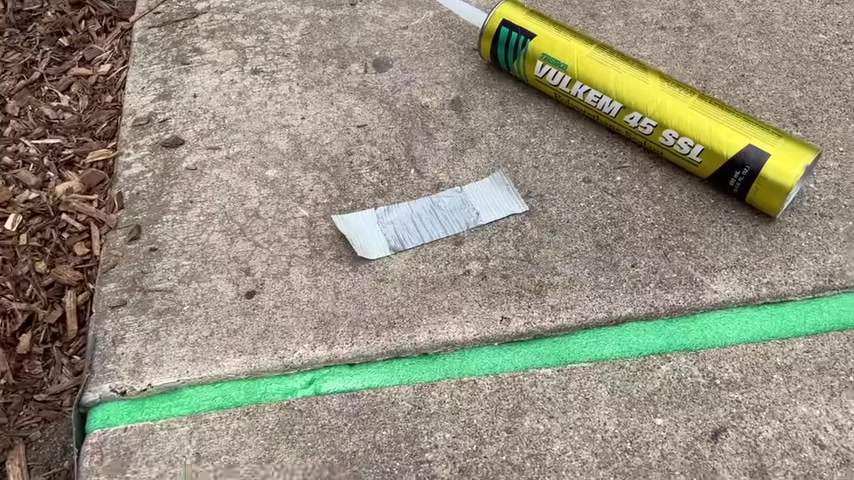
So I'm using this , which is a Vulcan 45 SSL that is semi self leveling .
I also like a secret product , but that is completely self leveling .
So if you have a gap like this and it is not level that self leveling product is just going to go to the low side and then it'll pull up or it will flow out of your gap with this semi self leveler .
It's a little more forgiving .
And if you have just a little bit more of a slope , it will still fill that gap and result in the solid seal .
But this is why we clean up that surface .
So the Vulcan 45 SSL will have no problem adhering to the concrete making a great seal and there is one small tip at the end which I'll show you to help blend it .
Now , sometimes between step one here where we're filling in the sand and then step two , where we're fitting this pool noodle and cutting it down to the size of our gap .
You might have to go back and forth .
You might get the foam in the actual gap and notice that it's sitting up a little too high .
So they take the foam out , knock down your sand a little bit and kind of go back and forth to make sure the foam is below the level of the concrete .
So the seal will actually have something to sit on top of .
So this one's a little easier .
The second one is going to be a little bit harder .
One is going to take a lot more sand to fill up .
And two , this is a lot more jagged and just going to be a little bit harder to cut , but you can cut in multiple sections .
So here I'll just cut half of the foam fitting it down within the gap And then you can do combinations too .
If you have one part that is consistent , you could just use standard backer rod for that small section while you're custom cutting your pool noodle to fit the more jagged rough areas .
Now make sure you don't leave any gaps .
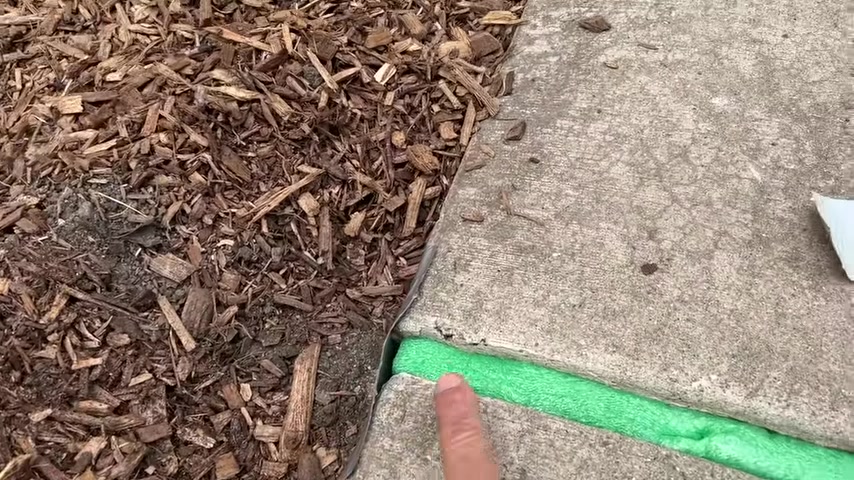
If you leave gaps , your self leveling or semi self leveling seal , it will end up draining through that gap and cause a divot in your finished seal .
So step one , step two , completed .
The last things I do is I do close off those ends here .
All that is is just some duct tape and then I double it back here .
So you do not have a sticky portion in the middle .
So the sealant won't stick to that once it dries and you remove it .
So then that will allow the sealant to go over and kind of close off that end .
And then I just confirm that the back rod or this custom cut pool noodle is not too high and that it's fit snugly .
You do not want it to float up .
That's kind of a classic misstep is it's not tight enough or it's too high you want , then you start applying your sealant and you have a high point sticking out of your ceiling , just do all those checks .
And once you do that , I would do one last shot back , cleaning up all the sand or any loose debris and apply the ceiling .
So then I let the sealant set up for about 10 minutes and Sprinkle on some sand .

This will help blend the actual sealant into the sidewalk , but it will also keep out leaves and bugs and twigs and mulch , especially if it's a windy day as the sealant is starting to set up and then here's what the finished product looks like .
So overall , it's a very approachable project and especially if you do your step one and step two and kind of get everything set ready to go .
That ceiling is just going to go in super easy and then you can Sprinkle on the sand to get the look you're going for to kind of match your sidewalk or driveway .
Now , remember these types of cracks and heat being in sidewalk often is because you have an issue with your down spouts or your gutters .
So check out this video right here , I'll show you the good , better , best options with getting down spouts rerouted in the water away from your home .
So you can avoid issues such as this .
So thanks for joining me on this video and we'll catch you on the next one .
Take care .
Partnership
Are you looking for a way to reach a wider audience and get more views on your videos?
Our innovative video to text transcribing service can help you do just that.
We provide accurate transcriptions of your videos along with visual content that will help you attract new viewers and keep them engaged. Plus, our data analytics and ad campaign tools can help you monetize your content and maximize your revenue.
Let's partner up and take your video content to the next level!
Contact us today to learn more.