https://www.youtube.com/watch?v=YWA-xbsJrVg
2023-06-14 18:17:30
How to Make a Website in 10 mins - Simple & Easy
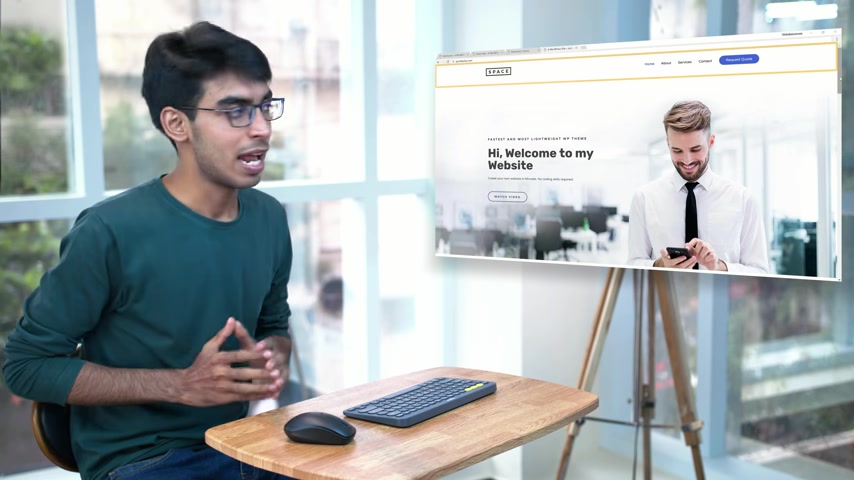
Hi guys , I'm Sang from website learners dot com .
And in this video , I'm gonna show you how you can quickly make a website in just 10 minutes .
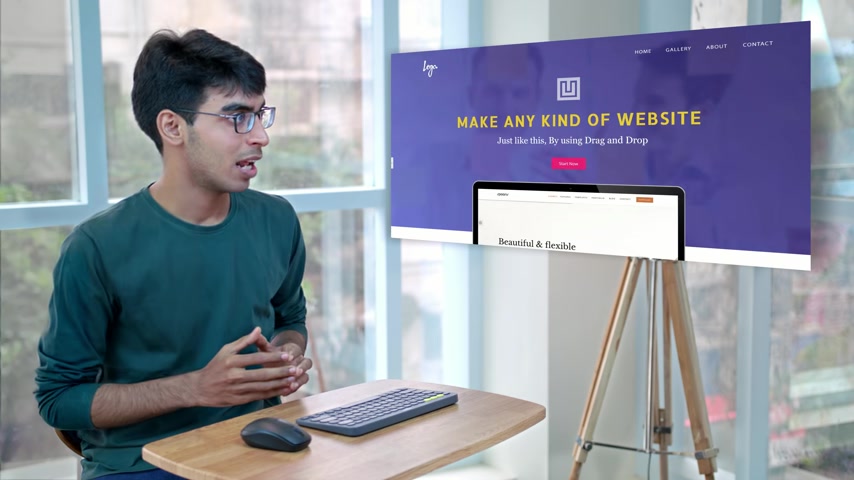
Now , after watching this video , you'll be able to make any kind of website just like this by using dragon drop .
So don't miss this video out and watch it till the end to learn how to do it .
Ok ?
So I'm shuang from website learners dot com .
And let's start making this website .
Ok ?
So before we start , you need to first click the link below this video .
So I'm going to click this link and it will take you to this page .
Now , we're going to do this in just five steps .
Ok ?
So the first step is to pick a name for your website .
Now , I already have picked a name which is quick dot com .
So I'm gonna search for it and then click check availability .
Ok ?
So now you can see that the name is available .
So once you get the name , you can go to the next step , which is to get hosting and domain .
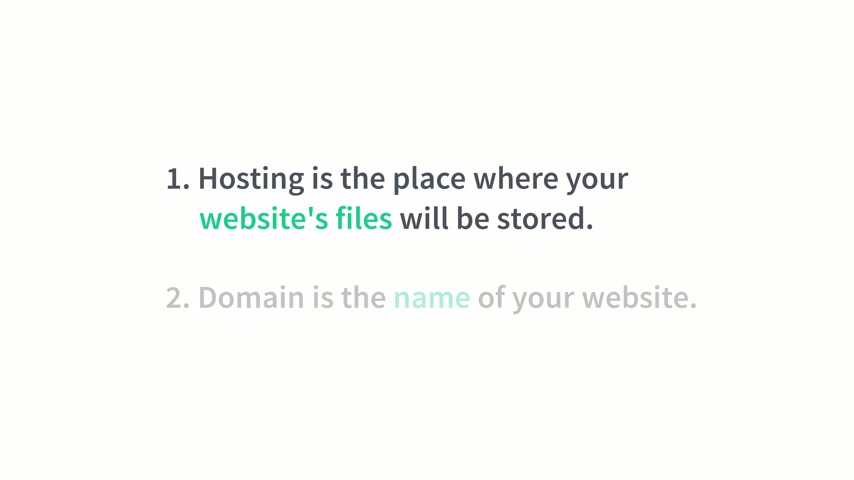
Now , hosting and domain are the two things which we need for launching our website hosting is the place where your website's files will be stored .
And domain is the name of your website .
So to get hosting and domain , let's scroll down and click get hosting .
This will take you to go dot com where we're going to buy the hosting .
So let's click get started now under the same name which you chose earlier .
So I'm going to enter quick techie dot com and then click search now , click select and continue .
Ok ?
So this is a car .
Now , you can see here that we're getting the domain for 9 ₹59 .
Now , if you change the duration from two years to one year , you can see that we're getting the domain for free .
So now let's proceed to checkout now .
Good .
I will ask you to log in .
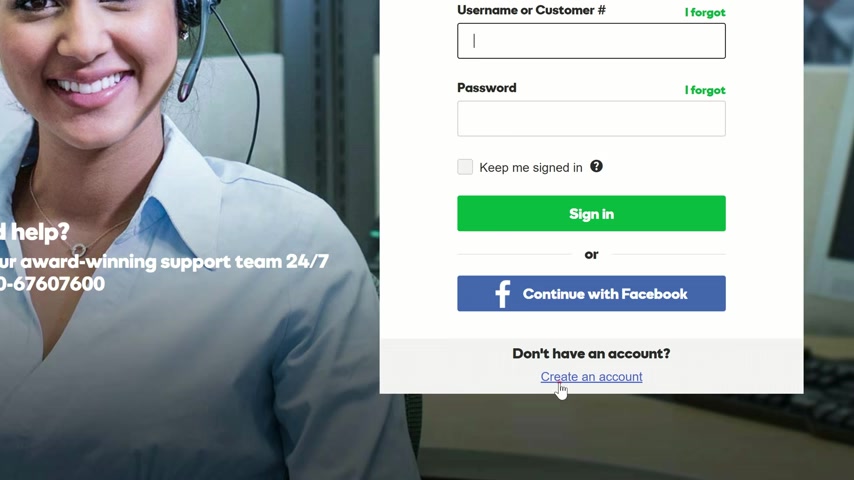
So let's click create account and fill in those details .
Now , enter any four digit number for the pin and click create account and then continue filling these details , the choose your payment option and click continue .
Ok ?
So guys , this is going to cost us around ₹99 per month and the plan will be valid for one year .
So let's place the order and make the payment .
So I'm going to quickly complete the payment .
Ok .
So now we have completed the payment and we have got a domain in hosting .
Now , let's go to the step three which is to install wordpress .
Now we're going to use wordpress because it makes it very easy to build a website without knowing any programming or coding .
So let's install wordpress .
We're gonna scroll down and then click , manage wordpress .
OK ?
So I click here and then click get started .
Now , just select your domain and click next .
Then again , click next .
And now you need to enter your user name and password for Wordpress .
You'll need this to log in into wordpress .
So I'm going to enter my name and password and click install .
Ok .
So wordpress is installed .
Now , let's click , get started and then click .
No , thanks and ok .
Ok .
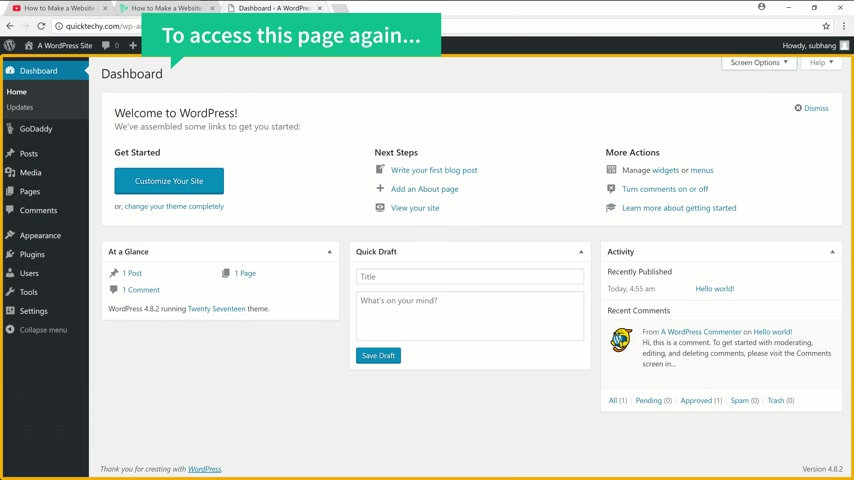
So this is a wordpress dashboard .
Now , from here , you'll be able to control your website .
Now , if you want to access this Wordpress dashboard again , you can just simply go to your website address and type slash log in .
Ok .
So once you reach your dashboard , this means your website is live .
So to check that please go to our website address and press enter .
Now , as you can see our website is live .
So this is how the default site looks like .
So next , in order to easily edit our website , we're going to install a new team .
So the new theme is called Astra .
So to install a theme , let's go here and click themes .
Now click add new and search for astra .

So we're going to install this theme .
Just click install and click , activate .
Ok .
So the theme is activated next , we're going to install a plug in which comes with this theme .
So by installing the plug-in , we'll be able to easily customize our theme .
So to install that plug in , let's go to plugins and then click add new the search for a plug-in called Astra and then install this plug in .
So I click install and then click activate .
So the Astrocytes plugger is now installed .
Now , this plug in has a set of designs for your website which you can choose and then apply it to your site .
So to see those designs , let's click , see library .
So these are the designs .
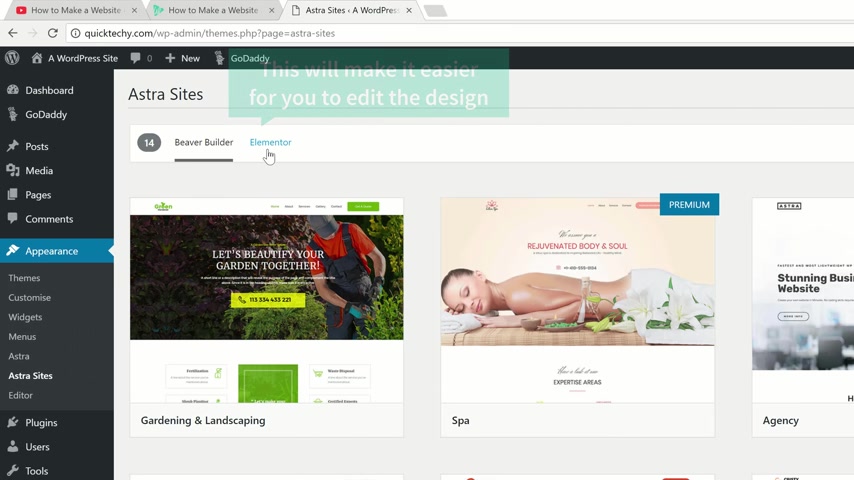
Now , before you choose a design , just click elementary , this will make it easier for you to edit the design .
So click element and now you can choose any design you like .
So I'm going to choose this design and you can see how the site will look like .
If you want to apply this design to your site , just click install plugins and then click import the site .
Now the design of the demo content will be imported into your site .
Once it's done , we can now see the site .
So let's click view site .
Ok .
So as you can see the demo has been imported into our website and this is how it looks and you can also see these other pages which also has a demo content .
So once I've got the design into your site , you can now go to the final step , which is to edit the content .
So to edit any page of a site , you just have to go into that page and click edit with elementary .
So let's say you want to edit the home page , you just simply click home and then click edit with elementary .
And now we'll go into this editing section .
So let's say you want to change the text here , you just select that text and then start typing anything you want .
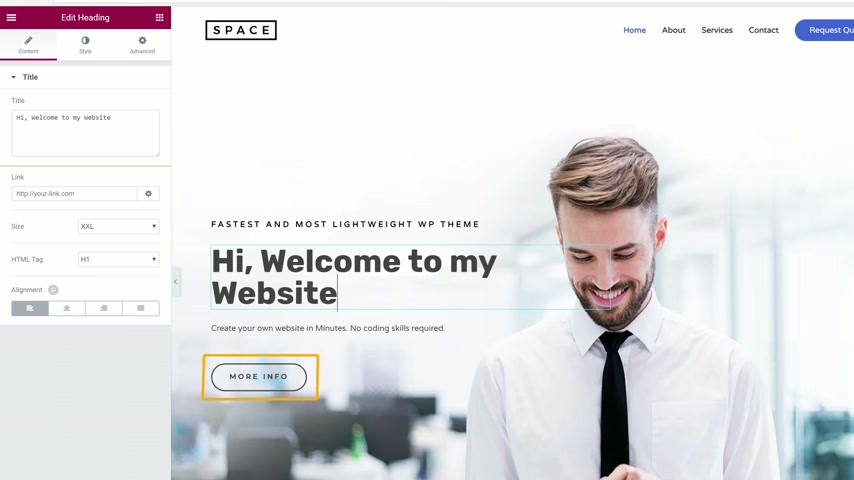
So I'm going to type hi , welcome to my website .
And now if you want to change the text on this button , just click here and change the text on this button here .
So the same way you can edit any text you want on this page , just select the text and then start typing .
So this works out throughout the website .
Now , if you want to change this image , you just click it , select the image here and drag and drop your image .
So once you are done with the changes , you can simply save the page by clicking save and all your changes will be saved .
Now , you can view the page by clicking here and then clicking view page .
So you can see that all the changes are here .
OK ?
So now you know how you can edit any page of your site .
Next , we're gonna see how you can change the header or the footer area of your website .
Now , by using element , you'll be able to change this part of your website .
But if you want to change this area , which is the header , you can do that by going into the customized option .
So let's go to customize .
And now you can see that there are some blue icons .
Now , if you want to change the logo , you just click this blue icon and you can change the logo here .
Now , the same way you can change the menu section by clicking these icons .
So everything can be edited by using these blue icons .
And this will be same in the foot area also .
So let's say if you want to change this text , you just click this blue icon and start typing anything you want .
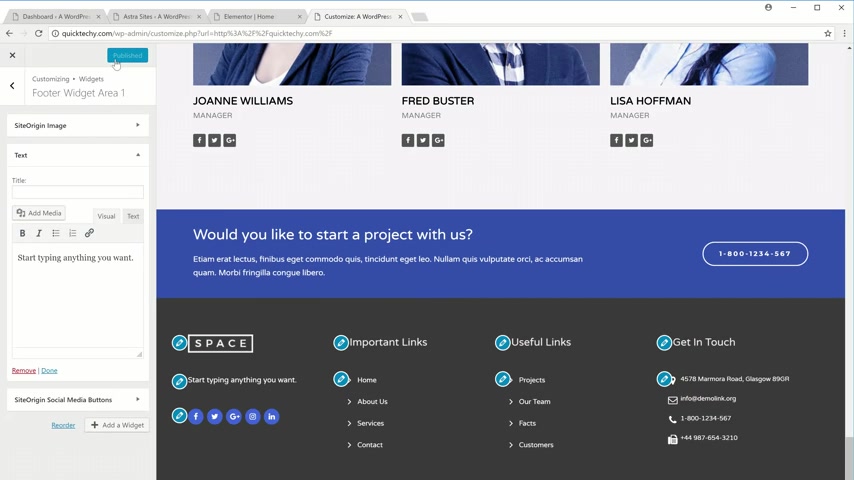
Once you're done with the changes , just click publish and they'll be published on the site .
So now let's close this and let's go back to our site .
OK ?
So we saw how to edit the header and the foot area .
Now what if you were to add a new page ?
It's very simple .
All you need to do is you need to go into this new and click page .
Now , let's say you want to create a service page for a website .
You need to first enter a title and now to start creating a page , just click edit with elementary .
So now it will take you to this blank section and now you have two options to create your page first .
You can either use these elements which are over here and then drag and drop them into this area .
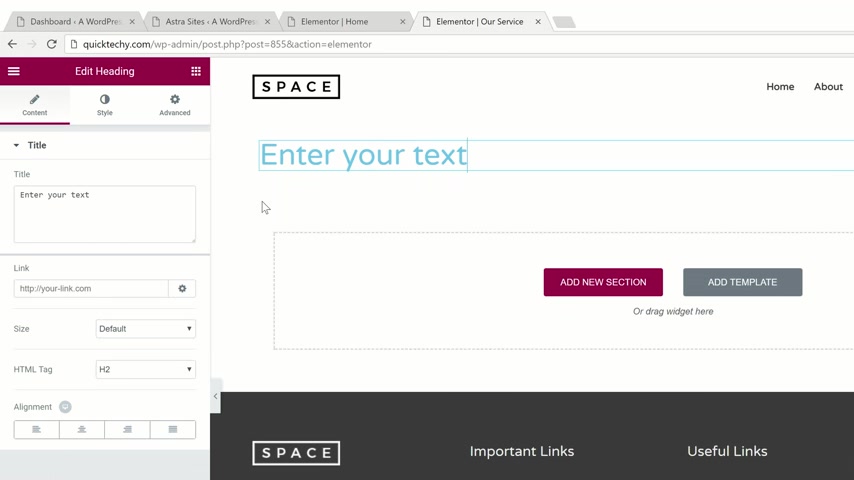
So for example , if you want to add a heading , you can drag and drop this element here and then enter your text and to add an image , you can drag and drop this element .
So drag and drop here and start creating your page .
Now , the other way to create your page is by using templates , the templates are readymade pages which you can import into your site .
So let's click , add template and you'll find a lot of designs here .
Now , if you want to use any design , simply click it , see how it looks like .
And if you like it , just click insert to get it into your page .
And now you can see that we have got the design into a page .
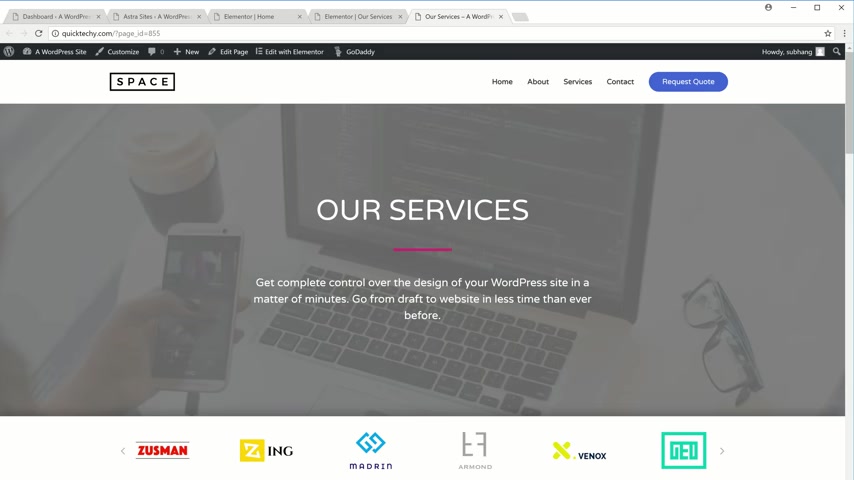
Now again , like we did before you can change anything on this page just by selecting it and typing anything you want .
This is how it works .
Once you're done with the changes , click save and view page , that is it guys .
This is how you can add new pages to your site .
So now you know how you can launch a site by getting domain and hosting , input the demo content and then edit it to make your own website .
So if you're ready to start making your own website , just click here .
It will take you to the page which we saw in the first step , which was choosing your domain .
So just pick a domain and build your website .
I'll see you in the next video .
Bye bye .
So if you want to also create a business email for your website , you can watch this video , we show you how you can do it for free .
Partnership
Are you looking for a way to reach a wider audience and get more views on your videos?
Our innovative video to text transcribing service can help you do just that.
We provide accurate transcriptions of your videos along with visual content that will help you attract new viewers and keep them engaged. Plus, our data analytics and ad campaign tools can help you monetize your content and maximize your revenue.
Let's partner up and take your video content to the next level!
Contact us today to learn more.