https://www.youtube.com/watch?v=nu90HT6F-3c
2023-06-14 18:17:08
HOW TO BUILD STAIRS _ EXTERIOR STEPS
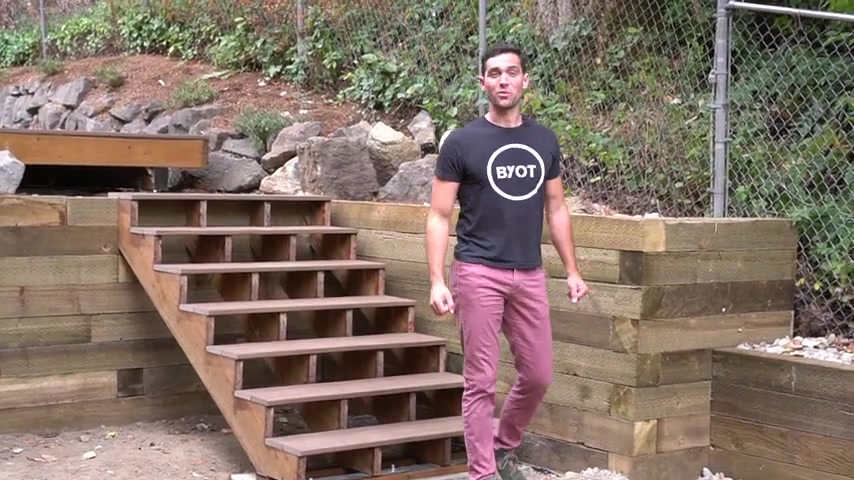
Boy , hello there , Brent here with bring your own tools on today's episode .
We are building exterior stairs .
If you wanna learn how to do it , keep watching , let's get started .
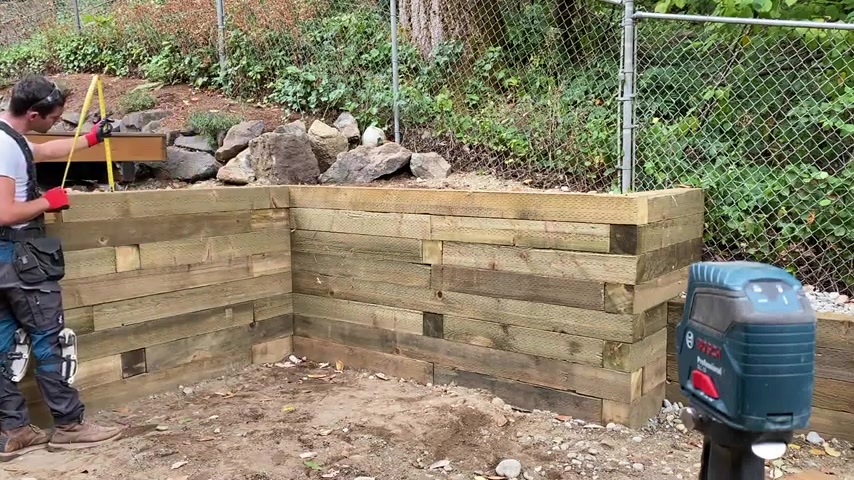
This is obviously our beautiful retain wall that we just recently built in by it .
But now we need to actually get steps from the top of this retain wall down to our ground level .
Now , we're not going to be attaching it to our deck , but this same type of design can be easily transferable to a deck layout .
First , things first , we need to actually figure out the rise so we can determine what each step needs to be to get to the very bottom of our concrete pad that we be pouring shortly .
Let's get to it .
First , things first , we need to figure out what the exact height of a retaining wall is .
And for this , I set up my trustee laser level , I determine exactly where the height is based upon the height of the laser level at the top of an existing concrete sub and then subtract the measurement that I get from the very top of a retaining wall .
For our situation .
We are measuring 47 a quarter inches and I would highly suggest using a stare calculator just to make things easy .
Personally , my favorite is my carpentry dot com and all you have to do is type in the overall height , the step height , the tread thickness as well as the depth of the step itself .
That's all you need to do and it calculates the entire system for you .
At this point .
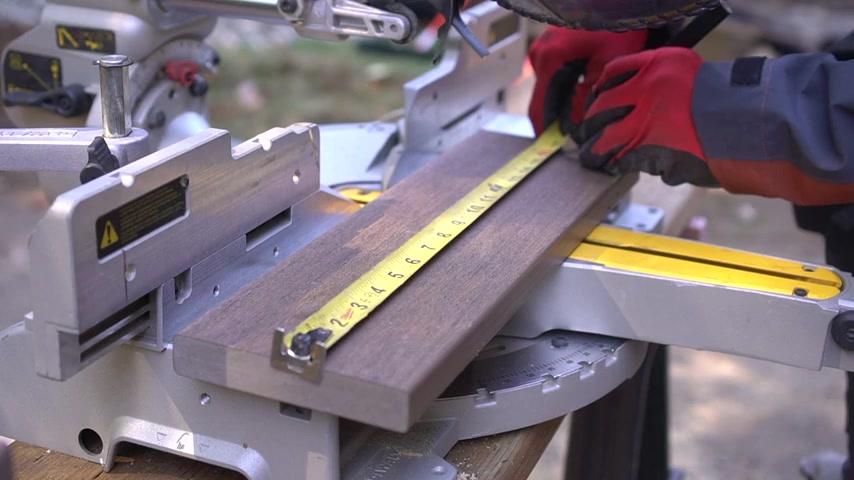
I take a scrap piece of wood and mark a line at six and three quarter inches as well as 11 inches .
On the other side , I connect those two lines together and I slice off that section of wood .
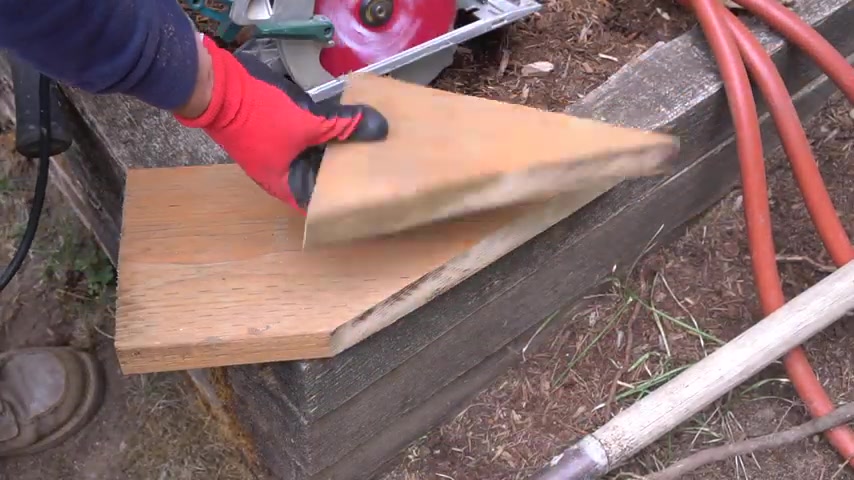
This is basically going to be a perfect example of what the rise versus the run is going to be for this entire stair system .
I secure this piece to a base plate .
And once we have that , we have our template for our entire stringer system , I bring it over to our two by twelves and start measuring out one after the other after the other .
Just remember to measure out the rise first and then it's just gonna be rise to run , rise to run , rise to run in continuous fashion .
As you can see right here .
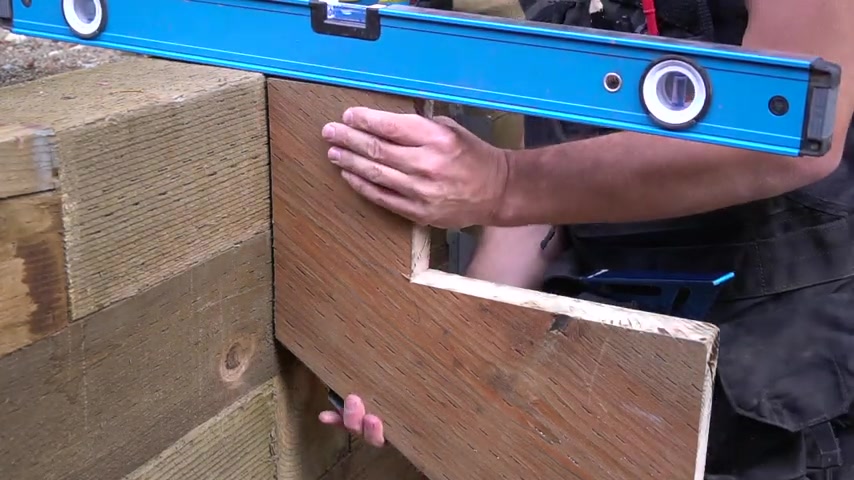
Once we have all of our steps laid out , I then grab my speed square and strike a line on the very back side of our first tread at the very bottom of our stair stringer I'm marking a line at five and a quarter inches and this is because I'm accounting for an inch and a half of added height for our two by four base plate that we'll be installing later more on this down the road .
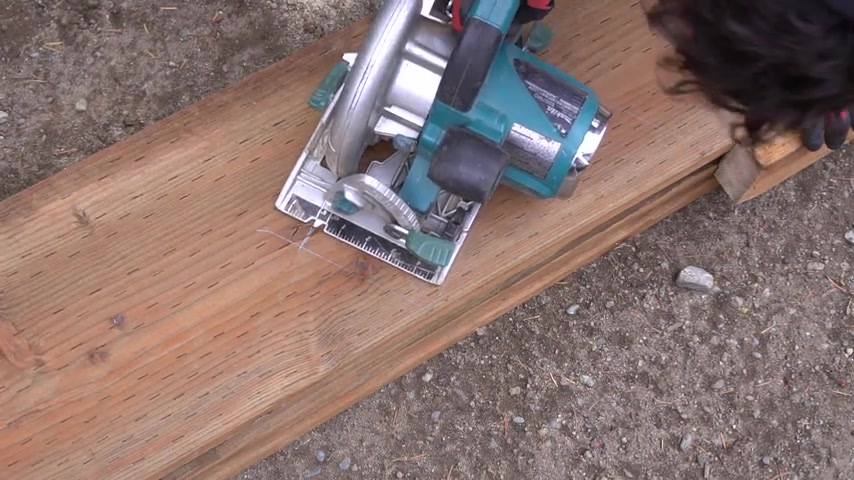
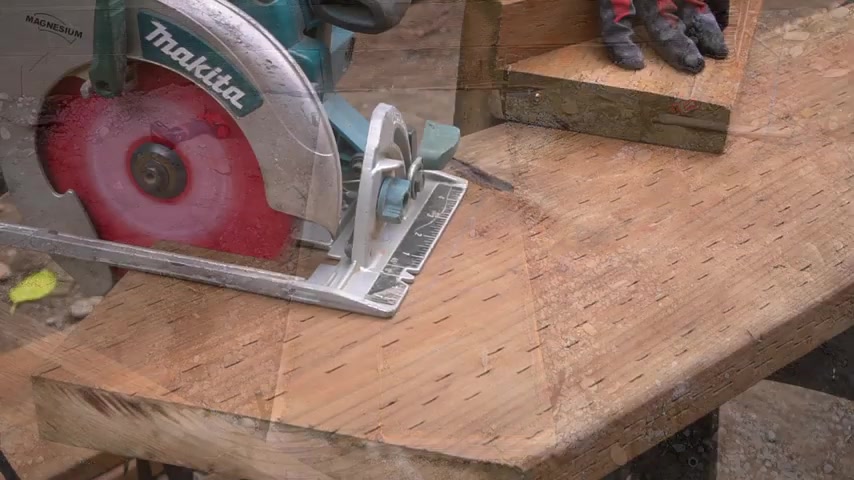
Also , at this point in time , we have our entire stringer system fully laid out and I take my circular saw and start cutting away at each section just obviously making sure I'm being careful and mindful of no kickbacks and making sure I'm keeping right on those designated lines , at least as close as possible .
A lot of work does go into the layout for this first stringer .
So before I cut all of the other pieces out , I do want to make sure we have the proper height and levelness before I cut into all of these stringer steps .
In this case , I mark a line in which I want the stair steps to stop and then nail one of our stare stringer brackets in place .
These are galvanized steel brackets that are specifically designed for stringer steps , they're easy to bend .
And once you mark the height of where it needs to go , just nail it in place , using some galvanized nails , you can obviously hammer them in place .
But personally , I do love any chance I get to use my palm nailer .
The way I have the stringer cut right now is exactly the way you want it .
If you're gonna be attaching it to a deck system .
But because we're attaching it to the retain wall , I'm cutting it in half because I just want one tread on this specific stringer again .
You don't have to do this step if you don't want to .
But this is how we're going to be building on this project .
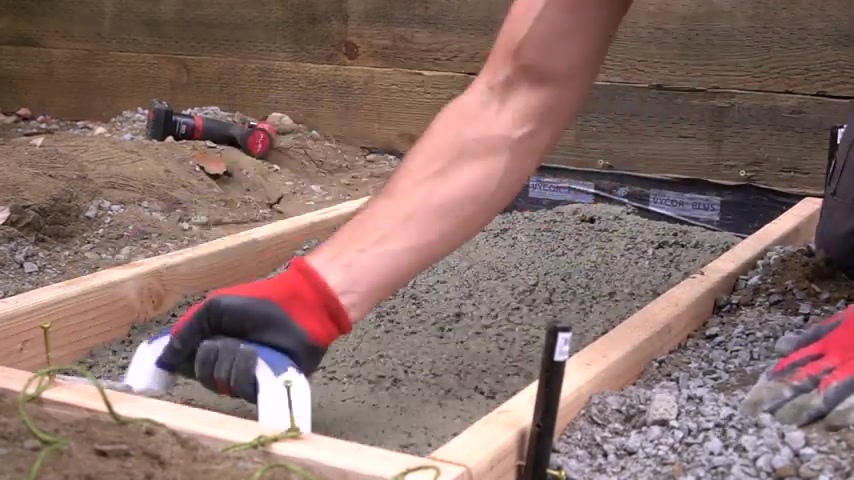
I level it out , tack it in place and then begin to start the framework for our concrete pad with the concrete pad .
It's just gonna be our standard two by four sections , which means the slab is going to be 3.5 inches deep , which is just fine for an exterior staircase .
Once I have all three pieces cut up , I secure them using Power Pro with three inch screws and slide it into its general location .
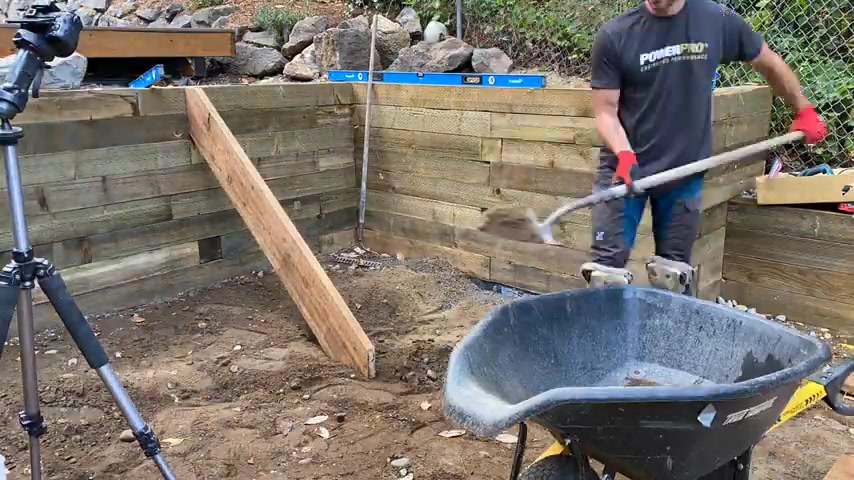
Now it's ok if it's not a perfect fit the very first time because you might have to do a bit of excavation at this point just to ensure we have the correct height of our concrete pad that's gonna be matching the adjacent concrete we have right next to it .
And as you can see , we did have to do a bit of excavation .
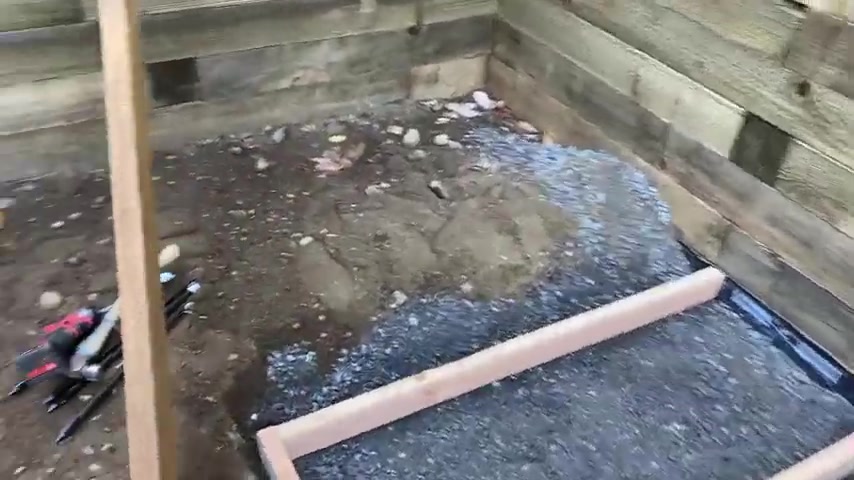
But once we actually had a nice level surface , I then brought in some crushed rock .
If you did watch how I built this retain , it's the same exact base product that I use for that project , which is five eights crushed , minus this is a perfect product to use as a base layer because not only does it compact very nicely and very securely , but it can also drain moisture pretty easily .
However , I did not rent a plate compactor for this project .
I just used my sturdy feet and my body weight to try and compact it at least as much as possible .
But just know the earth that's below , it is extremely compacted because there was three ft of soil on top of it just mere weeks ago .
Ok .
I figured I would explain a couple of things real quick with the leveling process .
So we have our laser level right here and from the existing concrete that's here , we have 10 and a quarter inches .
Now , I want this the same height .
So if we run a line right here , we have approximately 10 and a quarter inches of the exact same height as the existing concrete .
But keep in mind , I want this to slope away .
I don't want this completely flat .
So this side over here is 10 inches .
So it's gonna be sloping .
Water's gonna be sloping from here down away from our retaining wall note to self .
I hammered in steel stakes in all four corners and secured our steel stakes to our wood frame with our three inch Power pro screws .
Once one side is securely in place , just make sure that the second side is measured properly and you have the same width of frame on the adjacent side as I noted earlier , we will be putting bass plates below our stringer .
Therefore , I'm making marks on where the center of those bass plates need to be .
Now that we have our framework securely in place .
It's now time to mix up our concrete and for our concrete , we're going to be using fast setting concrete because I do want to confirm our stringer layout and to do that , I need some dry concrete .
If you want to use your standard concrete mix more power to you just make sure you wait at least a day .
The only key note that I have for mixing concrete is that I do suggest adding the water first and then adding your concrete to the water , then mixing it because it makes it a lot easier and less likelihood of dry concrete clumps at the very bottom , which I'm sure everyone has a witness and experience .
If they have mixed concrete , I mix our first batch of concrete , spread it out a bit evenly and then pour our second batch .
Just know that we use six sacks of £50 concrete for this approximate 20 inch by 50 inch concrete pad .
Once I had my concrete spread out , I then took a standard wood screed and screed over the top of the framework to make sure we had an even surface .
Then use my magnesium float over the top .
And if you want , you can use a finishing towel just to have a beautiful finish in the end as the concrete is still soft .
I take a string line and attach the string line to the screws that I installed previously because those are going to be our center points for our galvanized anchor bolts that I nudge gently in its proper position .
The stream line also does a really nice job of determining the exact height that you want across the entire length .
And therefore , positioning is very easy and straightforward .
Just make sure they're approximately the same height at each location as we wait for the concrete to dry .
I proceed to start cutting out my first stringer set .
I use my sucker saw to cut the majority of our steps out .
But because I don't want to go past , I can't cut each section in two fluid passes , but go ahead and cut as much as you can at this point .
And at the tail end , that's when we're going to cut it all out with our trusty reciprocating saw .
You obviously don't have to use a 12 inch long blade for this type of cut .
But a reciprocating saw really does make quick work of these type of cuts because it does cut extremely efficiently .
But it also leaves a fairly nice finish in the end .
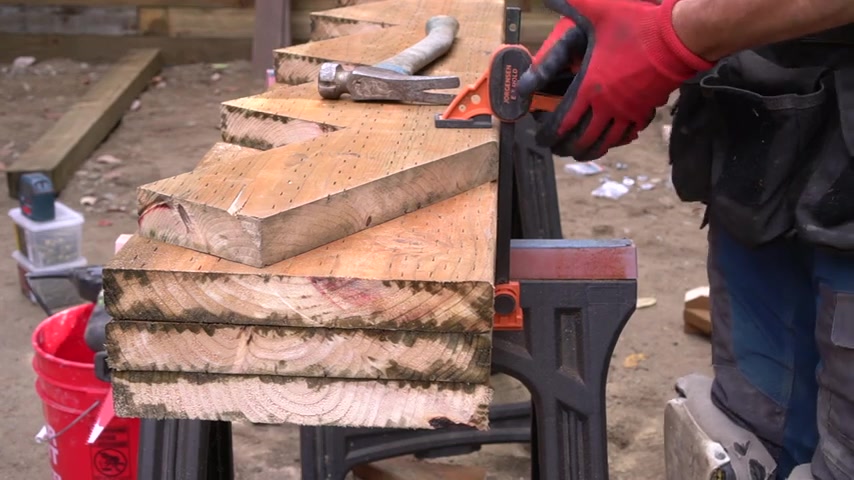
I quickly remove all of the notch steps out of our first stringer and then bring up all the other two by twelves that I previously cut to the proper length .
But I haven't notched them out .
Obviously , I align the backside of our notch stringer with all the other stringers and then clamp them down because I find it's a bit easier to guarantee that there's no movement as I'm making my marks while using this stringer , that's actually notched as a template .
Once we have our lines placed , I can cut each stringer like we cut our previous stringer and it does take a bit of time to do to make sure we have as perfect cuts as possible .
But it'll pay dividends in the end because you want to make sure that they're all aligned properly with the adjacent one .
I start laying out our brackets .
And the one thing to keep in mind is the fact that you want even spacing because these stringers will be visible .
So I do make a mark at 48 inches because that's how wide I want this stairwell to be and then evenly space out our base between each stringer , then mark a line height for our stringer brackets and proceed to installing it with our galvanized nails .
Just make sure the brackets are perfectly vertical , which is easy enough with a smaller level .
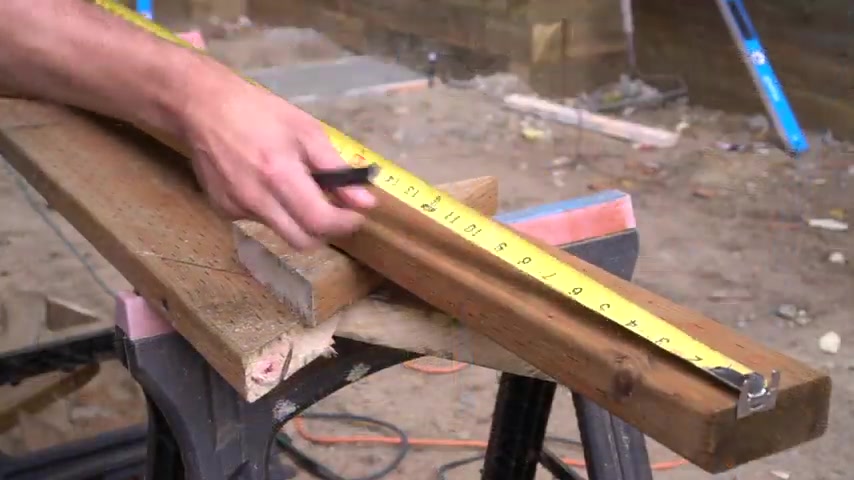
I grab my pressure treated two by four and cut it at 48 inches .
I have both sections at 48 therefore those are gonna be our base plates that will be resting on top of our concrete pad .
I measure our anchor bolt locations then pre drill our holes with a half inch drill bit .
Just make sure you give yourself a little bit of wiggle room because this will be tight if you don't , I then align our holes with the anchors and give it a few love taps to securely place it right on top of our concrete pad .
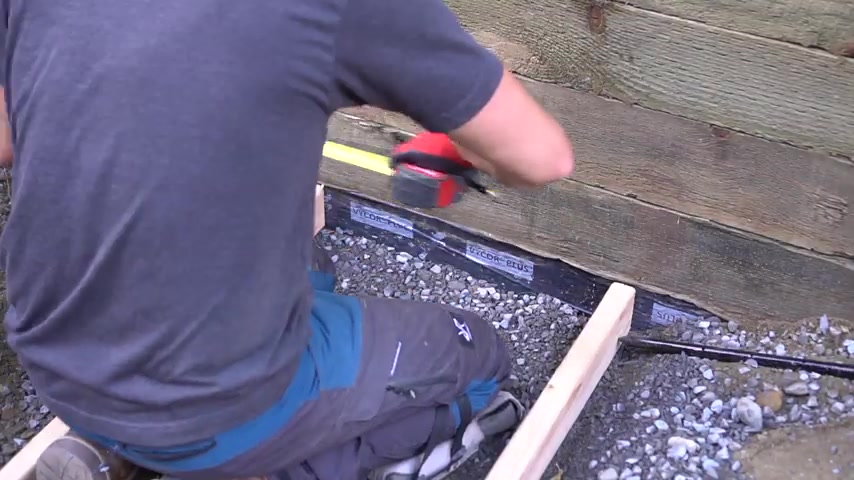
Then I actually suggest installing a four inch vapor barrier on top .
Then a washer and then a nut .
I did forget that when I did film this the first time , but I did go back and install a four inch piece of G tape right on top and then installed the washer and nut on top of that .
Keep that in mind , I placed our first stringer on top of our base plate and laid it up against our retaining wall .
In our situation .
I'm trying to make sure that the top of our stringer height is the same as the top of a retaining wall .
But in order to have the best hold possible between the bracket and our stringer , I'm using Power pro premium exterior wood screws .
This specific one is an inch and three quarters and provides an extreme amount of strength for this specific bracket system and significantly reduces the chances of any of these stringers coming loose compared to nails .
I generally install the top flange of the bracket first , then on the underside because I want to pin down that brace appropriately to the bottom side of our stringer and then finally the bottom flange .
After that , I take our second stringer and install that on the far side because I want to guarantee that we have a level surface all the way across .
Once I confirm true levelness , I install the bracket accordingly .
Same exact process as the previous stringer .
Just make sure you double check levelness before you proceed with all the others .
At this point in time , I want to say a huge and special .
Thank you to our sponsor this week Power Pro .
I've used their product for years and they personally reached out to me because they love what B Y O T has been doing lately and they wanted to show their support .
So please check out their amazing lineup of screws that are interior and exterior for all of your screwing needs .

The link is in the description below and at this point , you just gotta look and say that just feels good when you put it on there the very first time and it is real , real level that looks amazing in this looks amazing .
Uh So good .
Now get everything braced up fastened and get some steps in before we get our treads installed .
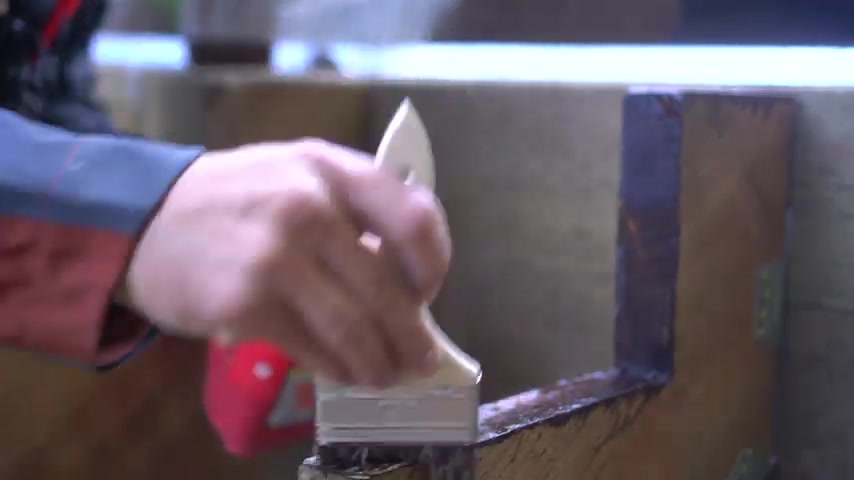
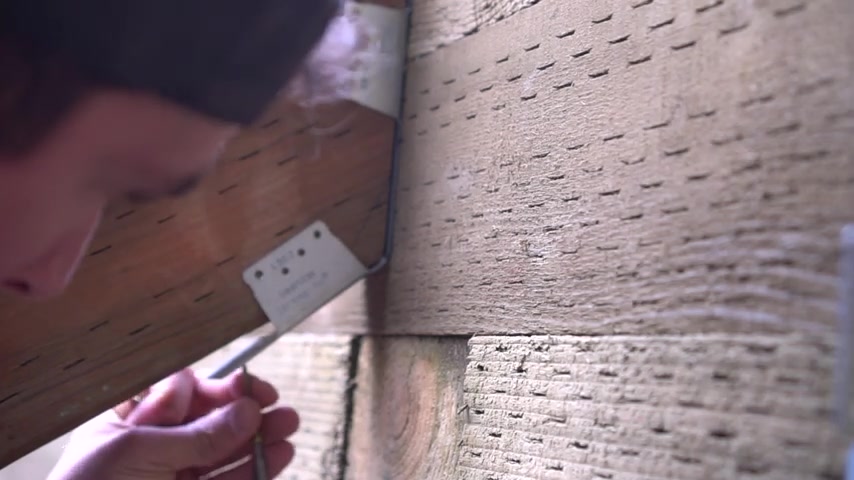
I do highly suggest taking some wood preservative and applying that to all the areas that we previously cut that will guarantee that there's no bare spots within this wood and it will last a lot longer in this case and won't have any weak points that we would if we didn't do this step , the decking does cover up the vast majority of this entire area but do your due diligence because no one likes weak points within their beautiful structure .
I use the same power pro screw that I used previously and install these L brackets at every single location where the base of our stringers met our base plate .
This is also a good time to mention that the reason why we cut the bottom riser at five and a quarter inches versus six and three quarter is because we have an inch and a half base plate .
And we want that rise the same rise all the way up now that we have our stare stringers taken care of .
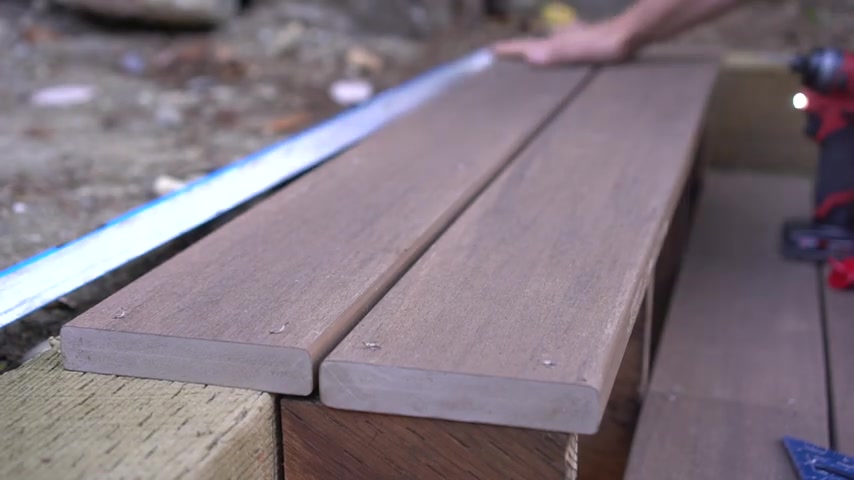
It's now time for our deck treads or stair treads .
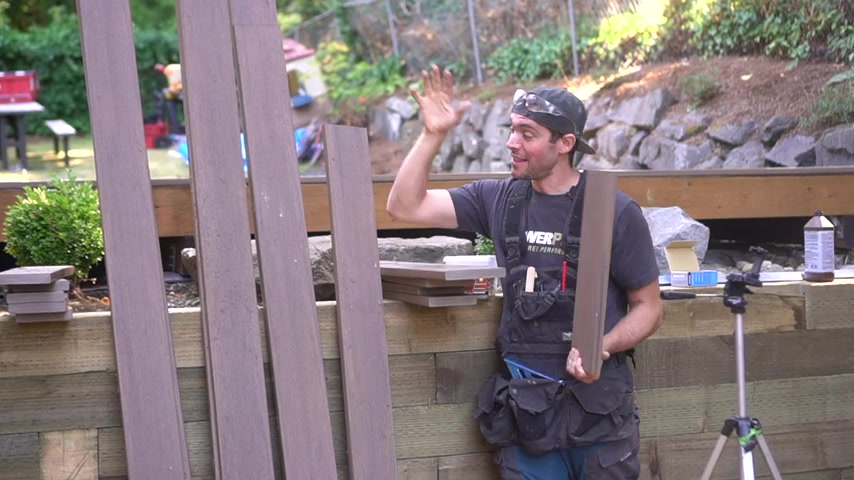
We're actually using our decking boards that we used in a recent B I T , which is timber tech decking composite material .
The one thing to keep in mind is that this is all extra waste from that project .
And that's why it's always important to keep this on hand even the small pieces because we're going to be installing these as well because we don't have enough of our four footers .
This is expensive stuff .
We want to make sure we have everything that we can use for these steps .
So we're going to be also using our Power Pro premium screws specifically for decking .
And that way we have all these boards fully secured at a inexpensive price .
Let's start installing for composite decking like this .
You do want to use a blade that's specifically designed for finish work or even specifically designed for decking boards like this .
But once you have them cut at the correct length , I do take my speed square mark , exact locations on all four corners .
That way I have perfect spacing for all of my fasteners .
The other nice thing about these fasteners is that there's no pre drilling needed when fastening these screws to our framing .
This makes the installation process quick and easy .
But also remember , keep a bit of space between each tread if you do have to cut section to section .
Remember the only reason why I'm not doing full boards on this back section is because I'm trying to use the waste that we already have .
And because each one of these boards is close to $100 .
I don't want to be buying any more than I have to .

Once it does come time to install the front board , I do take my decking shims to make sure we have an even spacing all the way across our front and back boards .
After I did a few steps , I did realize that the easiest way to install was to actually get all four pieces laid out properly , pre drilled , ready to go , then space them out evenly and making sure that the ends were perfectly aligned with each other then installed the front board , then the back two outside boards .
And then of course , the one right in the middle as I made my way up to the top of our steps , I made sure that the spacing stayed consistent even at this very top row .
And if you want to see what I do between our retain wall to our deck area , let me know because we are going to do something a little different .
A little fun , but it might not make it to a full video unless you guys speak up .
But guess what ?
Now that we have those last two boards in , we are done .
I know that these are just steps , but something about well laid out steps that feel good all the way down and all the way up is truly satisfying in my book , especially when knowing how much time and energy it was really spent with these steps .
Now , that's what I call one beautiful sexy beast .
Oh , yeah .
Partnership
Are you looking for a way to reach a wider audience and get more views on your videos?
Our innovative video to text transcribing service can help you do just that.
We provide accurate transcriptions of your videos along with visual content that will help you attract new viewers and keep them engaged. Plus, our data analytics and ad campaign tools can help you monetize your content and maximize your revenue.
Let's partner up and take your video content to the next level!
Contact us today to learn more.