https://www.youtube.com/watch?v=M5NOHVp2lPE
2023-06-14 18:16:48
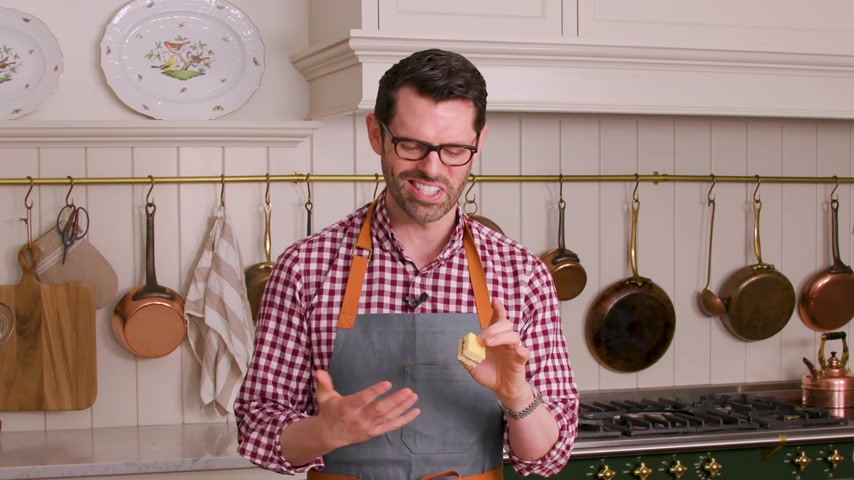
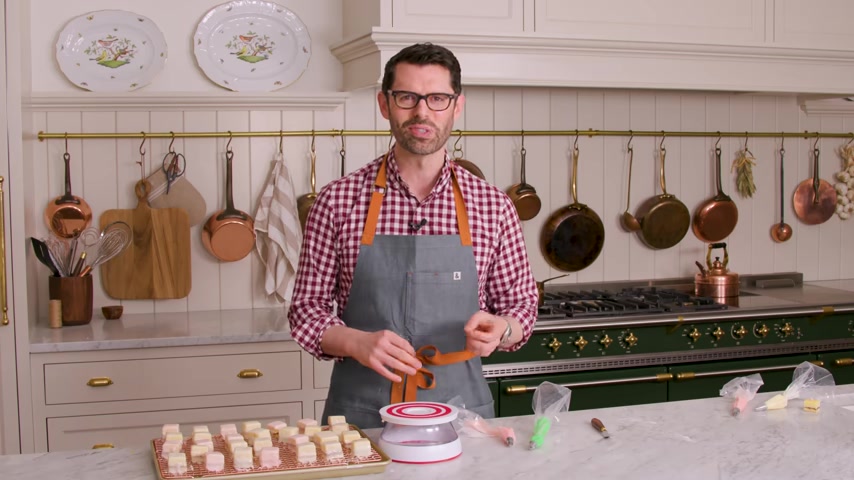
How to Make Petit Fours
If you've ever wanted to make a classic dainty peta , but we're too intimidated to try .
Then today's video is for you .
And if you like this video , don't forget to hit that like button and subscribe and you're watching Preppy Kitchen where I can teach you how to make delicious homemade dishes to share with your family and friends .
These peta will be ready before you know it .
So let's get started first off , preheat your oven to 3 50 line a 12 by 17 inch baking sheet with parchment paper .
Our cake is in a in this and you want it to release super easily .
So parchment paper is a must for the cake .
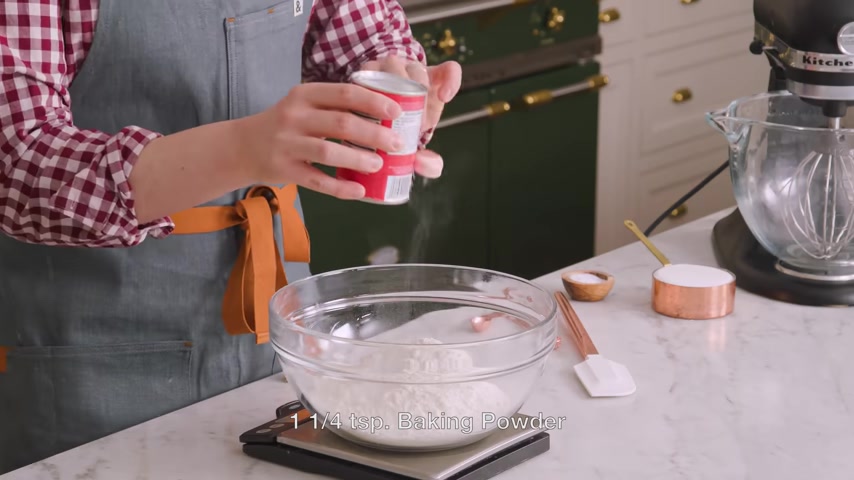
I'm measuring out three cups or 360 g of all purpose flour , one and a quarter teaspoon of baking powder and half a teaspoon of salt .
Give it a quick whisk and set aside the cake for these peta is the most just delicious cake .
But we're gonna add a special ingredient , eight ounces of cream cheese .
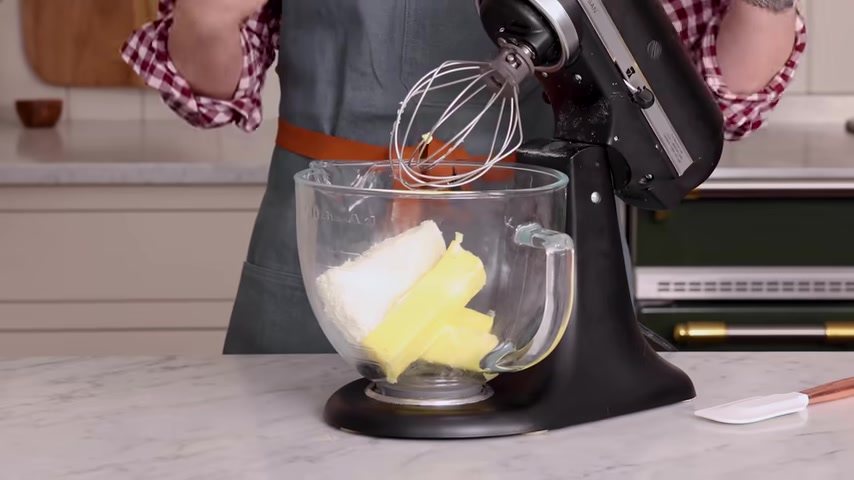
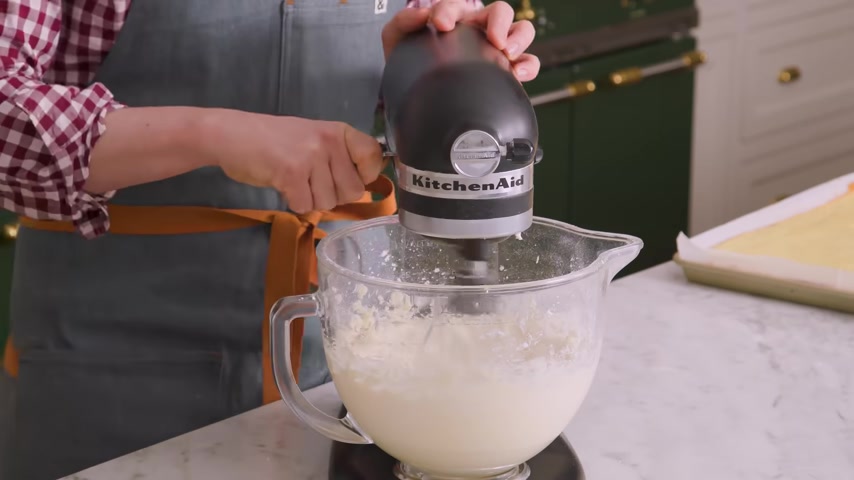
This will give our cake a wonderful like bit of tang , but also a body because we have to cut this into tiny little squares and it can't be a blow away super fluffy cake to my stand mixer fitted with a attachment .
I'm adding 1.5 cups of unsalted butter that's 339 g and it should be room temperature .
We're gonna cream the eight ounces of cream cheese with the butter .
It'll get really nice and smooth .
So do not skimp on this initial creaming time before we add the sugar .
You want it to be really well mixed in with no little nodules of butter or cream cheese hanging around .
So right now it looks great for me but for you , you see a lot of white streaks I'm assuming .
So we're gonna scrape the bowl down one more mix .
Then we're gonna add the sugar .
Now we're gonna add two cups of 400 g of granulated sugar .
Two and a quarter cups .
Hello , mix on high for about two minutes .
This looks like light fluffy , beautiful clouds right now .
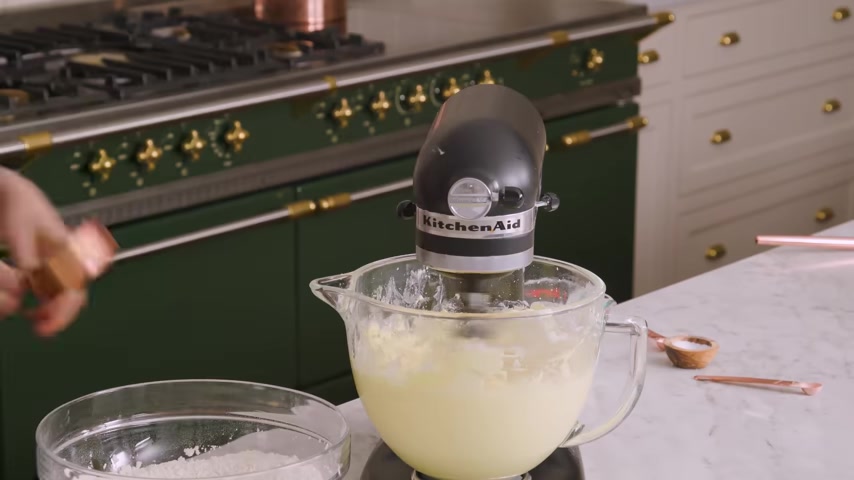
I want to show you look at that .
That is a light fluffy , beautiful mixture .
Best practice which I'm following today is to crack five eggs into a bowl , no shells , no shells at all for you .
We're gonna add these eggs along with two teaspoons of vanilla in one at a time , mixing on high and we will scrape the bowl down because it's gonna be eggy and amazing on the inside and just butter sugar on the outside .
Two teaspoons of vanilla you have to see this yellow on the inside , white on the outside , just like I said , scrape the bowl down at this point .
Your mixture might look a little broken .
You'll see nodules of butter in a matrix of eggs .
Don't worry about that .
We're gonna keep mixing and as we add the flour , it'll all come right .
Mix , mix , mix a little mixing later , the egg mixture has come together more .
I'm gonna start adding the dry ingredients along with a cup of milk , half a cup of milk , half a cup of milk .
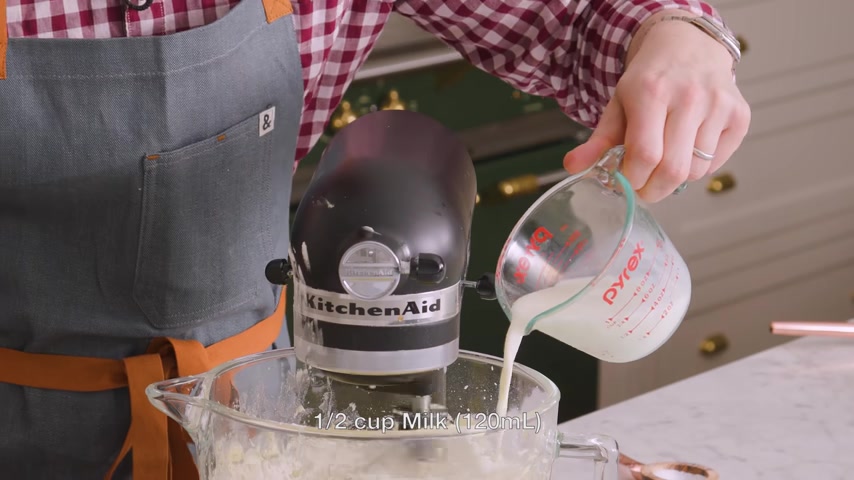
I'm adding the flour and half a cup of milk in three alternating batches just like you would for a normal cake .
But we're gonna mix on a low actually , the lowest setting and repeat last of the flour and the last of the milk , I'm gonna stop this right now and it's not combined yet .
We're going to finish this off by hand .
The main complaint I get from people making cakes at home is that their batter is over mixed and the cakes is kind of tough and gluey and not as fluffy and melt in your mouth .
Now , we can pour this out onto our prepared pan and bake it up .
Get all that batter onto this baking sheet , spread this cake batter out because it needs to be pretty leveled before it goes into the oven .
So get it all the way into all the corners .
Your peta should be about an inch , like an inch cube , minor , an inch and a quarter , some are up to an inch and a half .
That's all big .

So you want to make sure that this is gonna be really even and get all those big bubbles out because big bubbles will mean you have voids in your peta and that's not OK .
Nice and smooth .
I'm gonna give this as a couple of taps to work out any bubbles .
And now this goes into the oven 3 50 for about 26 minutes .
That's how much it is on my oven .
But check to make sure that it's bouncy to the touch and listen to the cake , just put your ear to it like this .
If you hear a lot of crackling , it needs to go back for an extra minute .
It should be fairly quiet .
Listen to your cakes .
My cake is out of the oven and we're about to cut it .
But before that , let's make our fillings .
This smells so good .
You've got to make this cake recipe .
When you make metaphors .
The world is your oyster .
You could fill them with anything today .
I'm using a simple vanilla butter cream .
A lot of PETA have royal icing decorations .
I'm going to make wine from butter cream because it tastes better .
So I'm making a little bit of extra butter cream today , meaning I want one full cup of butter .
We're gonna give this a good cream once that butter is nice and creamy .
We're going to add about four cups of powdered sugar .
Start off with two cups .
Add the rest as you go .
You do not want a massive sugar cloud in your face .
Not today as this mixes up .
I'm gonna add a few tablespoons of cream .
You could also use milk if preferred quarter teaspoon of salt .
About two teaspoons of vanilla .
We're gonna add the rest of the cream right now .
It's about two more tablespoons .
Mix some high for about three minutes .
Scrape that bowl down and mix , mix , mix my butter cream is done .
So let's assemble these PETA four .
Get away .
Iraq , flip the cake over .
We're going to use this in the next step .
So don't put your baking sheet away at remove the paper .
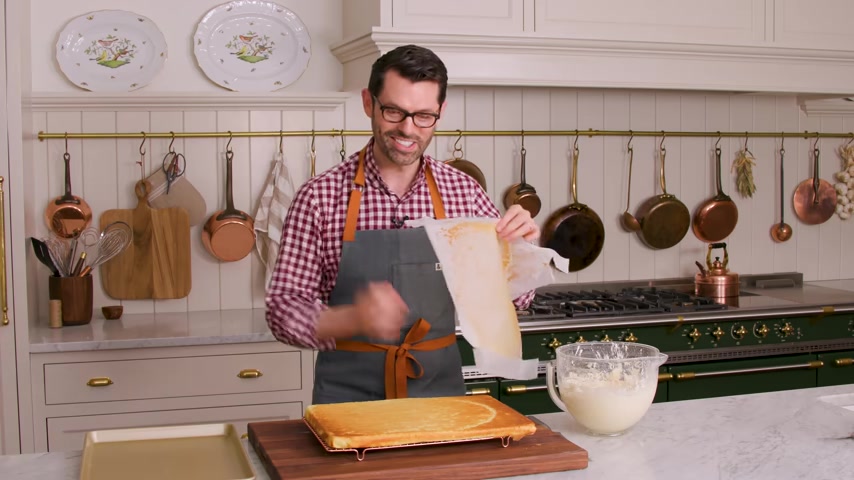
The smells suck in a lot of recipes .
You'll see this , cut it in half and flip it over and they'll bake these in multiple sheets .
So the cake is thinner .
But when you do that , you don't get the maximum absorption of the filling into the cake .
So I like to just cut it .
It's better .
Do not trim the cake yet .
We're gonna trim this after it is assembled .
So right now , we're gonna just leave this as is I'm gonna cut this in .
I'm gonna cut this in half .
But Exactly Fargo cut your cake in half .
I'm using a nice sharp strad knife and we're gonna cut this in half one more time just so it's manageable .
You could leave it as is or even have one mega cake if you want .
But that's really reserved for the people who have the cake cutting knives .
I don't have one for some reason .
Cut your cake in half carefully .
You can just eyeball it .
All right .
Once your cakes cut up , we're going to make a cake sandwich .
I'm using a cookie scoop to get some frosting onto this cake .
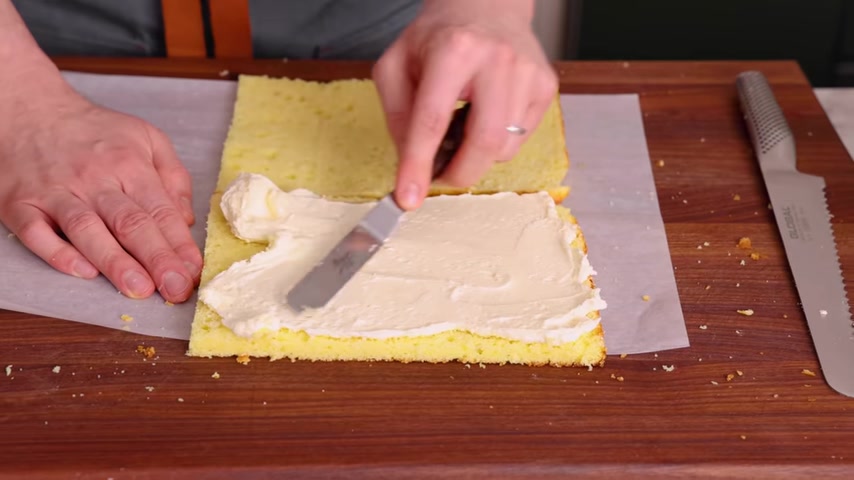
I don't want to rip it .
Once you have some good coverage , use a little spatula or a knife and just smooth it out .
Repeat that process on the other side with your other filling .
In this case , it's that raspberry jam , but it could be lemon curd marzipan , another type of jam anything you like .
Now , I'm using an offset spatula just to help me flip this over like that , press it down a little bit just so it has really good contact .
Give it a little bit of a wrap and let it hang out in the freezer for maybe 20 minutes or so while we make our pouring fondant or you could even do this overnight or a couple of days ahead and just cut these and make them later on .
My sandwiches are all frozen up .
And in the meantime , I marked a piece of paper .
This is actually plastic , but at 1.25 inch intervals .
So I can cut really easily .
I don't want to have to have my measuring tape out .
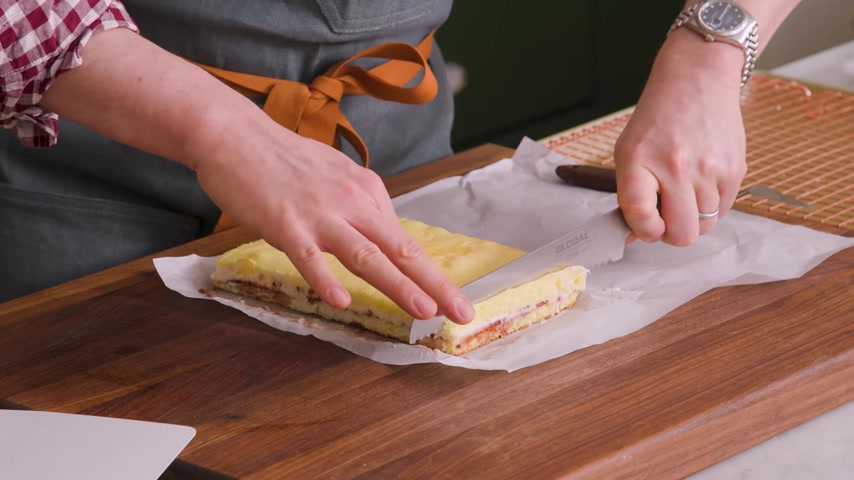
Like last time Fargo , we're gonna begin by trimming our pieces up because the edges are super unclean and messy and you can see how beautifully this cuts when it's frozen .
You don't wanna have soft cake or soft filling when you do this part .
Now begin by adding little tiny marks .
You can use a knife or whatever you want just so you know where to cut , mark it on both sides .
And this will be your guide right now .
I can already hear the comments .
You're like red , red riot .
That's a lot of work .
It is a little bit of finicky work , but here's the deal .
You don't have to make 100 peta .
You could make one block of this , freeze the rest for another time .
It freezes for months and then make them later or just enjoy a delicious cake sandwich .
That's all they are .
Let me tell you little secret .
These guys look perfect right now and they really are very nice cubes .
But if they get too warm before the fondant goes on , they might start slipping and sliding .
So we're going to put these back into the freezer while we make our topping and they're going to be in a perfect grid too .
So just throw these onto a wire rack that's over a baking sheet .
Um This will be the set up for later .
So you're just saving yourself a step later on these guys and the rest of the cut ones are going to go into the freezer and then we're gonna make our white chocolate pour fondant .
We're gonna give this chocolate a good chop , try and get fine pieces .
And in the meantime , I have some water set to simmer over a small pot in a small pot .
This can go into a small bowl and we're just gonna melt that over the simmering water with steam heat .
I don't recommend using a microwave to melt white chocolate because it will burn and you'll be sad .
I'm going to sift out 3.5 cups of powdered sugar right now .
It's about 420 g .
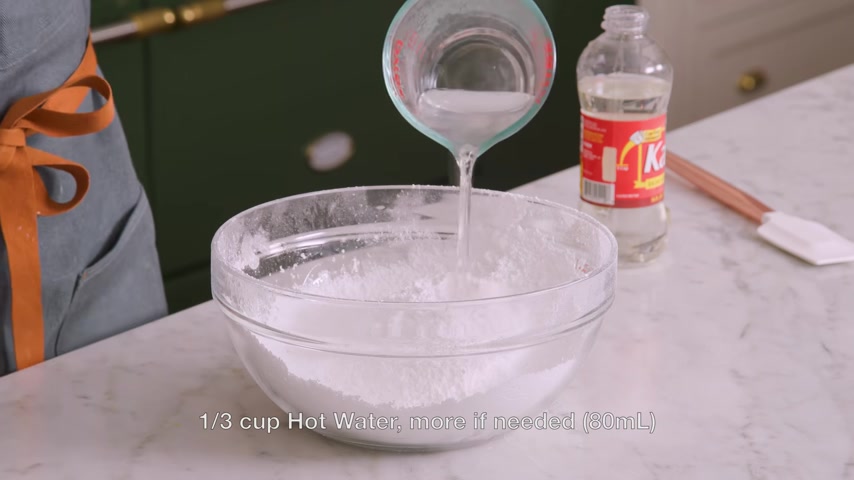
This is gonna be the fondant kind of like the base .
So you don't want any lumps in here because fondant should have a nice smooth glossy finish , stir the chocolate occasionally just so it melts evenly into my sifted sugar .
I'm adding a third of a cup of hot water fresh out of the microwave .
We're gonna pour that in and then add the corn syrup .
Now , I need that one quarter cup of corn syrup .
This will hold it together and give me a nice gloss .
Fold this together .
You do not want to use a whisk .
You do not want to use a machine fold together gently because if you use anything else , you'll have 1000 billion little air bubbles and your fondant will look horrible .
So be gentle .
With it .
My chocolate is nice and melty .
I'm taking it off heat that can hang out there though .
Let's get this all Incorporated before we add the chocolate .
Ok .
Just a little bit of mixing later .
And I have a beautiful pour fondant without the chocolate , the chocolate's next .
Get every drop of chocolate out one because you don't want to waste .
But two , it'll make cleaning so much easier .
Now we're going to stir this in just until you have a nice smooth even combined .
Amazing chocolate fondant .
OK ?
Just a couple of minutes of mixing later .
And I have a wonderful ivory fondant and that's gonna be very horrible .
This is ready .
We're gonna get to assembly now .
I'm so excited , so cold out of the freezer , so cold .
OK ?
Here's the deal .
A lot of recipes tell you to pour the fondant over this cooling rack that's on here .
That is a nightmare .
It's gonna be super messy .
You're gonna waste all the fondant .
We're going to do it a very easy way .
So get your fork out daintily place that petty fork right on top of the fork .
And you're going to hover this over your bowl .
I need a spoon .
Where's my spoon ?
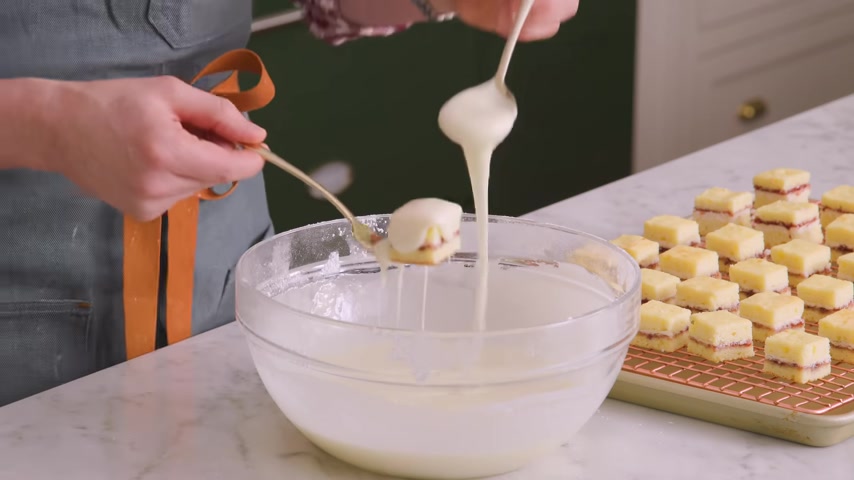
Spoon this over the top and you're gonna wanna have one big dip and then tilt your cube .
So you get all the sides , tap the excess off if you see any bubbles on top , just pop them if you want the bottom covered as well .
You can either dip it like this or dip it using your fork and you'll get complete 3 60 coverage , which is great if you're letting these like hang out someplace for quite a bit of time and you want them to stay fresh if you want a little bit of color for your fondant .
That is so easy .
Just add a drop or two of gel food coloring , mix it in and keep pouring .
I like to do like half of mine white , half of them pink and it gives you like some variation of color .
Once you've completed all the peta and they're covered in fondant , you're going to give them some time to set up so they're easily held .
It could be an hour or so because this needs some time just to firm up and dry out .
Once the fondant set up , you can do anything you want for decoration .
I'm going to make butter cream roses because I love roses and I haven't piped them in quite a while .
I have a little bit of extra butter cream left over .
I colored some pink .
I colored some green and I left some white using a small pedal tip .
It's a one oh one and I'm just going to pipe a tiny little rose right on the center and then a couple of leaves and that's it .
It doesn't have to be perfect .
It's really just the suggestion of a tiny rose repeat for the remaining ones and when you get tired , just do a different simple design .
If you like this video , check out my French playlist .
It's as delicious as it is beautiful .
The rest of these are going to get boxed up and said as just because presents for some local friends , I'll see you in the next video .
Partnership
Are you looking for a way to reach a wider audience and get more views on your videos?
Our innovative video to text transcribing service can help you do just that.
We provide accurate transcriptions of your videos along with visual content that will help you attract new viewers and keep them engaged. Plus, our data analytics and ad campaign tools can help you monetize your content and maximize your revenue.
Let's partner up and take your video content to the next level!
Contact us today to learn more.