https://www.youtube.com/watch?v=6R9HKvGxbR0
2023-06-14 18:15:56
DIY How to Paint Your Kitchen Cabinets A to Z
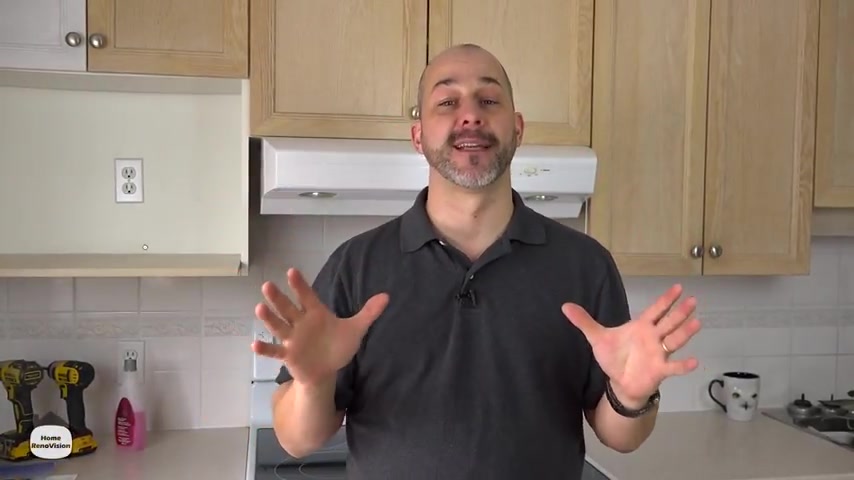
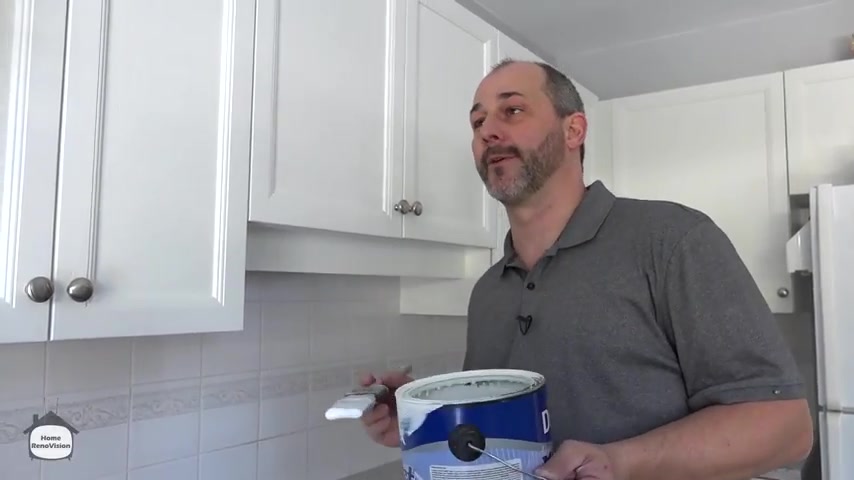
Today's video .
We are restoring this kitchen .
We're gonna paint the cabinets .
It's a lot of work , but I'm gonna show you every step you need so that you can have a successful remodeling of your kitchen .
Stay tuned .
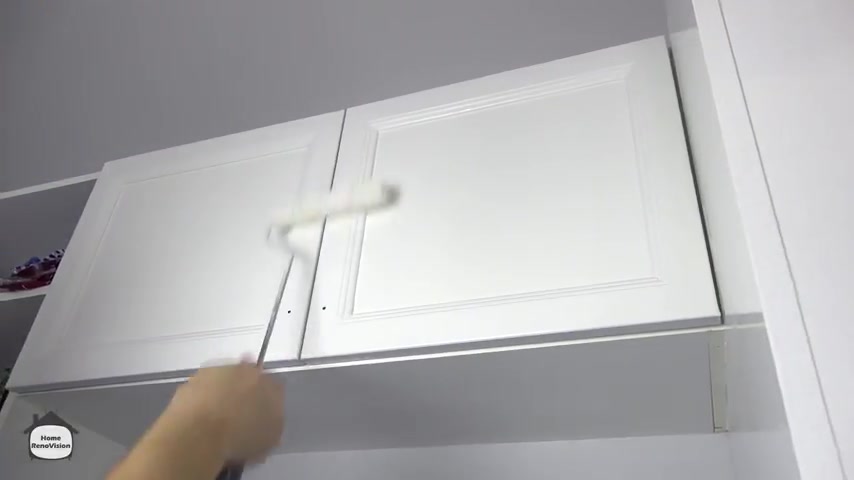
So one of the most dramatic things that you can do in your home for increasing , not only just the value but its physical appearance and your durability is to paint your kitchen cabinets .
So let's get into this because there's a lot of ground to cover .
There are a lot of different kinds of cabinets that are made and let's start with the doors because you have two basic things going on .
You have a door and you've got the box .
In this case , our door is solid wood and our box is a melamine or particle board with uh uh a vinyl finish on it .
OK .
So you have a lot of different kinds of surfaces that all need to be treated differently when you're painting your project .
Now , solid wood is simple .
It's wood , right ?
You're gonna paint it .
But this product here right away , you know , this has got a state , it's like a white washed oak if this was a new product , then whitewashed oak might be a water based stain , it might be an oil based stain .
So that's the first question you got to solve because no matter how much sanding you do on oak because of the texture , you're always going to have some of that finish sitting there unless you use a chemical stripper .
So sanding isn't enough , you need to know what products you're gonna use so that you get the right kind of bond .
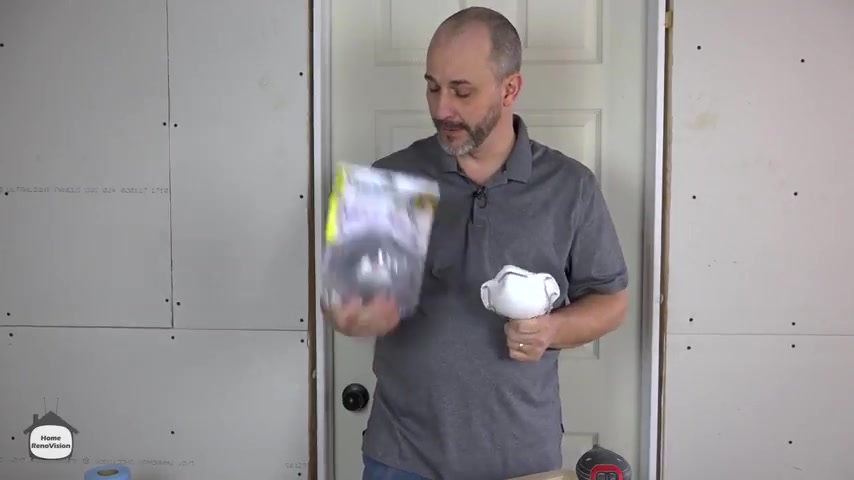
Now , before we get started , we want to take out , go up to the bathroom and steal this from your wife or if you use this yourself , make sure that you have a nail polish remover with Acetone or you might even have Acetone in your garage for basic cleaning .
And what you want to do is just take this and rub it on the surface of the door and see if anything comes off .
In that case .
That's a known if Acetone doesn't remove the surface , then the surface is oil based problem solved .
And I can demonstrate that by doing this because the client had previously done some paint work here .
Ok .
There we go .
Now , there's the brown paint that she had put on the inside of that door as a test for her color and she hated it by the way .
But just to demonstrate that that problem , that technique works really well for helping you identify if it's going to be a water base or an oil based product .
Once we have that problem solved , we know how to move forward with our products .
But the techniques are interesting wood .
You use light sanding with the vinyl , you have to go extremely light sanding and you have to use the right kind of primer .
So we'll get into all those products later in the project .
But for now , let's start from the beginning and what you need to do to prep your kitchen .
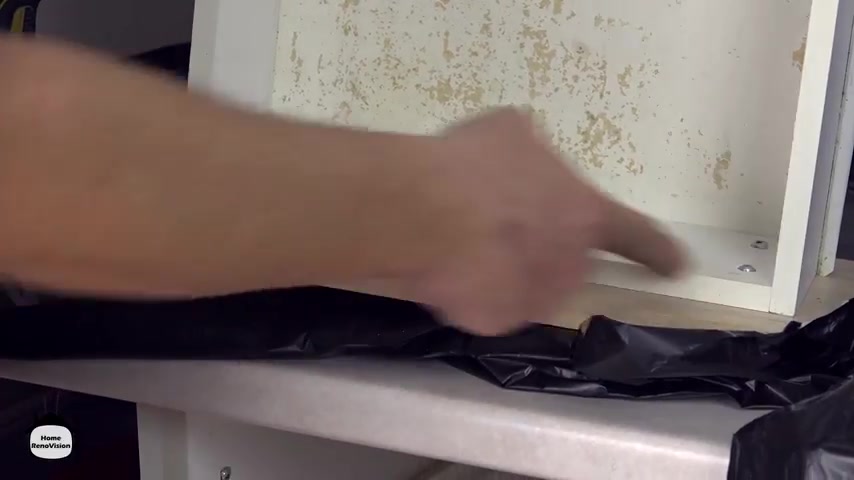
First of all , what we need to do is we need to remove all the doors because you don't wanna do the painting in the room you're working in , er , this is going to take a few days and it's gonna make a lot of mess .
So , what you wanna do is you want to find a place in your house where you can set up a station to paint all of these things depending on the time of year and the temperature and the humidity .
You might want to use a garage , you might be able to use the basement .
You might be able to just throw some tapes down in your living room and set up a workstation there .
But I would suggest not trying to do this job in the kitchen because you still need to live and that means you need to eat .
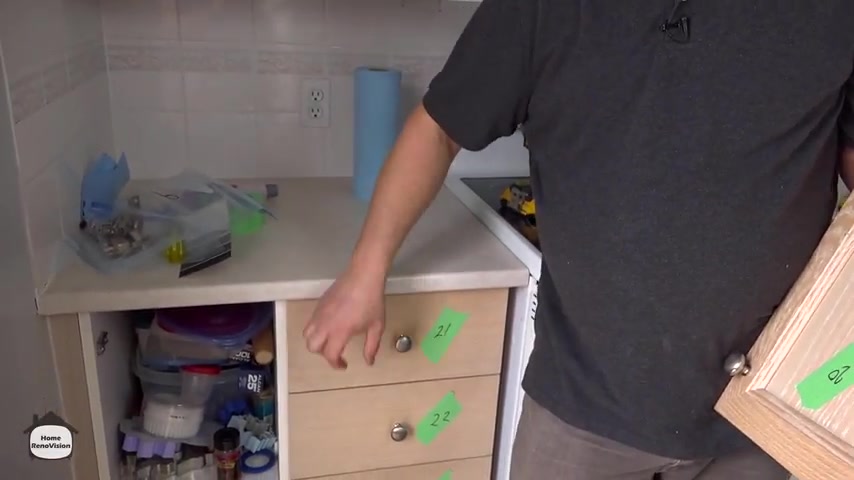
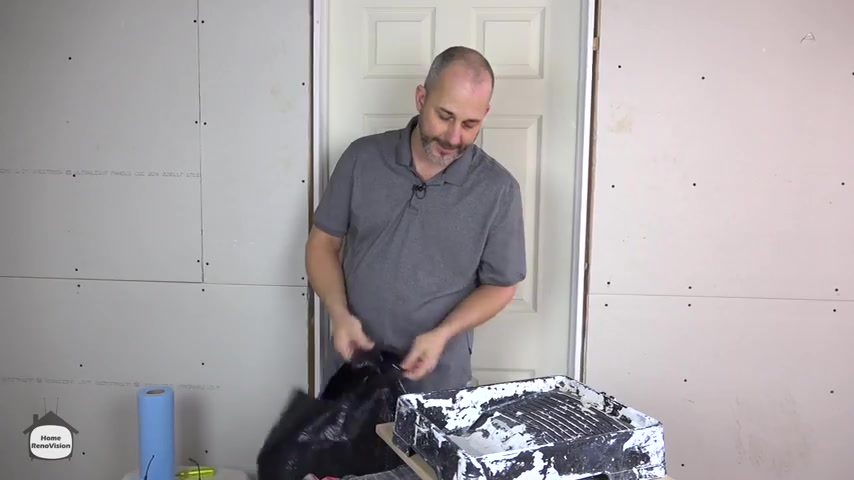
So , what I wanna do is I want to make my life simple because there are so many doors and drawers I wanna just get a piece of tape on everything in this kitchen .
And I want to down my numbers .
I stopped on the start on the top left , just like reading a book left to right and you number everything off .
So everything goes back where it came from .
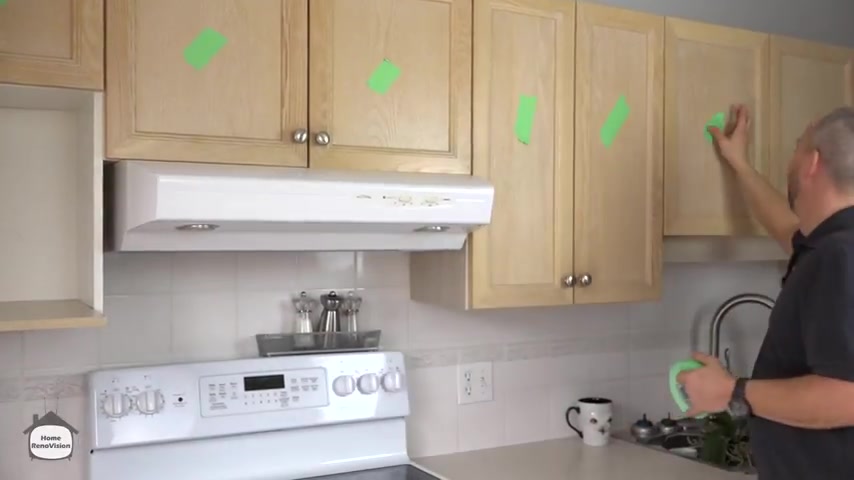
That way , you don't have to readjust all your doors and drawers after you reinstall them because they're going to be able to be in the same condition as they're in now .
Ok .
So the beginning of the project is quite simple .
And now we have all of our doors numbered .
We have a workstation set up that we're gonna be doing all the work in and we now have to remove all of these doors .
Um Most of the hardware nowadays is really simple .
It has a quick release tab on the back , ok ?
And you can just pop it off .
Now , if that's not the case , you might have hardware where you've got to put your fillip , spit on an adjustable screw here and then you can slide it off and , and leave the hardware on the wall , your worst case scenario , if that's not the case and it's , it's a hinge that's screwed to the cabinet and then screwed to the door and it doesn't have a releasing mechanism .

You may need to undo the screws that are attached to your door and then remove the door from the hardware entirely and leave all the hardware attached to the cabinet , that's fine .
If you have a cabinet that's got a picture frame or a surface that's gonna get painted as well .
So we want to remove all the hardware from all of our surfaces and that's as simple as pulling the screws and try not to lose them .
You ready to go and you'll see that they just pop right out .
Ok .
Now , just a quick note , if you have a kitchen cabinet that has an IKEA hinge on it , it has a locking cam mechanism that actually causes uh little rubber pieces in the back here to expand .
So all you do is you would take a knife and fry that locking mechanism up and then it pops out .
There's no screws involved in that system at all .
But here we go .
Now , these little plastic things here are actually really , really important .
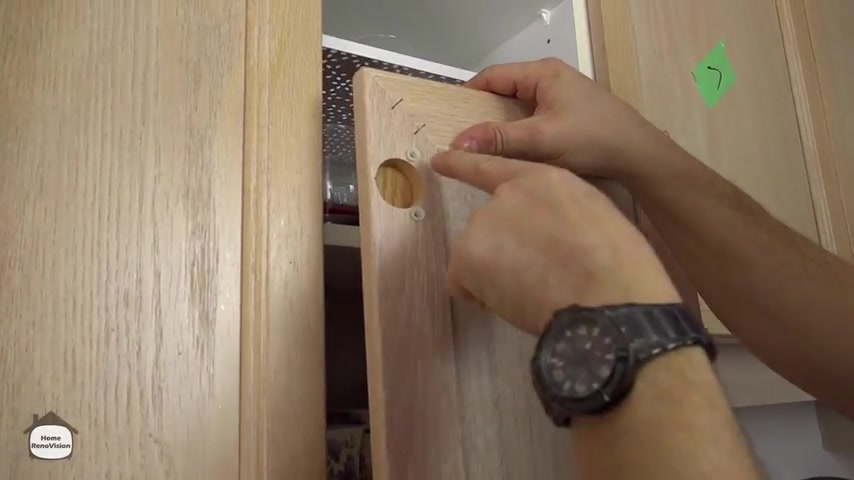
They're like a plug that's in the oak wood to receive the screw .
So when we're refinishing these cabinets , we want to leave these plugs alone , make sure you leave them in there because you don't wanna have to come back later and take all that out .
The only thing I would suggest is remove the little tabs that are on here that keep the door from being really noisy when you close it and you want to remove your handle and pull the screw out .
Now , when you're refinishing your kitchen , if you want to keep the hardware and put the same hardware back on , you're gonna save a lot of steps .
But if your hardware dates your kitchen and you want to put in something new , then you have an opportunity .
You can save this hole and drill a new hole with new hardware later .
Or if you already have poles on your doors and you have two holes , buy hardware with the same dimension on it .
Ok .
So it's , if it's a three inch by three inch handles and that way you won't have to do any filling and sanding and , and repairing of the door before you get moving forward .
If they're in good shape and you're gonna keep your hardware , this is a real quick process .
Ok ?
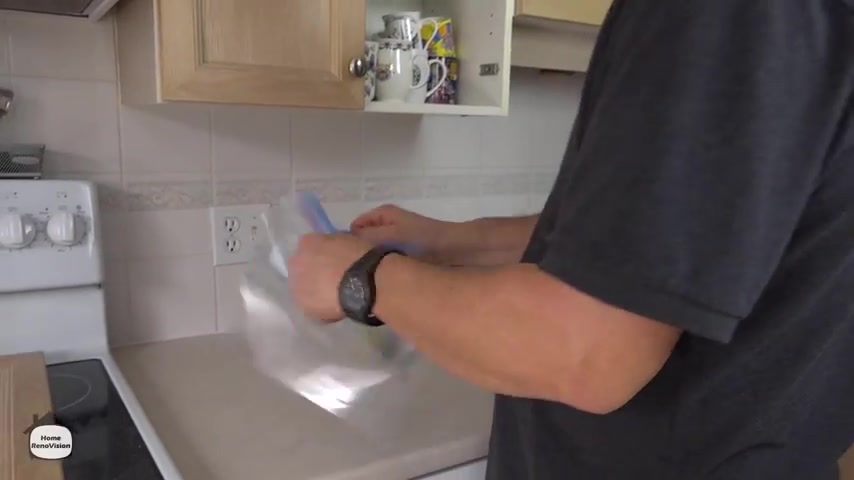
What you want to have , have your zip lock bags .
I prefer the freezer bags because they're really hardy and , and you just throw all that in there , all your screws and bits .
Ok ?
Close that up , get out your marker and put on here .
Number six .
This is really important because all of your doors and drawers that are in here are going to be set , especially for that piece of the cabinet .
You don't have to come back and make all your adjustments all over again .
Now , if your cabinets need to be adjusted , you can throw them all in the same bag and you can do all your adjusting when you're finished .
But in this case , these doors are actually lined up pretty good .
So I want to just kind of keep things simple .
The only other thing you might want to do is take your marker and put a little marker on the hinge and that'll mark whether it's the top or the bottom for you .
Here we go .
Very unique .
Just gonna get a lot of these out of the , out of the sight line .
Ok .
So you can see it doesn't take long to pull a kitchen apart .
If you got the quick release , you just spend more time on the other side , taking all the hardware off the doors .
But this is it .
Now , your kitchen is prepped .
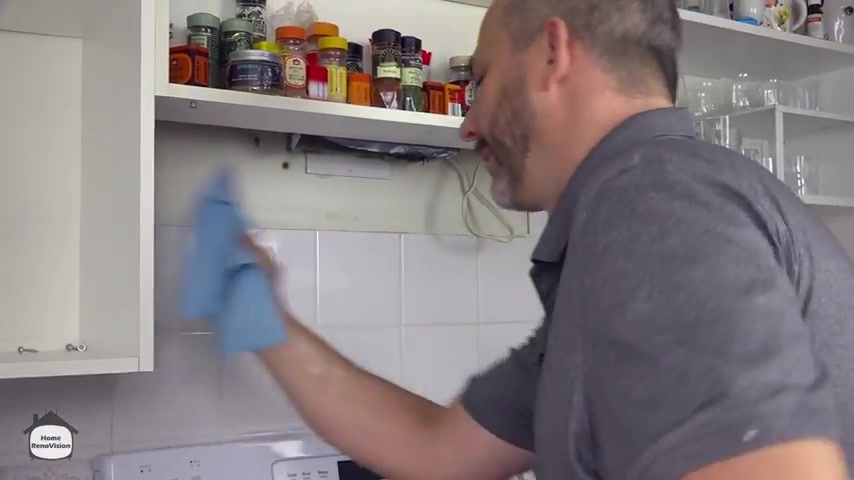
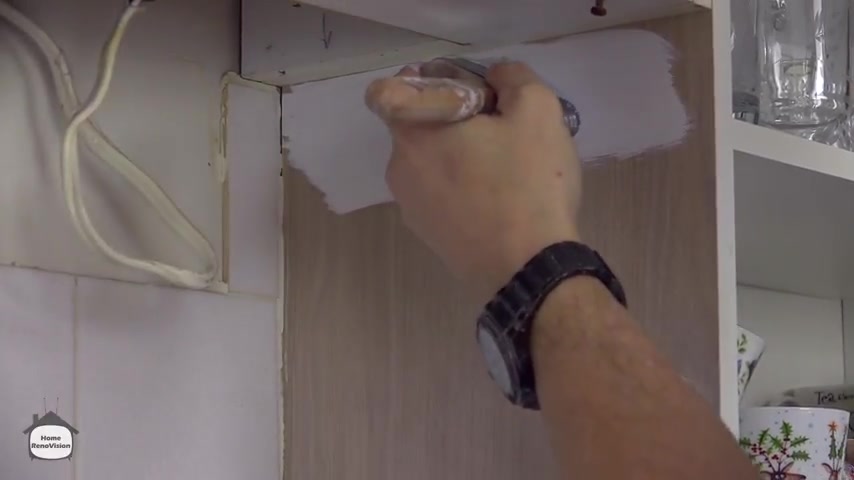
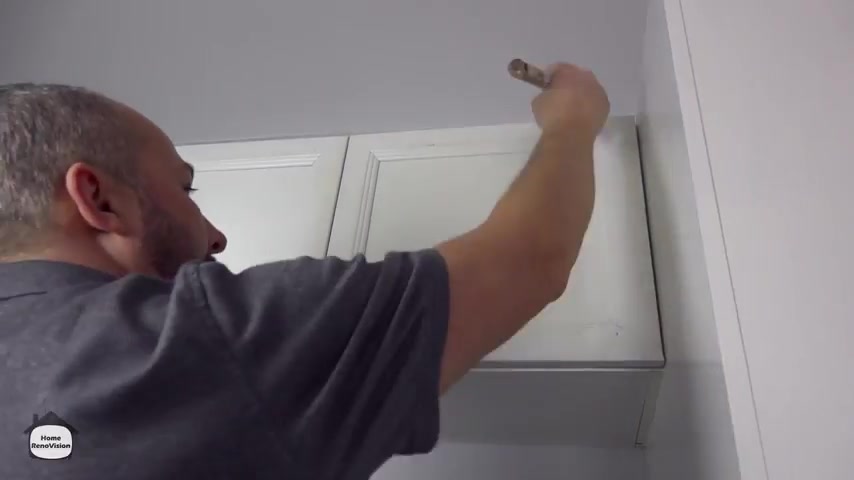
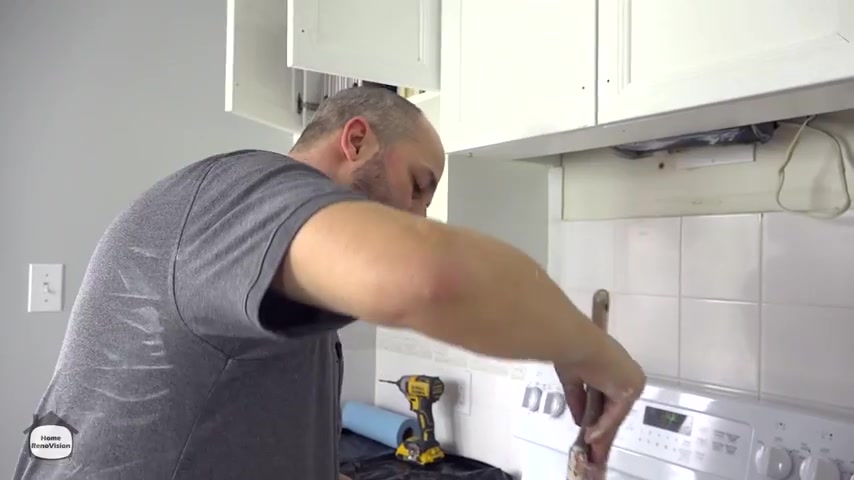
The only thing we're going to be painting in this kitchen because of this style , um , is the actual little bits of facade that are on the side of the cabinets that are showing , uh , you know , this little balance .
I think the side of the pantry door over there is gonna have to be painted as well .
But because the doors take so much more prep , what I wanna do is I want to get all the doors prepped , do those until we're ready to start painting and then we can come back and do a little bit of prep on this in the morning and we can paint everything all at the same time .
It's going to be probably a 3 to 4 day project just because we like to make sure we let it all sit the time of the year that we're in is about springtime high moisture in the air .
And because we're using a water based paint , we want to give it lots of time to set up and dry properly so that we don't want to things and have a problem .
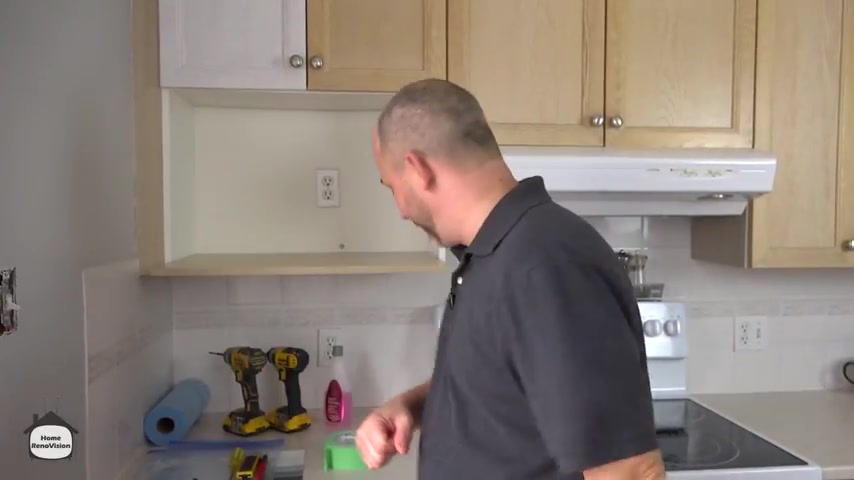
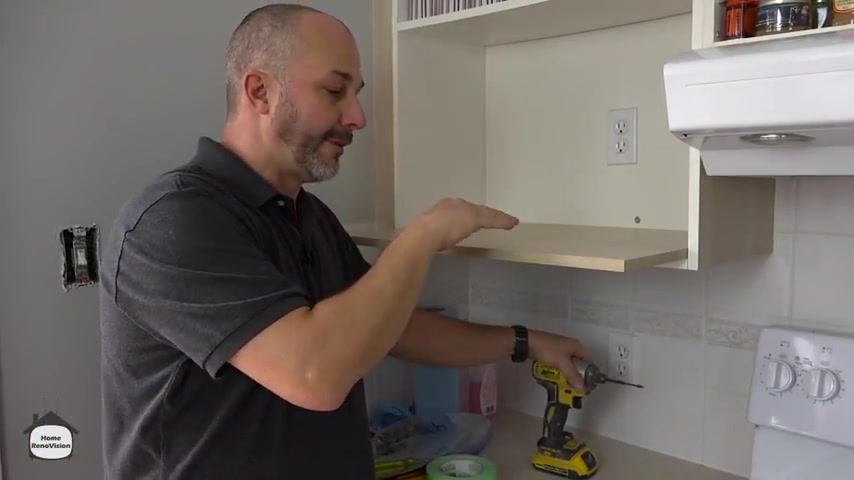
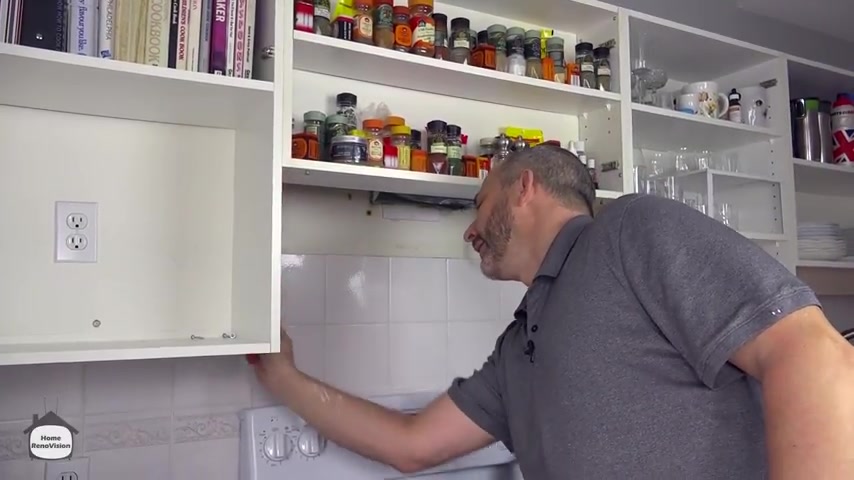
Now , here's the trick .
We have a microwave shelf and this is just a vine .
So , what I'm gonna do is I'm actually gonna remove this and I'm gonna go pick up a piece of solid pine and cut it to fit this space and paint it like the rest of the cabinet because I know that even after the , the this plastic vinyl here that's covering all the doors .
After this stuff is painted , it's not durable no matter what you do , we can give it a bit of texture .
We can paint it nice and it'll look pretty , but it's not very durable .
So it's not good for a shelf .
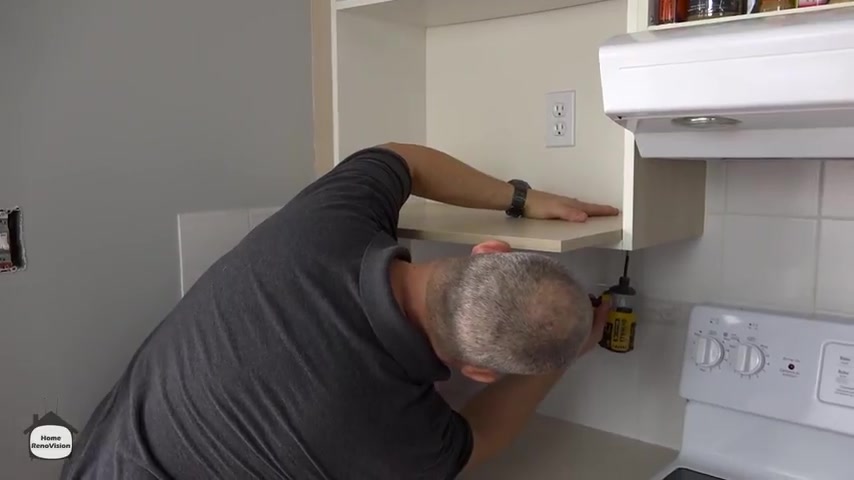
So what you want to do is they take your drill and underneath , there's going to be four set screws .
Usually here we go and these are cabinet screws and they have a washer head on them .
They're generally around three quarters of the thickness of the two layers of material added together .
And that's all they use to attach it .
So you can replace those for and you can actually save them for later just by putting them back in with a quick little twist .
Now that I have my microwave shelf , I'm not gonna just pitch it in the garbage .
I'm gonna save this as a template so that I can use this to make my shelf replacement .
Now , drawers are a little bit different because there's a drawer face and then there's a drawer and we want to remove the face from the drawer itself .
And in this case , it's five screws and we are going to have to , well , that's a knife .
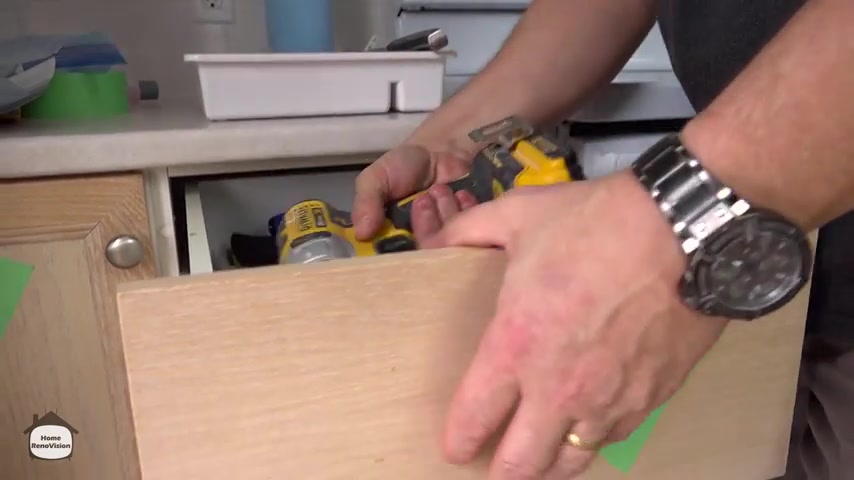
All right , we're gonna have to get some space in here and we want to first take the handle off .
Ok , then we have four set screws that are holding the face to the drawer .
We want to remove these screws only halfway .
Well , would you look at that ?
These drawer faces are not just screwed on , they are stapled on as well .
So , unfortunately , if I try to take that door face off , I'm gonna run the risk of damaging this drawer itself .
The drawer is made of half inch particle board material .
Um , I'm not gonna take the chance that I'm gonna be able to remove that without destroying the drawer and that causes a brand new kind of issue .
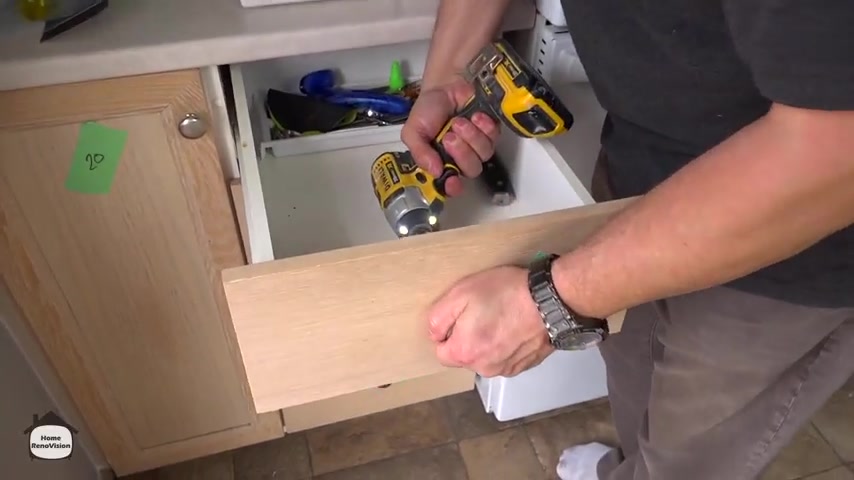
So , what I'm gonna do for now is I'm gonna treat all of these drawers and they have to be sight finished where they are .
I'm just gonna see which ones I want to leave in the kitchen and which ones I'm gonna take out to the shop entirely .
I think the homeowner is gonna be able to appreciate having access to their silverware .
Oh my .
So what we're gonna do is we're going to finish these drawer faces attached to their cabinet .
When we come and take care of all of these other parts of the facade , we're going to take all the doors off site .
These are actually a lot simpler to finish because they don't have all the detail , right .
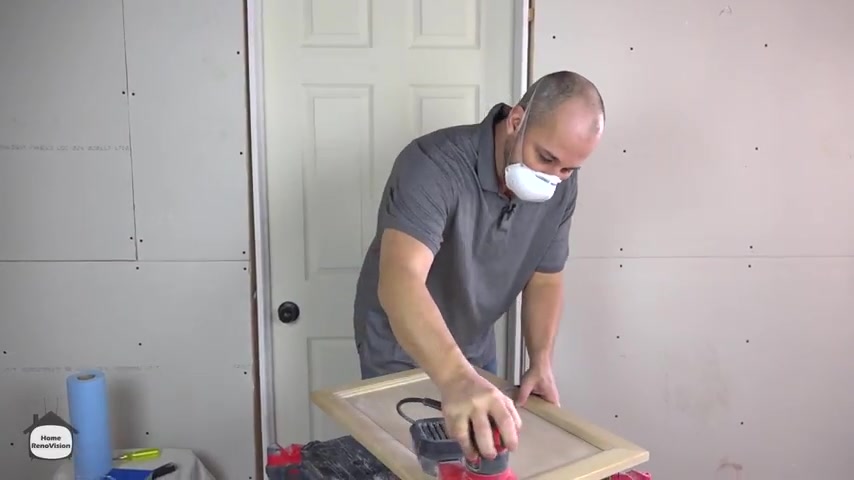
So this is actually quite easy to say with a palm sander .
One of the reasons I want to take all of the draw door faces away and take it to my shop is because the contour on this panel , it takes a lot of work actually to take the stain and get the finish off there and do it effectively .
So that requires a little bit more precision than just throwing a palm Xander on it .
And I want to have it in a different environment .
This is going to be simple .
I can set up my palm sander on a vacuum , come in and give this a good s stuff for the transition primer and it will perform just fine .
But this , this is a lot more work trying to make sure all these nooks and crannies here are filled in and sanded properly .
So I'm just gonna finish taking the rest of my doors off , get them loaded into my truck to take back to my workshop and then we'll meet you back there to continue on with the process of how to prep these things up and get them all painted .
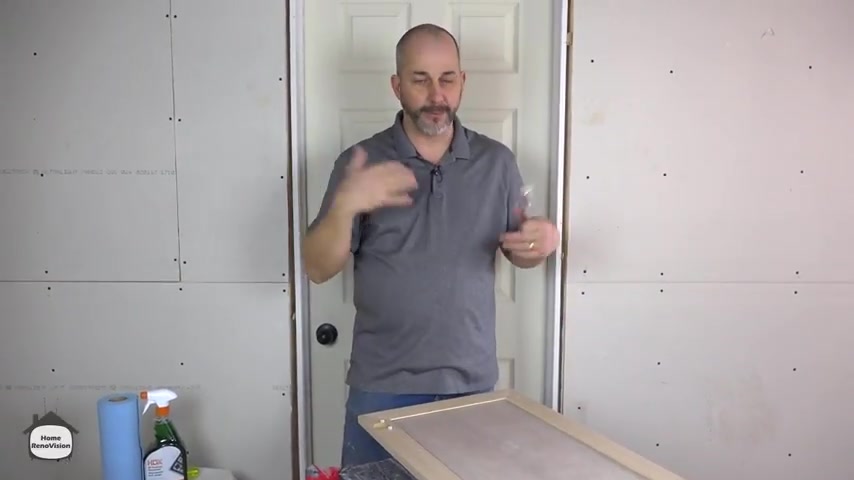
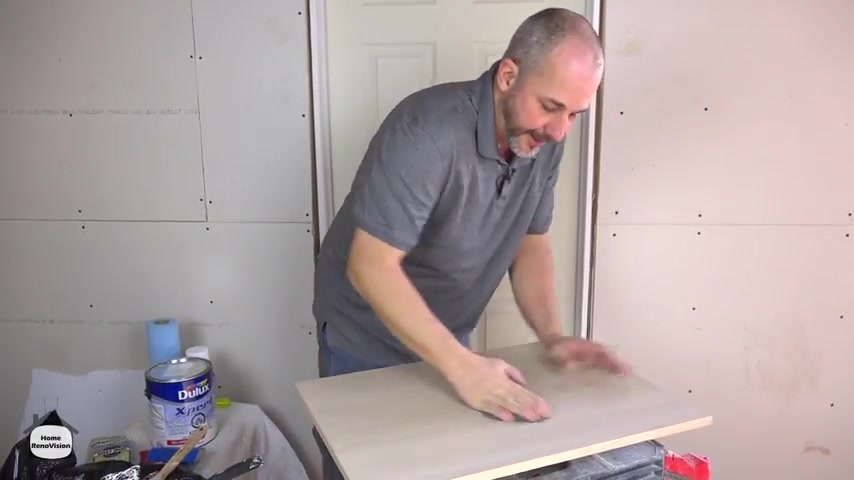
So we're back at the shop now and I'm gonna go through all the steps that are necessary in order to take it from this to a beautiful piece of finished painted wood .
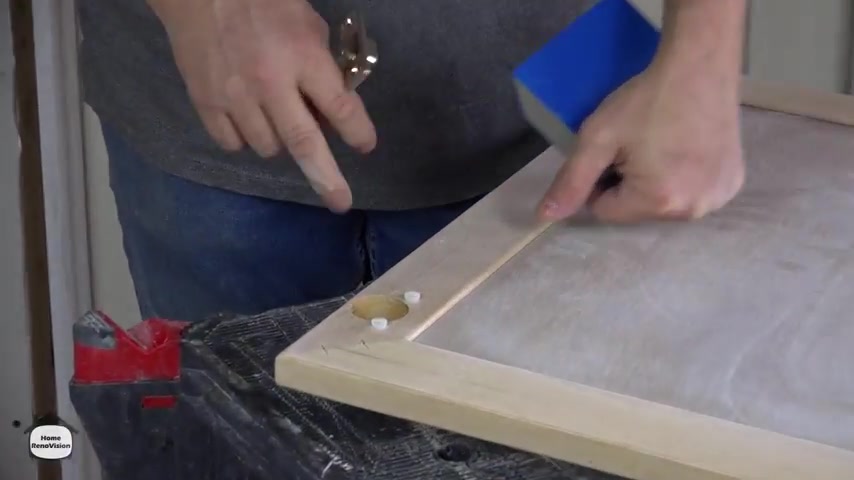
Now , when you have to be careful of a couple of things , when you get started , one , these little door stops , you wanna get these removed because you can see the unfinished wood underneath there .
All right .
So those garbage , you can go to the store when we're all finished and we can buy a package of brand new stops and we'll apply those when we install the doors at the very end of the project .
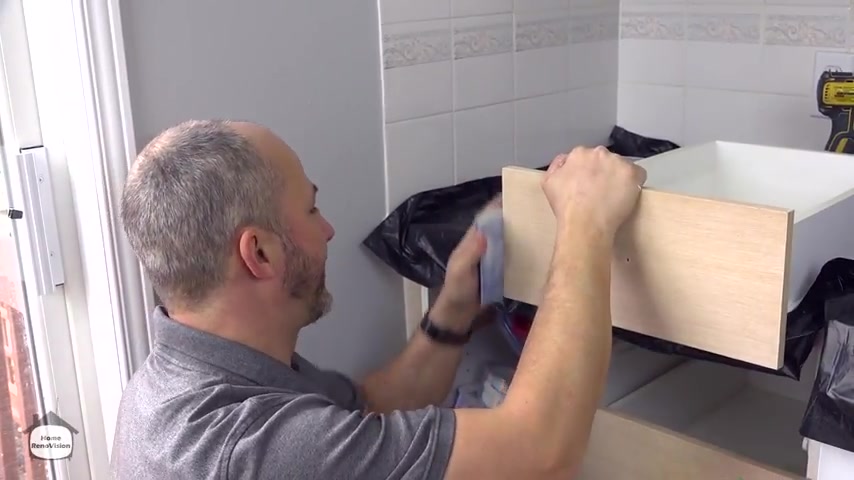
But for now , here we are , looks like we're ready to sand , except for one thing , we need to clean this first because it comes from a kitchen depending how old it is and what kind of condition your cabinets are in .
You are going to have varying degrees of cleaning necessary here .
But you don't want to start sanding until you've cleaned because natural wood doors have got texture and that texture .
If you put a sand pad to it , it's gonna start rubbing all of that grease into the grain , right ?
You're gonna trap it there and then when you go to paint , you're gonna be very disappointed with the results .
So the type of cleaner that you want to use depends on the person and the condition of the situation but generally , uh , like a T S P like a trisodium phosphate .
They come in powder , you mix it yourself or they also come and spray for them .
I just went down and I grabbed an all purpose de greaser because I'm not looking for a chemical like a T S P where I've got to actually wash it off when I'm done .
This is you just spray and wipe and walk away .
They're in good shape .
They aren't very greasy .
There's no real surface dirt not covered in tomato sauce .
I'm not expecting a big issue .
So we're just gonna spray that on liberally and we're just gonna wipe it off with our blue shop towels .
And what I'm looking for here is just a physical inspection of this rag when I'm done and then I can find out how much dirt is on there .
Now , that's pretty darn clean .
So , as a result , I'm not gonna spend all day long trying to wash my wood .
I'm just gonna take this wet rag , double check the sides .
You're gonna be surprised .
The majority of the dirt is gonna be right around where the handle is from people's hands .
All right .
And on the back side here , that'll be where most of the dirt is .
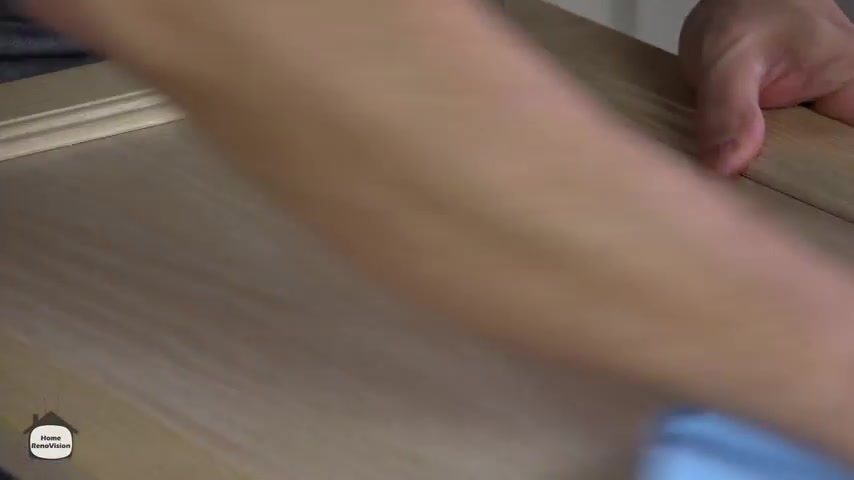
Once we've got this cleaned up , now we're ready to sand .
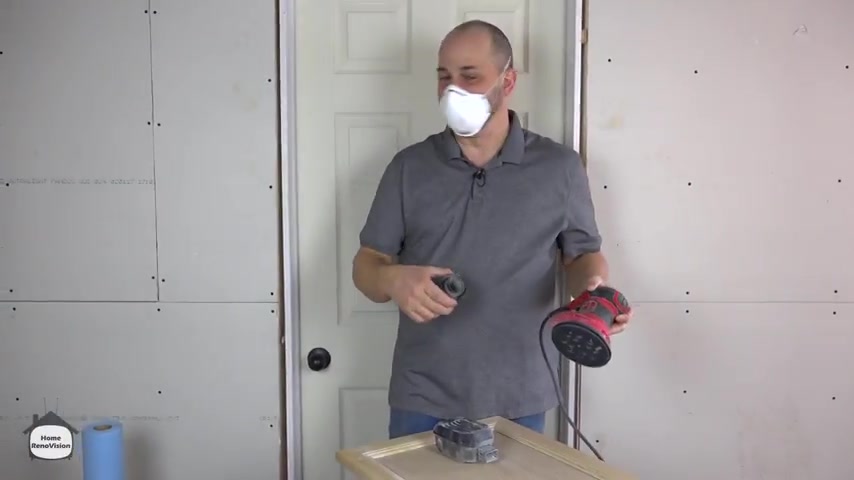
So for sanding , there's a couple of products you're gonna need .
One is an orbital sander and you can get these where they go in circles or vibrating .
Ok .
So either one will do the job if you get a kind that just vibrates , you can actually buy these with a square or a triangular tip .
And that can be real beneficial for getting into the corners .
But because we have a detailed door , we're going to need a sanding sponge as well .
And the reason for that is we want to actually get that sponge , press it into the detail and then sand out the detail .
Ok .
Now , here's the thing we already tested this .
We know it's an oil based .
Yes , you could get chemical strippers involved and you can go crazy .
I don't think it's necessary technology today makes it so that it's not necessary to take this back all the way to the bare wood .
What we want to do here is just transition it into a new product that we can finish and that's going to have the resistance in that wear and tear that we're looking for .
So we're just looking to scuff this up so that we have a texture that will receive our transition primer .
Once we have that texture , we can move forward instead of having to go back to the chemical strippers .
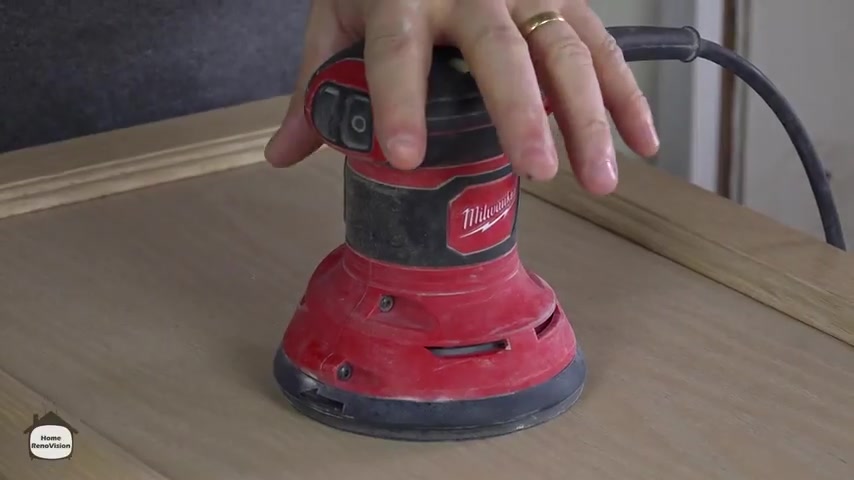
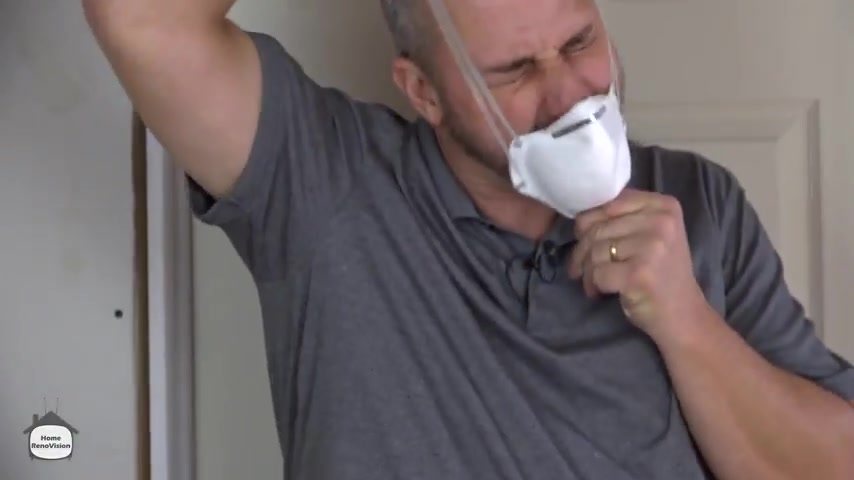
If you're going to use an orbital sander , of course , we have to take precaution .
There's a lot of fine dust being kicked out by that .
So you wear your mask , ok ?
If you're dealing with really old cabinets or if you're adding new products that are solvent based , buy this one .
OK .
This is good for all of those odors as well that are dangerous in the air .
This is just a particulate mask .
This will take care of the order as well .
We're not gonna be using solvents .
So I'm not worried about it .
I'll just wear this version of the diaper like a glove .
This sander has two adapters , one is a cartridge filter and that can attach and then you're just running the dust right into this box .
The other adapter is here and this is actually designed to be attached to your vacuum .
So you can actually vacuum while you're standing for the purpose of what we're doing here today .
I'm going to avoid turning that vacuum on because that just gets a little bit too loud and we're not really making a whole lot of a mess .
Yeah .
For sanding the surfaces or sander , I'm using a 1 51 20 grit .
That's plenty .
You don't have to go any more course than that .
The only trick here is you want to line up the holes , relatively speaking , because that's the vacuum is going to be sucking all the dust through the holes and then through your filter , if you don't line them up , the dust is going to go everywhere .
Yeah .
Now you want to do your best to sand with the grain and again , we're not taking it back down to bare wood , we're just scuffing the surface to get ready for transition primer .
So don't over sand .
You don't need to spend all day long on this process , make sure you do all your sides .
And of course , the entire back , generally speaking , the back of the door doesn't get a lot of wear and tear .
But it's that one time if you don't say this before you do your transition primer , it's that one time a plate or a ring from someone's hand is going to scratch across that .
If you don't prep it properly , it's going to disappoint you .
So take the time and do it right now .
Just a word .
This particular hardware has plastic caps that went inside a pre drilled hole .
I'm going to do my best not to damage those or remove them .
Because when I put the hardware back on , there's nothing there to be worried about .
I'm actually only going to see the context around it .
So when I'm sanding , when I'm painting everything , I'm gonna leave these here and work around them .
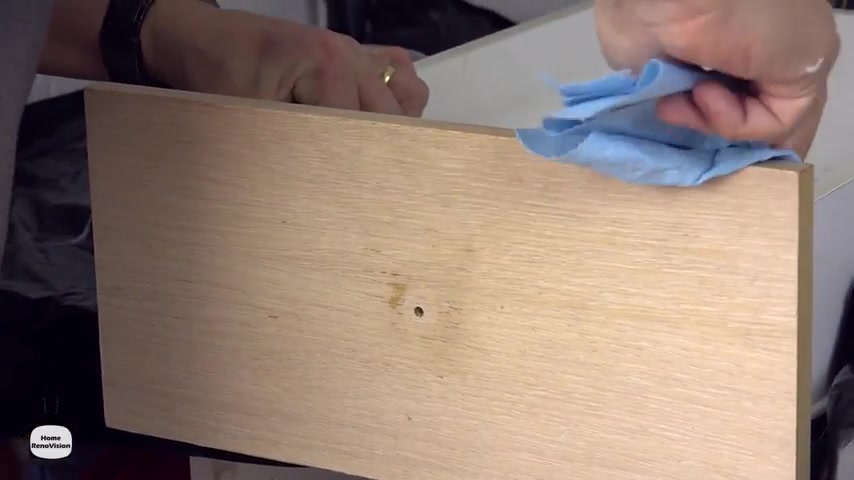
And I'm not going to be too concerned about what happens inside that area when you're done sanding , take your cloth , put a little bit of your deer on there and just wipe over your surface .
And basically what you're doing is just trying to remove the dust and the debris from the surface .
That's all so that our transition primer isn't going to be competing with the dust .
That's on there in order to get a good grab .
The other thing you can do is you can hook up your air compressor with a blower and give it a good shot with that .
If you have one handy , that is a great way to finish this as well .
Ok .
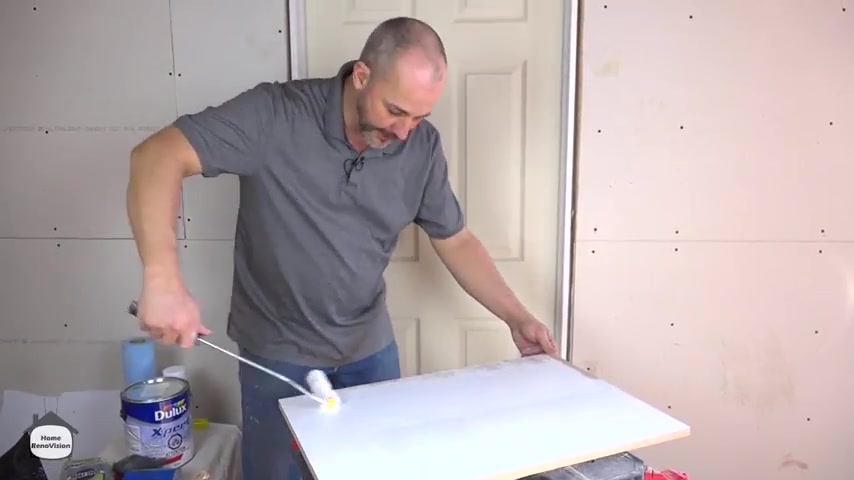
So now we've got our sanding finish .
It's time for our transition primer .
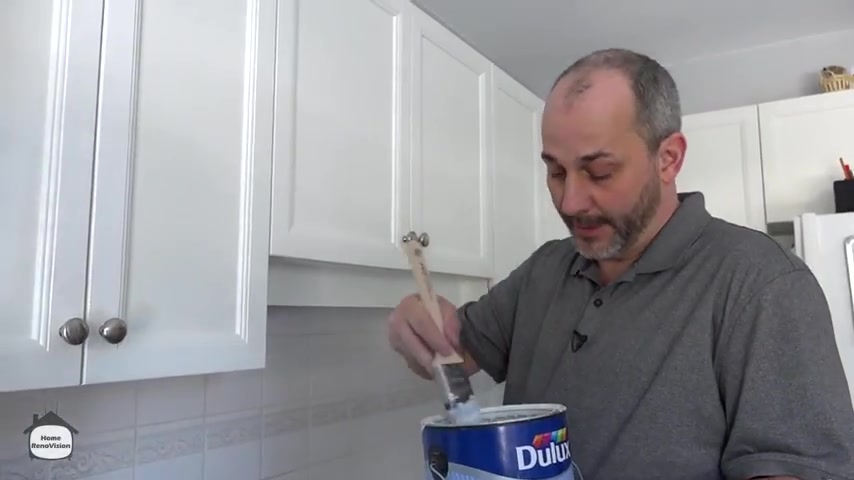
This is a product I use by Du Lux and it works amazing and I love it .
And so what I need is a paint tray and I need a roller .
Now , I've seen a lot of videos they talk about using these foam rollers when you're doing cabinetry work .
But I'll be honest with you , I would prefer going with this 10 millimeter microfiber foam rollers to me just seem to pick up too much air bubbles and cause a texture issue and you don't get that nice smooth finish you're looking for .
So I'm gonna use this bad boy , but my paint tray is a disaster and I am out of liners .
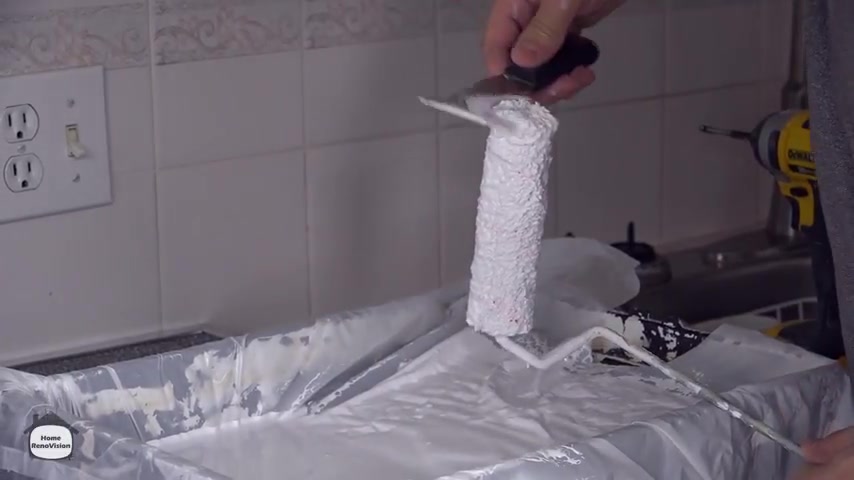
So I'm gonna show you a paint trick .
Oh my goodness .
Take your paint tray .
Put it in the garbage bag , instant liner .
Ok .
Now , if you don't own a five in one tool and you're going to paint , go buy one , this uh cleans rollers , opens cans , uh helps to repair the dry wall , puts dents so you can fill them up and it is the easiest way to open up a can of paint .
All right .
Try to portion of what you think you're gonna use and there we go .
I know this is crazy .
If you can remove the paint from inside that edge , then you can close that lid over and over and over again without having any issues .
Ok .
So try to clean that out as best you can give that a tap .
Now , I buy these little night trial gloves for doing stain work and that sort of thing .
And I'll be honest with you , I generally don't paint with gloves on , but this process is gonna take a few hours and I'm gonna be going back and forth between a couple of different kinds of paint and I'm gonna be touching a lot of edge .
Ok , let's face it .
These cabinet doors are tiny , there's a lot of detailed work here and since I'm gonna be taking a lot of edges and painting them here and then transferring to a drying station , I just thought , you know , this one time I'll wear the gloves .
All right .
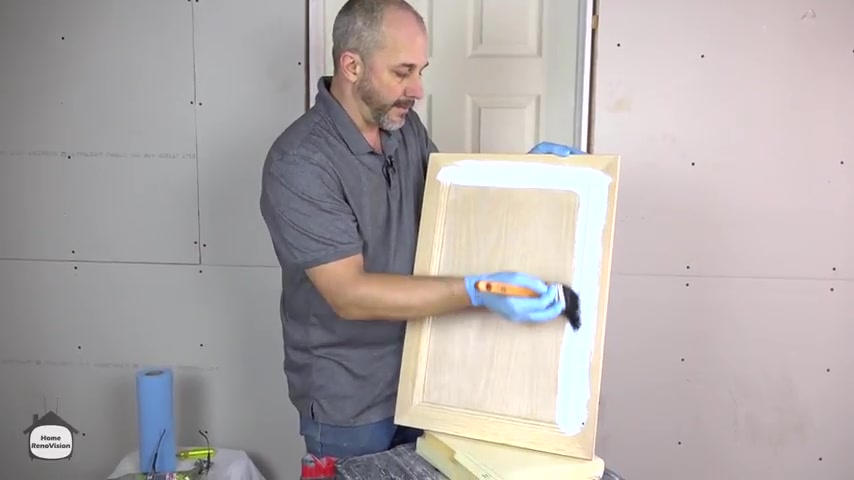
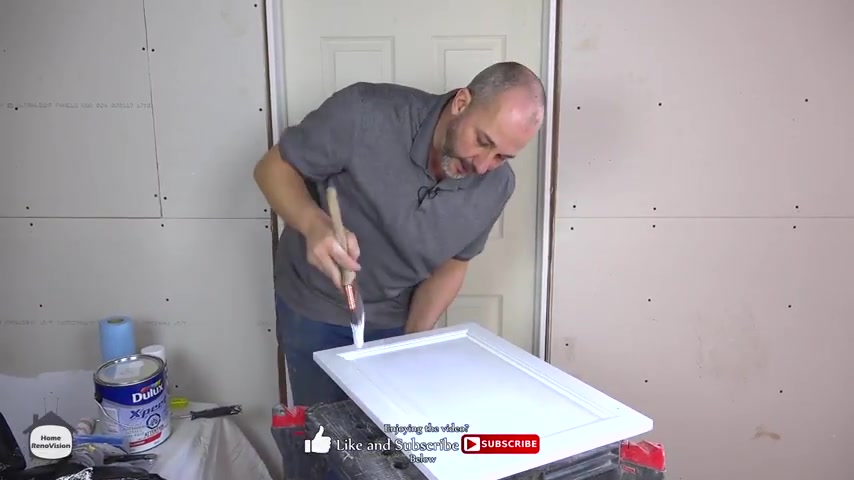
Here we go , brush and roll .
Right .
So the idea is like anything else you wanna fill up inside the brush ?
Ok ?
And then take the extra off , less is more .
And you want to paint from inside the brush , not the outside , it'll reduce your drips .
Ok ?
And the whole point here start in the edge and you work your way towards the middle from both corners .
So you put it in the edge and you pull towards the middle .
All right , making sure to get it in the , in the crack because these are two separate pieces of wood .
So you wanna get that nicely filled .
I would hesitate trying to fill it with any kind of cocking .
It's gonna cause you a great deal of regret .
It's not going to finish nice .
Now , if you get any brush lines , make sure you pull them out .
Ok ?
There we go .
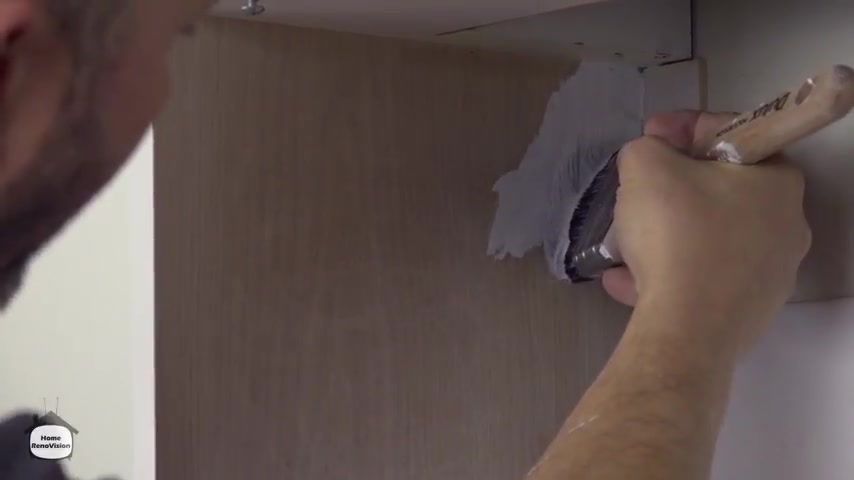
Now , I'm gonna show you another trick because this channel is full of nothing but tips and tricks .
This is my new favorite friend .
I love this product .
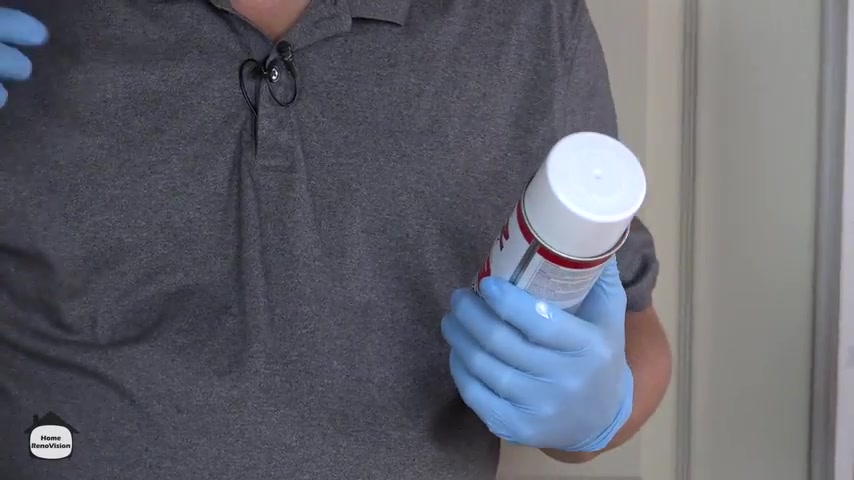
I've been using it for years any time I'm doing a minor patch or stain kill or anything that I need a good solid primer .
My favorite trick for this is actually an old set of stairs .
I can spray all of this down on the oil paint and then finish a couple of coats of latex over top , but make it look brand new if you want to make your life simple , this one can , will do a kitchen .
Now , I'm not going to suggest you spray the entire door with this , but because the , the detail that's in this door , if you want to make your life easy , you can use this as a spray primer just for the detail .
This is a shellac based paint and it is like a spray paint , of course .
So it will drip and it will run and if you have any of that , just wipe it off out of the way and then let it dry .
Ok .
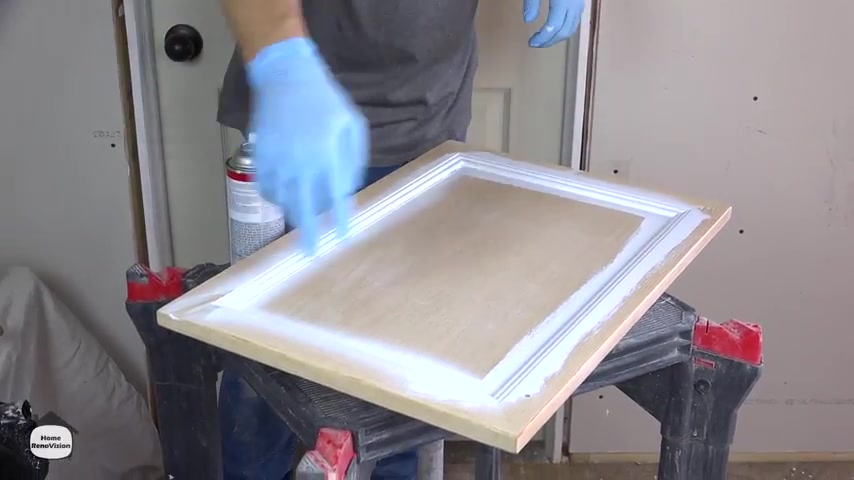
If you get proficient with this kind of product , you can prime all of this detail in just a few minutes and it'll save you a lot of time and effort .
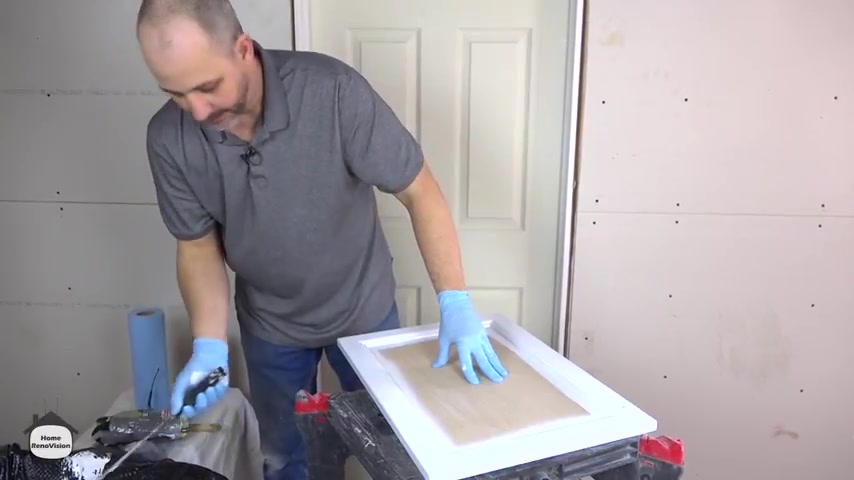
All right , of course , in order to finish your priming and you can use the brush on these edges here .
All right , I'm going to suggest that you do all four sides of the edge while you have this out .
Ok .
And you wanna follow with the green and don't worry too much about the texture of the surface .
We are going to sand between coats .
So don't get hung up on that .
If you have paint pooling in a corner or you have a big bubble by all means , get it .
But don't worry about brush lines .
Just wanna clean all this up .
Here we go .
Look at this , I'm still working from inside that one brush .
Amazing how much paint a brush will hold .
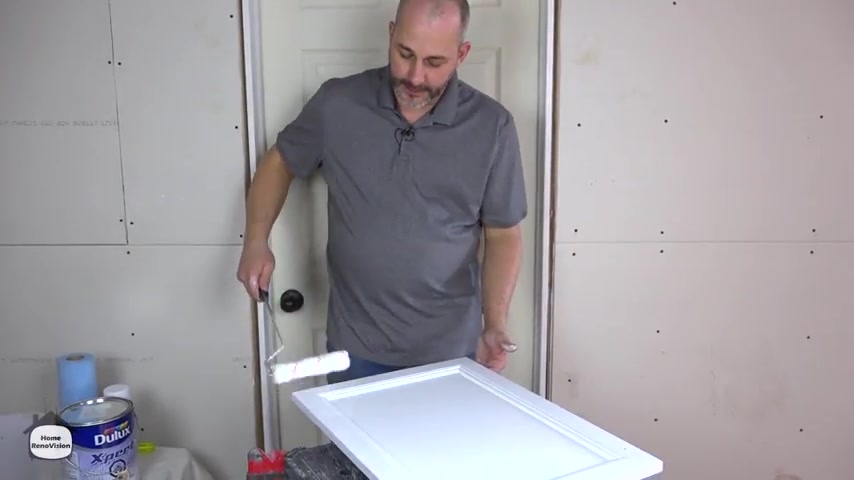
Once I have all five sides done , I'm going to pull out this thing here , my trusty roller and I'm going to roll the inside .
I've already got .
That's great .
Now , you'll see the process here .
You're gonna have a lot more paint on here than you want .
Ok ?
And this is the danger and this is why I'm showing you the hard way .
First .
There's more paint there than you want as a surface primer .
All right , if you're not careful , you're also gonna get it all over your edging and you're gonna be back and forth like this all day long , just priming up your door , not necessary .
So the way you solve this problem of having too much paint on a door is sand all your doors first and then when they're ready to go , cut all of your edges , then go back and put some paint on and then go to the next door , do two or three at once with the full roller and then you can come back and stretch it all out .
Ok ?
That when your roller is dry , you have a lot more control .
You can even do all of the flat surfaces if you don't want to use your brush .
Ok .
Again , it comes down to comfort , but I prefer to do all my flat surfaces with the roller instead of a brush .
Now , all we do is take this set it to our drying area and you can set this up anywhere you like .
I think the best for me that I found is just get a couple of two by fours , lay them on the ground in a corner and stack all your drawers , your doors across that .
And that's a perfect way to let them dry .
It takes about a half an hour .
So once your door is primed and it has dried completely , uh usually let it have a good couple of hours .
Don't be in a hurry here because you are going to use a mechanical sanding machine and you don't want to sand all of this off real easily .
If it hasn't had time to dry and bond properly , you're gonna be disappointed and have to paint them all over again .
So what I would suggest if you have the time in the patients prime everything one day and then do your first coat the next day and then your second coat after lunch .
And here's why we are going to be switching out our sandpaper and we're going to go from our 1 20 .
Gotta love the hook loop and we're gonna switch it over to the 2 20 .
Now , I like to buy them in different colors because then it keeps me honest and I don't forget that I gotta switch it out again .
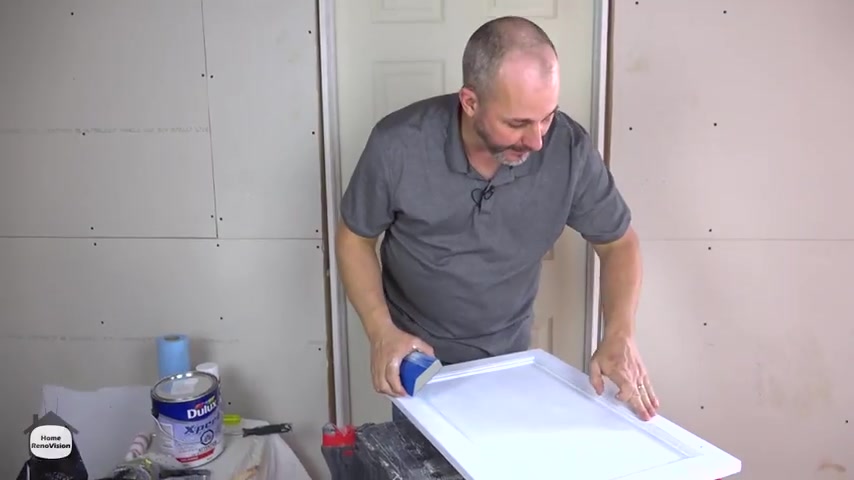
Line up the holes , get ready to go once we're sanded , we're gonna be using the Dux melamine paint .
I've seen a couple of videos done with this kind of product and , and they're talking about uh using something that's not an eggshell , but it's not semi gloss .
Somewhere in the middle .
This product here is uh it's amazing .
It's , it's a melamine paint .
So it gets you that nice smooth finish without the semi gloss shine .
It's also got additives in there .
So it's really , really durable and it will really help your kitchen cabinets perform .
So if you haven't seen this product used before , uh , feel free to stop by the delux stores or P P G paints and have them talk to you about the benefits of this .
I love this stuff .
I've worked on it before doing some custom working kitchens and , uh , really pleased with the results because they're sanding .
I should put this back on my face .
God help us all .
OK .
Here we are .
Now we got our 2 20 pad and again , this is really simple .
We're just trying to take off any little bumps that are sitting in the paint so that we have a nice surface texture .
I'm not trying to take this back to the wood .
Of course , just a quick one .
I , and that is it the other option that you have ?
Of course , and you'll see that even with just doing that exposed a couple of spots , the other option of course is just take a sanding block , you can get these medium or fine grit or if you have a medium grit and that's old .
Keep these handy in case you ever get this project and you can just pass it over the surface real quick .
OK .
Whenever we're painting between coats , the goal here is not to create a texture that will bond , it's not to do anything other than to take off ridges and bumps .
Ok .
So same thing , get the corner right in that groove .
Just a help guarantee you're defining that space .
Ok .
Anything that looks like it's a blemish address it that here we go .
Of course , when you're done tack cloth or use a little air pressure that'll do the job .
Now , same process .
Ok ?
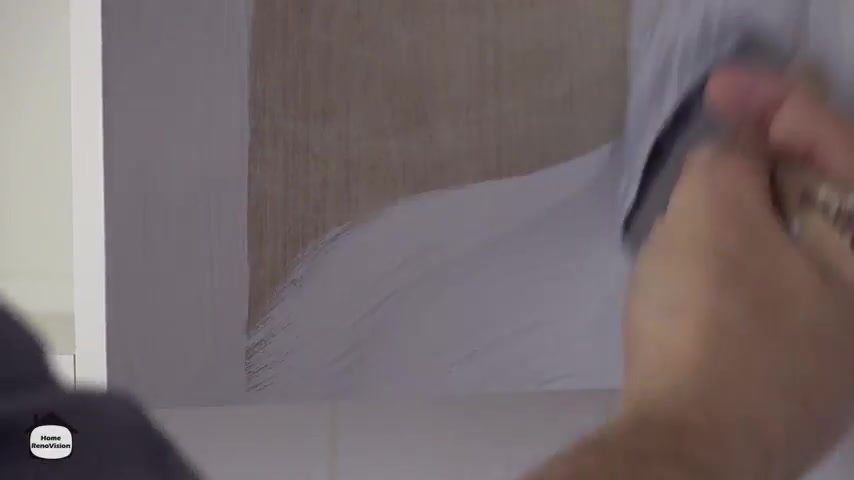
I would suggest you start clean , fill your brush with paint on the inside and then you're just gonna pull it , push it in the corner and then pull right and then just clean it all up , make sure that there's no ridges .
All right .
Here we go .
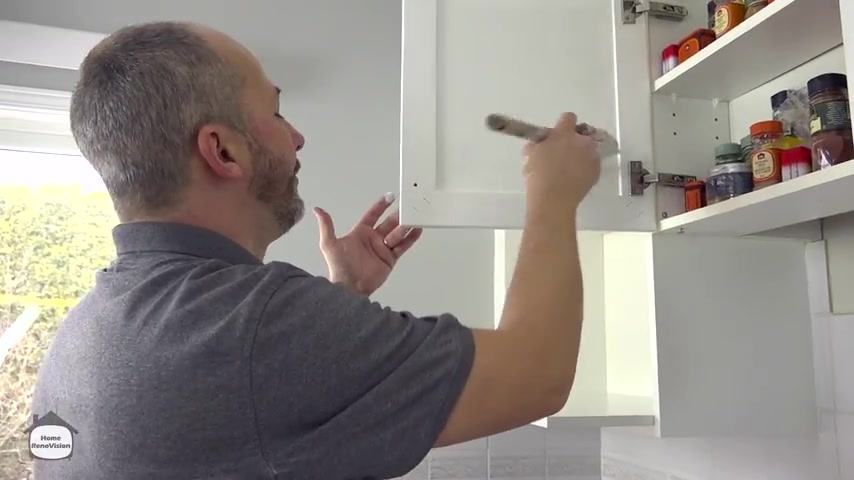
Now , painting a cabinet door is actually relatively simple .
It's just time consuming and the secret is in not using too much paint .
And the way we deal with that is I'm painting the trim area here , the detail , but then I'm taking the brush and I'm painting the outside of this picture framing as well while I'm at it .
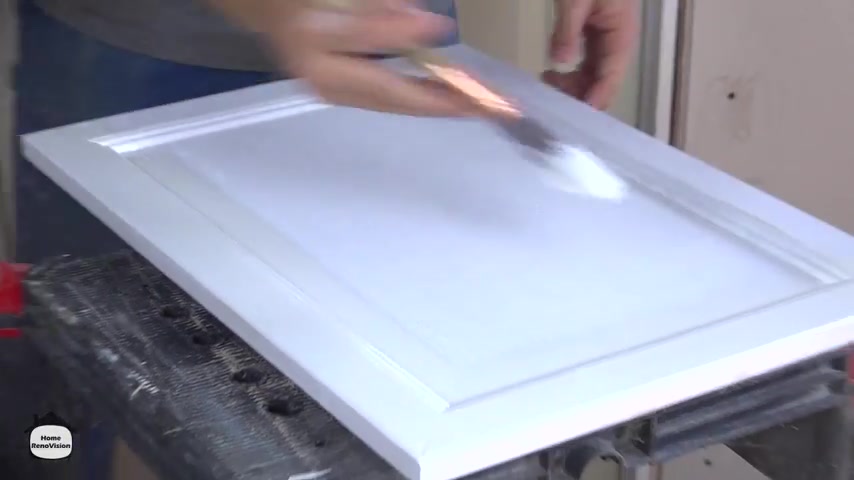
And the reason I'm doing that is because this gives me the ability to get rid of the excess paint that's stuck in that brush .
So I'm not leaving it all in the ridges and I'm not causing drips .
All right .
So here's my process , I get it in the corner and pull .
All right .
No , I'm gonna pull in the direction of the green here and I'm also going to paint the edge with the excess paint that's left on this surface here .
One of the things you want to be careful of when you're painting is this concept of less is more .
You might take a little bit of experience , but you really need to trust the technology that's in the paint .
Nowadays , this paint acts like a self leveler , you put it on and then it'll , it'll spread out while it's drying and gets rid of all these brush lines and it gets really good coverage .
A good quality paint gives you such good coverage that you don't hardly need any to get the result that you want .
And it allows you to still see the grain of the wood underneath the paint .
Here we go .
That is absolutely beautiful .
Ok .
Now , the same thing with the door , I'm using a 10 mil roller and this one I didn't load up .
You'll see how there's hardly any paint on there .
Same thing , I'm going to take the time to stretch this out for the purpose of our demonstration here .
I don't want to run it up against the hedges .
Now , you'll see , I don't know how well that shows on camera , but I hardly brought any pain over here at all and I can just run this back and forth all day long and before you know , it , it's been stretched out and everything is completely covered .
Look at that now , to duplicate the same texture on the sides , just run it over real quick so that you don't have a different texture left from the roller and the brush on your flat surfaces done .
Now , we want , of course , do the sides as well .
This is easy .
Sometimes you just use the roller again all the way around when it's dry , there'll be just enough paint left in that roller that you can do that .
And then you want to let this sit for a few hours , I would suggest probably five or six overnight again , is better .
The more patient you are , the better the result come back , take your sand block , give it a quick shot just in case there's any more dust in the area and then give it one more coat and that is all you need .
Now , if you want , when you're all finished , you can go back with the lacer finished .
But like I said , if you're using a regular latex paint , you probably need some sort of a , a lack or a finished coat to protect the door .
But if you're using a melamine paint from Delux , you don't need that step .
It'll save you a lot of time and aggravation .
It also makes touching up your cabinets at a later date , really , really simple because you can keep this stuff stored .
And if you ever do have damage during your install , you can actually take the time to fix it and you don't have to worry about matching your lack or as well as your paint .
There we go .
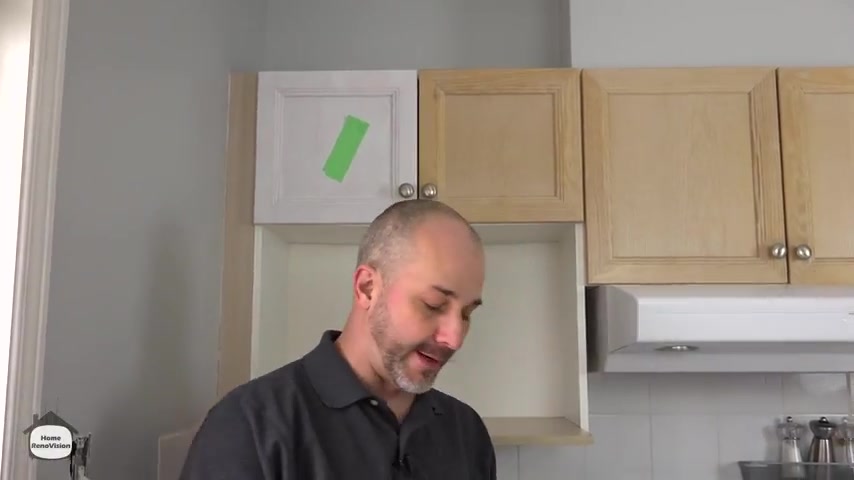
So the other type of process that you're gonna see in your kitchen , uh Most wooden kitchens are gonna have uh fillers Valances , um , microwave shelves like this one here and in most cases , or even the exposed side of a cabinet .
Most cases , the price point that kitchens are purchased at , you're not gonna get these in solid wooden stained , a lot of the fillers and , and , and miscellaneous trim boards are all basically an MD F material with a vinyl skin .
We'll call it plastic .
Ok .
So you can't take a mechanical san or , or a 2 20 sand that down .
It'll just eat a hole right through the thing and you're gonna run into trouble .
So what you wanna do is take some steel will .
Now , this is not the core stuff .
This is actually for fine wood working 40 is actually used when you have a piece of wood that's covered in Bethan , some sort of uh finish like that and you want to just polish it up and you can just polish it up and get rid of all the dirt and bumps and make it shine .
That's what this is for .
And this is what we're going to use here .
We're actually going to just rub it in circles .
And the idea here is we're gonna allow this steel wall to create our bonding texture for our primer because we can use a transition primer on this kind of material just like we did on the wood because it's designed to bond just about anything to anything .
Now , it's not gonna look any different it's not going to feel any different .
But know that once you've done the steel will application , you're going to have just enough texture there , you can take your paint and you can rule OK .
The fact that this is even rolling means there's texture on there .
If there was no texture , it would just slide across like a big smear .
But the fact that I can dry roll , this means that that worked .
Here we go .
I got just enough texture , even dry rolling .
That is brilliant .
And again , what we're doing here is we're relying on the technology of the materials that we're using .
We're not relying on the texture of the surface .
This transition primer , once it gets a chance to bond properly and cure and your finished coat of paint gets a chance to cure you .
Remember that , put this microwave shelf back on and slide your microwave in place and it's not going to cause any damage at all .
Ok .
So once your transition primer is dried , go back to your mechanical standard , you can then use your 2 20 sandpaper just like any other painted surface .
Again , when we're doing our sanding in between coats , what we're dealing with is the surface of what's painted , not what's underneath .
So all of a sudden now we've got our transition primer on here .
We have a brand new surface .
So just treat it like any other painted surface and you'll be fine .
Ok .
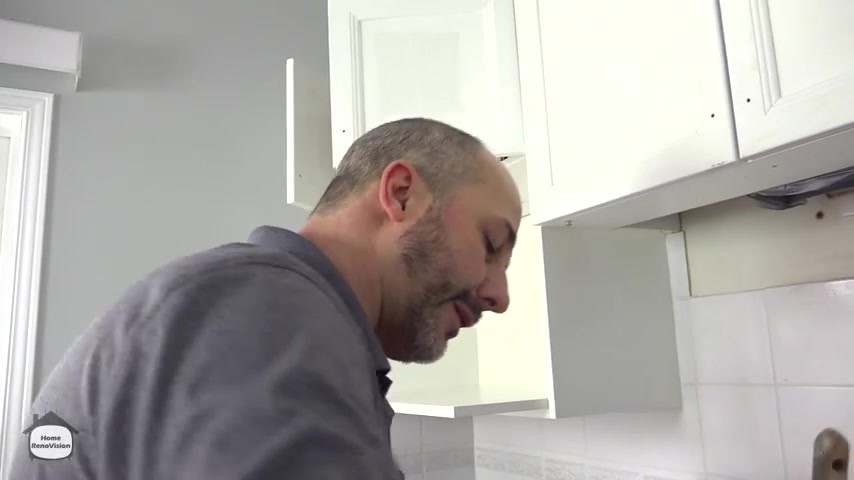
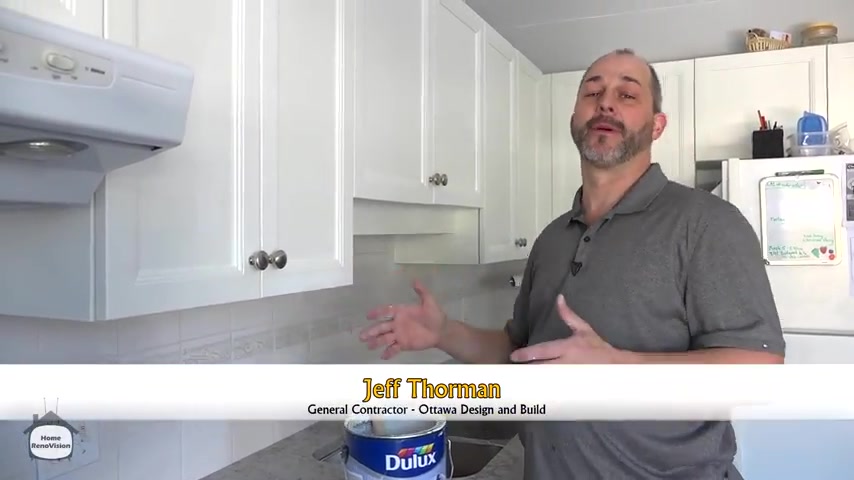
So we are back on the job site today .
Today is the day we have to handle all these little miscellaneous elements .
Uh the skins beside the hood fan Gables on the cabinets , that sort of thing .
So I guess your first step is clean out your room .
We got to remove the fridge , we got to move the hood fan and then we can T S P all of those surfaces , make sure they're also free from Greece .
Double check .
Quick note .
Nowadays , a lot of the kick plates around the cabinets are also done in the vinyl skin .
So that's the way it is here that has to be cleaned and painted as well .
Don't miss that element .
I know it's underneath the cabinet .
But if you miss that today , a couple weeks from now , I'll be sitting down for dinner , look across the room and go oh my God .
Look how ugly that is .
So we're gonna prep the room , make sure it's all ready to go .
Use a couple of black garbage bags on top of the counters and appliances .
That way it acts like a drop cloth .
I like to use the black bag just because if I have a drip or I see I'm making a mess .
It's really obvious to me .
Um Once we get that done and we clean all of our surface , then we're gonna sand all of these vinyl skins again .
Now we showed you earlier in the video that we use a little bit of steel wool for that .
We have a large surface so you can use a sanding disk .
I like to use 100 and 20 grid , but don't put it on the sander , just use it by hand .
OK .
So just grab a hold of it and use it as a hand sand .
Again , we're just lightly scuffing the surface so it'll hold to the bonding primer and then once we get all of that done , then we can start getting our first coat of paint on and then it's just a matter of hanging the doors and making sure it's all level .
So let's get working .
Ok .
So we're going to remove the hood fan because we have skins on both sides and just a little bit of space , but not enough to get a brush and roller in there and we don't want to try to maneuver back and forth .
We just want to remove it and then reinstall it .
Now we've got a video about how to change your hood fan in our library so you can check the little icon that looks like a magnifying glass put in hood fan and then there'll be a description , probably a link at the end of this video max .
I'm sure we'll take care of that .
That way you can follow that step along .
Yeah , typical .
There's no more there be very careful in messing with this stuff because you don't want to blow yourself up .
Hm .
So like an idiot .
I forgot my degree here today .
When I came lucky for me , the client had her T S P .
This is the new T S P product .
It's an environmentally safe version .
Uh My guess is that they had some issues with the political correctness of phosphates .
So they've corrected that , which is lovely .
So it's just a part mix with warm water and we don't need a lot of scrubbing here .
We're just gonna make sure that our surface is somewhat clean again , just removing the grease because we're not going to use a lot of mechanical sanding .
We want to make sure we've got a good surface to bond to .
So the next step of course is the sand and this is 100 and 50 grit .
And I'm just gonna go like this just using my hands like a sanding block .
Again , you can see on the surface if you go , especially in a circular motion , you'll see the scratches and this is how , you know , you've scratched it up .
Ok .
So like this , you really can't see what you're doing .
But if you go circular , if you're going up against the wall , just fold your paper in half and put your hand in the way .
So it acts like a guide .
So you're not going to scratch the wall set that and go .
So then when you're done before you paint , just take a damp cloth or a tat cloth and just wipe real quick to get the dust off the surface .
There's no sense painting that in because then that's just one more thing you're gonna have to sand off later .
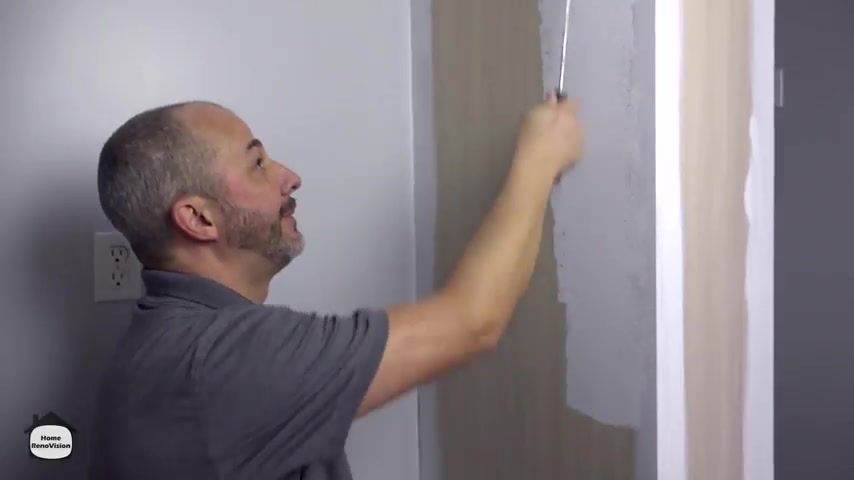
So again , this is our transition primer .
We're gonna be cutting and rolling .
The cutting is just a fancy word for using a brush to draw a line without making a mess .
So we're gonna put the heel of the brush in on the angle brush and then push the tip .
So we heal the tip , then we're gonna run a brush line down the side of that cabinet so that we don't make a mess on the wall .
If you follow this technique , you won't have to use tape and seal everything off .
And now if you want to , you could tape everything off , of course , but I prefer to brush by cutting in .
I find I can paint just as fast as most people can tape off a room .
I can have the whole room painted .
So I've learned not to use tape when I paint even on something like this .
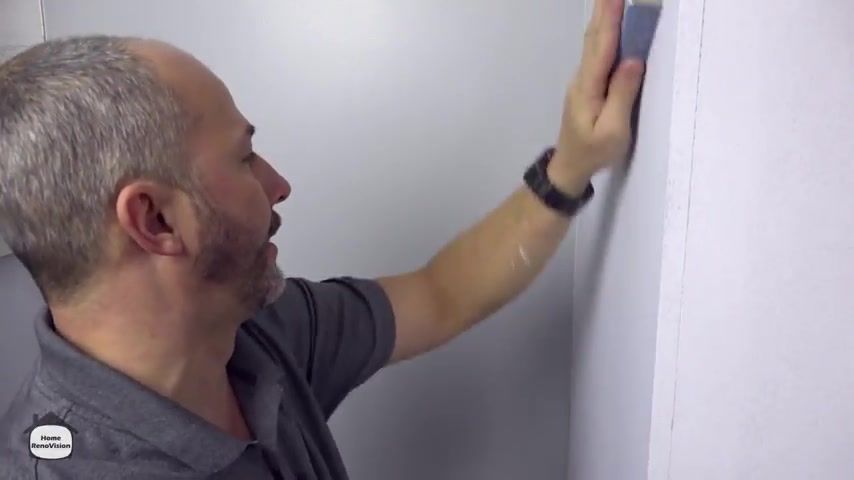
Now , when you get to the front of this cabinet , we don't want to paint the surface .
All right .
And if you use the roller here , you're gonna make a mess .
So use your , your brush and cut that edge as well .
And the secret here of not getting any paint on it is when you get to the bottom , if the , if the metal part of your brush stays level with the bottom of the surface , the , the bristles will be coming away .
If you go down like this , they'll curl underneath and make a mess on the bottom of the cabinet .
All right , it's the same thing here .
We're gonna go down and pull our heel off .
All right .
Now , we have our edge defined .
We can take the roller , but basically , there you go with a little bit of pressure .
You want to just kind of move whatever paint you have there around to even out your texture .
Here we go .
When you're done your surface , take a cloth , set it up and just do a quick run down each edge .
See , look at that .
I found a little bit of paint to the bottom as well .
Ah , nice and clean better to do it .

Now , it's hard to clean this transition primer off later if you find it .
So , keep it clean as you go because it is a transition primer and this really bonds to just about anything .
Do some of this without getting any paint on the wall .
Again .
When you're painting with a brush , you wanna paint from the paint that's inside the brush , not on the outside .
Make sure you force the paint inside the brush and then you can draw a line with your brush .
So you can see that , uh , in the beginning , we taped all the doors and drawers off because we were going to remove the faces and I'll just take this out .
Usually that easy you can see on the camera that it had these four screws in the corner as well as the screw that holds the handle we started taking apart .
And I realized , well , there's a staple on here as well in all four corners and the actual material on this drawer is quite thin on the front of the face .
So here is my concern .
If I try to take the face off , I've got staples , I'm gonna have damage , that's gonna be hard to correct .
And if they use any adhesive on this as well , when they stapled it , we're gonna run the risk of causing damage to this draw that I can't repair .
So what we did is we decided to leave it and we'll do all of this together when we come in and do the skins .
So , what we're gonna do is we're gonna leave the garbage bags on the counter now that we got this area done , we'll save the hardware for later .
So we're prepping our drawer by removing the door hardware , taking off the little silent stops to go on the back for when you close .
Of course , we're going to get our T S P O .
This is usually the dirtiest part on any cabinet is right around the handle all across the top .
We're gonna have oils from people's hands .
I want to get all that wiped up .
Ok .
And then we're gonna want to sand .
Now , in this situation , you could use your orbital sander , but because I'm painting in this room , I don't want to be doing anything that's kicking the dust up in the air .
So we're just gonna use the hand sanding block and you want to make sure you get every one of these surfaces preparation is really the key here , folks .
Just because you have a great product like a transition primer doesn't mean you get to get lazy .
Everything can always bond a little bit better , be a little bit cleaner , be a little bit more scuffed up .
So take your time .
Although it feels like it takes a long time .
If you try to cut a corner with your sanding , you're going to be really disappointed with the results at the end of the day .
And honestly , it takes a whole minute to draw , it's worth the investment .
There we go .
Take my rag .
I'm just gonna get the extra dust off .
And then once again , we're gonna cut the roll the entire service .
Well , it's attached , really want to just get all these edges .
And I'm going to suggest not using a roller on all these edges are , you're going to create so many drips that have to be cleaned up .
You'll just be going running around in circles .
So once again , I'm using a garbage bag as a tray liner .
I love my garbage bags , but this roller fell into the big soup .
So I'm using the 51 the curb Age and I'm literally trying to take out as much of this paint as I can .
Ok , off this roller before I paint the door face , I don't want to have this thing saturated or it'll just be like sliding around .
I'm making a huge mess .
So now that we have this pretty much dried out , I'm not even using any pressure .
Look at how much paint is coming off that roller .
Ok .
So now when I apply pressure , it's in order to get coverage and I'm not going to be forcing paint to be dripping off all the edges .
So dry , rolling your primer is definitely a good idea .
Here we go .
All right .
You know , Max wants to see if I can do this left handed .
Well , it's not as easy .
I just gotta hold myself still .
Uh But the same concept applies clean , just brush from inside .
It's all about technique here not speed , watch the heel of the brush .
I am not left handed on it .
But if you follow the technique doesn't matter how good of a painter you are , the technique is solid .
There we go .
So here we are , we have this huge skin panel .
Uh My suggestion is just keep the same six inch roller .
There's no real reason to set up another pink here with a traditional roller .
I know it seems like a lot of space but just a couple of minutes rolling it , you'll end up with a nice product .
You , you're gonna end up spending 10 or 15 minutes just cleaning up the other roller anyway .
Ok .
So all of our skins , we've got the primer on .
It's all nice and dry .
Relatively speaking , it's been an hour .
We just had lunch .
So now I'm coming back with the sanding sponge and I am not trying to scuff the surface .
This particular product bonds amazing with the paint .
What I am doing is just making sure that I don't have any large dust or dirt particles .
And so I'm just doing a little bit of a circle here .
The idea just to make sure if there's any debris that's in my way , I can get rid of it .
I'm sure that I have a nice smooth surface to work with just a little tip when you're working with your paint , pour out enough that you'd only leave about an inch , inch and a half in the bottom of the can .
That's perfect because now my brush I can force it into there , clean off all the paint that's on the edges .
And the only thing that's left is paint that's inside the brush , not on the outside and that is how you cut without making a mess .
That is our color .
I got pain on my hand .
This is like a really sticky paint , man .
Yeah .
You don't wanna get it all over yourself when you're working all Right .

Well , the secret to rolling with a material like this because it has the ability to cover such a huge amount of space with such a little amount of paint is you really want to stretch your first role , mark out over a large area , then you want to go back and then just push the paint around and cover it up .
Ok .
And then as you're finishing , hopefully your roller is dry enough that it leaves a nice consistent texture .
If it's not go rub some paint off somewhere and then come back so that you have a nice consistent text texture on the wall .
There we go .
Here we go .
Ok .
So the second coat I like to do once the doors are back in place .
Of course , I've got the insides and outsides all painted .
But because I'm moving this to a new location , I have no guarantee the condition of the door when it arrives .
And I would rather get the last coat while it's hanging in place just in case there's any damage that needs to be repaired from transportation .
I can deal with all that at the same time .
Besides , this really doesn't take that long to throw a coat of paint on a door and everywhere where you work , you're going to have different lighting , different environments .
It's just nice to have it in this final resting place when you do the final coat .
Sorry .
Now , in order to finish the coat I want to just put a little bit of paint on each of the inside of these doors .
I don't wanna just back roll until the coverage is really nice .
Again , I'm just using whatever pressure is necessary to get a nice even coat .
And then I'm gonna also put a little bit of texture on the door is where I rolled or use the brush .
Sorry , there we go .
Now , the only other thing that has to be done , of course , is putting the door hardware on .
I'm gonna wait till the next day to come back and do that because I don't want to risk damaging the surface while I'm messing around with the hardware .
If you're using a color that doesn't look like it's going to cover very well .
You can actually add the color into your primer so you can tint your primer and then it gets the equivalent of three coats of coverage with your color so that you don't have any bleeding through .
I didn't do that here because I'm using a relatively white color and tenting white into a white primer doesn't really effective .
But if you're using something with a little bit more personality and you want to guarantee coverage sometimes tinting the primer is a great way to go .
I don't know how well the camera picks this up because we're dealing with a natural wood .
There are some areas here where this joint is , you can see some light brown staining coming through .
And generally speaking , that's just the sap from the oak .
It's very here and there .
There's a lot of it on this corner here .
Wow .
Yeah , that really shows you can see that .
The reason you can see that is because when we are using our , um , our transition primer , it's a water based product that bonds to oil .
So , it's not a sealer the same way that a stain blocker would work .
So , what you're gonna find is when you're done , you want to give yourself about a week , maybe even two and then all these little spots are going to show up and that's not a problem because all you do is you get a stained sealer and I like to use aerosol kills .
It's a shellac based product .
It's the same product I used to seal all of the detail .
You can see this , this was done in kills , no dark yellow where the kills didn't show up the stain comes through .
So we'll wait and find out where all the stains are that come through and there might be just a few spots that might be all over the place .
It doesn't really matter .
One said , well , it's all made itself apparent .
Then we're gonna come back , give it a block a little touch up , something like this because this product takes 30 days to cure .
There's a possibility that over the next few weeks there's gonna be a couple of nicks and scratches , don't get worked up over .
It takes a while for paint to cure .
So this is the kind of process , make it look like it's done in a hurry .
But unless you're going to let these doors sit for a month and you're gonna add , spraying a blocker everywhere .
This is what you're in for .
So , don't be alarmed .
And if you have this kind of work done in your house and you see that there's stains coming through , it's very normal with solid wood .
So don't get worked up over it and just call your company up .
Who did the work ?
Inform them that they're going to have to do a service call , book it a few weeks away so that all these different areas will show up and then you'll get it all taken care of and you can live happily ever after .
Well , that's pretty much it .
We're just finishing the last coat and the last couple of doors here and we're going to be back in a couple of weeks .
We'll tag this on the video , but we're going to come back and do the stain blocking .
I know that's going to be an issue .
I see some places already .
Even after 24 hours , there's bound to be a few more issues that will poke up heads up by then .
So what is a way to deal with it all at the same time ?
And who knows , maybe by then we might even have some other work to do .
Ok .
So it's been a couple of weeks since we put the cabinet doors in and got the paint job done .
But since then , of course , the granite guys have come in , they've done a measuring and a reinstall of the countertops .
Now , these are beautiful courts and I'm here today because I need to reinstate all the plumbing .
And we have a beautiful sunny day , which is the perfect time to do our touch ups on our doors .
When we did the install originally , it was a little overcast kind of late winter , but now spring is sprung and I am able to see all the minor imperfections , little places where the grain of the wood has absorbed the paint more than the texture next to it .
So I can see , I , you probably can't even see it on the camera , but I can tell I need to hit something here .
I needed one more coat , right ?
Because there are highs and lows in the grains .
There is a different material in the wood that the people will react and respond to differently and you'll get different levels of absorption and you want your finish coat to be very consistent .
And so in this kind of light , you just pass back and forth and you can see all the areas where you just need a little bit of a shot .
Now , we're really pleased because we didn't have any rubbage .
There's no been no damage in using the kitchen .
So obviously , our primer and paint technique has been very effective .
This is just a little quality control , one extra step that , you know , generally speaking , nobody in the industry ever takes time for it .
And that's making sure that on a beautiful bright sunny day , it looks just as nice as it did when the all cloudy out and we were relying on the , the lights of the room , But it is amazing how different things are in natural light .
Ok .
So here we go .
It probably take 15 or 20 minutes .
We'll just run around the room .
Have a good look , make sure that all of my spots .
I'm happy with nice and of course , I can only look at it from one direction here .
Ok .
We'll also inspect inside the cabinets looking for any of that staining , not seeing any issues here at the moment .
I've already contacted the client and asked if they've seen any discoloration and there hasn't been any problem .
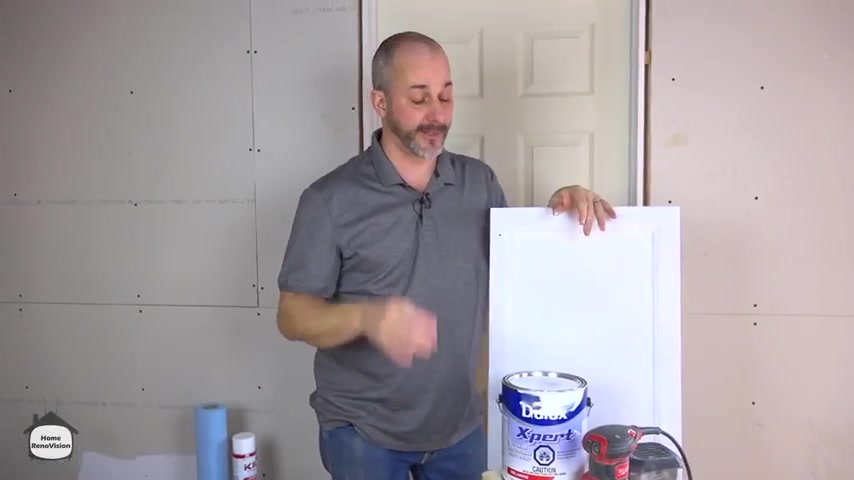
Well , there we have it .
That's all the whole system for repainting the existing kitchen .
This allows you to get a brand new look without the expense of changing all the doors .
Now , the thing is , is it takes a little bit of blood , sweat and tears material cost for this project was less than $100 .
All right , a little bit of primer , a gallon of paint .
And of course , we put the new stickies on the back of the door , the new bumpers .
So everything is nice and soft .
I'm really pleased with the way this turned out , took probably about two hours to level off all the doors again .
That can be a bit of a trick .
Ok .
So expect to have some time to be patient there .
But other than that , the process is simple , prep , prime paint , paint , paint , put on the hardware and you're good to go brand new kitchen .
So if you like this kind of content , give us a thumbs up .
We appreciate the interaction questions .
Sure .
You're gonna have questions .
Put them all below .
I will answer those questions every single day and we'll help you get through your project too .
See you next time .
Partnership
Are you looking for a way to reach a wider audience and get more views on your videos?
Our innovative video to text transcribing service can help you do just that.
We provide accurate transcriptions of your videos along with visual content that will help you attract new viewers and keep them engaged. Plus, our data analytics and ad campaign tools can help you monetize your content and maximize your revenue.
Let's partner up and take your video content to the next level!
Contact us today to learn more.