https://www.youtube.com/watch?v=0BdNUBIUpxo
The Best 'How To Build a Bed' Video on YouTube
Welcome back everybody this week .
I'm doing a first and building a bed that isn't a platform bed , but rather a whatever these kinds of beds are called .
So stay tuned and we'll get into all the details .
All right .
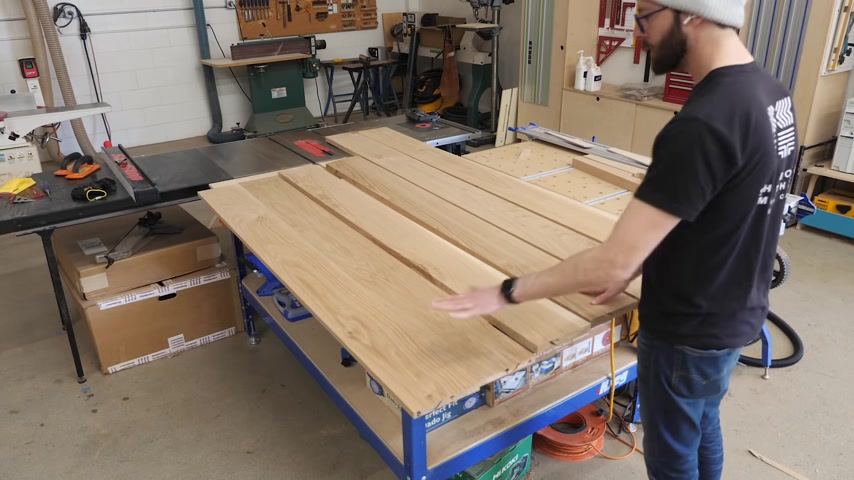
So here I'm starting off with a bunch of white oak hardwood and I'm just kind of breaking things down and figuring out where I'm gonna get all of my parts from .
So no finished cuts here just making big oversized chunks with a circular saw and then labeling my pieces so that I can keep track of what they're going to become and making sure that I don't forget about any of the pieces that I'm gonna need .
Now , thankfully with white oak , at least the boards that I got each one was pretty consistent in terms of the look .
So I didn't need to spend a bunch of time figuring out grain matching or anything like that .
Honestly , it was more a matter of just making sure that I was being as efficient with the boards as I could .
So once I got to this point , the next thing that I did was get everything milled up to its final thickness .
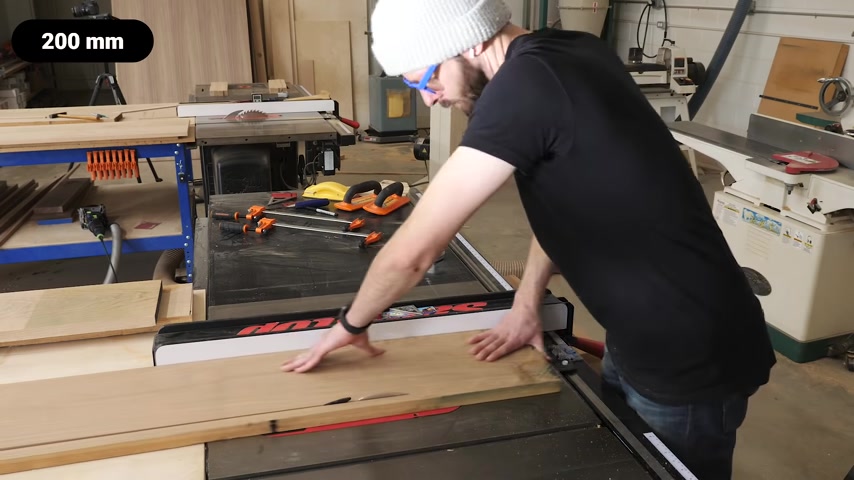
So the boards that I was using ranged from about 9 to 10 inches wide .
But my Joiner Maxes out at eight inches .
So here I'm just joining one edge and then I can use that edge on my table saw to rip the boards to just slightly under eight inches , so that I'll be able to fit them on my joiner .
And I find it helpful to make sure that you're being blinded by the sun when you do this anyway .
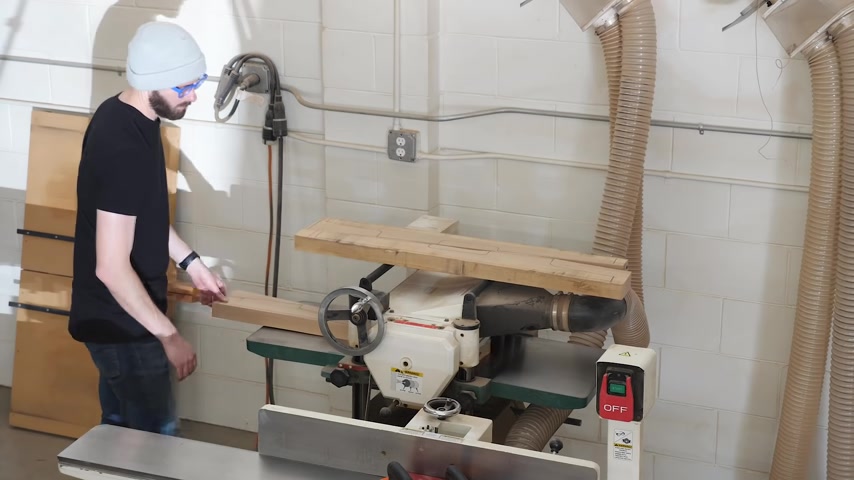
Now that the boards are narrow enough , we can go back to the joiner and get one face nice and flat and then take them over to the planner to bring everything down to the finished thickness , which for my bed rails is gonna be one inch and for my headboard is gonna be three quarters of an inch .
And speaking of the headboard , since this is a wider piece , about 13 inches , we're gonna need to glue up two boards to make an oversized panel .
And before we get any further , it's probably a good idea to talk about the design of this piece .
So I actually came up with this design about two years ago .
It was originally gonna be the piece that we built for our first ever set of woodworking plan project courses .
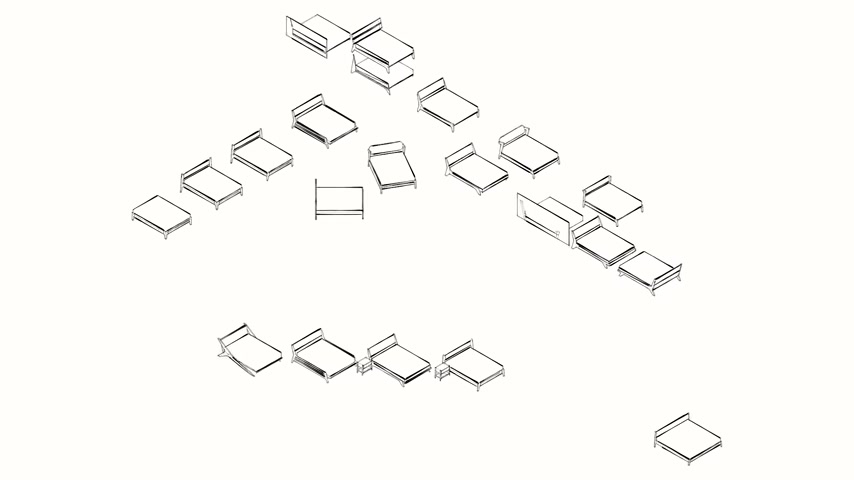
But then we thought that a bed might be too big and intimidating of a piece to start with .
So it got put on the back burner until a couple of months ago .
At which point I came up with a bunch of possible ideas and some I really liked and will probably build later .
But I kept coming back to this design for a couple of reasons first .
And mainly is that I really like this one .
I think it looks simultaneously familiar and unique if that makes any sense .
But also it checked all of the boxes for me .
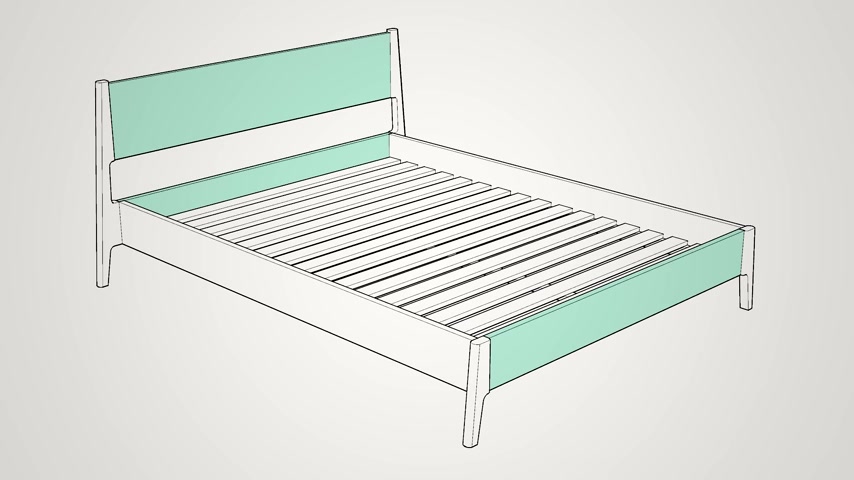
So like I said , this piece is the focus of our newest woodworking project course .
And in order for it to be a good candidate for a project course , it needed to be functional , achievable , incorporate lots of woodworking techniques that people can learn from .
And since it's a bed , it needed to be scalable to any size .
So by changing the length of these rails , you can dial in any length you want .
And by changing the length of these headboard and footboard pieces , you can dial in any width that you want .
So it can be built for any size mattress .
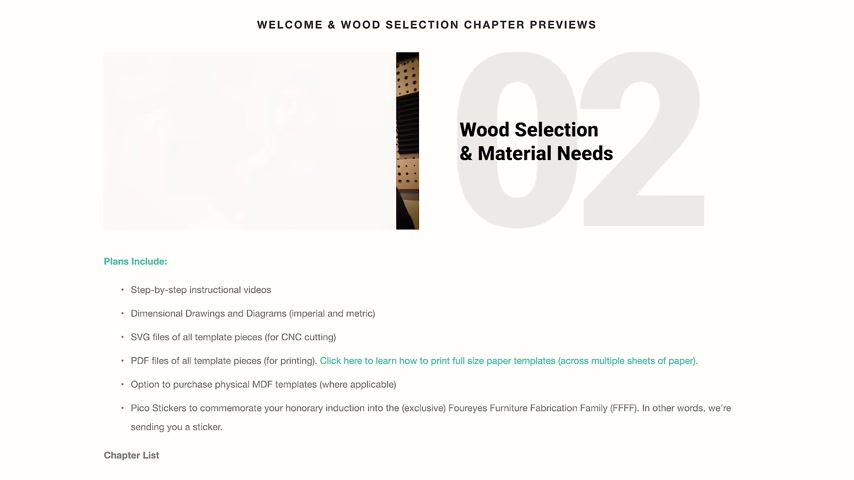
And on our website , we'll actually put up the first couple of video chapters so that you can get a better idea about this piece , all the materials you'll need all that stuff .
So if you're interested in building one of our project courses , go check that out and you'll find all the info on the website .
But anyway , while our headboard panels drying , let's start working on the legs and feet .
So here again , I've got a piece of rough white oak only this time it's a thicker chunk .
And you can see in the shot that I'm using some MD F templates to help me figure out where I'm gonna get all four of my pieces from .
So if you want to build this piece , you will need these templates .
So with the download , you'll get everything that you need in order to be able to make them on your own or if you don't want to make them for whatever reason , you can buy them from us and we'll ship them to you .
But in any case , next , I'm gonna take my big chunk over to the band saw and cut it into a few smaller chunks and then joint one face flat and then with that done , use the planner to bring everything down to about one and three quarters of an inch thick .
So now in order to really start shaping my piece , I need to create one nice flat edge on my work pieces and there's a few ways that you can do this , but I find the fastest to be a couple of passes over the joiner and then I can take my templates and I'm gonna make sure that they're flush here along the flat edge and then mark just to the top edge of the template .
And we're gonna do this for all four pieces here .
We're gonna start working on the joint faces for making our headboard and footboard subassemblies .
And if there's ever a time that you want to make sure that your blade is at a perfect 90 degrees .
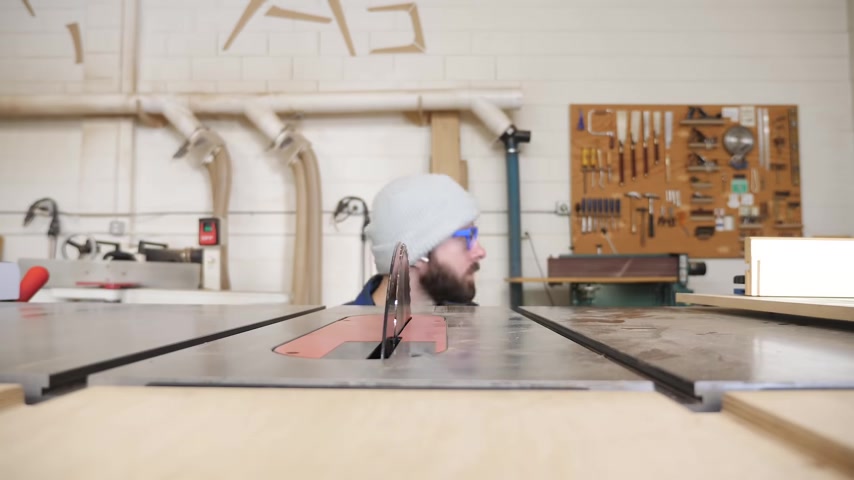
It's now , and the first thing that we're gonna do is cut off the tops of all four leg pieces .
Now , I can tell you that this is a five degree angle and if you've got a great miter saw set up , you could certainly set the angle and make the cut there .
But my preferred way to do this is to cut it on a table saw by pushing my template up against the side of my blade and then setting my M gauge by referencing it to the angle of the outside edge and then locking it down , then I can transfer my cut line around the front edge of the work piece and make my cut .
And we're gonna do this on all four pieces .
And by the way , the clamp that I'm using in this shot and a lot of the other tools that you see me use were provided by channel sponsor Rockler .
And this is one of their new spring loaded bar clamps that they just came out with .
The basic idea is that if you have them open too wide , instead of squeezing the trigger like 45 times , you can tighten it up with this lever and then squeeze it once to get it nice and tight .
So I just want to quickly say thank you for them , sending all these out .
Ok .
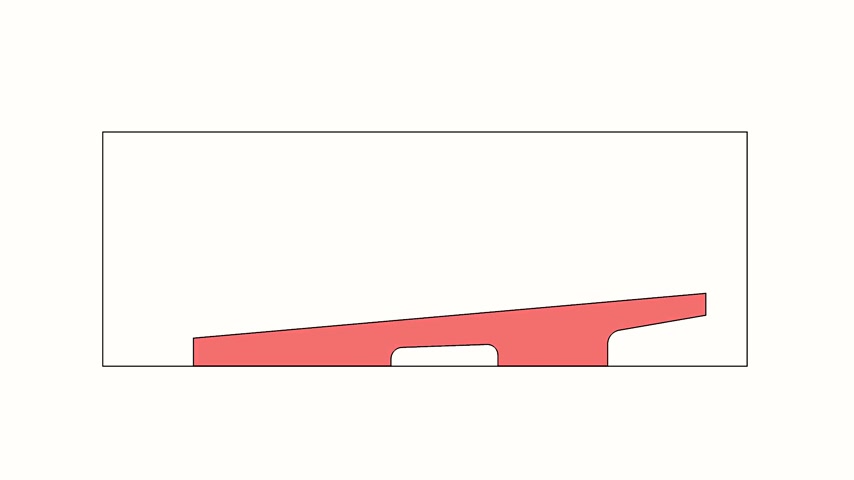
At this point , my work pieces perfectly match my templates along the top and outside edges like you can see in this shot .
And next , I'm gonna make myself a sled to cut these joint faces .
So what I'm gonna need to do this are a few pieces of plywood .
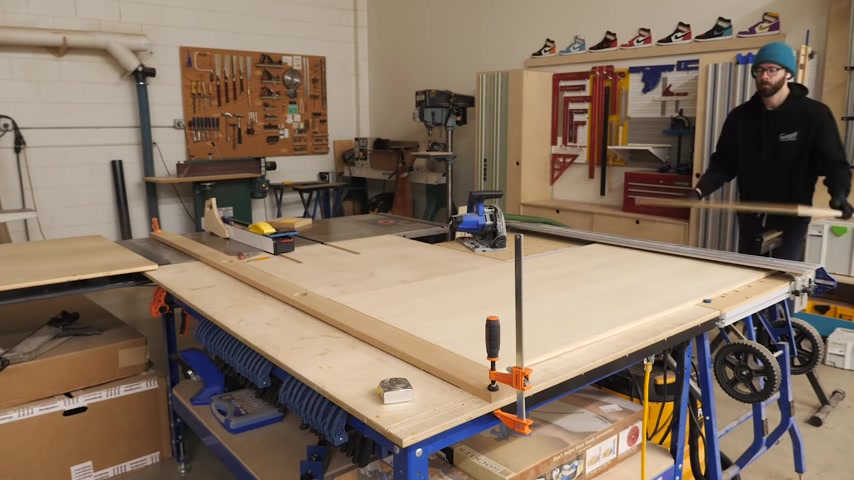
We got a bunch of smaller pieces that we'll use as various fences and clamps and then this big piece that's about 16 by 44 inches that we'll use for our Sledd .
So when I cut this to size , I'm gonna lock my tableau fence down at 16 inches , make the cut and then I'm not gonna touch my fence again until I've cut all of my joint faces .
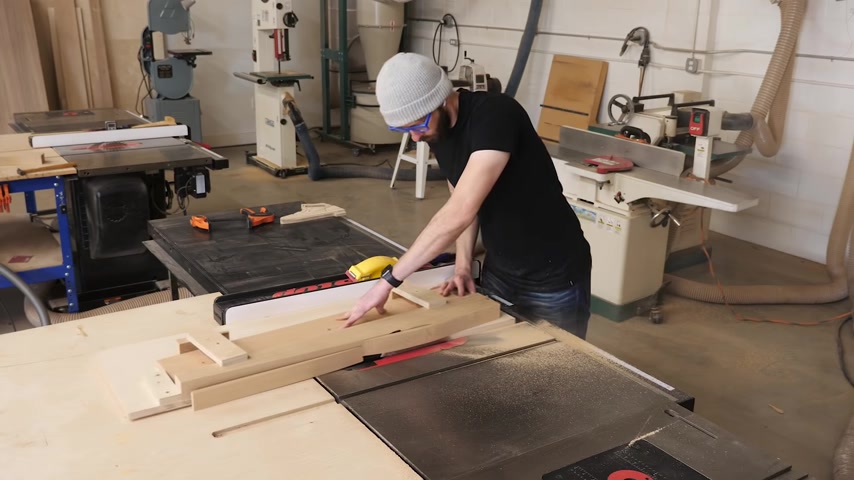
So in order to do that , what I'm gonna do is line my template piece up so that the joint faces are perfectly flush with the cut edge on my sled .
And then I'm gonna take my larger fence piece and match the angle of the outside edge of my template and secure it down with a couple of screws .
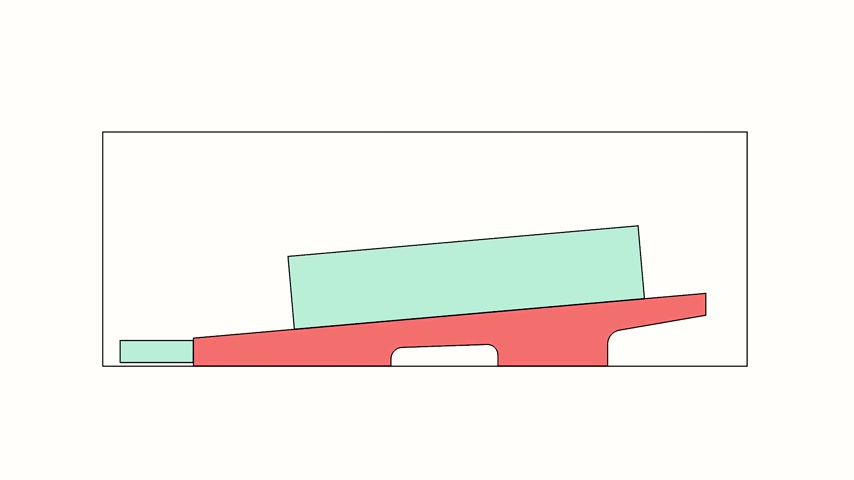
Then I'm gonna use my small fence piece to reference the top of my template and attach it with a couple more screws .
Now with my two fences set up , I can swap out my template for my work piece and to secure it .
I'm gonna get some off cut pieces that are the same thickness as my leg material and use my other pieces of plywood as a bridge to clamp it down .
Then with everything nice and tight , I can make the cut .
So this is a technique that you see me using a lot , but just like anything else in wood working , there are bunch of ways that you can get it done .
A tapering jig would work almost identically or even a track saw to cut the angle .
This is just the way that I like to do it .
And I think it's a good technique to keep in your bag of tricks right now that I've cut both of my taller headboard legs .
I can cut the smaller footboard legs .
And the good news here is that the angle is gonna be exactly the same .
So if I use the template up against the fence , I can just kind of slide it up until the joint face becomes flush with the cut edge and then reposition the smaller fence against the top of the template and do basically the exact same thing to cut the two remaining joint faces .
At this point .
My leg pieces are good along all three of these edges .
So next , I can start shaping things aesthetically .
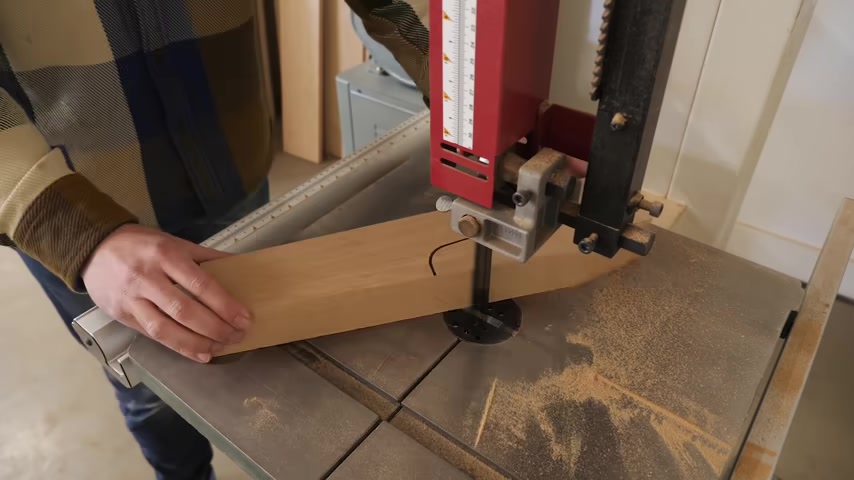
So I'm gonna start by tracing my template shape onto my legs and then using a band saw to clear away the bulk of the material .
Then with that done , I'll use some double sided tape to stick my template to my piece and use my router with a templating bit and a flush trim bit to finalize the shape .
And I'm just gonna take several passes working my way down all the way through the work piece .
Hey , guys , it's Chris , the guy you're watching , build the bed right now .
Anyway , I'm really bad at asking people to subscribe to the channel and I'm trying to get better at it , but I still can't really bring myself to do it .
So I'm just gonna tell you that this is a sub and this is a scribe , a sub and a scribe at this point .
My headboard panel was plenty dry .
So next , I can start finalizing the dimensions of the rails and headboard and footboard pieces .
So from an operational point of view , this is gonna be really easy .
I'm just cutting boards to length .
And I would say that the easiest way to cut long boards to length would probably be a nice Mtera setup , but I don't have a nice miters saw setup .
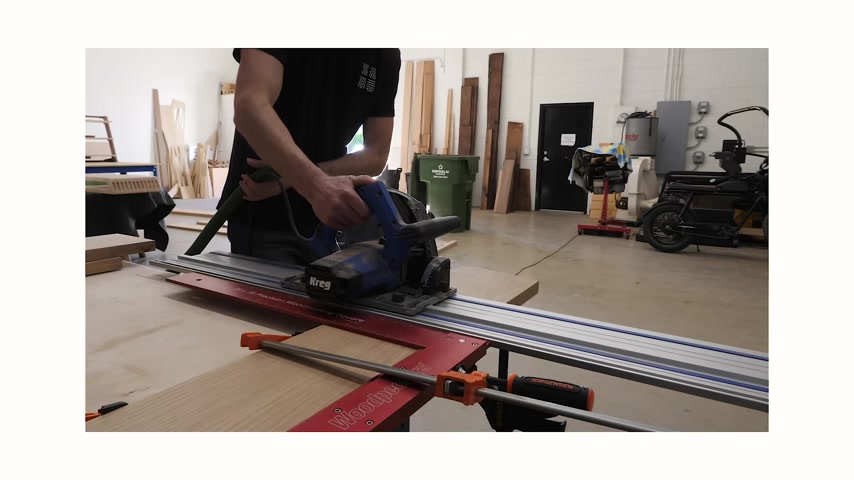
So I'm gonna use a track saw and to ensure that they come out perfect , I'm gonna find a reference edge that's nice and flat on each of my boards .
And once I do , I'm gonna mark that with an R and then I can use one of my squares to reference my track off of the edge .
And this is gonna ensure that I'm getting a really good perpendicular cut .
And since I want to make sure that both rails are the same length as one another and that the upper and lower headboard pieces are the same length as one another .
What I'm gonna do is cut one edge and then clamp them together in pairs and cut them at the exact same time so that I know they're identical .
Now , if I were a normal person , I would probably make all three of these boards the exact same length .
But I really wanted the bed to be slightly wider at the headboard than it is at the footboard .
And this is definitely a subtle detail , but I think it gives the headboard a lot more prominence that it would have if everything were equal .
And I think that this is one of the most overlooked yet , most important aspects of furniture design and that is stance .
It's the reason that this looks good and this doesn't , well , there might be several reasons for that , but you get what I'm saying anyway , any time I do a design like this , I can't tell you how many comments I get from people about my toes .
I mean , I guess technically this one's a little different , but at the end of the day , I'm willing to risk a stubbed toe in exchange for the look that I want .
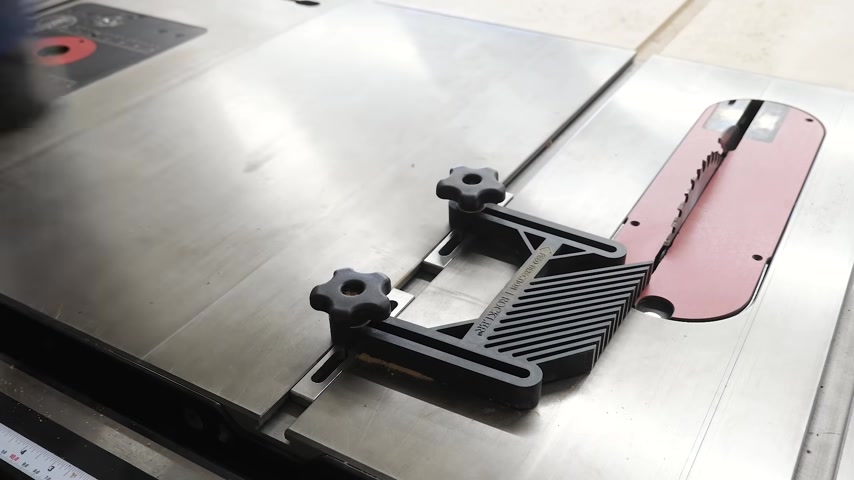
And for anybody who's not , here's a design for them , yours for free .
After I have all five of my boards cut to their finished length , I can go ahead and rip them to their finished width .
And by the way , I don't know if this is super obvious or if it could be an a ha moment for some people .
But whenever you're cross cutting and ripping pieces to finished dimensions , if possible , you should always do it in that order .
Crosscut , then rip , not rip , then cross cut .
And that's because when you cross cut is when you're more likely gonna get tear out and when you rip , you can clean things up .
We actually talk about that in our series tips and tricks .
Every woodworker should know which I'm gonna link in the description .
So if you want to learn more about that one or hear other tips , you can check it out .
So at this point , I've got a lot of pieces and I can finally start assembling things .
Basically , I want to turn these seven pieces into two subassemblies and to do this , there are a number of ways I could have gone Domino's dolls , biscuits a quick jig for making floating tenons , all of which we're gonna talk about in the woodworking course .
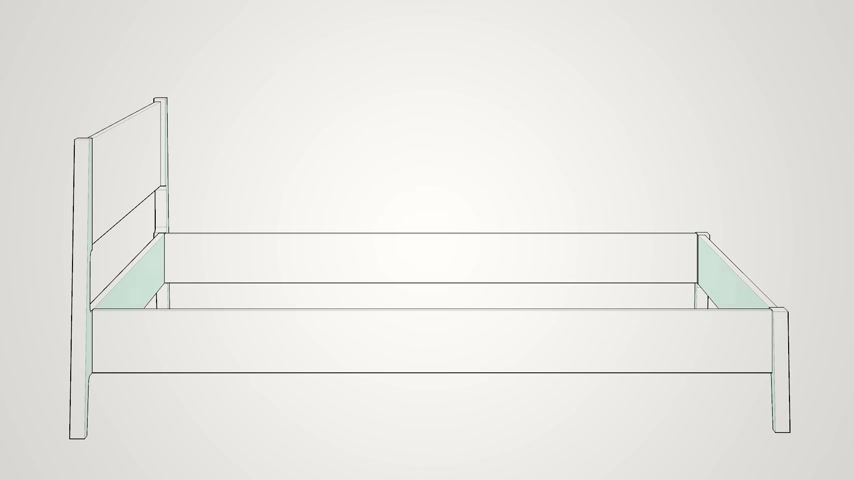
But regardless of what I used , the most important thing was paying attention to where I was positioning things .
So here prior to marking in my joinery , as you can see , I'm making sure that my rail is flush with my legs and on both subassemblies , it was crucial that I make my rails flush with the inside faces so that I end up with a nice pocket for the mattress that doesn't have weird corners jutting into it , right .
So after marking it all up and cutting everything in , the next step was gluing things together .
And here it's not really tricky , but the pieces are big and there is that five degree angle that I have to consider .
So Sean is acting as an extra set of hands here and you can see that we used some scrap to cut a couple of wedges which will help get better clamping pressure and also protect the outside edges of the legs from the jaws of the clamp .
And we'll do the same thing on the headboard assembly as well .
And also you may notice all these pieces piling up in the background here .
If you want to check out any of the videos for any of these three pieces , I'll link those in the description and if you want to check out Shawn's Calvin Kleins , there you go .
Now , I kind of mentioned it at the top of the video that this was a first for me .
Every bed that I've built in the past was some kind of platform bed .
So this was also the first time that I had ever used any bed hardware .
And obviously people can use any hardware that they like for this .
But I went with these because I wanted something invisible even when the mattress is off and these just seem like they'd be really strong and something else that I liked about them is that they didn't come with any instructions , which might sound weird .
But that's actually a good thing for me .
It meant that I got to devise my own way to plan for how to go about this .
So , what I did was mark out the shape of the hardware on a piece of quarter inch MD F and then use my router and a chisel to make a pretty close to rectangular cutout .
Then after I tested it out on a piece of scrap to make sure that the mortis was a good size .
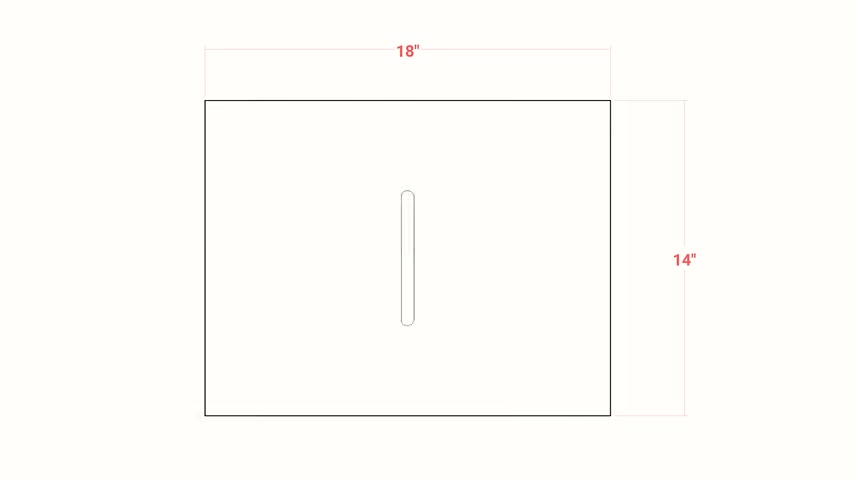
I used the MD F as a template to route a slot into a piece of plywood .
Then I could attach a couple more pieces of plywood as fences so that I could perfectly position the jig on the ends of my rails .
So here I'm setting the plunge depth by referencing the hardware and testing out the jig on one of my off cuts just to make sure that nothing bad happened and it was looking good so I could cut them into my actual rails .
And honestly , the hardest part about doing this was probably getting into position to make the cut .
Next , I needed to cut the corresponding mortises into my headboard and footboard pieces .
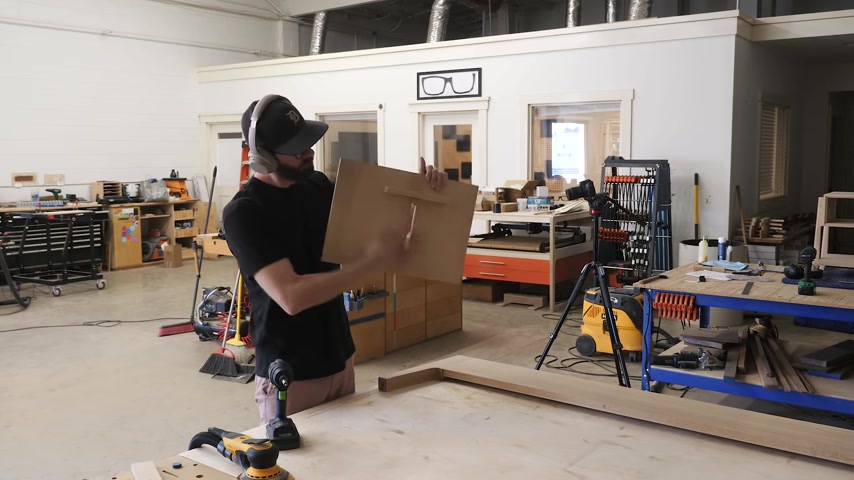
So here I'm removing the fence on my jig that runs perpendicular to the slot and then I can mark out where I want the hardware to go and then use the jig basically the same way to cut in my mortises .
Then on the footboard , I could do mostly the same thing .
Once again .
Only now I had to remove all of the fences and be a little bit more careful , just making sure that I aligned my jig nice and perpendicular to the top of my rails .
Since I can't just rely on a fence anymore in this shot , I'm marking out where the hooks of the hardware would go behind the slots in the mating pieces .
And then I could use my router again being careful not to clear out too much material so that there'd still be something for the screws to go into .
Let's go ahead and thank today's sponsor since we wouldn't be able to make these videos without them .
So thank you American Home Shield for sponsoring this video .
So obviously , nobody likes to think about household breakdowns , but the reality is they happen , but American Home Shield can help cover the cost to repair and replace things like your heating system ac frid and 20 other essential home systems and appliances and they know that no two homes are exactly the same , which is why they have several different options to help you find the right coverage for your home .
Now , as somebody who owns an aging home , ours was built in the fifties , I know the hassles and frustrations of having to deal with home repairs on your own I mean , I'm a decent woodworker , but that's pretty much where my skills end .
So for somebody like me or really anybody , American Home Shield offers a lot of value to its members .
For example , if they can't repair a covered item , they'll replace it and they have coverage available no matter how old your systems or appliances are .
So if you want to keep your home up and running and your budget on track , check out American Home Shield right now , my viewers can take $50 off their most comprehensive plans ever .
Just click the link in the description or go to A H S dot com slash four eyes to save $50 .
Again , that's A H S dot com slash four eyes for $50 off any plan , service fees , limitations and exclusions apply .
See plan for details , American Home Shield , be sure with the shield .
All right , thanks again .
And now let's get back to the build next while we still have everything unassembled .
I'm gonna cut in this optional thumbnail profile into my legs here and here and I think that this along with the round over details we put in here on the headboard and footboard , really make the bed look a lot more elegant .
All right .
So several minutes ago , I mentioned that this bed design was super simple to adapt to any size mattress by changing the length of these five pieces .
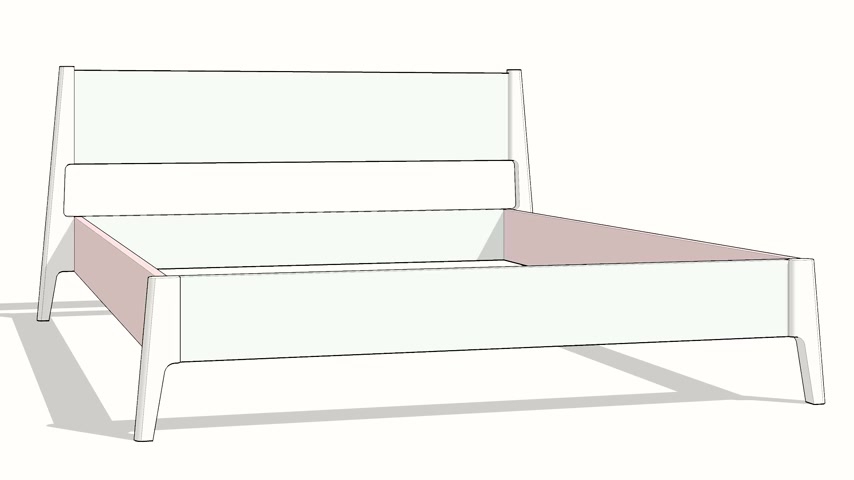
Well , it's also pretty adaptable in terms of height through a combination of trimming the legs to length and choosing where to position the mattress support slots .
Or if you want things really high using a box spring .
I'm not gonna be using a box spring though .
And because of the slots , it's not necessary to use one .
But anyway , here , I'm deciding how long I want to trim my legs and then marking out a cut line on my feet .
Then to make the cut , I'm gonna use my circular saw and a long piece of plywood as an edge guide .
Then after cutting the piece , I'm gonna lay my footboard on top of my headboard , making sure that they're flush along this edge , transfer my marks and cut the headboard feet to length .
So at this point , I'm finally ready to install my hardware and put things together .
And next , I'm gonna make the mattress support system .

And here there's lots of ways to skin the proverbial cat , which is a dumb saying now that I think about it , I mean , I know literally zero ways to skin a cat and I hope never to find out .
But that's off topic .
What I mean is there are a bunch of ways that you can go about this , but there's really only four important things .
One I need to have a pair of runners attached somewhere to the inside face of my rails .
Two , if the bed is wider , really anything over a twin , I need to have a center support rail and the top surface of that rail needs to match the top surface of my runners .
Three , I need some slots depending on the matches size , there should be 16 to 20 of them and four , the slots should have a gap somewhere between two and two and three quarters of an inch between them .
Now , personally speaking , I wanted to go for the lowest mattress height possible , which meant that my center rail had to be on the thin side .
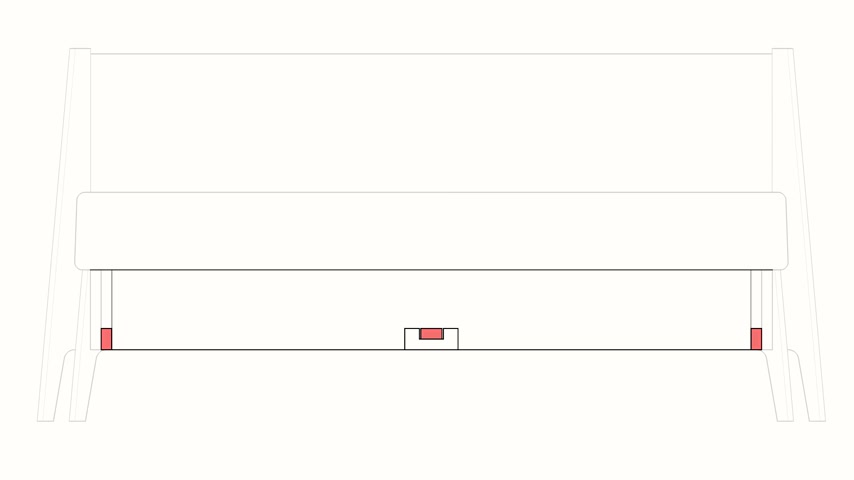
So for example , say you wanted your slots at the top of the frame .
Well , in that case , you can make this rail really wide like a beam and it'd be insanely strong .
But since mine is low , I'm making it thin .
So I'm also gonna make a few support blocks that are gonna sit under the center rail and they'll pretty much be invisible by the time we put everything together .
You know , it's funny ever since we started making these woodworking project courses , we've had some people tell us that they're too expensive and some people after using them tell us that we're not charging enough and I know that might sound like me tooting my own horn .
I get that .
But here's the way that I look at it .
Let's take this bed .
For example , if you're gonna build something like this , you're gonna spend a minimum of 50 hours of your free time on it .
Likely even a lot more depending on your current skill level .
And beyond that , depending on what type of wood you use , it's probably gonna be a minimum of $400 of materials .
I can tell you firsthand that it cost me 1100 .
But regardless of those exact numbers , the point that I'm getting at is the same .
If you're willing to invest your time and money into it , the value that you're gonna get from the course is way more than we'd ever be willing to charge you at the end of the day .
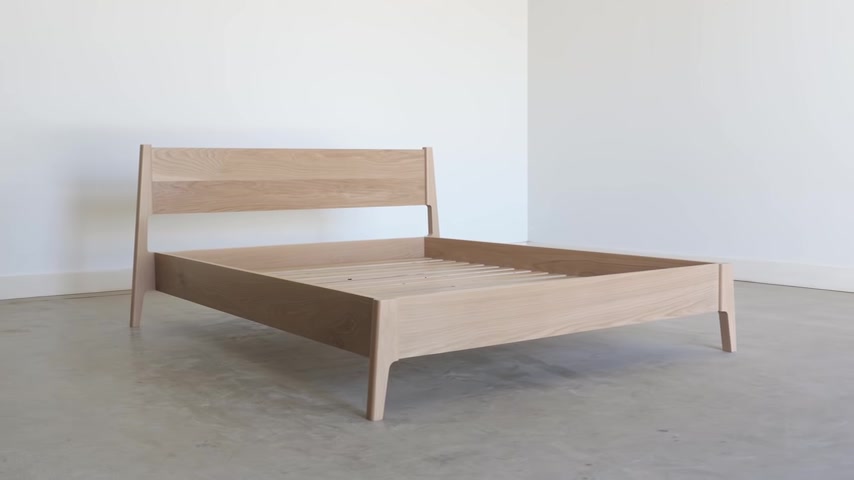
What matters is building something great that you'll have forever and gaining new skills that you'll also have forever .
And I think that that's what we provide .
These aren't cut lists that we export from our sketch up models .
Slap a $15 price tag on it and call it a day .
These are more like taking a college course in woodworking .
In fact , I can tell you that I took two college courses in woodworking and you'll definitely get more out of this than I did from that .
But that's just my opinion .
I know how hard we work on these things to make them the best that we can .
So maybe I'm biased and at the end of the day , you don't have to decide right now , just know that when you're ready , we'll be here and the link will be in the description and until then you can sleep on it special .
Thanks to all of my Patreon members for helping me to make these videos possible .
I know I say it in every video , but I really do mean it .
So I'm gonna say it again .
Thank you .
And if you're liking these videos and want to grab a four I T shirt , a field notes booklet or even discounts on the woodworking courses .
Check out the Patreon link in the description and as always , no pressure .
All right .
See you in the next one .
Are you looking for a way to reach a wider audience and get more views on your videos?
Our innovative video to text transcribing service can help you do just that.
We provide accurate transcriptions of your videos along with visual content that will help you attract new viewers and keep them engaged. Plus, our data analytics and ad campaign tools can help you monetize your content and maximize your revenue.
Let's partner up and take your video content to the next level!
Contact us today to learn more.