https://www.youtube.com/watch?v=P3c1nayCOsM
2023-06-14 18:12:34
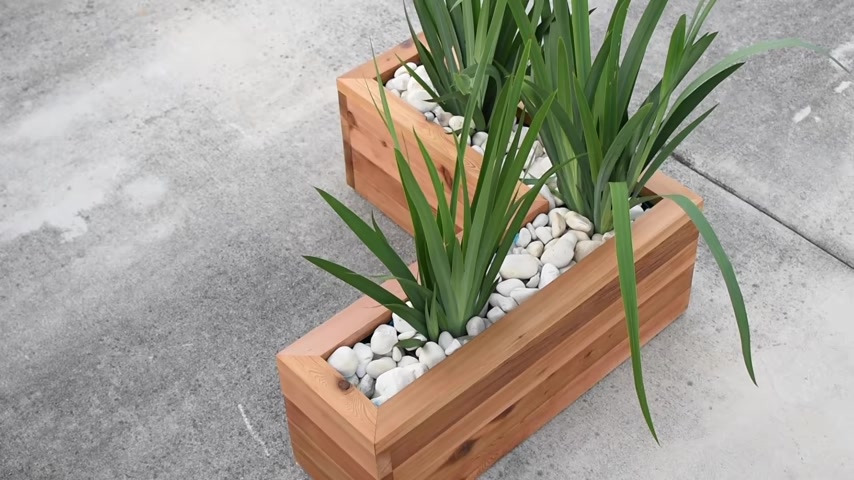
How to make an Outdoor planter ( with LED )
This video is sponsored by filter by , to me being creative is making the most of what you have .
And today I wanna show you how to take some of the most basic building materials and add some style in your home or an area outside your home .
And I'm talking about making one of the freshest planners you will see , you may ask but why and for a second , you might make me think .
But to me , the real question is why not ?
Like most projects , this one started off with a trip to my local home center and this project is gonna be made of two by four .
Cedar is cedar tends to hold up very well in the outdoor elements .
It's insect resistance and known to be a good option for planter boxes with a lot of repeating cuts coming up .
Here's a quick tip you can use for your Mitter saw .
All you need .
Here is a piece of lumber that extend beyond your longest cut , attach that to your miters saw then from the blade out all your measurements and just like that , all the measurements is out the window .
All you have to do is focus on how many you need to cut .
And now that I have everything cut the size , I temporarily stack them up in the form of how the box would look in the end result .
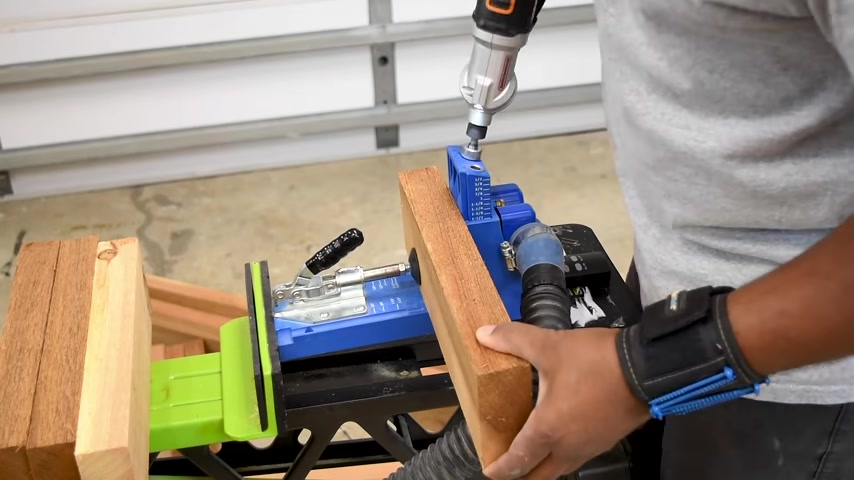
Then I the locations that I wanted to add pocket hole screws .
And since I'm working with two by fours , I need to adjust a bit and also the jig itself to accommodate for the two by four thickness .
And once you have all that adjusted , you'll need to drill a bunch of holes .
And if I can give you a tip , do not put all the two by fours in one big pile and then drill all your holes or you might end up with a bunch of extra holes like I did , I'll show you what I mean in a second .
Now that I have all the holes drilled , it's time to put it all together .
If you see where my thumb is , that's a hole that will not get used .
And this is what I meant by keep track of the board that you're drilling .
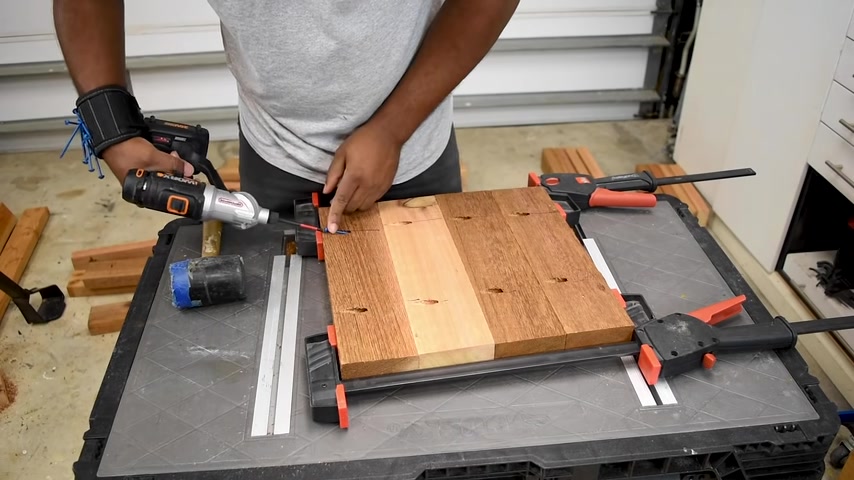
I was zoned out drilling a bunch of holes and because they had a line on it , I drilled it .
So if you drill once out of the planner at a time , it's easier to keep track of what piece need to be drilled and not .
So the boss just showed up and I gotta make sure I'm on my best behavior and I'm going in the right direction .
All I can tell you is don't judge her .
She wants to wear what she wants to wear and this is how she dress up .
The pack of ho screws is a quick and easy way to join these boards together .
You can also use wood glue if you like .
But I think the pack of hose screws is strong enough to hold the box together .
I kept the design really simple and it should be approachable for just about anyone .
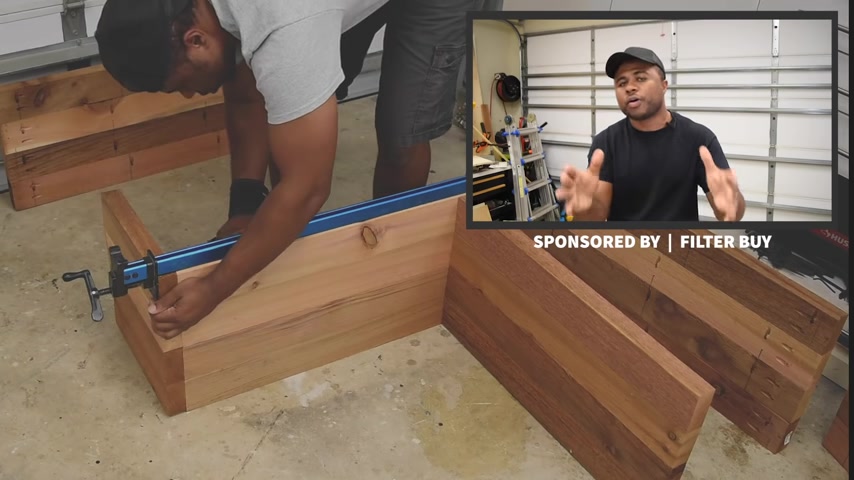
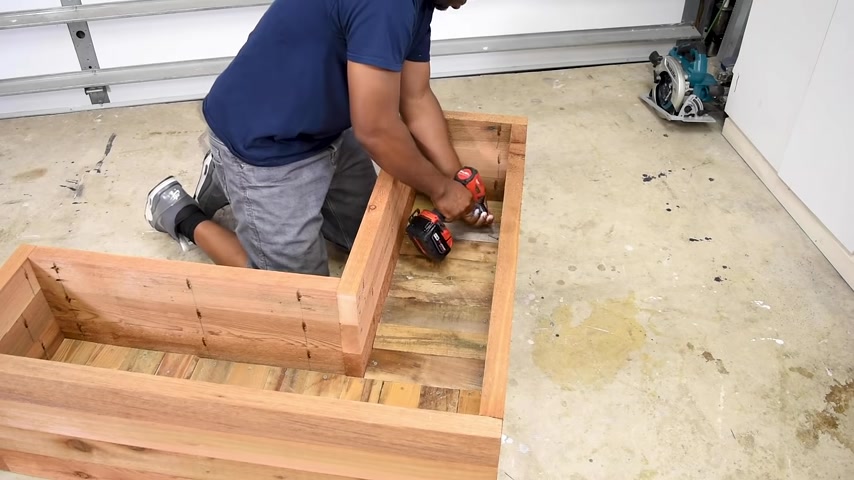
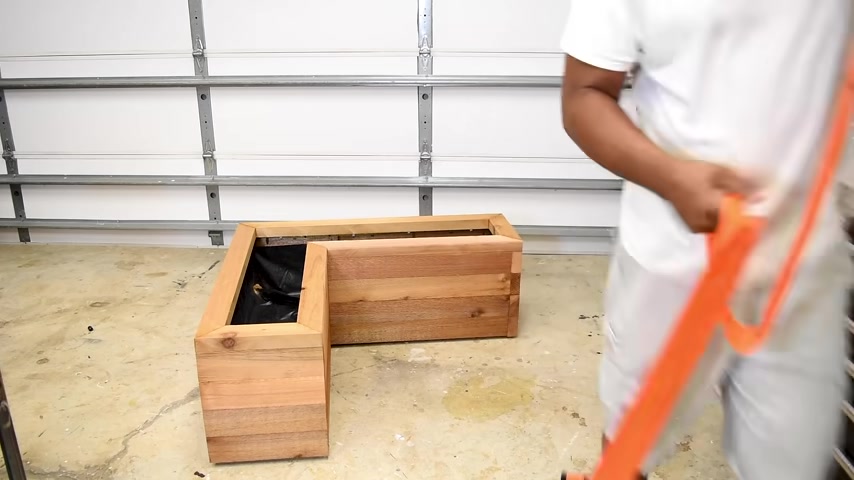
Now that I have all the panels built , I can begin to form out the box and this is pretty self explanatory .
I'm just going to start from one location and work my way around the entire box to like close off the last opening .
And as I do that , here's a little bit about today's sponsor companies like fear to buy , allow me to do what I love and share the experience with you guys .
So I know someone has to have it .
If you're the one that have the ac change in duty at your house , you know how often you have to change those filters .
There are benefits that comes with changing out your air filter .
And I can tell you to name a few of those for you .
One , you can improve the air in your environment , whether you're at home or business , you can extend the life of your H VAC system and also keep the energy cost down filth to buy is a direct to consumer air filter company , family owned and operated business .
All filters are made right here in the United States and they offer free shipping on all filters here in the US .
If you ever have trouble finding the right filter , they have over 600 options including a team of people that can make you a custom one by clicking the link down in the video description .
You can save 5% when you subscribe , all you have to do is pick a schedule that works for you and system set it up and forget it .
Never think about picking up another filter again .
So when they show up , you know , it's time to change them out and with just a few more screws to go , the framing of the box is complete .
The next step is to add a bottom and I'll do that with some reclaimed lumber .
This way , I can keep the cost down .
You may not have access to reclaim lumber , but you can always use pressure treated lumber or just use cedar as well for the bottom , for the bottom might cut some pressure treated two by four .
But this could easily be cedar as well .
The cedar will be a bit lighter , but it will also cost more if I were to drive a screw through the pallet , as is it would more than likely split .
So pre drilling is the way to go to avoid wasting a lot of screws .
I use wood glue in addition to the one screw .
Now , this may be the most complicated part to the project so far , which is cutting miters .
You can keep it simple and use butt joints here .
But I think the might have just come off a whole lot cleaner and it's just more attractive to the eye when you look at it .
And of course , the same could be said about the side , but I think we can kind of get away with that one .
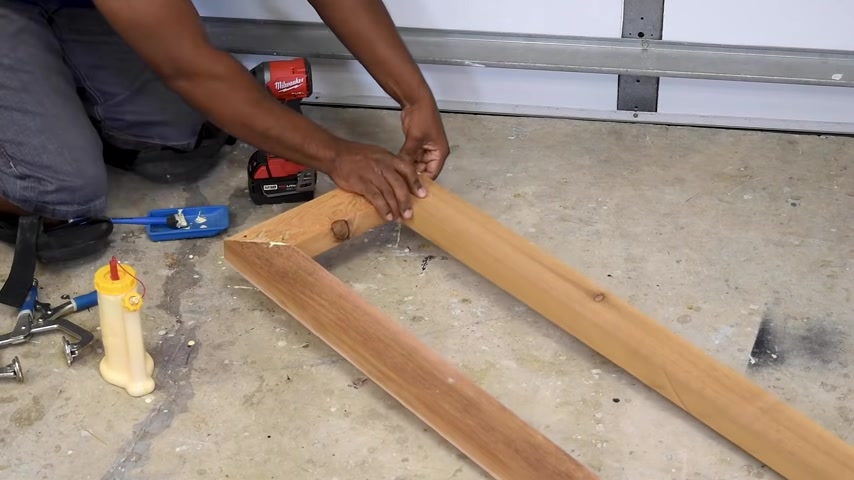
I laid the trim out as it would be attached to the planner box .
Then I marked the line across both parts and switching gears for a second .
I trimmed the two by four down .
So as you can see , I don't have the material to use the pocket hole jig on this , but I still want to use pocket hole screws on this .
So we're gonna make it work and I think two should be plenty .
And I think with this set up and some wood glue we're gonna be rocking .
So I'm pretty happy with that .
And now that I got this all figured out , I can go ahead and put the entire trim together .
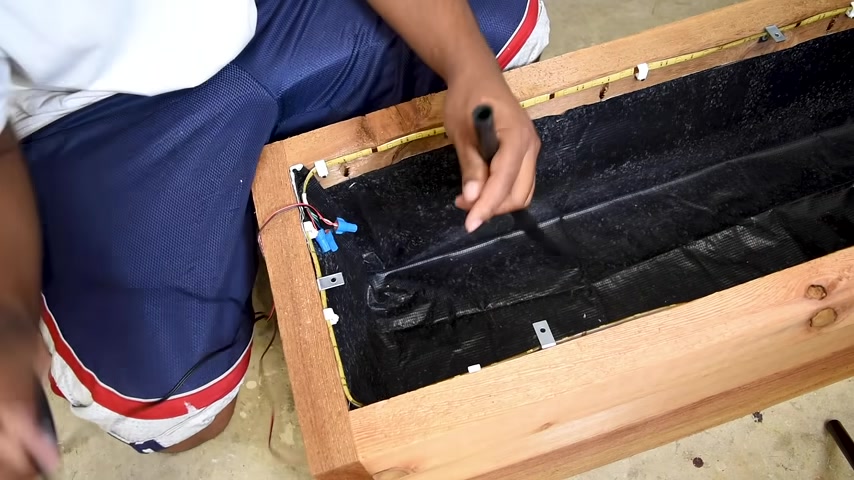
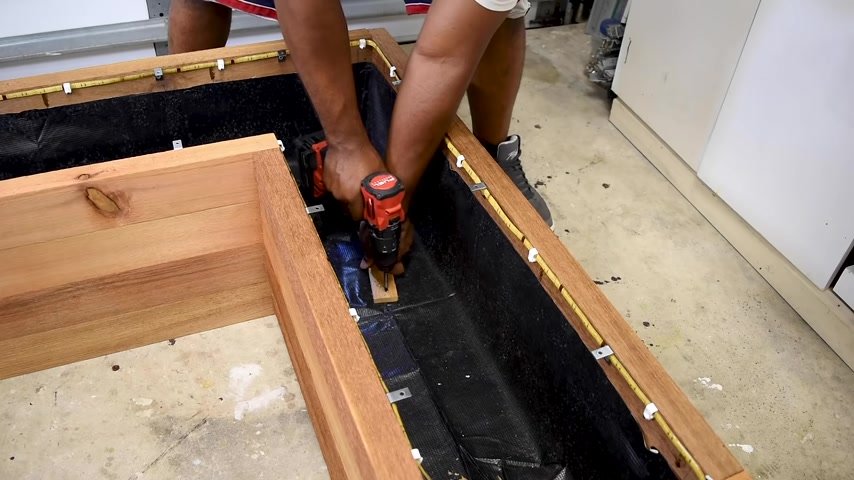
Now , I had this leftover piece of pond liner which I had from a project I did a long time ago .
Glad I held on to it because it's finally coming to use .
I am using a cedar lumber for this project .
So in theory , I could put some dirt directly in here and it should be good for a very long time .
But I think adding the liner should help protect dirty water from pouring out of some of the cracks .
This plant will have a led strip in it and I'll use this paper strap to hold it down .
This strip of led I'm putting on is the very first piece of led strip I ever had an old coworker of mine gave it to me to experiment with back in 2014 .
Yep , before I even thought about creating a youtube channel .
So I don't know if that's the reason why they look yellow , but they still work .
So I'm planning to use this bracket to help secure the trim going around the top and I anticipate the led will sit in this little section here .
The led si have are specially coated and they're meant to be used indoor or outdoor .
And since I'm making an outdoor connection , I need some outdoor wire nuts and inside the wire nut , there's some kind of gel in there that will prevent the water from getting to the connection .
The idea behind this is you put the planner wherever you want , you can then run a wire to it and then open up a world of possibilities or you can use a battery pack like this .
And since I mentioned running wires to this planner , I need to run a sleeve from the bottom up to the led splice , adding the led .
This is a nice touch on a final product , but of course , it may not be something everyone is into adding the zip tie on the pipe that I'm using for a sleeve will prevent the pipe from falling through the planner .
You could also add hot glue around it to hold it in place .
I also added some small holes in it for drainage .
The inside is prepped to where I need it to be .
So all I have to do now is add wood glue around the top lip and then attach the trim .
So I would suggest do a dry fit before you apply the wood glue .
Just to make sure things line up that way .
When this part come around , it's a little easier and to make sure the glue do its job , I'm gonna put some clamps on and let that sit for 24 hours after letting the glue set up overnight , I'm not gonna attach these little brackets to the trim .
So if you lift the planner by the lip , these should also take off some of the stress with nothing inside the planter box .
This should give you a general idea on how much this weigh .
As you can see , this is in pounds .
And if I switch the units , then it's in kilograms , it is on the heavy side .
But just consider the scale of it .
If you want to fill it first use straps to move it .
My suggestion is put it in the location you want it to be , then fill it .
Otherwise you'll have a hard time .
Like I did relocating it .
I also added a few blocks to the bottom of the planner to give it a raised look .
I started off by sending this down with my orbital sander .
Even with 80 grits .
I wasn't seeing much progress .
I really felt like I was spending my wheels and I was planning to be out here for many hours .
And then I remembered I had this thing , I believe this was 60 grits and man , this was not sanding .
This thing was eating the wood .
I mean , sand dust was everywhere and this was probably the most excited I was to see sanding dust .
Initially , I wanted to leave the raw look because I couldn't envision what it would look like with the finish on it and even trying it on a test piece , I still didn't see enough to make me feel comfortable .
I know cedar usually turned to this silver I gray look after a certain period of time , especially when it's being exposed to the sun .
So after doing some research and I have no proof of this , I learned that if you put a finishing oil in it , it can help reserve the brown .
Look , I don't know if this is an ongoing maintenance , but if you guys know the answer to that , I would love to hear your thoughts on this .
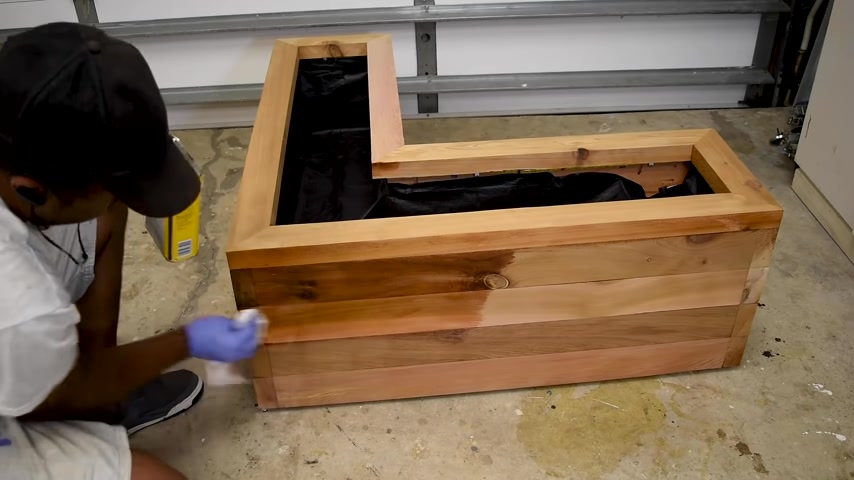
So the oil I'm using is tongue oil .
And after adding it to one side , I absolutely hated it .
And then I just continued to do the entire thing because at that point I didn't want to turn back .
So I powered through it until it got done and it really grew on me and now it was the battle of the irises .
I didn't know which one to pick up .
So I picked them both up .
I ended up going with the one that was a bit more contained .
I felt like a carrot , the modern look more .
And I'm really happy with that choice .
I kept the plants in the pot .
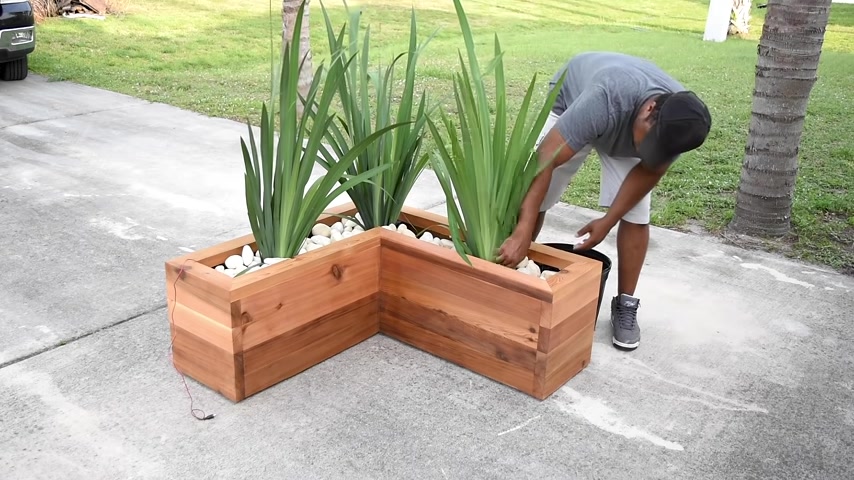
I just cut the bottom off this way , everything can stay contained and to put the finishing touches on , I added a weed barry to cover up the dirt and then place the rocks on top of that .
And as far as the led goes , I'm gonna power this one from a battery pack .
So this will be completely mobile .
But if you want to run wires to it , I got you .
This is what you do .
Remember that pipe I put in the planner , make sure you don't cover it up .
Now , you don't want to pass a wire through the pipe , preferably the power wire then connected to your power source and your power source can still be a battery pack just at a remote location .
And I'm pretty sure you can find solar powered led strips , but I'm not sure about the R GB version if you enjoyed this video and you'd like to see more bills like this .
Be sure to subscribe .
Partnership
Are you looking for a way to reach a wider audience and get more views on your videos?
Our innovative video to text transcribing service can help you do just that.
We provide accurate transcriptions of your videos along with visual content that will help you attract new viewers and keep them engaged. Plus, our data analytics and ad campaign tools can help you monetize your content and maximize your revenue.
Let's partner up and take your video content to the next level!
Contact us today to learn more.