https://www.youtube.com/watch?v=QsPQM6JPZJ8
2023-06-14 18:12:26
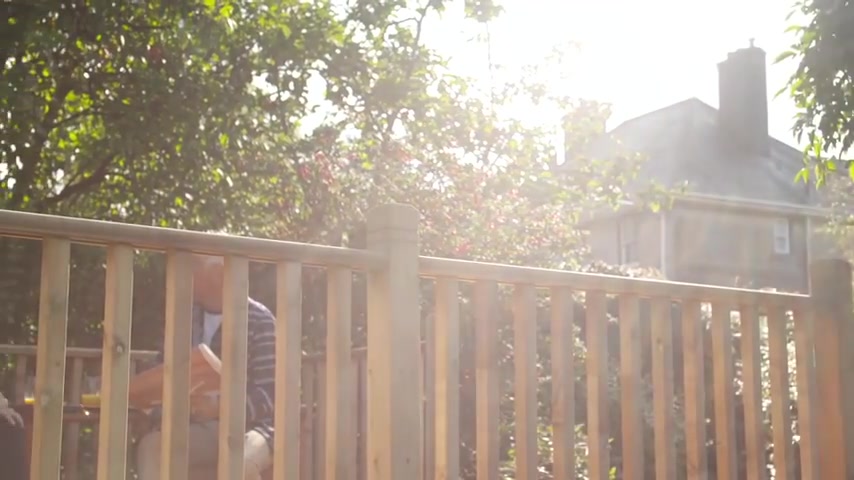
How to Build a Raised Deck with Wickes
how to build a raised deck .
A race deck is a great addition to any garden , especially if the ground is sloping or uneven .
A partly or fully raised deck is the perfect solution for those difficult to use outdoor spaces .
You'll find a full list of tools and materials you'll need at the end of this video .
When choosing where to build your deck .
Keep in mind factors such as shade and privacy .
If you decide to use a permanently shady spot , be prepared to clean and treat the wood once a year To preserve the timber from damp and prevent algae growth .
Avoid very wet areas completely .
It's best to plan your deck to scale on paper .
Try to be as accurate as possible with your measurements bearing in mind the size of deck boards you plan to use .

This will help limit cutting and wasting boards or bearers when planning a raised deck .
You should also bear in mind that any deck higher than 300 millimetres off the ground will require planning permission .
When building the deck , be sure to use structural treated timber and remember to treat all holes and cut ends of wood with two coats of preservative to start , measure and mark out the deck area using pegs and string line , then measure diagonally across from post to post .
If both the measurements are the same , then you know it's square , or you could use a set square .
To do this , you can then remove the turf and all vegetation from inside the area to a minimum depth of 50 millimetres .
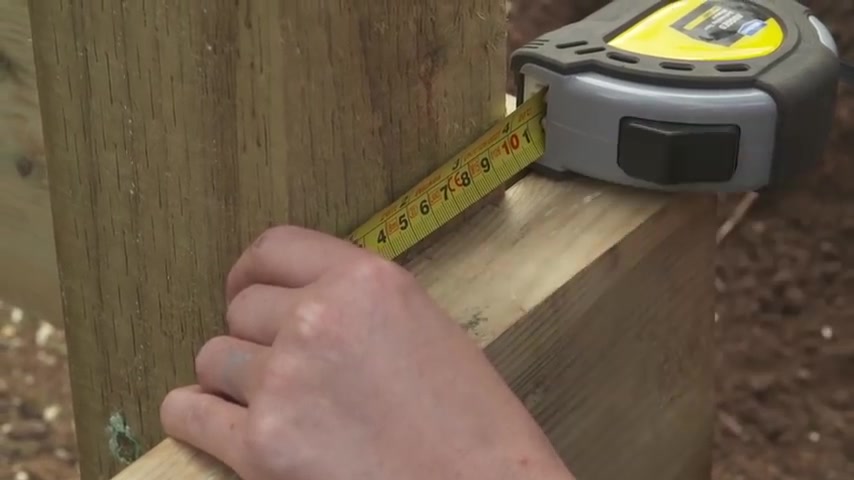
Once the area has been dug , place a post into position in the corner of your frame and measure and mark out 100 millimetres from each face .
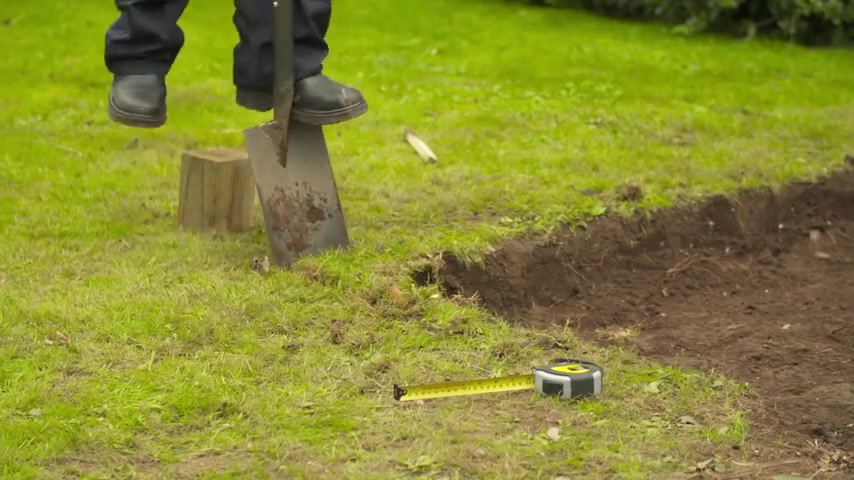
Remove this soil to a depth of 700 millimetres , being sure to look out for any cables or pipes as you go .
Once the soil has been removed , you should be left with a 300 by 300 millimetre square .
This is where you'll be adding the post Crete .
Repeat this for the other three corners .
Next , split a concrete block in two , using a brick bolster , then place a section of block into each of the holes , making sure they're firmly in place .
Take a length of post that is slightly longer than you need as you can cut it down later and place it into the hole .
Use small pieces of timber to create props that will hold the post in place until you're ready to post Crete and secure them to the joists with screws .
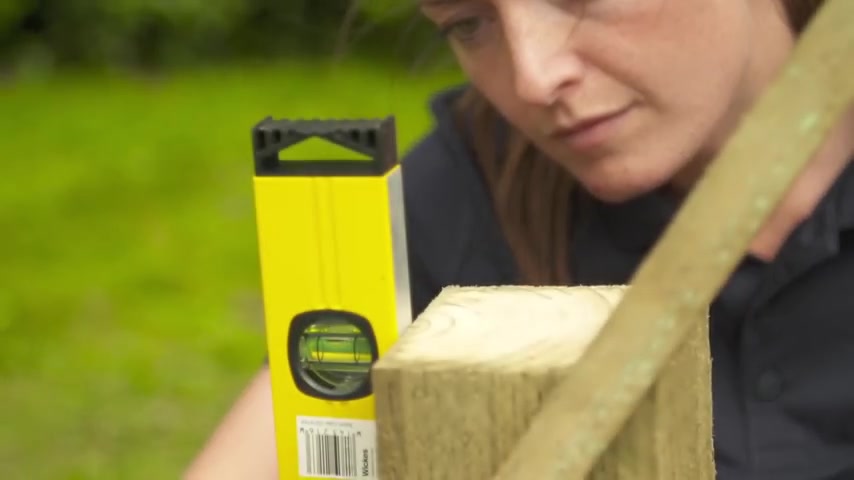
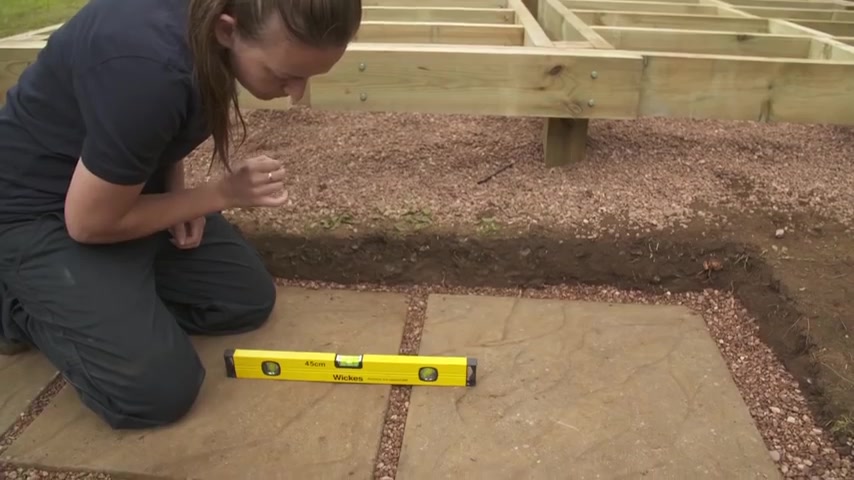
It's important that you keep checking the posts a level as you go .
Repeat this for all four corners .
Now it's time to pour post Crete or a concrete mix into the holes to make sure they're permanently fixed in place .
Ensure the posts remain truly vertical .
You also want to create a gentle slope away from the timber posts on all four sides to help rainwater run off and so prolong the life of the wood .
Leave the post Crete for around 20 minutes and then check it set .
Then remove the props .
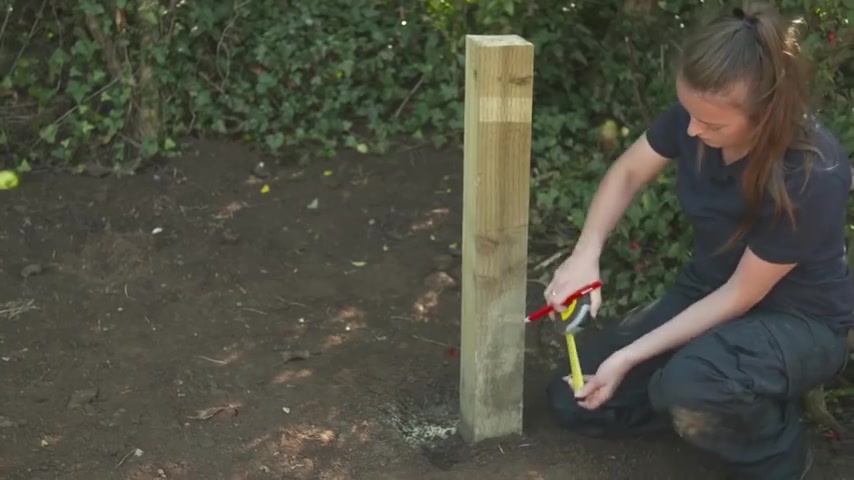
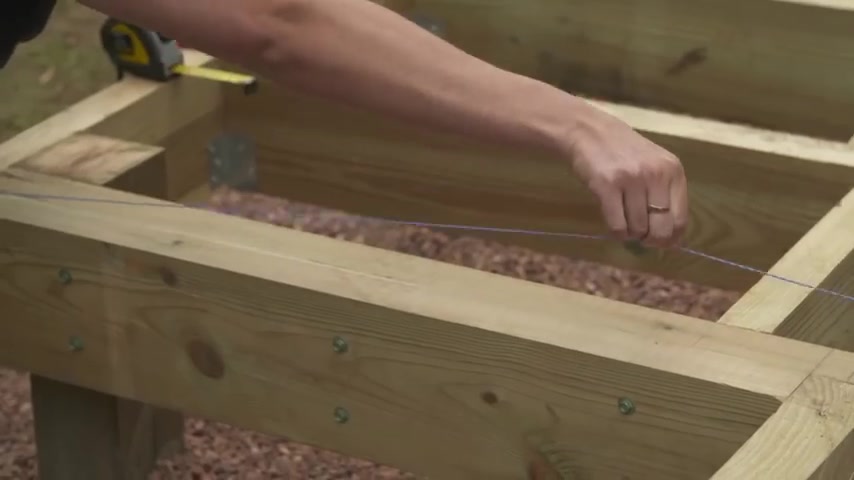
Create a string line around the four corner posts to help you to mark and place the guides for the remaining posts .
To do this measure from post to post to find out where the centre point is , then measure and mark out your mid point before hammering a post marker into place .
Bear in mind that posts shouldn't be further apart than 1500 millimetres .
Repeat this until the five post markers are in place as you did with the corner post .
Dig out the holes to a depth of 700 millimetres and a width of 300 millimetres and place the concrete block into position .
It's now time to prepare the outer frame .
If you're on a slope , then always measure from the corner where the deck will be at its highest off the ground mark on the post where the highest part of the frame will be .
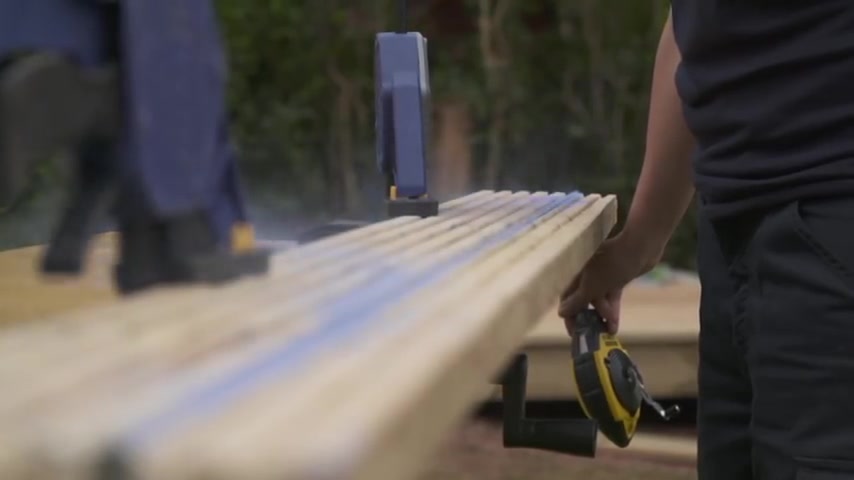
Cut the outer frame joists to length .
Next , line up a piece of frame with your mark and temporarily secure it in place with a 64 millimetre deck .
Screw to ensure rainwater runs off your deck and away from the house , you need to allow for a slight fall in the level of the deck frame .
You should factor in a two millimetre fall for every metre .
Bear in mind this fall When checking the levels throughout the build , put your spirit level on top of the frame and lift until it's at the required level , and when it is , secure it to the other corner post line .
The next piece of frame up with the corner of the one you've secured and repeat this process for all four sides , then double check that Each side is level mark on the frame where the mid point of the post is , and use a set square to draw a straight line downwards .
Draw guide marks 40 millimetres from the top and 40 millimetres from the bottom of the frame .
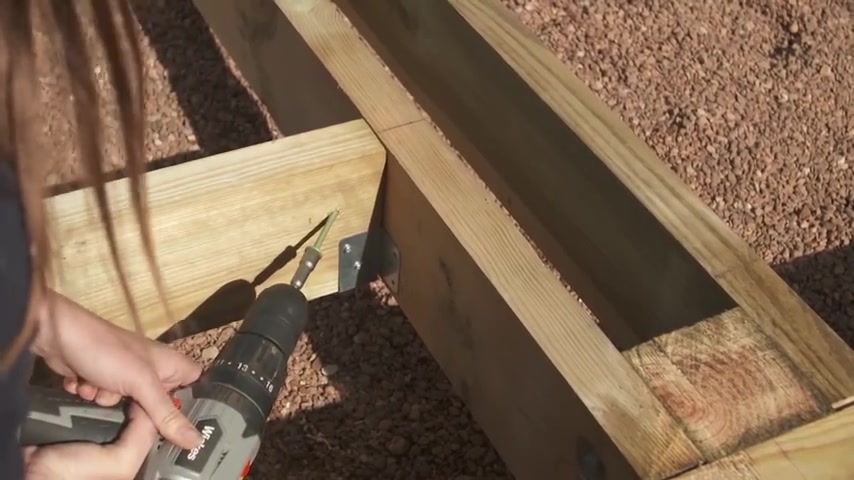
Next , use a 40 millimetre flat wood drill bit to make countersunk holes around each of the marks before using an eight millimetre wood drill bit .
To drill pilot holes , hang a washer on the end of a 100 millimetre coach screw .
Insert it into the hole and hand tightened before securing it firmly in place with a 13 millimetre socket .
Repeat this on each of the other corners .
Next mark on the frame where the centre of your support posts will be positioned and repeat the process of marking and drilling the countersunk holes .
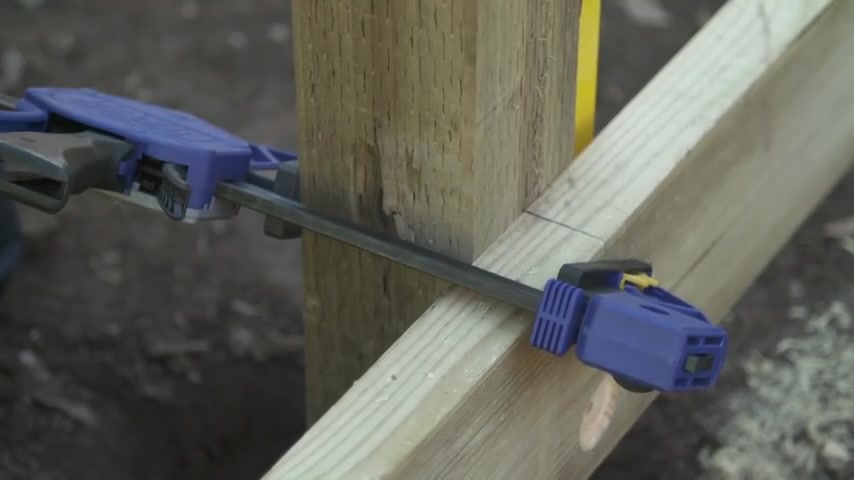
Put the post into position onto the concrete block , making sure it's level before clamping it into place .
You can now drill your pilot holes before securing the frame to the post with a washer and 100 millimetre .
Coach Screw as before , simply repeat this for all the posts on your outer frame , you can now add your centre post and support joists .
Bear in mind when measuring that .
These joists should run in the same direction as your deck boards .
Firstly , measure from the inside of the frame on one side to the inside of the frame at the opposite side and then cut a length of joist Accordingly .
Attach the joy to the post at each end and secure as you did to the outer frame .
Put the centre post into position .
Clamp in place and secure as you did the other posts .
Make sure the post is level before continuing .
Repeat this so the centre post is sandwiched between two sections of the support frame .
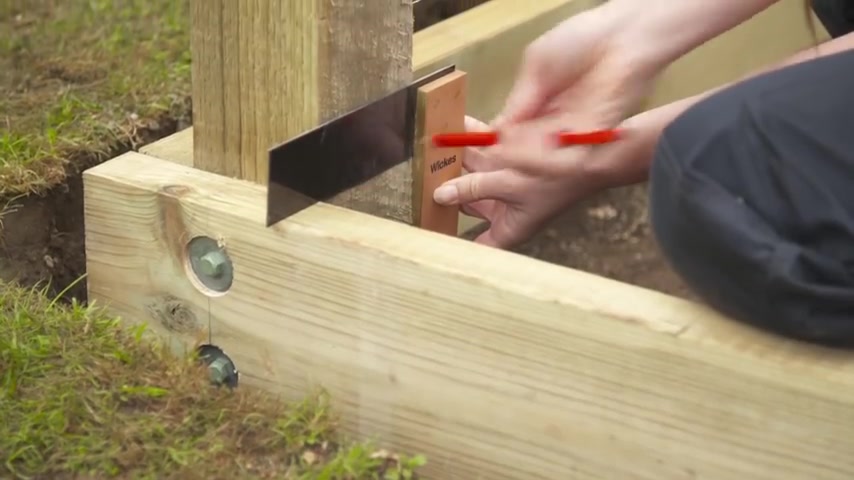
Once this is done , secure all the new posts with post Crete to trim the posts , rest the set square on top of the outer frame and mark a line on the wood of the exposed faces and then saw .
Repeat this process for all of the posts on your decking .
Remember to treat the cut ends as you go .
Next , Measure the distance between the central support joist and the outer frame and cut sections of joist to length .
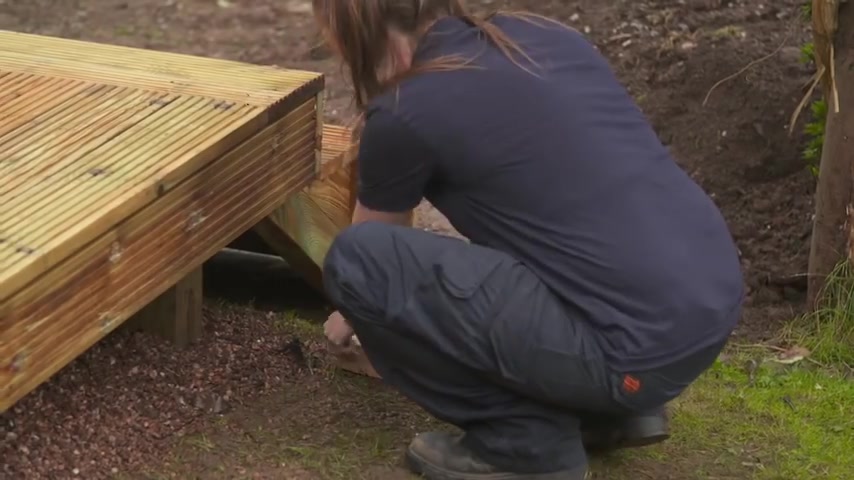
Roll out your landscape fabric and cut it to size , making sure it's as snub to the post as possible .
It's best to overlap the fabric to ensure it covers all of the area that will be underneath the deck .
Pour gravel onto the landscaping fabric to help hold it in place and further prevent weed growth .
Smooth the gravel as you go .
It's now time to mark out the placing of your internal joists .
To do this , you should measure 400 millimetres from the centre of the outer frame and mark a line using a set square .
This line is the centre of where the first joist will be positioned .
Repeat this at 400 millimetres in down the length of the frame and add an extra joist .
If your final gap exceeds 400 millimetres , then extend your line downwards onto the side of the frame and mark .
Pilot holes 40 millimetres from the top and 40 millimetres from the bottom before drilling .
Using a two millimetre drill bit , secure the joist in your workbench and attach a joist hanger to each end , using 30 millimetre exterior screws to secure the joist to the frame .
Place it into position with the centre of the joist lining up with the 400 millimetre spacer mark .
Be sure the joist is flushed with the exterior frame and use an extra pair of hands or packers to keep it in place .
If needs be , drill two millimetre pilot holes , then secure using 100 millimetre external grade screws and the supplied socket bit .
When fixing the joist to an unexposed side of the frame , drill a skewed pilot hole on either side before securing skewed screws into position .
Once the joist is in place , secure the final 30 millimetre screws to the joist hangers .
Repeat this for the rest of the joists , making sure the top of the joist is flushed with the frame before securing .
Now it's time to measure out and prepare your noggins , bearing in mind that the distance between them should never exceed 1200 millimetres .
It's also easier to stagger your noggins so that you don't have to skew screws to attach them .
Mark out where you want your noggins to be , and measure the distance between your joists .
Then cut the noggins to size .
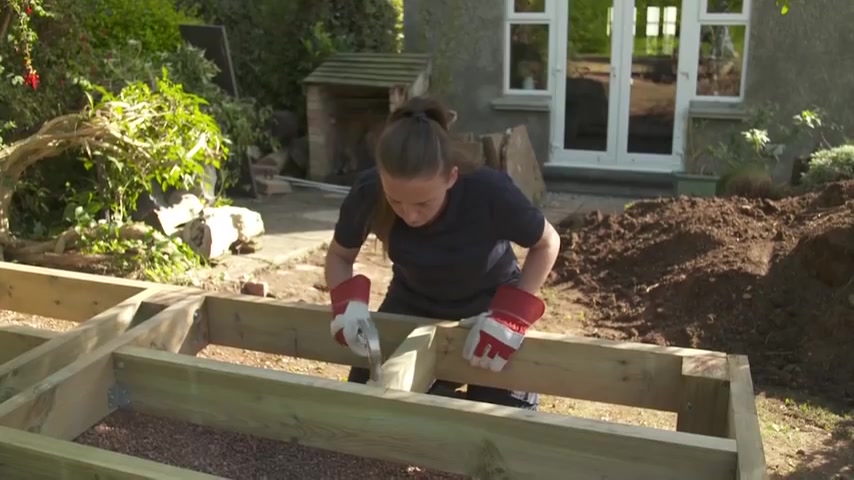
Put a noggin into position and draw a line that marks the centre of the noggin on each joist measure and mark 40 millimetres from the top and bottom on each side .
Drill your pilot holes before securing the noggin with 100 millimetre external screws , then repeat this process until all the noggins are in position .
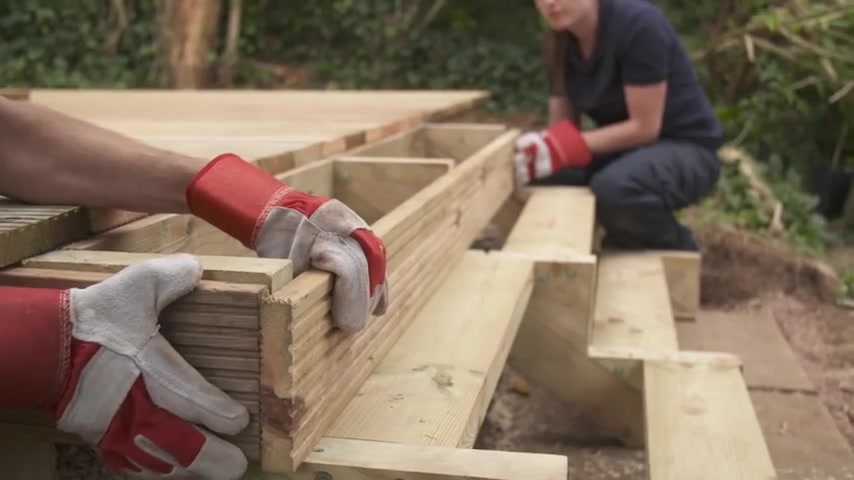
Now that the frame of your decking is secure , it's time to build the steps we're going to use .
Premade step rises To do this .
Start by deciding where you want the steps to be positioned .
Bear in mind that they shouldn't be spaced more than 450 millimetres apart .
Hold each step in position and mark their edges onto the wood .
Measure the distance between the marks and the next step and cut sections of Joyce to the required lengths .
Then measure and mark out three evenly spaced sets of pilot holes .
Pump the sections into place .
Drill the pilot holes and secure with 2 100 millimetre screws .
At each end , your steps should be supported on solid and level ground .
Next , put your first step into position , making sure that it's flushed to both the top and the side of the frame .
Mark two evenly spaced pilot holes and then drill through the side of the step and into the joist .
Secure the step in place with countersunk 100 millimetre screws .
Repeat this process for any other exposed sides of the steps To secure unexposed sides .
Drill a skewed pilot hole on each side before skewing the 100 millimetre screws into position .
Drill a final screw through the support frame and into the back of each step , being careful to avoid the other screws that are already in place .
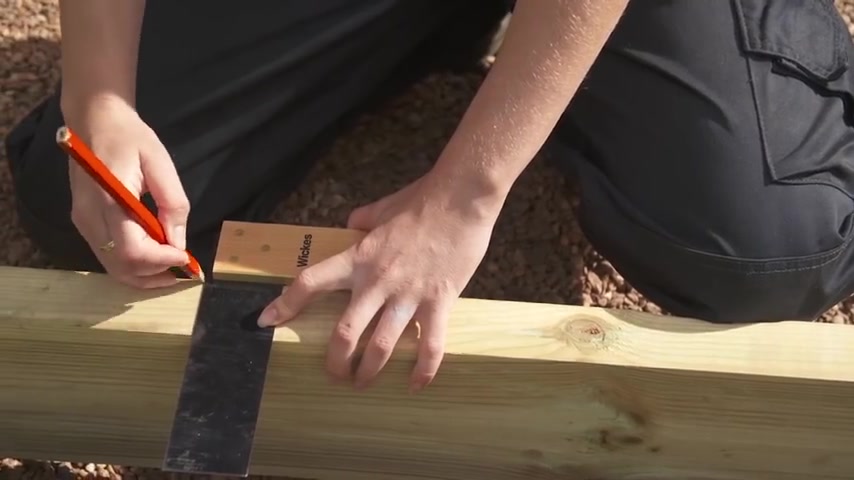
Now take an off cut of deck board and hold it next to the step to mark where the facial will go .
Use your set square to help mark a straight line to show its positioning .
Next , use a chalk line to extend the line you made across the width of the steps .
Measure from the far end of the deck to the chalk line and cut a deck board to length .
Put the cut deck board into position in line with the chalk .
We're going to be attaching facial boards to the decking so need to allow for an overhang when securing deck boards .
It's a good idea to pre drill all fixing points with a two millimetre bit to prevent boards from splitting .
And if you counter sync all drilled fixing points , you'll get a smoother finish .
Because this board is overhanging .
Screw through the third groove of the outside edge to ensure it's comfortably secured to the joist .
Fix with a 64 millimetre decking .
Screw when fixing the rest of the boards .

Always use the second groove in from either side to ensure the boards are straight secure with a single 64 millimetre screw in one end and then move to the opposite end and then back again .
Make sure to keep spaces even between adjacent boards .
Because timber expands and contracts with the changing weather , you should include a gap between five and eight millimetres .
Create a suitably sized spacer from an off cut of timber and use it to check .
The gap between boards is equal all the way along .
Once the boards are all laid , measure the gap between the steps and cut sections of joy to length .
These will act as additional support for your steps and can be staggered into position and secured like the previous noggins in the frame .
If your top step is like ours , then it won't need a noggin , as the overhang of the frame adds the necessary support .
When securing the boards to the steps , always secure the front faces of the steps .
First , measure the width of the step from the outer edge and cut a piece of deck board to length , making sure you allow for enough overhang on each end so that the board is flush with the FAA .
Then hold the board flush with the top of the step and pre drill your holes before securing with 64 millimetre deck screws into the second groove on each side .
Now it's time to secure the first part of the top board .
To do this , place the board flush with the board beneath and secure by drilling one screw into the second groove and one directly down and into the section of board below .
Depending on the steps you're building , you may have gaps that need filling as we do .
Start by measuring the gaps and marking the required size onto deck boards , remembering to subtract 10 millimetres to allow for the five millimetre expansion on either side , secure your board and use your chalk line to create a clear line , then carefully cut along the line using a jigsaw .
Once the sections are cut , put them into position and secure with deck screws into the centre of the board and the first groove , making sure the screws sit centrally into the frame of the step below .
Then repeat this .
For all the gaps , your steps are now complete , and it's time to add the facial boards measure and cut the length of board you need , then mark pilot holes into the second grooves at 50 millimetres from each end .
Repeat this at 600 millimetre intervals down the length of the facia .
Finally , attach with 64 millimetre decking screws and repeat this for all complete boards .
If , like us , you need to add an angled board because your garden is sloping , then start by attaching packers to the main joist frame .
This will give you something to secure the facia onto , then take an off cut of deck board and slide it underneath the top facia until it nearly makes contact with the ground .
Mark a line onto the top facia to show its position .
Then mark on the wood where the far end of your angled board will be and measure along to your line on the top facia .
Next , measure the distance between the end of the angled board and the ground .
When doing this , remove five millimetres as you don't want the board to be touching the ground at any point on your deck .
Board mark where the full board will end , where the angle will begin and where the angle will end .
Connect the marks where the angle will begin and end with a chalk line .
Then cut down this mark with a circular saw .

Secure the board to the Packers using 64 millimetre deck screws and repeat this process for all other angled boards .
Add gravel for an attractive finish and to age drainage around your decking .
Finally , if you want to add railings to your raised deck , then you can follow our step by step .
How to assemble Deck railings .
Video .
Your deck is now complete , so sit back .
Relax and admire your handiwork from your brand new decking .
Here is the list of tools you'll need to build your raised deck , and here are the materials you'll use , and this is the recommended safety equipment needed
Partnership
Are you looking for a way to reach a wider audience and get more views on your videos?
Our innovative video to text transcribing service can help you do just that.
We provide accurate transcriptions of your videos along with visual content that will help you attract new viewers and keep them engaged. Plus, our data analytics and ad campaign tools can help you monetize your content and maximize your revenue.
Let's partner up and take your video content to the next level!
Contact us today to learn more.