https://www.youtube.com/watch?v=kznkcaoLNao
2023-06-14 18:09:19
How To Install Epoxy Over Old Countertops Ultimate Guide _ Stone Coat Countertops
We used our stone coat liquid epoxy to transform this old laminate kitchen .
Learn right now how to save thousands on your next project .
You can renew and resurface old countertops , tabletops desktops and more , we're gonna teach you every step of the way for free .
In this video , we cover every pro tip and trick that you need to know to transform any space class is in session .
And we've done the hard work for you capitalize on our years of experience of using our epoxy to transform old countertops .
You're gonna be able to mimic marble , natural stone .
You can even mimic quartz concrete , whatever you design .
We're gonna show you how to do rock face edges , smooth edges .
We're gonna teach you the undercoat process and more whether you have a new construction project or a remodel if you want to do a dirty pore or an exotic countertop , all of that is revealed right now , you can design on a dime , you can transform your colors you can do in place backsplash , learn to take your project from concept to complete , stay tuned .
Enjoy the video .
Remember when you subscribe to our channel , click on the red subscribe button and be sure to ring the bell .
So you get notified every time we have a new video .
Thanks again .
Do you have an old laminate countertop kitchen that you need to revive using stone coat countertop epoxy ?
We're gonna teach you to renew those old countertops in place using eight simple steps .
Let's get started .
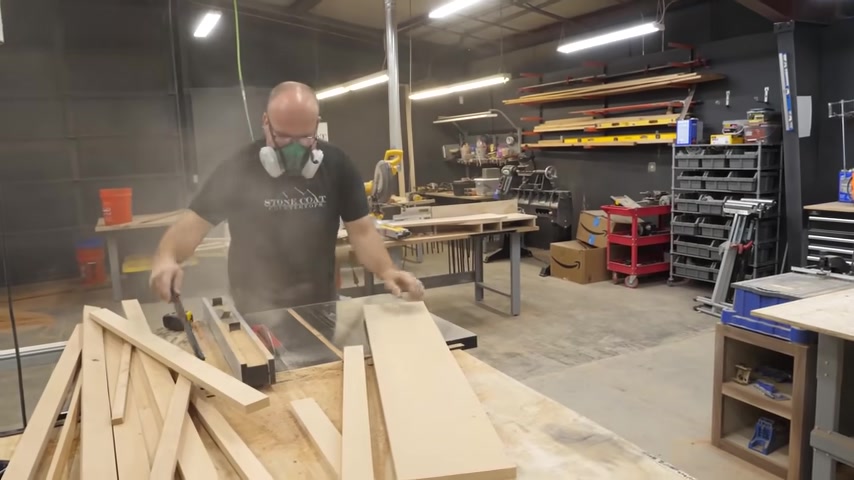
Step one is prep .
First we're gonna move any bulky appliances that may be in our way .
Then we're going to mask the floor using paper .
We'll add plastic over the cabinets to protect them from any drips and then we'll finish by masking the walls .
This stuff is fun .
It's simple , but it's also important .
Don't make a mess and you won't stress in this particular case , we're going to change the old sink .
It's seeing better days .
So we're going to add a stainless steel sink by disconnecting it and putting a new one in place .
If you like your kitchen sink , you can leave that in place and mask it off .
Pro tip guys dry , fit your new sink before you install it .
That way you don't have any surprises after the countertops are complete .
This ensures a perfect fit guys .
Whenever you have painted cabinetry or finished cabinets start with delicate surface tape as your first run .
That way , when you add your plastic , you tape to that and when you de prep or take it off , it doesn't peel any paint .
We're using three mil plastic this is also three ft wide .
The countertops are three ft tall so it fits perfectly , tape that to the cabinet tops and tape it to the floor and you won't get any epoxy drips that get on the cabinets .
Ok .
It's time for our optional prep step .
I can either cut the existing backsplash off , nice and flush or I can leave the backsplash in place .
If I leave it in place , the epoxy , it's self leveling .
It wants to run downhill .
So what I'll need to do is come back about two hours after I've poured my surface and add a little bit of color into that backslash .
That way I retain color on the backsplash to match the counters .
It's a little bit more simple and a perfect match if you pour it nice and flat .
But it does require me to cut this off .
I'll bond over the gap between the wall and the countertop and I'll make new backlash to cover the old .
I like to do it this way .
It looks super professional and it's easy to do .
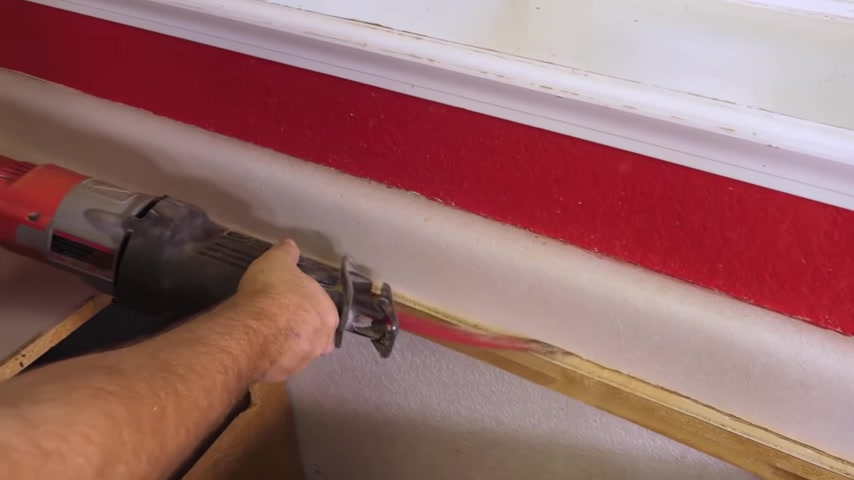
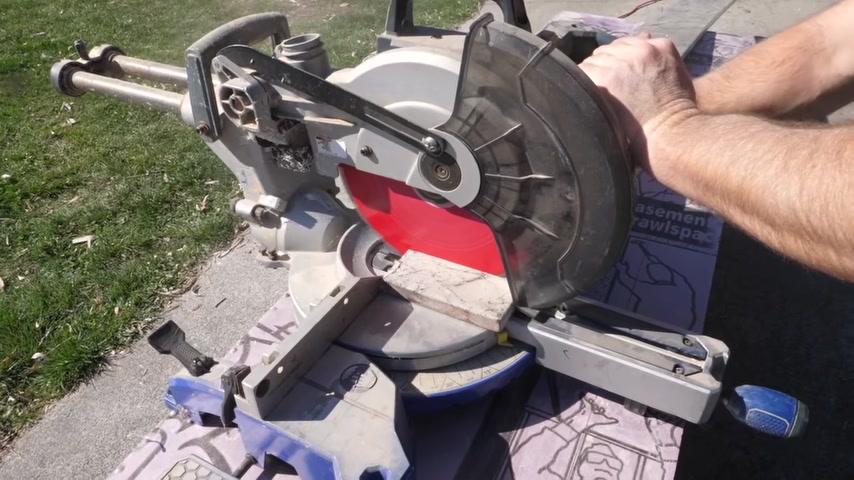
We're going to use one of two tools I can use a reciprocating saw or I can use a vibrating multi tool .
This is a plunge cut .
This will come at an angle , but it's super simple .
I'll use the saws all on my straight runs and my multi tool to plunge cut the corners .
I'll score the top of the back splash to cut any cawing .
So I don't peel the paint .
That's a pro tip .
When I'm done with this , I'm going to sweep up my sawdust mess and I'm ready for the next step .
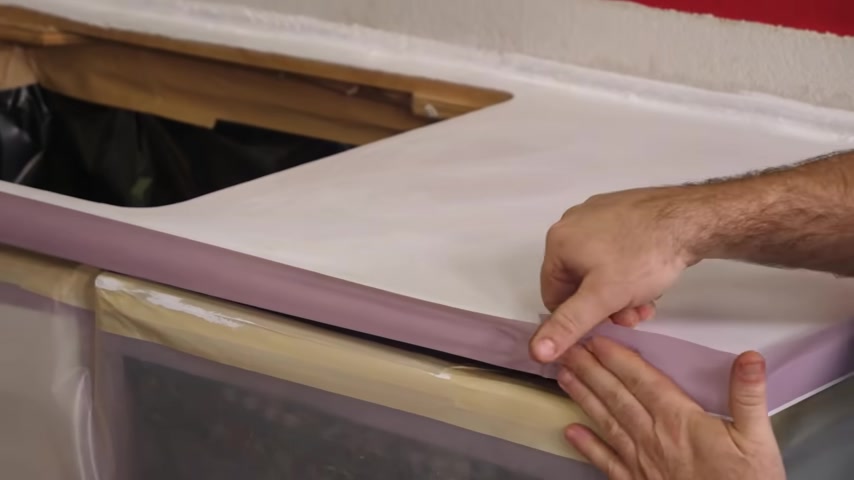
This is back rod , back .
A rod is found at your local hardware store .
It's designed to be put around windows to block any drafts coming through .
It's also a great solution to fill the gap between the countertop and the wall pro tip .
When you're adding the Bondo to the back here , we're also going to Bondo this seam where the old laminate countertop came together that will make it seamless and it won't go through when you do your epoxy pore .
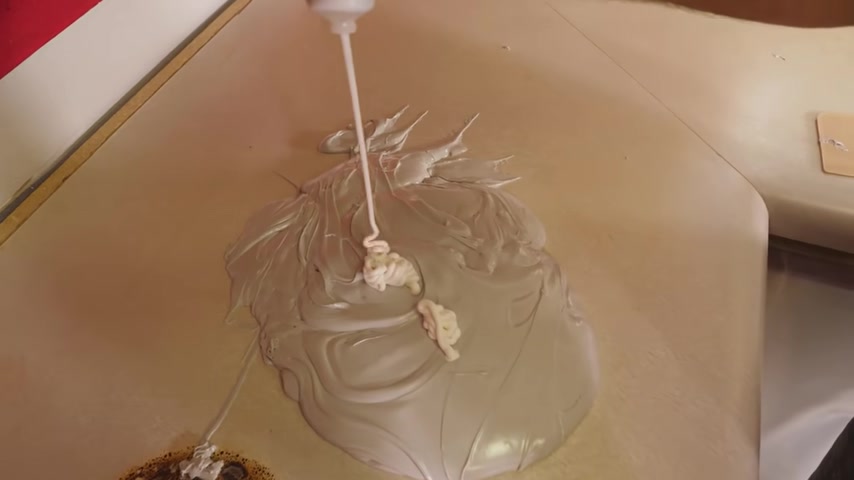
I'm mixing up enough Bondo to fill the gap between the countertop and the wall as well as cover any damage like scores from knives or burns .
I'm also going to cover the seam while I'm at it .
Now , if you're brand new to Bondo , be sure not to mix up more than you're comfortable with .
It has a short working time because I've done hundreds of kitchens .
I can move rather fast , but it's OK to break up the Bondo into multiple steps , just mix up enough to do what you're comfortable with and then move on .
The more hardener you use , the faster it sets up .
That's a pro tip .
I'm gonna use my handy masker to prep the back wall .
I'm going to be using different spray paint and additives .
So without worry during the project , that back wall will be masked off to make clean up a breeze .
Now , when you are prepping , you can use butcher paper , newspaper or anything to cover these different areas .
Remember every minute spent prepping and masking in the kitchen can save you a lot of time on the clean up .
So , take your time .
Have fun and prep it .
Right .
Step .
Number two is to clean and sand .
We're going to use T S P .
That's Trisodium phosphate .
We're gonna mix it with a little bit of warm water .
We'll scrub down the surfaces and then we'll sand with 60 grit to create a mechanical bond .
Follow the instructions on your D greaser .
We're going to use some elbow grease to get any grime off of these countertops .
So we get an excellent long term bond .
When we apply the bond though , we applied it heavy .
We're gonna sand any high points down using 60 grit and our random orbital sander .
We're also going to sand the laminate to create that mechanical bond .
Remember , your patchwork doesn't need to be perfectly smooth .
We're just trying to remove those high points .
Use 60 grid to sand that get it nice and flush .
You're ready to vacuum up the dust and move on to the next step .
Ok .
It's time to order .
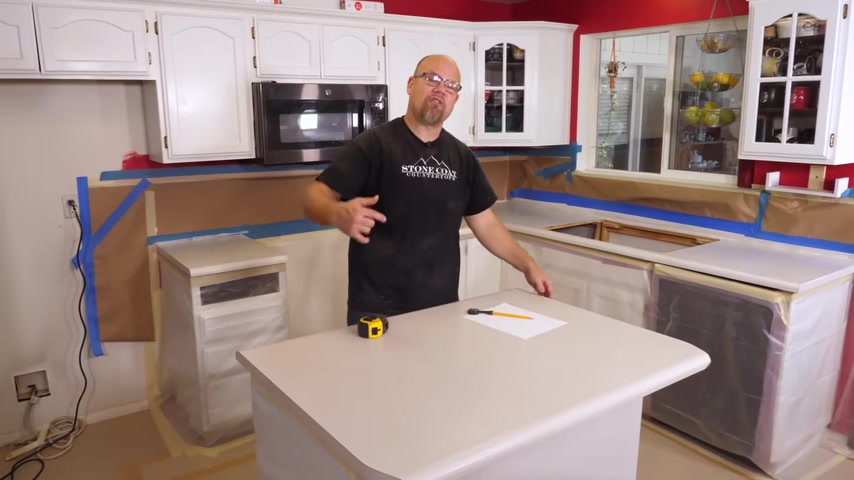
How do you figure out your square footage ?
It's simple .
It's length times width , that's gonna equal your square foot .
For instance , this island is 3.5 ft by 2.5 ft .
You multiply that and you're going to get eight and three quarters that's eight and three quarters square feet .
Let's look at our L shaped countertop .
This has a sink cut out and it's basically going to be broken up into three separate pieces for ease of measuring .
Let me show you how I'm going to use my blue tape as my imaginary line .
So I really get easy measuring .
I'm simply gonna break this piece off .
So that's a separate countertop than this .
Now , and I'm gonna measure this section .
I'm gonna measure this section and finally the third section .
And then I'm also gonna add in a little bit for my backsplash .
Let me show you how easy that is on two ft by two ft .
That's gonna be four square feet .
Here , I'm three ft by two ft .
That's gonna be six square feet .
And here I'm two ft by two ft again , that's four square feet .
So I have 44 and six , that's 10 , 11 , 12 , 13 , 14 square feet .
Then I'm gonna do the backsplash .
I know I'm going to account for a six inch backsplash .
So I'll just get my linear footage .
So I come here , that's eight linear feet and that's four linear feet .
That's 12 linear feet .
And then I'm just going to divide that by two because it's six inches .
So that's gonna be an additional six square feet you see how easy it is to measure .
So get your tape measure out , break your ken up into simple squares and that's how you can get the square footage .
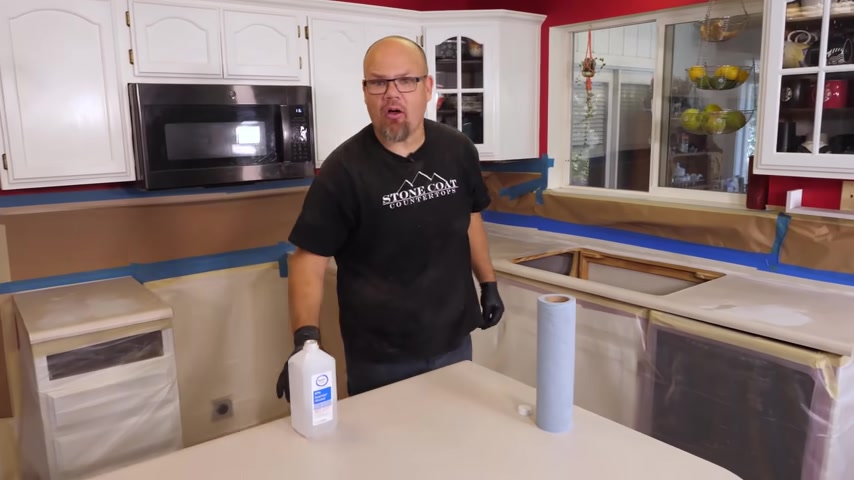
So you know what to order 91% isopropyl alcohol .
Basically rubbing alcohol makes a great cleaner as well as wiping up any excess dust .
Before we add the bonding primer .
It also removes epoxy from your tools .
And if you happen to have a drip somewhere , you don't want to jump to your Isopropyl alcohol .
It's a great solution for any mess up .
Step .
Number three is the bonding primer .
The bonding primer is only necessary when you're going over non porous surfaces such as laminate Coron and cultured marble .
If you're going to go over wood , you don't need to do this step .
You can go forward .
But because we are going over existing countertops , we're going to bonding primer that ensures a long lasting project .
This gives you a great chemical bond .
You simply roll it on like a layer of paint , let it dry and you're ready for the next step .
Remember , you only need a very thin coat thin to win on this process .
We're gonna add our color after this is set up , it's always good practice to use some masking tape on your rollers to remove any loose fibers .
This is a pro tip .
So you don't leave any fibers into your coating .
The bonding primer is all set up and dry time for step four , the epoxy Undercoater .
In this case , this recipe calls for white .
We're going to do our white undercoater .
We'll let that dry and we'll be ready for step five .
I'll do two coats of my white undercoat and I'm gonna stand in between with 220 grid .
Ok .
We're gonna show how to go over an existing countertop that you want to leave intact .
I'm simply gonna make a piece that drops over the existing countertop .
What I need to do is get my length and width so that I can drop that piece over this one and hide it .
Let's say I'm going to move later .
I could take that with me and turn it into a coffee table .
You think that's a good idea ?
I say you get the thumbs up button for that one ?
All right .
So I know my length is gonna be 43 5 eights and my depth is 34 .
So let's go 43 5 eights by 34 .
Is this current countertop ?
So I'm gonna make my piece bigger than that .
So it just drops right over that existing one .
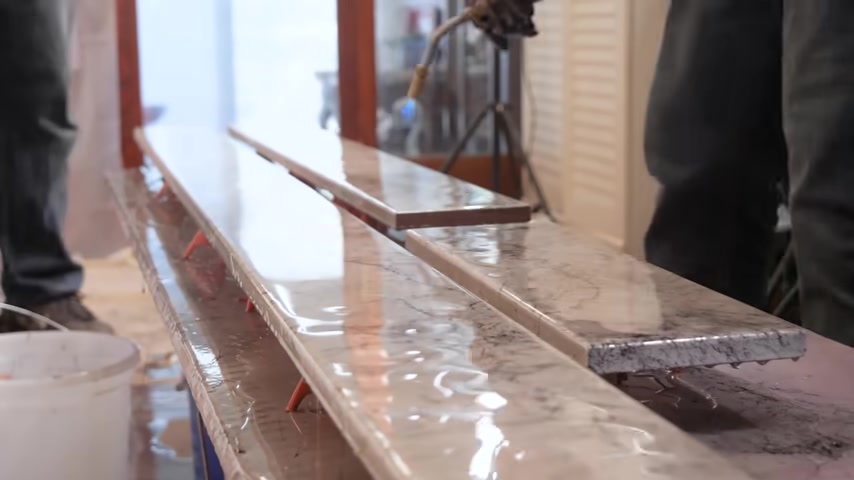
Let's go to the garage and show you how to do a drop edge with a few key pro tips .
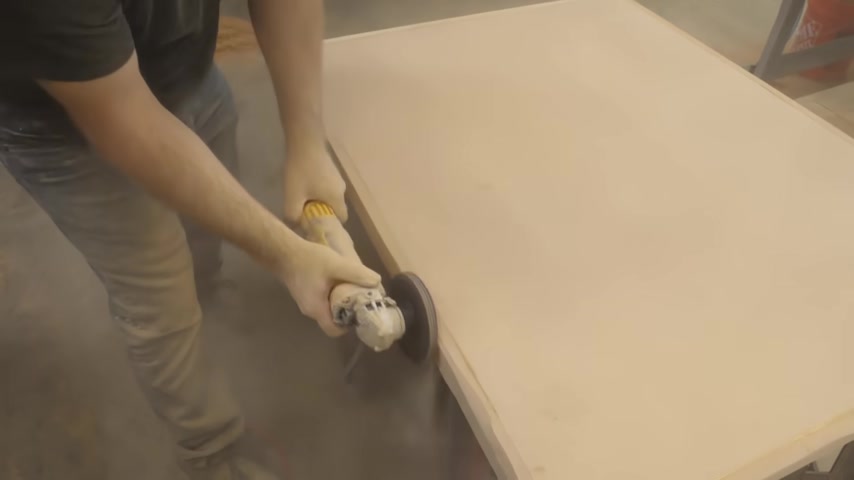
We're going to start with MDF .
That's a medium density fiberboard .
The reason we like this , it's inexpensive , it's flat and it's the same material all the way through .
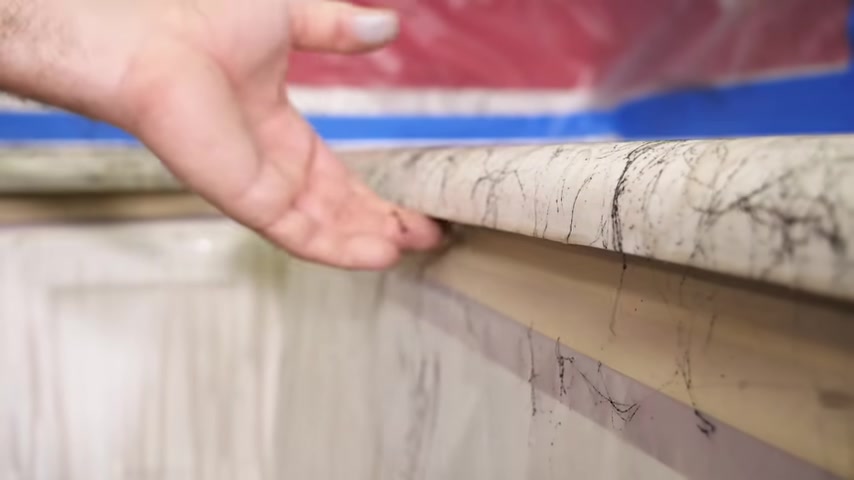
So if you happen to router an edge , it'll match just perfectly using a table saw to cut some drop edge strips will hide the existing countertop .
I'm going to screw these on to that piece of MDF .
I cut to size .
So I have a shell that's going to encapsulate that old laminate .
So what we're gonna do is create a drop edge to hide that existing island .
We know that island is one and a quarter inches thick .
So we'll be sure that that drop edge hides that island completely .
You can adjust the appearance of how thick your countertops are by adjusting your drop edges .
If you're doing new construction , you could even laminate just a strip of MD F below it to make your countertops appear an inch and a half thick .
This is pretty standard and it's awesome for new construction remodeling or even old coffee tables first .
I'll tack it on with some micro pens .
I'll glue it and then I'll come back and I'll pre drill and screw with coarse thread screws that way it doesn't ever come apart .
I've used an oversized drill bit as a counter sink .
So I would hide my screwheads .
I'm also going to use my angle grinder and a 50 grip metal sanding disk to pre shape the edges on this Accent Island you see on this island , I want to make it look like a rock face edge .
So I'm pre shaping that so that I can apply the next step .
But see on site , I'm going to keep those edges as they were .
I'll have two different edges on the same project .
It will actually add some more visual interest so that everybody who meets along this gathering place , which is the Accent Island will have something to talk about .
The Bondo is going to act for two purposes .
One , I'm going to hide the top seam where I laminated that edge and two , it's going to create a chiseled look .
In this case , I want the island to look like a piece of chiseled stone .
It'll look really fantastic having that stone and the rest of it smooth .
It really accents one another and creates visual interest .
This is easy to apply .
I mix that Bondo , I use a gloved hand and I tap those edges after I've applied it that creates high points .
I let that dry and I come back and sand it nice and smooth .
So it doesn't hurt your hand when you rub your hand against it .
That's how I gauge if it's done correctly , you can mimic multiple textures using the same process .
It's really fun to experiment in different ways to emulate lava rocks , seashells , rock face edge granite , anything that you wish , just study what Mother Nature creates and have fun .
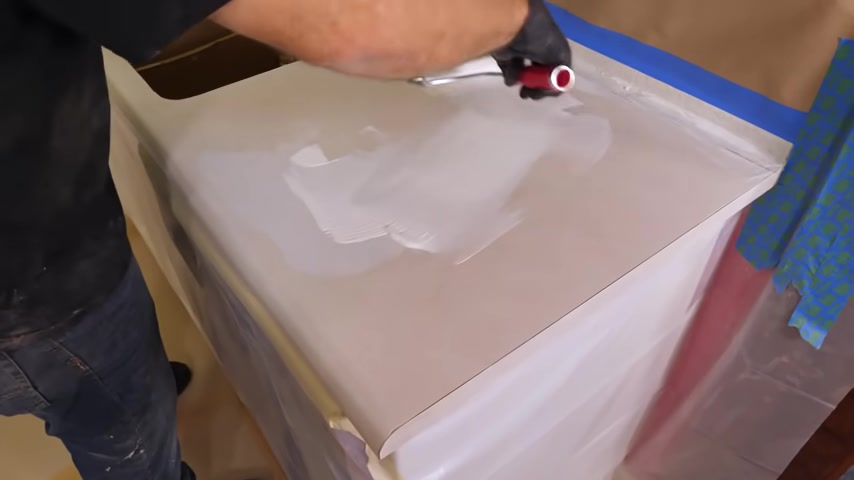
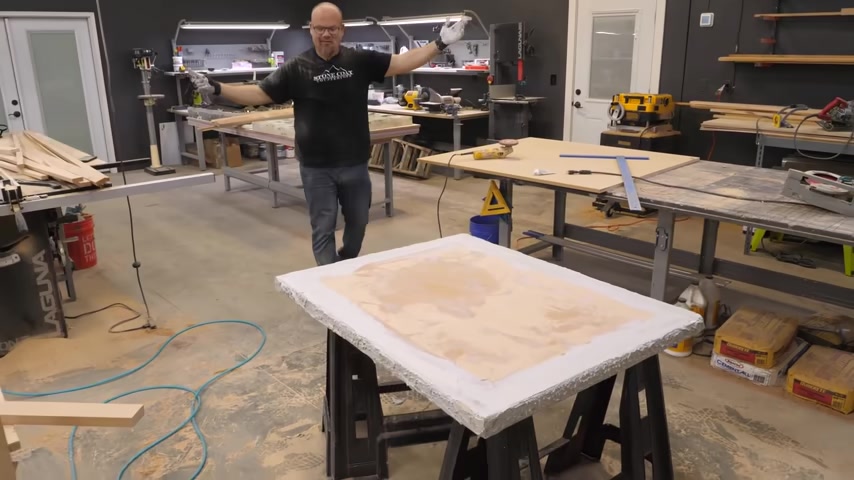
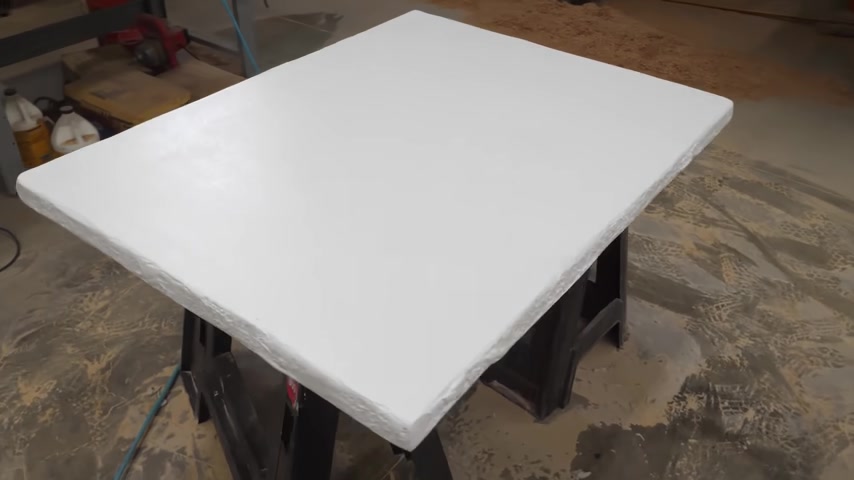
I'm going to do two coats of our undercoater .
This really gives us a beautiful undertone to start with .
And again , this recipe calls for white .
This is the same undercoater we used on site over the laminate .
But in this case , we didn't need our bonding primer because we're going over a more porous surface , which is MD F .
So no need for bonding primer just goes straight to the undercoat .
Now that I'm caught up with the rest of the kitchen , I'll bring this on site tomorrow and I'm ready to apply the epoxy .
We wanted to do a six inch backsplash .
So I went and bought Primed MD F that was six inches tall .
I'm just cutting it to size so I can make my backsplashes out of something that was readily available .
I'm using a trim router to create an eased edge .
So the epoxy will flow over that backsplash .
You can also use a sander and just make it where the epoxy will flow over and it's not a sharp 90 degree cut .
That's a pro tip .
I'm gonna sand my undercoat with 220 grid .
I'll wipe the dust and I'm ready for the next step .
Let's get ready to pour .
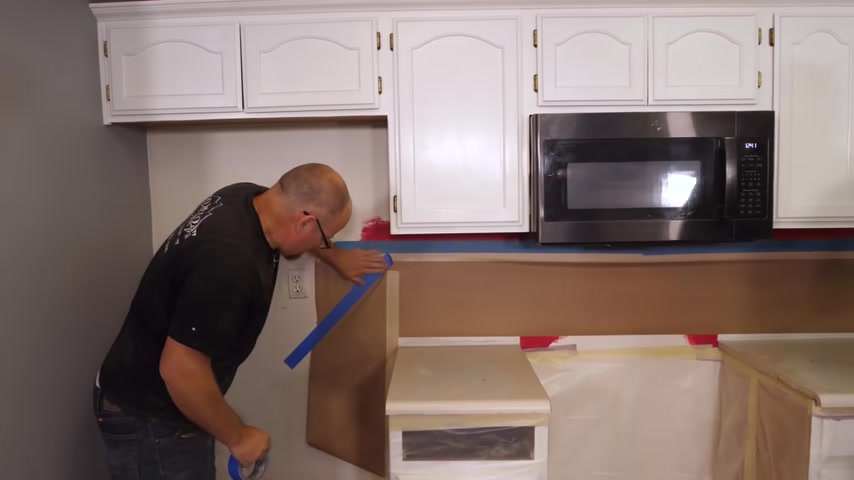
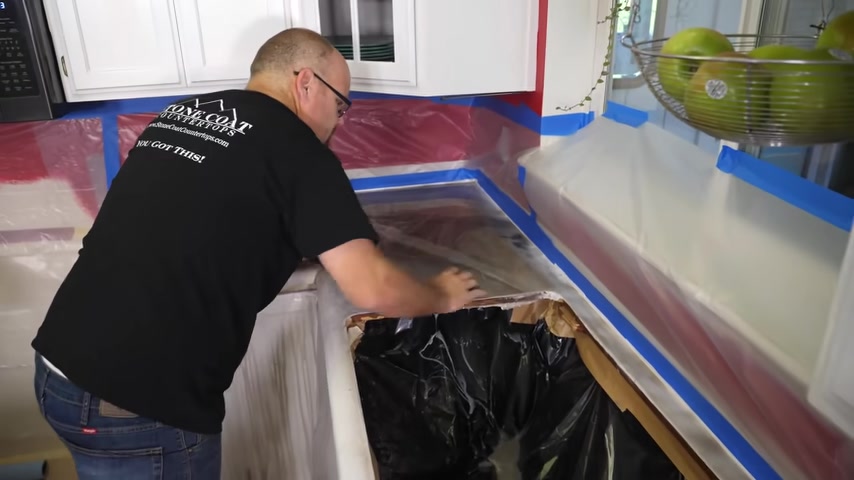
I'm actually gonna mask off the sink , cut out using a trash bag .
So it catches any drips and it doesn't go into the sink cabinet .
I'm also gonna mask where that plug meets the cabinet .
So nothing actually touches the cabinet .
Let's go ahead and oversize wherever we're prepping .
So we don't stress during the pour .
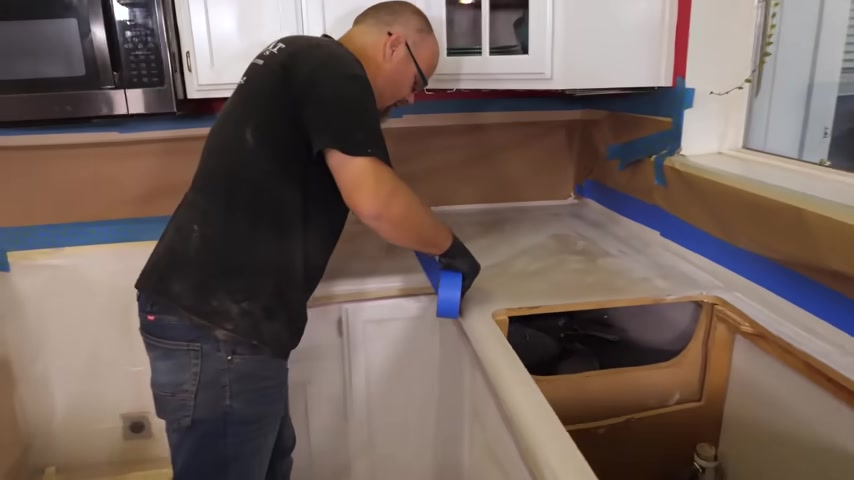
I'm going to temporarily use tape to mask a dam along the perimeter of my countertop .
This catches all the epoxy as I pour .
So it doesn't go over the edges until I'm ready for that step .
This catches all the epoxy that I can use as veins in different accents .
It's a great technique to do when you pour in place to control the pore .
I'll get my epoxy and accent colors all prepped and ready to go .
I'm gonna pre spray some of my edges to give it that effect .
So it matches the top surface .
This is a pro tip on how to make a realistic rock face edge .
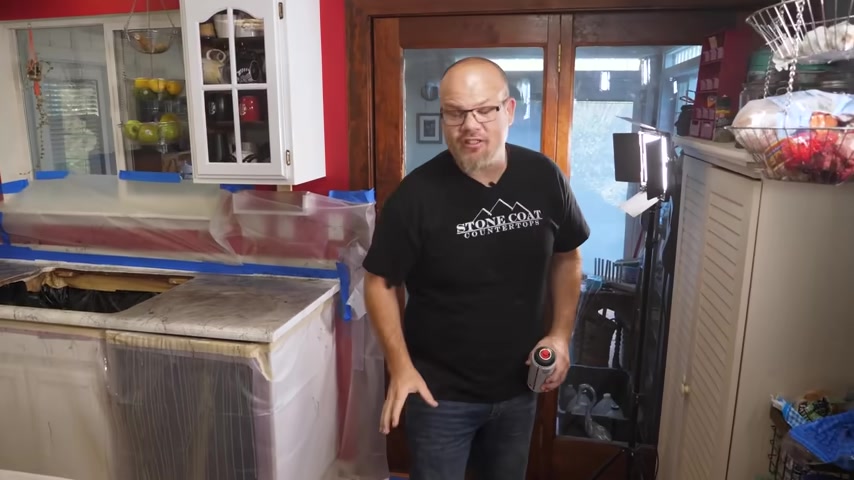
Hey guys , I'm one of the fellows working on this video .
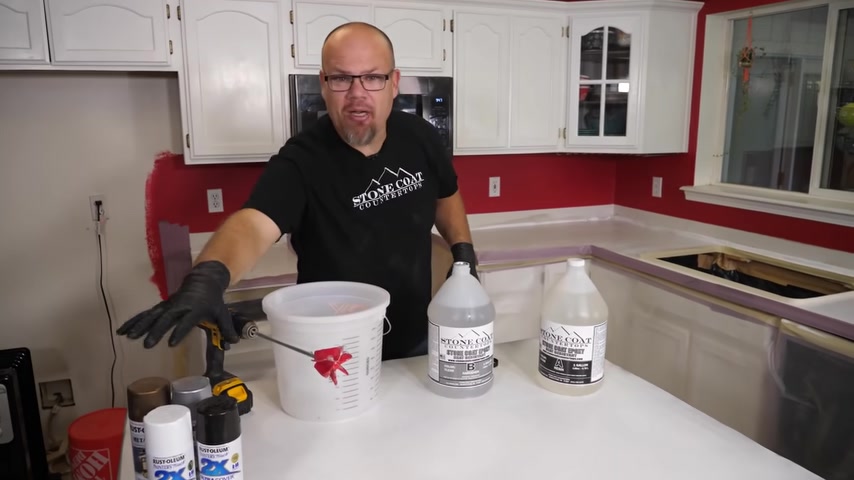
I want to make sure , you know , we have an entire kit that's made for this recipe as well as a few others that will help you save thousands on your next kitchen or bathroom remodel .

Click the link in the description below to be taken to that kit and now back to the video , this kitchen is about to thrive because we're at step five .
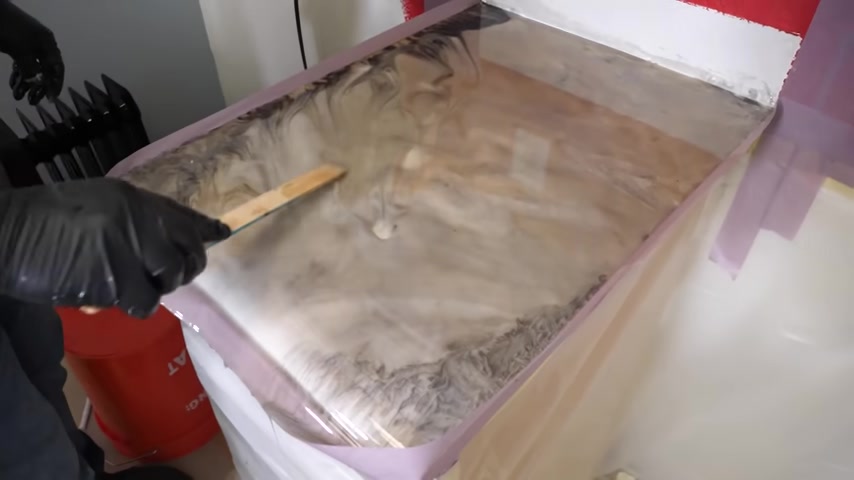
We're going to do the color code .
This is the epoxy , the colorant and we're gonna mix that into a bucket and pour it on the surface .
The epoxy undercoater is dry , we sand it with 220 grid .
Now we've taped the edges off that way .
We encapsulate and trap the epoxy until we're ready for it to flow over the edge .
We're going to start with our L shape .
Then we're going to do our backsplash and we'll finish with the island .
That's a pro tip .
We're going to use the island as our mixing station and we'll finish with that and then we'll walk away .
We'll turn the heat on in the house using a radiant heater .
That way it doesn't blow dust throughout the house .
It'll set up and tomorrow we'll do the clear coat .
Let's get started pro tip .
I'm going to use a little bit of Isopropyl alcohol and a rag just to wipe any dust left over from wiping the dust .
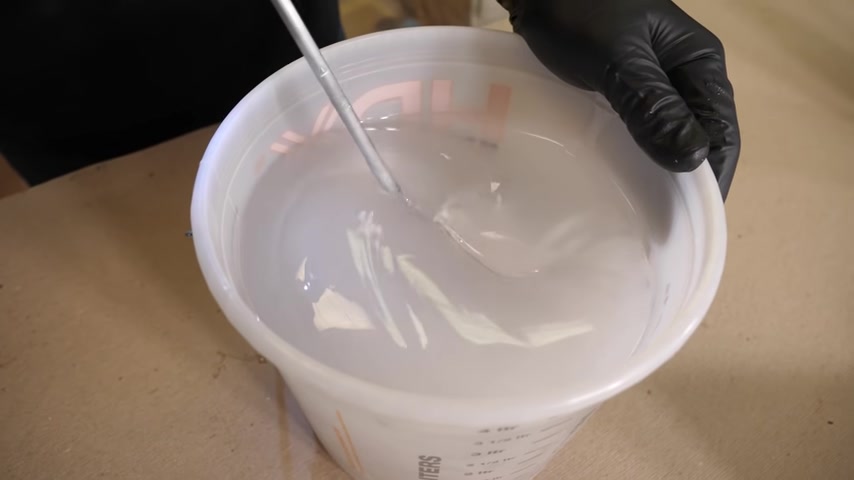
After Sandy guys , when you're mixing , we're going to mix part B and then we're going to mix part A .
We're going to do a 1 to 1 ratio .
We'll mix it for about two minutes using a drill .
Then we're going to use our spray paints .
This is what's going to give it its color and make it come to life and look like stone .
As we transfer the clear epoxy into another bucket .
We'll also add color periodically to give it that random look .
Then we're going to take that bucket and pour it on the surface .
After that , we'll peel the tape and let that flow over the edges in about three hours come scrape the drips .
I'll use a paint stick , a gloved hand or even an old credit card and scrape those drips off .
So the next day I'm drip free and I can apply the color code after mixing my clear epoxy .
I'm gonna transfer that into smaller pales .
This is where I'm gonna spray my different colors .
The different colors that I use will be mixed with my drill and I'm gonna use a vacuum to catch any overspray .
How many projects do you think you could do with one can of spray paint ?
A lot ?
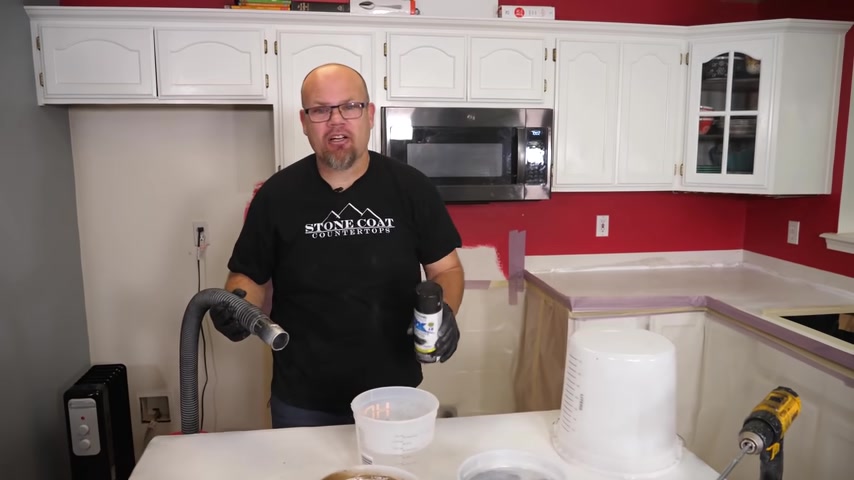
Man , a lot pro tip use a vacuum to extract your overspray to keep your work area nice and fresh .
Also to keep my countertops a little bit lighter .
I'm going to be quite conservative on the amount of black spray paint that I use .
I have less epoxy and I'm going to use less spray paint just to keep the black nice accents and undertones and not the loud portion of this project .
When you're mixing your colors start with the lightest color first .
Then when you put your mixing paddle in the next color , you won't contaminate a dark color within a light color and make it darker .
Does that make sense ?
That's a pro tip ?
Remember some of that spray paint is mixed into the epoxy and some were spraying between the layers of epoxy .
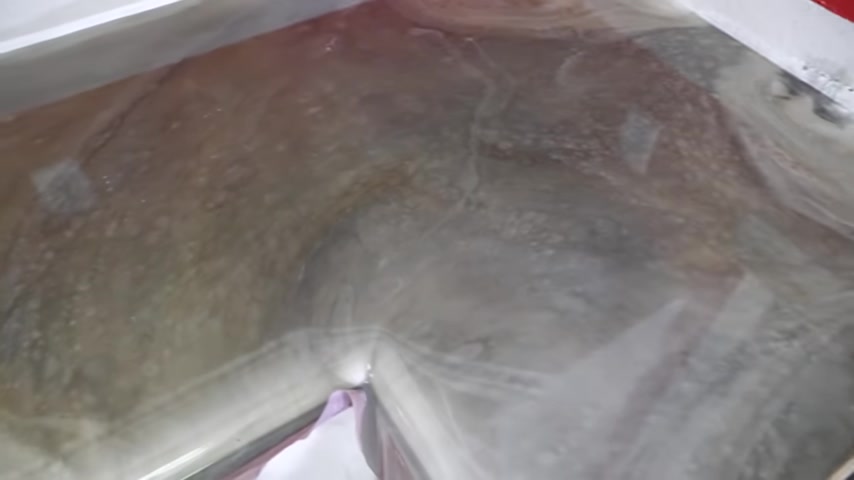
This gives you different effects that automatically make it look like natural stone .
This is how you do a dirty port like a probe .
Now , you know , OK .
Here's the game plan .
I'm gonna pour a stripe right in the middle of this , but I'm gonna keep the grain flow all going this direction on the L .
So it looks like it was cut out of a slab of stone .
Then I'm gonna do a diagonal pattern on the Accent Island here to make this the showpiece of the whole project .
When we have fixed counters in place , we can't tilt those counters .
So we're simply going to pour and let gravity do its thing .
You can also use a heat gun to move that around .
Even your gloved hands , those make great tools to move and manipulate the epoxy so that it all covers evenly as the epoxy begins to level over the edges .
I can grab that access and fill in any voids that I have left .
That's a pro tip .
So you don't get any waste .
You can also add that to the other counters that haven't been quite completed yet .
This also adds different colors into the mix that you can drag and create accents with that make it look more random and more natural .
I love the beauty in this recipe .
But remember you can customize this to your own space .
Any accent colors you want to add .
Don't be afraid .
You can also do a little research on our youtube channel on our website and see the multiple different options that you have to create your own dream kitchen .
Remember you're gonna save a lot of money too .
We're going to mask the edges of the island in the same form and fashion as the rest of the project .
But in this case , we're going to tilt that island .
This allows us to coat it using gravity .
It's a fun technique and I love doing it where it's possible .
We scraped out the buckets after mixing and used that excess epoxy to pre lubricate the island .
This allows the pore to slip and slide a little bit easier and to coat this quickly using the tilt method .
We're also gonna come back and add a few veins .
This adds real beautiful color and stacks those on the project to make it look very natural .
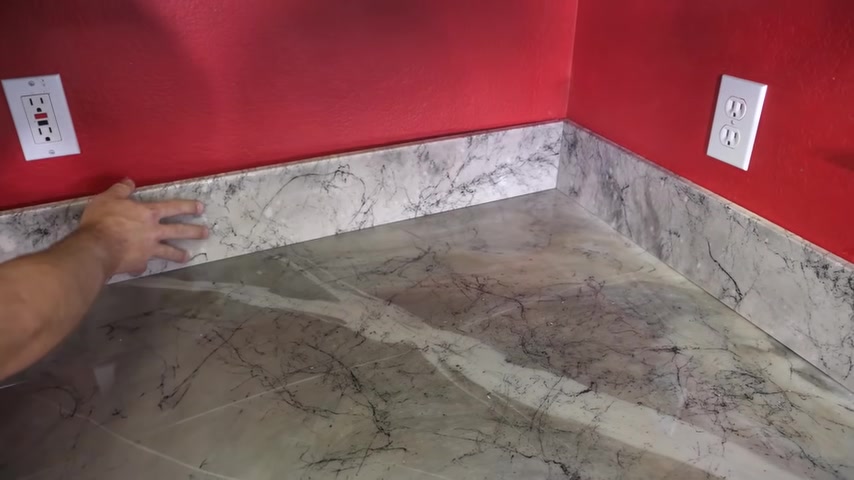
Now , it's time to coat the backsplash .
We actually made a little station in the kitchen where we used a piece of insulation foam to catch our drips and stacked it on buckets .
This was a great process to be able to pour any of the excess epoxy .
We had left to coat those backsplashes .
I also added a little bit of black spray paint into the bucket and poured that in the center of the splash .
The splashes were just a little bit too light for me and they didn't match the counters .

So by adding some black and tilting it and moving it around , I was really able to match that color that I had in the counters where these would be set .
Don't worry , this is a forgiving process .
If you want to adjust the color , use gravity , use heat , use a little bit of color and you can match it exactly to your desire after my pour , I'm gonna torch out the air .
You can use a heat gun or a torch and remove any air bubbles that are caused by mixing .
Now it's time to take off that tape that we created a temporary dam with rub out those edges using a gloved hand and you'll be ready for the next step .
That's step five .
That's the epoxy pour .
And that's the fun part .
But remember prior planning prevents poor performance .
We prepped this kitchen so we weren't worried about making a mess .
What we're going to do now is wait a few hours , we're going to come back and scrape the drips on the underside of these countertops that does two things that removes the bumps .
It also waterproofs that under lip to really make this tough and last long time in your kitchen environment guys , we'll be back in a few hours .
We'll take care of that .
But I am loving the contrast that we're getting here .
I got some darker areas in this section .
I come over to this part of the kitchen and it almost turns to caramel with a little bit of black veins .
And then I got this vein that comes through my accent Island and I love the rock face .
This really put the cherry on top of this project .
We'll be back in a bit when we come back to scrape drips .
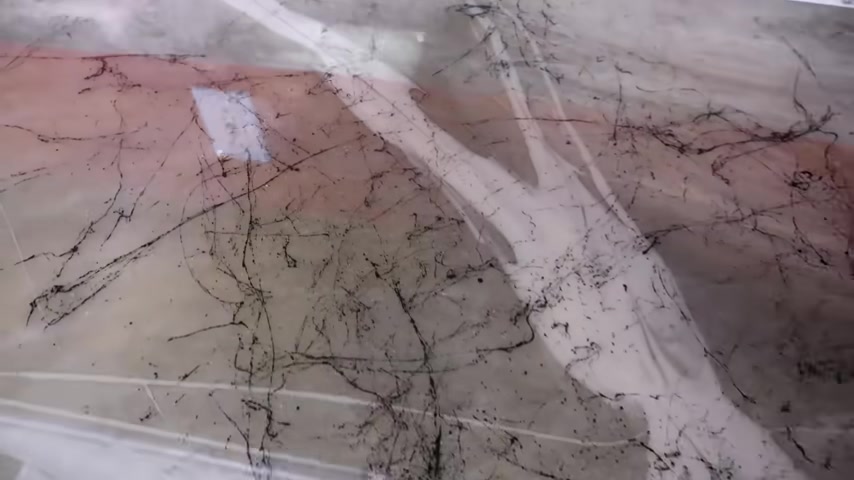
I like to scoop up the excess that may have fallen on the floor after it leveled and use that to create fractured spider veins .
You see the epoxy is gelled at this point .
So those veins don't like to travel much and they'll stay nice and thin and make it look like fractures .
This is fun .
I also use that same paint stick to scrape those drips underneath the countertop .

And after that , I'll use the gloved hand to remove any excess .
So it's nice and smooth and I don't have to sand after those drips have hardened .
That's a pro tip guys .
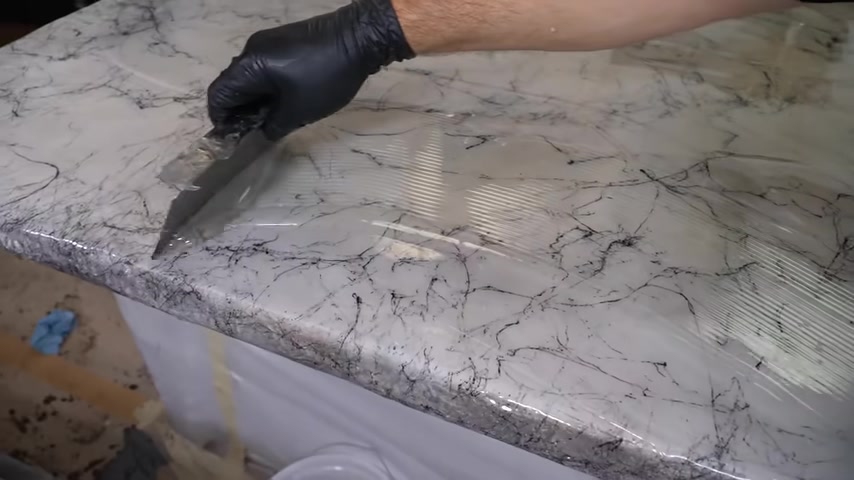
It's time for step six .
We're going to up level this project with marble spray .
We have multiple colors , black , white and silver available .
This actually gives you an enhanced look .
It's going to put fractured lines over this color coat to really give it an added layer of depth and realism .
Guys watch how we do this .
First , we start with the edges , then we do the major part or the field of the countertop and then we'll do our clear coat .
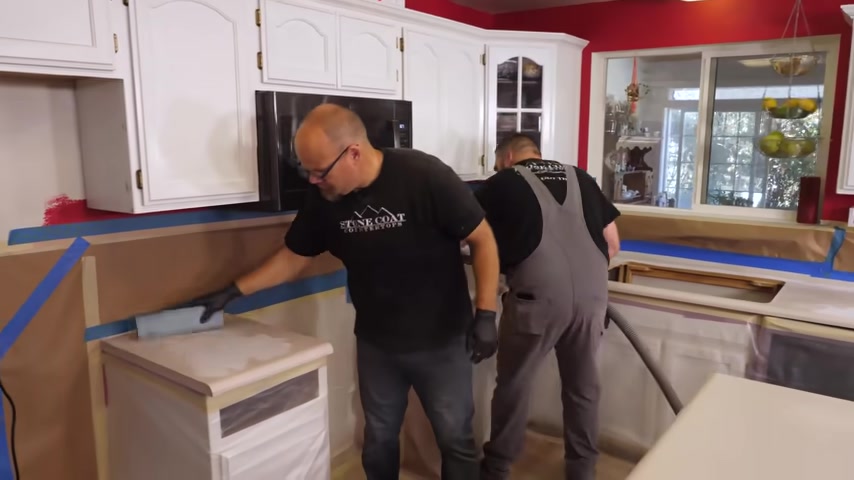
But first , we're going to sand with 220 grid .
This will make sure the clear coat adheres to the first coat that we did guys .
This is an easy step .
You don't need to be perfect .
All we're doing is roughing and scuffing , just scratch it up so that the next layer really grabs hold as a mechanical bond guys .
Again , we're going to use our 91% Isopropyl alcohol to wipe the dust off this surface .
So we have a clean surface to fracture our marble spray onto .
All right , guys , pro tip .
When we send you the marble spray , it won't depress .
There's a safety under this cap .
So pop the cap off and we have a little washer that washer doesn't allow the cap to depress and that's how we ship it safely .
So take that off .
So your marble spray will work .
All right guys , I'm gonna start on the edges first .
I'm gonna do perimeter all edges and then I'll fill in what needs to be done on the top .
This is so that I don't overdo the marble spray and I get just the right amount test your spray before you go on the surface .
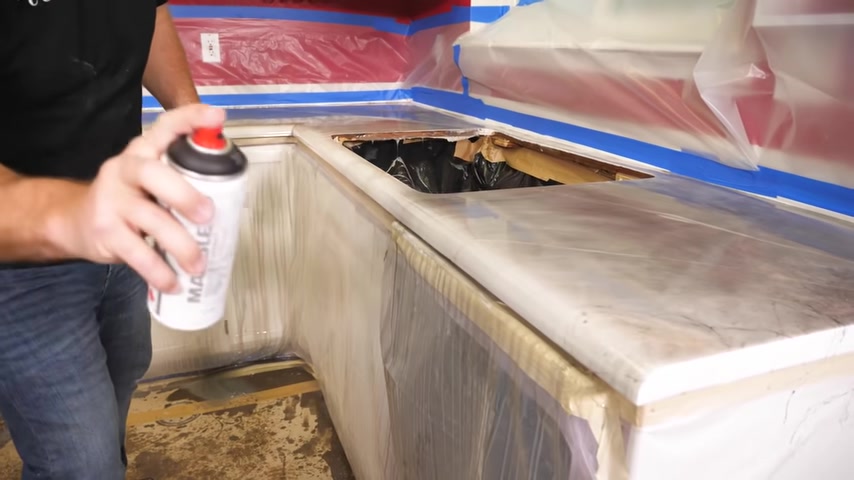
That way you understand how it comes out of the can a little goes a long way .
This one can , will do multiple jobs for me .
So don't worry , you'll have plenty .
Remember we have all the products we're using in this video right there at stone cook countertops dot com .
Wow , that looks good .
Ok .
I'm gonna go ahead and do the field now and we'll see what this thing looks like .
We have multiple colors of the marble spray depending on the desired look that you have .
If you like a lot of contrast over a light color , you can use marble black .
If you want some lighter tones , you can use our silver or our white .
These are all different effects to give you a different look .
All right guys , question of the day .
Did you like the marble effect after we did it or did you prefer it before the marble effect ?
Let us know .
I love it after the marble effect .
I can't wait to try it or I liked it better before the fracturing .
Let us know in the comments below .
Don't forget , do your backsplashes and face the top of the back splash towards the can .
So you get everything to match like a pro .
It's amazing to see this project come to life .
But even though this step looks good , I can't wait to add the clear coat .
It adds so much depth .
It makes it look like you're a faux artist .
I love that marble spray .
What do you guys think ?
Would you like the white , the black or would you like the silver over this kind of a color or would you like it the way it was if you choose to do the marble spray after you spray it , go through and break any of those strings that are hanging down this stuff dries really fast .
You can do that quickly .
Remember traditional countertops can cost thousands of dollars but stone coat epoxy costs $5 a square foot guys pro tip .
You notice that I have plastic up where that backsplash is going to go .
That's because that marble effect spray is obviously going to have a little bit of overspray .
So you want to catch that with some plastic , some paper , some newspaper , cardboard , whatever you choose to block that spray , I'm going to pull that down .
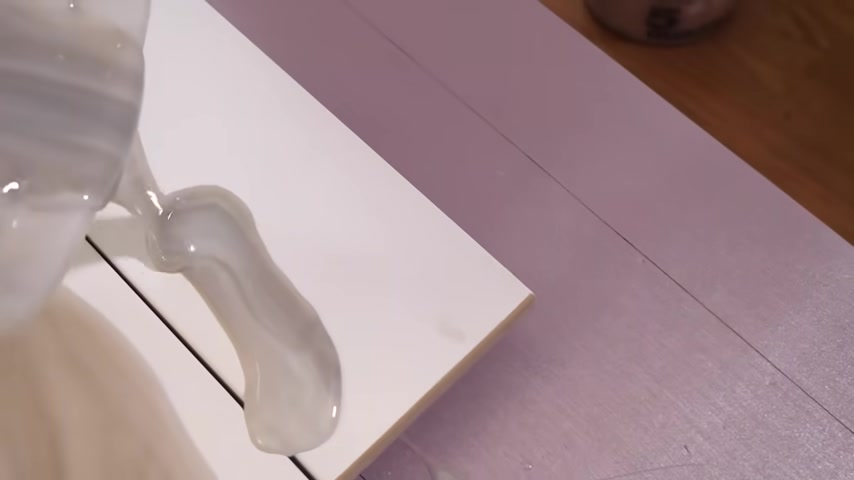
Now , I'm going to pour the clear coat , going to add 1 to 1 ratio like we did yesterday with no colors .
It's the same stone coat countertop , epoxy and we've heated it up , we put it in front of a space heater .
It's going to flow like a dream .
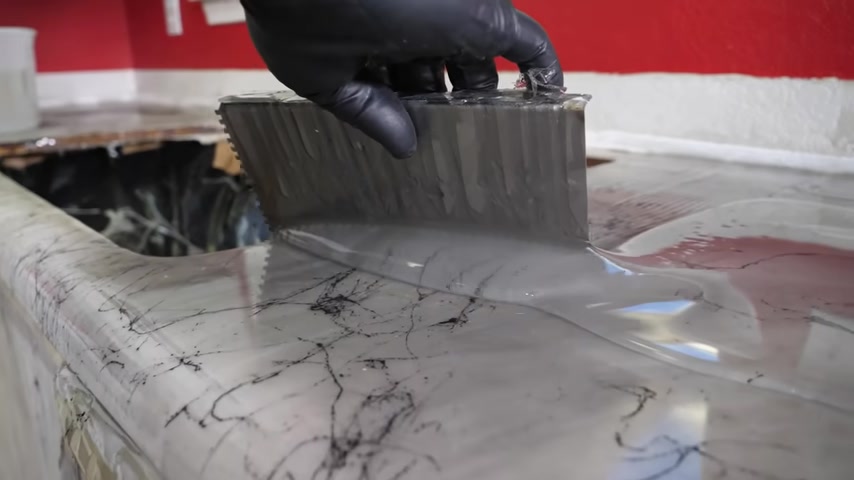
But in this case , instead of pouring it out of a bucket , we're going to pour it and Tral it , we're going to gauge that with our 1/8 by 18 square notch trail .
This allows it to spread nice and evenly .
Then we're going to chop that surface just to ensure everything is mixed and we hide those troll after that , we'll come back and scrape those drips in about 3 to 4 hours .
Then tomorrow we're gonna de prep this thing .
We're gonna be all done and we'll get ready to put that kitchen sink back in and get this countertop back to use .
Ok , guys , because this island is removable .
I'm gonna take advantage of that .
I'm gonna pop it off , use this as my mixing station and we'll finish with the island so that we can put it back on and pour it .
And we're all set up , guys .
Remember the marble effect spray dries really fast .
There's really no waiting time .
It'll be ready for clear epoxy after about 10 minutes of drying .
That's awesome .
Again , doing a clear coat is simple .
We'll start with part B and we'll do part A .
We're going to use three ounces per square foot on this coat .
Then we're going to mix for two minutes using a drill .
We'll pour it out , we'll try it , we'll chop it and then we'll torch the bubbles out .
The bubbles come out super fast .
That way we can mix with the drill and then train a little air .
But the torch will remove those .
If you don't want to use a torch , you can also use a heat gun .
I'm gonna begin in one end of the kitchen with my clear epoxy .
I have no color in it .
It's just clear .
I'm gonna use my 1/8 inch square notch trial to gauge the depth .
So I get an even coat here .
This is the finished coat .
We want it perfectly level .
After I spread that out , I'll scrape the excess back into my fixing cup .
This , I can pour that back wall any little sliver like that and not make a big mess .
It's really easy to control and I have plenty of working time .
So I don't need to be in a hurry .
I'll just work my way around that kitchen by using that same technique , scrape the excess into the bucket and I'm ready to move on .
I no longer need my mixing station I'll slide my island back into place and I'll do the same process and procedure on the island .
Ok .
Guys , now that the clear is all trolled out on the surface , we're going to chop the surface using our chop brush , then we're going to come back and torch it .
Make sure you brush those edges out horizontally with that chop rush and you'll get beautiful coverage .
Remember , just chop the entire surface in a random pattern .
It's that simple chopping mixes the material one final time as well as removes any of those trial lines .
It's a great step to ensure you have a uniform cured finish .
Guys .
Did you know that stone coat epoxy is eco friendly ?
There's no noxious smell .
It's also heat resistant .
You could set hot pans directly on the surface .
It's U V resistant , scratch resistant .
It's perfect for your kitchens and bathrooms .
It's food safe .
It's impact resistant .
It's been tested by customers and contractor approved when it's time to remove the air bubbles .
I'll simply sweep the surface with my torch again .
You could use a heat gun as well .
I'll do this multiple times typically three times .
I'll let the countertops rest for about five minutes and come back and torch it again .
Pro tip guys do a final sweep , go through and scan the surface .
Look for any little micro bubbles that might be sticking up and the torch hammers those out right away .
Sweep it before you leave it .
All right , we're gonna come back in a few hours , just like yesterday , we'll remove those drips and then tomorrow we'll take all the prep work down , we'll clean the kitchen up , slide the fridge and stove back into place , install the sink and we're all set .
That's how you clean a bucket .
If you let the epoxy set up in a bucket and you pull it out a couple days later , that's how you clean the bucket efficiently and perfectly .
When you take all your masking off , start from the top and work your way down .
Put everything onto that floor material , roll it up like a burrito and clean up as fast .
Use the opportunity with the stove and the fridge out of place to do a deep clean before you put them back in .
I like to make my backsplashes piece larger than necessary .
So after I pour them , I can use a wood , tooth saw blade to cut through that epoxy and wood and give myself a factory finish .
All right , let's go get the parts we need for the sink .
We're going to cut this back , splash flush and we'll be back to finish the install after you make your backsplash , cut the bottom side of it .
That way you get a nice tight fit to that existing countertop and it looks much cleaner .
You're going to get some drips bumps and imperfections on that bottom .
When you pour , just cut it off and you'll have a factory edge after dry fitting all of our backsplash .
We're ready to adhere it to the wall using 100% silicone .
Just a few dollops , evenly spread and it'll adhere for life .
Now it's time to seal the joint between the backlash and the countertop .
We're gonna pre mask using blue painter's tape and we've gotten some silicone that complemented the color of our countertops .
This is a very , very light gray silicone and it worked out perfectly for this recipe .
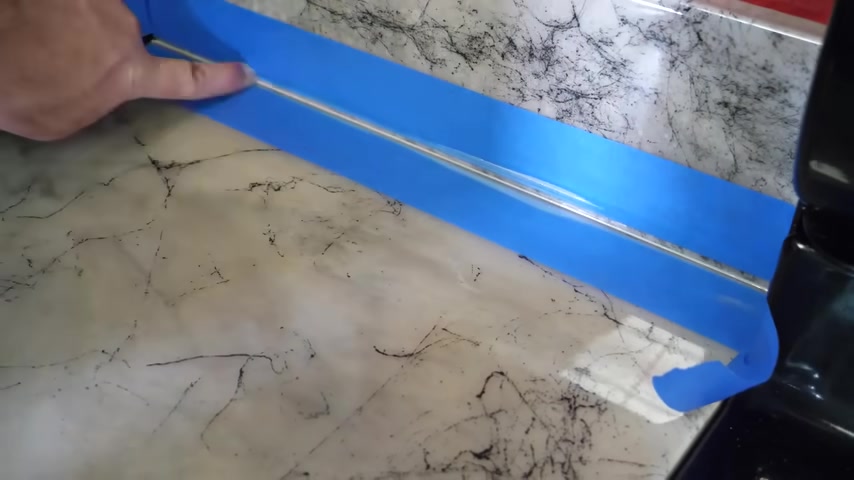
The best method to create a nice tight seam is to use your finger and push that silicone in place after that , remove the tape and it's gonna look amazing .
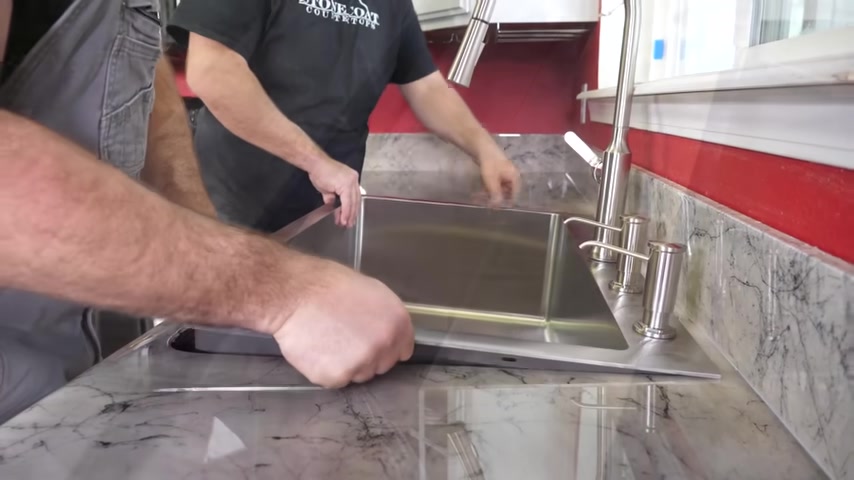
I used some plumber's putty to install the flange of the garbage disposal into the sink .
I also pre installed the faucet and soap dispensers so that when I dropped the sink in , I was ready to hook up the connections and test it out .
We use the same method as the backsplash to create a leak proof seal around the perimeter of that sink .
Remember we have videos on how to do under mount sink installations as well .
Just check the description below .
We love to use our liquid smooth cleaner to finish the job , right ?
It makes the countertops feel as slick as glass .
Remember the difference between good and great isn't much .
So go ahead and try a practice sample board , even go down to your local thrift store and get an old end table test your recipe and your epoxy skills .
You'll get a little bit of experience and you can do this in your own space .
That's a pro tip .
Thanks so much for watching everybody .
Did you change your mind about the marble spray ?
Be sure .
And let us know in the comments below .
Click the link in the description below to be taken to the epoxy kit for this recipe .
We'll see you on the next remodel you got this .
Yeah .
Yeah .
Partnership
Are you looking for a way to reach a wider audience and get more views on your videos?
Our innovative video to text transcribing service can help you do just that.
We provide accurate transcriptions of your videos along with visual content that will help you attract new viewers and keep them engaged. Plus, our data analytics and ad campaign tools can help you monetize your content and maximize your revenue.
Let's partner up and take your video content to the next level!
Contact us today to learn more.