https://www.youtube.com/watch?v=zGokZUj6jXI
DIY Teddy Bear Balloons _ Baby Shower Centerpiece
Hey , welcome back to my studio today .
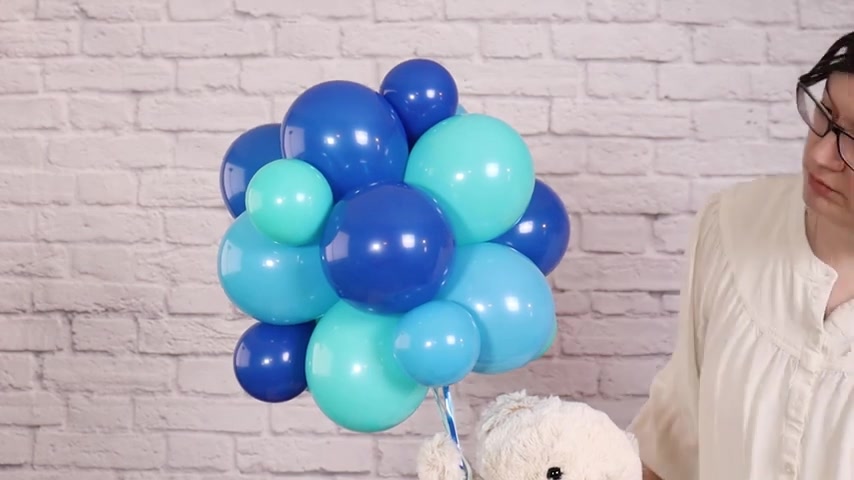
I want to show you how to put together this teddy bear balloon arrangement .
It will be an adorable addition to a baby shower or a birthday party and it comes together really quickly .
So follow along and I'll show you how to make it .
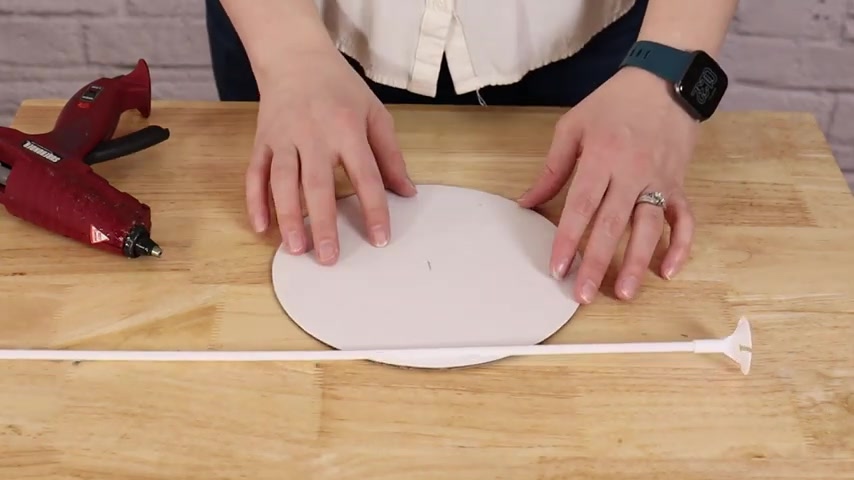
The base of this design is made from a 20 inch balloon stick and cup .
Then I'm going to adhere to the very center of this six inch round cake board .
Now , you can make a circle out of any piece of cardboard .
But when you buy a cake board , it's already cut into a perfect circle .
So I'm going to find the center point of that piece of cardboard and then just hot glue , the cup of my balloon stick directly to that board , making sure it's nice and centered .
I also want to add a little bit of hot glue between the cup and the stick and that'll make it so that if anyone picks up this design by the balloon stick , it won't pop off while they're trying to carry it .
I'm using 34 5 inch balloons in various shades of blue for this design .
And the first thing we need to do is create two sets of five to make up the base , one of those sets of five , I'm going to inflate all those balloons to two pumps of air each .
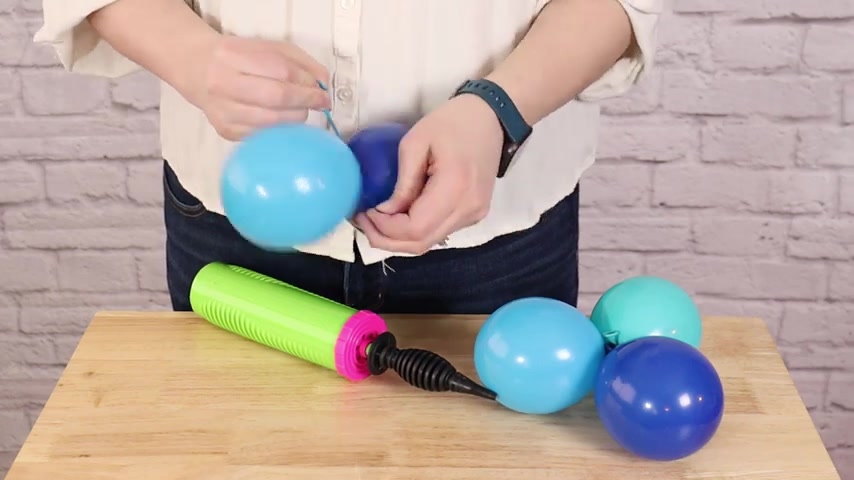
Then I'm just going to tie off each of those balloons and then repeat this until I have five individual balloons inflated to two pumps each .
I'm then going to tie those into pairs just taking the nozzles and twisting them together .
But we need to make a trio and a pair to create our set of five .
So I'm going to take one individual balloon and tie it to the nozzles of one of my pairs creating that trio .
I tied my other two balloons together into a pair and then brought the pair and the true together so that the nozzles touch , twist them together and that's going to create our set of fives .
So this is one layer of our base and we're going to do the exact same steps , but instead of two pumps air , these are going to be inflated to four pumps and this is going to make them slightly larger and we will create the lower part of our base .
So go ahead and inflate five balloons in various shades of blue , create a trio and a pair and then bring the two together , twisting the nozzles around , so they lock into a set of five .
Now this will complete the base of our design and we can move on to the globe part or the upper part of this design for this section .
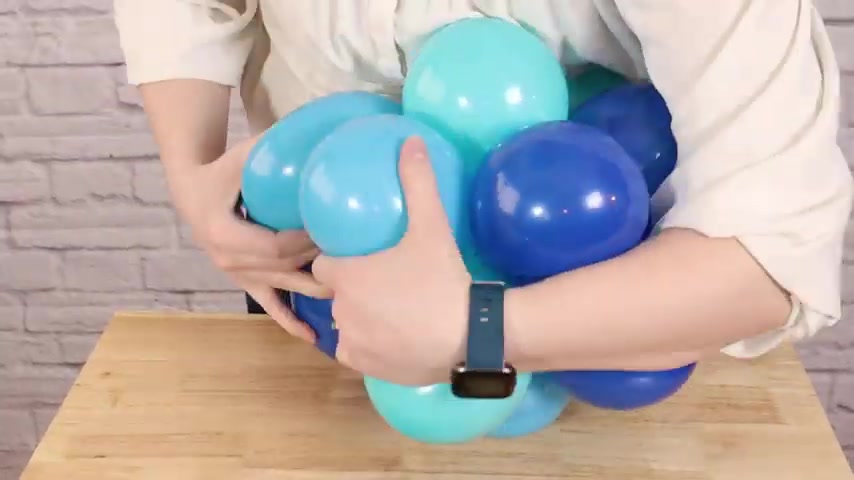
You're going to need to inflate 12 balloons to four pumps each and then tie all of those balloons into pairs .
Once you have all those pairs together , we're going to bring those into one large grouping or making globe .
So take two pairs and twist them together just like you would with a quad , But we're going to bring another pair into this sliding it so that the nozzles touch and then bringing those two new balloons around and twisting them together by always making sure that the nozzles touch in the center of this arrangement .
It will assure that this comes out as a spear , keep adding pairs until all six of them are joined together and then take a good look at all sides and switch around the balloons until you're satisfied with the color arrangement , making sure there aren't too many of the same color right next to each other .
Finally , we need to inflate 12 balloons to a single pump of air .
Now , we want these to be really tiny accents for our globe up above .
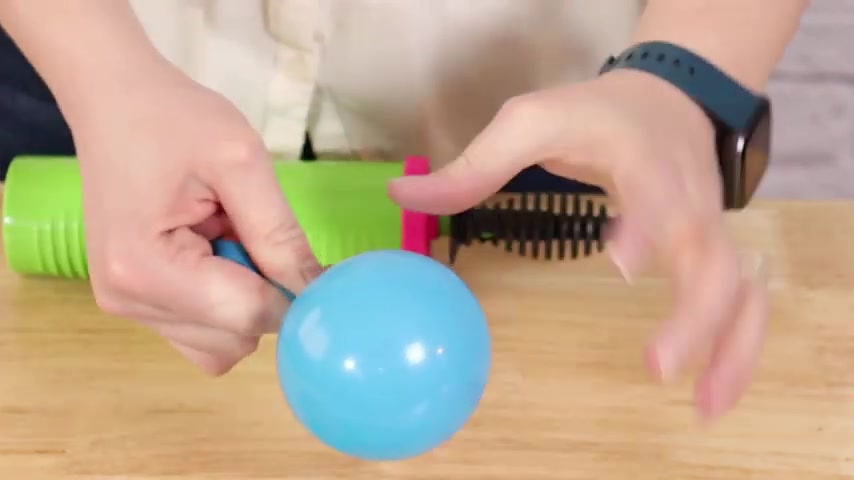
So you want to push the air right to the end of the balloon and tie a knot so that you leave a really long tail because this tail will need to stretch across the entire center point of our globes .
So we want to create these tiny balloons with long nozzles on them .
So go ahead and inflate all 12 of these and then we're going to tie them together into pairs .
So take two nozzles and tie them together just like you did before .
But these make sure the knot is at the very , very end of those nozzles .
So we get a nice gap between our tiny balloons to camouflage my cardboard base .
I'm going to take two sheets of tissue paper and fold them into quarters and cut out a circle .
I want that circle to be slightly larger than my cardboard base and that'll help camouflage so that no white or brown cardboard shows through between my balloons .
So I'm going to set my base right on the corner of where I folded it and make a line about two inches larger than that base .
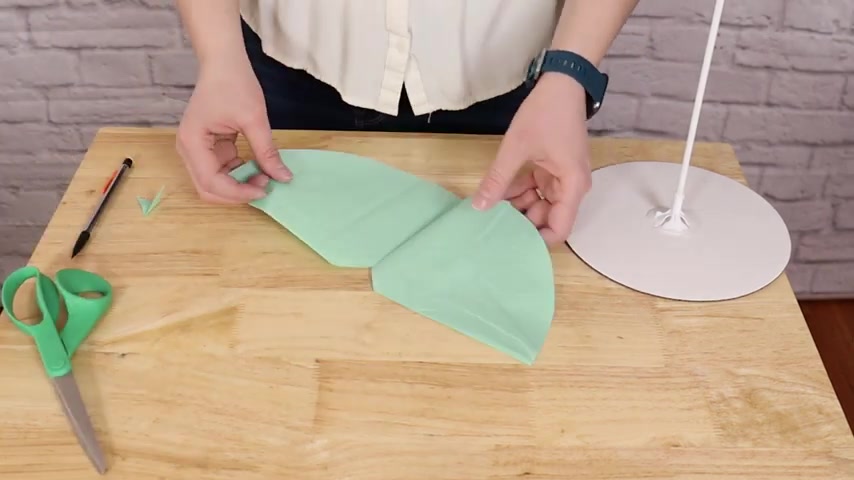
Cut it out with a pair of scissors and then also cut off the very tip where we folded that corner and that will give me a nice circle to place right over the top and camouflage all that cardboard .
Now , let's add the balloons .
So I'm gonna take my first set of five , which is the balloons filled with four pumps of air .
And I'm gonna slide that set of five right around the balloon stick .
So the balloon stick is touching the nozzles and the two balloons that went around that balloon stick .
I'm gonna twist those around each other and that will lock these set of five balloons to the stick .
Now , you want to be a little careful as you rotate this around .
So you don't actually rip the tissue paper that we just added .
So try and lift the balloons up slightly as you twist them around and they'll be snuggly attached to the pole now because we have a mix of colors .
I do want to make sure that I'm changing around the different shades of blue .
So they don't have two of them next to each other that are the same color .
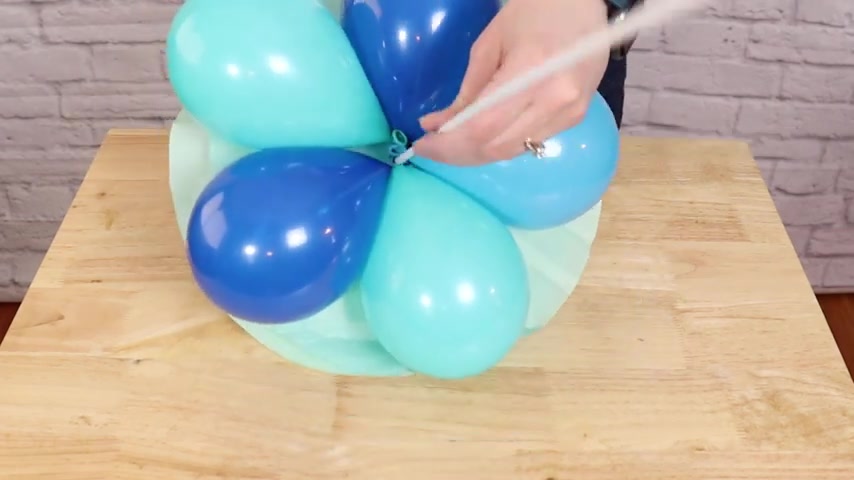
So once you're satisfied with the arrangement of those colors , they're nicely attached to the pole and we can add the next set of five .
So this will be the set that has two pumps of air in it and we'll add it in the same way right on top .
So take two balloons , go around the balloon stick and twist them together .
Now , you want the balloons in this set of five to nestle between the balloons of the lower level .
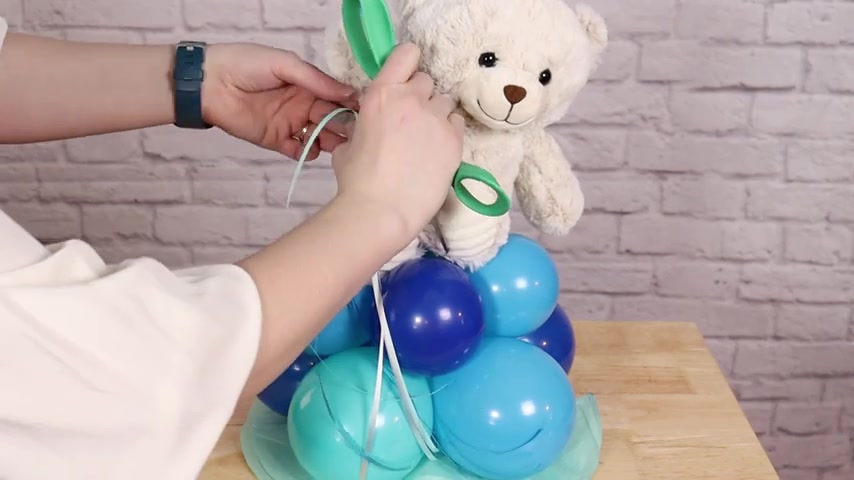
You can do this by gently pressing down on them slightly to make sure everything is nice and snug and ready for the next layer to make it look like our teddy bear is holding onto balloon ribbons instead of the balloon stick .
I've cut a couple of pieces of curling ribbon to 24 inch lengths and I'm gonna attach them to a single piece of clear tape .
So I'm gonna lay that tape sticky side up and then take the end of all my pieces of curling ribbon and place them right onto the sticky side of that tape .
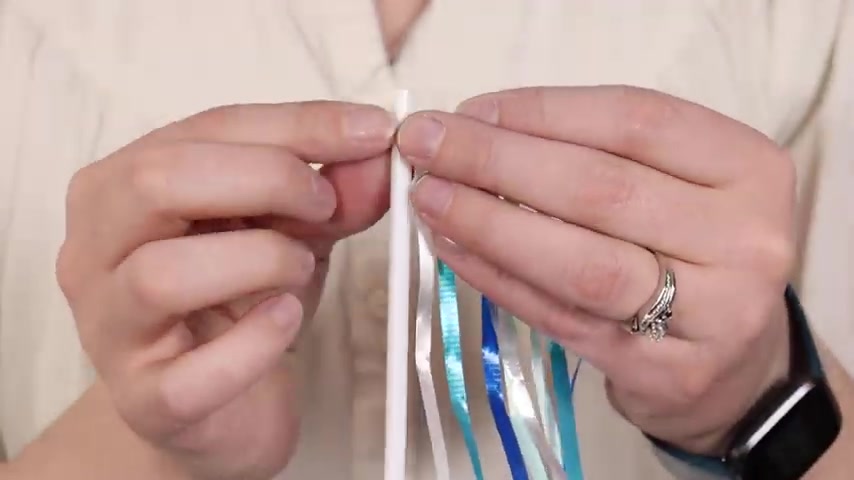
And that's gonna make it really easy to attach this to the top of our balloon stick , simply align the tape with the top edge and wrap it around until all of the tape is adhered to the stick .
Now , we can finally add the star of this arrangement , the teddy bear .
I'm gonna place him right on top of the base balloons and wrap his legs around the balloon stick .
And I want to make sure that he stays on this balloon arrangement and I don't have to worry about him falling off .
So , what I'm going to do is using some small rubber bands and I'm gonna attach the shoulder of the bear directly to that balloon stick .
So it doesn't fall off when transporting this or when it's just on display .
So I'm using some of these mini hair tie rubber bands or you can find these in the craft section .
Sometimes I'm just going to take that and put it over the balloon stick , wrap it around a couple of times and then bring it down to about where the shoulder of the teddy bear was making sure that goes over the top of all those ribbons .
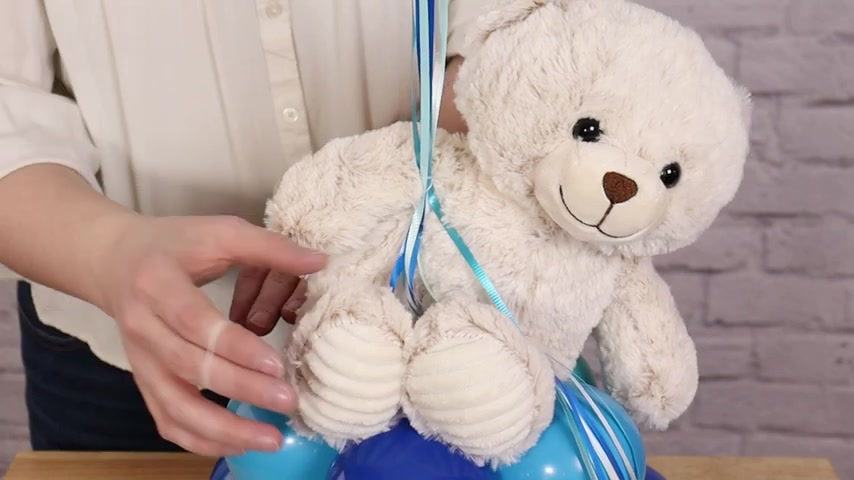
And then I'm going to bring the teddy bear back , put him right where he was and then put his little arm through that rubber band making sure it's coming right up to his shoulder .
So he's nice and secure to that pole .
Now , I'm also going to add some rubber bands in a couple other places , so he tips a little bit more than I would like with just the shoulder attachment .
So I'm also going to put a rubber band over his foot and wrap it not only over his foot but over the balloon that's below his foot and that's going to help make sure that he doesn't tip too far off of this arrangement .
The third rubber band I'm gonna place on the teddy bear's hand .
So it looks like that he's holding onto that string and he's not just hanging out next to the ribbons .
So , just like I did with the shoulder , I'm gonna wrap that rubber band around the pole a couple of times and then pull it down and put just the little hand through the rubber band and that will hold it all in place .
And the great thing about this teddy bear is he's a little fuzzy .
So you can't see these rubber bands through his firm .
Next , I'm going to secure the globe to the top of the balloon stick and I'm gonna adhere it in place using a couple of glue dashes right on the very top of that stick .
This will just make sure the globe doesn't actually pop off while in transport .
So pull the balloons away from the top of the stick .
And then once you've got it in place , press those balloons in so that they attach to that adhesive .
And then to this , we're going to add all of those tiny balloons .
And this is just gonna add a little bit more texture and interest to that globe to add these pairs place one balloon in a gap between some of those larger balloons and then pull the other balloon down across onto the other side of the globe so that the nozzles of those two tiny balloons fit right between the nozzles of the larger balloons of the globe .
Then just repeat this step until you've got all of the pairs attached , keeping a close eye on your color distribution .
So you don't get too many of the same color right next to each other .
The final step is to arrange the ribbons so there aren't any clumped up spots under the rubber bands and to do a loose curl on the ends of all of the ribbons .
So they have a nice , gentle cascade down the side of the design .
I hope you're inspired by today's project and give this a try .
I cannot wait to make another one of these with a different stuffed animal and change up the balloon color combinations .
There are so many different cute possibilities for this project and I hope that you'll get a chance to make one too if you enjoyed today's project , hit that like button and subscribe below if you'd like to see even more party and event content , check out our Patreon group , I'll have it linked below where you can see even more behind the scenes , glimpses of the projects I do here and some more tips and tricks .
So until the next time you can check out some of my other videos over here and remember .
Stay creative , everybody .
Bye .
Are you looking for a way to reach a wider audience and get more views on your videos?
Our innovative video to text transcribing service can help you do just that.
We provide accurate transcriptions of your videos along with visual content that will help you attract new viewers and keep them engaged. Plus, our data analytics and ad campaign tools can help you monetize your content and maximize your revenue.
Let's partner up and take your video content to the next level!
Contact us today to learn more.