https://www.youtube.com/watch?v=djnNkLi_K6E
How To Make The Best Croissants At Home
What's not to love when it comes to croissants , flaky on the outside , soft and buttery on the inside .
They might just be our favorite French pastry though , easy to enjoy .
Croissants can be difficult to perfect , especially if you're making them at home .
The process takes practice and a lot of patience .
But trust us when we say it's worth it .
We tested hundreds of croissants to bring you the best classic croissant and have you bacon like a pro .
So let's get into it .
We're gonna start by making our dough .
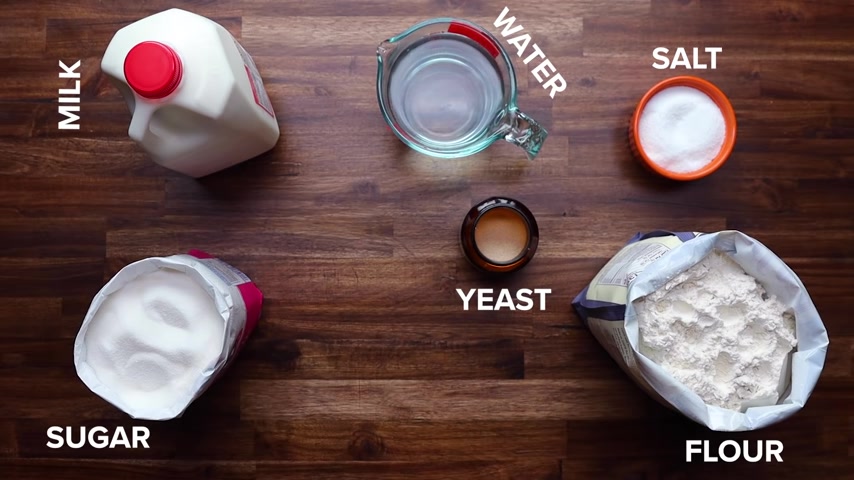
Our dough consists of eight ingredients , milk , water , flour , sugar , salt , yeast , malt and butter in a large bowl .
Combine the milk and water .
A lot of croissant recipes call for just water .
But we found that a combination of water and whole milk creates that tender crumb .
We want the added sugar from the milk will also help us achieve that deep copper color .
Ok .
Next , we'll add the flour .
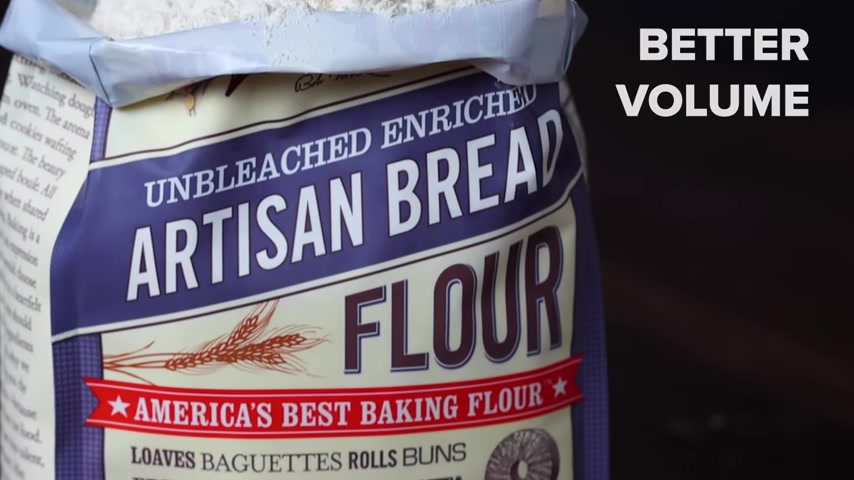
We're using bread flour because it's high in protein and one of the strongest flowers available , it's gonna help provide the structural support for our dough .
The extra protein in bread flour makes for better volume .
Chewier crumb and more browning in the crust .
Now add our sugar , salt , yeast and malt for extra flavor .
The last ingredient for our dough is unsalted butter .
Not all croissant recipes use butter in the dough , but we found that a small amount of butter fat in the dough helps during the lamination process .
We'll mix this together with our hands until the dough resembles a shaggy mass .
We don't want to develop gluten here .
We just want to hydrate the flour and create a unified dough .
Trust your instincts here .
If your dough feels too wet like this , it will be more difficult to roll out , which will cause the butter to shatter .
When laminating , you can always add a little bit more flour .
Here .
If your dough is too dry , it'll begin to tear during rolling and eventually bake into something more similar to a bread roll than a pastry .
Unfortunately , there's really no fix for this .
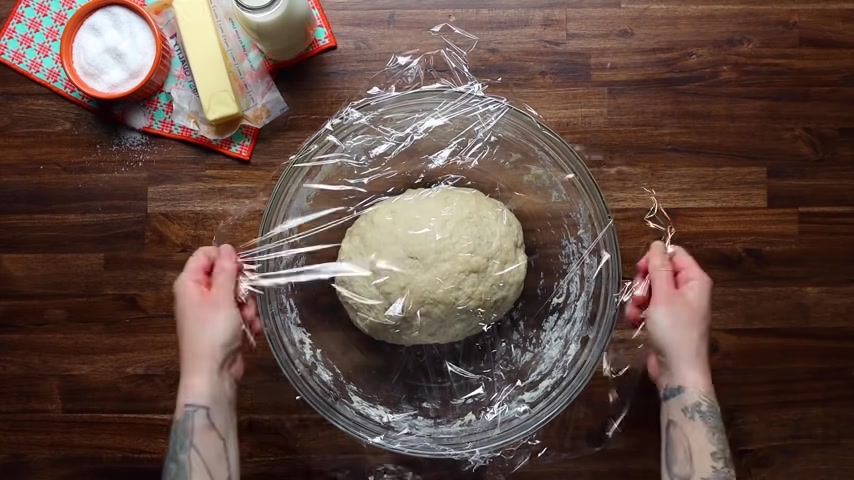
Cover the bowl with plastic wrap or a kitchen towel and allow the dough to rest at room temperature until it rises to about 1.5 times its original size and has a slightly puffy texture .
This will probably take about an hour depending on the temperature of your kitchen .
OK .
This looks good .
We'll punch down the dough and trans it onto a piece of plastic wrap , then gently press the dough into a rough eight inch square .
There we go .
Then we'll wrap the dough tightly and refrigerate for at least three hours but preferably overnight .
Let's move on to one of the most crucial steps of croissants .
The butter block or barrage .
It's really important to use a high quality butter .
We recommend using European or European style butter because we're looking for at least 84% butter fat that's going to help give our croissants that famous honeycomb finish , make the butter block place a sheet of parchment paper on a work surface with the long side nearest to you .
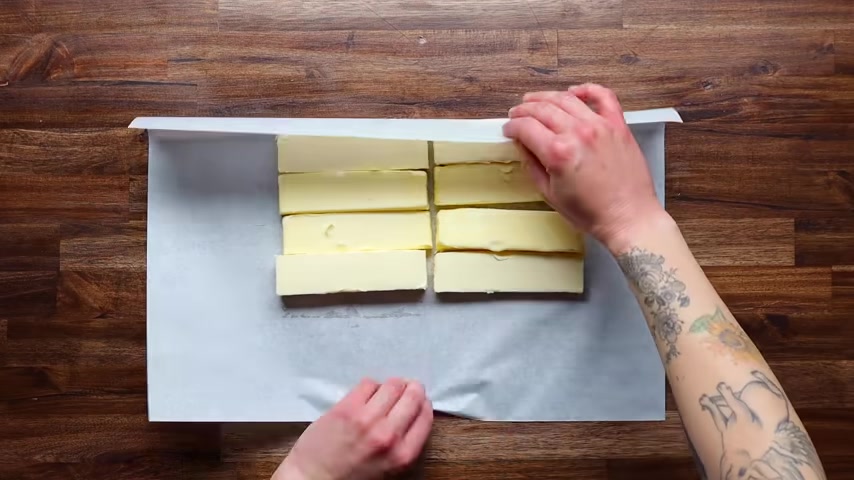
Next , we'll slice the butter into quarter inch thick pieces and arrange the slices in a single layer like tiles , fold the edges of the parchment paper to encase the butter and flip the packet over .
So the seam is facing down , we'll let the butter packet rest at room temperature until it's soft but not greasy chilled .
Yet .
Pliable is what most recipes will tell you .
We essentially want the butter to be a little bendy but not break for us .
It took about 30 minutes for our butter to reach this consistency .
Then we'll take a rolling pin and roll it over the packet to distribute the butter in an even layer all the way to the edges and corners , leaving no spaces between the tiles and there you have it , place the butter packet in the refrigerator to chill until you're ready to laminate .
All right , let's laminate .
First thing we need to do is lock the butter into the dough to do this .
We want to make sure that our butter and our dough are about the same temperature and texture .
Simply hold the butter in one hand and the dough on the other hand and feel them .
We'll dust our work surface very lightly with flour .
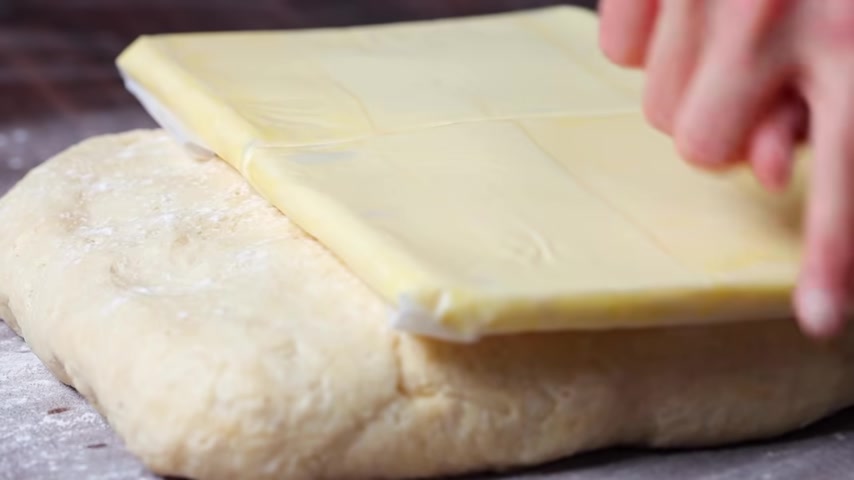
We will use our butter block as the guide to how large we roll out our dough .
We want to roll out our dough to be about the same width and about twice the height of our butter packet .
Once the dough is rolled out , place the packet , butter side down on the bottom half of the dough , leaving about a half inch of space around the edges .
Once you have the butter in the correct spot , carefully peel back the parchment paper to release the butter .
Now fold the top half of the dough over the butter stretching it ever so gently so that the edges of the dough reaches the exposed edges beneath the butter .
Use the palm of your hand to gently press the side and bottom edges of the dough together to seal the packet closed .
Look at this , our dough looks sort of like a closed book .
So moving forward , we'll call this the spine side and this will be the page side .
We want to make sure that the butter rolls out evenly .
So we'll use our rolling pin to firmly press the dough and begin distributing the butter to release that tension from folding the dough onto itself .
We'll use a serrated knife to cut down the middle of the spine .
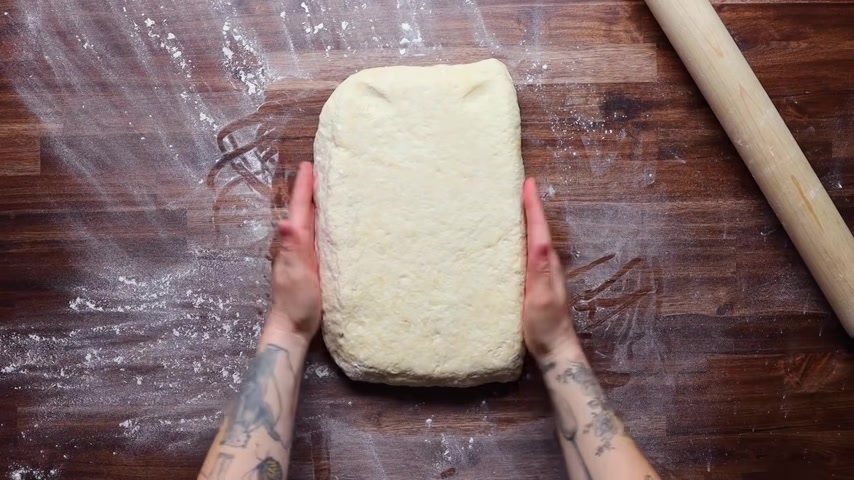
Now , make sure to orient the dough so that the split spine is closest to you and begin rolling .
Continue rolling until the dough is about 12 inches high , fluffing and moving the dough to make sure it doesn't stick to our work surface .
Once we have the height , we want to roll the dough until it's about a quarter inch thick .
It's time to make our first fold fold the butter third of the dough up and the top third of the dough down kind of like folding a letter .
Hence why we call this fold a letter fold .
We want to continue rolling out to about the same size rectangle we had before with a quarter inch thickness .
If your rectangle gets a little wild and has some rounded edges , you can use a serrated knife or a pastry wheel to straighten out the sides .
We want to keep as close to a perfect rectangle as possible for optimal layers .
Now , we're ready for our second and final fold .
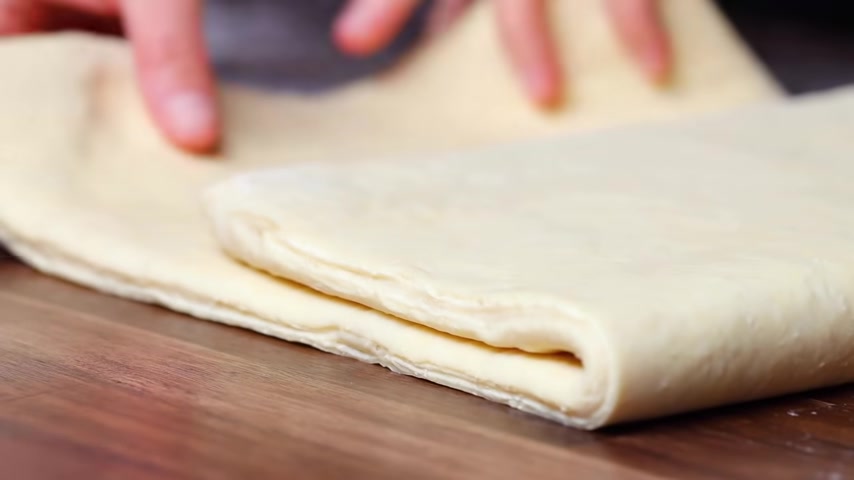
Fold the left two of dough over itself to just pass the center of the dough , then fold the right third of the dough over itself towards the left so that the edges meet , gently press the two ends together to make a seam that resembles an offset book spine , then fold the left side of the dough over to meet the right edge of the dough .
This is called the four fold .
A lot of recipes will have you resting and folding the dough three and four times to create a crazy amount of layers and show off that iconic honeycomb structure .
However , we found that although fewer creates fewer layers , they're more distinct layers and honestly give the croissant our favorite crumb texture light with just enough chew .
Plus it's a little less labor intensive .
Our croissants are really shaping up , but actually let's get to shaping these babies .
Now we got to roll the dough out one more time and you guessed it get back down to that quarter inch thickness .
For this next part , we like to use a pastry wheel .
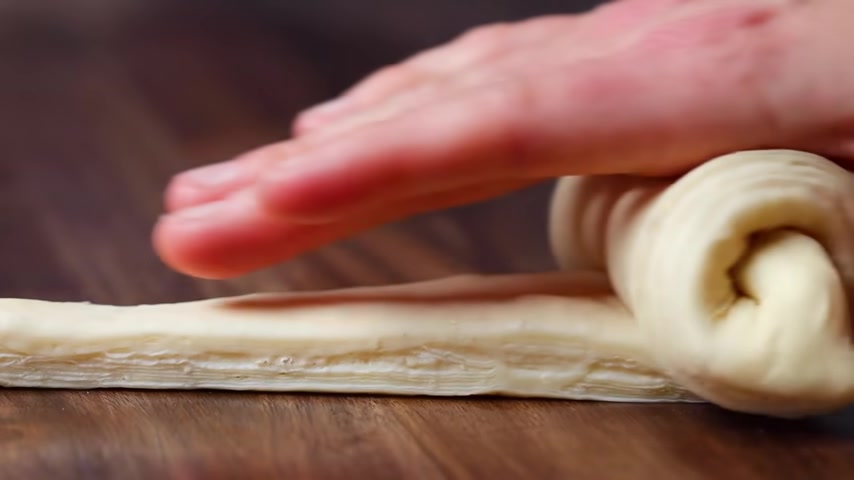
But you can also totally use a large chef's knife in by marking three inches and roll the wheel from the mark diagonally towards the bottom left corner , continue cutting the rest of the dough until you have about 10 to 12 triangles , make a slit in the middle of the base of each triangle to help relieve some tension and then roll them up to create that iconic crescent shape .
Make sure to roll as tight as possible without applying too much pressure so that the croissants will hold its shape as it proofs and bakes .
The French word croissant actually translates to crescent in English .
Many historical experts believe French croissants evolved from Austrian Krell , a buttery and often sweet , baked , good shaped like a crescent moon .
According to the popular legend , Krell dates back to 16 83 when a baker heard the Ottoman Turks toddling beneath Vienna to lay siege to it .
He sounded the alarm to save the city and created Krell to celebrate this victory .
Its curve shapes supposedly symbolized the crescent moon emblem on the Ottoman flag .
Kip eventually migrated to and evolved into what we now know and love as the croissant .
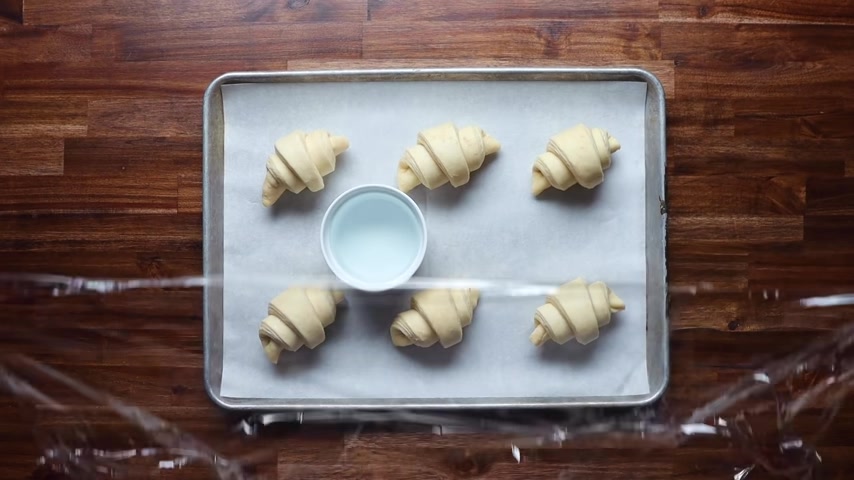
Before we get to baking , we have to proof our pastries .
We like to add boiling water to a small vessel like a rain and place it on the tray under the plastic wrap .
While the croissants proof moisture is key to prevent the dough from drying out .
You'll know they're ready to bake when they look like light puffy clouds , they should slightly wobble when you shake the tray .
Lastly , we'll brush them with an egg wash to give our croissants that iconic shiny copper brown shell .
And finally , it's time to bake .
We recommend placing a pan filled with boiling water at the bottom of your oven .
Steam ultimately helps the dough grow before the heat traps it in its shell .
Bake the croissants in the oven at 350 degrees for about 30 minutes .
And before we bite into these works of perfection , we want to let them cool for about 20 minutes and voila perfectly golden croissants .

We think croissants taste best when baked fresh with a smear of jam or a drizzle of honey and served with your favorite breakfast beverage .
The possibilities are really endless when it comes to using this laminated dough to make other beautiful flaky pastries .
This recipe is truly a labor of love and once you nail it , the reward is insanely sweet for this recipe and even more croissant baking tips , check out tasty dot co croissants really make the world a better place .
Are you looking for a way to reach a wider audience and get more views on your videos?
Our innovative video to text transcribing service can help you do just that.
We provide accurate transcriptions of your videos along with visual content that will help you attract new viewers and keep them engaged. Plus, our data analytics and ad campaign tools can help you monetize your content and maximize your revenue.
Let's partner up and take your video content to the next level!
Contact us today to learn more.