https://www.youtube.com/watch?v=ESfKFlBxwEc
2023-06-14 18:06:31
Learn How To Build a Deck with Wood _ DIY Projects
Building a deck is the ultimate backyard diy project .
It takes some work , but you can do it in this series .
We'll show you how to build a basic deck from design to framing and stairs to finish .
First check with your local building department and Homeowners Association regarding permits and building requirements .
Also call 811 to mark any underground utility lines when planning size , make sure you'll have enough room for your outdoor furniture and that you'll have enough room to move around .
It's also smart to think about the decking deck boards are typically 5.5 inches wide .
So try to plan a deck size that won't leave skinny pieces at the ends when designing .
Remember that the railings need to stay clear of windows and out swinging doors .
Once you have a basic layout , bring it to Lowe's to have an associate put together a professional plan and materials list for materials , treated lumber is the standard to withstand weather with wet pressure treated lumber .
You'll need to let it dry before staining as an alternative .
Consider upgrading the decking and railings with composite materials and always follow the manufacturer's recommendations for fasteners and structural hardware .
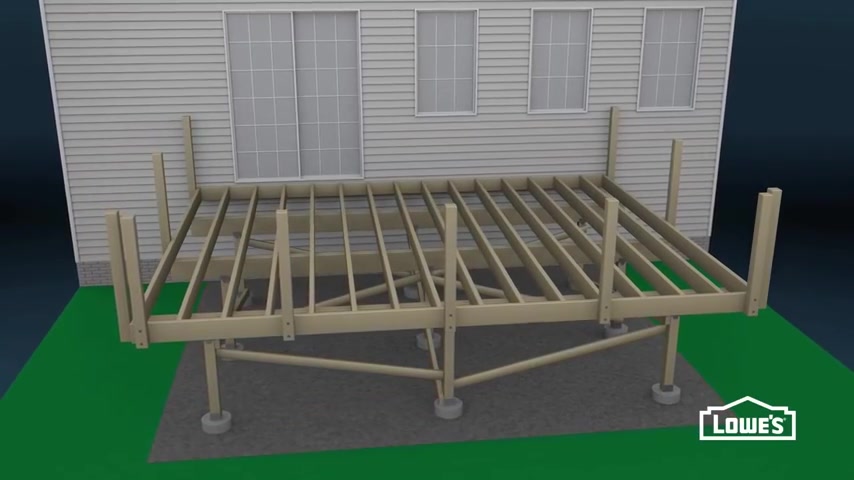
Our basic deck construction will be the foundation and four by four posts , two by 10 beams , diagonal bracing , two by eight framing and joists five quarter decking stairs and railings .
For larger decks , you can install parting boards in the middle of the decking .
You can eliminate some of the posts by attaching a ledger board to your house , but it can cause problems later if not done .
Right .
It's a job usually best left for the pros .
Our deck is free standing so it won't be attached to the house .
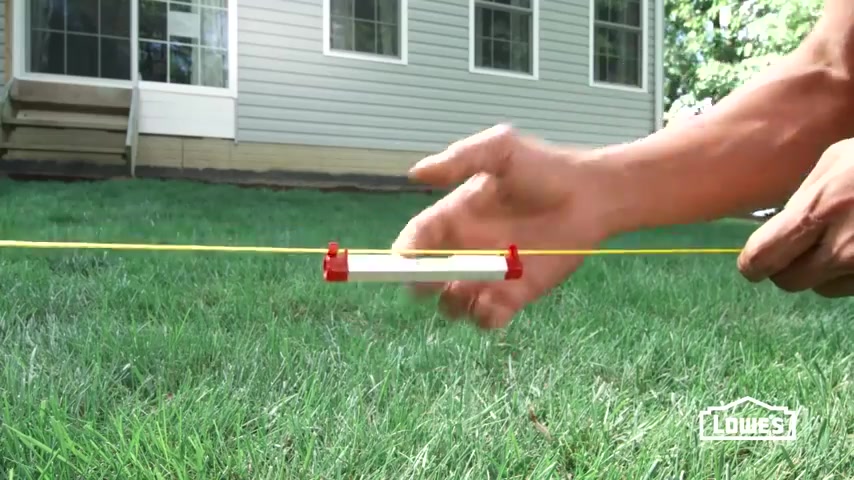
When you have a solid plan , you can mark the layout with strings and batter boards made from two ft furring strips and screws place the batter boards beyond the corners of your planned area and tie strings to them , marking the outer edges of your deck , use a single stake next to the house .
Check that the strings are close to level .
The layout is square when the diagonals are equal , adjust the strings as needed , then mark them in their final position .
So they can be taken off and put back in the right place before marking the posts cut the sod .
If required by code , a sod cutter can make this job easier .
The post layout depends on the size of the beams .
Local building codes and your deck design measuring from the house .
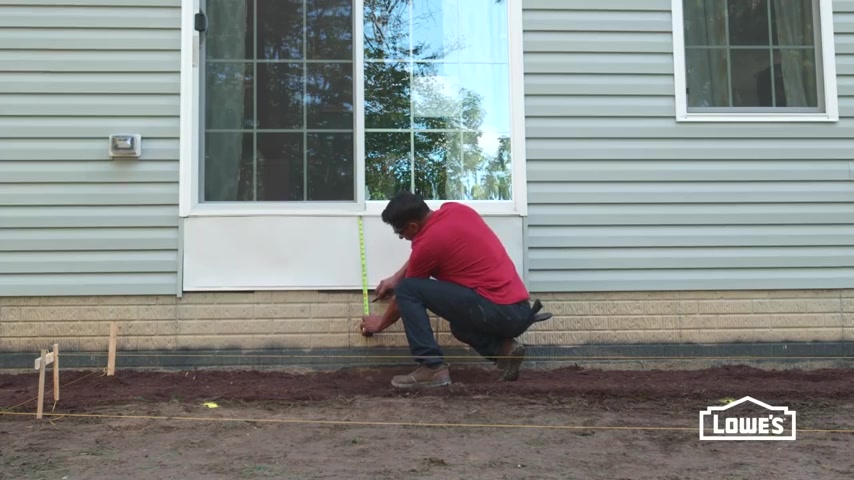
Locate the post lines with additional batter boards and strings , mark the post positions on the strings , then mark the ground with paint after the posts are laid out , mark the height of the deck and posts on the house .
The deck should be below the door threshold to keep water out of the house , measure down the thickness of the decking plus the width of the joists and support beams .
This notes the top of the posts mark a level line at this height along the house .
Next steps are to set the posts , then build the framing .
Remember to follow local code for deck posts .
There are several methods for setting posts .
One way is to pour concrete in the post hole , set the post on the concrete and backfill with gravel to help prevent rotting .
Our wooden posts will be attached to concrete footers above ground for either method , set the footers below the frost line to help prevent heave during a freeze , temporarily , remove the layout strings to get them out of the way , dig the holes six inches lower than the required frost line depth for your area and slightly wider than the concrete footer tubes .
A power auger can make this step easier and faster measure to make sure you dug to the right depth .
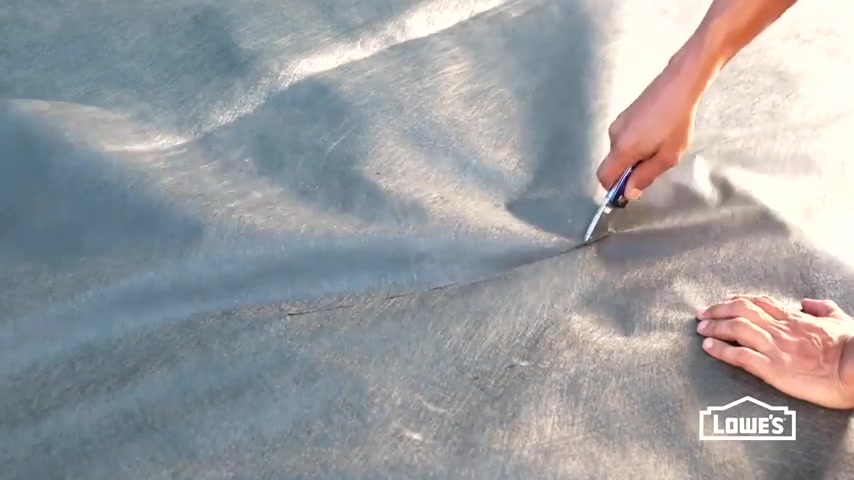
Next , lay out landscape fabric and cut post hole openings .
Later , we'll add gravel over the fabric to help with weeds and drainage .
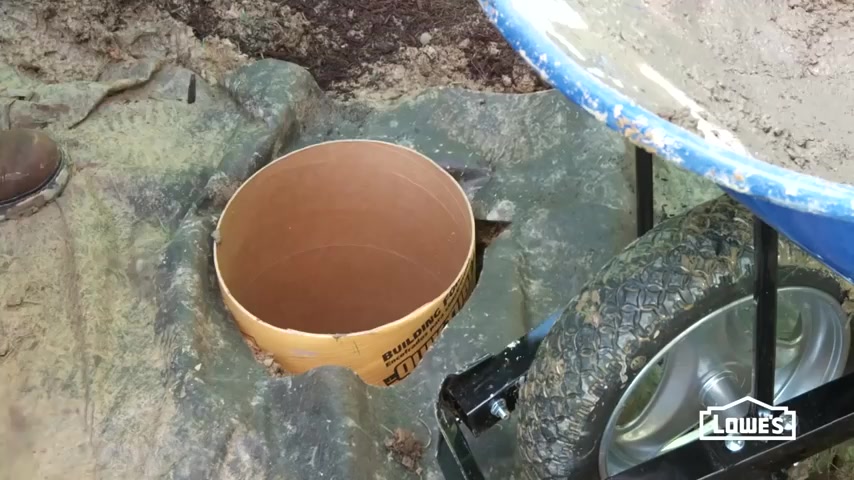
Then pour six inches of all purpose gravel into the hole and pack it tight with a post , put a concrete form into the hole and mark it a few inches above ground .
Pull out the form and cut it with a handsaw , set the cut side down in the hole and make sure it's plum and level .
Now mix concrete according to the directions and fill the tube .
Halfway .
Use a shovel or two by four to remove air pockets .
Then fill the rest of the way , embed an anchor bolt into the concrete , make it plumb and leave no more than an inch of thread showing also backfill as you're working to keep the form in place , follow the directions for cure time .
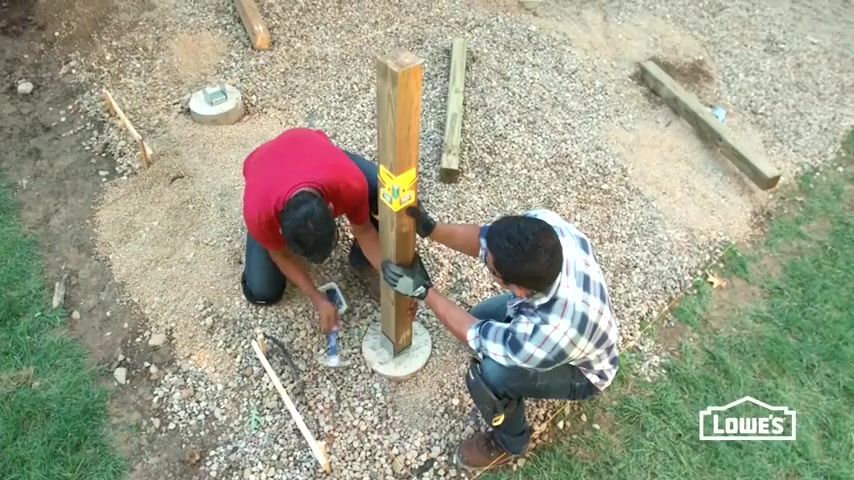
After the concrete has cured , cut away the excess cardboard above ground , then finish covering the landscape fabric with gravel , secure the post brackets with washers and nuts , then set the pressure plates on top .
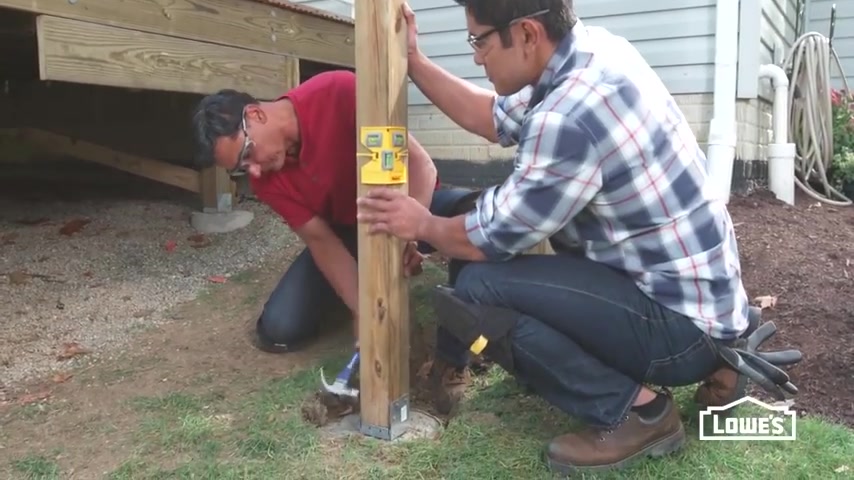
Now place the posts on the brackets , making sure they're plumbed and secure with 10 penny nails or structural screws .
If you're installing on an existing concrete pad , drill into the pad and install concrete anchors to secure the brackets when the posts are in place , mark the tops by holding a chalk line on the height mark you made on the house , extend it along the posts , level it and snap the line .
Use this line to mark the height on the rest of the posts with a level line , then cut them with a reciprocating or circular saw .
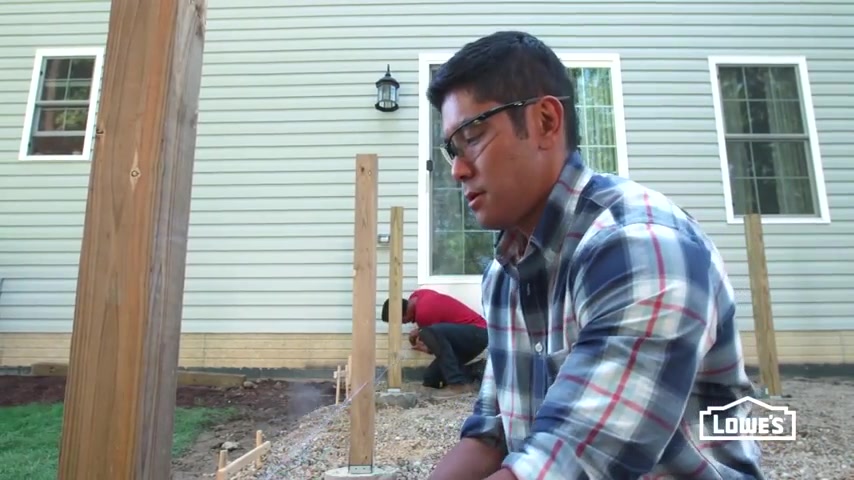
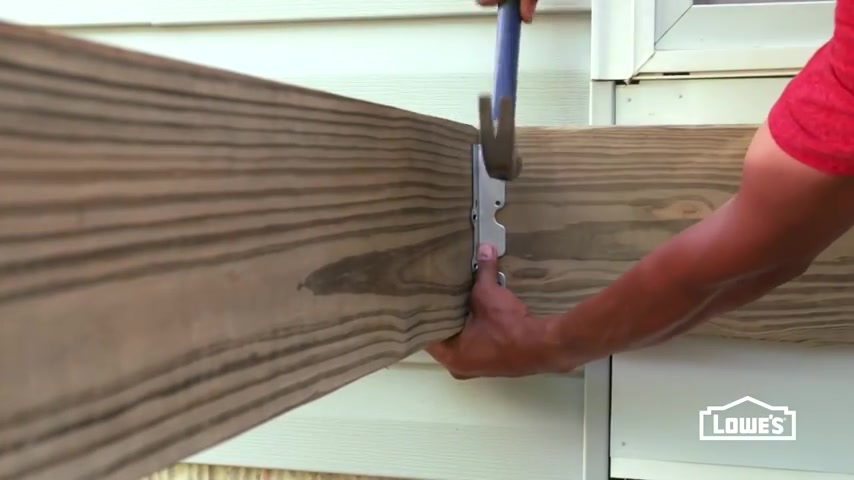
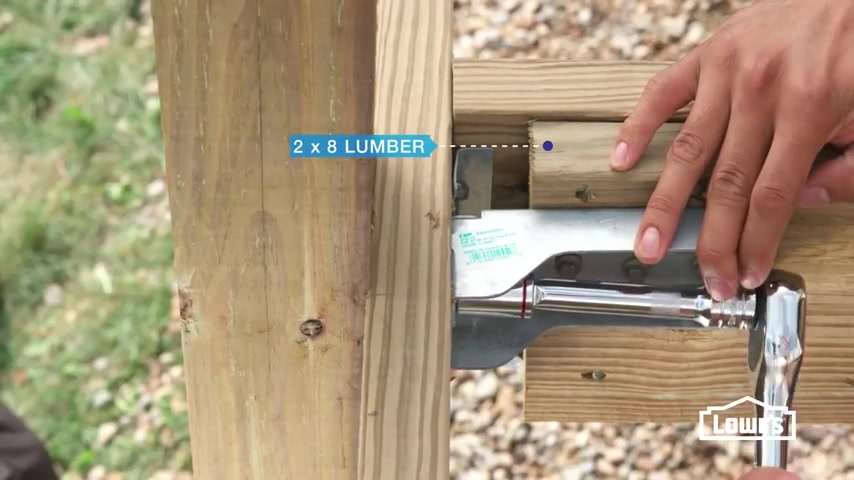
Next step is to attach support beams made from 22 by tens .
Start by determining the crown of the boards .
The crown is the slight arch in the board and should always arc up , clamp the boards together and drive nails about eight inches apart .
Next , attach post caps with nails , then set the beam on the post caps .
Crown side up and secure to the bracket .
Make sure any joints are over a post .
Apply , waterproofing tape or silicon sealant along the top joint of the beams for a waterproof seal .
Once the beams are in place , screw , diagonal bracing to the posts to prevent racking to cut the beams to the right length .
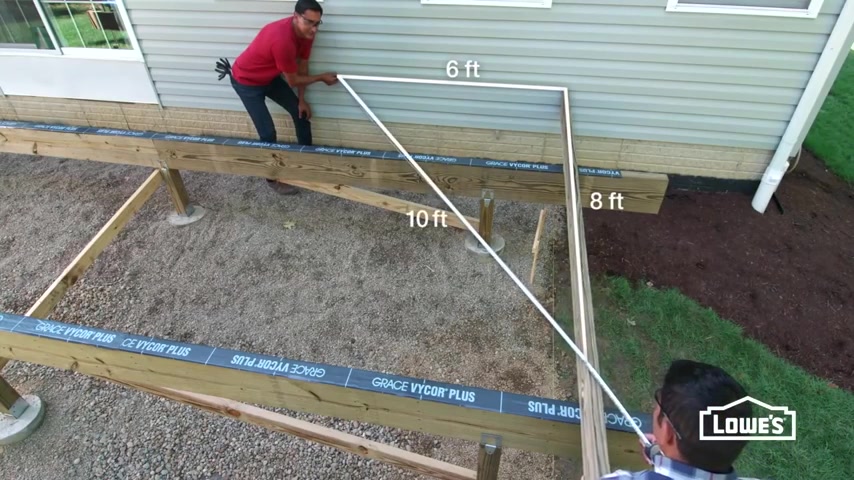
Start by setting a straight joist against the house at the edge of the deck square .
It up by marking six ft from the deck corner on the house and eight ft from the corner on the joist adjust the joist until the diagonal measures 10 ft mark and cut the beams .
Next , build the floor frame start by marking the floor joist spacing on all the beams .
Following your building codes , typically 16 inches on center , then place each rim joist on a beam and transfer the lines down the face of each joist .
Placing an X to the side of the lines indicating where the joists will be attached , drill pilot holes through the rim .
Joist into the end joist and secure it with deck screws .
Next , attach reinforcing brackets with deck nails or screws .
Don't attach the other rim joist yet position the frame on the beams , making sure it's square and secure it with rafter ties .
If your rim joists are two pieces , you can assemble the frame half at a time .
We're adding bracing in the middle to support parting deck boards , hold the floor joist along the 16 inch on center line , flush at the top and drive in a screw .
Hold a joist hanger against it , tap in the prong tightly , wrap it underneath and against the other side and tap in the other prong .
Now secure with joist hanger nails or structural screws .
Install the rest of the joists too when they're all up , strike a line and trim them to length , finish the frame by attaching the other rim joist with hangers and nails with the frame , secure the decking can go on next .
There are two ways to mount posts .
Posts can be mounted on the inside of the rim joist or on the outside of the joists , which is what we're doing on this wood deck .
Start by determining the post spacing for the number of posts .
Start with posts by the house posts at outside corners .
Plus at the top of the stairs .
Now measure the distance between two corner posts and divide by the distance allowed between posts round up to the nearest toll number , then subtract one , for example , 15 ft divided by five ft equals three minus one .
So you get two posts in between , make sure the posts are evenly spaced if one is lined up right over a joist .
You can reposition it slightly cut the posts to length according to your plan and local codes , we're using deck anchors attached to the joists which makes for a stronger railing along the end .
Joist attach extra bracing between the joists to mount the anchors , screw a post in place , making sure it's plumb line up the anchor and mark the bolt hole drill through the joist and post , attach the anchor and secure the post with carriage bolts .
Add a second bolt through the joist below the anchor , an anchor on the back side of the bracing adds strength along the rim .
Joist for posts next to joists , you can add a piece of tube to secure the anchor .
So it doesn't interfere with the Joist hanger for posts that are in between joists install extra bracing to secure the anchors decking goes down next because our deck is so wide .
We're installing parting deck boards in the middle .
We've added extra bracing to support them near the house , set the straightest decking board flush with the rim .
Joist drill pilot holes about one inch from the edge into the rim .
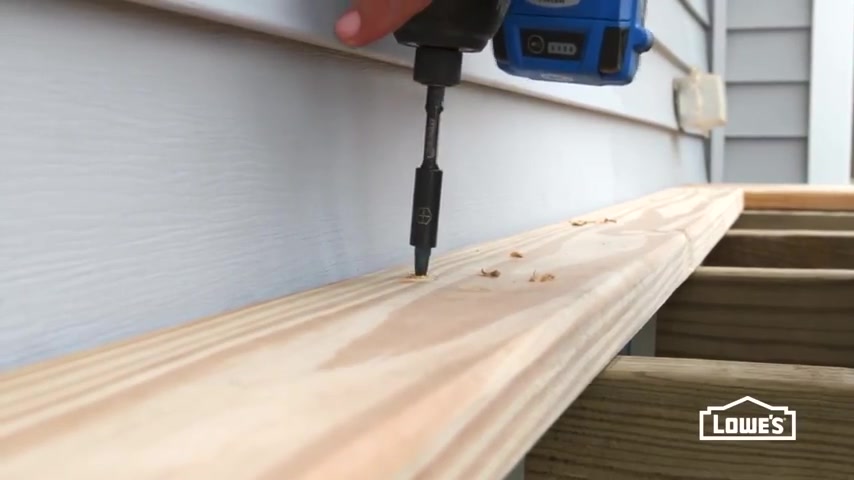
Joist then drive in decking screws , continue securing to the joists with screws along the entire board for the next board , pull it against the first board , then secure it with two screws in each joist .
When attaching wood decking drill pilot holes at the ends , the screws along the middle , shouldn't need them .
Also notch around posts or other obstructions .
Continue installing the boards , checking for square every few boards .
When you get near the end dry , lay the boards to determine the width of the last board .
Remember to account for overhang .
If it's too skinny , you can rip a little of the last few boards to widen it .
Then round over the edges with a router for a cleaner look .
We also routed the decking toward the parting boards .
When the decking is secure , snap a straight line allowing a one and a quarter inch overhang and cut the excess with the posts attached .
You can install the railings .
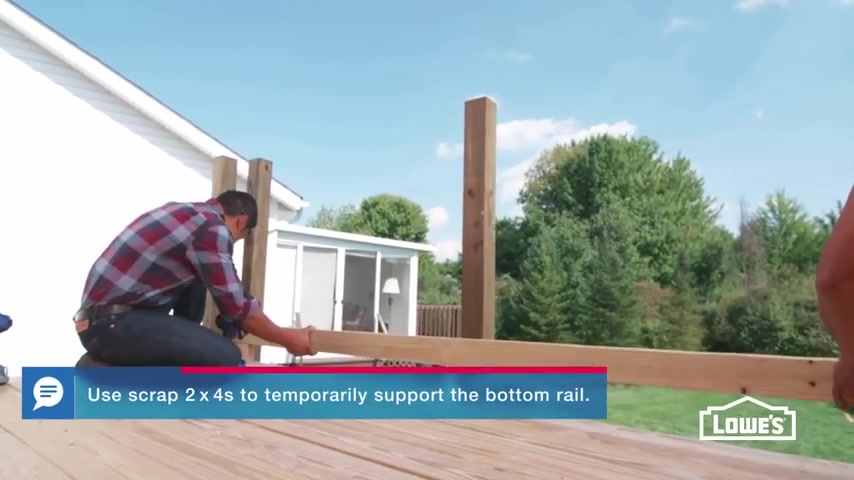
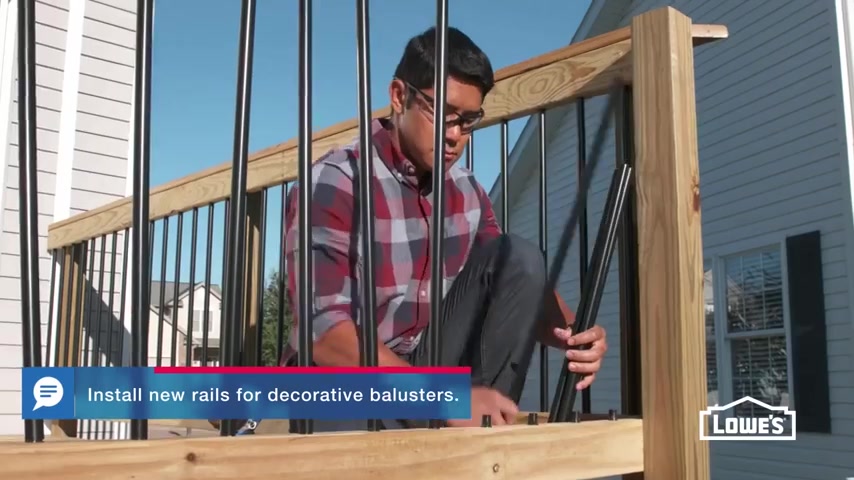
We'll use two by fours as the top and bottom rails , add a rail cap and attach ballers attach two by four rails along the back side of the posts .
Bottom rail 3.5 inches from the decking and top rail flush with the top of the posts for a finished look center a five quarter by six inch rail cap on top and m the corners to space the ballers , you can use a scrap two by four to attach them drill , pilot holes in each baller and secure with screws to the top and bottom rails .
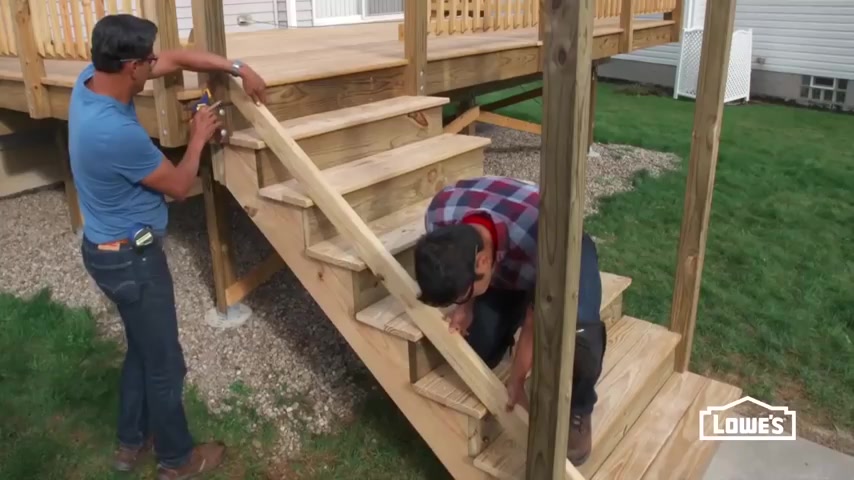
Deck stairs are typically made from two by 12 stringers spaced about 12 to 16 inches apart .
They rest on a solid foundation and are attached to the deck with hangers .
They have risers also called toe kicks treads and railings , stairs should be at least 36 inches wide .
You can build your own custom stringers or get precut ones at Lowe's , whichever you choose .
Always make sure to follow building codes to start determine the location of your bottom step .
Set a long level on top of the decking and measure the height where you want your steps to end .
For example , 55 inches divide this measurement by seven , the ideal height for each step round to the nearest toll number to get the number of risers .
In this case , it's eight .
Now divide 55 by eight to get the actual height of the risers .
For us , it's six and 7/8 inches .
If your steps are too short for your comfort , reduce the number of risers by one and calculate again since we're using the deck itself for the top riser , we'll subtract one step for our treads .
We're using 25 quarter by six inch decking planks making each run about 11 inches and two by toe kicks on the back provide a clean look .
You can use the total run length to determine where to build your landing support .
One method for a landing is to install concrete footers and posts and secure the stringers to the posts , check out our deck layout and posts , video for step by steps .
Another common landing is a concrete pad .
It has a four inch layer of gravel underneath and extends beyond the steps about 36 inches to install , build a wood frame and set it in place to mark the area .
Dig down at least four inches below the frame .
Add gravel and compact it with a hand tamper .
Then mix the concrete , set the frame in place and use a level to make sure it's slopes slightly away from the deck , wet the frame and gravel and pour the concrete into the frame .
S greet it with a straight two by four .
When the concrete starts to lose its sheen , smooth it with a float , then make a non slip surface with a stiff broom , finish the edges and spray it with cure and seal , let it cure according to the directions .
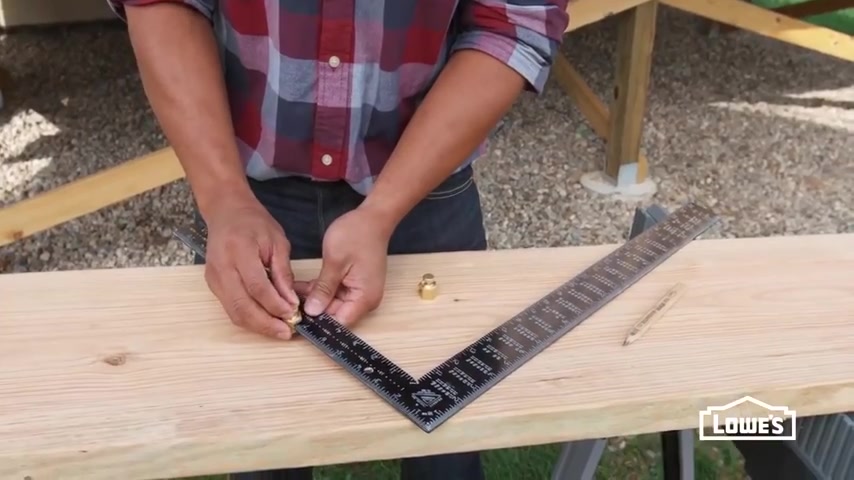
When your landing is installed and the rise and run determined lay out the steps on the two by twelves set stair gauges on a framing square at the height of the rise and the length of the run , hold the square at the corner of the plank and mark the top run , then slide the square along the plank and mark both rise and run .
Continue marking until you have your number of steps at the top step , subtract the thickness of the tow kick and strike a perpendicular line .
This is where the stairs attached to the deck and there is no toe kick at the bottom step , mark the thickness of the tread to shift the entire set of stairs down when the treads are installed this will make the bottom step the same height as the others .

Cut the stringer with a circular saw and finish with a handsaw .
Use this stringer as a template to mark and cut the others .
Next , attach a two by eight to the rim joy to secure the stringers , brace it to the beam or joist behind with Joist hangers or decking screws , hold the stringer flush with the bottom of the joist mark .
The hangers , then secure them to the deck , then to the inside of the steps to secure the bottom of the steps to the pad , attach cleats between the stringers and drill through the cleats to install anchor bolts , tighten the nuts to lock them in place to install the railings , attach four by four posts at the bottom like you did on the deck .
Next cut and attach all the tow kicks and treads with screws , clamp two by four rails along the step to mark the angle at the post cut with a saw , then attach the bottom rail to the inside of the posts with screws .
Next use a baller to locate the top rail and secure with screws mark .
Then cut the angle on the posts for the five quarter cap rail .
Use a T bevel to get the angle , adjust your saw blade , cut the cap rails to fit and attach with screws , secure the ballers just as you did with the deck railings for stairs with four or more risers attach an exterior hand rail on at least one side , use a vertical two by four with rounded edges or a metal rail .
And now the basic build for this deck is finished .
One thing you can do to make your deck really stand out is update the railings on wood decks , consider replacing the traditional wood ballers with metal .
The sleek black metal accents , a tradition wood deck with a modern touch .
If you want a new look for your composite railings , some systems make it easy to change the style of ballers .
Just remove the top rails and go from white to black ballers .
For a contemporary look lighting always makes a deck shine and it's really helpful on stairs to install low voltage lighting , cut the holes , then mount the fixtures and covers , then secure a transformer near an outlet route .
The cables and connect the lights .
Solar lights are a snap to mount because they don't have cables .

Also , post caps are a simple way to illuminate your new gathering space on the decking .
Puck lights can be installed using a drill with a whole saw .
The lights sit flush with the decking and provide a nice soft glow around the perimeter .
Got leftover materials , build a matching bench for extra seating on a composite deck , use treated lumber for the framing and composite materials for a smooth seating surface , then dress up your deck with skirting on our deck .
We attach framing to the posts and screwed on lattice .
We finished up by adding vinyl trim .
Then we wrap the joists with composite boards .
Another option is skirting made of deck boards .
They can be installed on the posts or on the rim and end joists like we're doing add a facia board when the planks are in place .
Of course , don't forget about other furniture and accessories .
Tables are a must for the classic summer barbecue or coffee and dessert .
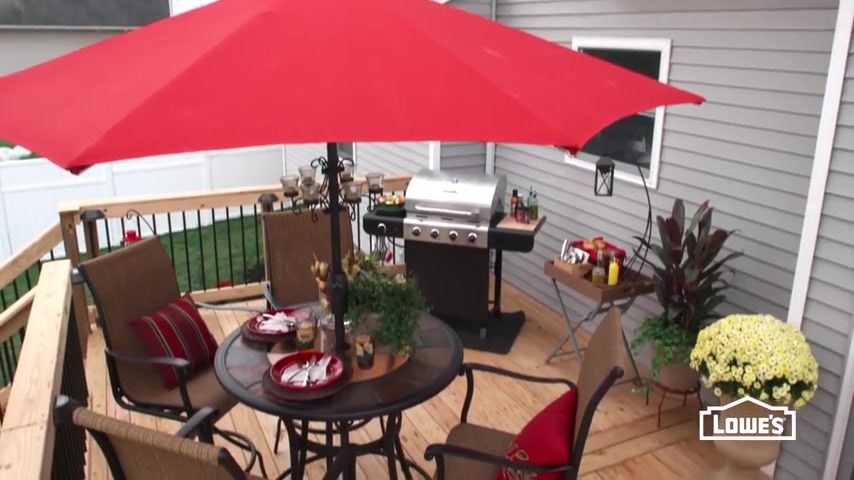
Add an umbrella to protect guests from the hot sun .
A gazebo with lounge seating creates a cozy place to relax , add soft cushions , lamps and a rug to make the space more inviting .
Keep a deck box nearby to store pillows .
Finally fill in with plants and landscaping to complete a stylish and welcoming backyard getaway to learn about each step of deck installation .
Go to Lowe's dot com slash build the deck .
Partnership
Are you looking for a way to reach a wider audience and get more views on your videos?
Our innovative video to text transcribing service can help you do just that.
We provide accurate transcriptions of your videos along with visual content that will help you attract new viewers and keep them engaged. Plus, our data analytics and ad campaign tools can help you monetize your content and maximize your revenue.
Let's partner up and take your video content to the next level!
Contact us today to learn more.