https://www.youtube.com/watch?v=Z00berTW5hc
2023-06-14 18:05:32
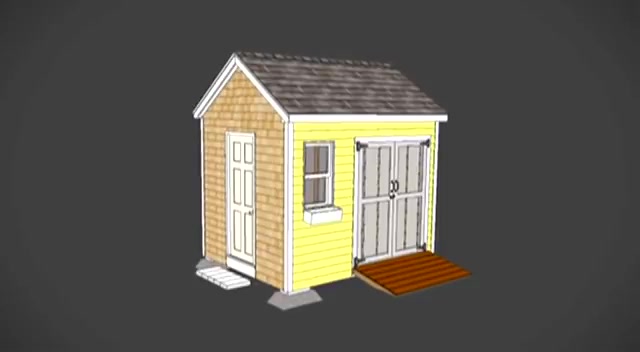
How to Build a Shed
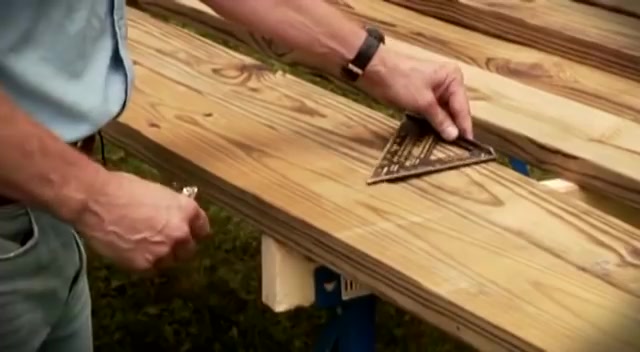
Establish where to dig the holes .
We move the frame out of the way and start digging .
We'll fully explain how to build the floor system in the next chapter .
But for now , all we need are two by eights cut to the length and width of the shed .
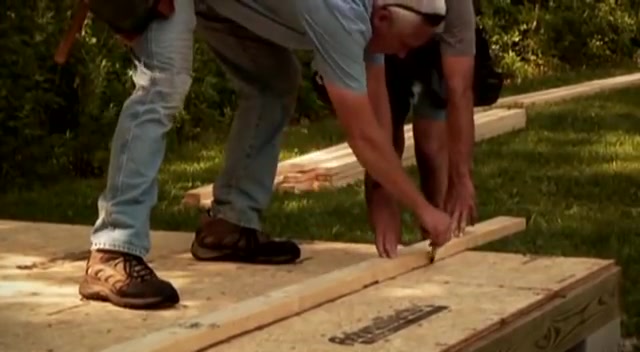
You can get this length from your plan , lay the perimeter Joyce out on the ground , then nail them together with 12 D or 16 D galvanized passengers or sinkers once nailed together , use the box to position your shed exactly where you want it in relation to the house and the yard cross measure to roughly square the box , then place the concrete blocks in the corners to establish the places to remove the grass before I remove the box .
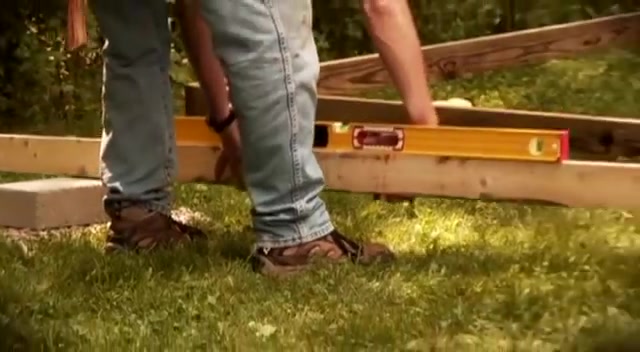
I check for level from corner to corner .
This gives me a rough idea of how deep to dig for each block .
It's pretty obvious by looking , that's the highest part of the , of the ground here .
But we use the level of check to make sure that that's where we're going to start from .
You don't want to start from the low part of the ground and try to work your way up because you'll find yourself digging very far down .
So we work from the highest spot and do our layout from the highest spot down to the lower spots .
That way , it's a lot easier to add block than it is to dig out earth .
Set the floor Joyce box aside and start digging .
I like to use a helper with a shovel to do most of the digging .
We're just going down below the top soil and if the top soil is only four or five inches , that's all we're going to go .
The soil beneath the top soil here is gravel and water travels right through it very easily .
So it doesn't , it doesn't retain water if it retained water and it froze , then it expands quite a bit .
But seeing that it's a lot of gravel , the water goes right through it .
Now , you can either put a bunch of block there and build it up from there .
But I find it's a little easier to grade it .
Me just using stone and it gives us a little play left and right back and forth when we put the frame back on to position it right where it needs to go .
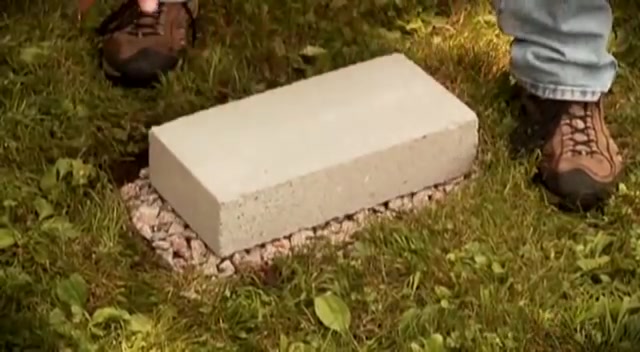
If the bottom of the block is above grade , add enough crushed stone around the edge to prevent the block from shifting over time .
Any size , crush stone will work to support the blocks as long as it's well draining here .
I'm using a three quarter inch size right now .
We're just going to get a rough level again .
We're starting with this side on the right .
That's the highest point and just putting a us straight edge from one to the next .
Just let me level this up a little bit .
Just put your weight .
Yeah .
Stomp on a little bit .
Yep .
Work around the perimeter from the highest block .
Taking the time to ensure a level foundation saves the headache down the road trying to straighten things up .
Measure that and we're either gonna add more stone or we drop that down and put a 2nd , 2nd 1 on there .
So we just pull a little stone out .
Yeah , and put a second block there .
Right ?
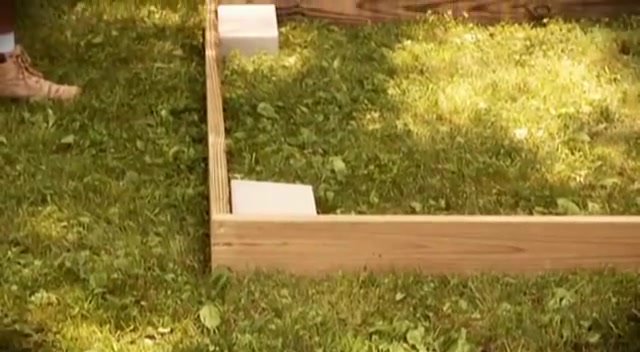
Perfect position the floor joy box on the blocks and square to make any final adjustments you need .
Let's not try to move the back blocks in place until we ply with it and we can move it around that way .
It'll stay because the whole thing is gonna shuffle .
Ok .
That's good .
Know what that one we started with .
Could go up .
Remember to position the block faces flush with the floor perimeter .
Perfect .
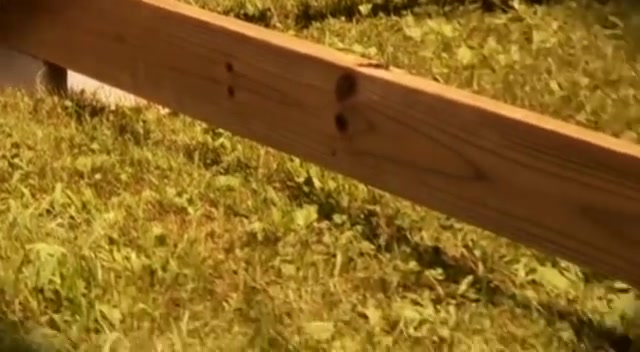
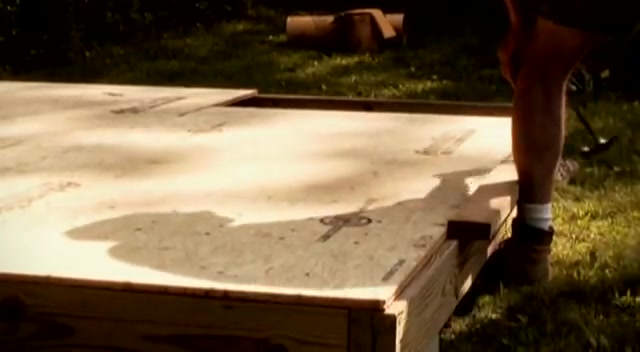
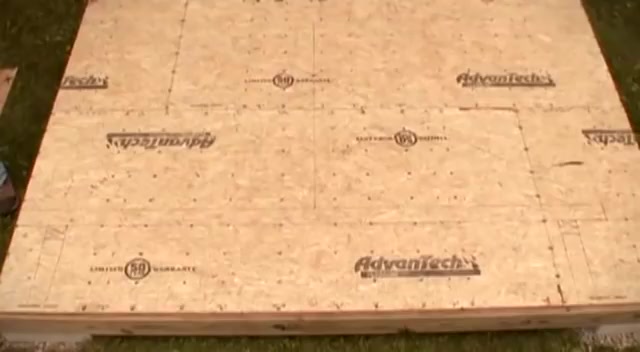
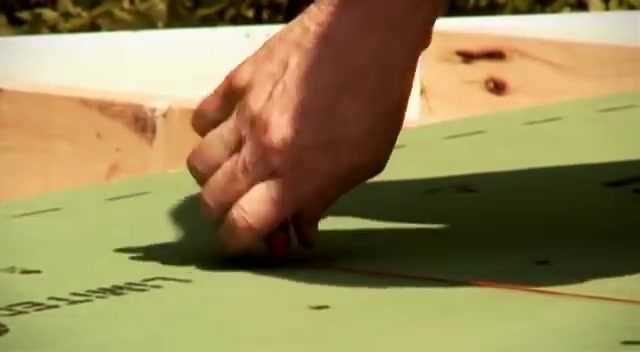
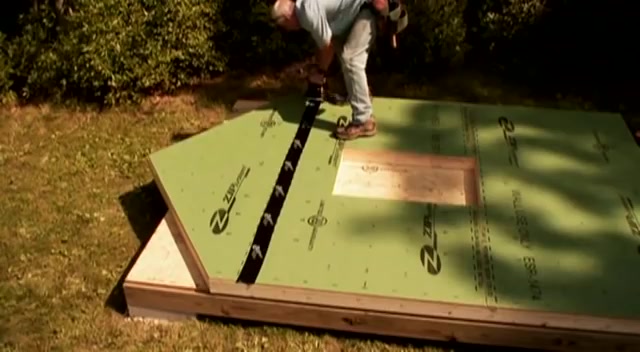
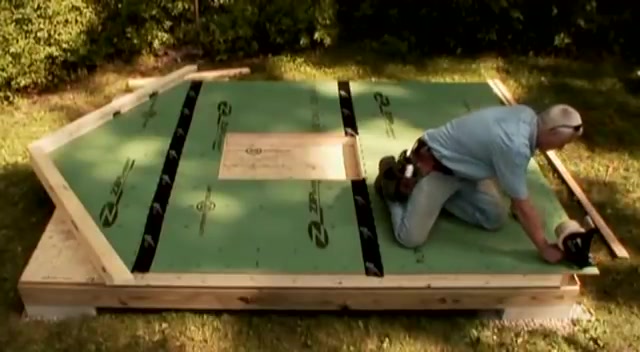
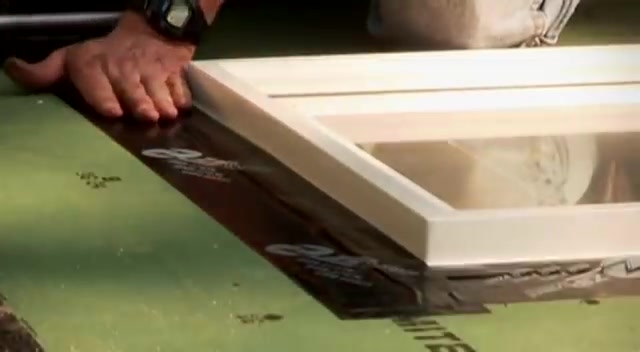
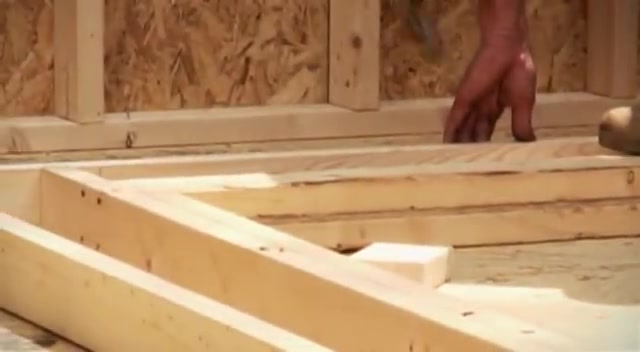
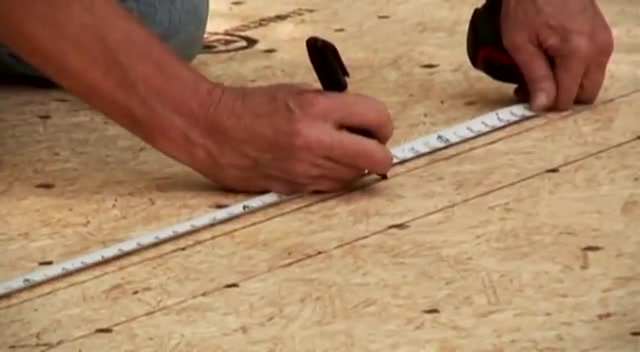
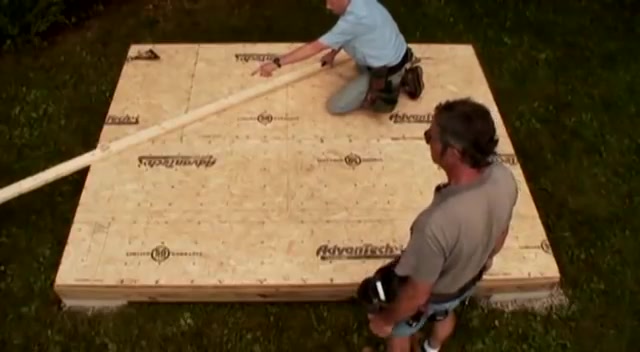
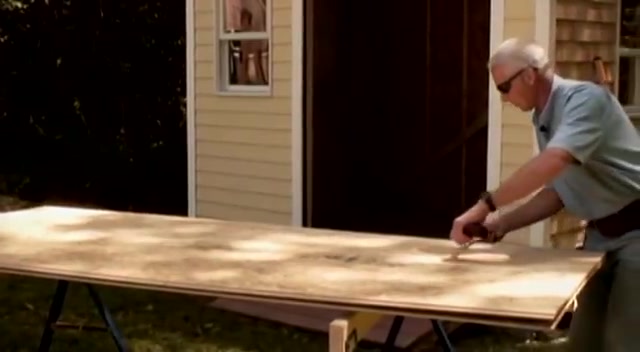
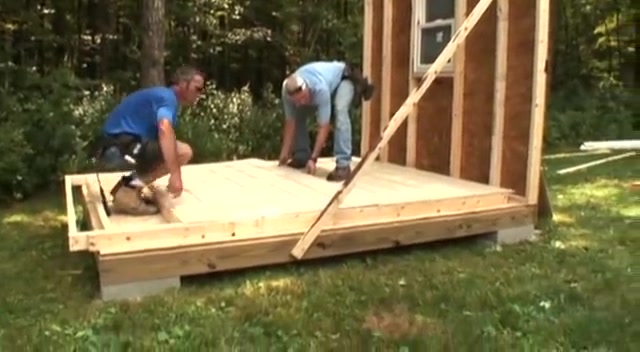
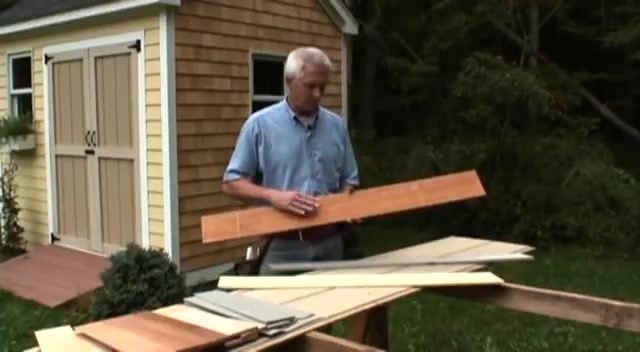
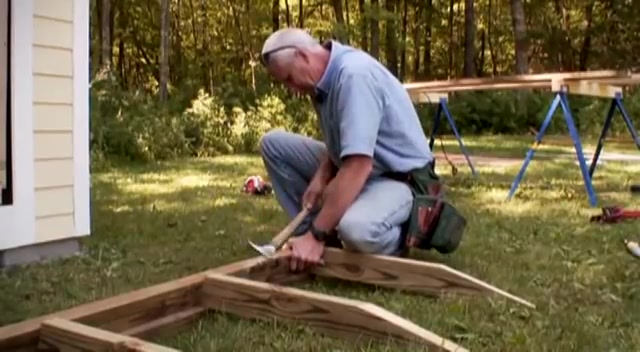
The floor system consists of two by eight pressure treated lumber .
Joists are 16 inches on center , the front and the back rim joist that carry the load are doubled up , will use three quarter inch tongue and groove oriented strand board or OS B for the flooring .
Now that the foundation is set .
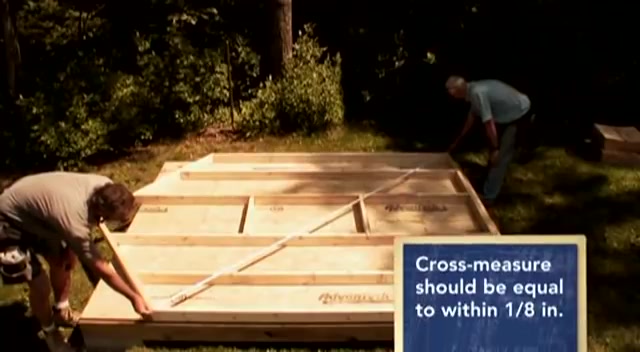
We're going to build a frame , we're gonna put Joyce hangers on the frame to hold it together .
We're going to square the frame up and then we're going to put the sub floor down on top of it , nail it tight and that'll hold the whole floor nice and square and straight .

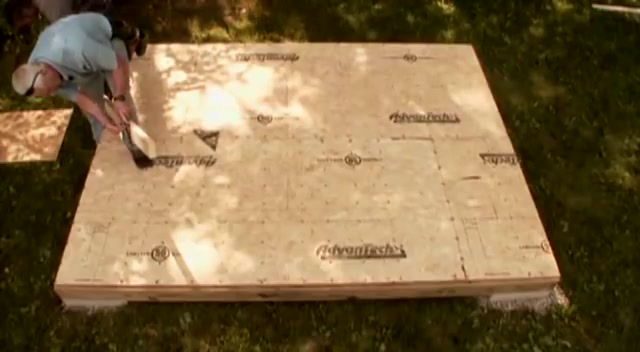
This is the underside of the subfloor , which is , it stays dry but it's exposed to the ground .
So while I have it , it only takes a couple of minutes just to throw some old stain on here .
And if you don't have old stain , you can buy from the oops pile at the paint store and it just helps preserve the bottom .
It's , it's , it's just an extra little insurance policy .
While we let the stain on the underside of the floor decking dry , we can assemble the floor framing , just hold it up tight .
Mac .
All right .
Okey doke .
Even though we will use hangers on the floor Joyce to transfer the load to the rim .
We threw , nail them first while it may seem like overkill , it's actually the fastest and easiest way to position the joists while we install the hangers to ensure that the load from the floor Joyce is properly transferred to the foundation blocks .
We doubled up the front and back room Joyce .
This will prevent the floor Joyce from sagging over time .
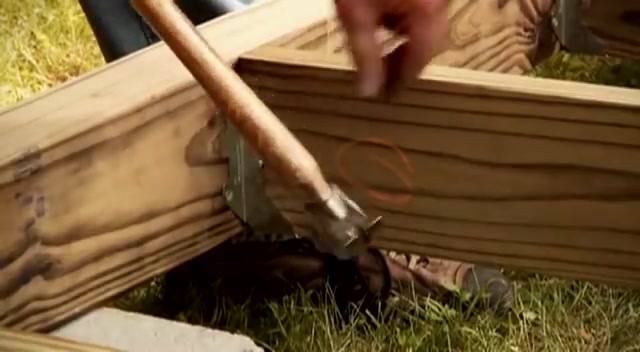
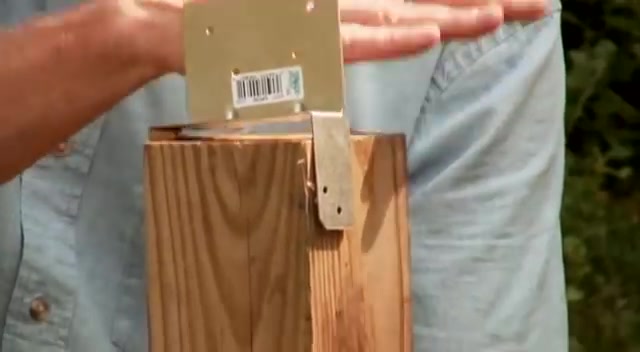
Two nails at each choice location is sufficient when securing the Joyce hangers make sure to use galvanized nails .
The copper and the pressure treated lumber could corrode the fasteners square , the floor framing prior to installing the Os B , the framing might have moved a little bit during assembly .
Keep going .
Oh , yep , that's good .
Yep .
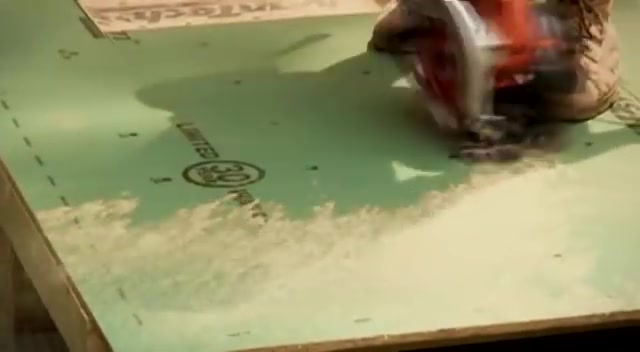
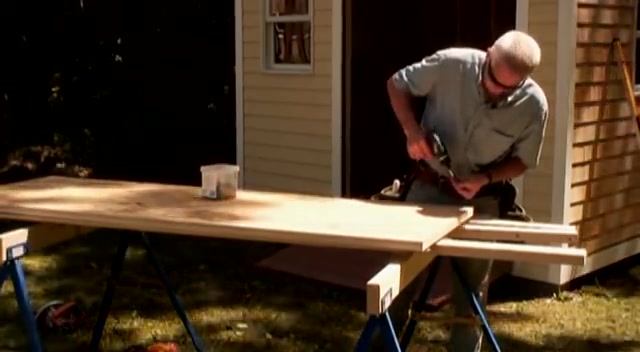
Groove into the tongue groovy , the tongue into the groove , apply a subfloor adhesive which is rated for exterior use to the top of the floor .
Jot why glue , why not , Why go to that extra expense , that stuff .
So pricey makes the floor stiffer and stronger , right ?
Only when we are ready for the next sheet .
Do we put glue on the outside edge ?
This way , we avoid inadvertently stepping in or putting our hand in the glue , which instantly makes a big mess .
Shut it down gently .
You don't want to slap it down on the glue just to show you the type of nail that we're using or the differences in the nails .
This is a smooth Shank nail right here .
This is a deform nail .
They're both the same length .
But for sub flooring , I prefer to use a deform nail .
This one happens to be twisted .
There are some that have little rings on them .
They're called ring shank nail .
The purpose is that they go in and they bite a lot harder so that they're less prone to pulling out unlike a smooth shank nail .
So on this joy , I kept the glue to the inside edge so that I could catch this sheet when we're ready for the next sheet .

I'll put the glue on the outside edge again .
It's worth it during the construction process to take the time necessary to get everything as straight and aligned as possible .
Ok .
Out of the way , let's just put it up on the , this is where a lot of people miss the mark .
They don't , they don't put the glue in the groove and that's the weakest point .
So that's where you want .
More strength increases the stiffness and the strength I've read by up to 30% for that same reason , I stagger the butt end seam of the Os B use a scrap of two by four block and a hammer to tighten up the seams .
Yeah .
Keep going , keep going .
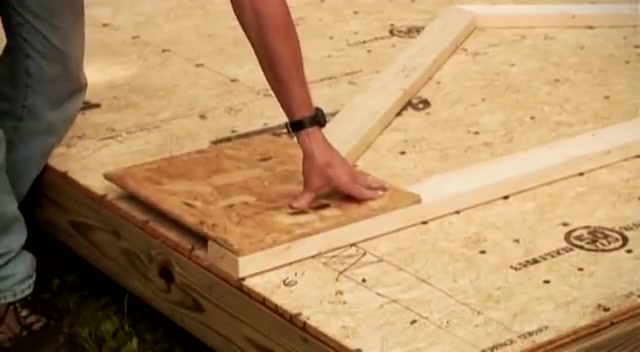
If there's a small difference between the edge of the Os B floor and the outside of the frame , don't worry about it .
It'll be covered up by the wall plate .
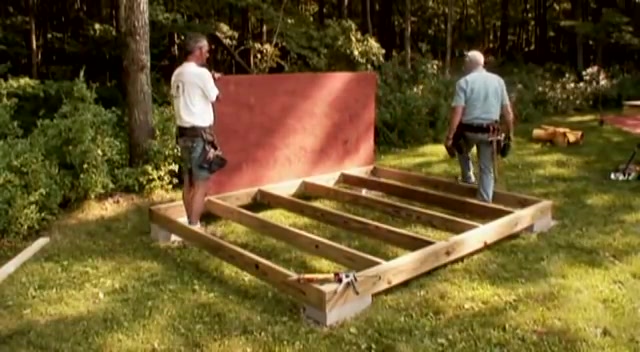
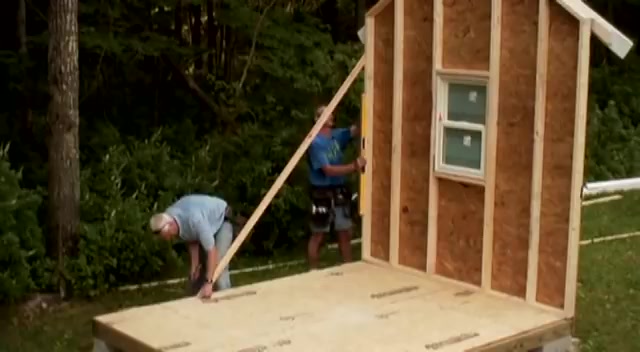
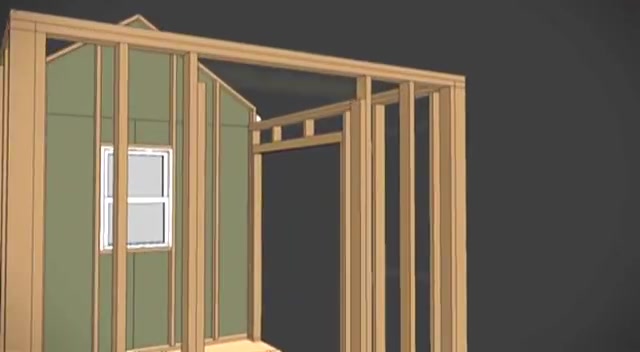
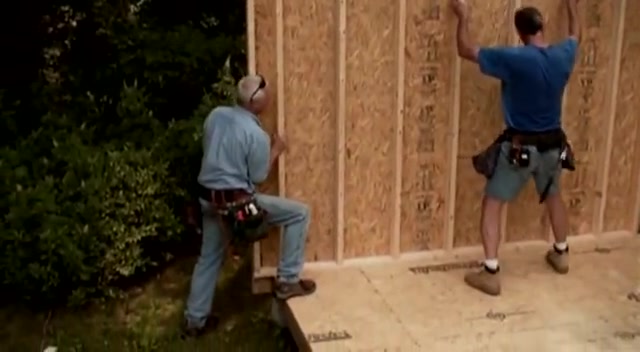
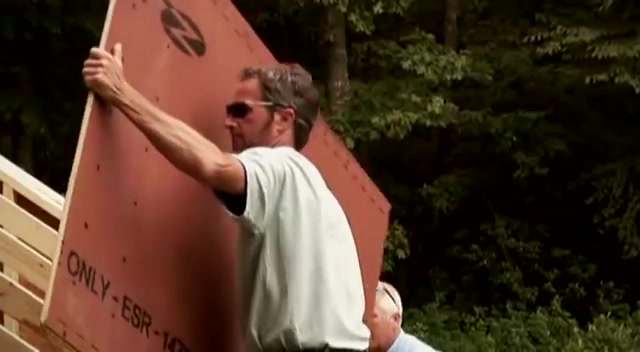
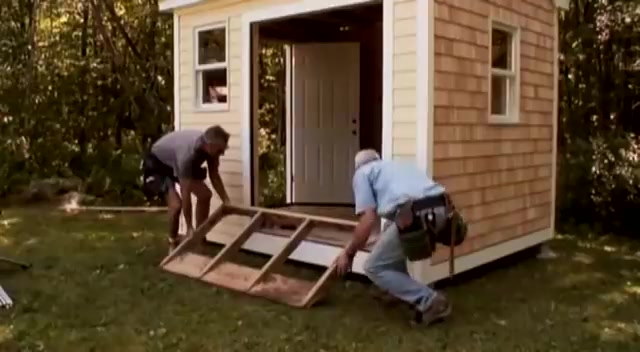
This shed , we can build the gable end in one shot and lift it up .
We frame the entire gable end from the bottom plate all the way up to the top of the roof pitch .
We're going to put the sheathing on , we're going to put the trim on , we're going to put the window in and then the siding .
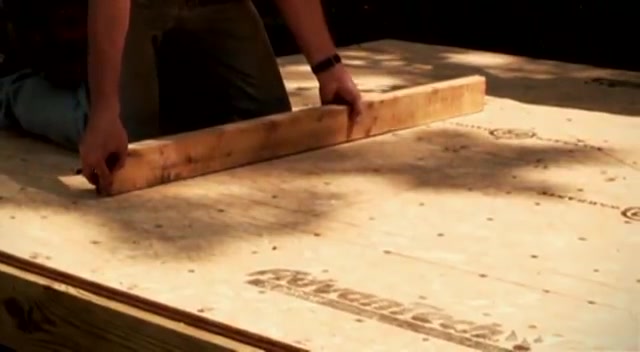
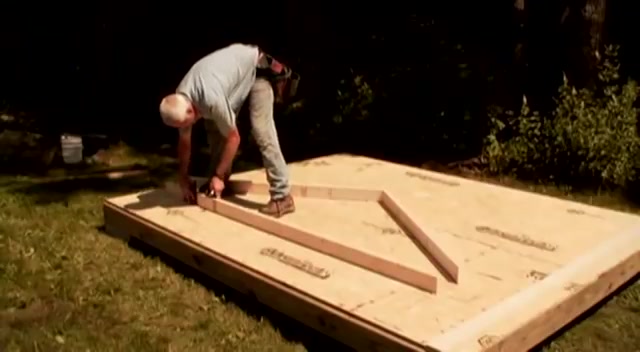
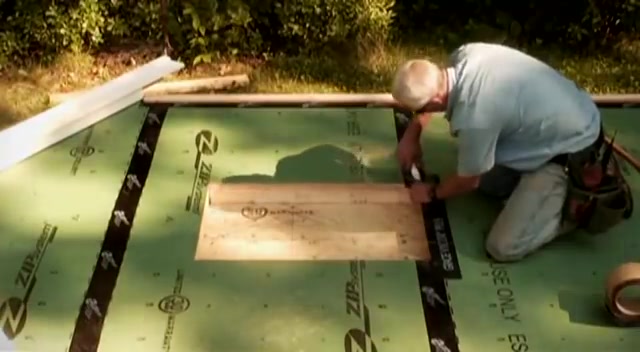
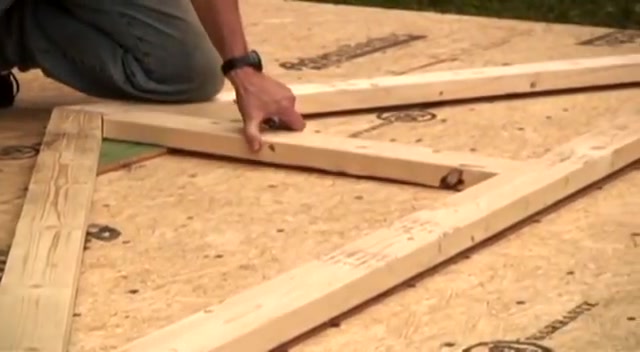
So it will be 98% complete , then lift it up into place once it's in place , we really don't have to touch it after that , since we have the outline of the roof already on the floor here , we're going to use it to find out the length of the gable end studs .
And so we already snapped this early , we snapped the roof outline so we could establish the trusses and build those .
Now , we're going to use the same outline to find out the length and the location of our gable end wall studs .
Now , we know what we're going to have for the length of the studs and adding for the gable end which you will see in a minute to lay out the balloon frame , gable and wall .
I first marked the stud locations on the top plate that we drew on the deck .
When we built our trusses , I then draw a parallel line above the height of the roof peak and mark the same stud locations on it and then 63 a quarter .
Yeah .
See I'm going from this mark to this mark , but I only have to go in between up to the top of the roof .
I connect the marks with a straight edge to represent the edge of the stud .
I can then measure the distance between the plate and the long or short point of the stud as it intersects with the top plate , that's the bottom of the top plate .
And I measure straight down to that red line which is the top of the stud .
I add this distance to the standard height of my wall studs .
This gives me the exact height of each stud in the gable end wall .
That's what's nice about having the layout right on the floor .
Really very little measuring while I'm at it .
I lay the top plates down on the deck and mark the stud locations .
This way .
When I build the walls , I'll know where to locate the studs for this wall .
We opted for a window centered under the gable .
I adjusted my stud locations to land on either side of the window before I move on .
I mark the stud locations on the bottom plate as well .
Ok .
Let's just put all of these in place .
The floor deck is a handy surface to build on .
So we take full advantage of that .
Each stud is secured to the bottom and top plates with two nails at each location .
75 inches , the rough opening header and sill consist of single , two by fours secured to the adjacent studs at the proper height .
Put it out .
I use the floor to square the wall .
All right , you're all set .
I'm in the right place .
All right .
First , I tack the bottom plate in place 1 34 and an eighth .
Then cross measure and make adjustments until I'm sure that the wall is square .
Yeah , I can see it has to come to me too .
Yeah .
According to my eye a little more , go back a little .
Alright .
Right there , then tack the top in place with a couple of six penny nails right down near the bottom .
Good .
All right .
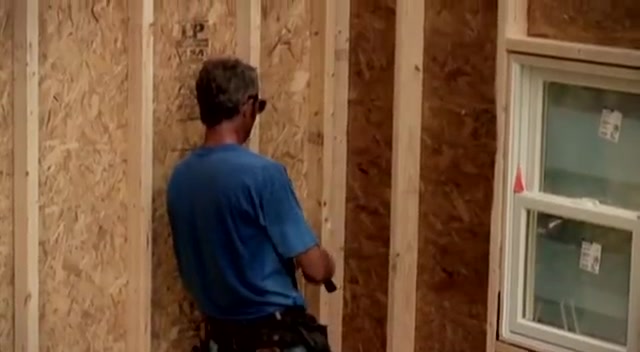
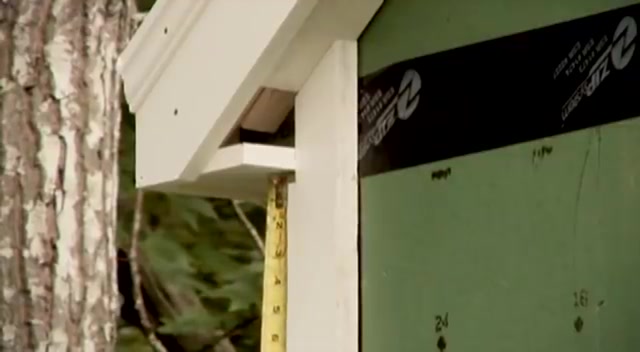
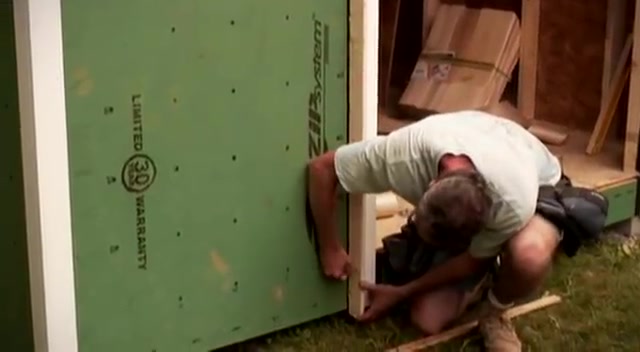
When installing the wall sheathing , I let it overhang the bottom of the wall framing by seven and three quarters inches .
This allows the sheathing to extend below the floor framing .
That's what I'm looking at .
When I say perfect the bottom , I secure the sheathing with eight D nails .
I mark out the window opening and use a circular saw to cut away the sheathing writing is up .
No more .
Trick questions , please .
Once secured , I cut the sheathing flush with the top plates .
Look at that almost like we knew what we were doing .
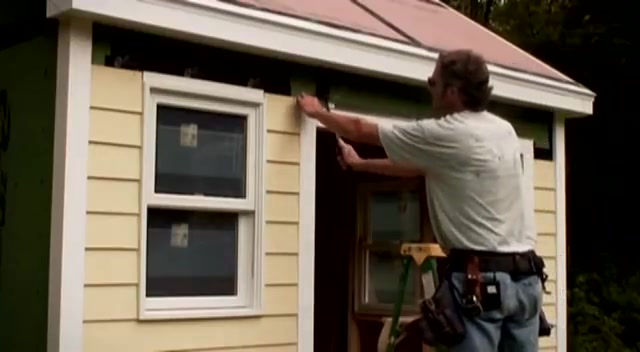
I apply self adhesive flashing tape over all of the seams between the wall sheathing panels .
I'm going to take this a step further and we're going to install the trim , the windows and the finished siding on here .
Then once that's done , we're going to lift it up into place and continue with the other walls and nailed down 22 by fours on the flat as blocking for the Eve trim .
So I'm putting an extra layer of tape where I know the corner board will end and the siding begins because I know the siding , all the nails on the last row of siding will go right along this tape and the nails for the corner board will be right here too .
So just putting this extra piece of tape helps ensure that the nails are all sealed up .
After marking the location of the corner boards apply stops to set the siding against these stops will be removed .
Later .
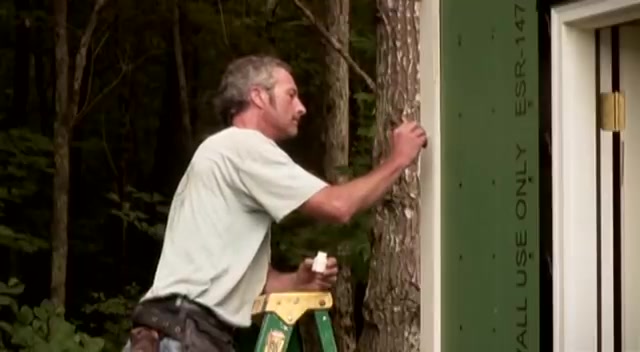
When we install the corner boards for the gable and trim , we use a PV C product that is impervious to rot and can be left unpainted .
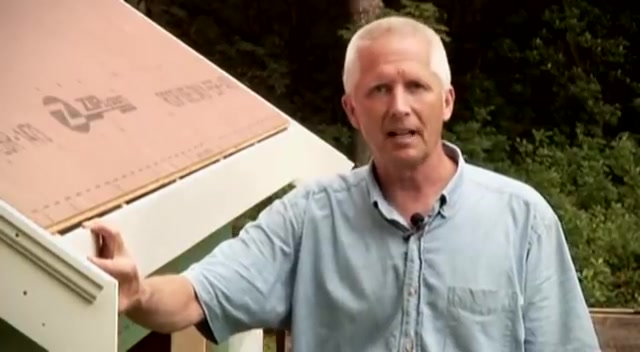
Oh , the so ros flush to the two by blocking , we hold the rake trim above the blocking 5/8 of an inch .
So the top edge will be flushed with the roof sheathing .
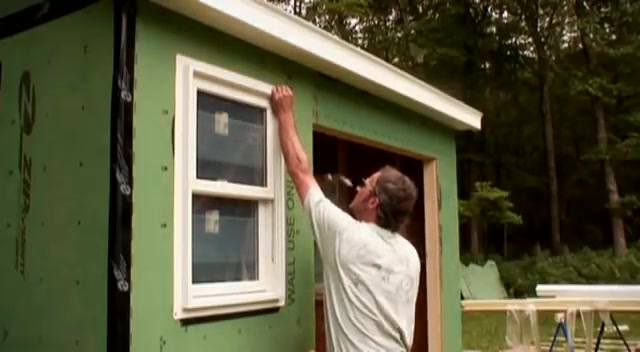
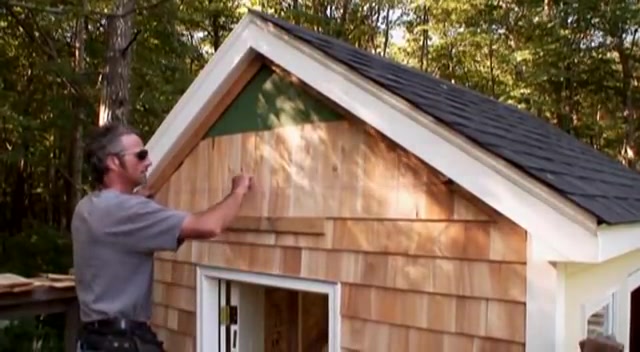
Once the window opening is flashed and the window is installed , we can begin installing the side wall shingles .
I only have the four inch with me .
Normally , I'd use six inch such as happens on the job site as well .
You use what you have .
Can you hold on to that ?
So the purpose of this flashing is that if water gets in through the window somehow into the roof open , it runs down , hits this flashing and comes out before installing the window , apply a beta cock along the sides and across the top of the rough opening .
This will seal the back of the window flange it .
Yep , 42 .
Perfect right there .
That's if we went ahead and shingled this whole thing all the way down sided , it lifted it up , then we have no way of nailing this section of sheathing into the rim of the floor system here .
And this is just to keep the flashing from getting crunched and mutilated below the siding , we install drip cap flashing over the water table .
Like most flashing details .
I like to tape the top edge with self adhesive flashing .
What I'm doing here is laying out the courses of shingles so that we can try to get them to come even with the bottom of the window and the top of the window , just something that distinguishes a good job from a bad job with the story pole laid out .
We transfer our marks to the wall for reference as we install our shingles .
Notice we use a piece of 38 inch thick siding to space the shingles up off the cat flashing .
This helps prevent the siding from wicking up any water that pulls on the flashing .
These are just b grade white cedar shingles .
They have knots in them , but the knots are usually up above the exposure line .
So they're cheaper than the ones that don't have knots .
Thank you .
All right .
While you can hand nail shingles , it's well worth the expense to rent a compressor and pneumatic stapler .
I recommend an inch and a half staple with a quarter to a half inch crown .
You have to stagger so that you're covering the seams and you're supposed to stagger over three courses worth and these shrink anyway , a lot of people try to get them really tight , they shrink .
That's the look , they shrink and they turn gray .
It's the other reason why you want to make sure to stagger the joist because they do open up sometimes up to a quarter , I've seen you , you have a quarter inch gap over a quarter inch gap , over a quarter inch gap .
Water is going to go right through at the bottom corner of the window , not the shingles to protect this vulnerable spot from leaking .
Because over the next two courses , you'll end up with three seams right in a row all the way through , which would be a good place for a leak at the rake .
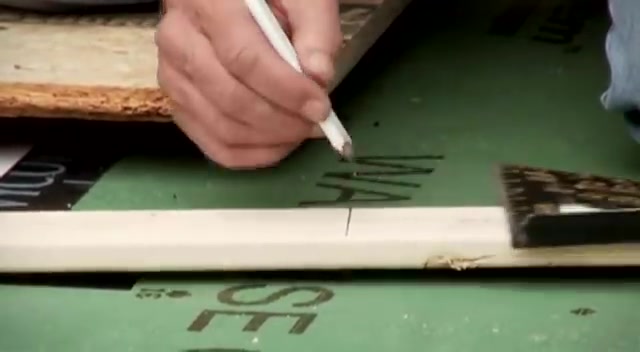
The shingles need to be cut to match the roof pitch .
An easy way to do this is to fabricate a simple circular saw sled that matches the roof pitch .
The shingles butt into one by blocking that will eventually be covered with a piece of PV C trim .
Long range .
Yeah .
Oh , right up .
If it slips , I'm running .
No , it should be .
All right .
It , it tacked up , tacked up from the bottom .
So , all right , you got it .
I have it .
You wanna , you're just gonna nail it or you wanna eyeball it close with eyeball it once I get the nail in here , uh , back to me a little back to me , back to me .
Uh right there is good .
Very good .
Yeah .
So that's close .
We're not quite on our line at the bottom and it gives us enough room to adjust .
That's what we want , you need to go in in the middle of the window .
Yeah , not too much .
Just let me pull the nail .
Yep .
After we constructed the balloon framed gable and wall , we discussed in episode four , ready to move on to the more standard construction of the other three walls .
These walls consist of two by four framing .
There was one bottom plate wall studs at 16 inches and 24 inches on center and two top plates that carry the load of the roof .
There's one load bearing header over the double door and two non load bearing headers over the other openings for wall sheeting on the back wall .
We are using a 38 inch thick product that has an enamel coating that doubles as our siding for the other two walls .
We're using a 7/16 sheathing product that incorporates a weather barrier which replaces the house wrap to calculate the length of the wall studs .
I take the overall height of the wall and subtract the thicknesses of the top and bottom plates instead of cutting each wall stud separately .
I prefer to line them up on edge and gang cut them with my big foot saw attachment .
Once the studs and plates are cut , I use the flat surface of the shed floor to build the walls .
I begin by marking the stud locations on both the top and bottom plate at the same time for efficiency and accuracy .
Each end of the stud is secured to the plates with two through nails .
Then we fasten the double top plate at each stud location .
Remembering to hold it back 3.5 inches to allow the top plate of the adjoining gable and wall to lap over and make a secure connection .
Fasten the double top plate at each stud location feed while you mail tack the bottom plate to the floor using a small six penny nail to prevent the plate from moving .
While we square the wall 1 41 and an eight .
Yeah , that's square .
As we mentioned , we're using a combined sheathing and siding product for the back wall and overhang it 3.5 at the end of the wall , we let the siding hang over 3.5 inches to cover the stud of the adjacent gable wall at the bottom of the wall where the siding hangs over the floor framing .
I measure up and mark the bottom plate location to ensure that every nail hits home .
I use adhesive at the seams to secure and seal the panels where they lap strengthening up the joint and trying to make it a little more waterproof .
I'm holding this up because this stuff that's good where it is up there , man .
Ok .
Whoop .
Whoop .
Ok .
Oh , got it .
Watch the nails somebody and let's go up pretty quick .
Come up .
Ok .
I'm gonna push it right .
You got it .
I'll hold it .
Ok .
Now , I'm gonna go around and push it in .
You are stronger than the incredible Hulk .
There you go .
You're on it .
Ok .
Go ahead once lifted and in place , secure the wall to the floor at each stud location and also to the adjoining wall .
All right .
Now , we just have to put a little tape to help seal the outside , put the corner board on and we're done .
God forbid , we don't build this dirty enough in the wind comes and blows it down for the front wall , double door opening .
We'll use a load bearing header to support the weight of the roof trusses .
We decided on a five ft wide opening .
So we'll make our header five ft wide plus 1.5 inches on either side to allow for the thickness of the jack studs .
The header consists of half inch sheathing sandwiched between 22 by fours on edge cut to length to support the header .
Two jack studs or trimmer studs are cut to fit from the bottom of the header to the bottom plate to make things easier .
Nail these to the king studs prior to wall assembly .
Right ?
I started it five ft , right .
Thank you .
Small blocks or cripples are placed above the header at the typical stud locations .
Well , you smell that somebody's cooking lobster on the grill .
You smell that is that lobster shanty anywhere nearby here to avoid the need for load bearing headers , the windows in the shed were sized to fit between studs , two ft on center .
All that's required are single header and S studs above and below the window with such a large door opening in this wall .
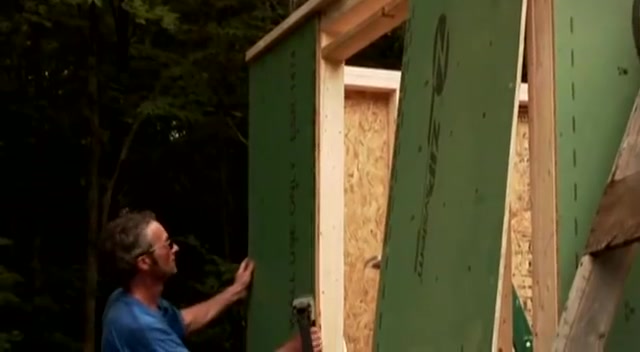
It's impractical to sheath the entire wall before we lift it .
Instead , we square the wall and attach one sheet .
We'll infill the rest of the sheathing after the wall is in place .
Sorry , let me do it .
I'm all thumbs that you want me to turn .
But before we raise the wall , we trimmed the sheathing around the door and window locations .
This is a handy trick .
Use the circular saw as a dust blower to keep the dust out of your eyes .
When you lift the wall , pull it , pull it to us , keep going good .
Now , got it me .
Do you do you , you could come in a touch .
So while Mac and feels the sheathing on that wall , I jump ahead and frame the last wall , I frame the wall just like the others .
But at a rough opening for a door that I purchased at the local home store doing all that bounty hammer .
The opening is centered in the wall and gets a non bearing header like the window in the adjacent wall .
A good trick for hammering in tight spaces is to use the side or cheek of your hammerhead to start the nail .
Another good hammer trick is to use the claw to counter sync the nails at the door locations .
The double top plate ties the end wall to the adjacent walls .
Secure the top plate with nails located above each stud .
OK .
Say you when , when are you gonna push ?
Hold it good , hold it right there this time , hold it there before applying the sheathing square .
Embrace the wall .
Keep holding it .
Ok .
All right .
Did you check it ?
Perfect .
Here we use a scrap tacked to the top plate to ensure the sheathing aligns .
The last step is to remove the bottom plate and the door openings .
This can be done with a hand saw , but it's much easier to use a reciprocating saw .
The roof system for the shed consists of simple site made trusses held together with OS B gussets .
All right .
Now that we've built all the walls right now , we're going to take a step back before I built the walls .
I actually used the floor deck to lay out the roof instead of using regular rafters and a regular ridge .
We built roof trusses .
I used the floor deck to snap out the lines because it's a much easier method of snapping it out full length pictures and then building the trusses right in place there on the floor deck .
So front to back is eight ft .
So that's what this represents from one side to the other , one wall to the other .
We have eight ft from the outside edge of that wall framing to the outside edge of this , we have eight ft and this is the top of the wall .
So on top of that , we put a roof truss , we're going to overhang the sockets six inches because we made it 12 inches like the house , it wouldn't be in proportion with the shed .
So we want to keep the same details but shrink them down to have the right proportion .
So we're making the overhang six inches .
so six inches from the outside of the wall to the front of the overhang .
So this wall is actually this wall right here .
What we want to do is mark the center .
It's an eight ft wall plus six inches on both sides gives you nine ft overall half of that , which is the center of the roof , 4.5 ft .
And then what I'm gonna do is just make another mark up here four or five ft away .
It doesn't really matter the same distance , four ft six inches and then just draw a reference line and this is the center of the building and the center of the roof for the slope of the roof or some people call it the pitch .
We're going to use an eight pitch here .
And what that means , an eight pitch or an eight slope means that for every foot I come in , I'm going to go eight inches up .
We know we're going 4.5 ft in to the center and we go up eight inches .
There's one ft 16 , there's two ft 24 there's three ft 32 there's four ft and then the half foot equals four inches , which is right there .
Ok .
Now , we have our top measurement here .
This is the top of the roof and we want the other top of the roof to fall right on top of the cord there .
Yep .
Just like that .
All these marks we're making is to the outside of the roof and then the other side .
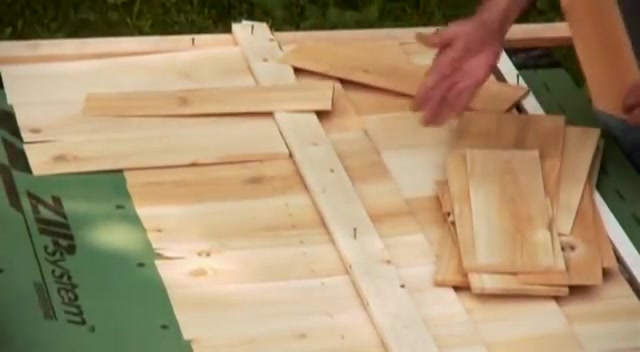
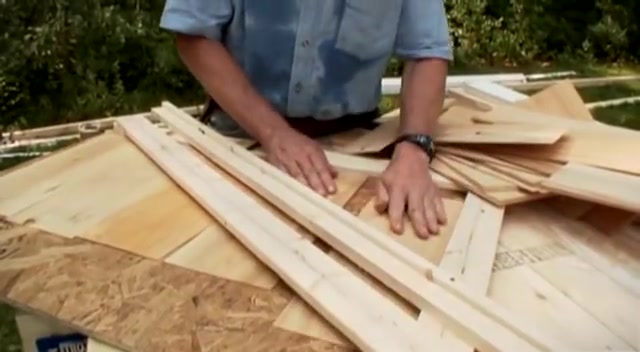
So now you can see the three pieces that we need to build the trust .
We have the bottom cord and then we have two top cords , one on this side and identical one on that side that we have to cut out a two by four stock .
What I need to do is get these two angles , this one down here and this one at the top so that we can cut this top court out a couple of different ways to do that .
We know this is an eight pitch or an eight slope .
And on all of these speed squares , you see a bunch of numbers here , no matter what type you get , they're all laid out the same .
I'll use this one because it's a little easier to read .
So it's the same thing .
We're looking along this edge right here of the top and we're going to dial it up till we hit the eight , the inside eight .
Not , I mean , the outside eight , not the inside here .
That's for Hipper Valley , we're going with the outside numbers .
That would be it .
Another way is using a sliding t be that way .
You don't even have to look at any numbers .
And all you do is hold it up against the lines , move it until you get the correct angle , tighten it up and there's the angle for the top .
Ok .
Long point to long point , the outside edge of the rafter or the top court of the trusts .
Yes , much better .
We're going to use a plywood gusset to nail the trust together .
So I'm just going over at least a couple inches past the inside of the wall .
Match the bottom edge here , mark the top , but I'm going to mark it down about a quarter because I don't want it coming up above the top again .
The same thing here down about a quarter of an inch .
Draw on that this line all the way up .
It doesn't have to be perfect because it's just a connection system .
So we'll cut that go about eight inches , 8 to 10 inches on either side , not work .
Yep , that works .
So we'll nail that together .
Put the two end ones on and we have a truss .
The only difference between a gable and trust and a regular trust is that the Glen trusts on the gable and wall on each end because they sit on the end wall , the sheathing goes up .
We have this big gap with nothing to nail to .
So we're going to put in little uprights in here .
So the sheathing can be nailed to it .
All the trusses inside don't need that once the sheaving comes up half inch Os B in this case , and we nail the whole thing together .
That's what really ties it together and makes it strong on this shed .
We are using two methods to build the gable end walls for no other reason than to show you .
Two methods are most likely to use .
When you build your shed .
You wanna pick one method and use it on both gable ends .
If you use a trust to make up the gable , you have to add blocking to fasten your wall sheathing .
After I build the trusses , I set them aside until I'm ready for them .

For this shed , we spaced the trusses two ft on center .
We marked the layout directly on the top plate , then brought the trusses in .
Am I moving along the back wall and nailing these with you ?
I think I can do this with you just staying down there .
Ok .
We will find out .
Do you want me to set a couple of nails in across the back ?
You know what ?
Just for now , go up on the ladder and hold this as we install the trusses .
We use a long piece of one by with the two ft on center layout marked on it .
Then we nail it to the gable end and use it to hold and space each truss in place right there .
Good .
You know , I mean , for now we secure the trusses by toe nailing them in place later , we'll add hurricane clips to satisfy our local code .

Uh I'll wait for you to get in , just put it in position .
It's got to go down .
We keep the gable and truss flush with the framing to ensure the sheathing remains in plain .
Alright .
Ok .
We got the roof trusses up .
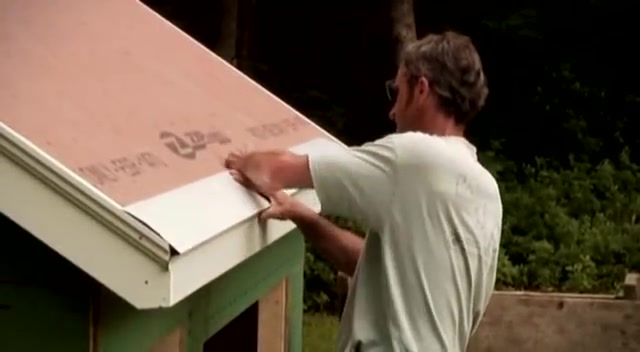
We just have to do some adjusting here and there take some measurements to make sure they're nice and plumb and we're going to put the roof sheathing down to ensure that the roof sheathing splits on a truss measured back from the rake trim to the center of the top core .
Also remember to stagger the seams as you did with the floor framing .
I can spin it around .
You want spinning around .
No , I can spin it around if I , if I have to got it , the roof sheathing we are using for this project has a tongue and groove system that keeps the edges aligned without the need for roof or H clips .
All those designers ever know how to brace the gable if we don't show them how to do it .
Now nail this down to the floor once we get it in position .
Oh , let's over , overkill .
It's gotta go more .
Uh-huh .
All right , we gotta get serious here .
Is that working ?
It is .
Oh , hold on .
That looks sweet .

Unlike the floor adhesive is not necessary for the roof sheathing guys are making me nervous in building this shed .
There was no one point construction where we can stop and say now let's do all the trim .
However , in a video , we can do exactly that .
There are three main areas of trim for this shed .
There's the trimmer on the roof area consisting of rake boards faces and so it , there's the trim around the doors and windows and then there's the trim that abuts the siding , like corner boards and bottom bands or water tables .
The trim is installed first .
In fact , it's often installed before the roof sheeting goes on from the surface of the gable wall .
We blocked out three inches using 22 by fours and flat as blocking for this trim .
I'm using a PV C trim which is a plastic board comes into a wide variety of shapes and sizes , some different profiles .
This is definitely easier to do on the ground .
This thing , if you only have one guy doing it , the socket behind the rake boards is secured to our two by four blocking .
You don't have to the top , but you will have to back cut one of the sides to get a tight fit .
We applied our one by six rate boards directly to this blocking all right .
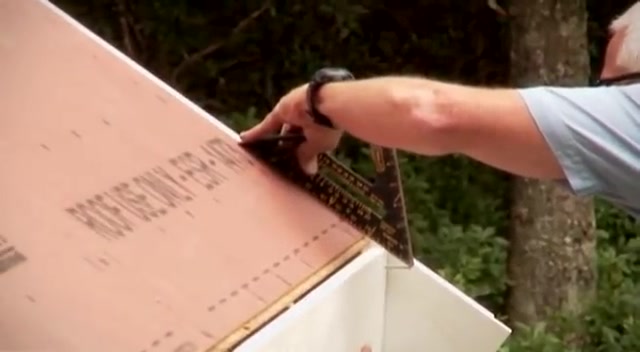
These are five eights use a piece of the roof sheathing as a gauge to align the rake trim plus with the top of the sheathing on a gable wall , the two rake boards meet at the top in a plum cut might in this case , it's the plump cut of an 8 12 pitch roof which you can read off your speed square to dress up the rake boards .
We added a second decorative piece , let the downhill ends of both boards run long for now .
After the roof sheathing is installed , we can install a facial .
Sounds good to me .
Cut the length of the facia equal to the distance between the inside of the rake boards .
Yeah , I know the .
Then using your speed square install it .
So the top edge is flushed with the roof sheathing with the front of the face .
As a guide cut the rake boards flush to it , then make a level cut across the rake boards flush with the bottom of the facial cut the sofa to the same length as a facia and secure it to the bottom cords of the trusses .
I like to visually check that the soft , it is tight against the back of the facia before fastening it .
There you go .
It only comes in about a half inch .
Yep , you got it for this project .
We're using one piece molded corner boards cut to fit around the socket at the top and flush with the bottom edge of the wall while fitting the corner board to the socket might look complicated .
It's really only three cuts , a rate cut that matches the roof pitch , a plump cut flushed with the side of the building and a level cut at the height of the soft underside to finish the trim at the corner requires two small blocks piece with a bevel cut on top for the sofa , a small right angle triangle for the right trim .
While it might look like Mac is using office white out to cover the nail heads and the PVC trim , it's actually exterior rated white touch up paint almost .
It's right since we are building our custom barn doors for this project , the trim around the front opening is installed flush with the framing good .
Yeah .
All right .
Let's do the other one since you're here and let's make sure that looks about right .
The windows and doors came with their own molding .
So the only other trim pieces left for us to install are the two bands .
One is the trim under the front door or kick plate here .
I really appreciate the durability of PV C trim .
This is a vulnerable spot prone to damage and rot , but by using P BC , I'm sure I'll never have to replace it .
The other trim band is at the bottom of our balloon frame gable wall .
Oh , yeah .
Yeah , I'm good .
We intentionally left this off to allow us to attach the wall sheathing to the floor system .
So we're putting in a couple of different types of doors and windows here for this door on this gable .
And we used a regular contractor grade steel entry door .
It'll get a lot of use and it's an easy door to put in and out .
It's a very inexpensive door , but it's still strong and sturdy for the window .
We bought the smallest window that they had in stock because we didn't want too much glass in the shed .
We still want to use the inside a shed for mostly stored .
So we want to limit the amount of glass that's around there for the front .
We're going to put in a nice wide double door .
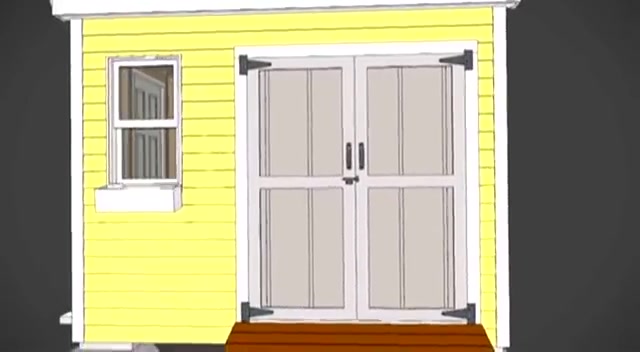
This is where we're going to save a little bit of money by building it ourselves and add some customization to the shed .
You know , how about you getting this other end ?
Ok .
How am I gonna get it right there ?
I can't get that .
Oh , I thought you were gonna do that .
Yeah , I am .
But I need to do these first before installing the door .
I cover all the edges of the sheeting with flashing tape .
Hm .
For the window opening , I create a sy pan with one wider six inch piece of flashing across the bottom .
I run this up the sides about four inches .
Then I cut away any excess flashing along the sides and stretch the membrane down the front at the corners for the door pan .

I use the same method being careful to seat the flashing into the corners .
This helps to prevent the bottom of the door jam from tearing into the flashing before installing the window , apply a beta cock along the sides and across the top of the rough opening .
This will seal the back of the window flange .
Two people can work together to quickly install the windows and doors .
Beautiful .
I love it for windows .
The person on the inside can center the window and make adjustments by gently prying on the edges .
The side's got to go up up a little bit more .
That's it .
That's good .
The person on the outside can level and nail the window once it's in place , the same cooperation works for the door installation as well .
Good .
First , once the door is centered , the outside person attacks the molding at the bottom , then the inside person can adjust for an even gap between the door edge and the jam all set .
Go ahead .
They look good when the doors in place a nail anywhere along the top will hold it until the door can be permanently secured .
Nail it off .
Let me give it a shot .
All right .
Put one right in the center here , I'll hold it to all set .
Ok .
Good .
Nail it off .
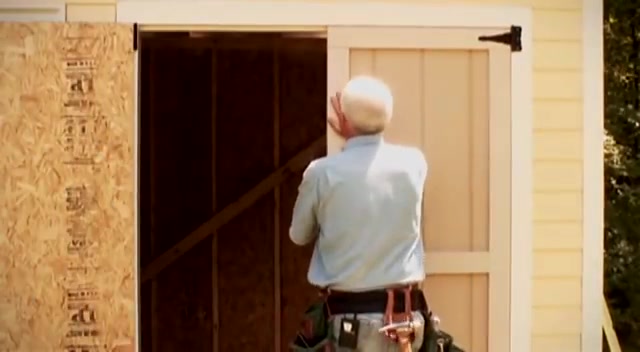
You got it for the double front door .
We'll use the same two in one siding and sheathing product .
That we used on the back of the shed .
This will make light sturdy doors that won't sag over time on the outside .
We'll apply a one by four pine frame .
This adds stiffness to the sheathing and gives us something solid to fasten our hinges to a rough opening is five ft wide .
So one door is two and one half feet .
Then I subtract one quarter of an inch all the way around to allow the door to move .
So I mark and cut two pieces of the sheathing to two ft five and one half inches by six ft , two and one half inches , rather than measuring and cutting the door separately .
2971.399 --> 3034.78
Be sure to clamp or hold the one by and the sheathing firmly together .
As you drive the screws , you can design your doors to your own taste .
Here , we went for a simple barn door look with no diagonals and not one screw came through good .
You like that idea .
Let's see what it's gonna look like .
Oh , it's gonna look beautiful .
Huh .
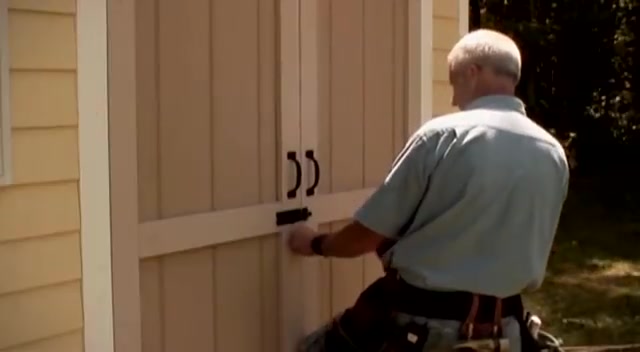
Our hinges were off the shelf barn style hinges from the local home store .
I attach the hinges directly to the one by pine with one and one quarter inch screws to hang the door .
Simply hold it in place and secure the other side of the hinge leaves .
That's squarer than I thought I like that .
Is that a word ?
That's the one very much more squarer .
Hit one in the two or call it good for now till we get the other one done and check it .
That's right , just right .
I'm using a typical slide bolt and some handles for hardware on the front , right ?
For security , you can also add slide bolts to the inside , top and bottom of the doors .
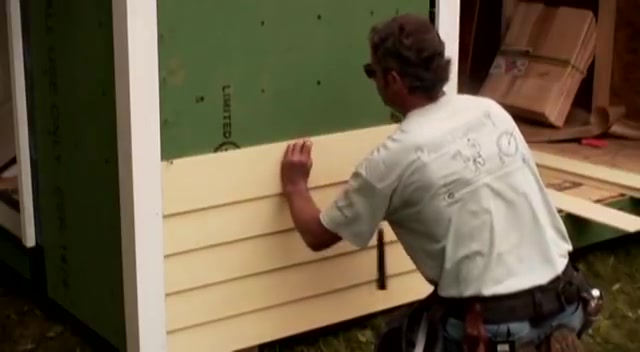
Yeah , that for the siding on this shed , we're using a number of different sidings for the rear .
We're using a paneled siding .
It's a smart side engineered wood panel .
It looks kind of like a barn board .
It comes pre prime .
So you don't have to worry about finishing it right away .
The nice thing about this is quick and easy and this is the finish .
So once you nail it on there , you're done for the front .
We're going with a more traditional clapboard type of look .
We're using fiber cement siding here .
And the nice thing about this is it already has the finish color on it .
So once we nail that up , we're done , we don't even have to finish paint it for the gable ends .
We're just using a white cedar shingle that we're going to let naturally go gray .
The easiest way to install the clapboard siding on the front of the shed is to make a story pole on the story pole .
I mark lines to represent the siding .
If possible .
I also adjust a course to land directly on the top of the window .
I place the story pole so that the bottom of the first course hangs down beyond the sheathing by about one half inch .
I use the story pole to mark the top of each course of siding before installing the first row at a kicker strip .
This can be a rip piece of siding or in this case , we used a one half inch wide scrap of Os B sheathing .
This strip kicks out the bottom courses to make it uniform with the other courses , right ?
The an efficient method for installing lap siding is to tack in nails at the siding layout .
Marks next to the trim , use these nails to locate a piece of siding while fastening it .
Once the siding course is secure , remove the nails above it and use them to secure the next course of siding .
When marking and cutting siding around windows and door trim , leave a 1 16 to 18 inch gap for expansion and contraction .
Sure .
When the bottom of the course falls over a window or door , it's necessary to add a kicker strip for these strips .
I use pieces that are the same thickness as the siding .
Flashings above the windows and doors will direct water out if it gets behind the siding .
Flashing is sold at most home stores for added protection against moisture infiltration .
I tap the top of the flashing with self adhesive flashing tape .
No , the , because you told me to do it correctly .
Yeah .
Yeah .
1 16 .
No .
Oops , you go be at seven .
You want screw it or nail up high over the top of the last course of siding .
I install a piece of one by trim sized to leave the correct reveal .

Now that the front's done , we'll move to the side and finish off the last of the siding .
The process for siding a wall with the shingles once it's up is the same process that we used on the other gable wall before we stood it up .
Only now it takes slightly longer to complete the job since we often have to work off ladders or scaffolding for the upper courses .
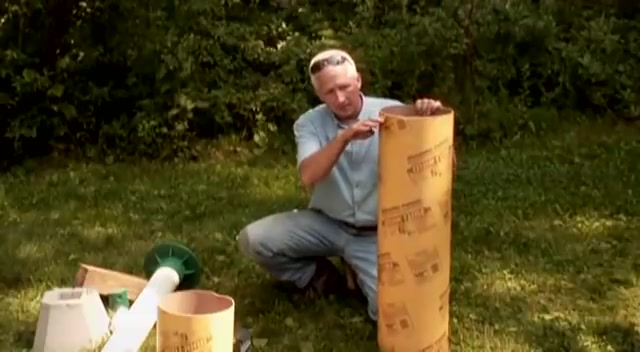
Great the roofing material we chose for this shed is a typical architectural asphalt shingle purchased at a local home store .
It matches the roofing on the house and is durable and practical for a small shed project .
It also has the added benefit of being easy to install before installing any roofing .
We need to install the roof flashing for this project .
We are installing a drip edge where the roof sheathing meets the FAA .
On top of that , we apply a flashing tape and go straight .
Yeah , straight as you can .
Instead of crooked , your heads don't slide on it .
Good .
I've got a roller for that .
We also apply a flashing tape over all of the roofing seams .
I think it's clearly obvious to everybody that I've never used this before .
It's my first time and we will take a little practice .
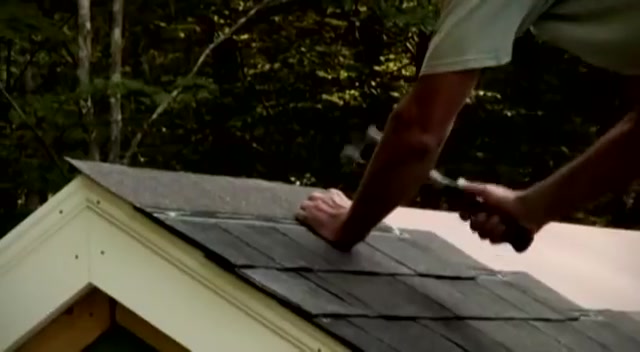
installing the asphalt shingles is probably the easiest part of building this shed .
And by remembering a few rules , it will protect the shed for decades .
First install a starter strip of shingles under the first course at the bottom edge .
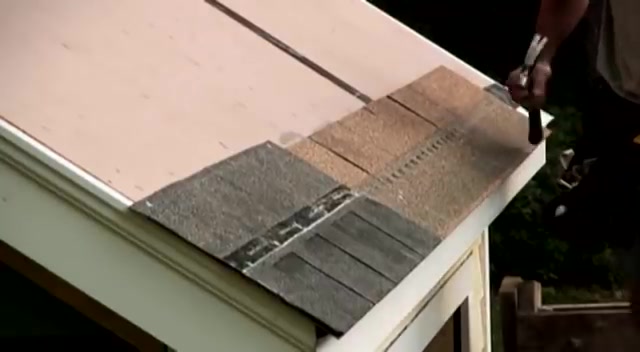
And while I'm a fan of following the manufacturer's instructions , we used some extra shingles .
We had left over from a previous project as a starter strip .
Asphalt shingles need to be staggered to prevent leaks to stagger .
The shingles cut a series of starter shingles and install them in a stair step pattern .
The manufacturer of this brand recommended cutting pieces of 28 21 14 and seven inch shingles to make up the first shingles in the first four rows .
The off cuts of these shingles make up the first shingle of the second four rows and so on along the rake , we'll overhang the shingles three quarters of an inch .
This combined with our PV C trim will prevent any water damage along that edge .
No soup for you .
You want bread .
You pay for bread .
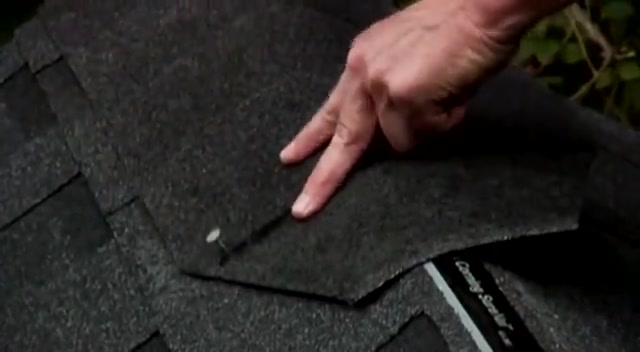
It's not hard to keep shingle rows aligned , especially on a small roof like this .
But it's not a bad idea to snap a few control lines along the way , we overlay the top courses , then install the ridge cap to complete the roof .
Finish the roof .
You use a roof cap which in this case , just standard three tab shingles that I cut with a little angle on them .
Now you can buy them like this , but I happen to have an extra bundle laying around of three tab shingles .
So I cut them up and they fit on the exact same way as the pre bought stuff for this shed .
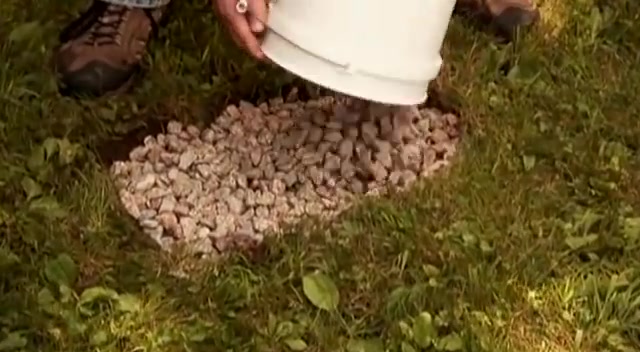
We're using a pretty basic foundation system .
All it is the cinder blocks on top of some crushed stone that goes into the dirt 6 to 8 inches .
We just dug the top soil down until we hit some gravel , filled the holes up with crushed stone and then put cinder blocks on .
But for a lot of other cases , you have to use a more substantial footing either by cold or just by common sense .
If you live in a high wind area or a seismic zone and you want this shed to stay put , you have to do something a little bit more substantial than just plopping it on a bunch of cinder blocks .
Ok .
Over here we have some different alternatives to the foundation systems .
This one actually isn't that much more substantial .
It's just a little bit easier .
It's a heavier foundation , a heavier block than what I have there .
You don't want to set it on top of the grass or the subsoil , you want to put on something more substantial like we did like gravel or crushed stone .
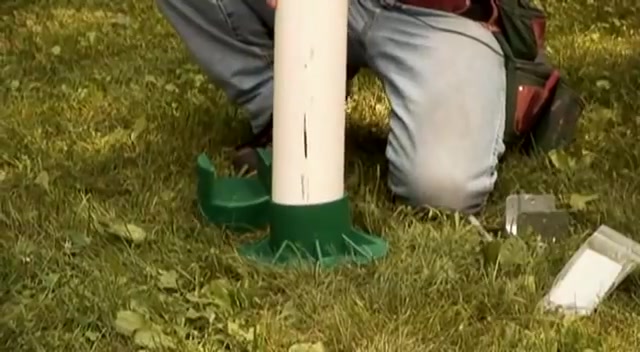
Once it's set , there's a hole formed into it that accepts a four by four p pretty tightly .
And obviously this is a little bit easier to do as far as leveling because you don't have to set these at all the same level like we did with the cinder block .
These can go at a little bit different levels and then you can cut the four by four to the exact level .
So your shed stays level and then you have some sort of connector to connect the pulse to the floor system .
Another alternative is called the ready footing and this is plastic and consists of a base a top and in between is just a simple scheduled 44 inch pipe .
You dig the footing down as far as you want it , say you want to go below the frost line .
And around here it's about 42 inches .
I would dig down 42 inches , set the base down in the hole .
You cut the schedule 40 pipe place this on top , push it tight together .
You don't have to glue it and it's all set back , fill it , make sure it stays plumb and there's your footing .
The floor frame fits right inside .
The Len is here and then there are a couple of bolts that bolt it and secure the frame to the ready footing .
The nice thing about the ready footing is that you don't have to wait for the cement to cure the minute you dig the hole , drop the footing in , put the top on back , fill it .
You can build right on top of it right away .
There's no curing time , no mixing time , none of that .
So it's a good alternative to use for a solid footing .
When you don't want to wait for the concrete is what most people are familiar with the builders tubes .
Basically , they're formed for concrete footings again , just like the ready footing .
You can dig down as far as you want , whether it's a foot or three or four ft to get below the frost table .
If you have one drop this down inside , make sure it's in the right position .
Have it sticking up maybe two or three inches above the finished grade back , fill it and then fill it with concrete .
If finished grade came to here , we fill it with concrete right to the top before the concrete cures drop in an anchor bolt .
So it's sticking up about an inch or two .
Once that's cured , we have the concrete foundation here with the anchor bolt sticking up about an inch or two .
Now to fasten the floor system to the footing .
There are a lot of different types of systems to connect a floor system down to a footing like this .
This is just one where it will drop right onto the anchor bolt and then you put a washer and not down and tighten it nice and tight .
Once the fastener is placed on the anchor bolt and fastened , and we can put a four by four post in there secure that build our floor frame on top of that .
And again , there are all sorts of different fastening systems to attach post to beam , beam to floor connections .
The whole idea is you want to have a system that connects your floor system to the post , the post , the footing , again , the concrete footing is the most substantial footing you can have for a shed , a deck or any structure .
So we've got the block on the rock footing .
We've got a more substantial large concrete footing that accepts a four by four post .
We have a ready footing and then we have the full concrete pier .
There are many different types of siding options you can put on the shed on this shed .
We use three different types which is not normal , but it worked out .
It worked well for demonstration purposes and for practical reasons as well .
On the rear of the shed , we use the structural sheathing type of panel which also doubles as a siding on the outside .
It's made to look like the old board and baton or texture 1 11 look and it comes pre stain .
So once you put it up , it's done and then within a few days or so you just have to paint it and it's all set for the side of the shed .
We use regular b grade white cedar shingles .
They have knots on them a little bit more than half way up , which makes them a little bit less expensive .
But when you cover over like that , the knots are concealed .
So the knots are really not a problem and it's a less expensive choice than getting the a grade less natural .
They last 20 to 30 years , maybe a little bit longer .
A little bit more expensive alternative is a red cedar type of shingle .
It's a little bit thicker and it has a much longer lifespan .
These typically go 40 years and over again , depending on how they're treated and how they weather .
Now , the Red Sea are a little bit longer than the white cedar .
And since they're more durable , we can actually get a taller exposure out of them .
The other alternative to a natural white or natural red cedar is to stain the white cedar or red cedar ahead of time .
These I ordered from the factory and these are dipped so that they're covered on all edges , bottom sides , front and back and you can see right where the line is for the dipping .
This really increases the life span of any shingle whether it's red cedar or white cedar .
This one happens to have a semi transparent type of stain .
This is the same type of thing .
This is a white cedar , pre dipped , white cedar from the factory .
It just has more of a solid color stain .
You can use just about any stain that you want on these .

You can either order these from the factory pre dipped and dried or you can set up a little assembly line in your backyard and pre dip them yourself , let them dry and then put them up and they'll last a lot longer than if you put them up naturally .
For the front of the shed .
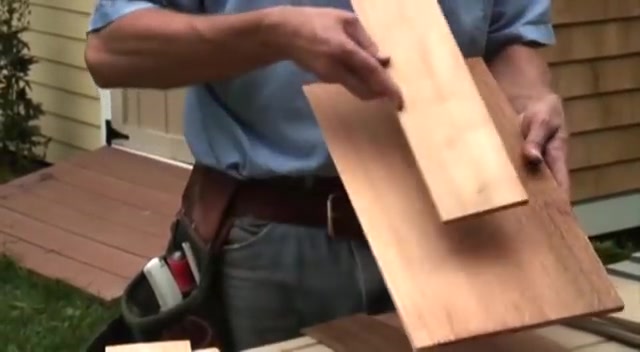
We used a lap siding that you typically see here in New England , a lot of the houses have the lap siding , but in this case , we used a fiber cement lap siding on the front .
We ordered it pre finished to the color that we wanted it .
So once we nailed it up , put it in , it was done and finished and we don't have to worry about protecting it for a long time .
Unlike the beveled siding , it has a square profile , but once it goes up on the side , it looks just like the bevel siding .
Another option is to use wood beveled siding .
What the fiber cement is replicating .
This is regular half by six wood bevel siding .
It's a clear piece .
So if you want the look of wood on the front of your shed just like you might want to match the house if you have real wood look , this is a more expensive alternative to the fiber cement product .
But again , for that real wood look , this is the only way to do it .
And finally , we have another type of wood beveled siding .
This is either redwood or red cedar , but this is a finger jointed siding .
In other words , they make up long pieces out of very small 8 , 12 , 16 inch pieces of scrap that they finger joint , they glue together , then they run it through the mill .
Once they do that , it goes through the painting process right in the factory .
So it's primed all the way around and it lasts quite a long time if you're going to paint the shed .
This is a good option because it's inexpensive and it's primed all the way around .
So there's less labor .
If you want a natural look , then you have to go back to using the wood siding and you have to clear coat it or stain it yourself .

You chose to add a ramp in front of the double door .
This will allow a lawnmower or snow blower to be driven right into the shed .
The ramp framing is made of three parts .
There is the ledger that attaches to the shed under the door opening .
There are the joists to carry the load of the decking and there's a landing plate that stabilizes the ramp on the ground .
The ramp framing is pressure treated lumber and the surface is synthetic decking which we had left over from another job .
This can easily be purchased in small quantities from your local lumber yard or home store .
First , I cut the joy to three ft lengths , which is how far I want the ramp to be .
Then I hold them in place and scribe the top and bottom angles .
This is pretty forgiving , but it's important to cut all the joys the same .
So first I cut one choice , then use that as the template to cut the other three .
Next , I cut the ledger to length which is equal to the width of the opening .
Then I cut a bevel on top to match the slope of the ramp .
Finally , I cut the landing plate to length which is the same as the ledger .
I assembled the ramp using galvanized ad and 10 D nails .
We leave that there and we take this right , something like that .
Do I have to go get that crying towel that's in my truck right to the end , right .
I'm not close to it when attaching the frame to the shed .
Remember to position it .
So the decking will be flushed with the floor .
Then I dig out to level the ground .
I don't know what that pencil was for .
That's a lot more than an inch there .
Bucko gonna buckle you , you will not .
I know we'll put stone in it .
Well , you are a little older than me .
So I thought you might be more tired .
Right .
Let me just get , I'm on the mark .
Inch and a half .
Go ahead .
You're just putting one in for now and then I'll move this where it needs to be you there .
Yep .
Oh , and that helped pull it right down .
When you , when you finish that , we space the decking to allow a full course at the top and bottom to the mark I made here so that we can keep , maintain it the same .
So measure that I've got 30 30 and three quarters , 30 and three quarters .
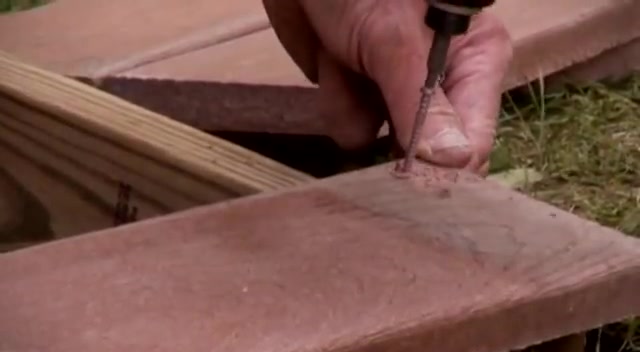
Then fasten the decking with screws designed for synthetic decking .
We also made a window plant box for this shed constructed from scraps of PV C trim .
The box had eight inch sides , holes in the bottom to allow drainage and was secured to the shed with deck screws .
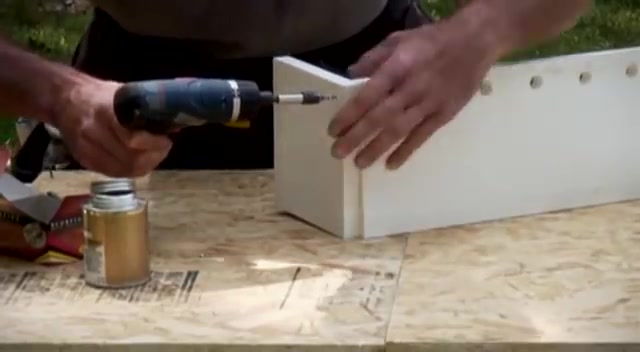
Course my , I was wondering when you were gonna feel that there you go .
Let the glue do the work .
Partnership
Are you looking for a way to reach a wider audience and get more views on your videos?
Our innovative video to text transcribing service can help you do just that.
We provide accurate transcriptions of your videos along with visual content that will help you attract new viewers and keep them engaged. Plus, our data analytics and ad campaign tools can help you monetize your content and maximize your revenue.
Let's partner up and take your video content to the next level!
Contact us today to learn more.