https://www.youtube.com/watch?v=P871I4H1T1Y
2023-06-14 18:04:47
How to Install a Subway Backsplash Tile!! Everything You Need to Know In One Video!!! DIY
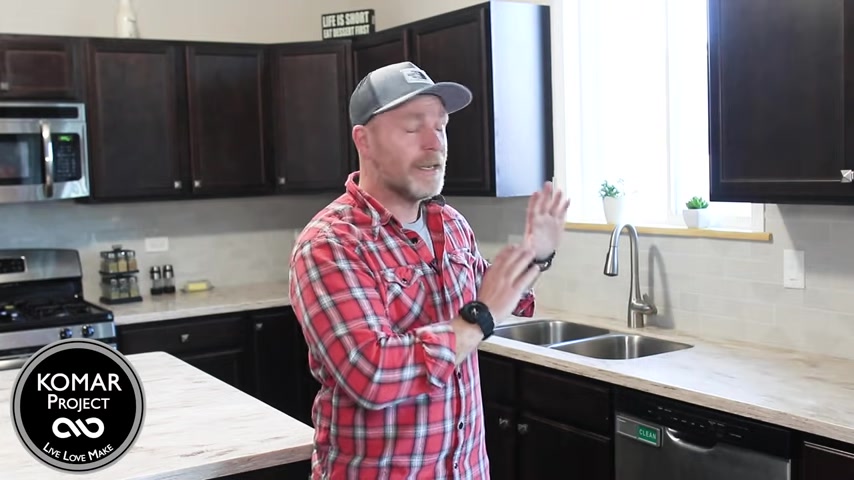
What's up guys ?
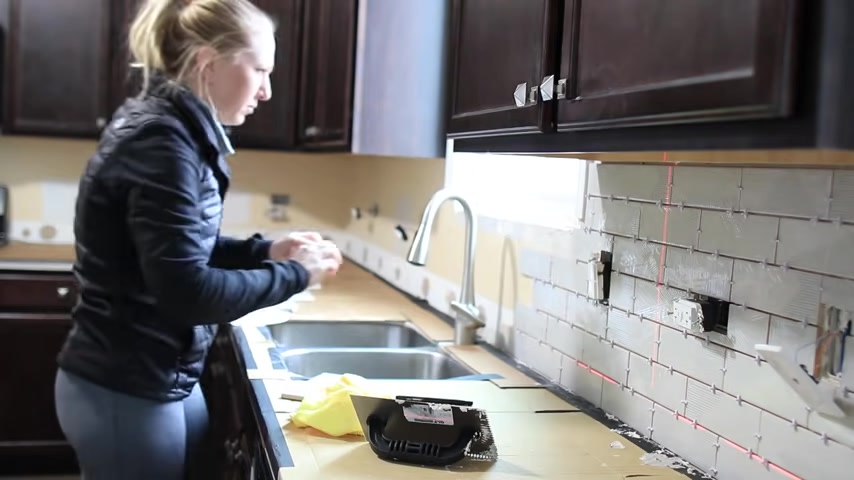
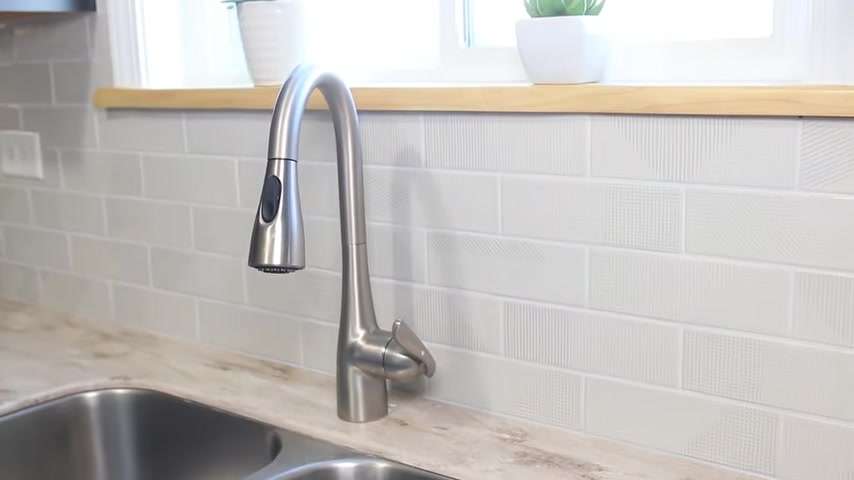
My name is Bar and today we're going to be given this builder grade kitchen a super simple makeover just by adding a subway backsplash that looks like this .
Yes .
So this is a very simple project .
If you're looking to learn how to tile , this is the place you're gonna learn .
And this is the tile you wanna learn on because it's pretty much impossible to screw up a backsplash unless you intentionally want to piss off .
Your wife .
Don't do that .
No .
So yeah , let me show you exactly what we did here , what tools and materials we used and how we got this thing done .
Welcome to the project .
Ok .
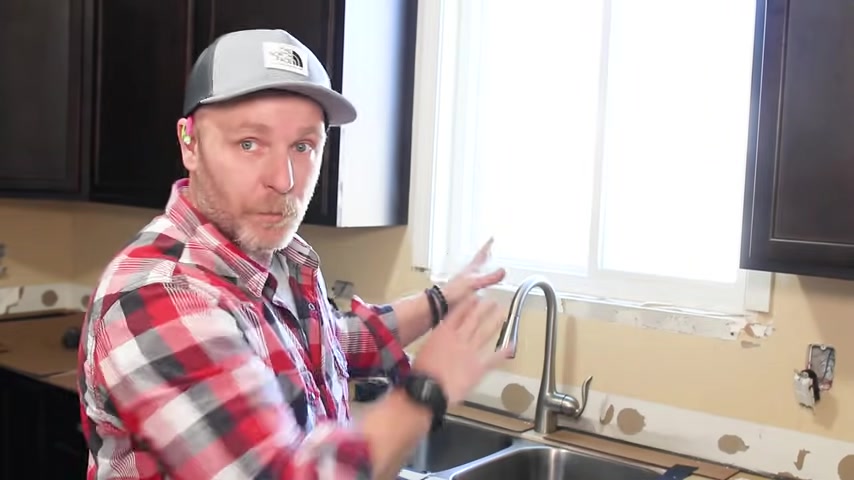
So the first thing that we actually have to do is remove the old backsplash .
This came with the house and it matches the countertops for some homes .
That's ok .
But in our case , it's gotta go .
So , Hammer and Bar , let's do it .
A backsplash is probably the easiest way to give your kitchen a dramatic upgrade without breaking the bank .
I think we're all in at around 500 bucks for materials and two days of labor after finding my stud locations I carefully use my bar to pry it away from the wall at those stud locations and then I just removed it from the wall .
Now , send the purpose of the tile .
Next , I needed to remove the old cocking and I use a scraper with a razor blade to do that .
This is one of those tools that is used all the time in my shop .
And the disposable blades are cheap to replace .
I'll have a link to it and all the tools I use in this build in the description below .
Now , this process is a messy one .
At least every time I've done it , I made a big mess on the countertop .
So I always cover it with some cardboard or plastic .
That way it makes the clean up a breeze and keeps the misses happy .
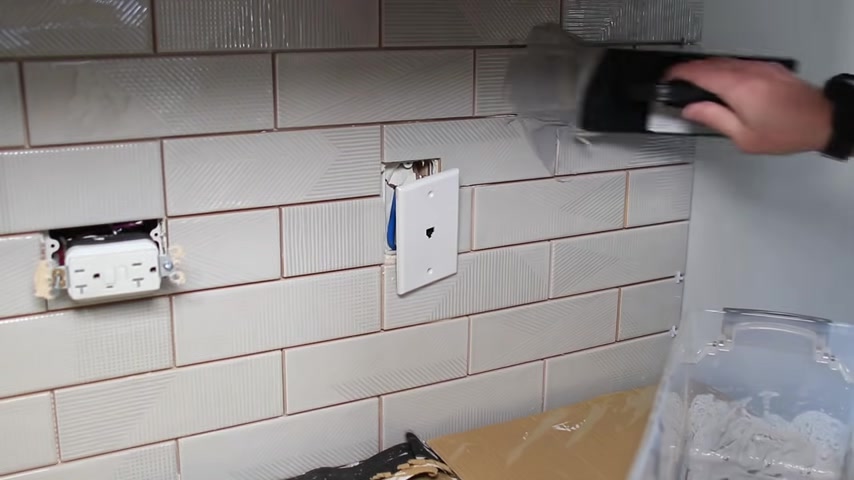
Next , I needed to pull the electrical outlets away from the wall and make room for the tile .
Yeah .
Ok .
Yeah .
So you definitely want to turn off the power before you pull any of these outlets out .
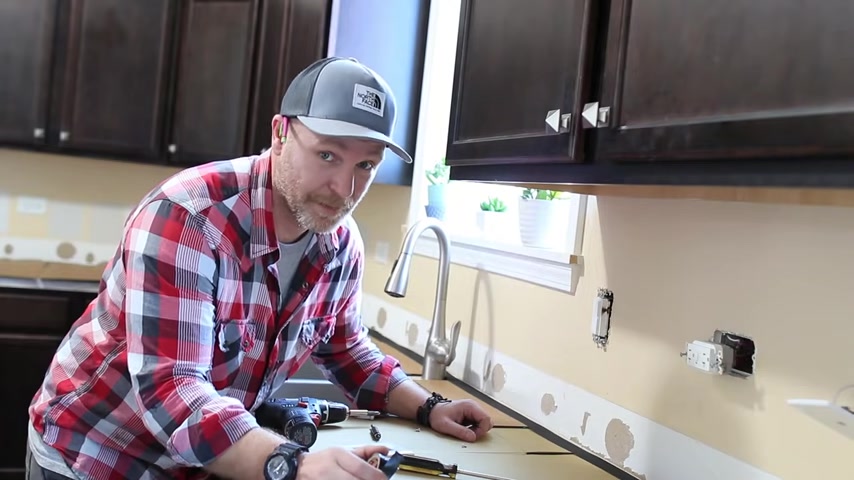
Any time I work with power , I get zapped for whatever reason I get zapped .
I just ran downstairs , hit the breaker , they're all off and we're gonna tape every single outlet when it comes out so that I don't run into issues because when it touches the box , you have a chance of a short one .
Yeah .
So make sure you turn off that breaker before you start and if you're not comfortable doing that or working around outlets just call an electrician .
Don't be like me here .
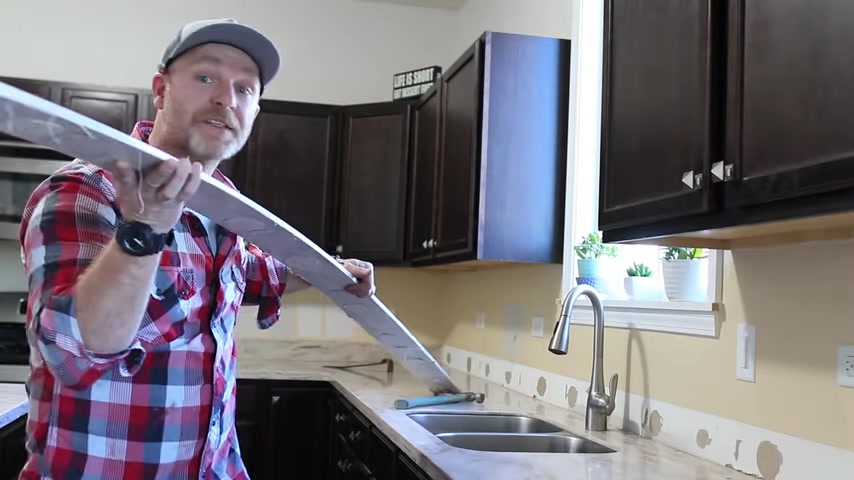
I'm removing the window sill because I'm gonna be replacing it with a custom wood one that I'm making my day .
But if you're just doing a backsplash , you don't have to do any of this .
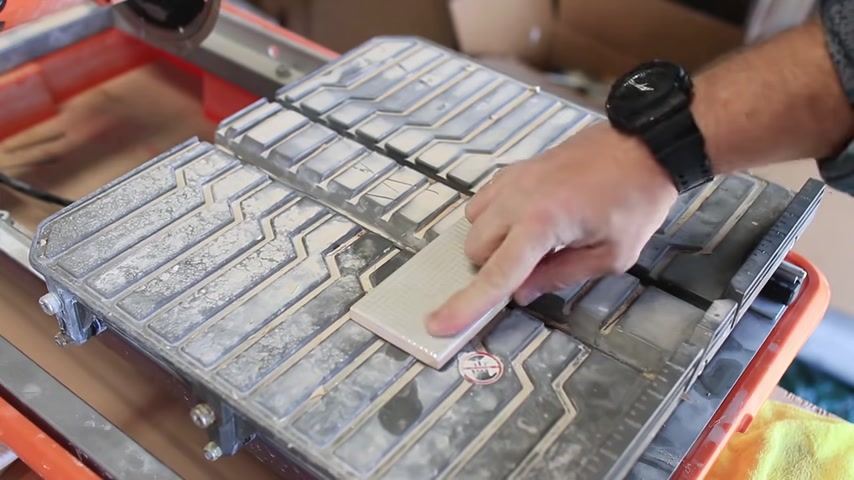
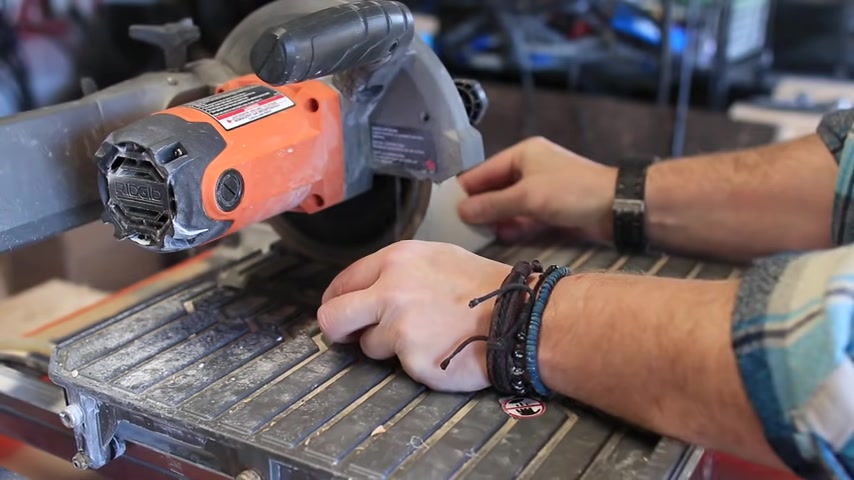
Now , let's talk about all the tools you're gonna need to complete this project starting with the wet saw , right ?
So the way these saws work just like a table saw , except that it has a sliding table .
Instead of pushing the piece on the table , you actually lay it on the table and you slide the table itself through the blade .
So it makes it very easy .
You can do the same exact thing using a grinder and I'll show you guys how in just a little bit , but you're also going to need a square , a sharpie A V or not .
In my case , this is 3/8 of an inch , a rubber grout float and a sponge .
All right .
Now that we have our walls all prepped .
The window sells out .
We're gonna do something really cool with that one .
Um It's time for the time .
So let me show you guys what we got because it's cool .
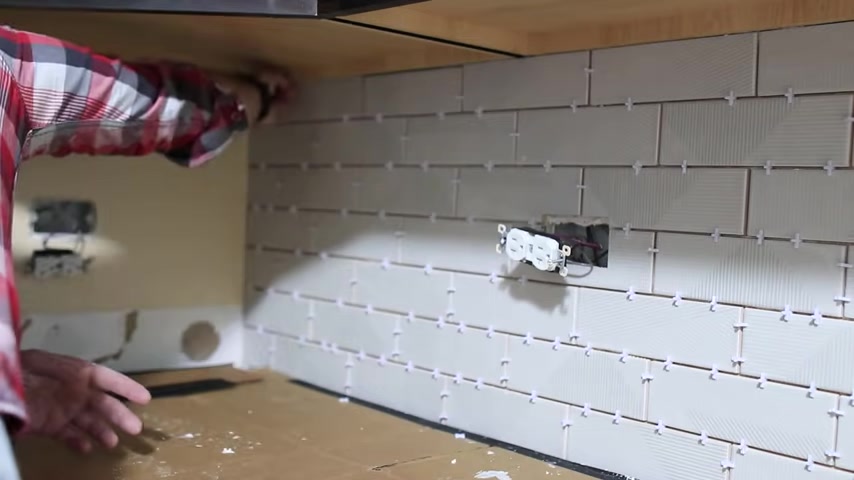
These are 2.5 by eight inch subway texture ties , which I think is gonna give the backsplash a little bit more character but still retain that clean modern look we're going for .
Ok .
So we're gonna be starting with the outside corner , wherever our cabinets are showing because this is gonna be the end piece .
So I want a full tile here and start working my way towards the corner .
So once everything is prepped , you want to lay this stuff out , you wanna know how many tiles you're going up because the last thing you want is a little slither down on the bottom or on top , you wanna kind of space it out according to your spacers and the size of your tile .
Now that we have all of our tiles figured out , let's talk about cutting and actually how to make cuts .
First .
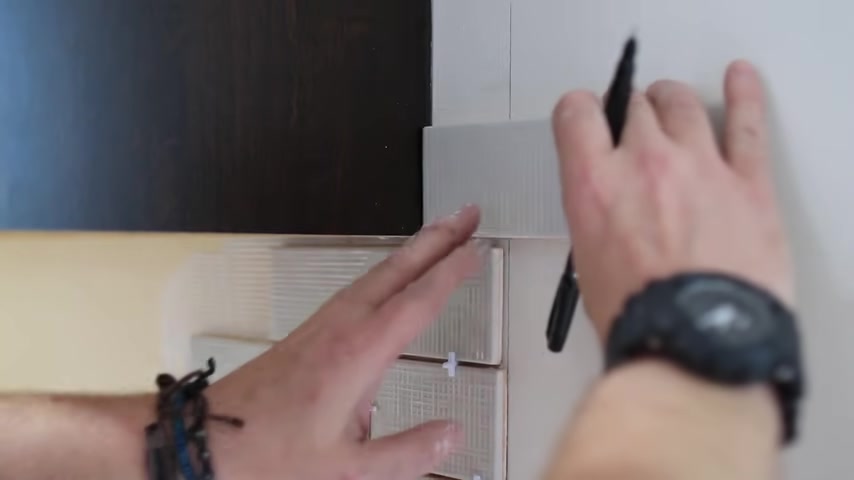
You want to measure out your tile to whatever size you need and then mark it with a sharpie .
If you use a pencil , you're barely going to see the mark .
But with this being a polish tile , you can very easily wipe it off and you can see it while you're working with repetitive straight cuts .
I place the mark right up to the blade and make sure that I'm lined up .
Then I can take a piece of scrap wood and clamp it to the table for a consistent tile cut size or you can just mark each piece and cut it that way .
There's no need for a stop lock .
Next is what I call the L shape cut .
You're usually gonna have to make these around outlets and I do it just like a straight cut .
But the only difference is I don't go past the perpendicular line , then you can rotate the piece and cut that shorter end .
Now , this isn't gonna cut all the way through for you because the blade is circular and you're gonna have to remedy that .
And the way I do this is with a tile lift method .
And basically all it is is just lifting that tile a little bit while the blade is spinning and it cuts it to the corner for you and then you can just clean it up .
The next cut is the U shape cut .
I start by making end cuts on the left and right side of the U and then make cuts between them every eighth of an inch or so .
Then I tilt the tile up and remove the rest out of the material between them .
I've been using this method for years .
And if you don't feel comfortable doing these cuts , just flip the tile upside down and you can cut from the backside , just remember not to pass your mark line .
Remember how I said that you don't need a tile saw to do this .
Well , it's true .
You can make all these cuts and then some using a grinder with a diamond tip blade .
All you have to do is clamp your tile as close as possible to the edge of your work surface with the wayside hanging off , then you can cut it off with a grinder , knock it on the table gently and the waist will fall right off , then you can clean up the insight and you're ready to install .
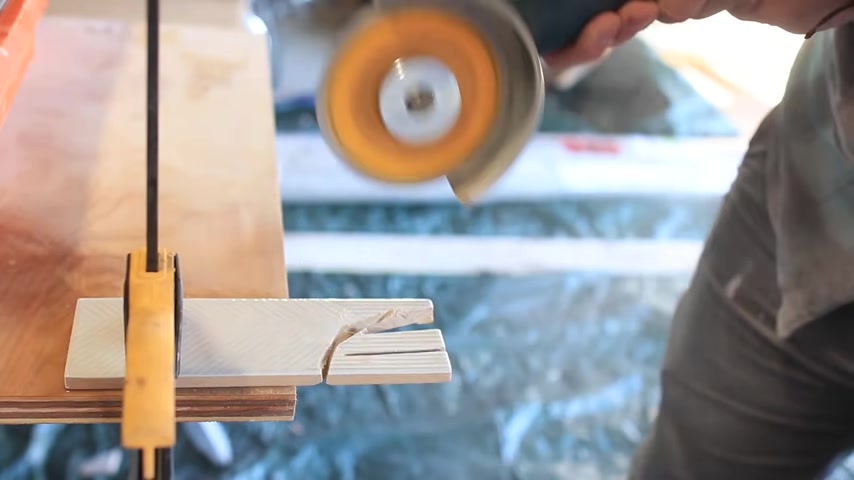
The really cool thing about using a grinder is that it has a small blade and you can actually make curved cuts with it .
This would be very useful when installing towels in the shower and you have to make curved cuts around the drains and water controls .
So a big tile saw like this is great , but don't let that stop you because you guys just saw that a grinder is gonna do the trick just fine and even one of those scores that breaks for like 20 bucks will do the job as well .
So don't let a specific tool stop .
You just get out there and figure it out .
You guys can do it .
Not for the fun part .
The actual tile installation , I'm using a premixed mortar from my local hardware store .
You can get it in powder form , but I hate mixing it .
So premixed it is , you want to slap it on the wall using the trial and spread it around evenly .
Then place a couple of spacers on the bottom and start placing your tiles on top of the counter top .
You wanna start with a full tile on the bottom and then a half tile on the second row .
Then you can just alternate placing two spacers on each tile and one in between also with an edge like this , you want to place the factory edge of the tile on the outside where it's going to show and the cut side is gonna go on the inside of your backsplash .
I hope that makes sense for small areas like on the side of this cabinet , you don't want to put mortar on the wall there .
What you wanna do is just back butter your piece and then you can put it directly onto the wall without having to make a huge mess all around your cabinet around the outlets .
You want to hover your tile in the area that it's going to be and then mark it , then you cut it the way we talked about earlier .
Just remember when you're cutting fur around the outlets , cut it to where the drywall is not where the box is ending .
This is going to make it a lot easier for you when you actually go to install the outlet back into the box .
Installing these tiles is super easy .
And even Honey Bunny got in on the mix , which was awesome because we got to spend some quality time .
We got a project done and we had a lot of fun doing it .
What , how do I know ?
OK , so I put this approximately that much on , how do I know that's enough ?
What is the goal ?
I understand what the question is .
Why is that enough or is this too much ?
And that's enough .
So , honey Bunny had a great question .
How do you know when you have enough of the mortar on the wall or on the back of the top ?
Let me show you .
So this trial and any other trial is gonna be designed with either a notch or with these grooves with these notches here .
And when you get 90 degrees to the wall , it's gonna give you the exact amount of spread that you need .
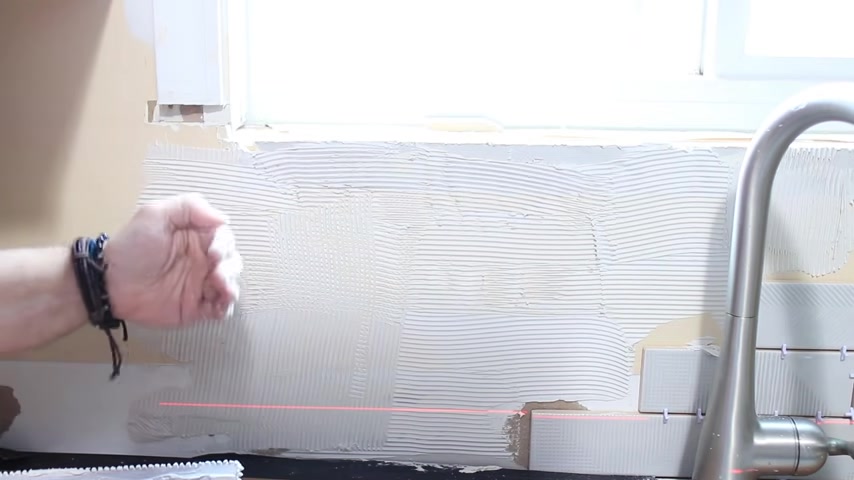
So whether you have a perfect V notch or you go across this way and then this way , as long as you have water there and it's sticking away from the wall , you're gonna be fine .
All right .
So , too much water would be when you apply it and then you don't go all the way to the wall .
So you , so you should definitely hear the scrapes .
Yes .
So if this is too high , now you can , as long as you scrape it to the wall , you are good to go .
All right .
If you have this and you're just kind of floating it across , even though it's at a 45 degree angle , you're not going all the way to the wall , that's gonna be too much because then the tiles are gonna be off because you're never gonna be able to get that smooth consistency all the way across your wall .
This way , if you're scraping across the wall , you're always gonna get the same consistency .
Very good question , baby .
That was a perfect example of why she's smarter than me because she asked the questions that I don't even think about .
Did you do it ?
All right .
It's been about four hours since I installed this side of the back splash .
And I'm out of spaces , which means I either go back to the store and get more or I could just rob from here because the mortar is getting dry .
So once you pull these out right now , they're not gonna move .
It'll be like , all right guys , we're at that point where we have to pull out the stove and all I wanna do is just get it off of the wall so I can put a ledger back there so I can put my tiles on top of that ledger .
I'll have to pull the whole thing out .
So let's try that .
I place my level across the two cabinets and screw my ledger right under it .
So I know the towel will have a smooth transition over the empty space and a ledger can be just about anything that can temporarily be screwed to the wall .
And in my case , it's an old piece of scrap plywood .
Then you can continue the tile across just like you're installing it over the counter top .
Yeah , you get stuff in my mustache .
You lie .
I totally got stuff in my mustache fart .
Ok .
That's what you call a finger throw .
Oh , nice snap cabinet .
After getting the motor out of my mustache .
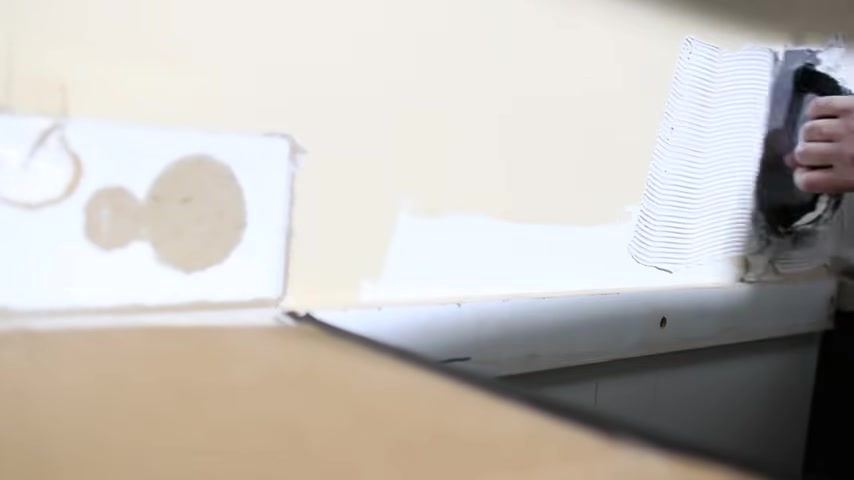
I started mixing the grout .
Your spacers are gonna dictate the type of grout that you should use anything .
1/8 of an inch or smaller uses uns sanded grout .
And since my spacers are 1/8 of an inch , we got uns sanded grout called silver bullet , which is a very light gray and it's gonna complement the tiles really well .
You want to get a consistency between ketchup and peanut butter and just start pushing it into the grout lines using the grout flow .
After grouting , I let it sit for about 30 minutes and then use the tile sponge to start cleaning it all off .
You're not going to get it all on the first cleaning and that tile is gonna have like a misty haze to it totally normal .
Just clean it again and again until it's all gone .
I think we did a total of four wipe downs before we got that has completely off .
Then I cock the bottom and top of the tile using a cock .
Install the outlets using longer inch and a quarter .
Number six screws , put the cover plates back on .
Install the new live edge window sill that I made .
And this project is a wrap .
So that's it .
Guys , we are done and this was a very simple and painless installation which a lot of times it's , they're not painless .
They're you , you know , you know how bad they can be .
But overall it only took us a weekend and we were able to knock this thing out .
Now , we absolutely love this texture tile .
It adds a character that you normally wouldn't have with the subway tile and it just looks cool .
So we like it .
So if you guys have any questions or comments on how I did any of this stuff or if you want some clarification , leave those comments down below .
If you wanna know what's going on on a daily basis .
Go ahead and follow me on Instagram .
I'm very active there .
That's the best way of getting a hold of me and getting merchandise and all that stuff .
And if you're a youtube channel , go ahead and hit that subscribe button with the bell .
So you don't miss any upcoming videos and also share this video with your friends and family so they can put in a backsplash themselves and they don't have to call you .
Thank you so much for joining me on this experience .
I'll see you guys next time , ok ?
Don't fuck .
Just don't get caught by the Popo because you know the Popo , that's me .
I'm the Popo .
He's gonna get you .
Partnership
Are you looking for a way to reach a wider audience and get more views on your videos?
Our innovative video to text transcribing service can help you do just that.
We provide accurate transcriptions of your videos along with visual content that will help you attract new viewers and keep them engaged. Plus, our data analytics and ad campaign tools can help you monetize your content and maximize your revenue.
Let's partner up and take your video content to the next level!
Contact us today to learn more.