https://www.youtube.com/watch?v=HnCh0bfaZ9U
How to Solve a Rubik's Cube - Part 5 - Complete Top Face
All right , this is step five of how to solve a Rubik's cube .
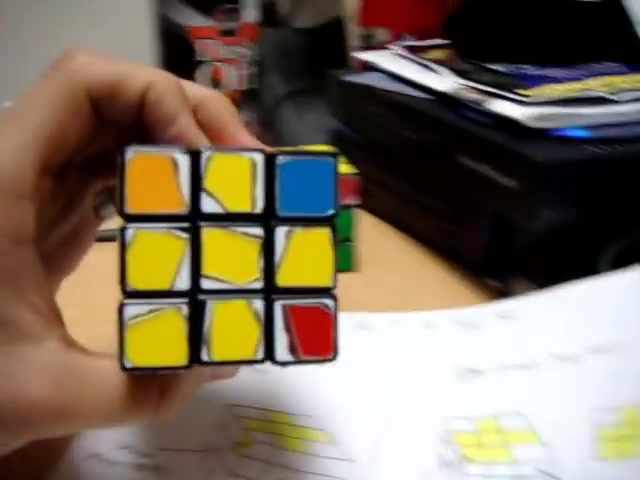
At this point , you should already have a cross on the top in yellow .
And you should also have two completed bottom layers that were done in the last four steps .
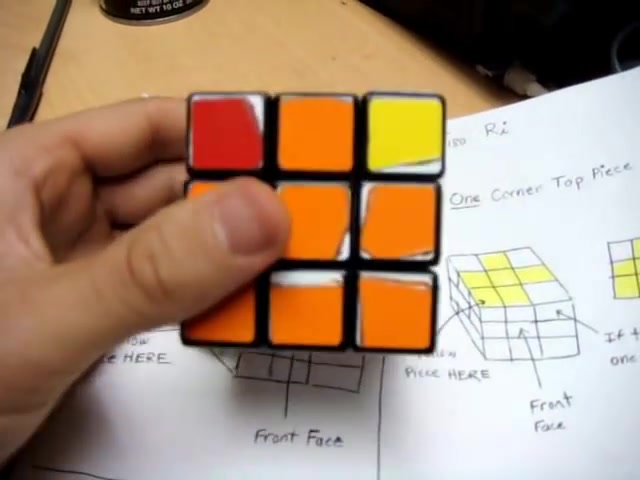
So what we need to do now is we need to just check how many additional corners we have next to this yellow cross .
In my case , I have zero , but you might have one or you might even have 23 is not a possibility .
So depending on how many you have , there are certain ways to hold the cube before you perform the algorithm .
The algorithm in this case is right clockwise , top clockwise , right , counter clockwise , top clockwise , right clockwise , top 180 right , counter clockwise .
So in my case , I have zero extra corner pieces next to the yellow cross .
So as I diagrammed here , if you have no corner pieces on the top , you need to place a yellow piece on the top layer in the upper left of the left face , in the upper right of the left face .
So in my case , that would look like So , and then you could perform that move .
So let's go ahead and do that .
So the move I would like to perform is right clockwise , top clockwise , right , counterclockwise , top clockwise , right clockwise , top 100 and 80 right , counter clockwise .
Now what this gives us is it gives us one additional corner next to this yellow cross .
So if you look at the diagram , if you have one corner top piece , you are to place it in the bottom left of the top face .
So I would be holding it like this and this would now be my front face .
This is the top face .
This is the right .
So you have to position it like this .
So after you position it like that , then you can again perform the same move .
So that move is right clockwise , top clockwise , right counterclockwise , top clockwise , right clockwise , top a 180 and right counter clockwise .
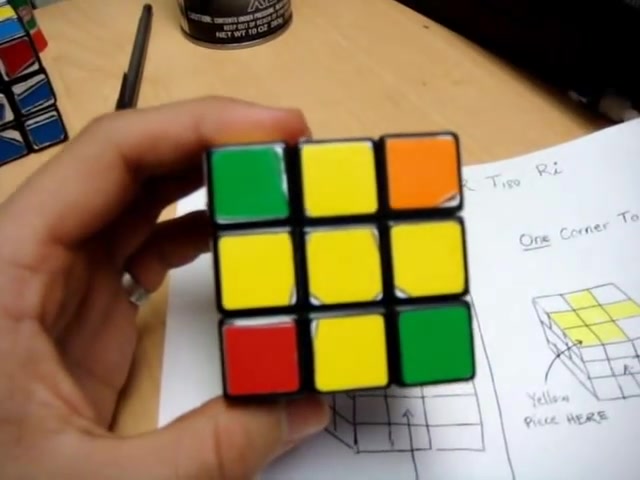
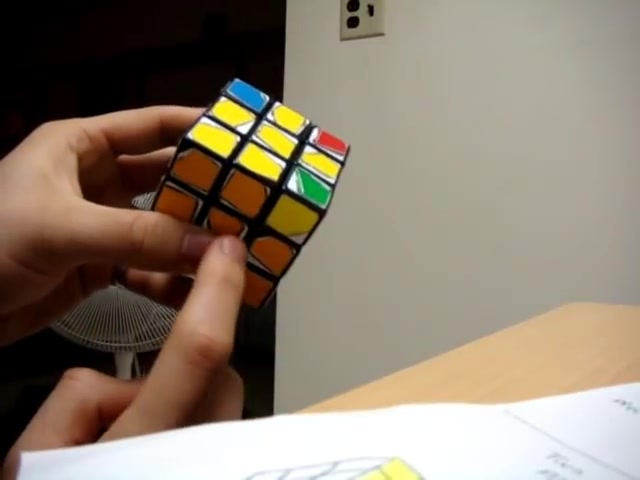
Now , as you can see in my case that completes the top layer .
Now you have all yellow on top .
That doesn't finish the cube though , you still have to position the remaining edge pieces and corner pieces of the top layer .
So the one case that I didn't go over it is the case where you have two top corner pieces next to the yellow cross .
And for all the cases , there are certain different ways that this can look , you can have two ones that look on top like this and you have a yellow piece here .
Now you always have to place the yellow corner piece on the front face in the upper left .
So I have used , I'm using my old cube as a demonstration .
So this is in this case , it is this case .

So what you have to do is you have to place the yellow corner piece in the upper left of the front face .
Now you might be holding it like this .
All you have to do is basically just rotate the cube until you have a piece that matches where you need to put it , which is in the upper left of the front face .
Then you can go ahead and perform that same move .
So I'm going to do that move again .
So once it's here , then you can perform that move .
This is now the front face .
So it is right clockwise , top clockwise , right counterclockwise , top clockwise , right clockwise , top 100 and 80 and write counterclockwise .
Now you see what that gives you is the one piece next to the cross .
So it is already positioned as you can see , it is already positioned as it should be when you're performing the algorithm .
So all you have to do is just do the move a another another time .
So if we do the move another time , right clockwise , top clockwise , right , counter clockwise , top clockwise , right clockwise , top 180 right back down , we get another instance where there is one corner piece next to the cross .
But as you'll see , it's in the upper right and we don't want it there , we want it in the lower left .
So all we have to do is just turn the cube until we have that piece there .
And you'll notice that there is a yellow piece in the upper right of the front face .
If you have a case where there is one additional corner piece next next to the cross and you also have on the front face , a yellow piece in the upper right .
Then you'll know that by performing that algorithm one time , it will complete the top layer that's called the soon S UN E .
So if we perform that move one more time , right clockwise , top clockwise , right , counterclockwise , top clockwise , right clockwise , top one 180 right counterclockwise that completes the top layer .
The next step is going to be positioning the corner pieces of the top layer .
Are you looking for a way to reach a wider audience and get more views on your videos?
Our innovative video to text transcribing service can help you do just that.
We provide accurate transcriptions of your videos along with visual content that will help you attract new viewers and keep them engaged. Plus, our data analytics and ad campaign tools can help you monetize your content and maximize your revenue.
Let's partner up and take your video content to the next level!
Contact us today to learn more.