https://www.youtube.com/watch?v=Le-0wHEKvow
Atlas OS Windows Showcase & Installation GUIDE! (Windows _BUT_ Optimized for Gaming)
Hello , guys .
I'm welcome back to another video and today's video I'll be showing you guys how to install Atlas .
And also , I'm gonna be showcasing it , giving you guys some pointers .
Um , and tell you why you should use Atlas .
Uh , but if you already know what Atlas is and you just want to get started installing it , there's a time stamp on the screen right now which you can skip to , Um but yeah , let's get Let's get let's get started with , uh , showcasing it .
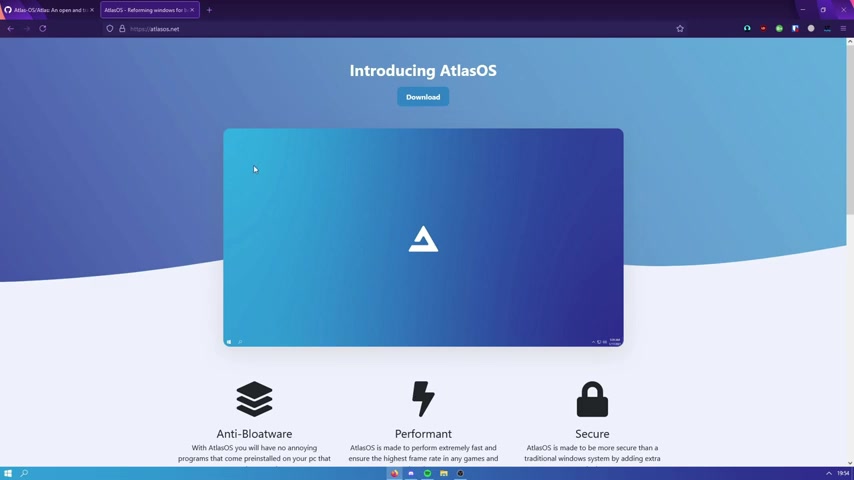
OK , so we actually have the Atlas OS website , which is atlas OS dot net .
You guys can go to this .
Um , but essentially , you just download it and you can download the latest version .
You can also view our change log down here .
Uh , you guys can check out what has been made .
We have a couple of builds .
Um , but you can only download the latest version .
Um , but we do also do have a github , which is , uh , clickable down here at the bottom .
Um , which gives a much more detailed explanation of why you should use Atlas .
Um , but essentially , um So Alice is pre tweeted .
We've done almost everything to squeeze out the most performance and minimise latency and input lag .
Uh , we've done this by doing the following .
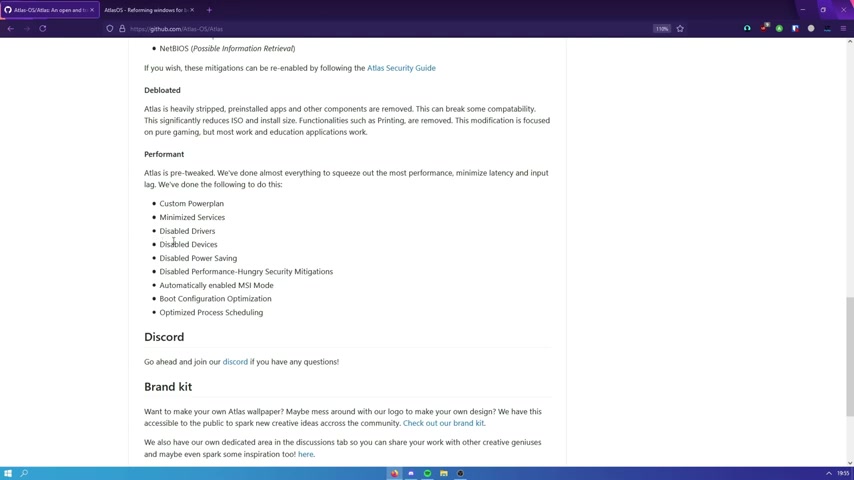
So we have a custom power plan , uh , which I'm also running Atlas .
So I have that enabled right now .
Uh , you have We have We've minimised services , so that means the system latency is gonna be a lot less .
And for people who are running back , like worse systems , like , really laggy , um , old components , Um , then FPs is going to be a big part of having one of my services .
Um , so this is a This is a really important thing .
Um , we've also disabled any useless drivers and anything that's like , really , really old systems .
Um , we disable devices that aren't being used .
This is also good for system latency .
Um , and also input lag .
So we've done that .
We've also disabled power saving , so we're making sure that nothing is being disabled to save power .
Um , if you guys are on a laptop , then you probably should look at a different alternative because this is strictly for gaming .
Um , and that's the only thing that we are aiming to achieve .
We disabled any performance hungry security mitigation .
So such as Windows Defender , that is completely stripped .
Um , it means you can get a lot less CP usage because Windows defender does take up quite a lot of CPU .
Um , we've automatically enabled M SI mode .
So that's for your graphics card .
Um , and like your USB port stuff like that , uh , your boot .
The boot configuration is optimised , so the installation for Atlas is a lot faster .
Um , there's a lot less to install as well .
So Atlas is only 1.5 gigabytes or so , Like around that , Maybe a little bit higher .
Um , but compared to like , I think it's like I'm not 100% sure on this , but it's around eight gigabytes .
Uh , that normal windows is , but that's because it's packing all the other versions as well .
Um , So , um , we also have , um we've optimised process scheduling , so your CPU is gonna be able to prioritise open apps in our background apps .
Uh , so this is also very important .
So you guys can also see the source here .
So we've included all the source here in case you are not trusting , um , Atlas And we also have the modules here , too .
Um , and also , there is all the credits over here , in case you want to check them out .
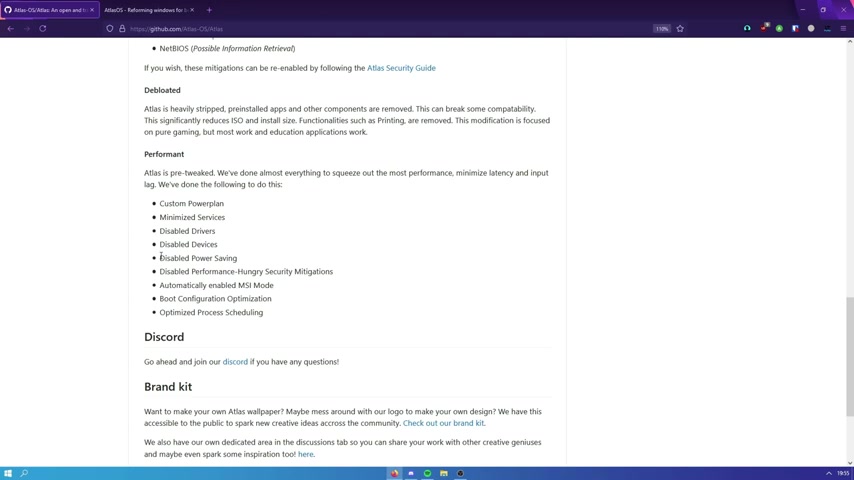
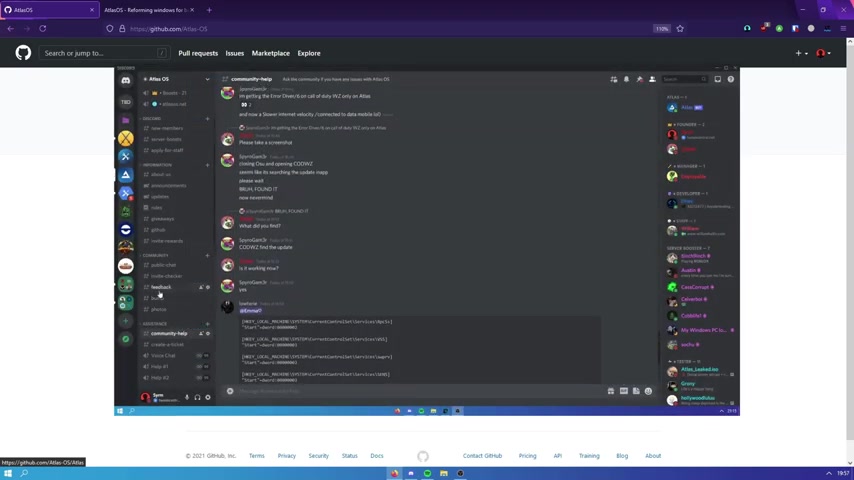
And we also have the atlas disc or which is linked to the description .
In case when you're installing it and you become you having any issues , we can help you , Uh , do not .
Do not be afraid to ask the community .
Um , as it says community run or what you can do is you can create a ticket in case you have an actual , uh , an issue with , uh , an app is coma is not compatible .
And you and you want to get that fixed , that we can look into it and help you out and even release a new build where that is fixed .
Also , make sure to follow us on Twitter .
We don't use it much , but we do appreciate it .
So go ahead and do that too .
So now you're probably wondering , um so how do we as a viewer know that it's actually working ?
So I have a , um I'm gonna put a benchmark on the screen right now , so I'm gonna be comparing normal windows to Atlas .
You guys can see that there is a lava triangle benchmark , and basically higher is better , and lower is worse .
So Atlas does a lot better than normal windows at handling the the lava triangle , which is just processing .
Um , a lot of data to be shown on your screen .
Uh , so this also will be applies to any game .
It doesn't matter what game you are going to play on Atlas .
It's always gonna perform better than normal windows .
And you're also probably gonna perform better if you're playing competitively because you have a lot less system latency and your input lag is basically not there , which is really , really good .
So yeah , now I'm gonna move on to the installation guide .
Um , so if you haven't already leave a like on this video share atlas with your friends , Uh , because we are really are trying to make something which is a lot better for gamers for free .
Anyway , we'll see you guys now , OK , so this is gonna be the USB installation guide , which you will need a USB , which will have to be at least , um , at least two gigabytes in size kind of anything above that , then that's going to be completely fine .
So first thing you want to obviously go ahead and down Atlas , which you have the ISO .
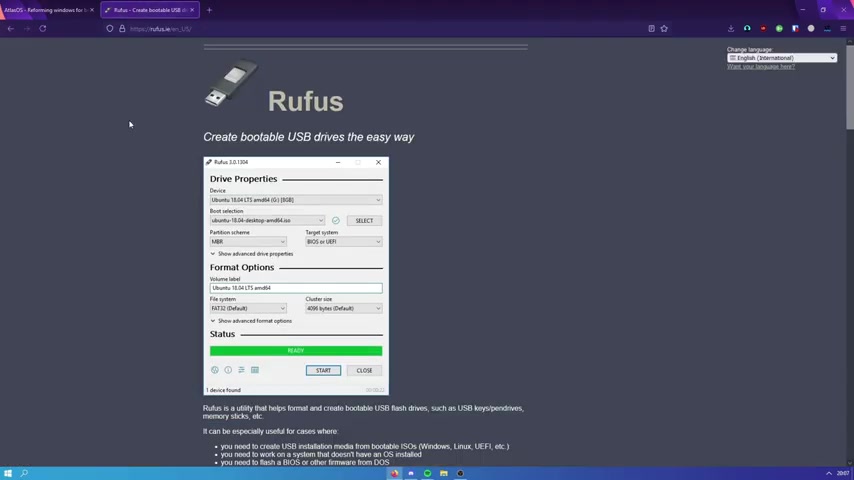
Uh , next you want to go ahead and install a Rufus , or you can use or you can extract it manually .
But I'm gonna be using Rous first tutorial .
Do you want to go ahead and download it ?
You want to open it up , as you guys can see .
Now you want to select the device , so I'm gonna be selecting my USB stick .
Um , you then also need to select the IO , which I'm gonna do right now .
So as you guys can see now , I have Atlas loaded .
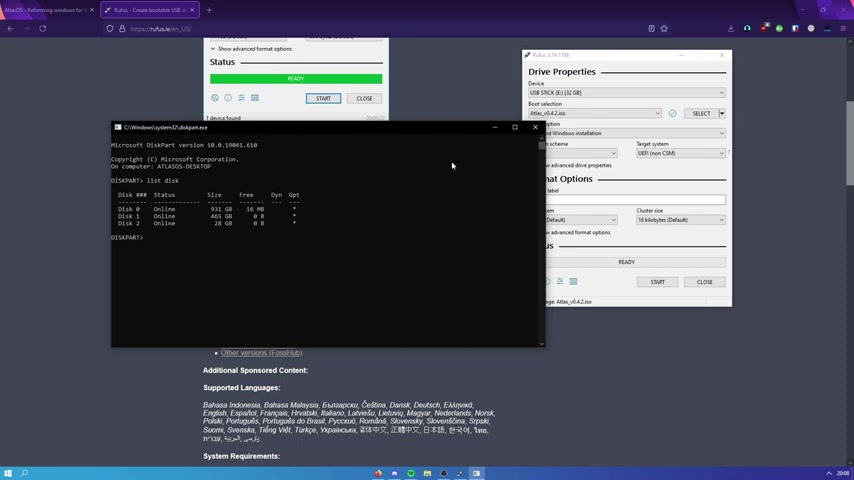
Uh , so now what we're gonna be doing is we'll be managing the petitions scheme .
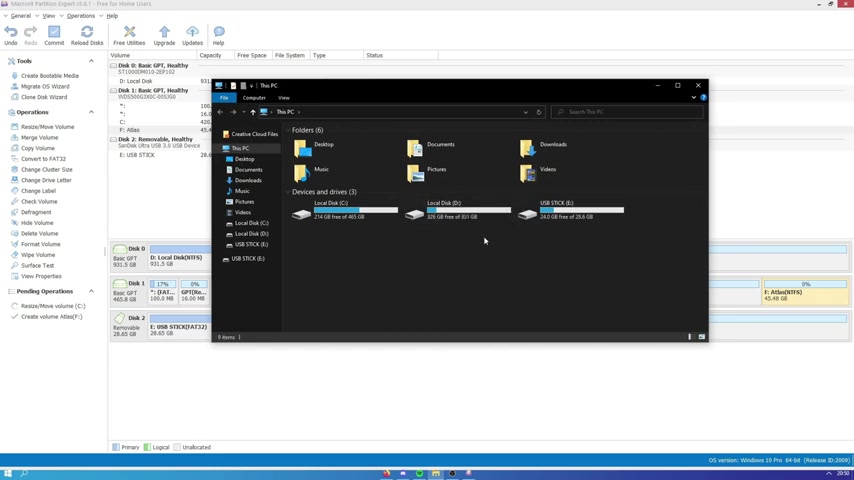
So what you want to do is you want to open up C MD ?
Uh , when you have C MD open , you want to do disc parts , Um , and then you want to do list disc .
And when you've done that , you guys can see that your your disc is GP T .
Now you want to figure out which one that is .
So if you open up this , you can see both your disc .
So my C drive is only 500 gigabytes , so that would have to be my disc one .
Um , my hard drive is 931 so it must be my disc zero .
So what you want to do is if you don't have G PC , What you guys can do is you can do MBR , and you can do it that way .
Um , I don't recommend that I would rather do GP T .
And what you can do is you can translate your disc into a GP T , and we will do that later on in in the installer .
What ?
I mean later on in the installer .
I mean , when you've booted onto your USB stick to start the installation on of windows , you would then clean your drive and then convert it into the GP T um , partition scheme .
Um , and then that way you can easily install onto that .
Um , but yeah , that's that's what we're gonna do .
So , uh , this can also say the same .
You can change the volume label .
This is just gonna change the name of your your USB stick .
So change if you want to , um , you can keep this as default and then you want to go ahead and press start .
Now again , it's gonna warn you and say that all day on the device will then be destroyed So everything is going to be cleared and it's gonna put on the Windows files .
So go ahead and wait for that to run .
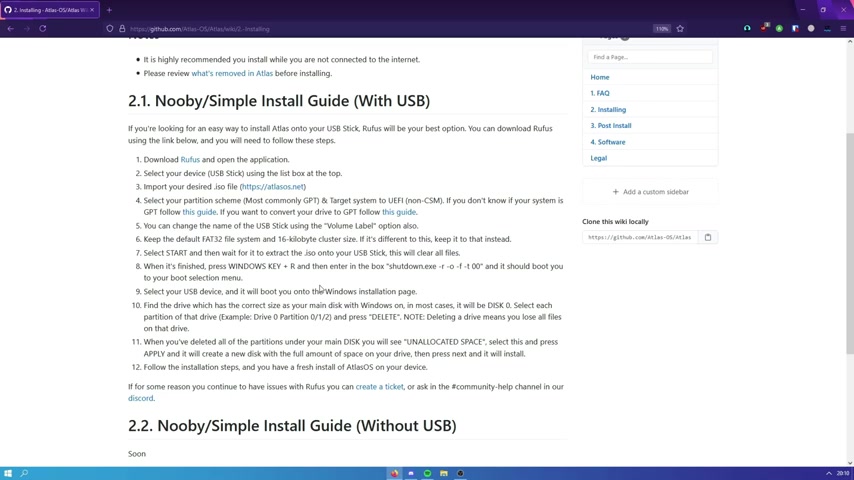
Once it says ready right here like this , then that means you're good to go , and you can then go on to that next step .
So in the next step , what we want to do is we want to boot into your IV or boot selection , um , menu .
Or you can boot into the UEF I so into your bias , and you can boot into your your USB stick .
That way , if you don't know how to do this , then we have a little , um , a little shutdown dot EXC command , which you can put in your run box .
It automatically boots you onto the place where you can select your media , which you want to boot onto , Um , so you want to copy this , which will be in the description and you want to paste it in your box and then press OK and your system will restart Now , as you're restarting , you're going to have the menu of the boot selection .
You want to select your USB stick , and then once you've selected your your USB , stick from wherever your boot sequence is or anything like that .
Um , if you do need help with this again , join a discord .
All What you can do is you can search up how to , uh , boot onto a USB stick and then put your computer name or your motherboard model or anything like that , and it should come up with any images on , like , Google or go or anything like that .
Uh , you can see where you need to go , um , because it's different for everyone .
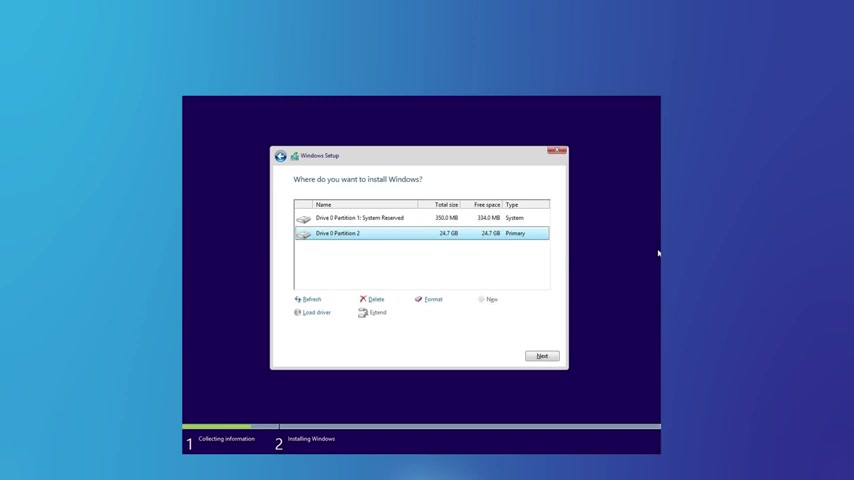
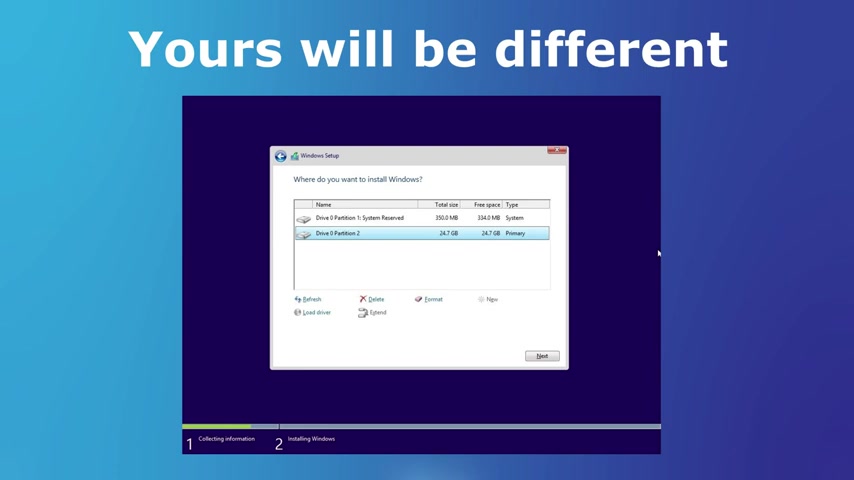
But you want to be on to your USB stick , so you're gonna be granted with this menu .
Now , once you've done this , you just want to press next , next , next , and you'll come to all of your drives .
Um , once you're at all of your drives , you want to , um , format .
Basically clear your drive , which has windows on it .
So you should have remembered which one was your Windows drive .
Normally , it's gonna to be dis zero or the one that says system , Um , next to it as the label of the volume .
So now what you want to do is you want to hold shift on your keyboard and press F 10 , then AC MD is gonna pop up , and what you want to do is you want to do what we've done before , which is gonna be dis part one word DISKP a RT .
And then it's gonna open up disc partition .
And then what you want to do is you want to do list disc IST space DISK .
Then it's gonna come up with all your discs , and you want to select the one which you want to completely clear Now what we said before about the GP T , um is then gonna apply here .
Now you want to select your disc that you want to clear , So you're going to do SEL .
So sell and then dis zero or whichever disc you want to , uh , want to select so SEL space DISK space zero .
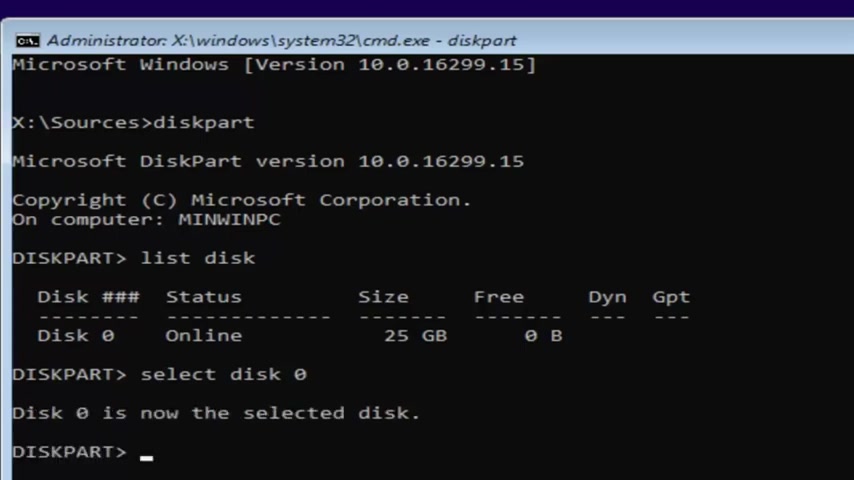
Then when you've selected your disc , you want to , uh , then clean it So you're just gonna type clean So CLEAN once you have entered that and it's now clean cleans , you're gonna have no data on that .
So any data that was on that drive is going to be cleared now , What you want to do If it was not GP T before you want to do convert space GP T so CONVE RT space GP T and it's gonna convert it into the GP T partition scheme .
And then you are good to go .
So you wanna You wanna close the C MD and you want to click the little refresh button where you can see all your discs and it's gonna refresh it .
And it's gonna show your disc without any new volumes and you will just see one .
Now what you want to do is you want to select that one and click next , and then you've completed the first bit of the installation .
So now you've successfully installed Atlas .
Make sure when it's boosted up , it's gonna open .

AC MD do not close the C MD , and it's gonna apply the tweaks wait for it to restart , and then you've got your system good to go .
You can also skip to the post install um , part of this video , which I'm gonna show you guys the scripts and talk you through with each one does .
OK , so now we're moving on to the non USB guide .
If you don't have a USB or you can't afford one or you don't know where to get one , then this is going to be helping you .
And also , you won't lose any files with this one , as all it's going to be doing is going to be creating two boot versions of windows .
So the one you already have on your computer , um and then it's gonna have outlasts as well .
Um , so you will need this software right here .
Um , so go ahead and download it .
It will be in the description , if you if you if you don't want to download it , then you can also do it through normal windows .
But I won't be showing that in this video .
So go ahead and download this , um and then just download it and run it .
Um , and then you'll be greeted by this window here .
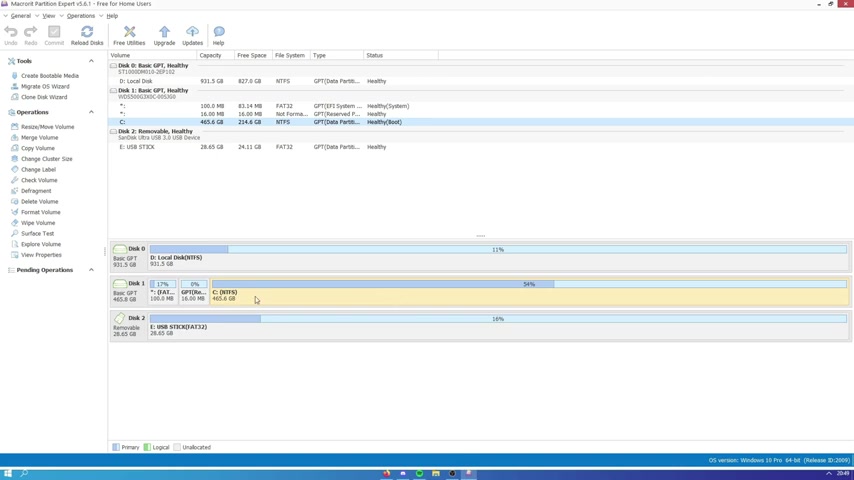
So what you want to do is you want to select your SSD wherever you want to install windows onto , you have to allocate at least 30 gigabytes , so make sure that you have at least 30 gigabytes , at least 30 gigabytes of storage on your drive where you want to install windows .
So I'm gonna be selecting my SSD because I don't want to install it on my hard drive , and I right click You're gonna click resize , um , and then you're going to be un allocating around 30 gigabytes .
It doesn't matter , or you can do more .
It really does not matter .
Um , it just depends on if you're going to be , um , deleting the old version of our windows as you're moving on to Atlas , um , which you should definitely do .
So you don't have double windows on your computer .
So , I , I have 45 gigabytes unallocated .
Right now , I'm gonna go ahead and press , OK , um , and then with this unallocated space , you then want to create a new volume .
Um , we'll be naming Atlas .
Um , as as that's what we're gonna be installing , and I'm gonna OK , now , once that is done , you are not done yet .
You need to go ahead and press commits .
Um , so now you need to close close .
Close all of our applications .
Um , so just press .
OK .
Um , this operation might be completed and be restarting the computer .
I restart right now .
Obviously , I'm gonna press .
No , because I do not want to restart my computer .
If you want to go ahead and do that and then you have a a drive , which will be right here .
So then come back to this video if you have restarted , and then we can continue .
So now what we're gonna be doing is we're going to be getting this batch script , which is in the description .
You wanna right ?
Click it , run it as administrator , and it's gonna ask you for the full path of the IO .
So I put my IO on my desktop , which I can then right , click it .
And then if you go to properties , you can then see the location .
If you want to copy and paste this one into there , Um , I don't have a backslash on my keyboard , so I'm just gonna go and copy this one here , Um , and then you want to put the name on the ISL like that ?
So now you have that .
You can then go and press enter .
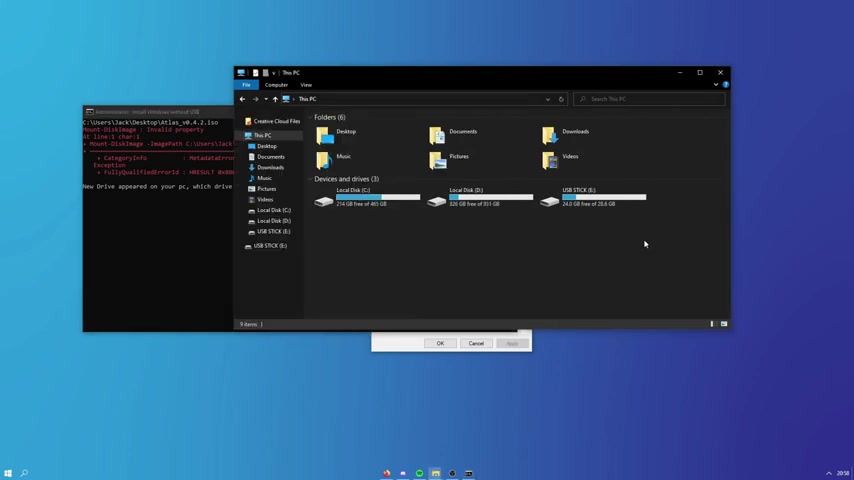
It's gonna error for me , but it should be all good for you .
Uh , This is because I'm on on Atlas and it's actually stripped .
Um , so it will still work all fine .
But now you'll see a new drivers appeared on your PC .
Which driver letter does it have ?
So you can go onto this PC and a new drive will appear and it's not going to be the same one as we made in our partition software .
It's gonna be a new one which you haven't seen before .
It's gonna ask for the letter .
So that's gonna be my for as an example , my UB stick is the E .
You would then get the letter of whichever was created and type it in here to say it was F .
You type F and press enter , and then it would work .
And you would then be restarted into the installation for Windows and you would go through all of that .
Um , and then you would you know , you you would be set .
You'll be on Atlas .
It will restart automatically .
Um , as you will have to go through the tweak supplying stage .
Um , but then you should be all good .
Now , bear in mind .

If you do restart your system , it will appear by asking you which windows you want to open .
Um , as you do have , technically , two windows installed .
Um , So what I recommend is you go on to the atlas version of Windows , Uh , which will pop up at the restart .
Um , Then what you do is you move all your files you want to keep from the way from your main windows that you used to have on to Atlas .
And then what you can then do is use the same partition software that we used before to then delete that partition , which you had old windows on .
So then you only have a and you're good to go .
Then once you've deleted that , you can then make that , uh , make your normal make atlas larger .
So then you're using all of your desk , and there isn't just like a bunch of unallocated space .
That's all for the non the USB stick guide .
And now we're going to go on to the post installation guide .
OK , so now you've installed Atlas , and now this is going to be the post installation guide .
So you will see a a nice little folder on here called Atlas , which will be on your desktop .
When you launch , you can then open this and there is some some little folders here and also some links to our discord and wallpapers .
You may want to use , uh , some documentation and also the issues placed in case you have any issues with Atlas .
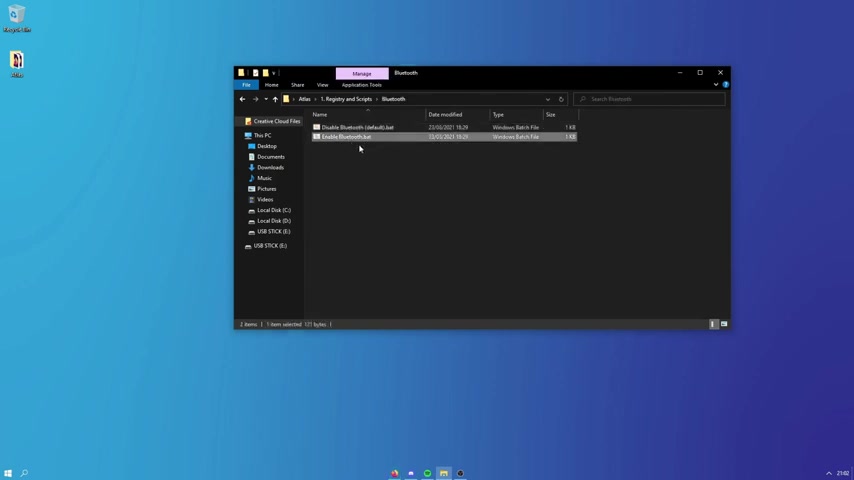
Um , so I'm gonna go through the registry folder right now .
Um , so in case you want to , um , enable Bluetooth because it's actually disabled by default , we have that there .
Then we also have , uh , DEP , which you can search up what it is here .
Um , it's recommended to enable DEP in case you're playing valour .
Because otherwise the valour and the cheat will not load , which means you can't play valour .
And I think that's for some other apps too .
So you might want to enable this one .
we also have a full screen .
Uh , I recommend to keep this , uh , disabled , but you can also look it up .
Uh , you have , uh , hard drives , um , enable Pre fetching or disabling it , disabling pre fetching and enabling it .
You also have notifications in case you want to enable them .
We have power for sleep .
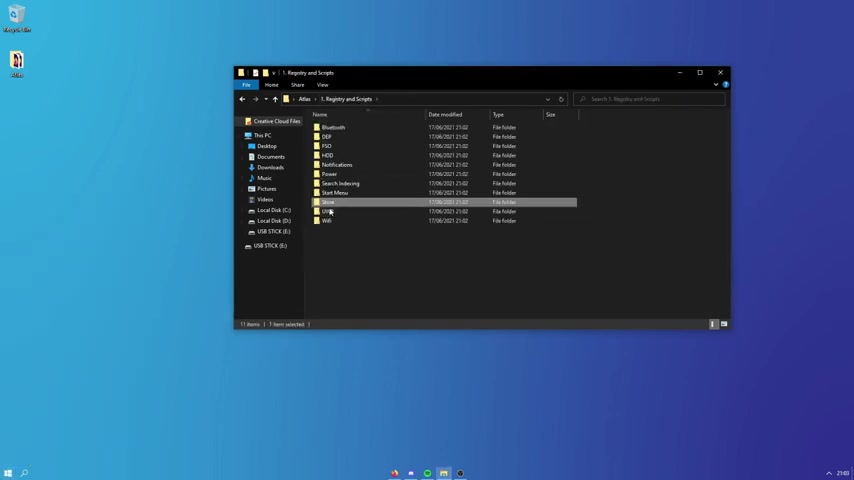
Stay search indexing start menu if you want to unlock it and add to icons like this , um , we also have the store , in case you want to disable that .
We have UWP .
Uh , we have WiFi and stuff .
And also on our new version .
We also have Xbox , in case you want to , uh , disable any of the Xbox apps as well .
Um , so that's the That's the first bit .
Uh , we also have the tools .
Uh , so we have the archive .
We have some links here .
Uh , recommend you to install seven .
Of course .
A browser .
We have some browsers here .
Recommend Firefox .
So now we have drivers .
We have GP U driver , which can be like a MD in video drivers , which you can just do manually .
Uh , we also have NV clean store .
So if you have an NVIDIA graphics card , you can clean install it , uh , which means he's gonna strip any other bloatware and anything .
You don't want to be installed .
So you do shadow play , you can remove it .
It's very good .
You'd recommend it 100% .
And then we have snappy driver installer , which we're gonna move on to right now .
So snappy .
Driver .
Install origin is going to be in the description .
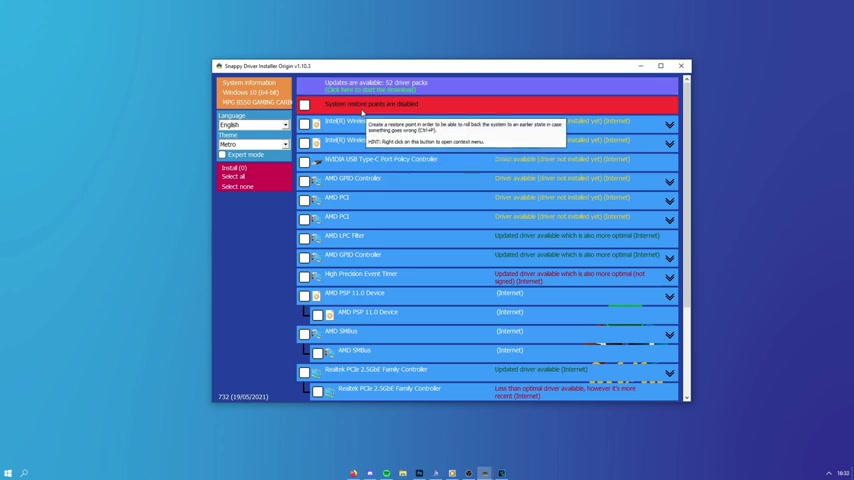
You want to download it and then extract it .
You don't want to run the 64 1 R as an administrator , and it's gonna open up like this so you can select .
Um , so it won't be like this .
Uh , this is because it's already got my index downloaded .
I could delete it , but I'm just going to go for it right now .
Uh , when you when you open this for the first time , it's gonna it's gonna give you a dialogue and it's gonna say Like , um , it's gonna ask you if you want to do indexing if you want to download all the drivers and stuff like that or any of the Internet ones , you want to do the index , which is gonna be the third option .
So you wanna click that and then download all the indexing it only take around a minute , and then you'll be met with all of your drivers , which you have on your computer .
So you want to select which one you want to say .
I want to update my check brio .
Um , so there are some for my , um my Internet driver , uh so I can select one , and then I can click install right here .
It's then gonna download it , and then after it's downloaded , it's then gonna install it , and then you should be all good from there out .

So hope you guys did enjoy this video .
If you did leave a like , make sure to , uh , join the discord for Atlas and description .
If you have any questions , you can ask it there .
We also have a ticket system so you can request help if you need any .
Uh , but yeah , I hope you guys enjoyed this .
Leave a like all that good stuff and see you guys in the next one .
Goodbye .
Are you looking for a way to reach a wider audience and get more views on your videos?
Our innovative video to text transcribing service can help you do just that.
We provide accurate transcriptions of your videos along with visual content that will help you attract new viewers and keep them engaged. Plus, our data analytics and ad campaign tools can help you monetize your content and maximize your revenue.
Let's partner up and take your video content to the next level!
Contact us today to learn more.