https://www.youtube.com/watch?v=UgNUcEk3NIE
Spread Love Cuties! 🌈❤️How to Make a Folding Rainbow Cake Pop Up Surprise Card
Hi here .
How are you guys doing today ?
I am so excited to bring this um super easy rainbow cake pop up surprise card for you guys .
Um because I'm really hoping that it will bring a lot of um cheer to your day and that's what really inspired me to create this for you because I know a lot of you are probably stuck at home not being able to go to school or even visit a lot of your relatives that you usually see um so much .
And so I know a lot of you are probably really down about that .
And so that's what really inspired me to create this for you because I wanted to do something that was full of cheer full of love , full of color , of course , really cute and where you could just write a lot of positive messages to someone that you love .
So it's super easy .
So all you need is a regular piece of paper , nothing fancy .
And um today I'm gonna be using color pencils and um markers and a sharpie , but whatever you have at home really doesn't matter .
Uh The only reason I'm using a color pencil also is because on the inside , um you don't want to go too dark only because you're gonna be writing on top of it .
So that's , that's why um the color pencil .
But if you have some really light um markers you can use , definitely use those too .
And so I'm really excited to start this with you because I really hope that it will really inspire you and um to spread some love and some cheer .
So let's get started , get your sharpie ready and your piece of paper .
And let's get started to create this card .
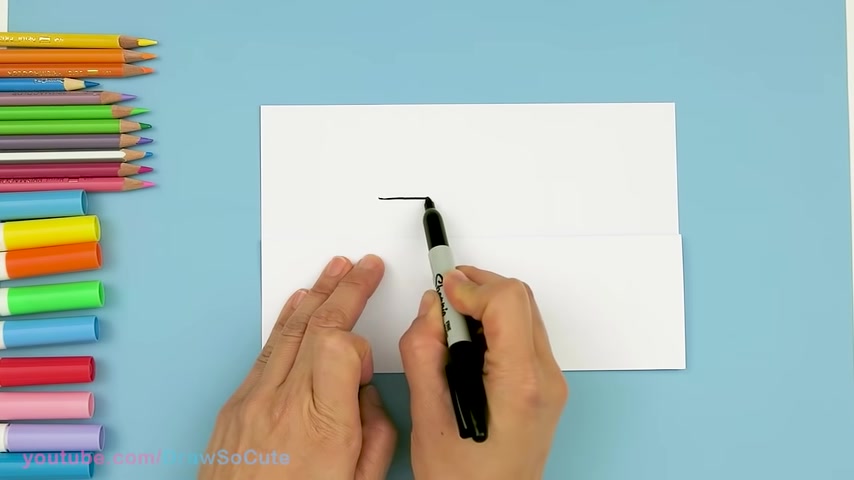
We're going to first start by folding the paper .
So um this is once again , just 8.5 by 11 , just a regular piece of copy paper .
And I'm gonna um fold it in half .

So I'm just gonna align my corners on both sides at the top and just fold it right here in the center .
And then from there , I'm gonna open up this flap right here and fold it right back down to the center crease and that's it nice and easy .
So when you're done with the car , all you do is pull this part open and that's your surprise right here .
So now that we're done with that , let's go ahead and start um drawing and coloring to draw the car .
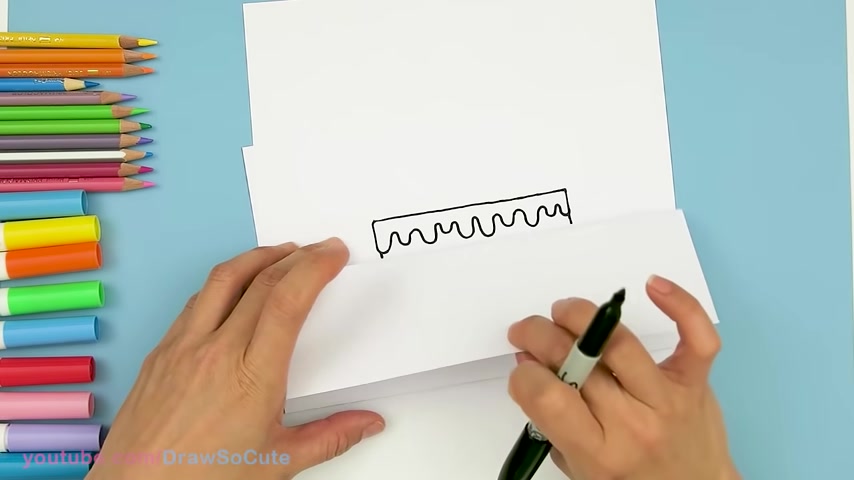
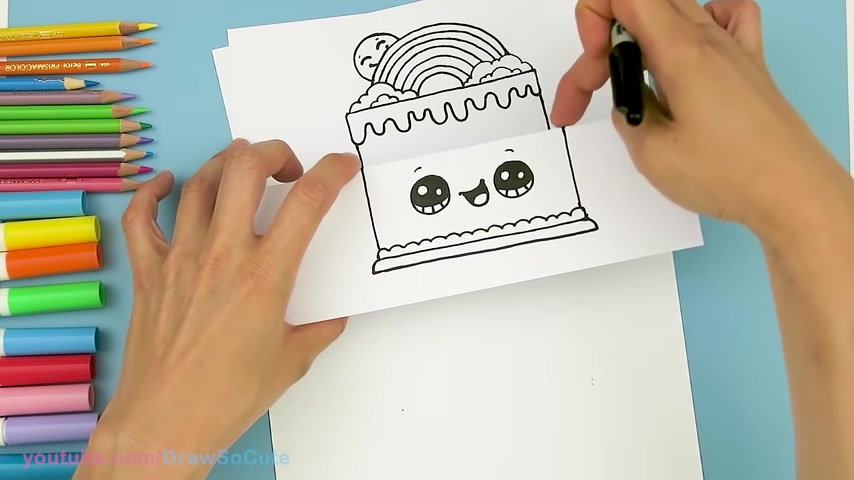
You just wanna make sure your paper is in the folded position and then we're basically just going to draw a um the cake right in the center .
So I'm gonna start on this part right here and say about right here .
I'm gonna center my cake not too high , but right here , I'll start because you still have to remember there is going to be a rainbow and the sun right here .
So I'm just gonna say about right here .
I'll start and draw a straight line across .
It's all up to you .
How big you want your cake to be ?
How wide , so about right there , I'm gonna stop and I'm gonna round off my corner a little bit .
Oh And you know what ?
I almost forgot , I'm gonna put a piece of paper under here uh , before I mess up my um table right here .
So OK .
Um , because it's just a thin piece of paper .
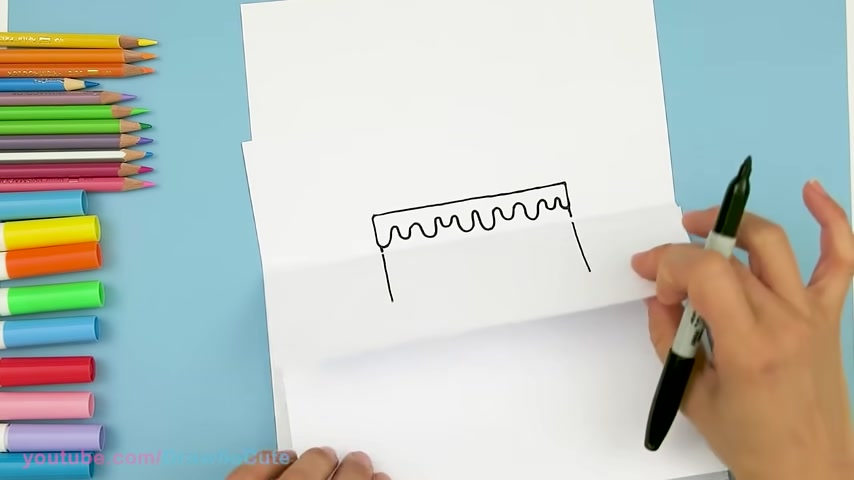
So you wanna make sure you have a paper underneath and from there , I'm gonna start and draw the drizzle .
So I'm gonna come down with a straight line on both sides and I'm just gonna drizzle across .
So it's gonna be above this center crease right here .
So just make sure of that .
You're not gonna touch that center part and you're just gonna go up and down with a drizzle .
It's all up to you .
How many of these things you want to create , but you just want to go all the way back and forth , sometimes longer , shorter and one more right back to that .
OK .
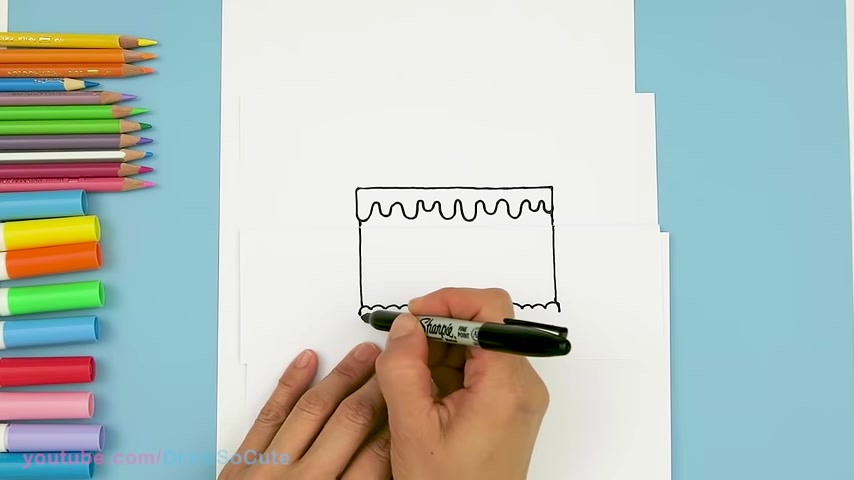
So then from there , we're gonna create the cake .
So come in a little bit and from there now we're getting to this panel right here .
So from this panel , um just to make it safe , what you want to do is I'm going to put a piece of paper underneath this panel so that I don't muddle up that .
So just make sure you get another piece of paper and just put it under here just in case you don't want it to be bleed through .
And from there , I'm going to continue this straight line down .
So now I'm working on this flat now .
So once again , make sure you have a piece of paper under this .
So uh I'm just gonna come in here and fix up any gaps I have right here .
So it looks like one continuous cake .
Let me make it straight .
OK ?
And then , so then as we come to the bottom about right here , I'm going to stop and I'm gonna go across .
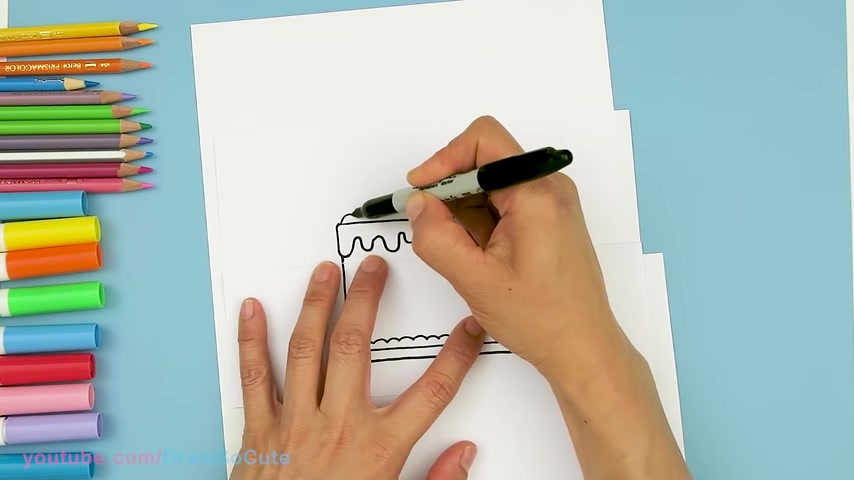
So I'm gonna start and draw some decorations at the bottom .
So I'm just gonna curve all the way across .
Nothing fancy .
It's up to you .
How you wanna decorate your cake .
I hope this inspires you .
So we're just gonna come down just like the other side and from there , I'm gonna go um and draw a straight line to connect it all the way across .
Then from there , I'm gonna come down with another curve that comes out more .
And so this is going to be kind of like the dished as it's on and I'm gonna go straight across there .
Ok .
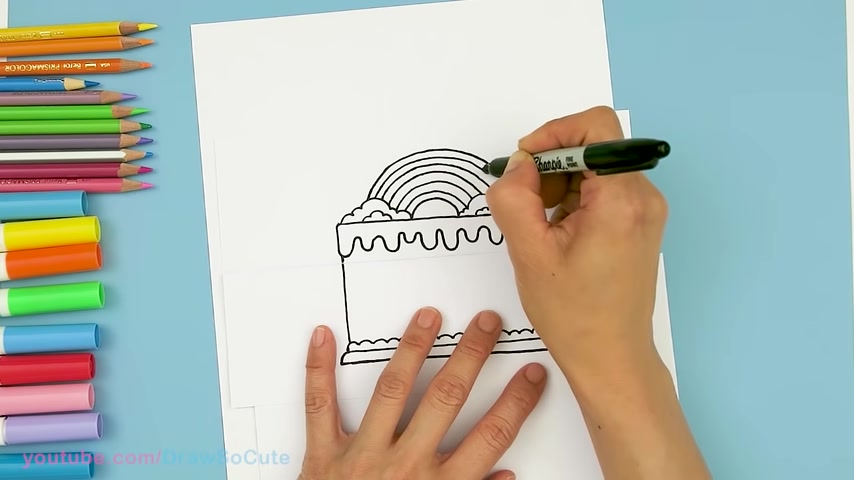
So now we're gonna draw the top of our cake right here .
So we can see that .
I know the back paper .
I should have used a different color paper .
Huh ?
So you can see a little bit better .
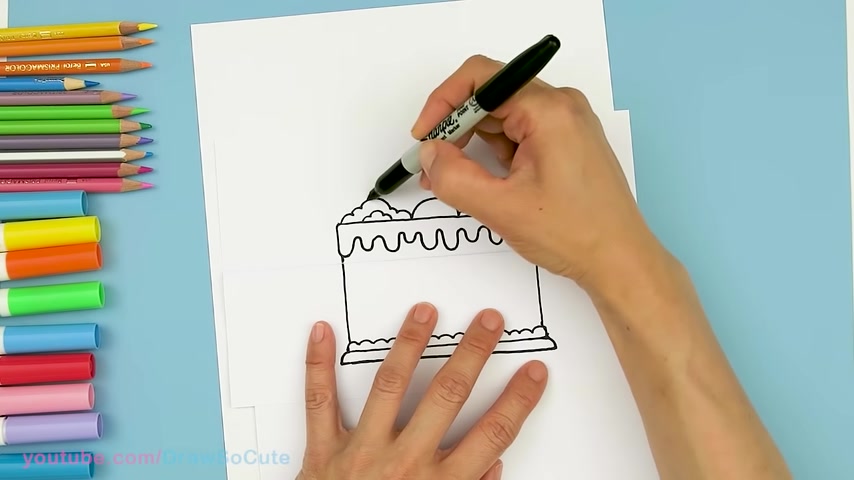
Um , but now we're gonna work on the top .
So here's the top of my paper and we're gonna start on the rainbow .
So let's see .
Oh , in the clouds .
So I'm gonna come right here .
I'm gonna work on the clouds first on this side and I'm just gonna go nice and round fluffy clouds and come down .
Um maybe another layer right here and same thing on this side .
So I'm just gonna go this way and the insight got two mound of fluffy clouds and then in the center , I'm going to create a curve for our rainbow .
So I start with the inside one and I'm gonna come to the outside .
So about right here .
Uh It should end about right here .
I'm just gonna give myself a point and I'm gonna go up with my curve there and then let's see .
I'm gonna put six co colors on this rainbow and make it a little bit easier .
So I'm gonna go to the center to find my center on this rainbow .
So it makes it a little bit easier for me to see all my um the colors , the stripes I need to create .
I'm gonna draw the center line first , go all the way across .
So I have the center and I'm just gonna create three here and three here .
So it makes it a little bit easier .
Yeah .
Ok .
And 123 .
Oops , I think I went a little high .
Huh ?
That's ok .
The top color will just be thinner and one more .
And definitely if you have a pencil at home , start off with a pencil , it makes it a lot easier .
OK .
There I got my rainbow in .
So then now let's draw the sun .
I'm gonna pop it up right here .
So just kind of imagine a circle right here .
So I'm just gonna go somewhere right here .
Start as if I'm drawing a big circle and pop in my sun and let's make the sun really happy .
So I'm gonna put two curves right here , kind of popping out of his head and a smile .
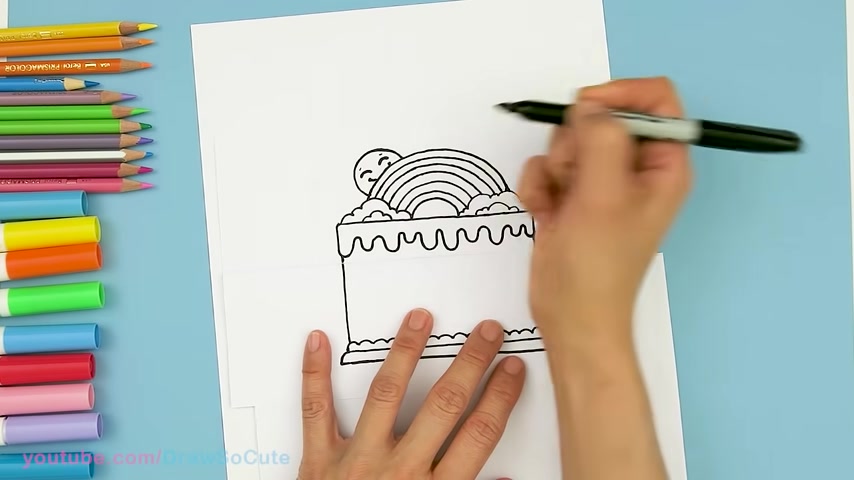
I can't really see it but there and then in terms of the rays , I'll do that when I'm coloring because I don't want to muddle up with the sharpie and then um let's bring this cake to life .
So in this area right here , now we're working on this panel .
So right here , we're going to um draw a big circle .
So about right here , it's a big circle for dry eyes and another one right here .
OK .
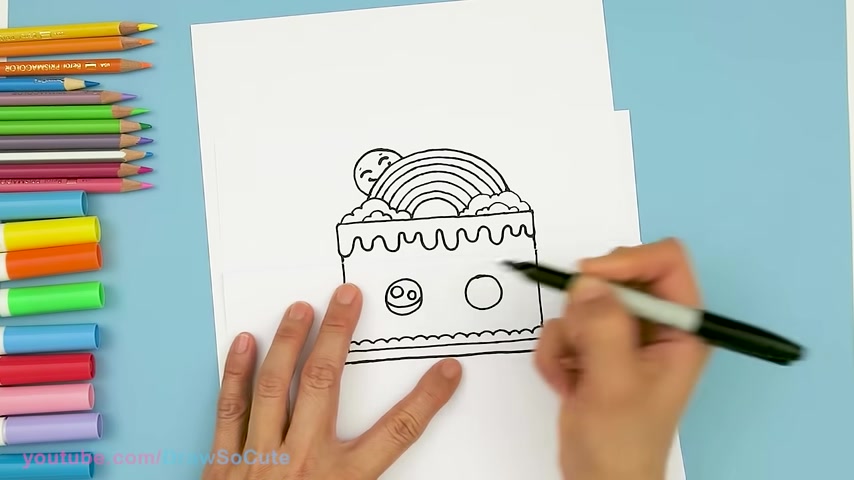
So then let's make them um sick your eyes , two small circles inside for highlights and the curve line at the bottom and shade in the top and the lines at the bottom and same thing over here and lines at the bottom just like the other side .
And then from there , let's draw a really happy smile .
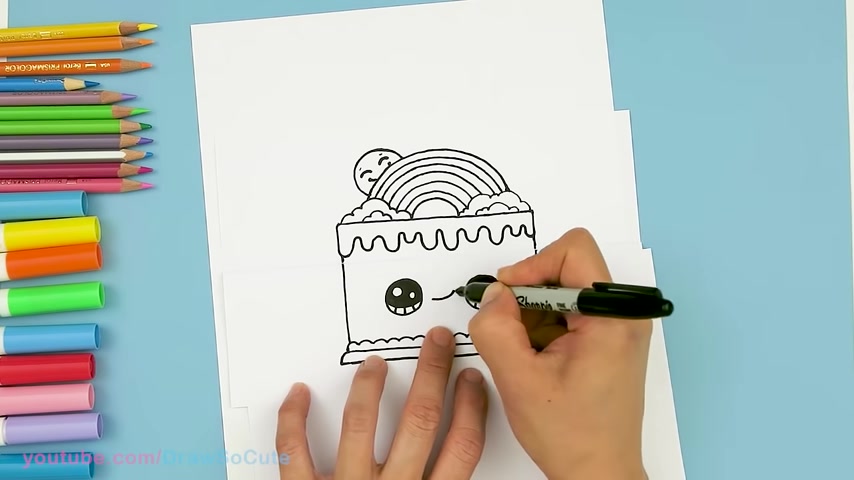
So right in the center between the eyes , we're gonna go up with a curve , cap it off and right here , we're gonna add a deep curve like a US slant and then the tongue and I'm just gonna come in here and shade this part in black , make it a little bit easier .
And then let's not forget the eyebrows .
I mean that the curve above the eye above each eye .
So just making sure it's not going above this crease right here .
So the next step is to open up your card and we're going to basically connect this line to this line right here .
So that's the first thing you wanna do .
Just go right on down .
OK .
There really tall a cake , right ?
And then we're gonna drop a bunch of horizontal lines .
So I'm going to let's see here .
123456 , I'm gonna put six layers of um wording in here .
So the first layer that's most important is because when this crease is back , you do not want to have a layer with a line right here because that wouldn't make sense .
So whatever line you create needs to be below this crease right here .
That's the most important thing .
So I just wanna make sure , so just make sure you're going below that line .
So I'm gonna put my hand right here .
That's where that paper folds .
So I'm gonna start by right here and I'm just gonna follow my top and go right across from my first layer .
So you don't see it right ?
So that's um , I just wanna make sure when you forward back your paper , you won't see that line from there .
Um We're going to create the next important line that you need to create is on this part right here .
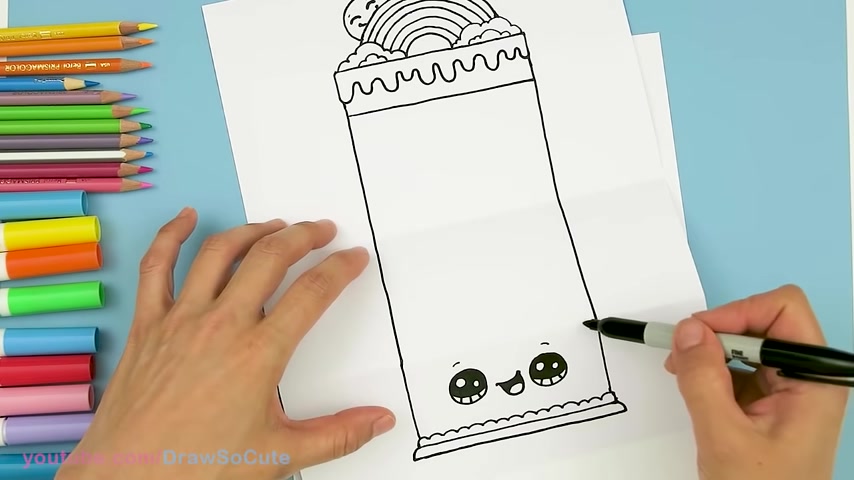
So we're going to create a line right above this crease so that you don't see it , see this line when you fold it back either .
So that's the second most important line .
You wanna make sure when you fold it , you still don't see it .
OK ?
So then from there , it's all up to you how thick or thin you wanna make your layers .
But um like I said , you're just gonna put six in here .
So um I'm gonna use this as my center since I have this center crease just makes it a little easier .
And then I'm just gonna put three on each .
I'll say about right here and two more and , and that's , that's pretty much it .
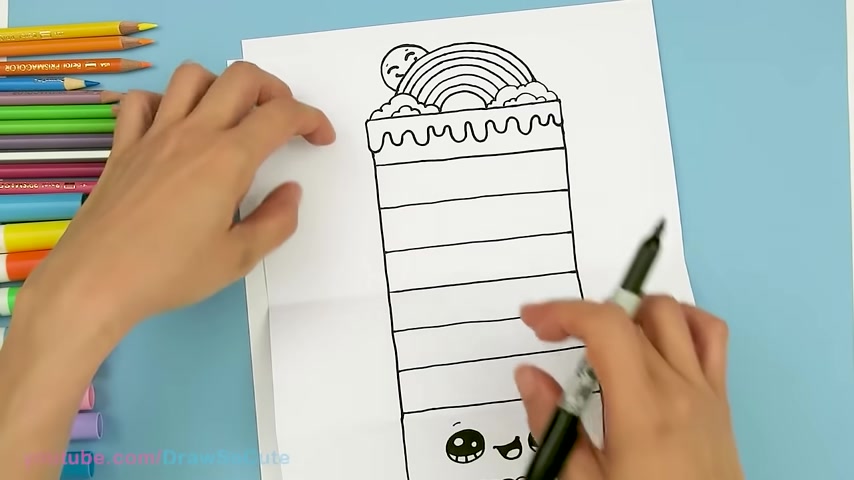
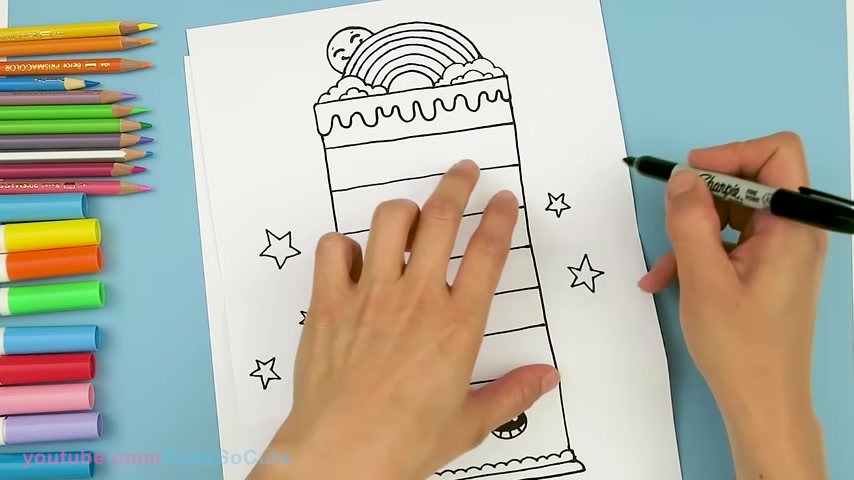
And um if you like , you can add , um let's add some stars and stuff right here to make it extra um sparkly and cute .
So just make sure your stars don't go above this panel right here .
So everything is kind of in this area .
You can add some um stars and hearts , whatever you like to decorate the sides and just , just do it at different angles , different sizes .
If you like to decorate , you can put confetti whatever you like .
I hope you guys will send me um on Instagram .
Uh You can find me at Q by we um at , by we on Instagram and I love to see how what you came up with , with your card and all the positive messages that you guys wrote .
Uh Let's see here .
Uh Hearts maybe , I mean stars , maybe a heart and let's see .
I'll leave it for now .
So what I'm gonna do is go ahead and color everything first and then come back in and write all the little messages with a sharpie on top of the um color pencil .
So they are all done .
I hope you cut .
I really loved how that turned out and that it really inspires you to create it too so that you can spread some love and cheer and positive words to someone that you love .
We all need to be a just kinder and sweeter in this time and just be able to show the people that we love that we love them and that we miss them and that we are thinking of them So I just , like I said , I really hope this card inspires you and helps you to do that .
And um I hope you guys stay safe and remember , I love you and thank you for being the best fans a youtuber could ask for .
And um oh , and also if you haven't subscribed , please do and I'll turn on your notification bell so you won't miss any new draw .
So cute videos .
See you later .
Are you looking for a way to reach a wider audience and get more views on your videos?
Our innovative video to text transcribing service can help you do just that.
We provide accurate transcriptions of your videos along with visual content that will help you attract new viewers and keep them engaged. Plus, our data analytics and ad campaign tools can help you monetize your content and maximize your revenue.
Let's partner up and take your video content to the next level!
Contact us today to learn more.