https://www.youtube.com/watch?v=EzU61g11Q1E
Quick Shortcuts for solving a 3x3x3 Rubik's Cube - For faster solving
Hey guys in this video , I'm gonna be showing you a couple of easy shortcuts that you can use in your basic method .
So here you go .
So if you remember watching my previous video , I mentioned that uh you have to do a yellow plus first to carry on with the , you know , the solving of the cube .
So what I told you is do A F are you A , are you A and F dash ?
So you gotta do the rur dash U dash twice , right ?
So there's a short cut to that .
So instead of that , you can keep the L like this like have a good look so you can keep it like this .
And I'm going to teach you a new type of movement .
It's like called small F .
So in small F , you move the first two layers like so now , now in F you would move just the front layer .
Now in small F , you move the first two layers and then you do an Rur dash , you dash and then a small F dash .
So that completes your cross in one go .
So like you just use the RDR dash U dash once .
So all of us turn the first two layers .
So that's F dash , rur dash , dash and small F dash .
So in this shortcut , I'm gonna be teaching you another yellow layer shortcut .
And this is an oil , oil is basically orientation of the last layer .
So that fills up the whole of the yellow .
So I wanted to do another OL video separately , but then I'm gonna just show you this one because it's like really , really easy .

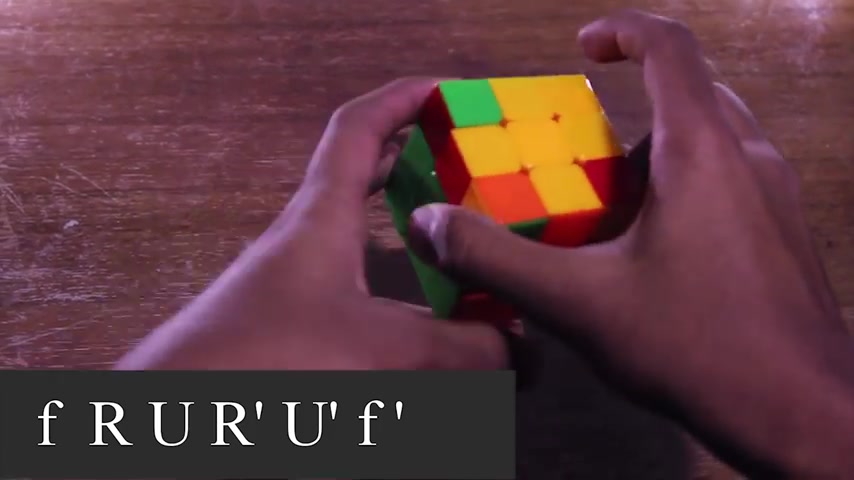
So if you get a T A yellow tea that is , I normally tell you to just ignore the corner pieces and just go for the bar and then do a , you know Frur dash and such .
But uh if you get this case , please do not go for that .
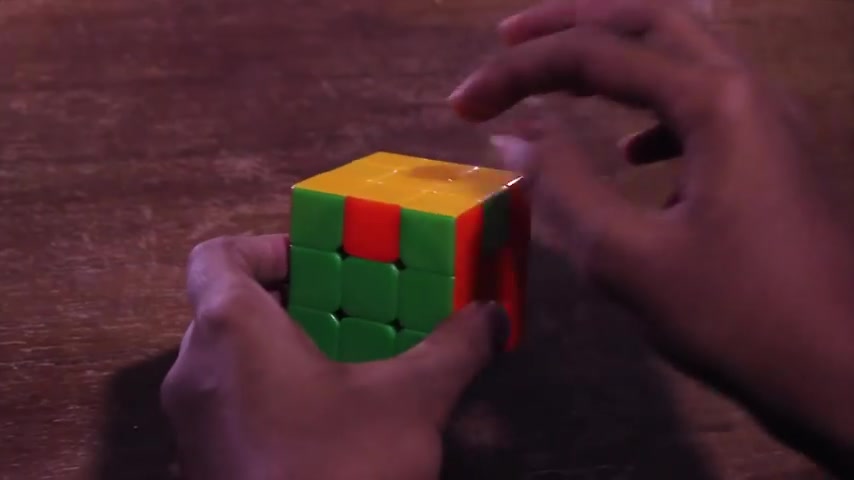
So when you get A T and these like uh H pieces are facing away and then you have the headlights over here , have a good look .
So a T edge piece is facing away and headlights , you keep the key like this , like the bar like this and then this face it to your right and do uh F rur dash , U dash and F dash .
And in one step you get the whole cube finished .
So it's basically keep uh like how you keep the cube while doing the and it's basically the same thing , but it completes the whole of the yellow .
So I'll just show you that again .
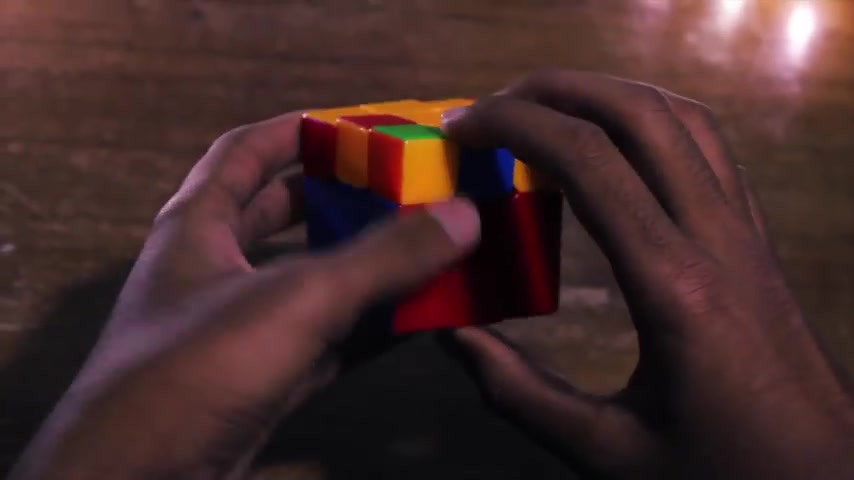
So here we are .
Now , if you do that on this side , you will not get it , neither will you get it .
If you do this side or this side , you gotta keep it this way .
The T is like this and then you do an F rur dash , U dash and an F dash .
There you go .
So in this shortcut , I'm gonna be teaching you how to directly skip ahead and finish the last step .
So if you refer to my previous video , I would have told you that when trying to change the , you know , placement of the H pieces , you need to do the same formula twice .
I mean once clockwise , one anti anti clockwise uh like so , so now if you have to put this piece over here and this over here , so that's opposite side .
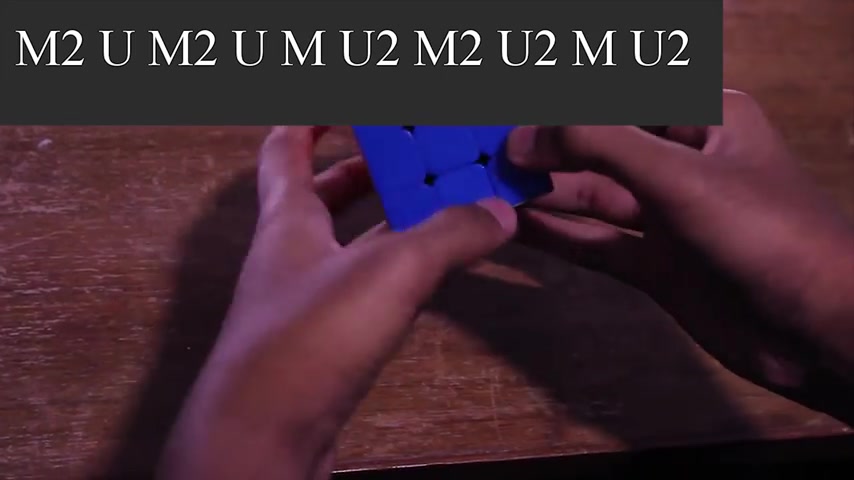
You have to do uh you have to follow the formula that's going over here and it goes like M 22 U two M 22 .
Now you might be baffled by what this M is .
M basically transfer the moment of the middle layer .
So moving it , holding it like this , if you move clockwise , it goes like this M dash or , well , basically M dash is this side .
So M and M dash .
So I will be going back to the Yeah .
So this is what we were dealing with opposite sides , edge pieces .
So we hold it like this .
We go as M 22 U two M two U and , and M two , so that totally finishes the last .
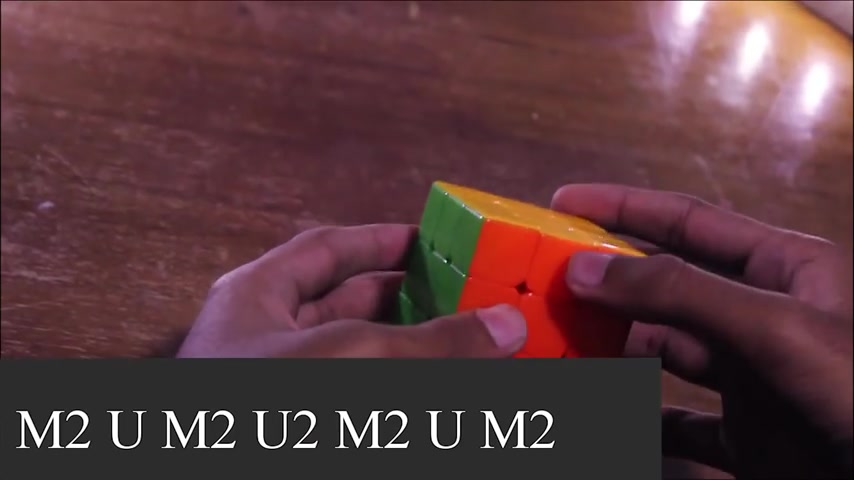
So in this situation where again , in the last layer and the last step , we have to change the placement of the edge pieces .
But in here , we have to put into the adjacent places like we gotta put this H piece over here and this over here and this over there and that over there .
So it's like unlike the opposite sides , now , we need to put it in adjacent places .
So what we do have to do over here is keep two colors like uh which you want to place adjacent like this and these two like that and then hold it like that .
So the one that you have to put uh push to your right should be on your right .
And yeah , so that , that's it .
That's how and here you need to do the formula that's given over there and it's like M 22 umu two M two U two M two , I mean M and then A U two , I'm sorry , I'll redo that .
So that goes like an M 22 umu two M two U two M and then A U two .
So that totally completes .
So if you follow all these , all these shortcuts , you can just shave up for like about probably 20 seconds from your present time .
So uh after this , I'll advise you to move on to fritch method which is like really , really faster there's like an F two L where you can directly complete two layers and then OLL which I showed you one part of the OLL already and then there's a PLL which will finish off the last layer .
So that's it for this video .
If you like my videos , hit the like button and then subscribe to my future videos and I'll be seeing you that peace .
Are you looking for a way to reach a wider audience and get more views on your videos?
Our innovative video to text transcribing service can help you do just that.
We provide accurate transcriptions of your videos along with visual content that will help you attract new viewers and keep them engaged. Plus, our data analytics and ad campaign tools can help you monetize your content and maximize your revenue.
Let's partner up and take your video content to the next level!
Contact us today to learn more.