https://www.youtube.com/watch?v=XY6h33q3atk
How To Make Paper Flowers from Book Pages
Hey there .
It's me Julie A Fan Balzer and I'm super duper excited to show you how to make these awesome book page flowers .
They're easy to make , they look fantastic .
At the end of the video , I've even got a picture of what I turned them into .
But basically , you need to start with the book .
You're going to go ahead and rip out some pages .
The book will survive .
I promise .
Um it will live on even better .
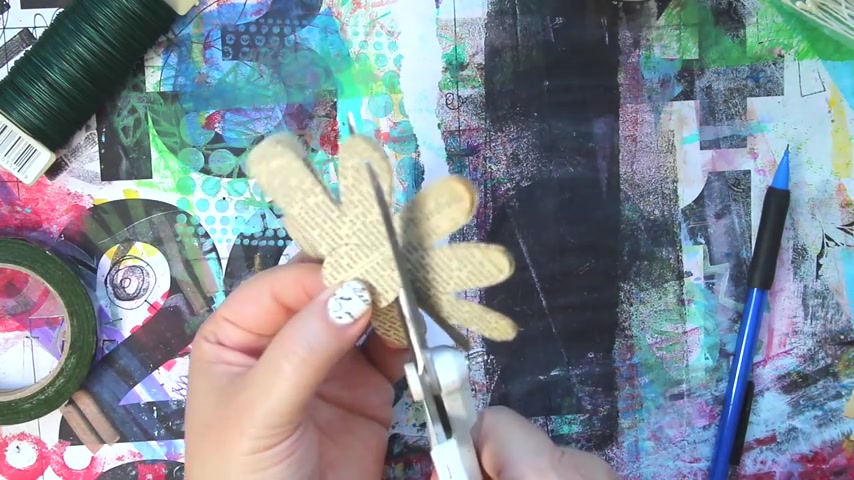
So you need five pages for this and I'm using a template .
Now , I cut this template with my scanning cup , but you could cut it with , you know , anything that you wanted .
You just need a 10 pedal flower with a hole in the center .
That's the only rule that's gonna make these flowers come together .
So any 10 pedal flower with a hole in the center .
So I have five pages stacked up together .
And what I'm gonna do now is I'm gonna go ahead and cut away the excess paper and now I'm going to cut all five layers at the same time and I'm not being careful .
I'm really being messy .
Flowers are imperfect and so is my cutting .
So it's a perfect match .
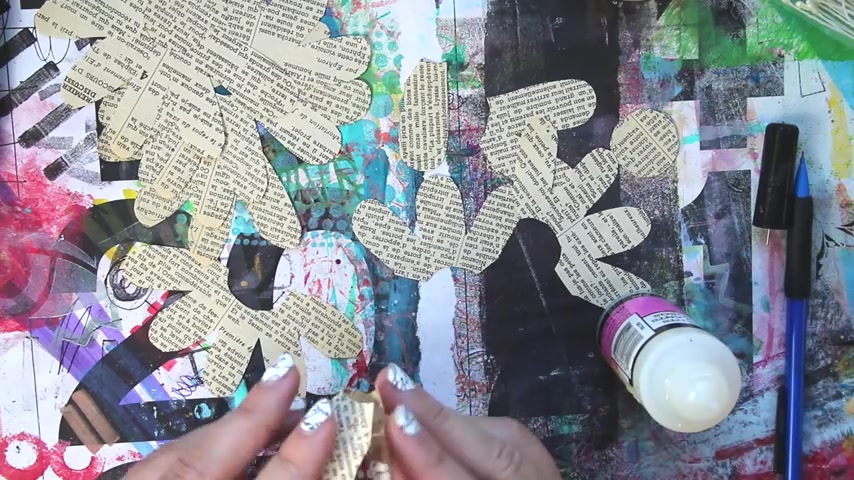
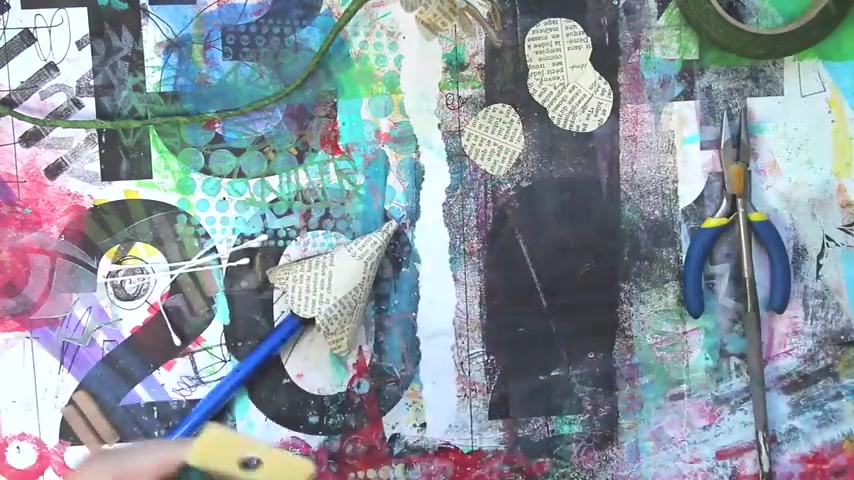
I do want to make sure to cut out the center .
So I simply cut into the flour and then around .
And the reason I don't have to carefully cut the center out without cutting in is because we're going to cut these flowers apart .
So it's totally fine to cut into them .
Now , don't throw those centers away .
We're going to use them for something else , so be sure to keep them .
So I have my five flowers with the cut in there .
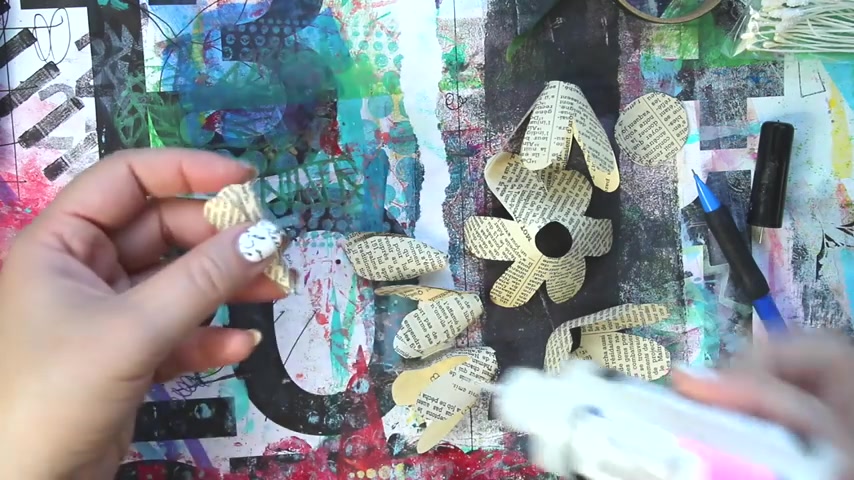
And now , so from the first flower , I'm going to cut out one pedal .
So I'll have one pedal and nine pedal .
I'm not throwing away any pieces .
I'm just separating out petals , right ?
So this is a 10 petal flower .
The next one , I'm cutting two petals and so I'm gonna have two and eight and then the next one , I'm cutting out three petals .
So I have three and seven and then the next one , I'm cutting out four pedals .
You get how this works , right ?
So the last one , we're cutting out five pedals and you have two pieces that each have five pedals .
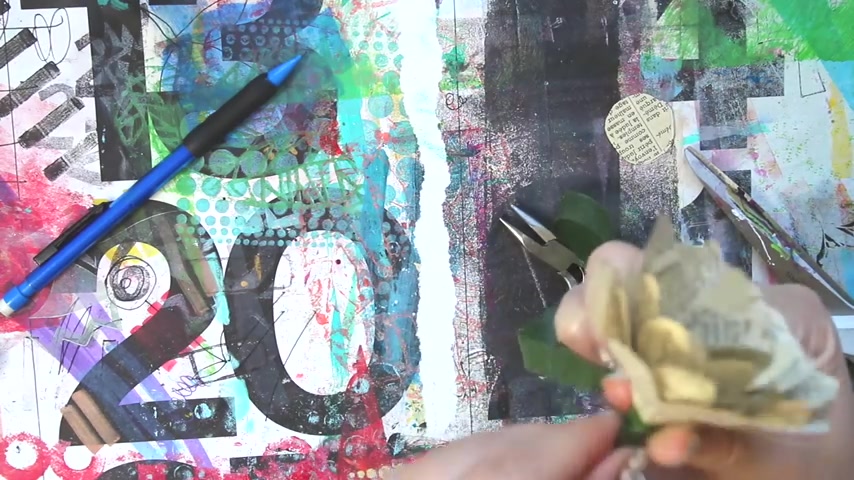
So I'm using glossy accents as my glue .
You can use any glue that you want .
I find that this sets up fast , has a great tiny little um nozzle which makes it really easy .
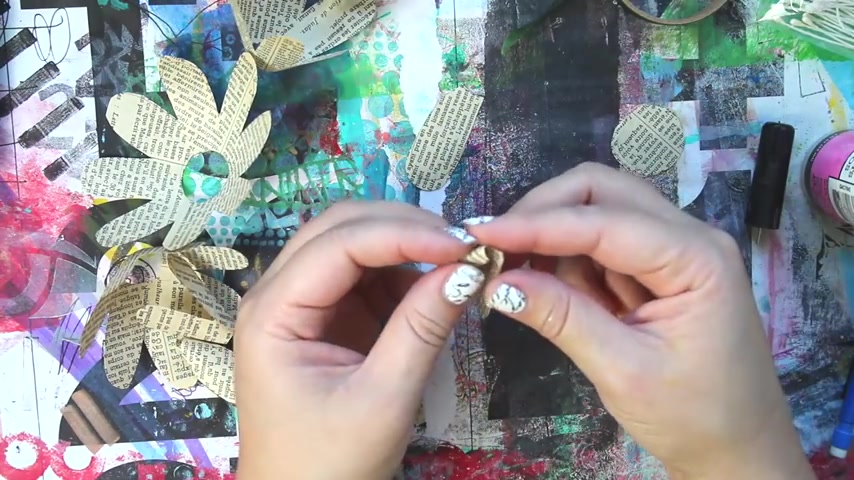
And basically what I want to do is on every single one of the pieces I want to overlap two pedals .
So let me say that again , it's really important that you overlap the two outside pedals .
That's how it goes from two D to 3d .
So that five pedal piece is now becoming a three dimensional four pedal piece because I've overlapped two of the pedals to take it down from 5 to 4 .
And you can see I'm having a little fussing around issue there .
But basically , there's my four pedal piece from my original five pedal piece .
So I'm just going to keep on overlapping pedals so that I create all these three dimensional pieces .
And when you get down to little ones like the three , it starts to feel a little bit fussy because to make that you're almost folding it in half .
So I'll sometimes use my pencil to kind of , you know , um help me make that one shape together .
Now , for the two pedal , you're not going to be overlapping .
This is the exception to the rule and instead you're just gonna be um overlapping a tiny corner instead of a full pedal just to get that little curl to get the center of the flower looking , right .
So once you've kind of smoothed the paper around , so , you know , the curl is gonna work and depending how thick your paper is , thinner paper believer , and it's actually harder to do this than with thicker paper like hard stock .
This is actually super easy .
Um I'm just going to put a tiny dab of glue and I can see why having that tiny little tip is really great with the glossy accents .
And I'm gonna go ahead and wrap that around and secure it again .
Use my pencil to help me out where I need to .
Now , the one pedal , I'm not going to be gluing it at all .
I'm simply bending and folding it just to make it a little rounded and a little less flat again .
I'm trying to move it from two D to 3d .
So let's go ahead and lay out all of our pieces .
So I'm gonna lay out all of my flower petal pieces and I'm doing them in , in size order because that's how we're actually going to begin to adhere the flour together .
So I start with the smallest slather a bit of glue on the bottom there .
And then I'm going to insert it into the tow into the two .
So this is the one pedal going into the two pedal and I'm trying to offset them kind of like theater seats so that their pedals aren't actually directly on top of each other .
And then when I'm ready , I'm gonna go ahead and take that piece and I'm gonna insert it into the next size up .
And this is how basically the whole flower is going to go together .
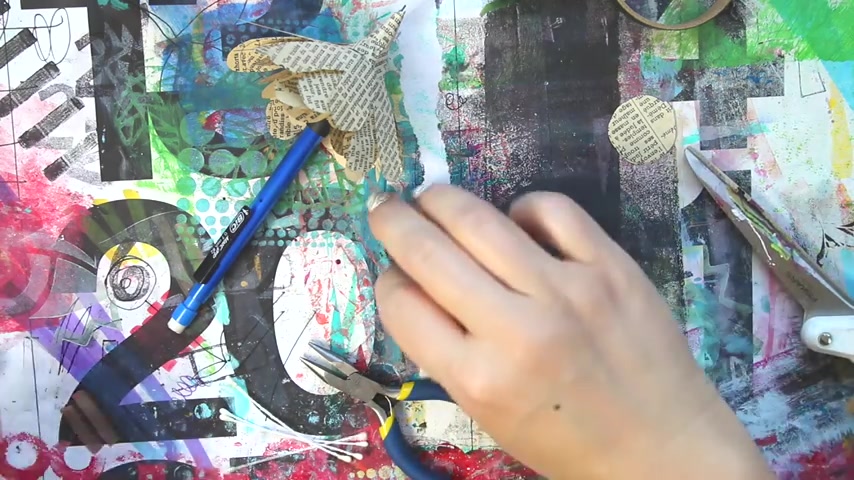
One of the things that I find makes this process a little bit easier is if you actually use the pencil or you could use a chopstick or you could use a paintbrush or something just to kind of hold everything in place because your finger gets a little bit fussy .
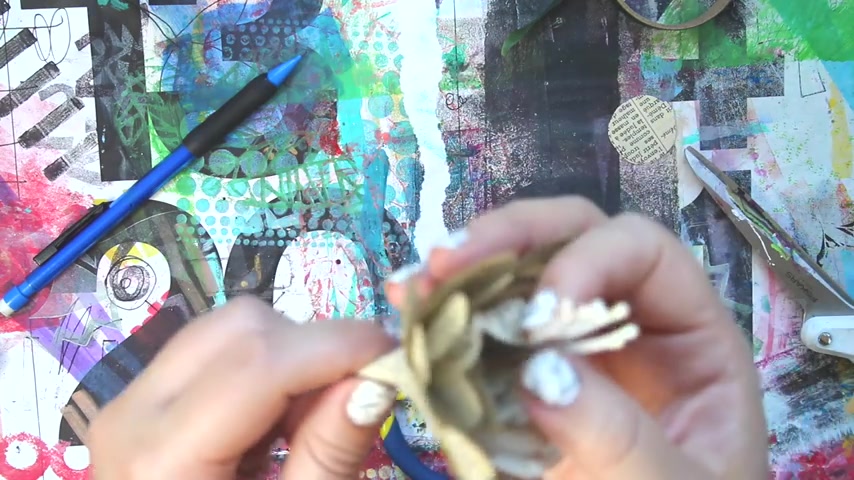
But I just keep adding glue and each of the um you know , three dimensional petals in order .
And soon enough , you'll see that we've built up this nice flower , but we need to finish off that bottom cone area .
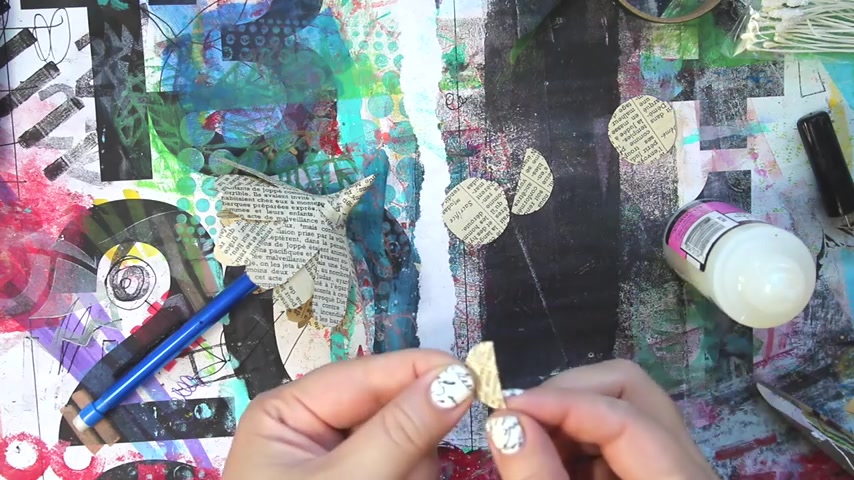
So these little circles we saved , I'm gonna cut them in half and then I'm gonna apply glue and then I'm gonna use that little half circle shape at the base of the flower to kind of cover up and meld together all the different layers that we've been putting on there .
And the nice thing about the book pages is that they're very pliable and soft and with the text , it makes it really seamless .
So you can hardly see where you've actually done this .
Um adding or patching .
I actually ended up using two circles or four pieces for each flower , but you could use less or more depending on how your flowers turn out and also how big your template is .
That's another issue , of course , right ?
So once that's done , um these are little centers that I bought at the craft store , you can buy them actually in the cake decorating section for some weird reason , along with any flower decorating , they come in different colors and styles .
Um There's actually two different styles I think in that bag , the sort of pearlescent ones that I'm holding and then kind of more fuzzy pipe cleaner centers .
There were some glitter centers but I like those .
So I use them .
Um But anyway , these are little wires that have these little ends on them and they really make your flowers look real .
So I'm using some green craft wire .
You can also use green florist wire .
It doesn't even have to be green because we're going to wrap it .
But that's what I'm using .
It's soft enough to cut with scissors .
So I'm gonna cut a piece off and that's a little longer than I want my stem to be because I'm going to wrap the wire into a loop around those little steam and pistol , uh whatever part of the flower that the inside bit of the flour it is .
Um And then I'm going to bend those up because remember I said those are wired and then I'm simply gonna wrap that straight end around and I have some pliers there in case I need them .
But honestly , this wire is so thin that I found that I was able to do everything with my fingers .
Um But if you have a really nice manicure or whatever , you might want to use a pair of pliers to get it around .
Ok .
So once that's all done , you have them sort of hooked in there .
So what we essentially need to do at this point is we need to insert that into the center of the flower , basically where the pencil is right now .
So I'm just gonna go ahead and thread that through into the center of the flower .
And then basically , um , the hole is not really large enough or hopefully , isn't large enough to let that whole center thing that we've just created fall through there .
So now I'm taking some florist tape and where the flower meets the wire .
I'm starting to bed .
Now , the key to florist tape is you have to pull it .
You have to like , give it , stretch it a little bit .
So that while you're wrapping , you want to be pulling and stretching because it's not actually sticky .
The way like traditional tape is , um , it's sort of , it's , uh , sticks to itself mostly when you really Yankee .
Yankee , I'm making yank a cute word when you yank and pull on it like that .
So I'm wrapping up the base of the flower a little bit and then I'm going to wrap down the base of the flower and then I'm going to wrap all the way around the wire pulling as I go .
Now , if you run out of tape , like I did , it's not a problem .
You just add a new piece on .
I like to pull it off the roll to work with it .
I find it a little bit easier than working with it on it .
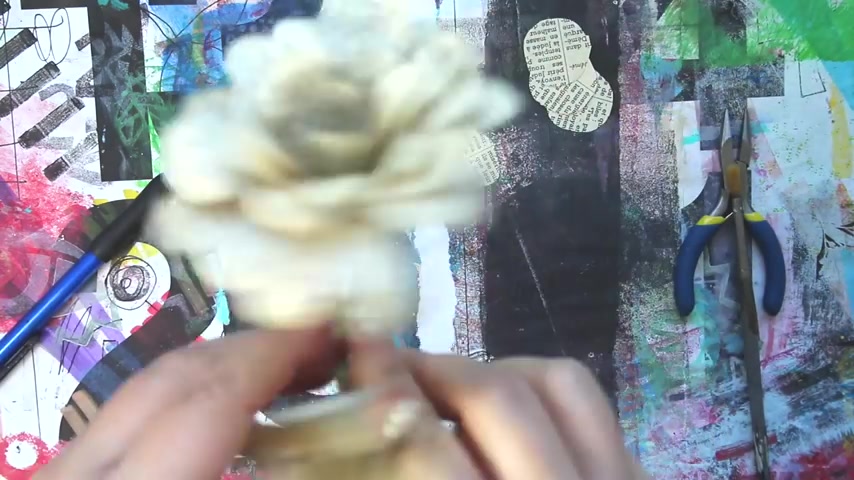
And then one of the things that I think makes the flowers look awesome is if you roll the petals and I'm just using a pencil here to do it .
But I found that the pencil is a little thicker than I like .
So I actually switched to a paintbrush about halfway through and I found that the handle of the paintbrush was better size for me .
But that's one of the things that really makes this 3d flower sort of pop .
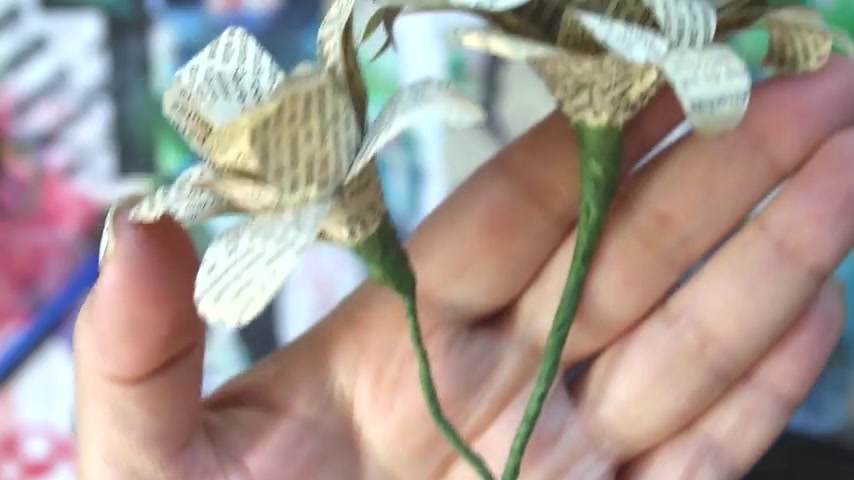
So I want to make a second smaller flower .
So I'm taking two book pages and we're going to go through the exact same process that we did before .
Um and you could use any number , but I find that a two book page flower really makes that nice companion smaller flower .
So I'm gonna cut this into one pedal , two , pedal , three pedal and then there's a four pedal leftover piece .
So you can see that's the one pedal .
I'm cutting off two .
I'm gonna go ahead and cut off three and there is numero four .
So Uno Dose Trace Quattro , right ?
1234 .
Now the other flower we're gonna cut five petals .
So what I'll have is 25 petal pieces .
So what I should have is 123455 .
And that's how we're gonna make our smaller flower , same process , overlapping the petals when I get to the one and the two .
And I'm just being really careful and folding them over .
I'm stacking them on to each other using the pencil .
I'm threading in the center .
Now , when I want to join the two pieces together , I want to just overlap them .
Wrap the wire from the small flower around the already covered wire from the big flower .
This is going to attach them .
It's also going to stabilize that bottom wire just make it thicker and hardier .
This is not pretty wrapping , it is gonna all get covered .
This is more of an armature than anything else .
So I'm just going to go ahead and wrap that around .
Now , there's a little bit of tape still hanging off that small one and I'm just going to pull it hard and wrap it around both .
And what you'll see the magic of florist tape is that it's going to be a pretty seamless joint .
You're not going to be able to tell where the two flowers .
I mean , you can see that obviously that they're coming together , but you're not going to be able to be like , oh my gosh , I see a raw wire or anything like that .
And I'm adding in just another piece to finish that off .
I'm gonna curl those pedals and look at that .
I mean , that's amazing .
Right ?
That's a couple of book pages that just got turned into these incredible three dimensional , absolutely gorgeous flowers .
And if you , you know , look at them from the bottom , you can see they look good from all different angles .
So that you can display them , you can carry them , you can use them and that joint that I promise you is going to be seamless .
Boom .
There it is .
You can't see any wire exposed , you can't see anything like that .
It just seems natural that they're right there right together .
So super cool , super easy , right ?
I didn't lie about any of that .
So I wanted to share with you a picture this is the bouquet that I made for my friend's wedding .
Um And that is paper flowers mixed in .
That's faux greenery from uh Ac Moore .
So super easy to make , to make her a kind of really classical bouquet with a little bit of a twist .
Anyway , come on over and visit me at Balls designs dot com .
I would love to see you .
Are you looking for a way to reach a wider audience and get more views on your videos?
Our innovative video to text transcribing service can help you do just that.
We provide accurate transcriptions of your videos along with visual content that will help you attract new viewers and keep them engaged. Plus, our data analytics and ad campaign tools can help you monetize your content and maximize your revenue.
Let's partner up and take your video content to the next level!
Contact us today to learn more.