https://www.youtube.com/watch?v=awj4dwOY91Y
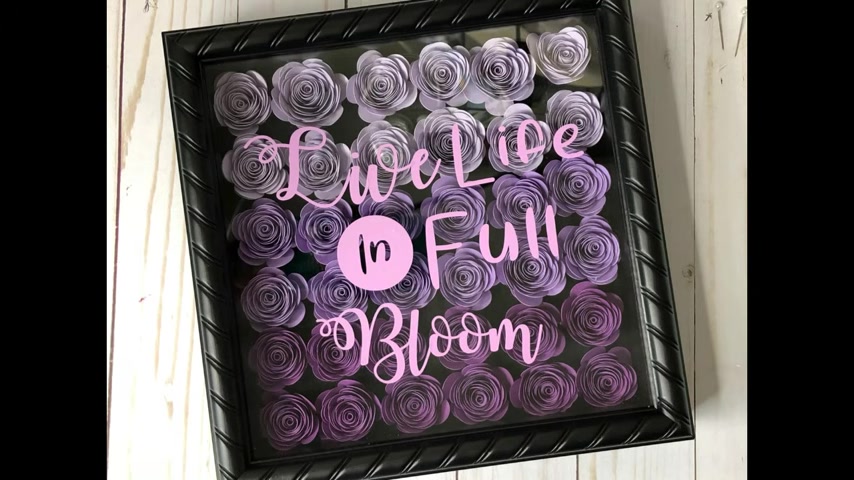
How To Make a 3D Paper Flower Shadow box with Cricut
Hi guys , it's Crystal .
Welcome back to my channel today .
We're going to do the shadow box with the flowers in it that you probably have seen all over Facebook and Instagram .
So I thought we would recreate that on our channel here .
So let's go ahead and get started .
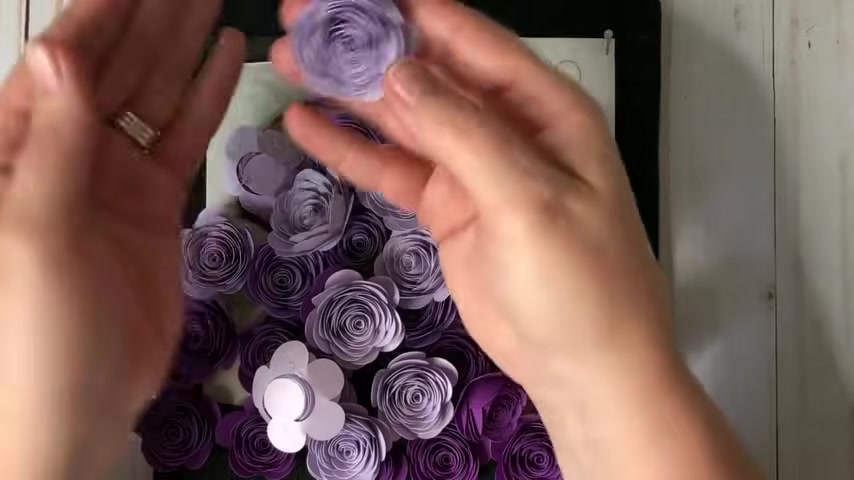
So as you can see , I've already done .
So we have one more layer here to do of the um light color flower .
So they're going to be this lighter shade here .
That's what we're gonna work on now .
So these are not glued down or anything .
I've just been kind of working .
So what I'll do is um so I work on , I worked on all the dark colors first and as I'm going , I'm just setting them down .
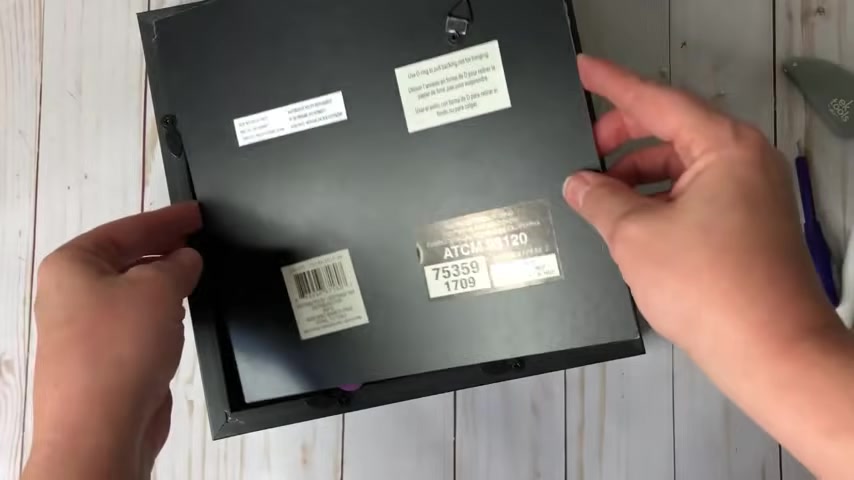
So I still need to pull this off because I wanted to show you guys um this is the one that I bought from um from Michael's .
So , um I wanted to make sure you guys could see the information right here .
So I bought this from Michael's .
Um I got it during the 60% off sale , so it was $5 and this is the eight by eight but I think they're originally like maybe 12 99 something like that .
So anyways , as I make them , I'm just slowly going across and just setting them and then when I go to glue them down , I'll just pick them up , glue them that way I can keep them all together .
So as I'm going , I'm just putting them down so I kind of can see where I'm at with my numbers and if I need to come back and add a few more of some of these colors and kind of blend it .
If there's not gonna , if it's not gonna fill right up here , then that's what we'll do .
So , uh let's go ahead , I'm gonna set this out of the way so you can see how I'm kind of doing them .
So I just kind of pull this back off .
Some of the shadow boxes , the front will come off like the door will open and that's fine .
Just do the same thing .
That way you can see how many you're going to need .
All right .
So there's tip number one so far this project , it , it is taking 36 of these flowers here and we'll find out if we need a little bit more here in a minute .
So 36 .
So it's 12 of each color and I use three different colors .
These are the colors I use , I purchased the big pack .
It's 200 count of cord .
So , and it's multiple layers of pinks and blues and reds and purples and stuff .
200 count for Michael's and it was $10 for the whole pack .
Plus I have the 20% off my whole total and it was so it was $8 for the pack .
But what I like about Michael's is they have the stacks and it'll even have more of a purple tone , say like five or six of them .
Um There may even be eight different shades and you can get like a 50 pack for 4 99 to do it like that as well .
So that's what we did .
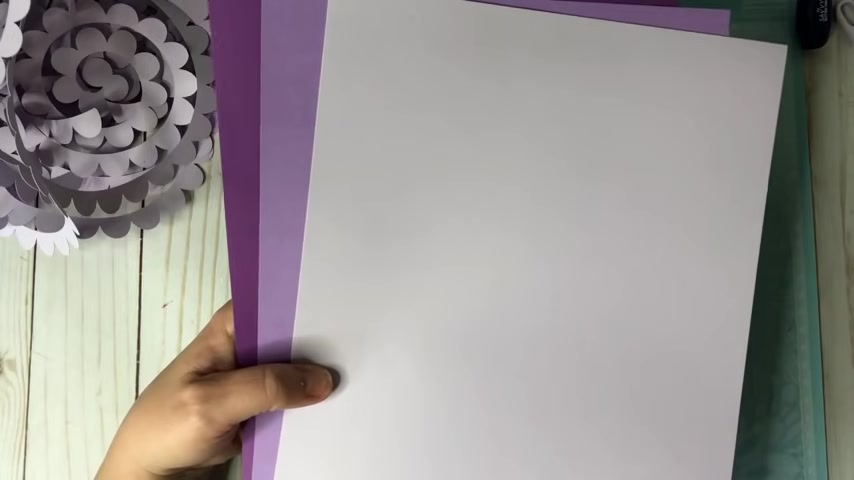
So then the next thing as I'm loading these , I'm gonna have the file down below all you're gonna need to do is load your 8.5 by 11 on your mat just like this in this direction from top to bottom .
Make sure you line up on the corners here and then it's ready to go .
It's gonna cut out two at a time .
So I wanted to show you that here .
So whenever you get it , all you're going to do is you're going to pull it just like this .
I like to pull from the side here .
And that way it goes at the same time .
And I highly suggest that when you're messing with Corp ST or paper that you use the light grip matte , then your paper is not gonna stick .
Then I try to , I've always struggled using the spatula to pick up my paper without messing it up .
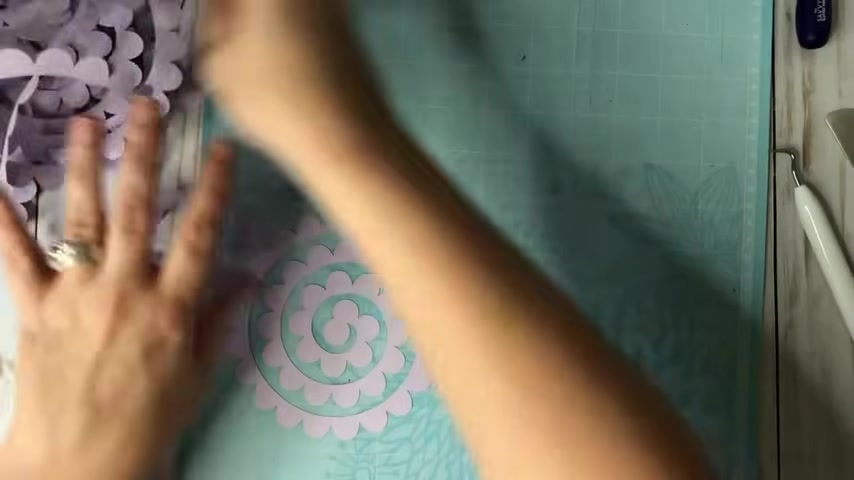
So I always use , and I have hot little work .
I always use my we tool and I just kind of get underneath there and then I just start pulling it up .
Now I make sure I have control of it because I don't want it to rip and then I pile it .
So as you can see , I just kind of have them piled here because there , there's just no easier way to do it .
You can sit there and really kind of make them stack pretty , but I just kind of toss them like this .
So what I do is I work a system .
So what I do is I load a paper , I cut it and then while that's cutting and I have it on fast mode so it can work with the cricket air , the cricket explorer too .
Um All that stuff .
Um But if you , if you have fast mode , put it in fast mode , it's gonna work just great and go super fast .
So as that's cutting , I'll come set back down , I'll do a flower and by the time I'm done with this flower because you will make these really quick , it's already ready .
So I'll unload it , load my next paper , come sit down , do my next flower .
So that's how I did it .
Now , you could take several days to work this , you could get all your flowers cut out and then come back and , and do just a few flowers every day .
So if you have arthritis or anything fat , don't let this um project um overwhelm you to where you feel like you can't accomplish this because I have a hard time with my hands with tedious projects like this .
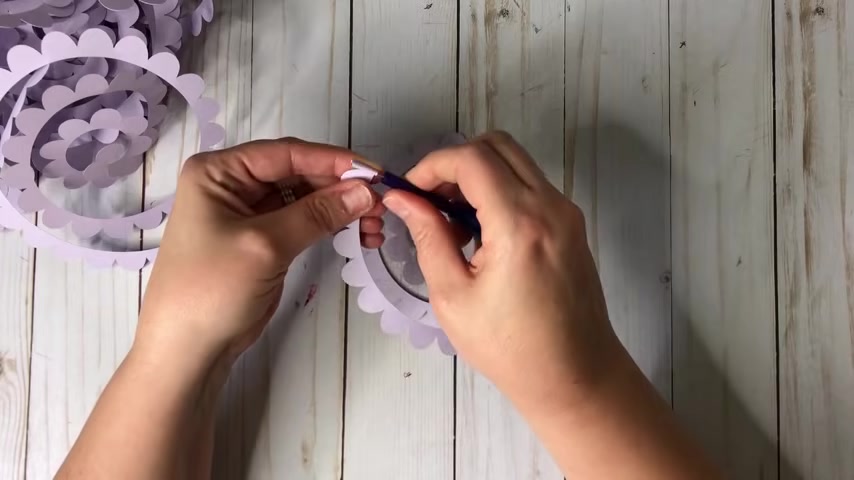
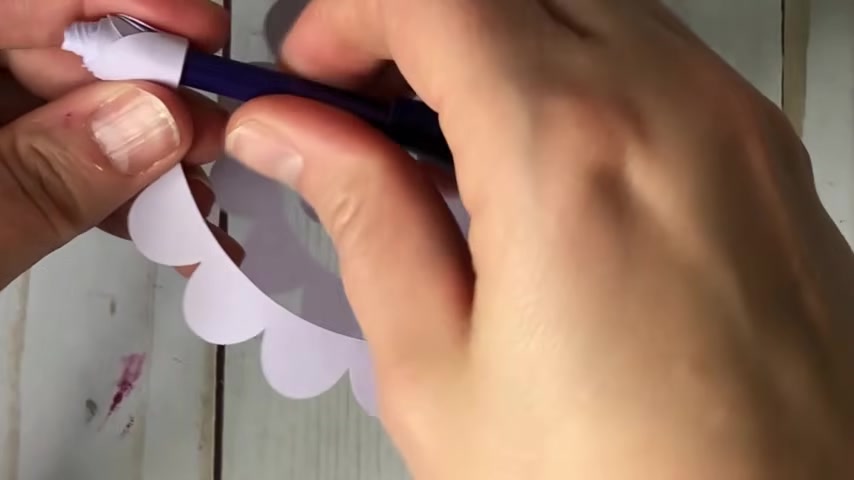
And so far I've been doing these back to back to back and it seems ok , so what you're gonna do is you're gonna take your tool here .
Now , the one that I got is the , um it's safe slotted .
So it looks just like this quilting tool by uh quilt creations .
I got mine from Hobby Lobby .
Uh 40% off Amazon also has those .
So anyways , um , it has a little slit .
You're gonna get it right here at the end .
I'll have to show you again because I've started this one and you're gonna just start twisting .
So this thing has like a twist with a handle kind of twist here .
So I just kind of hold it like this and I'm just turning .
So hopefully you guys can see this .
But what you're wanting to do is this piece of paper here .
You're wanting to keep it against this edge so tightly , you don't , not super tight , you'll get the feel of it with after 1 to 2 flowers like these are so easy .
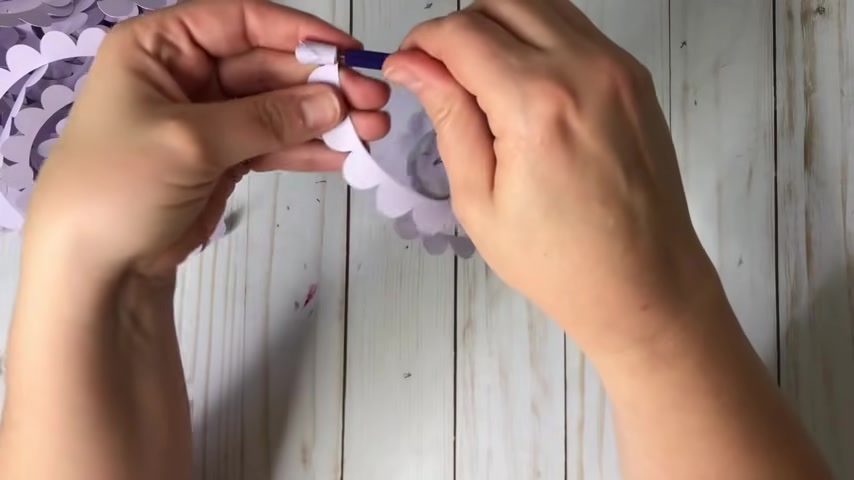
So what I'm doing is just moving my hands down , I'll come back up , get control and I'm just continuing .
So you can see hopefully in there how that's kind of winding up .
And like I said , I'm just lining this edge up with this edge .
So I'm just trying to keep it on the edge .
Now , you'll see as I go along , the more more you have , the more it'll kind of move down this way and it'll kind of seem a little bit harder to just kind of get it on there .
You'll see what I'm talking about in just a minute and , but don't worry about that sometimes I think when we see somebody else do something and they do it so perfectly , you think that you're really mess it up when you're not .
So you'll see here in a little bit because I've been doing it every time now it's starting to slip .
So it's wanting to kind of come down this barrel barrel .
That's right .
I'm just keeping it tight .
I'm continuing to come around and it'll continue to come down that barrel and here in a minute , I'm gonna put it in fast forward mode .
So you can see several more in these deduction .
What I'll do at this point is kind of hold my flower and just take my paper , um , and keeping it tight and going around .
Same thing , just keeping the edge .
Hopefully , I was in the frame here , keeping the edge against the edge if that makes sense .
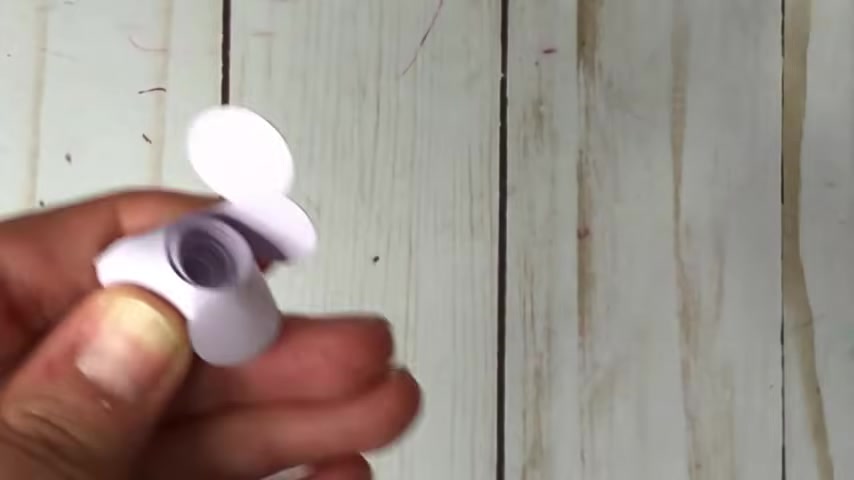
So at this point , I just make sure I wrap it all the way around and then you have your circle .
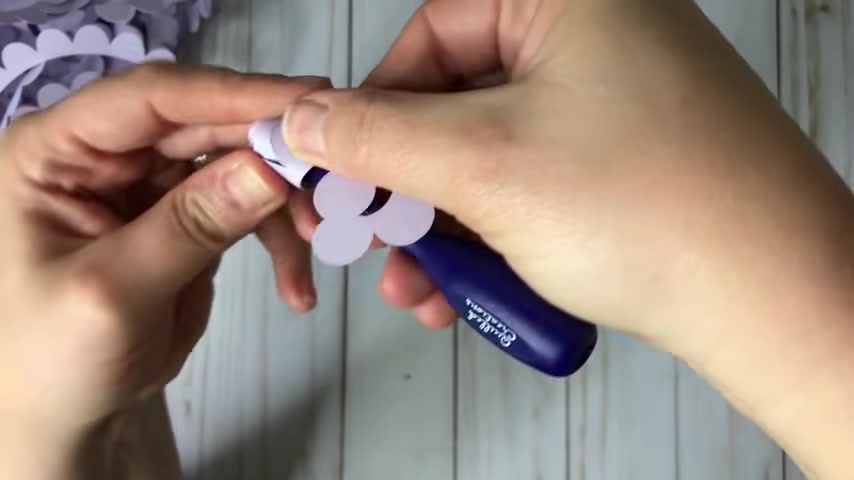
So I , I just keep that poked up just like that and then I pop it off and then what I do is I just let it go .
So I let it go , set it down , kind of tap it a little bit and now sometimes you'll see and you may see that here in a minute when I get it fast forward , these will kind of be popping out a little bit more .
It doesn't matter once you glue it down , they're gonna go back down .
So I just kind of push these where I want them to be .
So say I'm happy with that at that point , the um piece that's open here , not the bottom because the , that last round circle is gonna go on the bottom .
OK ?
So the last piece of the flower pedal , you're gonna take a little bit of glue just like this and you're going to pop it just like that .
So you're gonna hold out for a second .
So now everything is attached .
You just got to attach the bottom .
You open up the , the bottom circle here , pop on a little glue .
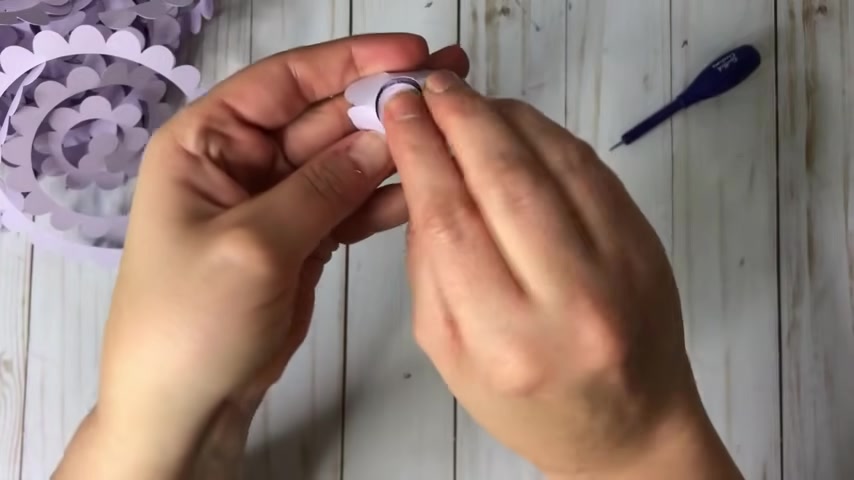
I like to put it on this side instead of this side .
And then you wanna just hold that circle down , push from the center here and the bottom .
And remember hot glue does get hot .
So um just kind of push what you can just like that and there's your flour easy peasy , lemon squeezy .
All right .
So let me zoom you guys in a little bit and I'm gonna show you putting this on and then we'll start putting it in fast forward motion .
Now , when I do mine , I have it in this direction .
So you can see my tail is coming from here .
It's coming towards me .
So the top of it is pouring away from me and the tail is going around .
This is the way that I have it when I'm holding it to start .
So let me zoom y'all in a little .
All right .
So what you do , your little tool has a little slot .
You won't be able to pick it up .
I have a glue everywhere .
Um It has a little slot in the middle and there's several tools on the market .
There's tools that is like $2 and so you just slide it on so it's inside that little slit there and then you just kind of push against your finger to kind of get it going and then just turn .
So you're keeping it real tight and then just keep going all the way around .
So I'm just gonna keep going .
And this tool sounds sometimes like it needs oil .
So anyways , but um like I said , there's tons of tools on the market .
You can use a uh end of a paintbrush , you can use um like a little chopstick , things like that .
All you would have to do is just put a little glue dot on the end to kind of get it to hold and then just turn , turn , turn .
So like I said , when I get to this point , I'll kind of hold my flour and just wrap my flour around it .
So hopefully you guys can see all of this and it's not a mess .
All right .
So once you get to this point , you see the bottom sticking up , I just kind of pop it off , then I take this guy and kind of bend it still .
So now at this point , like I said before , this is a good example .
So you can see that that's kind of popping up a little bit .
It doesn't matter because once you glue it , it's gonna stay down .
So I just kind of tapping on it a little bit making it just stay down .
So say I'm happy with that .
Once again , I find my end , which is like this piece here and I'm gonna add a little bit of glue just like that .
Sorry .
It probably was not the get that down just like that .
All right .
So then I open up my bottom here .
Like I said , I like to get my glue right in here .
Push down on the middle and just like that , like I said , be careful because the glue will get hot .
All right , just like that and you can come back and pull off any little pieces of strings , but just like that super easy .
So let me put it in fast forward mode .
583.07 --> 667.53
You could literally just glue the bottom piece .
So just glue that bottom piece and you're good to go .
So just kind of preference of what you wanna do .
So I figured that out on the last few .
So anyways , let's go ahead and get started here .
So let's get those out of the way .
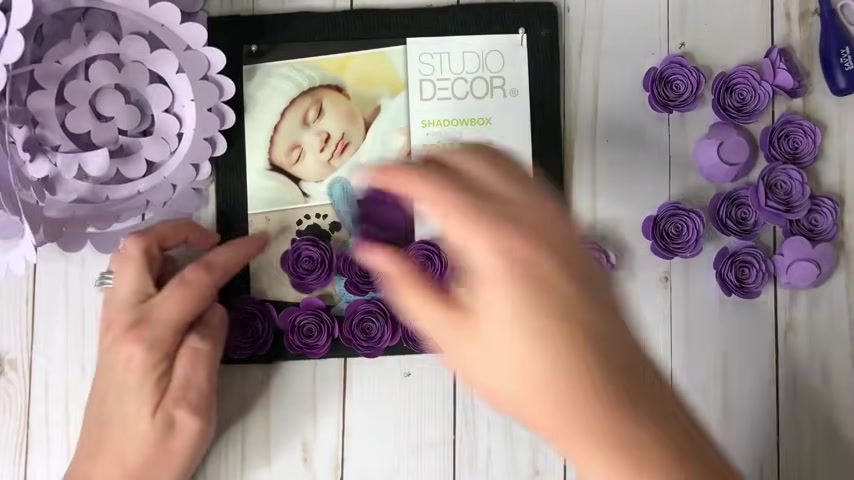
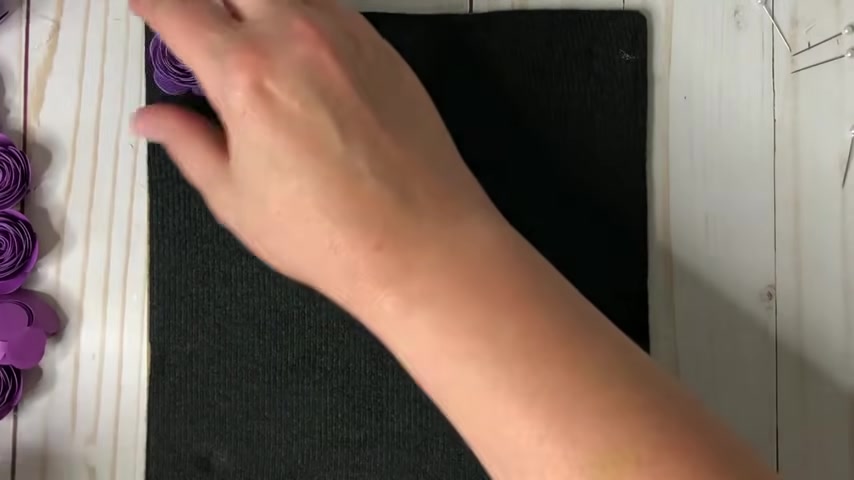
So we're gonna take our board here and like I said , now , if you have the , um because like it's gonna go over the top just like this .
So this one has like the little hooks that kind of go around the back .
So if you have the one where the lid opens on the front with the magnet , like I said , just open it and then pop these down .
So what I'm gonna do it comes with these cute little pins that I'm gonna save for later and for something else and then take this paper off .
Now , this is kind of like a little felt foam board .
So either a you could take some of these small needles like this .
So say that you want to , this is something that's in your home and you may want to be able to change the flowers out from time to time , take some of these small needles , you can get a package of these at , um , but the ones that are real small , they're really short .
Um , if you know what I'm talking about , I wish I could grab those down before I start up .
But they're way up there in my .
So , and so , but anyways , you can get this container , say at Walmart .
And it's like , um , I think they're called dress pins .
So they're really short and you could push those down in here in the middle piece and then push down on the foam and that way it sticks on here and then that way you could swap those out any time you wanted to if you didn't want to sit here and do them all with the hot glue .
So , what I'm gonna do first off , just like I did earlier , I'm gonna go ahead and line all of these up .
So I know where they're at and how much space and then I'm just gonna pick them up one at a time and glue them down .
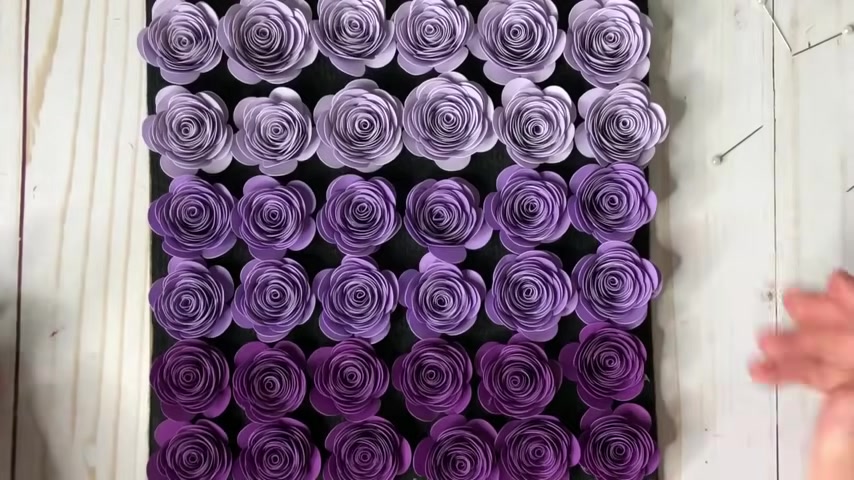
Uh , so now that I have them all laid down a place where I want them all , I'm going to do , I'm just gonna double check that .
Everything's pretty much even now , you'll see where some of these , all I need to do is come back and kind of squish them back a little bit and then pop them right back down .
So if they're kind of pushing on each other like the leaves are kind of not right .
You can always adjust those before you get ready for the final glue .
So everything looks good to me .
So , what I'm gonna do because I'm gonna start from one side to the next and all I'll do is very carefully to try not to make anything shift .
I'm gonna add a little glue to the back and pop it on .
I can clean up all my strings later .
So I don't have to worry about them right now and like I said , just pick them up one at a time and pop down the glue .
So as you guys seen there , I just took my quil tool , but you could take anything and you could just go in between like this , pulling out any of those little um stray pieces of um , of glue .
So just pop them out just like that .
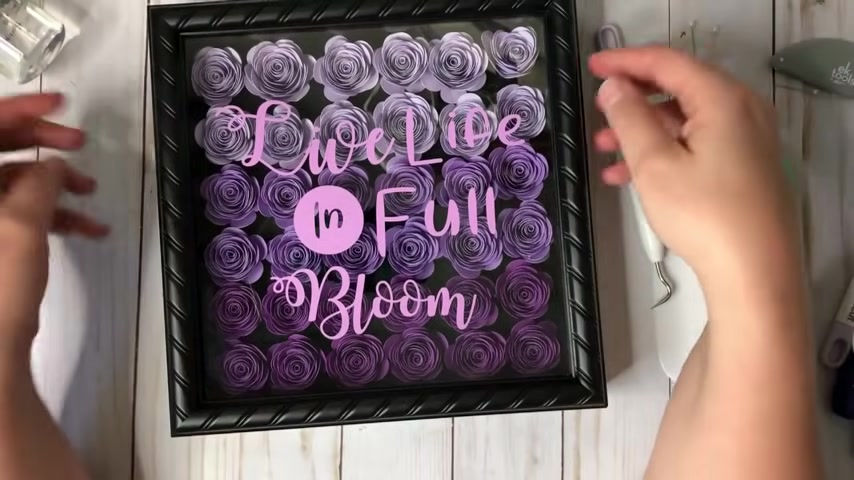
So this is what it looks like so far .
So you guys , so you can , now you can see the , um , the two tone colors and stuff here so you can see how that looks .
I think that looks really neat .
Um And I could have even came with like so much of the , this color and then switched them out like that way .
They weren't just in rose , but you can do it however you want to and then you can either just leave your glass like this or you could add the vinyl on like we're gonna do .
But I think this would make an amazing mother's day gift .
Um , birth announcements , you know , whenever the baby's born they're waiting and all that kind of stuff , there's tons of them out there .
So , uh let's go ahead and get the final one here and see what it's gonna look like .
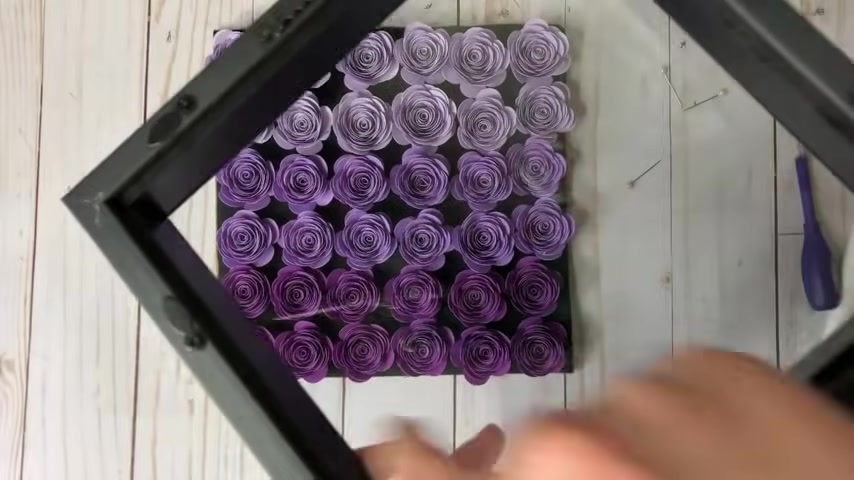
Ok , so to pop the top on , you wanna make sure you take Windex and clean the inside if you fingerprinted it at all , but all I need to clean is this top piece .
So all you're going to do is get your glass on , flip it over just like this , then carefully get your flowers inside where they need to be .
You may have to kind of push on them just a little bit because we got right up on the edge .
So you wanna make sure how close you get to that edge , but you're just gonna have to play with it for just a second and can I pop these in ?
Ok .
So I have cleaned off the glass with some alcohol and a clean wash rag .
You could paper towel , whatever Windex .
Um So now what I'm gonna do is I've got my vinyl all weeded out .
I did forget to weld .
This is like the first time I've done this in forever .
I forgot to weld these pieces this first and then attach and uh , so you , I don't know if you guys will be able to pick it up or not , you can see where they're not attached and I just brought them in , but I'm gonna go with it anyways .
The only tiny little piece that's missing is there that I pulled up .
But I'm gonna roll with it anyways .
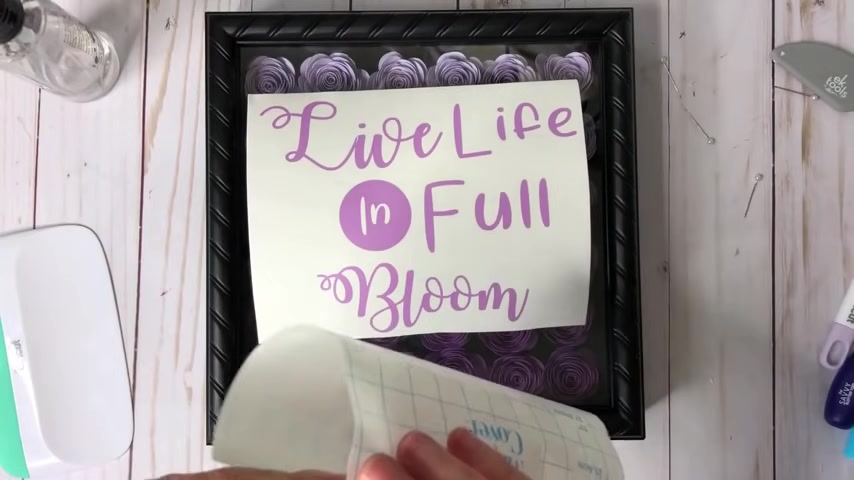
So I've got my contact paper from the dollar tree and I'm gonna go ahead and get this down .
So now that I've got this all picked up here , so now I'm going to , so now I'm going to just very carefully get this lined up here trying to keep it even .
Just wanna stop and look at that really quick .
I think that's OK .
So I'm gonna go ahead and just varnish this down .
OK ?
So here it is .
So I hope you guys enjoyed this .
I hope you guys found it helpful .
I hope this made it a little bit easier for some of you guys that are seeing these all over Facebook and Instagram and kind of wondering how they're made from start to finish .
I will be sharing down below uh the file that I created , which is this is a free file for the flowers in design space .
Um But I just attached the two .
So all you have to do is put in your 8.5 by 11 and it'll cut those out .
I'll have a link down below of the fonts that I used .
And uh but I just went and looked up some different um some ideas , this isn't written the exact way that somebody did in the fonts .
But I kind of looked up some different ways that people have been doing them and I really love this , uh , little quote here .
So , um I try to recreate it the best that I could .
But I hope you guys enjoyed this .
I hope you guys found it helpful .
If you did , please hit the like button down below and subscribe and I'll see you on the next one .
Are you looking for a way to reach a wider audience and get more views on your videos?
Our innovative video to text transcribing service can help you do just that.
We provide accurate transcriptions of your videos along with visual content that will help you attract new viewers and keep them engaged. Plus, our data analytics and ad campaign tools can help you monetize your content and maximize your revenue.
Let's partner up and take your video content to the next level!
Contact us today to learn more.