https://www.youtube.com/watch?v=WzhZCTzl2us
How to Make a Beautiful Bridal Rose Bouquet with Frosted Paper
Welcome to craft school .
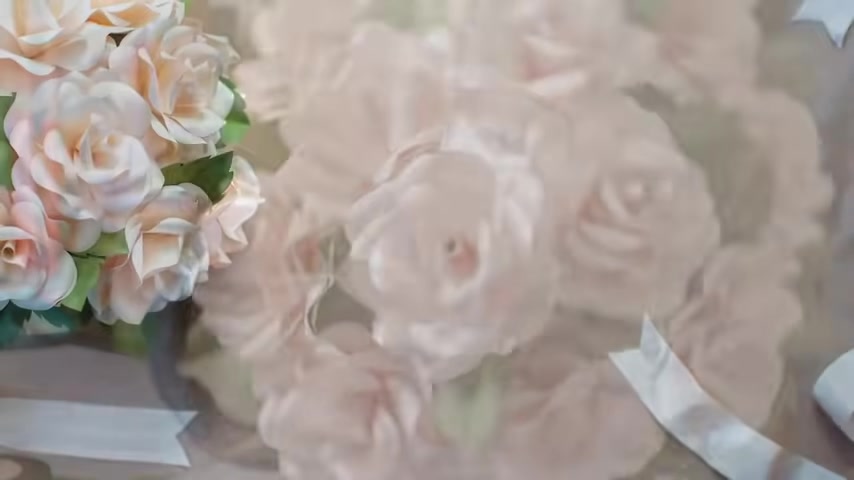
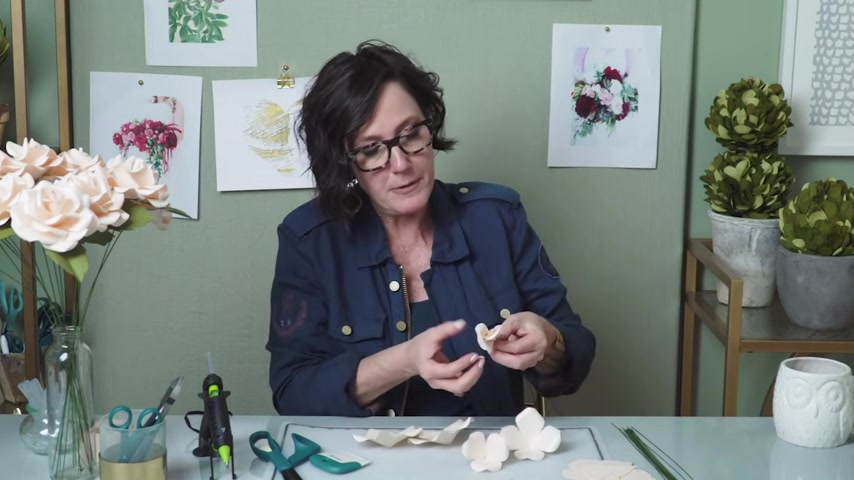
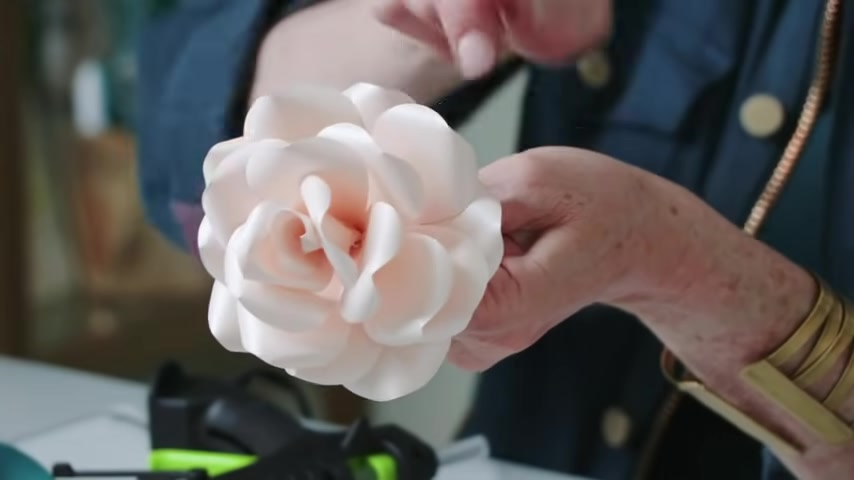
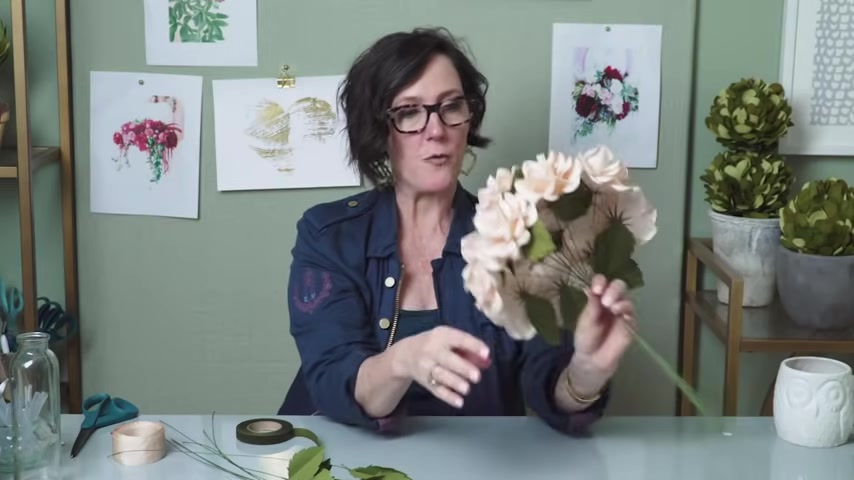
I'm going to show you how to make this gorgeous rose .
Now , this was the very first flower that I've ever designed .
And I have to tell you it's probably the easiest , but nonetheless , it's stunning .
And after we're finished making our roast , I'll show you how to make a bread of bouquet that looks something like this for materials .
I'm using a frosted paper called coral and that is a text weight and for the leaves , I'm cutting it out of jelly bean green and this is also text weight , but it is not frosted .
And you can use this in card stock as well .
I have an 18 gauge paper covered wire , 24 gauge paper covered wire and then a ribbon that I'll wrap around the stem to match my flowers .
I've printed out my patterns for tools .
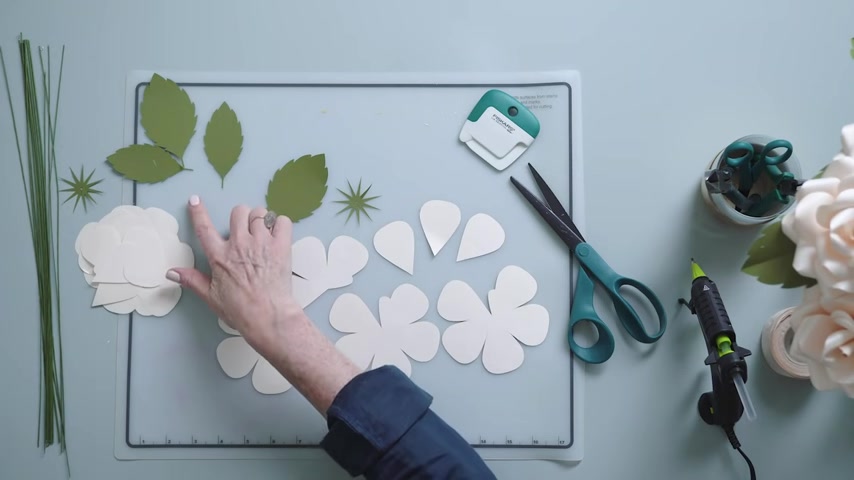
I'm using a high temperature hot glue gun needle , nose pliers with a wire cutter , a heavy duty wire cutter , a curling tool and some craft scissors .
You can cut your pedals and leaves by using the SPGC file and cut them on your personal cutting machine .
Or there's also a PDF template and you can cut them by hand for each rose .
I have three of the small pieces and then four pieces that have multiple petals .
I also have the seal and a leaf and then I've cut out a few extra leafs to show you how I'm going to attach this on a separate wire to integrate those into your bouquet .
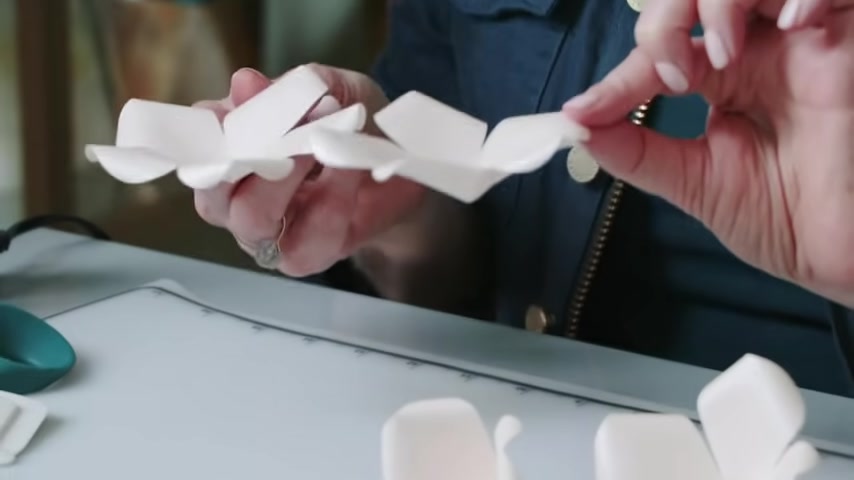
The first thing you're going to want to do is curl your pals .
Now , you guys have probably seen me use the edge of my scissors to curl .
But now I have a curling tool that was made for me by scars and I'm gonna show you how to do that technique .
So I'm starting with my small ones and I'm curling the two corners and you can see I'll show you the full shape here .
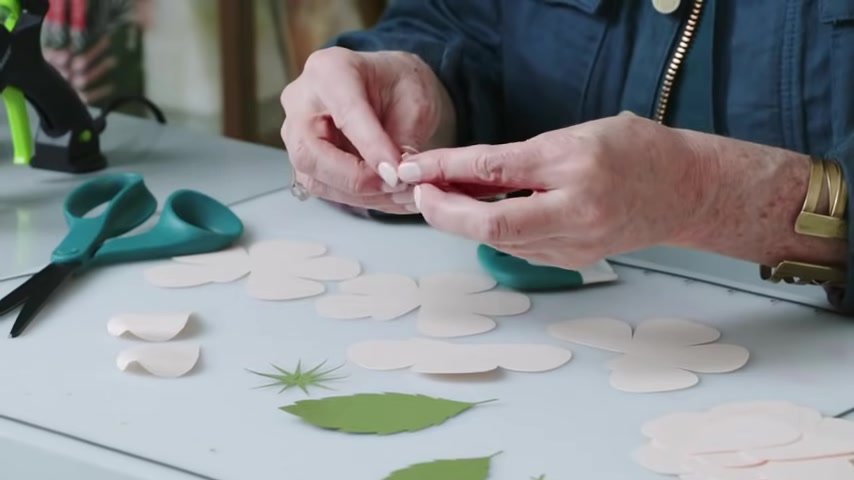
It sort of bulges on the both sides .
You'll want to curl each of the corners rather than just one straight because you'll get a better shape .
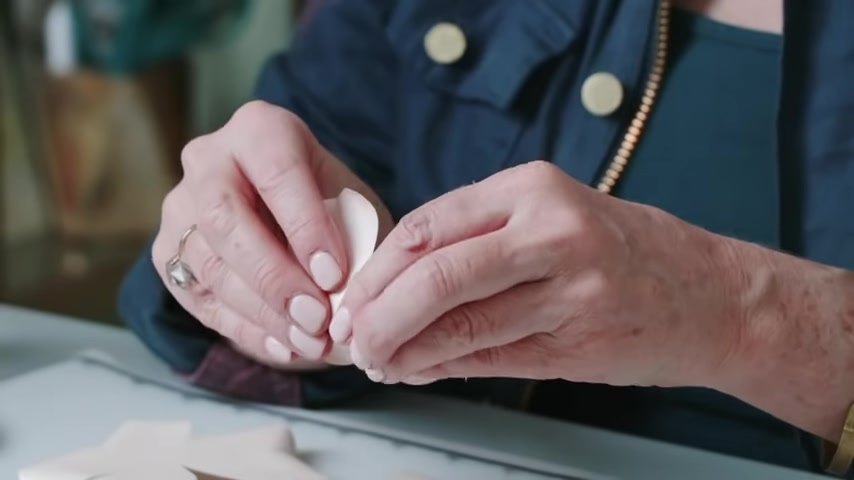
So here's the correct way and I'll show you the incorrect way .
So if you just curl it straight , it's gonna look like this and it's not quite as pretty .
That's ok because I'll just take this and rec curl it .
That's the beautiful thing about paper .
You can , you can recur it and shape it once I curl it , I'm also gonna use my fingers like this and just nudge the corners down a bit and create a point .
I'll go ahead and do that for all of my pals .
Once I have all of those curled , the next thing I'll do is take these multiple petal pieces and glue them into a cone .
So I'll put just a line of glue right there on that tab .
You can see each one has a tab and right , you can see there's a point , I'll fold that over and make it into a cone and I like to get these done and let them cool while I'm working on the inside pieces .
So let's talk about hot glue guns .
If you guys have been watching my videos for a while , you'll probably remember me saying that I only use a low temperature hot glue gun .
And , you know , I think I've changed my mind .
So low temperatures might go to when I work on crate paper .
But what I'm finding is that frosted paper because it does have a bit of a finish on it .
It doesn't hold as well .
And I've just had so many difficulties getting things to stick that I've discovered this hot glue gun if this is a Sher Bonder and it has a very fine point .
And this is probably my favorite one I've found so far .
So I reserve this one for when I'm working with frosted paper .
I've learned how to use it .
So I don't burn myself .
Um You can too , but for other um crafts , I will go ahead and use my low temperature just , just so , you know , sometimes it's good to have two different hot glue guns in your tool kit .
So here they are all four pieces and you can see how the cone is very small and then it starts to broaden as I get to the last piece .
Here , these two are very similar .
You can tell that this one is a bit more flat than this one .
So you'll want this to go in last I have here my 18 gauge floral wire .
And the reason why I like this paper covered floral wire .
There's a link for it below is that I can finish a rose and not have to use floral tape .
This is if I keep it clean , this will do the trick and it just saves a little bit of time , especially if I'm doing a bouquet where you don't see the stems quite as much .
So it's just a time saving thing .
And it also looks really pretty .
What I'm doing here is I'm bending my floral wire , I would say about a quarter of an inch at the end .

The reason I want my glue to have a bit more to grab onto .
So I'll take my first piece and I'm actually going to flip it over so that my curls go upwards , put a line of glue right along the edge , make sure you can see that and place my floral wire right into that glue .
And you can see that the hole there is getting full of , of glue and that will help it stay on and not pop off once that's cool .
I'm going to roll this paper , I'm making it a bit more snug at the bottom and roll this into a cone .
I'm going to leave about a half an inch flap right there .
Put just a dot of glue on the inside and then close that up .
I'll hold it till it cools and then I'll curl it back the other direction .
You can use your fingers to sort of nudge it .
And this is what you want it to look like .
Something like this for the second pedal .
I want the curls to go the other direction .
So I'll place it so they curl down towards the table .
I'm gonna put about a triangle of glue .
Oh , I don't know , maybe a half inch size there .
And then I'll place that about the same angle so you can see the tips match each other .
But I want this one to overlap and I'm , I'm going to pinch it into place .
So it will get a little bit of a wrinkle .
So I'm pinching it at the bottom .
I want this to be as tight as possible .
And the third , I'll do the same come on about that much glue and I'll overlap on one side .
It is a little bit hot .
So I have to be careful and then pinch it again and I'll hold that till it's cool .
You'll see , it's a little bit wrinkly and that's ok because this will be covered up by the next set of pedals .
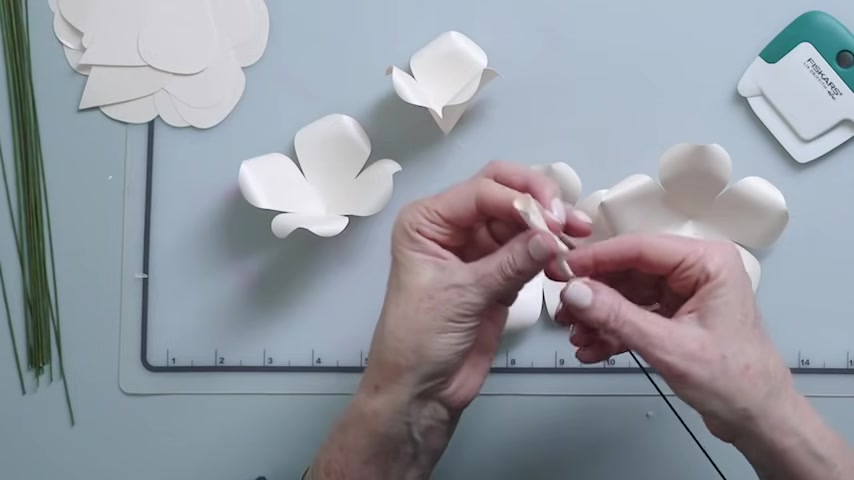
The most important thing is you'll want it to be reasonably tight at the base , the center of your rose should look something like this and I promise you this is the hardest part of the rose and the rest is simple and fun .
So you'll start with your three pedal cone piece and you can see there's a hole in the bottom .
You may not have a hole with every single one .
And that's OK .
You can just punch it through , but just slide your wire right through that hole towards the top .
And right before I get it there , I'll put some glue onto the base of my center , slide it into a place and then I want to rotate it so that it's the most pleasing to my eye .
I try not to overlap pedals .
So they're right on top of each other , but you just kind of fiddle with it until it feels right to your eye .
And then I'll add the four pedals .
This one does not have a hole in it .
So I'll just poke my wire right through , slide it up and then add some glue at the base .
One thing you might want to consider is don't add glue onto the flap where you had glued it before .
Because oftentimes I find when you put hot glue on top of hot glue , it might loosen it , it will heat it up so that it loosens a bit .
That's just sort of a rule of thumb .
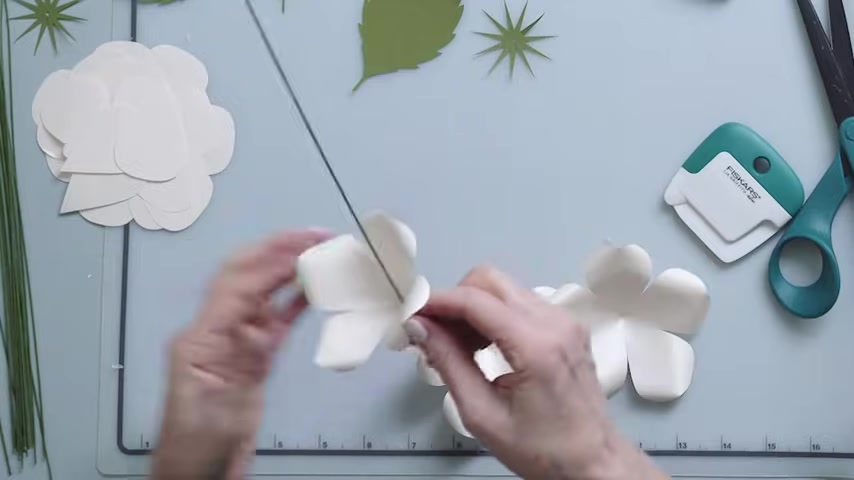
So you can see there's the four pedals and then we'll add the fifth or the five pedal that is the first five pedal .
In this case , I'm just going to add glue to the base since it's open enough .
So that looks , and then the final set and since you have two stacks on top of each other that are a five and a five , you'll want to make sure that you rotate those pedals so that they hit each other right between the first and there's your rows .
And that was pretty simple .
So the last piece that I'll add to this is the sequel .
It's really tiny and that's why I love this fine point here .
I'll add a line of glue and then overlap two of the little sequel pieces .
You can curl those if you want to , you don't have to .
But it's an option .
You just kind of curl them out like this .
There should be a little hole for your wire , slide that into place and add just a dot of glue the base .
And that gives you a beautiful finish on the back of your rose .
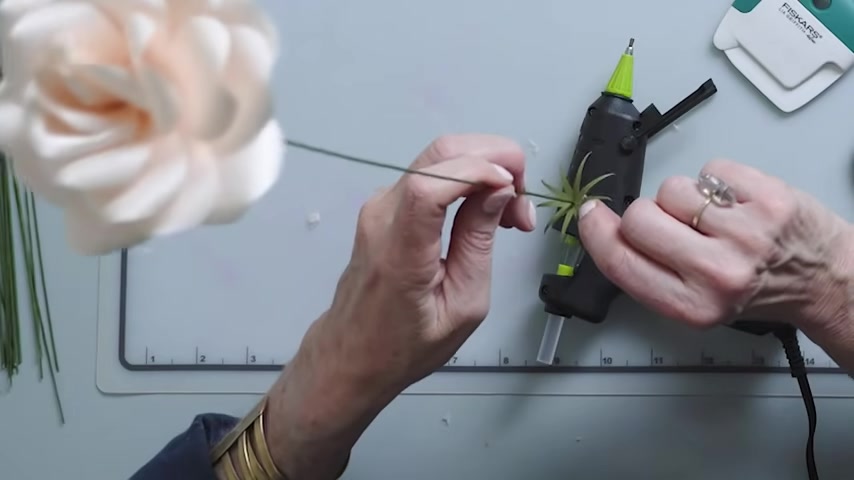
Since I'm using these roses in a bridal bouquet , I want to have the green leafs integrated throughout and the easiest way for me to do that to make sure it's even is to add a leaf right to the base of the flour .
I didn't do a score line on the sleeve .
So I'm just going to fold it in half .
Use my curling tool to give it just a bit of shape .
Put some glue right on the base of that leaf and then I'll place it behind and this will give just a peek of the green leaf between each flower when I arrange that into a bouquet .
So let's make one more .
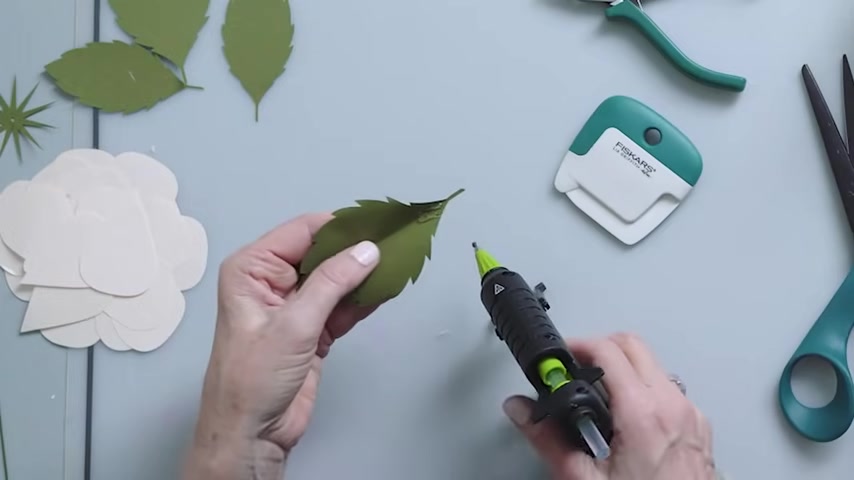
I've cut extra leaves for this bouquet as I want to use them behind the bouquet , do the same thing , just fold them in half and then we'll use the tool to shape .
I have two different sizes .
I have the large one for the center and then two small ones .

And really , you can use any size .
You can use too large .
You can , you can do it in twos or threes of any sizes .
I always feel like having plenty of greenery in a bouquet is a good idea .
I'm using my 24 gauge wire for this because I don't want quite the bulk .
But you could also use your 18 gauge a place a bead e right down the center , lay the wire into it .
And that while it's still cool , I'll take my second leaf and just sort of place it at an angle right there in that bed of glue and I'll turn it over , put some glue on the back of the third leaf and place it going the other directions .
So it looks something like this and this is the way I add extra green into my bouquet .
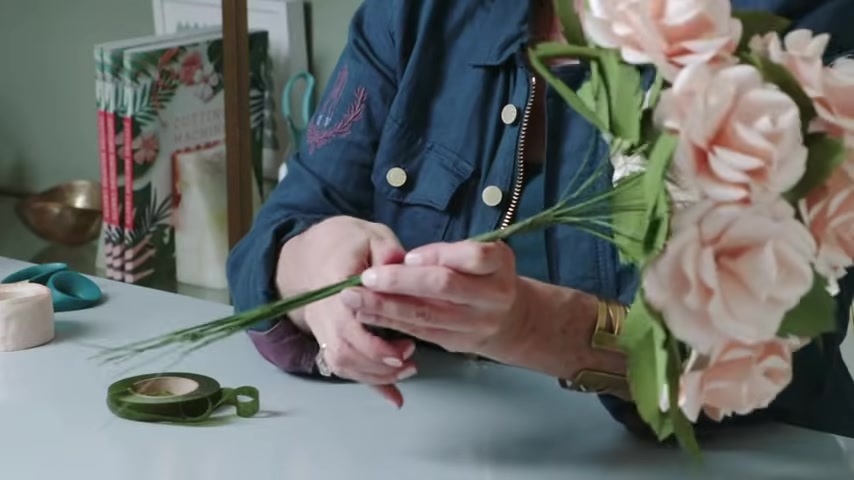
So I have 12 roses and a handful of extra leaves .
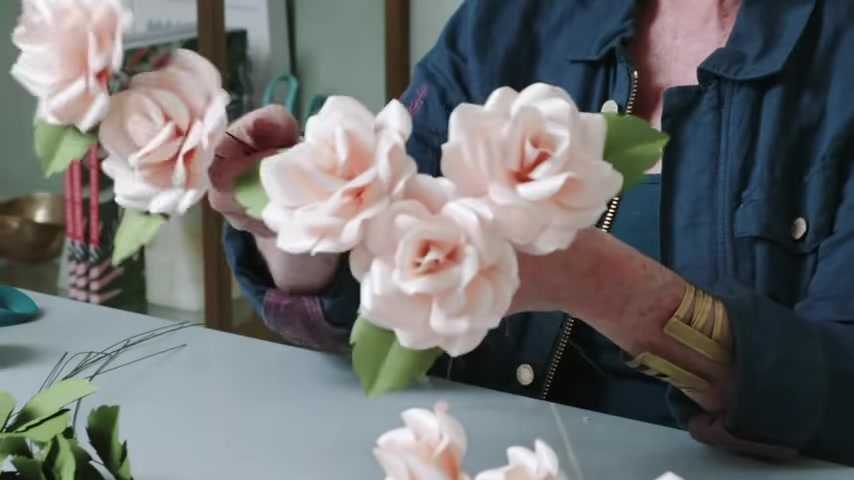
I'm gonna pull out some of my roses and just start arranging them .
The nice thing about working with these flowers on a wire is you can actually bend them .
How do you want to do that ?
What I want to create here is a cone shape , kind of a , a half circle and then we'll surround it with leaves .
So as I'm adding in more flowers , I'll just bring my wire so that everything fits and I'm , I'm looking at it from behind .
You can see what I'm seeing back here .
But oftentimes I'll want to turn it around and take a peek because if I see a leaf , I'd like to pull up here and I want to rotate this flower here .
I'm , I'm tucked between those two flowers .
I'll do the same over here .

I'll have a hold of it like this and then I'll just turn it around and reposition and adjust again .
I want some of these leaves to peek through .
Not too much .
I don't want them to overpower the roses , but just to see enough of a little green smattering throughout the bouquet .
So this looks pretty good to me .
One of the things that you might want to keep in mind is , don't crowd your flowers too much .
Go ahead and feel free to bend them back and to use that wire so that they're not so tight that they press against each other and you'll also get a bigger bouquet .
So I'll show you from behind what it looks like and everything looks pretty good .
This is about where I wanted it as far as the flowers , I'll add these next , but I want to hold it in place .
So you can either take a ribbon , a cord , something and tie that around or you can use floral tape .
And I think I'll use the floral tape method .
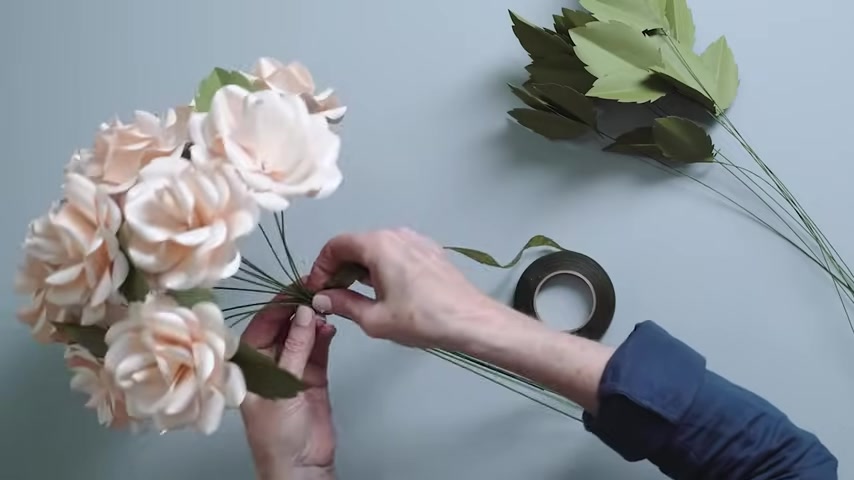
So for those of you who are not familiar with floral tape , it's actually a lot different than tape and that it's not really sticky .
It's a paper that stretches like a crate paper with wax on it .
So in order to get it to work , you have to heat it up with your fingertips and then stretch it as you turn it , it often rips really easily .
But that's ok .
You can just apply it right on top of the floral tape that you've just applied .
It takes a bit of time to get used to it and to learn how to work with it .
So don't feel too frustrated , but you can see how it's starting to keep this together really nicely and it , it's actually kind of sticky too .
Ok .
That's enough for now , I'll add more later .
But once I have the floral tape on , I'll go ahead and go back and just adjust something can shift and make sure that it looks exactly what I'm looking for and then I'll add the green leaves .
So for these green leaves , for the most part , I want them to be back behind the bouquet to cover up some of this wiring .
There might be a place or two that I want to slide a leaf into .
I think that I'd like one right into here .
So I'll slide that through the bouquet .
You can also adjust your flowers .
You can slide them in and out a little bit .
If you see one that's maybe out too far , you can slide it back in deeper or vice versa .
I'm going to fill in some of these gaps in the back , adding some leaves and once I have those in place , I'll add some more floral tape .
So on a handheld .
Ok .
You want to think about how long you need to handle .
So one thing I do know is this stem is too long .
So I'll pull out my heavy beauty wire cutters that will give me more than one cut at a time .
I'll pull these out a bit and then just cut these down and to cover up all these raw edges , I'm going to add some more floral tape .
This is where I'll bend my handle down so it makes it easier to hold and then we will cover up the stem with this ribbon .
I have this beautiful silk ribbon here .
I think I'll leave about a foot and a half and I'll place it right at the base of the flowers .
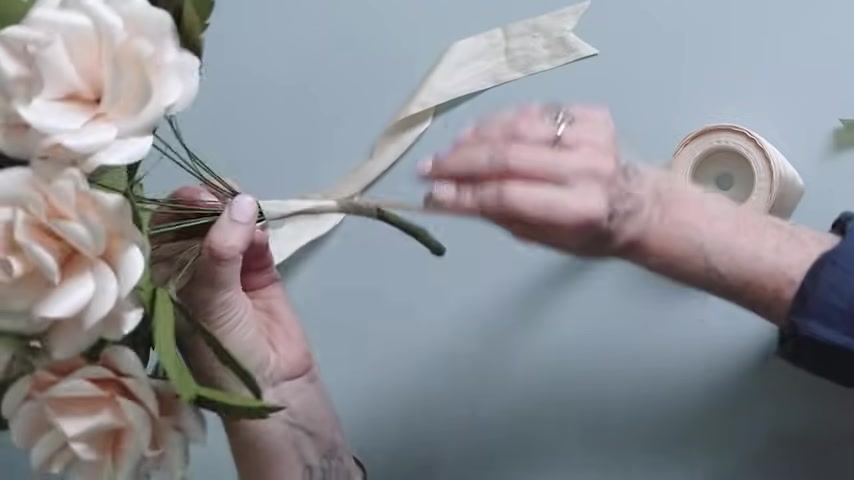
Pull that with one hand and then wrap the stem with the other .
Once I get to the bottom , I'll just rub it really tightly and then just go back up the stem .
It helps to trim , trim the ribbon so that you don't keep twisting .
So I had both ends of ribbon .
I'll place this one on this side , bring the first ribbon up over the top and then loop it back through the second ribbon to tie my knot .
And this will give me a nice straight knot .
Sometimes this might take two people to do , then you can tie a bow so that it looks something like this .

You can use this technique to make a bridal bouquet or a similar one to make a tabletop arrangement .
And when you do and take pictures , make sure you tag us at hashtag mate with Lia and click the button below so that you can be here for the next classical video .
Are you looking for a way to reach a wider audience and get more views on your videos?
Our innovative video to text transcribing service can help you do just that.
We provide accurate transcriptions of your videos along with visual content that will help you attract new viewers and keep them engaged. Plus, our data analytics and ad campaign tools can help you monetize your content and maximize your revenue.
Let's partner up and take your video content to the next level!
Contact us today to learn more.